Category Archives: BBQ & PICNIC RECIPES

SPICY FRIED CHICKEN THIGHS

OLYMPUS DIGITAL CAMERA

This has been my favorite recipe for fried chicken for many years now. And I know there are quite a few ingredients in the recipe as well as some planning time involved, and in truth the frying part isn’t that much fun either. But you are just going to have to trust me when I say I have tried to cut the ingredients and time down, but none of my attempts have been successful. I even gave it a go again the other night for our dear friends Jim and Margo. And although the chicken wasn’t bad, it simply was not as good as this recipe either. (I’ve tried, really I have.) So from now on I am just going to have to plan ahead and follow my original adaptation of Selma Brown Morrow’s recipe to a tee. But I promise you will not be disappointed if you too love a crispy crusted, tender and spicy piece of home cooked chicken. And yes I know, just looking at the ingredients you would imagine that the chicken would be way too spicy. Not the case. It merely has an attitude. Not too much of an attitude mind you, but enough to make it interesting. And we all know that the taste of chicken can be a thundering thumping bore if not given a little flavor enhancement here and there.

So give this fried chicken recipe a try. It will lift your spirits with just the first bite. And you will never have to be embarrassed to be seen in its company. No one could possibly consider you less than a true bon vivant for serving this dish or even being in the same room with it. And how many other foods, or friends for that matter, can you make that same statement about? Just sayin’!

  • 1 c. buttermilk
  • 2 T. Dijon mustard
  • 1 T. powdered onion, divided
  • 1½ tsp. granulated garlic, divided
  • ½ tsp. paprika
  • 1½ tsp. dry mustard, divided
  • 1½ tsp. cayenne pepper, divided
  • 2 tsp. kosher salt, divided
  • 2 tsp. freshly ground black pepper, divided
  • 1½ c. flour
  • 1½ tsp. baking powder
  • 8-10 skinless chicken thighs (not boneless)
  • extra virgin olive oil
  • 2 T. ghee, opt.

To make life easier, I suggest getting out a medium sized glass or plastic bowl with a cover and a large enough rimmed baking sheet to contain the chicken pieces in a single layer. (There are lots of ingredients that are duplicated in the marinade and the coating. So make life easier on yourself and touch each spice container only once.) So as we go, I will follow each new ingredient with “B” for bowl and “S” for sheet. Buttermilk (B), Dijon mustard (B), 1½ teaspoons powdered onion (B), 1½ teaspoons powdered onion (S), ½ teaspoon granulated garlic (B), 1 teaspoon granulated garlic (S), paprika (B), ½ teaspoon dry mustard (B), 1 teaspoon dry mustard (S), ½ teaspoon cayenne (B), 1 teaspoon cayenne (S), ½ teaspoon kosher salt (B), 1½ teaspoon kosher salt (S) 1 teaspoon black pepper (B), 1 teaspoon black pepper (S), flour (S), baking powder (S). (Looks much more difficult than it really is!)

Whisk the marinade ingredients in the bowl together. Whisk the ingredients for the flour coating together on the baking sheet. (Don’t use the same whisk until you have washed and dried it thoroughly.) Set pan aside because you aren’t going to need it until the chicken has marinated for up to 48 hours.

Place the chicken in the bowl of marinade. Stir to make certain all of the chicken has been exposed to the buttermilk mixture. Cover bowl and refrigerate for 24-48 hours.

An hour before you plan to fry the chicken, make certain that the seasoned flour covers every inch of the baking sheet. Remove the chicken from the marinade (do not shake off any of the marinade) and place each piece on top of the flour. Turn each piece carefully to coat thoroughly and let stand for 1 hour before frying. (Turn as needed during the hour to allow chicken to absorb as much of the flour mixture as possible.)

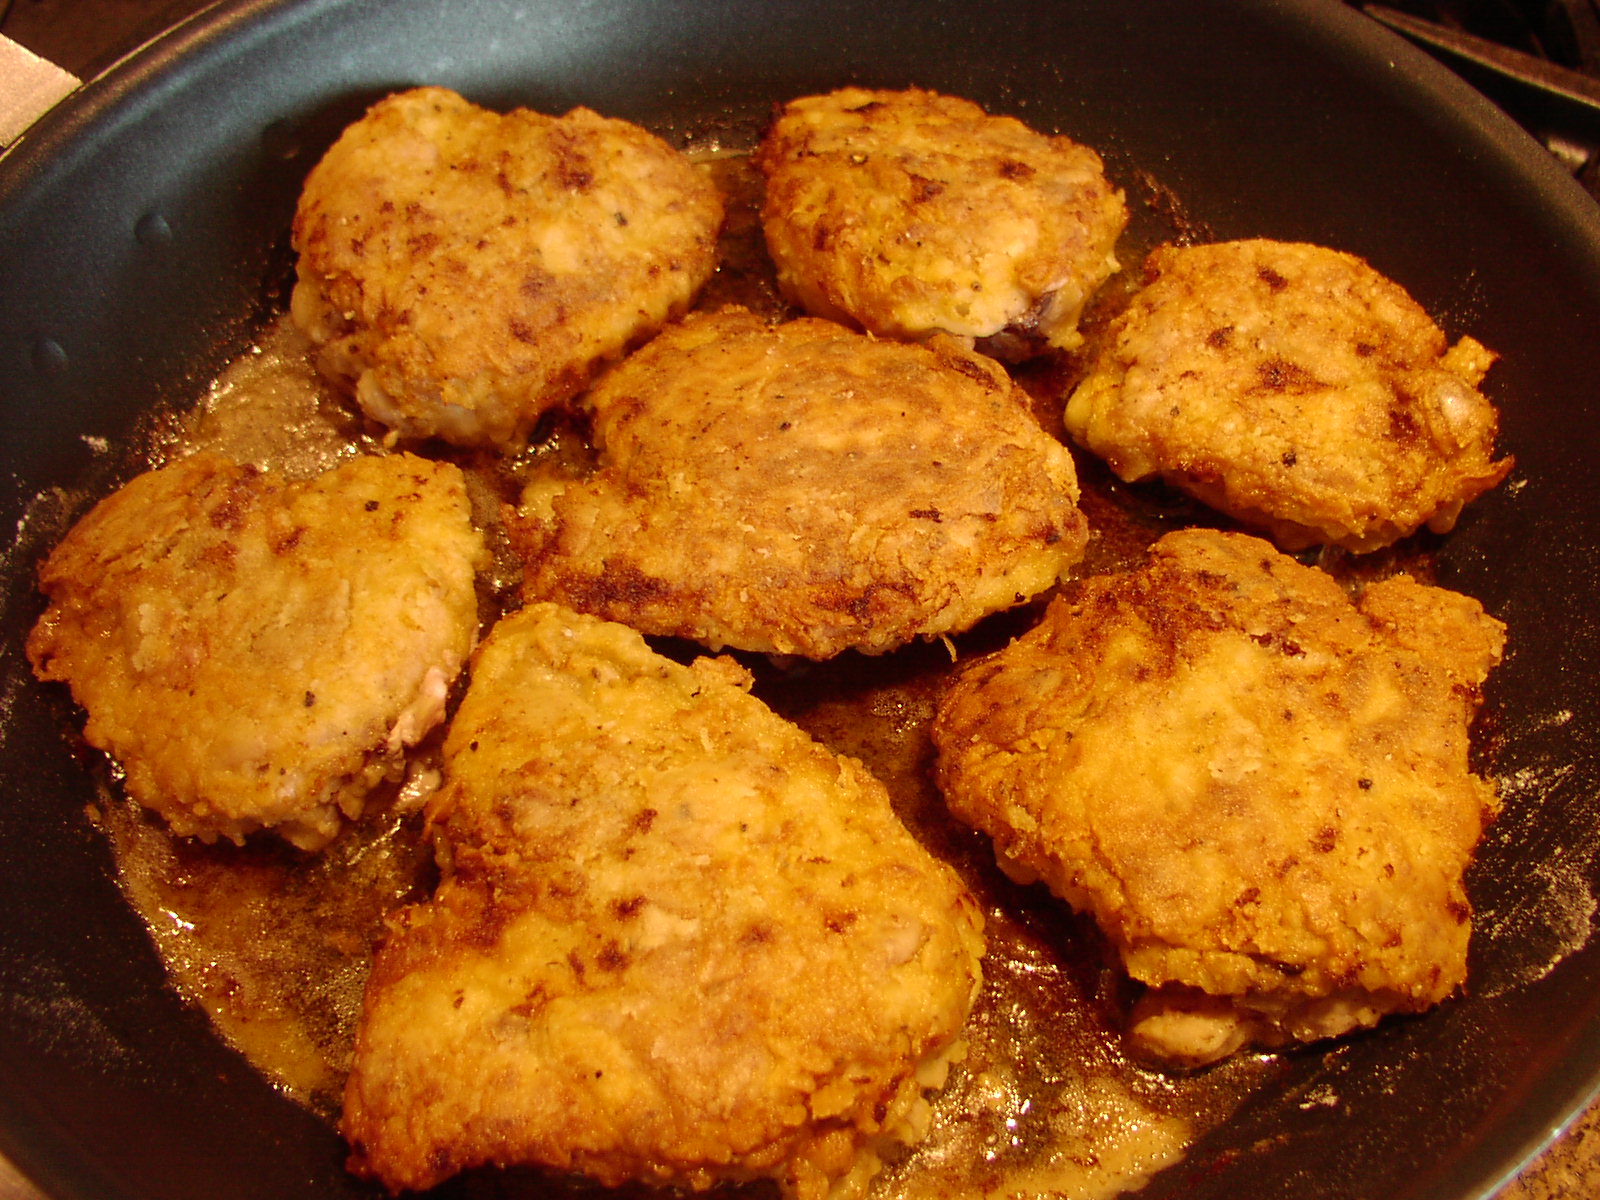
Pour enough olive oil into a large fry pan to cover the bottom; with a little more just for good luck. Add the ghee. Bring temperature to medium high. Place chicken in pan with the less meaty side down first. (In other words, if the skin were still on the chicken, the skin side would be closest to the ceiling.) Turn the heat down under the chicken until the oil is just bubbling nicely around the chicken. When the first side is a lovely dark golden brown (and yes you can carefully peak to make sure it’s a lovely brown) turn the chicken being ever so careful not to pierce the flesh or disturb the crust. Cook the second side until the chicken is done (internal temperature should be at least 165 °F) and the crust is a deep golden brown. When chicken is finished cooking, remove to cooling racks. Do not place on paper towels or the underside will get soggy. Best served at room temperature.


SHRIMP AND MACARONI SALAD

OLYMPUS DIGITAL CAMERA

This is another one of those retro recipes that absolutely starts my heart a fluttering. I don’t know whether it’s because it’s reminiscent of picnic food my mom and grandmother used to fix when I was a child, or if it’s just because the main ingredient is pasta. Whatever the reason, you mix cooked pasta with mayonnaise, and I’m all over it! Actually, when I stop to think about it, I’m pretty sure the reason I love macaroni salad so much does indeed stem from my childhood.

When I was a kid, macaroni salad always equated to picnics. And picnics always meant cold fried chicken, macaroni salad, homemade rolls, grandma’s dill pickles, watermelon, and chocolate cake.

Picnic days would start with all the food stuffed into a cooler and placed in the back of the station wagon along with blankets, a table cloth, and any other accoutrements that might be needed for a day at either the zoo or the beach. Then dad would gather my grandparents, 2 younger brothers, mom, and me in our two-tone green Ford station wagon and head out early in order to secure a good picnic spot at either Woodland Park Zoo or Juanita beach. (And yes that is a lot of people in one station wagon, but at least 2 of us kids were in the back along with all the supplies. Never would be able to get away with that today. Thank God!) Then away we would go. We almost always got a good spot, I invariably got sunburned, my brothers were always a pain in the – – -, and a wonderful time was had by all. And nary a morsel of food remained to be carted home.

So do I have a reason to love macaroni salad? I would have to answer most emphatically – yes! And if you too love macaroni salad, give this recipe a try. You could even start your own picnic memories with this simple and soul satisfying dish.

  • 1 pkg. (16-oz.) medium sized elbow macaroni
  • 2 c. mayonnaise or more as needed (I use Best Foods Light Mayonnaise)
  • 1 T. Dijon mustard
  • 1 T. fresh lemon juice
  • ½ tsp. dried dill weed
  • ½ tsp. celery seed
  • 2 tsp. seasoned salt or more to taste
  • freshly ground black pepper
  • 1½ lbs. cooked shrimp (26-30 per lb. count – no smaller) cut in half or thirds
  • 8-oz. frozen petite peas, thawed but not cooked
  • 2 c. finely chopped celery
  • 8 green onions, finely chopped (1 bunch)
  • 1 can black olives, sliced

Cook macaroni to al dente, drain and rinse in cold water. Set aside. Meanwhile whisk together the mayonnaise, mustard, lemon juice, dill weed, celery seed, salt, and pepper in a small bowl. Set aside.   In a large bowl, combine the cooked macaroni, shrimp, peas, celery, green onions, and black olives. Pour the dressing over salad and toss gently to coat. Cover and refrigerate for at least 2 hours. Before serving, adjust the seasoning. The salad may need a little more seasoned salt.

Cooked Shrimp

  • 1 T. unsalted butter
  • 1-1½ lbs. uncooked shrimp, shelled and de-veined
  • seasoned salt
  • freshly ground pepper

Melt the butter over medium heat in a fry pan. Add the shrimp and lightly season with salt and pepper. Cook, stirring often, only until the flesh is totally pink and opaque, and you see no more grey bits. Remove from heat, cool, and cut into 2-3 pieces each.

CHEESE & PIMENTO SPREAD

OLYMPUS DIGITAL CAMERA

When I was a kid, my parents used to buy Kraft Pimento Spread in a juice glass. (At least, that’s how we used the containers after the cheese had been consumed.) I loved that stuff and could tidily polish off a whole jar by myself if my parents weren’t careful.

So when I discovered to my amazement that you can still buy cheese spreads in a jar, I was magically transported back to my childhood! And why I had never noticed these darling little nostalgic reminders of the good old days at my local grocery store before I began this segment is anyone’s guess. But Kraft Pimento Spread, as well as Old English Cheese and Roka Blue are apparently still going strong. Of course each jar is over $3, but because they are still appearing on the shelves, it seems that people must still be purchasing these products with regularity. (Now granted, I didn’t look to see if there was a pull date on the labels. For all I know those jars could still be around from the 50s. But for the sake of my sanity and yours, I’m going to assume that someone is monitoring the pull dates on these products as routinely as they are on the Hostess Twinkies labels!)

And what started this whole trip back to pimento cheese spread you wonder? Well it was my dear friend Vicki. Mr. C and I were over at her home for an afternoon band rehearsal (not Vicki and me, but our husbands doing the rehearsing) and one of the munchies she served was so simple, but so delicious, I had to make it for myself and share the results with all of you. In Vicki’s version, she simply mixed mayonnaise with finely grated cheddar cheese and diced pimentos. Lovely, and ready immediately.

In my version, I wanted something a little closer to my childhood memory of pimento cheese in a jar. So I decided to process the cheese and mayonnaise to a fine paste and then add the pimentos. And because I enjoy just a little bite to my cheese spreads, I added a wee bit of heat in the form of black pepper and creamy horseradish. And time. (My version is better after it has had a little time to mellow in the refrigerator.)

So if you too happen to be old enough or hip enough to enjoy cheese and pimentos together, give either or both of these cheesy pimento spreads a try. I promise you will not be disappointed by the flavor combination. Of course in making your own pimento spread, you will be missing out on some of the fascinating ingredients contained in the original product like carob bean gum, guar gum, annatto color, and sodium bisulfate. But this is just an example of the type of sacrifice one has to make in the quest for delicious food.

Thank you Vicki, not only for this recipe, but for all of your knowledge and inspiration into the world of delectable cuisine.

  • ½ c. mayonnaise
  • 1¼ c. grated sharp cheddar cheese
  • 1 grind black pepper
  • scant 1/8 tsp. creamy horseradish, opt.
  • 2 oz. jar diced pimentos

Combine the mayonnaise, cheese, pepper, and horseradish in the food processor. Whirl until smooth. Add the pimento and give it one or 2 quick pulses. (You don’t want the pimento too finely chopped or blended. Little pieces of pimento are desired.) Allow to rest in your refrigerator for a couple days. Serve at room temperature on buttery crackers.


EMMER FARRO CAPRESE SALAD

OLYMPUS DIGITAL CAMERA

As I wrote in my preface for my blog on Split Emmer Farro and Wild Rice with Mushrooms and Pecans, “Emmer (farro) has been cultivated in the Fertile Crescent (the region in the Middle East which curves like a quarter-moon shape, from the Persian Gulf, through modern-day southern Iraq, Syria, Lebanon, Jordan, Israel, and northern Egypt) and in Italy for over 10,000 years. Farro, which is just the Italian name for emmer wheat, has a delicate roasted nutty flavor and a distinctive chewy texture. It has a higher fiber and protein content than common wheat, is rich in magnesium, niacin, zinc, and B vitamins, and holds the distinct honor of containing the lowest glycemic index of all cereal grains.”

And in addition to all the nutritional attributes mentioned above, this ancient grain just happens to be extremely delicious. I mean really, is there anything else you could ask of a simple grain? Both good for you and extremely palatable. I think not!

And this recipe, straight off the emmer farro package (with a little re-working of the preparation instructions on my part) is just a wonderful example of how tasty and versatile this grain can be. It just takes a little re-thinking of your use of grains to make room for this ingredient in your diet.

I know there for awhile, most of us were hesitant to include grains in our diet because they were in the dreaded “carbohydrate” category. But as we have all read, there are carbohydrates that are better for us than others. And emmer farro is one of them.

According to Jane Lear from the takepart website, “As far as complex carbohydrates go, farro is rich in the cyanogenic glucosides that stimulate the immune system, regulate blood sugar levels, and lower cholesterol. Although it isn’t a complete source of protein, like quinoa*, farro contains more than, say, brown rice, and it also contains lignans that give it antioxidant properties. In general, whole grains take longer to digest, so they keep you feeling full longer and provide sustained energy. They’re also thought to reduce the risk of heart disease, diabetes, and some cancers.” And as for me, even though I am not a rocket scientist or a learned nutritionist, I somehow know instinctively that farro is much better for me than the refined and processed carbohydrates found in high fructose corn syrup or white bread!

So do yourself and your family a favor. Buy some emmer farro, prepare this recipe, and stand back and wait for the compliments. This salad is like the essence of summer in a bowl.

*for a wonderful taste treat featuring quinoa, try my Lemony Quinoa with Fresh Herbs

  • 5 c. water
  • 1 c. emmer farro (I use Bluebird Grain Farms*)
  • pinch of kosher salt
  • 2 T. extra virgin olive oil
  • 1 T. balsamic vinegar
  • ¼ c. finely chopped shallot or onion
  • ½ tsp. sea salt
  • a touch of freshly ground black pepper
  • 2 tomatoes, seeded and chopped (I like to use heirloom tomatoes in 2 different colors)
  • ¼ c. loosely packed chopped fresh basil (not too much or the basil flavor will overwhelm the other ingredients)
  • 4-oz. finely diced mozzarella cheese, either fresh or regular

Place the water, emmer farro, and a pinch of kosher salt in a covered pan. Place on high heat and bring to a boil. Boil for 5 minutes, stirring frequently. Reduce heat, cover and simmer for 45-50 minutes or until berries are plump and chewy. Meanwhile, combine the olive oil, vinegar, shallot, sea salt, and pepper in a medium sized bowl. Set aside. Combine the tomatoes, basil, and cheese and set aside. When the farro is done, drain off excess liquid and pour into bowl with olive oil dressing. Stir to combine and let sit for about 30 minutes. Add the tomatoes, basil, and cheese; stir and adjust seasoning. Serve warm or at room temperature.

This salad is best prepared just before serving. Leftovers are still tasty the next day, but the tomatoes break down and the general mouth feel is not as appealing.

*For information about retail locations in your area, visit www.bluebirdgrainfarms.com


TUNA MACARONI SALAD

OLYMPUS DIGITAL CAMERA

For the past few days I have had this burning desire for tuna macaroni salad. (I haven’t even thought about macaroni salad for decades, but for some reason, this salad from my childhood has been haunting me.) Maybe it’s because the temperature has been hovering on the hot side and cold salads are a great answer to what to fix for dinner. Whatever the reason, the other evening I simply had to break down and cater to my taste buds and take a trip down memory lane.

Now for those of you who know me well, you know that my mother was not generally considered a good cook. (That’s being extremely kind.) But there were a few dishes she’d make that were really quite tasty. And tuna macaroni salad was one of them. Of course her recipe was a little more bare bones than my new version, but none-the-less, I loved it when I was a kid.

Now that my palate is a bit more experienced, I decided to upgrade my mom’s recipe (macaroni, tuna, celery, and mayonnaise) to include a few additional ingredients. I felt these ingredients were necessary to bring Tuna Macaroni Salad into the 21st century.

And I know what you are thinking. Patti should be posting sophisticated nouveau recipes rather than trying to resurrect some old dish that wasn’t that memorable to begin with! Well, that may to true, but both Mr. C. and I loved this new reincarnation of an old standby.

So some hot evening when you are tired and not feeling like being terribly creative, give this salad a try. It is simply a perfect dish for a hot summer evening. Plus it is stinkin’ easy to prepare, inexpensive, and family friendly.

  • 2 T. dill pickle relish
  • 1 c. mayonnaise (I use Best Foods Light Mayonnaise)
  • 1 T. Dijon mustard
  • ¼ tsp. seasoned salt
  • freshly ground black pepper
  • 2/3 c. finely chopped celery
  • ¼ c. minced onion
  • ½ c. chopped pimento stuffed green olives
  • ½ c. tiny cubes of sharp cheddar cheese
  • 2 cans (7-oz. each) water-packed albacore tuna, drained and flaked
  • 2 c. small pasta shells, cooked al dente*, placed in colander, rinsed with cold water and allowed to drain
  • chopped tomato, garnish, opt.
  • shredded lettuce, garnish, opt.

In a medium sized bowl whisk together the relish, mayonnaise, mustard, salt, and pepper. Gently stir in the celery, onion, olives, cheese, tuna, and cooked pasta. Refrigerate for at least 30 minutes before serving. (That gives you time for a nice cold before dinner drinky poo.) Serve salad garnished with tomato and lettuce.

*most important that the pasta be cooked al dente “to the tooth” – neither crunchy or too soft


JAPANESE CUCUMBER SALAD (SUNOMONO)

OLYMPUS DIGITAL CAMERA

OK, I know. There are recipes for Sunomono that are much more complex, but this is still the best version of this simple Japanese salad/appetizer that I ever tasted.

I learned how to make Sunomono when I worked at the International branch of Seattle-First National Bank. Remember Seafirst? Now there was a bank!  (Sorry, woolgathering again.) So to continue, it was during those years working at International branch staffed by employees from several ethnic groups that I learned to prepare some of my favorite dishes. But none was as easy to build as this perfect summer side. And if you are like me, the thought of spending a lot of time preparing a salad (or any dish for that matter) on a hot summer evening is just not very appealing.

So do yourself and your family a favor. In the near future, spend a good 7 minutes or so making one of my all time favorite salads. And if you really want to know how well we like this dish, suffice it to say that the two of us can (and usually do) polish off an entire recipe’s worth of this salad at a single sitting. (Last evening was no exception.)

And for those of you with children; don’t think twice about preparing this salad for your family. My kids loved it, and believe me they could be just as picky as the next bunch of heathens. (And of course I use the term “heathens” to describe my children in only the most loving way!)

せていただ (Itadakimasu)

  • 2 T. white distilled vinegar (that’s right, the old fashioned kind)
  • 2 T. sugar
  • pinch kosher salt
  • 1 English cucumber, partially peeled and very thinly sliced

Combine the vinegar, sugar, and salt in a small saucepan. Bring to a boil and remove from heat. Allow to cool to room temperature. When ready to serve, pour the cooled dressing over the cucumber making sure each slice is coated with the sauce. Serve immediately.


CREAM CHEESE POUND CAKE

OLYMPUS DIGITAL CAMERA

I strongly feel that every good cook should have a really delicious pound cake recipe in their arsenal. And if per chance you don’t already have one, this amazing recipe that I found in Bon Appétit (the magazine) several years ago is going to rectify that situation.

Although the baking method is totally different from any other cake recipe I ever encountered, the results are nothing short of amazing. Who ever heard of starting a cake in a cold oven, then gradually increasing the heat throughout the entire baking time? Crazy, right? But baby, the results speak for themselves. This cake not only has a lovely vanilla flavor; the texture is divine.

And oh the delicious desserts you can make using this pound cake. Among others – trifle, strawberry or any fruit shortcake, pound cake topped with ice cream and sauce, pound cake topped with apples heated with butter and brown sugar and topped with my Bourbon Caramel Whipped Cream (under This & That Recipes) and many, many others. Or you can enjoy this pound cake my favorite way. Buck naked! (Not me, the cake!) Just a big old slice of this fantastic creation along with a strong cup of freshly brewed coffee. Heaven I’m telling you. Heaven!

So next time you want to impress the pickles out of your family and friends, bake them a pound cake fit for the Gods. But be nice, let them have a piece. They will be eternally grateful, I’m sure.

  • 1 c. butter, room temperature
  • 8-oz. cream cheese, room temperature
  • 3 c. sugar
  • 1 tsp. salt
  • 6 lg. eggs, room temperature
  • 4 tsp. vanilla
  • 3 c. flour

Cream butter and cream cheese together in a large mixing bowl. Add sugar and salt and whip until mixtures is light and fluffy, about 5 minutes. Add eggs one at a time. Beat in vanilla. Add flour at low speed until well incorporated, but do not overbeat. Transfer batter to a butter and floured Bundt pan*.   Place pan in cold oven. Set temperature to 200 degrees; bake for 20 minutes. Increase temperature to 250 degrees; bake 20 minutes. Increase to 275; bake for 10 minutes. Increase temperature to 300 degrees and bake for about 60 minutes or until a toothpick inserted near the middle of the cake comes out clean. Allow cake to rest for 15 minutes in pan before turning out on a rack to finish cooling.

*Alternate method of baking the cake: Lightly butter a glass 10×16-inch baking pan. (Preferably glass)  Scoop batter into pan and level the top with an offset spatula. Place pan in cold oven. Set temperature to 200 degrees; bake for 20 minutes. Increase temperature to 250 degrees; bake 20 minutes. Increase to 275; bake for 10 minutes. Increase temperature to 300 degrees and bake for about 40 minutes or until a toothpick inserted near the middle of the cake comes out clean. Remove from oven and cool on a rack before cutting. Use in your favorite dessert.

COLD TOMATO BASIL SOUP

OLYMPUS DIGITAL CAMERA

When I first saw this recipe in a recent issue of Cooking Light, I thought immediately that this was a winner. And then when I tasted it, I knew for sure. It is light and creamy and very, very tasty, especially when it is garnished with a small plop of Greek yogurt to provide that perfect bit of tang. Yum!

And this is the time of year for cold soup. Not only does it beat the heck out of standing over a hot stove, but the vegetative ingredients are at their prime and as inexpensive as they are going to get for the entire year. A winning combination if I ever heard one!

So do yourself and your family a favor. Serve this some hot evening along with a big old plate of cold cuts, a hunk or two of really good cheese, a loaf of rustic bread, a couple jars of hearty mustard, a bowl of mixed olives, some chunks of fresh fruit, and a glass of your favorite wine or beer, and you have a summertime meal fit for a king. Thank you Cooking Light for another wonderful and healthy recipe.

  • ¾ c. buttermilk
  • 2 tsp. sugar
  • ½ tsp. kosher salt
  • freshly ground black pepper
  • 2 T. fresh lemon juice (or more to taste)
  • 2 T. extra virgin olive oil
  • 4 ripe fresh from the vine or vine ripened tomatoes, cored and quartered
  • ¼ c. coarsely chopped fresh basil leaves, plus additional small leaves for garnish
  • 2 green onions, rough chopped
  • 1 clove garlic
  • plain Greek yogurt, opt.

Whirl the buttermilk, sugar, salt, pepper, lemon juice, olive oil, tomatoes, basil, green onions, and garlic in a blender* until smooth. Adjust seasoning. Refrigerate until ready to serve. Garnish with yogurt and basil leaves.

FYI: Although most of us have relegated our blenders to the back of our pantry or to the garage, bring that old standby back into your life. Food processors simply do not do as good a job at pureeing food.


COLD TOMATILLO AND AVOCADO SOUP

OLYMPUS DIGITAL CAMERA

For our summer BlueStreet Jazz Voices potluck dinner party, one of our wonderful first sopranos brought this delightful cold soup. Deb served the soup in very pretty and very tiny little dishes. Each was garnished with a cilantro leaf. Each little bowl only provided about 6 small spoonfuls of this glorious concoction, which of course left us wanting more. But with all the other food available, the amount she served was just right. Plus, the soup is quite rich, so a small amount was absolutely perfect. So of course being the foodie that I am, I immediately asked for the recipe. I was astounded when she told me the soup contained only 4 ingredients plus salt, if required. What’s not to like about that?

So being the sweetie that she is, she sent me the recipe. Now you know me. I never leave well enough alone. I decided to try my hand at making the soup from scratch, rather than use store bought Salsa Verde. (I have since laid in a supply of Trader Joe’s Salsa Verde for those occasions when I need a tomatillo and avocado soup fix right now!) But for many, like myself, there are no Trader Joe’s in the immediate vicinity. And the green salsas I can find in my local grocery store, at least the ones that look like they are half decent, are all quite pricey. ($6.95 for 20 ounces; I think not!)

So I am going to provide you with both Deb’s recipe and my recipe for this amazing soup. Both are delicious. Both are fairly economical and healthy, and both are perfect to serve as a first course on a warm summer evening.

Thanks again Deb for this great recipe.

Recipe number 1:  

  • 3 small ripe avocados diced, about 2½ cups
  • 1½ c. Trader Joe’s Salsa Verde* or salsa Verde of choice
  • heaping ¼ c. chopped cilantro, plus more for garnish
  • heaping ¼ c. sour cream
  • kosher salt, if required

In blender, puree all. Thin with water if desired; season. Chill until cold. Serve in small bowls garnished with cilantro.

*FYI: Trader Joe’s Salsa Verde is about $2 a jar. Worth every penny!

Recipe number 2:

  • ½ small jalapeno pepper, seeds and stem removed
  • 4 large or 5 small tomatillos, cores removed
  • ½ tsp. kosher salt
  • freshly ground black pepper (not too much)
  • ½ c. loosely packed rough chopped fresh cilantro
  • 1 green onion, rough chopped
  • 1 very small garlic clove
  • 3 small ripe avocados, cut into large chunks
  • heaping ¼ c. sour cream (I use Crema Mexicana – Mexican style sour cream)

Place the jalapeno pepper and tomatillos in a shallow roasting pan and bake in a 350 degree oven for about 40 minutes or until veggies start to soften. Remove veggies from oven; cool.  Whirl in a blender or food processor with salt, pepper, cilantro, green onion, garlic, avocados, and sour cream. If the soup is too thick, add a small amount of water. Adjust seasoning. Chill until cold. Serve in small bowls garnished with cilantro.

CHICKEN AND WILD RICE SALAD

OLYMPUS DIGITAL CAMERA

I recently served this salad as part of a cold soup and three salad luncheon for a JazzVox audience. It was the hit of the meal. Well, this salad and the Mixed Berry Trifle. (Recipe for the trifle to follow within the next few days.)

Everyone loved the nutty flavor of the wild rice, but the best part for me was the fact that I knew I was serving my guests a very healthy salad without their knowledge. (It’s fun once in a while to slip one over on my friends.) But in all honesty, who would find fault with me for such a deception when the “deception” tasted so good and was so good for them?  According to the care2 website, wild rice has several very impressive health benefits:

  • Wild rice is gluten free
  • It does not contain sodium
  • It contains twice as much protein as brown rice
  • Wild rice is actually a grass and the grains are not polished or refined and can be eaten by diabetics in moderation
  • It is very rich in antioxidants – containing 30 times more than white rice
  • Because of its high fiber content, wild rice keeps your digestion smooth and helps lower cholesterol
  • Wild rice is a good source of essential minerals such as phosphorus, zinc and folate, which give you energy and nurture your bones
  • It contains vitamins A, C and E which are essential for overall health and immunity
  • A serving of wild rice is lower in calories than other rice varieties

And as you can read from the ingredients list, wild rice isn’t the only healthy ingredient in this salad. Pecans contain unsaturated fats that contribute to heart health. Avocados also contain healthy fats and loads of nutrients. Throw in some white meat chicken, 3 types of veggies, and some garlic for good measure, and even though the salad contains a small amount of vegetable oil and a kiss of sugar, the health-o-meter remains at the top of the green zone when you consider the recipe as a whole.

So I guess all things considered, a salad that tastes wonderful and contains healthy ingredients is by definition a winner. And this winning recipe comes to me from my dear friend Sandy. The recipe actually appeared in my second cookbook, but after all the praise it received at our last concert, I just had to share it with my internet readers too.

So do not hesitate to prepare this salad in the near future. It is the perfect dish to serve on a warm summer evening along with a rustic loaf and a nice crisp Sauvignon Blanc or Viognier. And Sandy, as always – you are the greatest. Thanks again for this lovely recipe.

  • 2¼ c. chicken broth
  • 1 tsp. kosher salt, divided
  • freshly ground black pepper
  • 1 c. wild rice, rinsed in cold water
  • 2 cloves garlic, finely minced
  • ¼ tsp. sugar
  • 1 T. Dijon mustard
  • ¼ c. rice vinegar
  • 1/3 c. vegetable oil
  • 1 boneless, skinless chicken breast, cooked and cut into bite sized pieces
  • 3 green onions, thinly sliced (both white and green parts)
  • ½ red bell pepper, diced
  • 12 sugar peas, cut in 3rds
  • 2 ripe avocados, diced
  • 1 c. toasted pecans
  • juice of 1 lemon, divided

Bring chicken broth, ½ tsp. salt, and a couple grinds of pepper to a boil. Add the rice, stir, and return broth to a boil. Reduce heat to simmer and cover. Cook for about 30-40 minutes or until the liquid is absorbed and the rice is tender. Remove from heat, uncover, fluff with fork, and toss with half of the lemon juice. Set aside to cool. (If you have extra liquid, drain the rice before adding the lemon juice.)

Meanwhile whisk the garlic, sugar, remaining ½ teaspoon salt, pepper, mustard, vinegar, and oil together; set aside. This is the dressing for the salad.

When the rice is cool, gently add the cubed chicken, green onions, red pepper, and snap peas. Stir in the dressing, adjust seasoning (it may need more salt), cover, and refrigerate for at least two hours to blend flavors. Just before serving, gently stir in the avocado, pecans, and remaining lemon juice.