Many of you know that Mr. C. is an exuberant mixologist. He absolutely thrives on trying new and exciting ways to diminish our supply of liquor, liqueurs, bitters, and other various and sundry drink additives. And isn’t that wonderful. Of course! Unless you are someone like boring me who basically only likes a few different mixed drinks. First and foremost, Tanqueray Martinis. Followed by Margaritas, Gin or Vodka Gimlets, and an occasional Bloody Mary.
But, whenever he tries a new cocktail, I am a good enough sport to give it a small and tentative taste. Well, guess what?! This drink was very tasty. And I don’t even like Champagne. (I know, sick and wrong.)
Now, would I drink an entire French 75? No. Would I advise you to try one? Absolutely. And any of the other adult beverage recipes under the snappy title “Adult Beverage Recipes” on my blog.
Well, that’s it for today. The sun is shining, our fridge, freezer, and pantry are full of fun and exciting ingredients, and I know what I’m going to cook for dinner. If that isn’t a combination made in heaven, I don’t know what it could be!
May you too be blessed with a roof over your head, food to feed your family, and a job (unless of course you’re retired) that you like. We are here for such a short time. Count your blessings and make the most of whatever you have. Cheers.
And from our home to yours, peace and love to all.
1 oz. gin
½ oz. fresh lemon juice
½ oz. simple syrup (see recipe below)
2 oz. Champagne
Pour the gin, lemon juice, and simple syrup into a cocktail shaker. Add ice and shake well. Strain into a Champagne flute or highball glass. Top with Champagne. Stir gently.
Please note: The recipe for a French 75 is very similar to a Tom Collins. In a Tom Collins, carbonated water is used in place of Champagne.
Simple Syrup
1 part granulated sugar
1 part water
In a small saucepan, heat the sugar and water until the sugar dissolves. Remove from heat and allow the syrup to cool and you have classic simple syrup to use in cocktails and all sorts of sweet summer beverages.
I made this soup the other evening because I had made taco salad a couple night’s before and had leftover taco seasoned meat in the fridge. So, not wanting to serve taco salad again I decided to try my hand at using the meat in soup form. So, onto the computer I went and found this recipe on the cookingclassy.com site. (A great site BTW.) I made a couple small changes, but this wonderful recipe is thanks to Jaclyn, the creator of this terrific food blog.
Now, I realize it’s summer and serving soup for dinner may not be at the top of your meal plan. But the time of year has never stopped me from serving soup any old time my heart desires. And when it’s as easy to prepare as this soup, all I can say is – bring it on! Especially since Mr. C. and I still had colds and were not functioning on all 4 cylinders. (And yes, most modern cars still have cylinders, despite the rise of electric vehicles. While electric cars don’t use cylinders, the vast majority of internal combustion engines still rely on them for power.) Anyway, not feeling up to par, the time it took to make this soup was thankfully equal to the amount of energy I had to get some kind of dinner on the table.
So, if you too need a recipe for a quick and easy, one dish meal that everyone in your family is bound to love, give this recipe a try.
Well, that’s it for today. But before I leave you to your own devices, let me tell you about the book I just finished. The Dry, written by Jane Harper. Actually, it was my second time reading the book, mainly because I enjoyed Jane’s writing style so much the first time through. Much more interesting and realistic characters than found in many murder mysteries. And a wonderfully original plot. I heartily recommend you give this book a read.
Now, if only I could say the same about reading the Seattle Times. I am so very tired of reading about the cruel, nasty, bigoted, stupid, and ridiculous idiots that are pretending to lead our country to be “great again”. So, do I prefer to read fiction? You bet I do. At this point, reality is scarier than any words jumping out at me from a book.
Peace and love to all.
1 tsp. extra virgin olive oil
½ lb. lean ground beef (or left over taco meat)
½ c. chopped onion
1 clove garlic, minced
1 (14.5 oz.) can diced or crushed tomatoes
1 c. beef broth
1 T. tomato paste
½ c. water
1 (4 oz.) can chopped green chiles (I use Hatch mild)
2 tsp. chili powder
½ tsp. ground cumin
1 tsp. paprika
¼ tsp. dried oregano
freshly ground black pepper
1 c. frozen or canned corn
1 (14.5 oz. or 19 oz.) can black beans, drained and rinsed
2 tsp. fresh lime juice, opt.
kosher salt, if needed
Heat the olive oil in a large, covered pan. Add the ground beef or already cooked seasoned taco meat along with the chopped onion, crumbling and stirring occasionally until browned. Add the garlic and sauté for 1 minute.
Stir in tomatoes, beef broth, tomato paste, water, green chilies, chili powder, cumin, paprika, oregano, and black pepper. Cover pot, and simmer for 30 minutes, stirring occasionally.
Add the corn and black beans and cook until heated through. Add additional water to thin soup if desired. Stir in lime juice and taste. Adjust seasoning as necessary.
Serve hot with desired toppings.
Optional Toppings:
Grated sharp cheddar cheese, sour cream, chopped green or red onions, diced avocados, and corn tortilla chips.
So, I served this salad at a JazzVox pre-concert meal on Sunday, May 14th. The following Tuesday morning we left for Europe. So, I’m pretty sure you understand why I didn’t post this recipe until we returned.
But I must say, for being such a simple recipe, this salad was a hit, thanks to Kate from the cookieandkate.com cooking site. (A great site BTW. Check it out!) And of course, being me, I did make a few insignificant changes. But boy oh boy, this is one terrific tasting salad. Crunchy and very easy to make. And not only is it healthy and mayonnaise free, its vegetarian and vegan as well. (At least I think it’s vegan.) (I’m not really an expert on vegan.)
Anyway, now that I’m home and finished posting my trip report (always a priority), I am back to posting recipes.
So, I hope you make this salad and enjoy it as much as our guests did. And I know, no bacon. How can you possibly make a broccoli salad without bacon? Well, take it from me, no one seemed to mind the lack of bacon at all. Not one person came up to meet ranting and raving about the lack of bacon in the salad. They just told me how much they loved it. And I must say, our guests have pretty decerning palates. These are jazz lovers! I rest my case!
And sorry, no picture. But I was crazy busy and completely forgot to photograph the salad. But take it from me, it looks like every other broccoli salad you have ever seen.
Well, that’s it for today. Both of us have colds. (And no, we didn’t catch our colds on our return flight from Europe. I woke up with a scratchy throat the day we were leaving. And since have generously shared my illness with Mr. C.) Not Covid, because we have tested multiple times. Never-the- less, we have not had a cold as nasty as this in years. So, take care. Our friends report that they too have had really bad colds. Something very contagious is definitely making the rounds.
So, take it easy if you can. Pamper yourself and those around you.
And as always, peace and love from our house to yours.
Combine the red onion* and ice water in a small bowl. Make sure the onion is under water. Let the onion mellow out while you make the dressing and chop the veggies. Then drain the onion and pat dry before adding it to the bowl with the broccoli.
In a salad bowl, whisk the olive oil, vinegar, Dijon mustard, honey, granulated garlic, granulated onion, salt, and black pepper together.
Add the chopped broccoli, sunflower seeds, golden raisins, and chopped red onion.
Stir until all ingredients are coated with the dressing.
I highly recommend letting the salad marinate for at least 20 minutes, or overnight in the refrigerator is even better. Give the salad a good stir before serving. You might even want to give the salad a taste and add salt if required.
*It seems to me that red onions seem to be getting “hotter” than I remember them being in the past. So, letting the cut onion spend some quality time in ice water helps reduce the onion’s bite. This is true for other onions and shallots too.
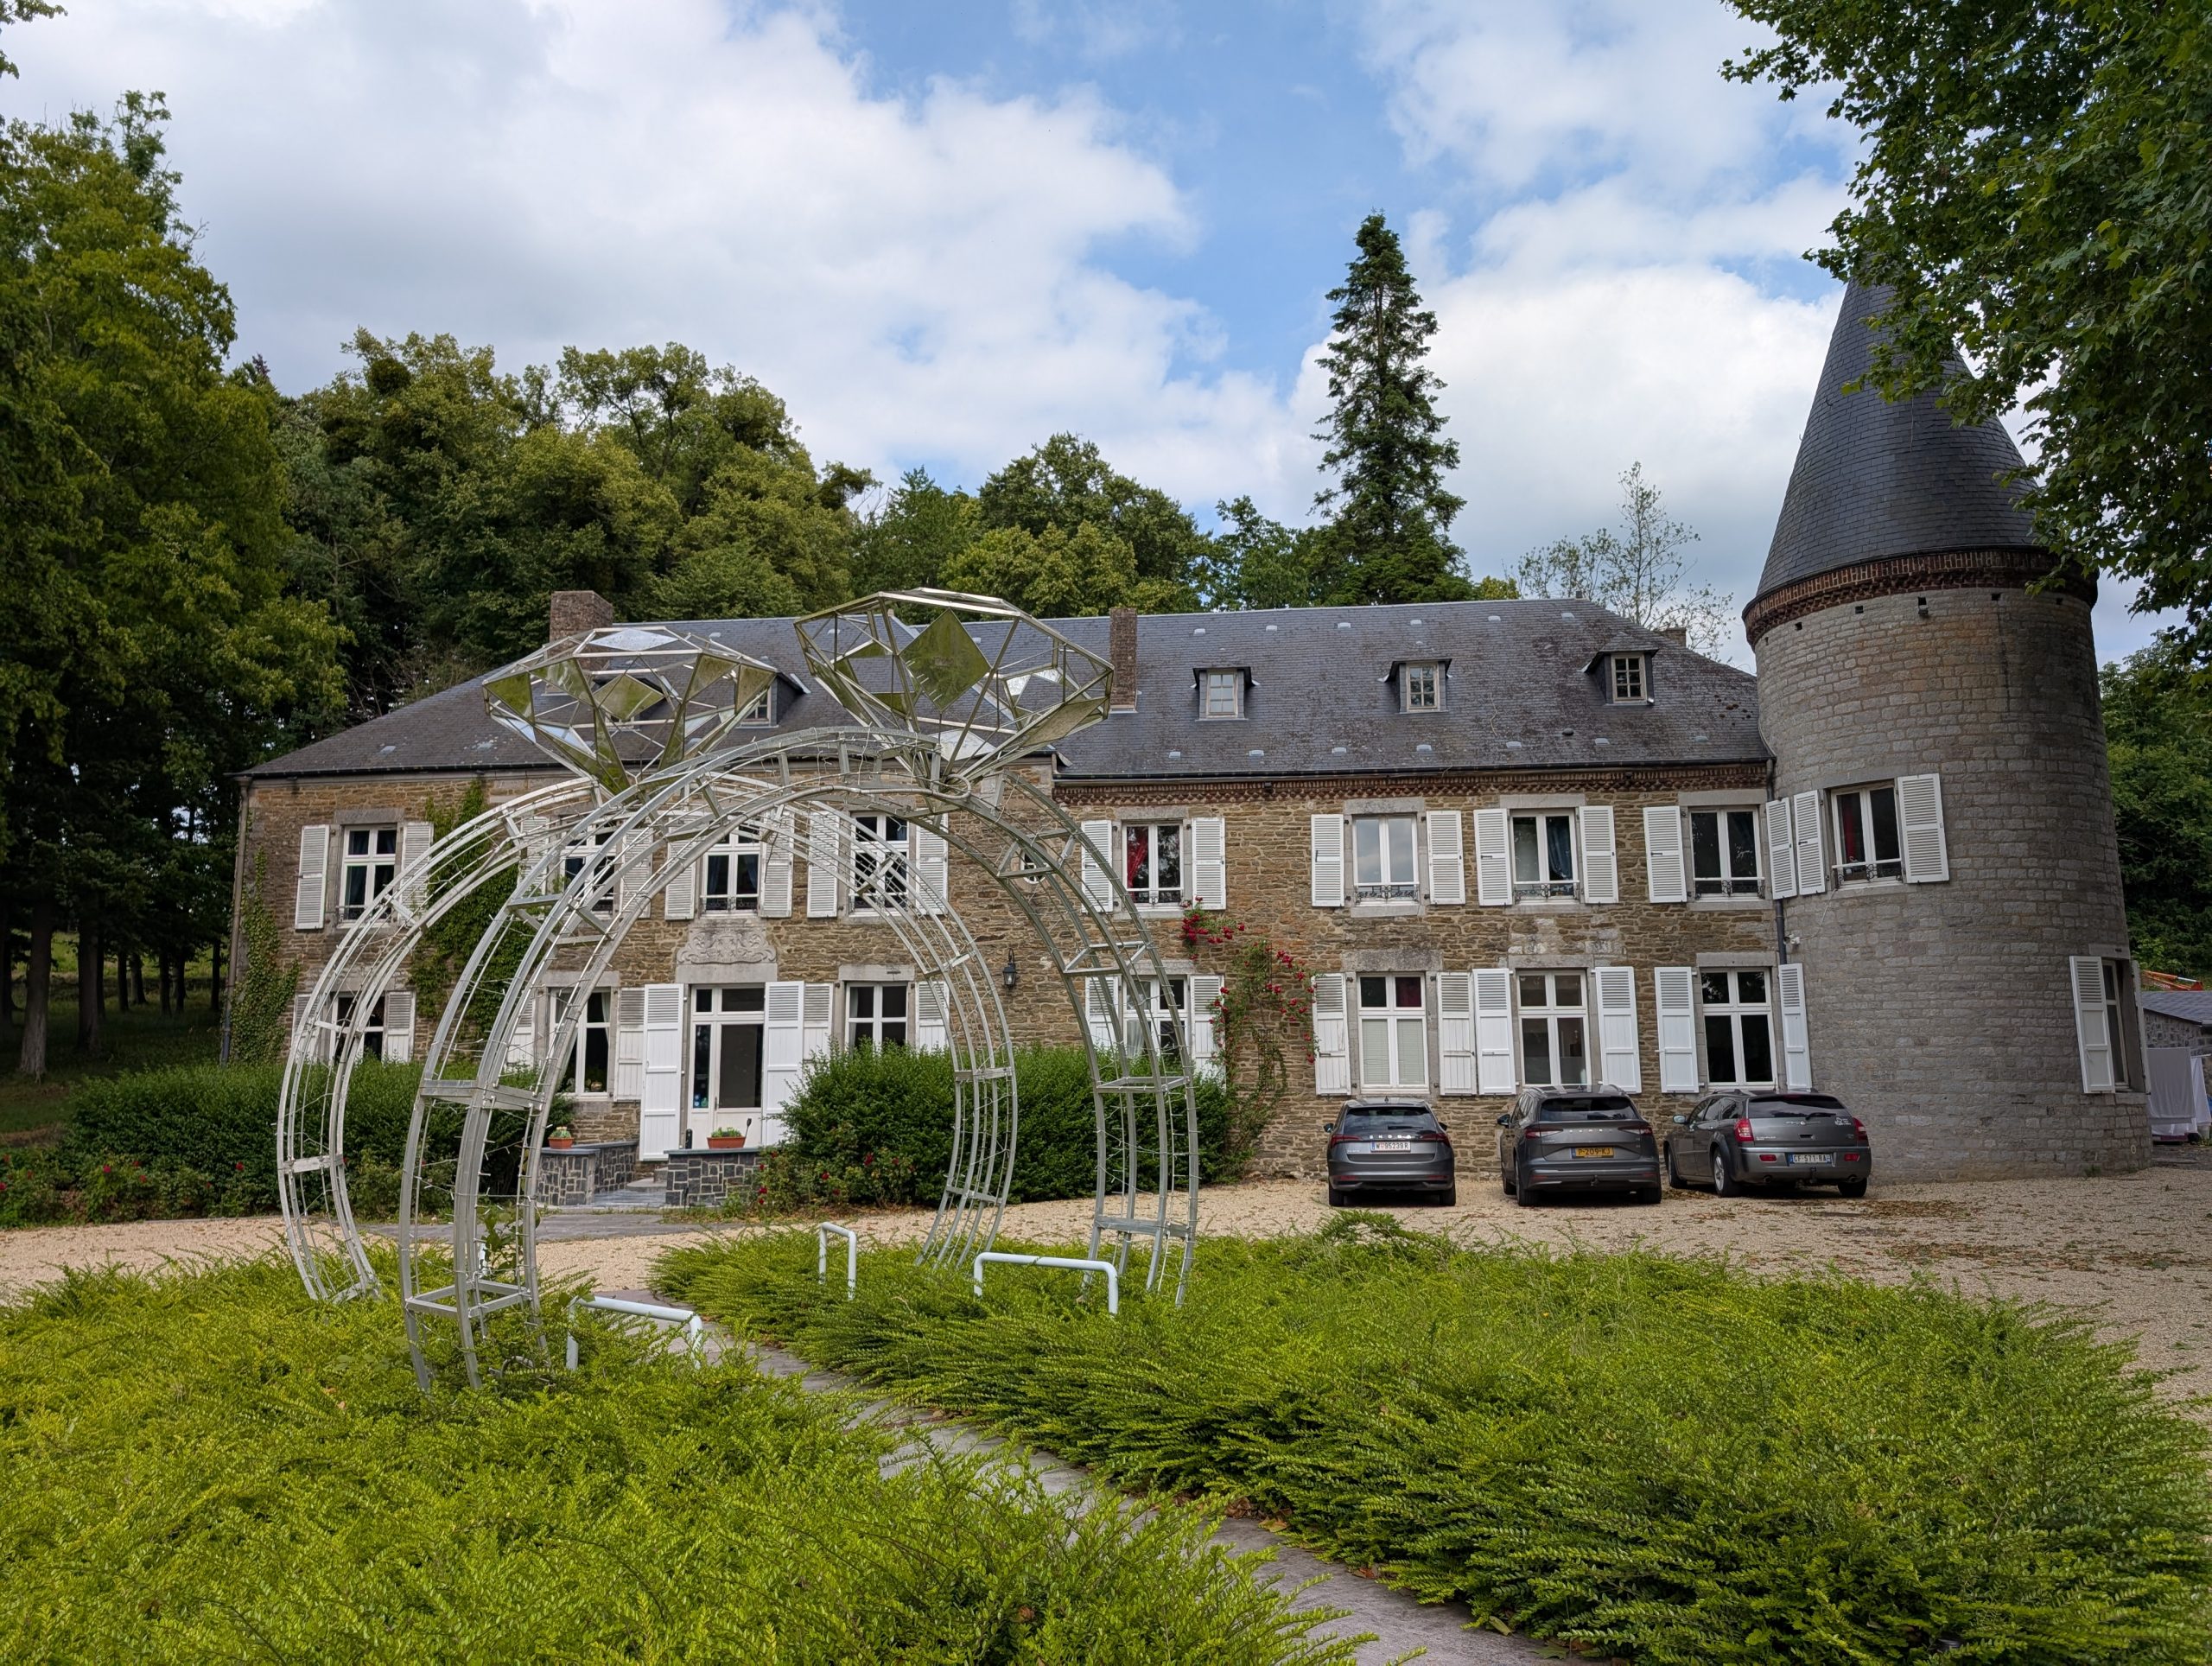
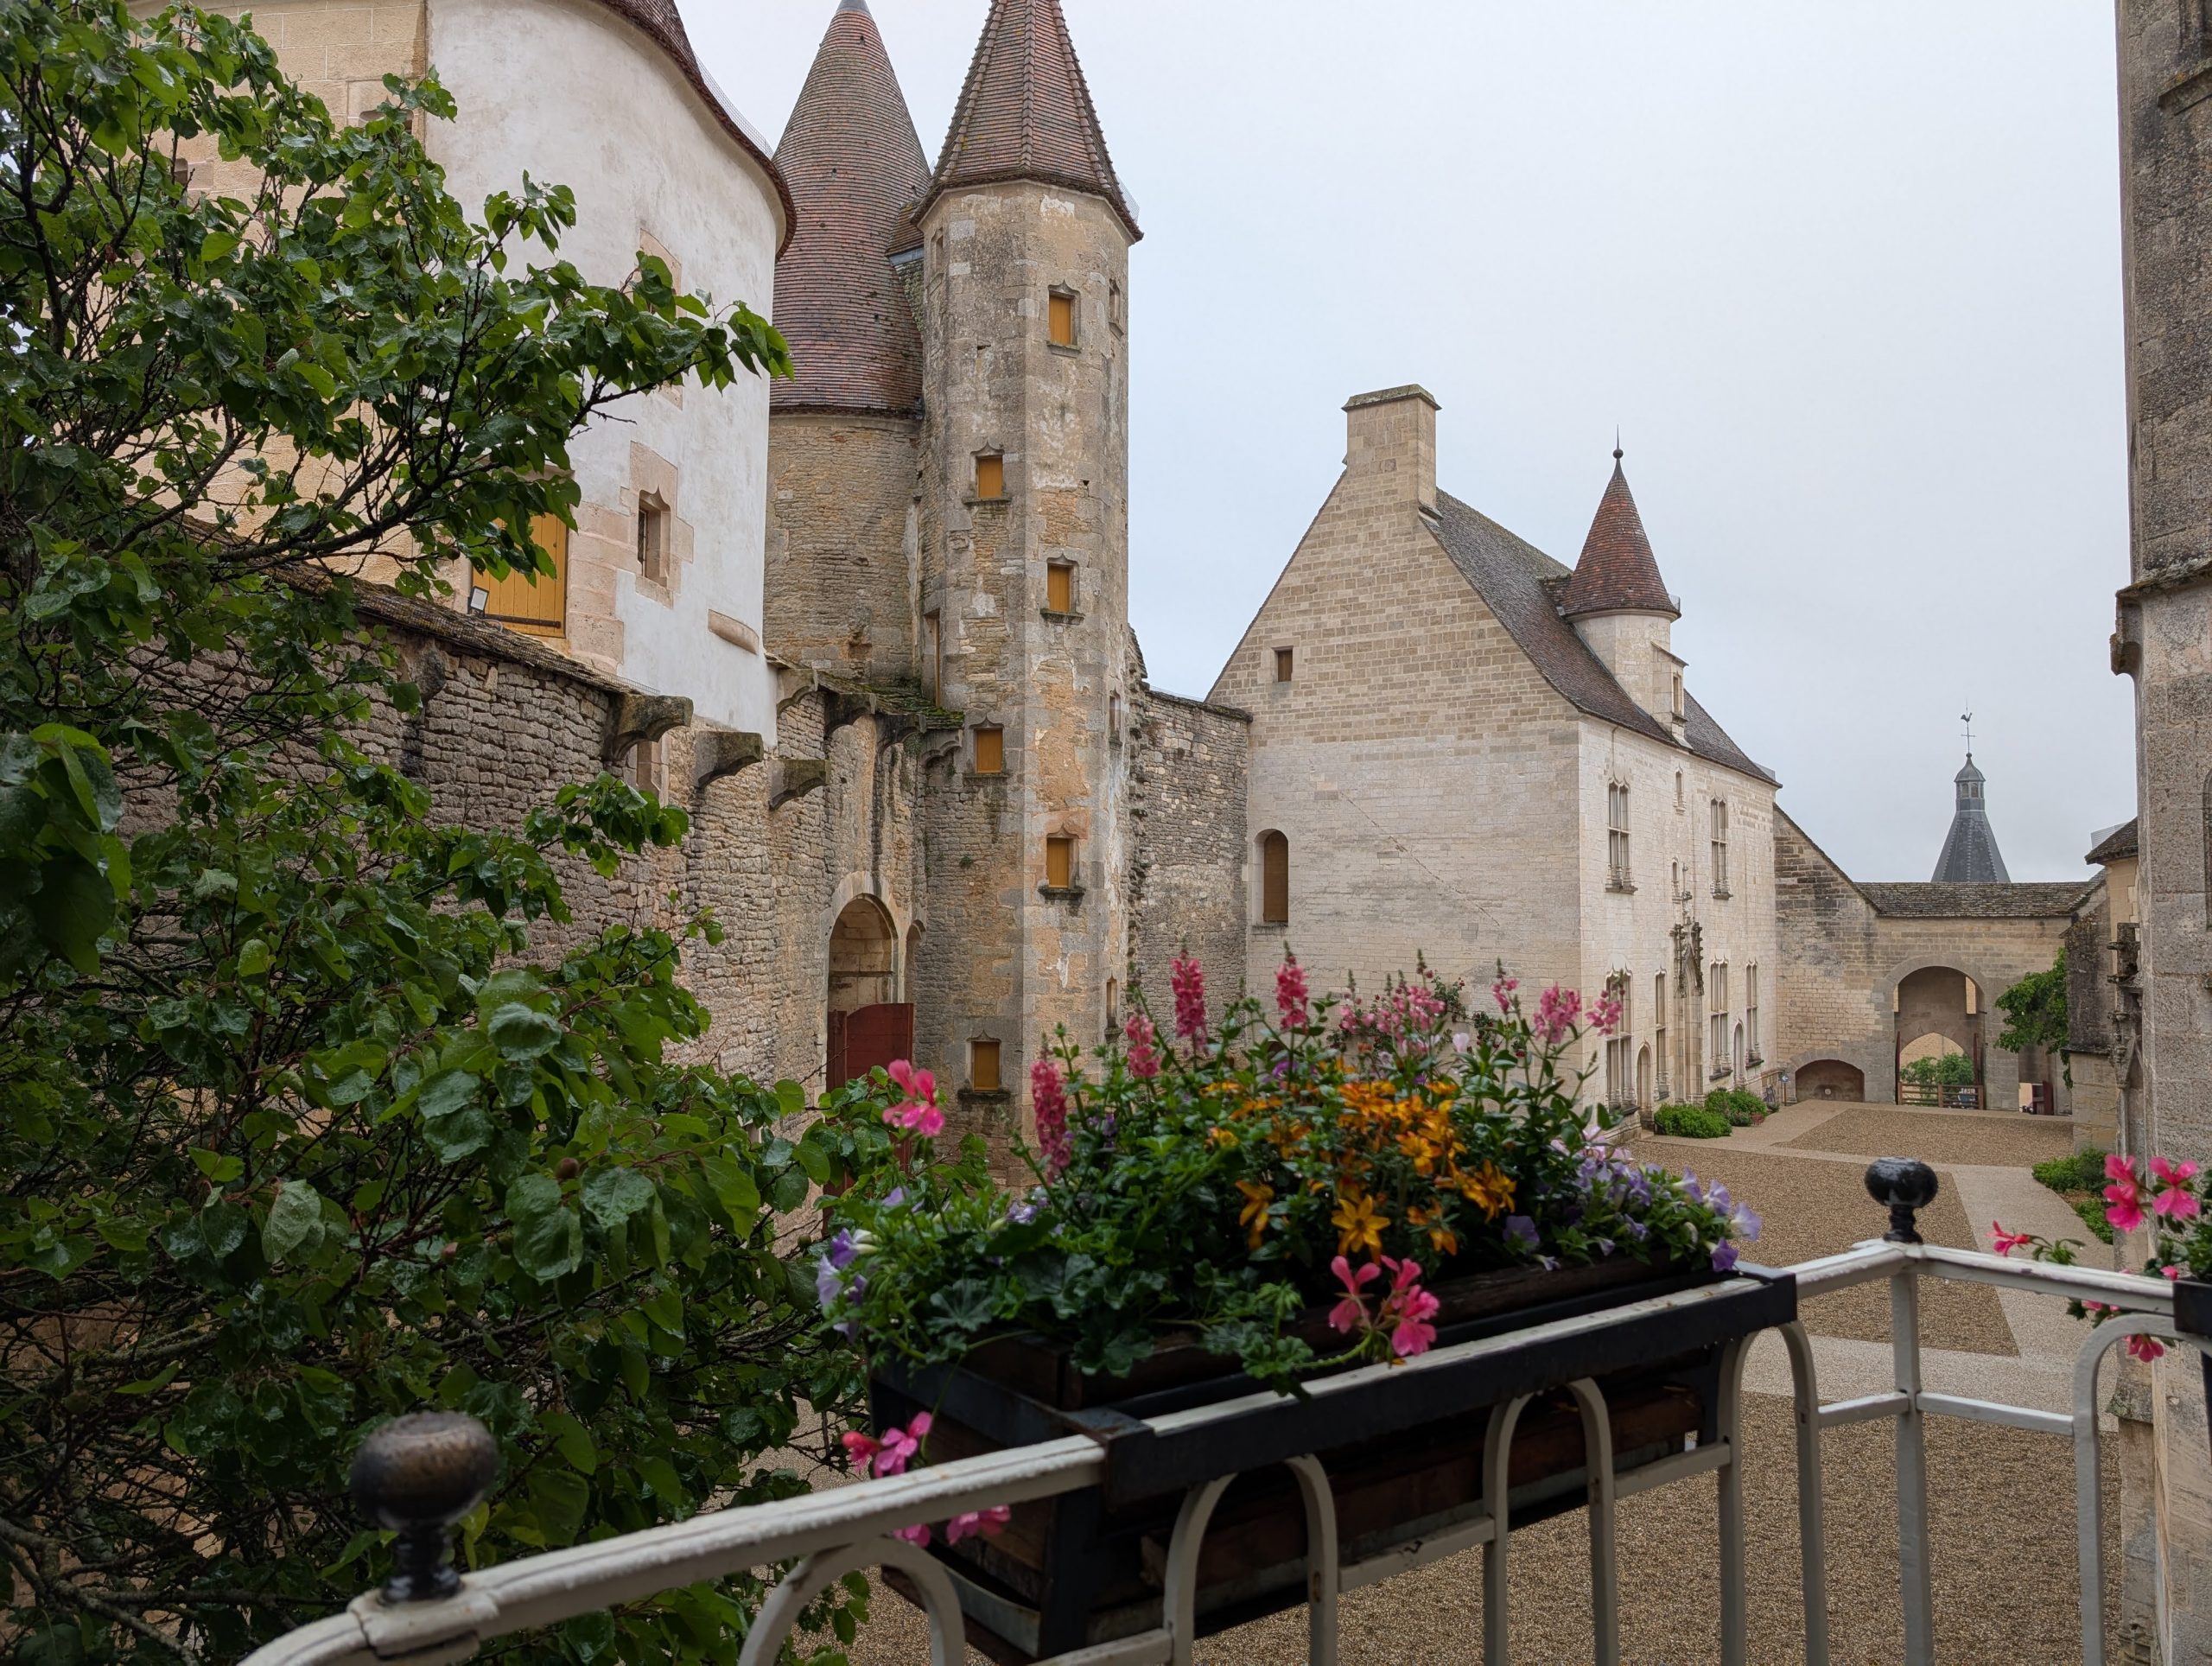
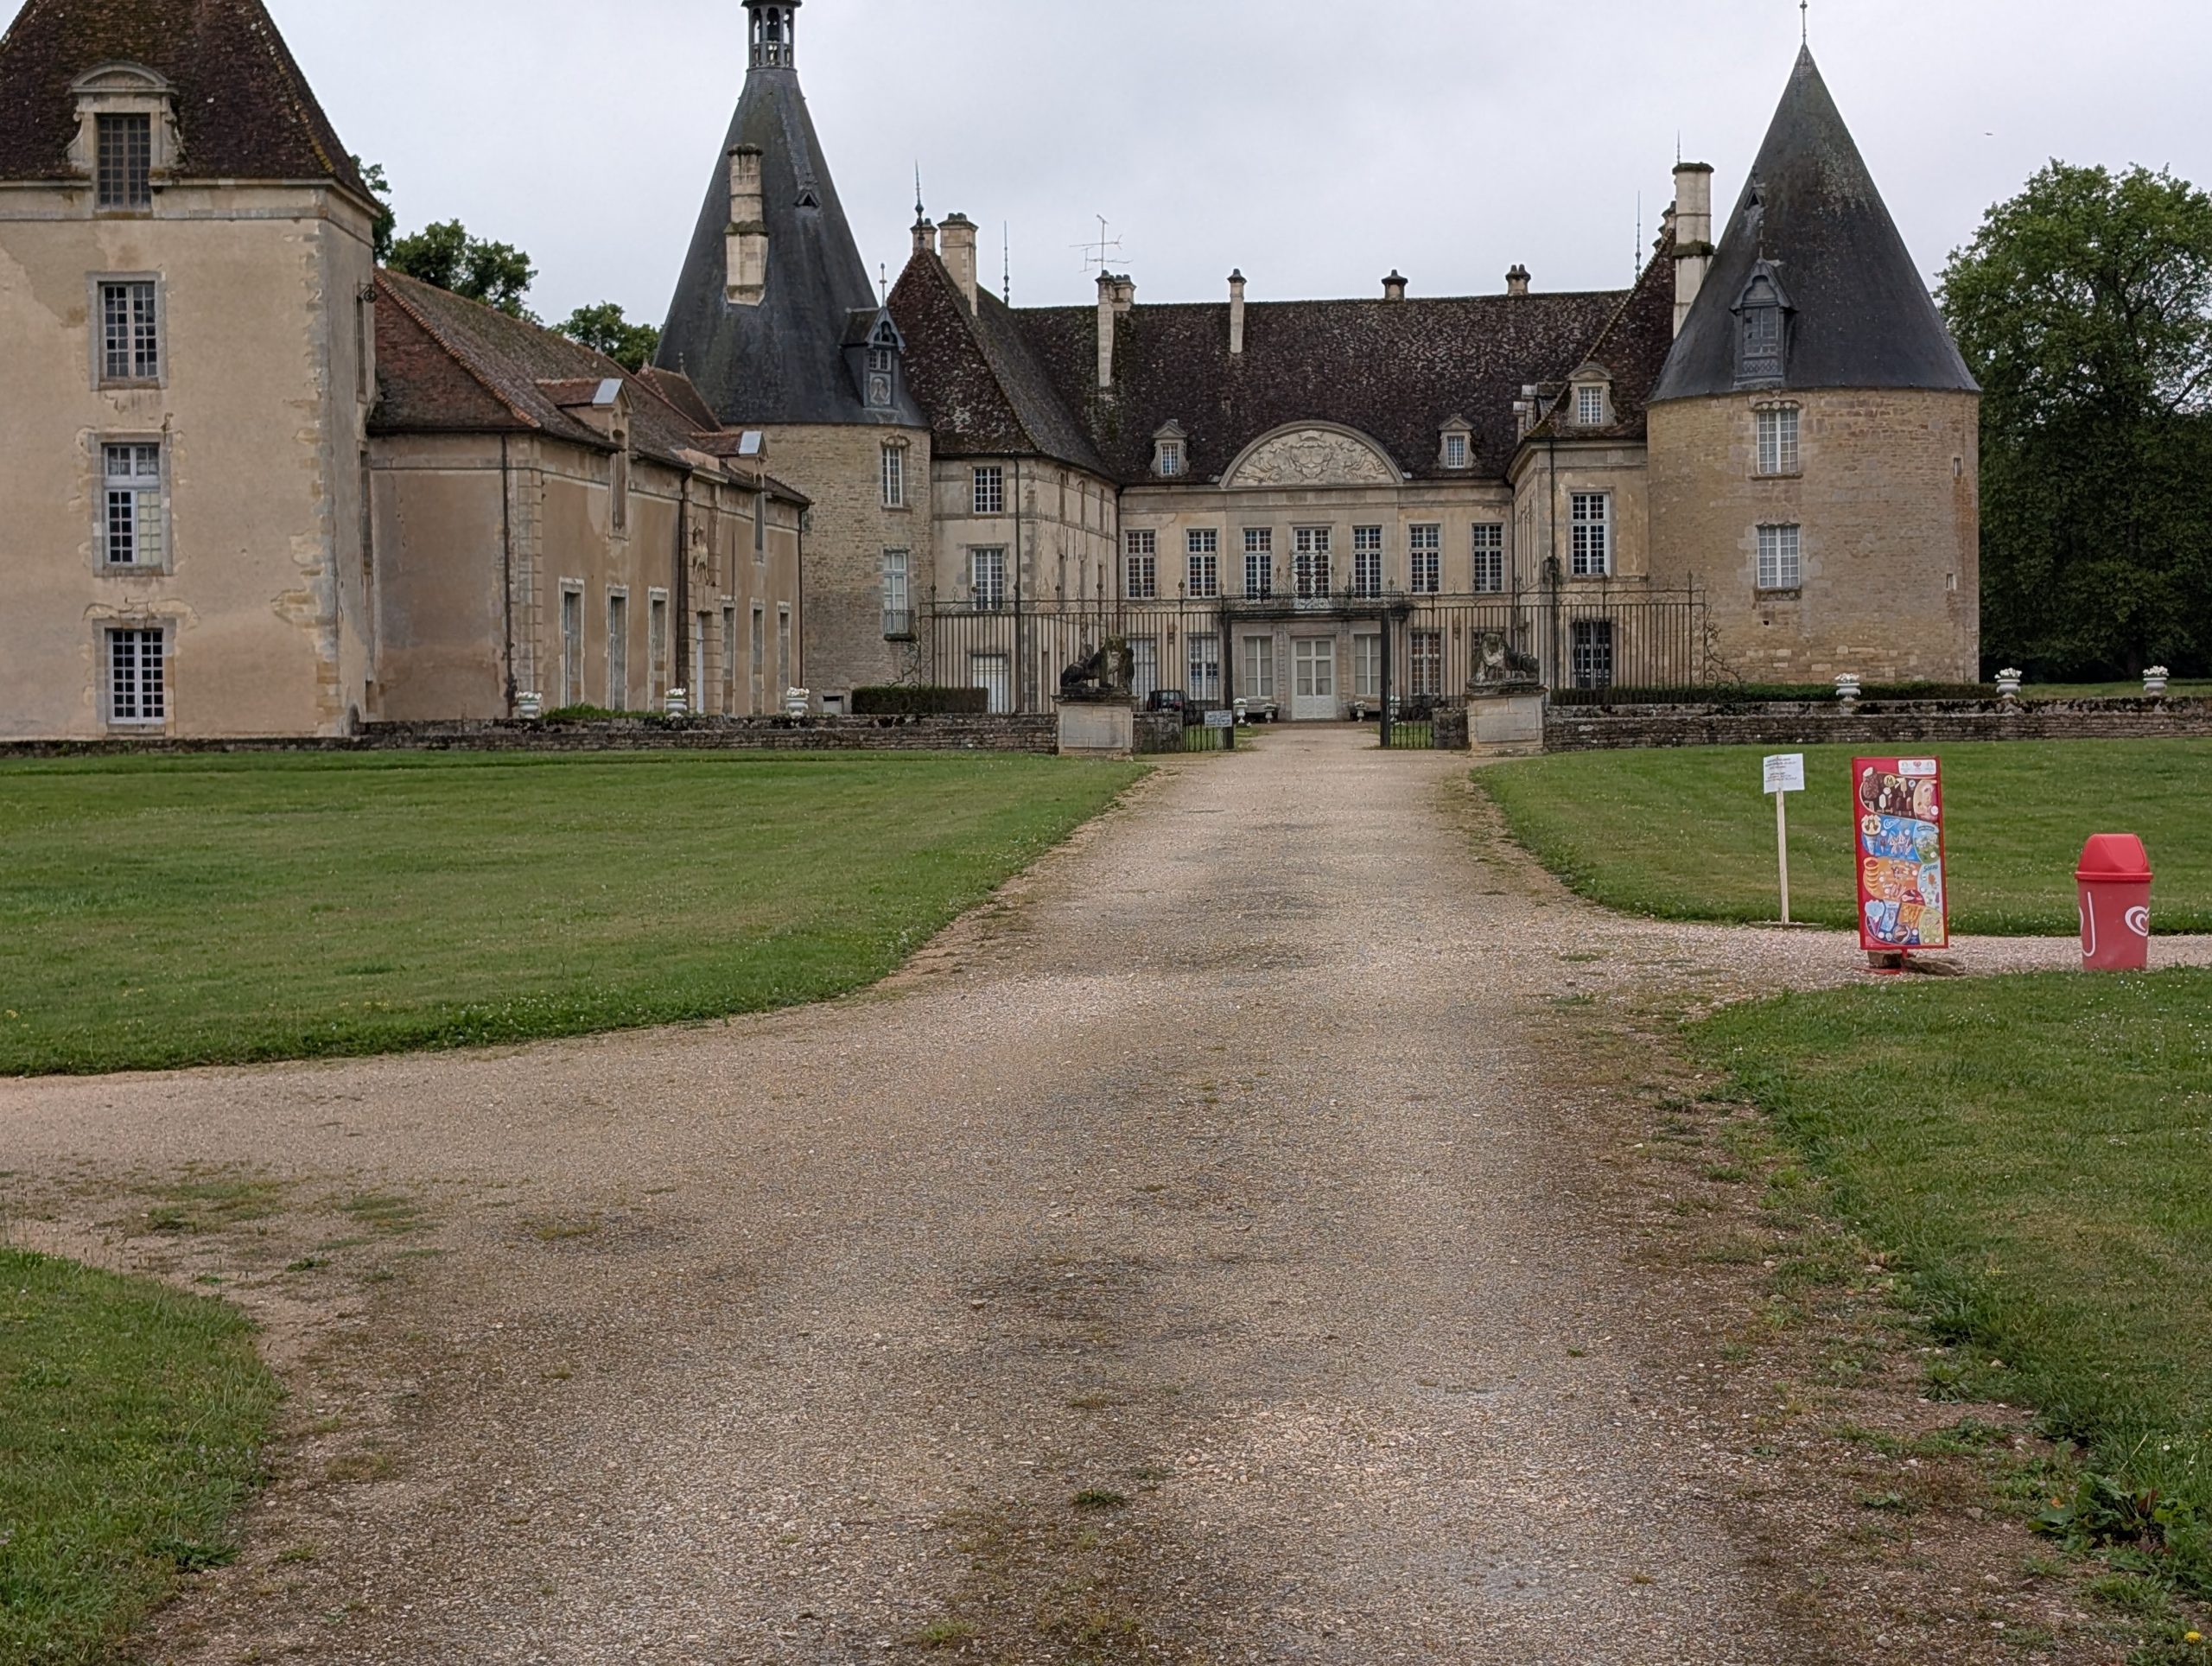
Monday, June 9, 2025 – Château d’ Aviette – Rancennes, France
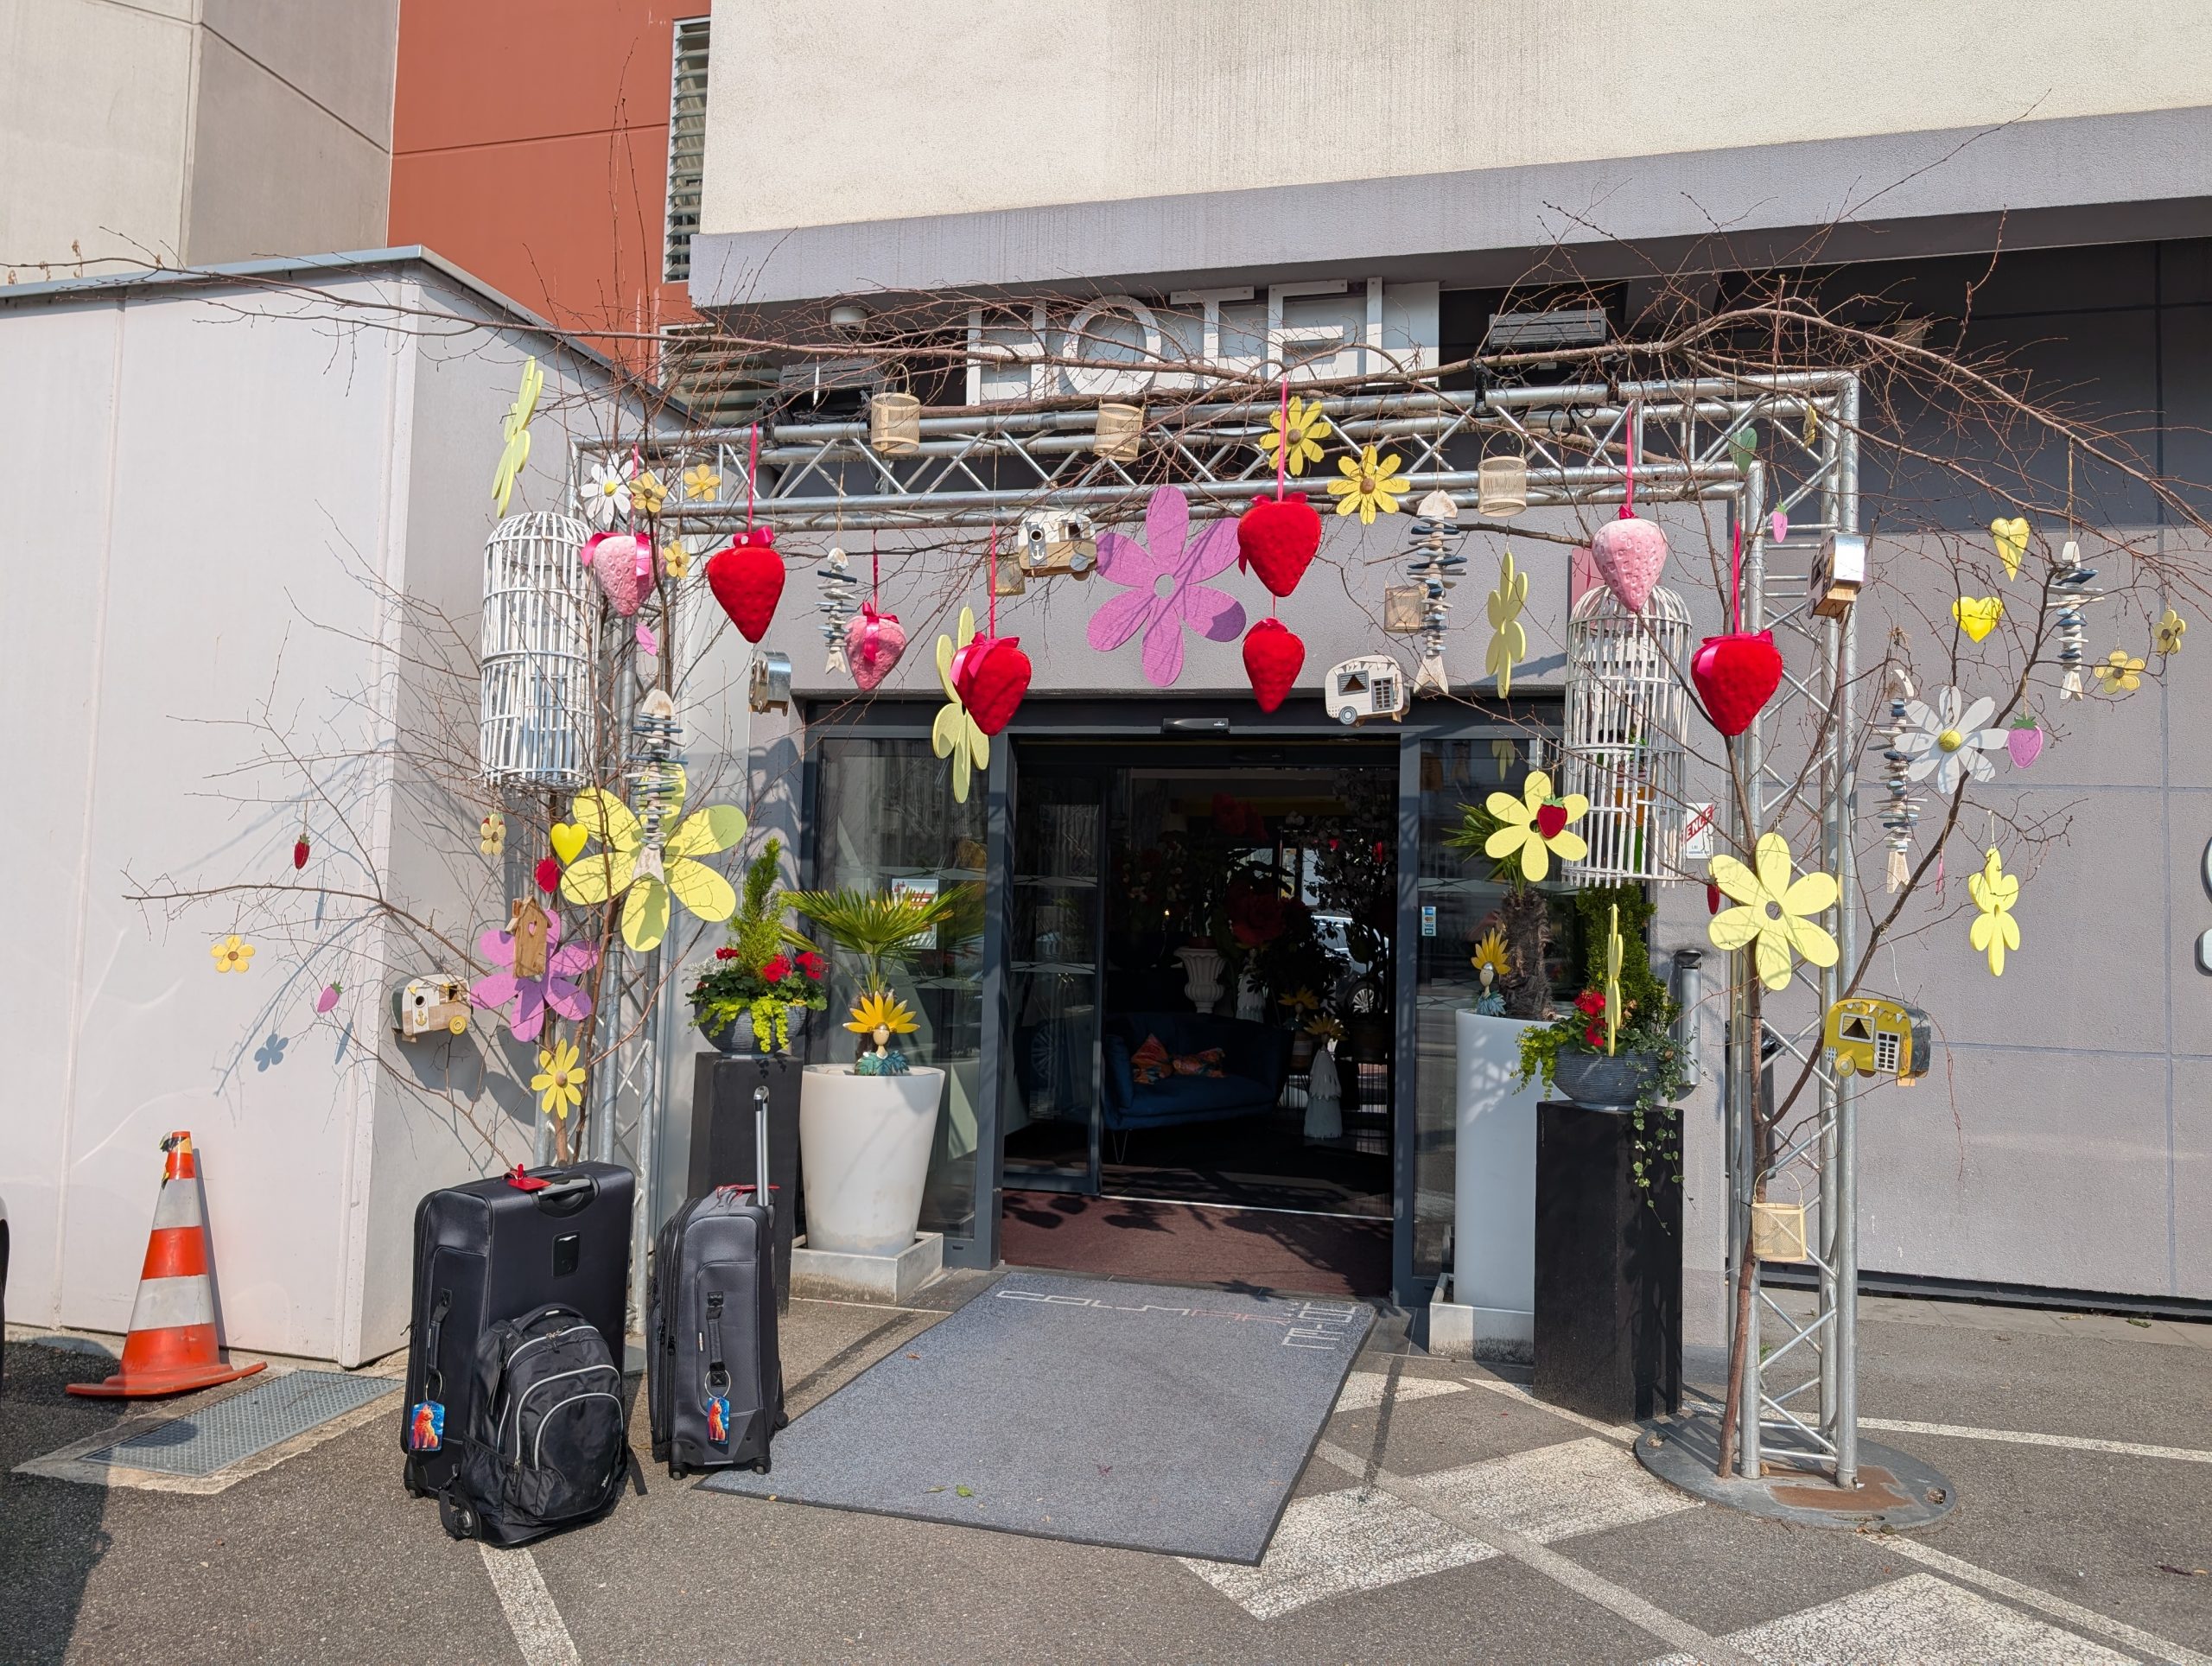
Just had to have a picture of the entrance to the Colmar Hotel. Such a nice way to be greeted every time we came back from yet another fun adventure.
After another wonderful breakfast, it was time to start heading Northwest from Colmar, France to our one-night stay along the border of France and Belgium before turning in our rental car in Amsterdam.
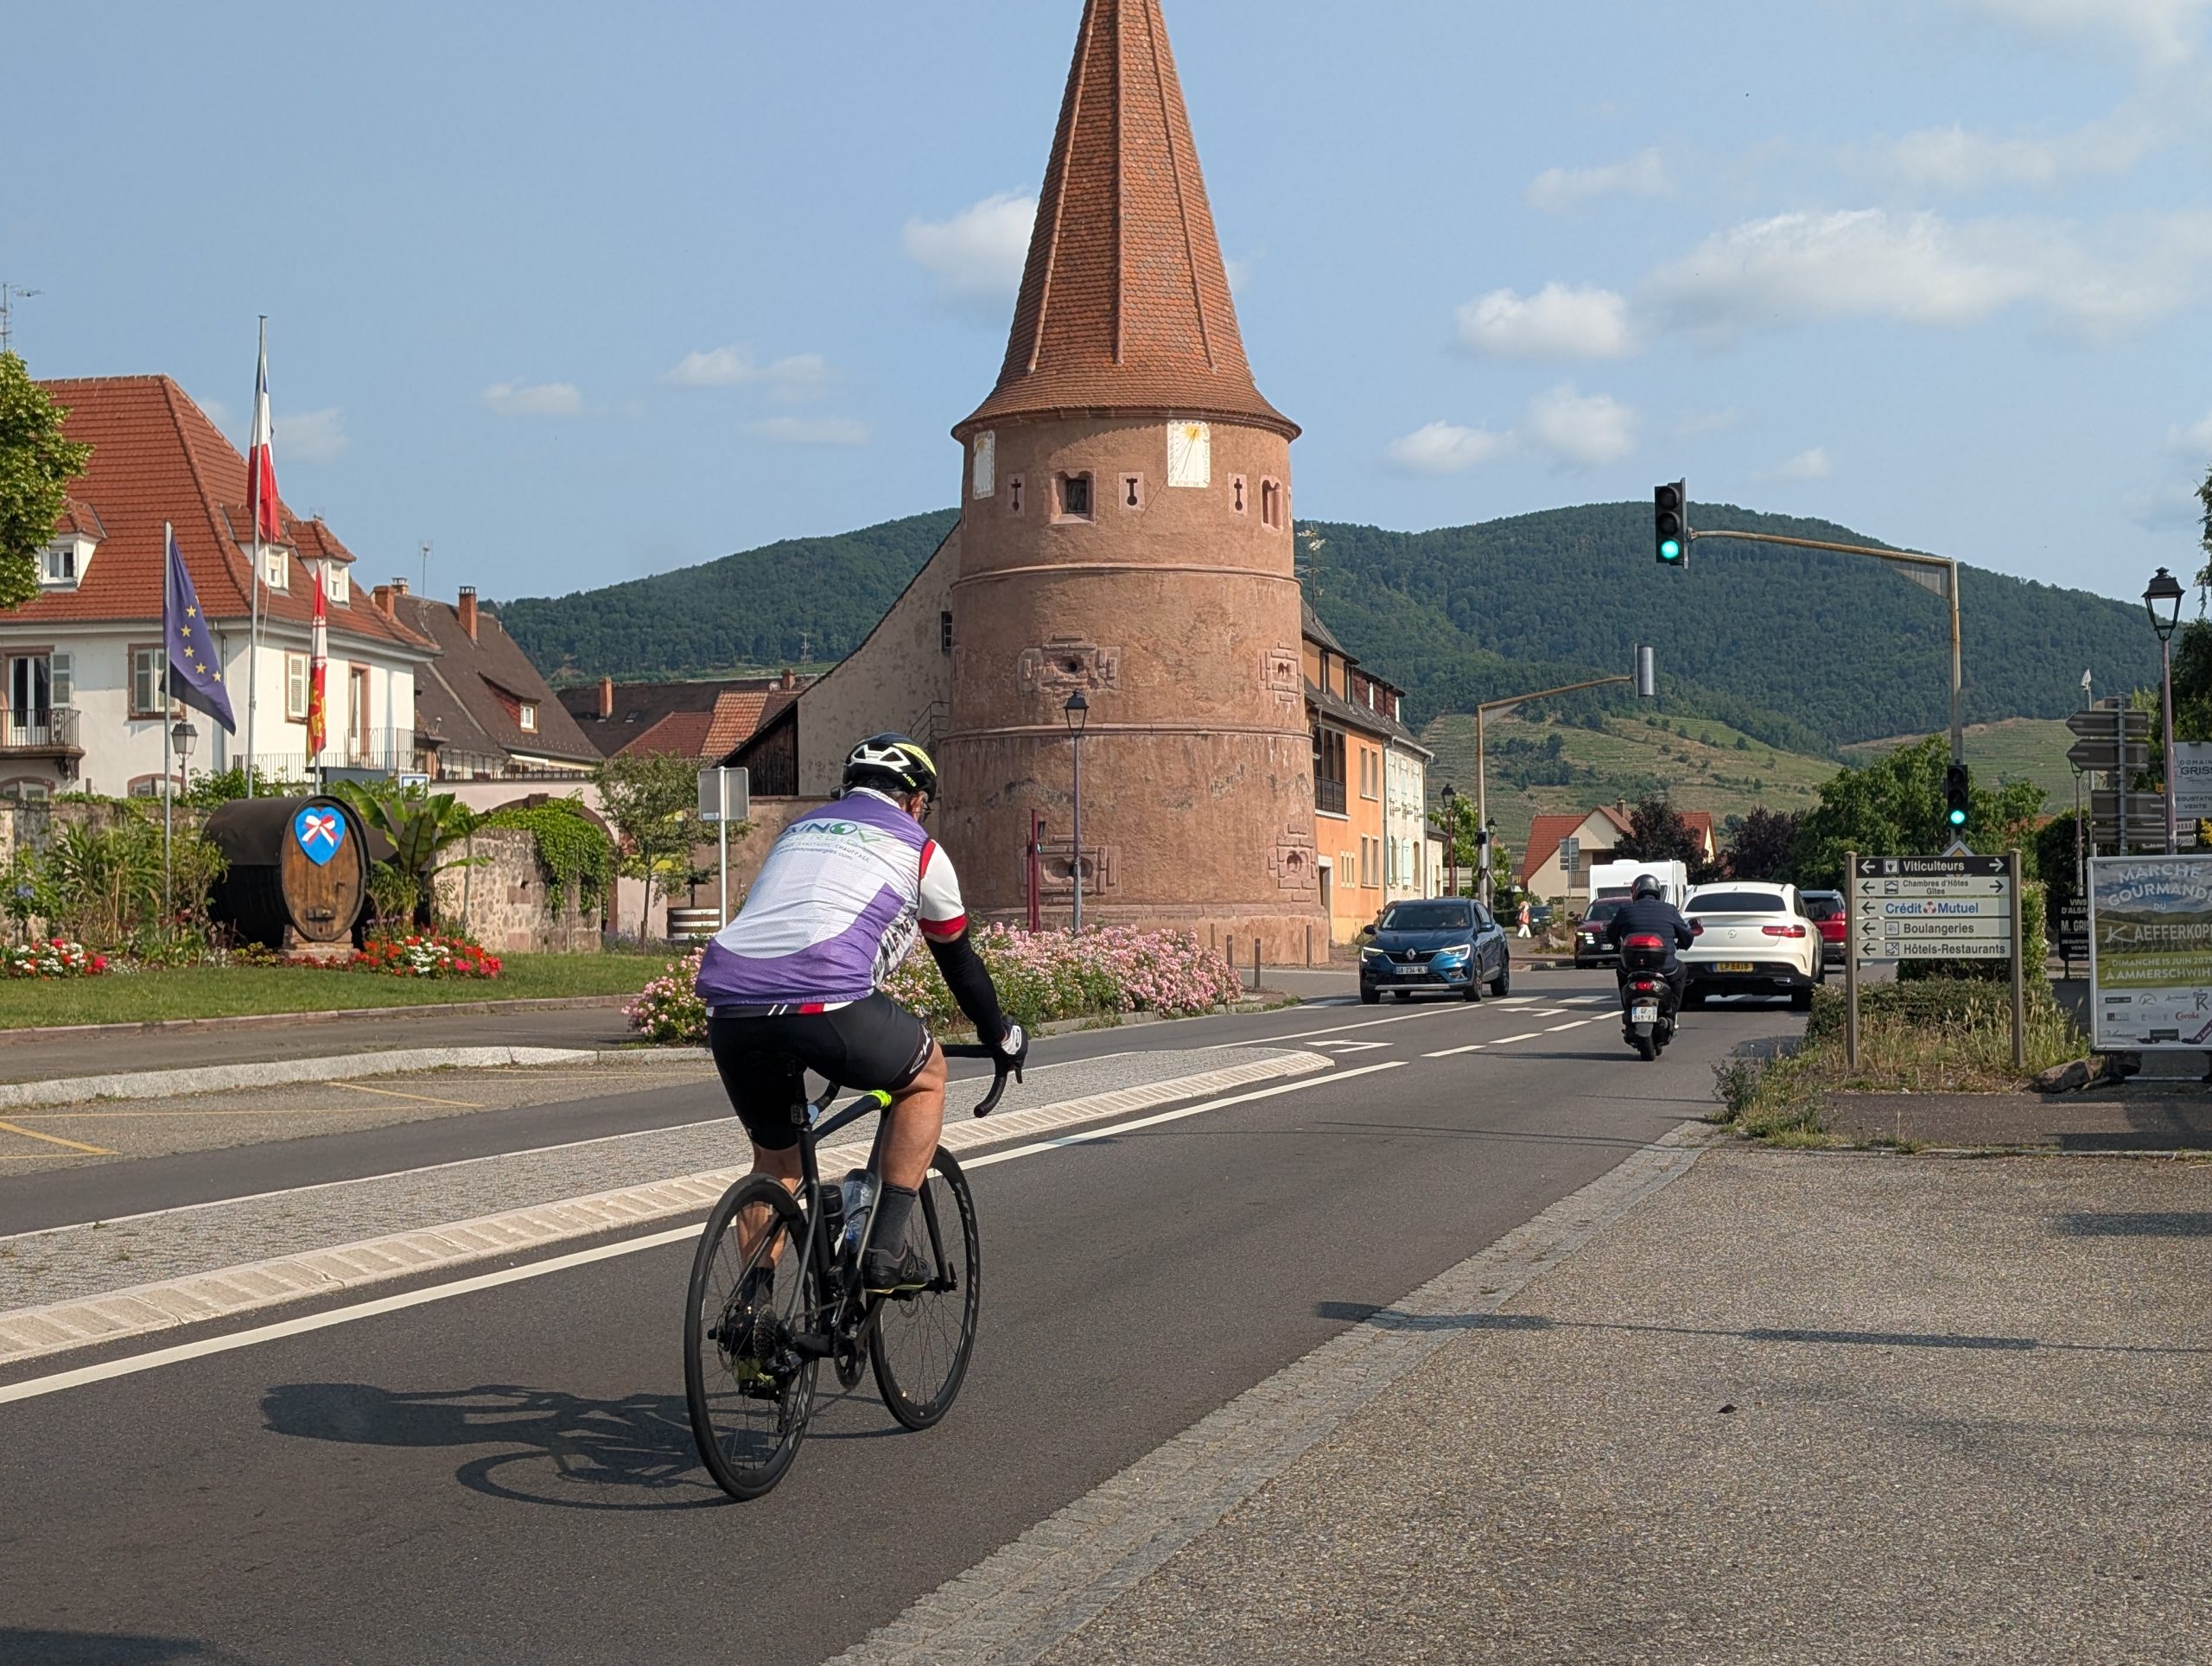
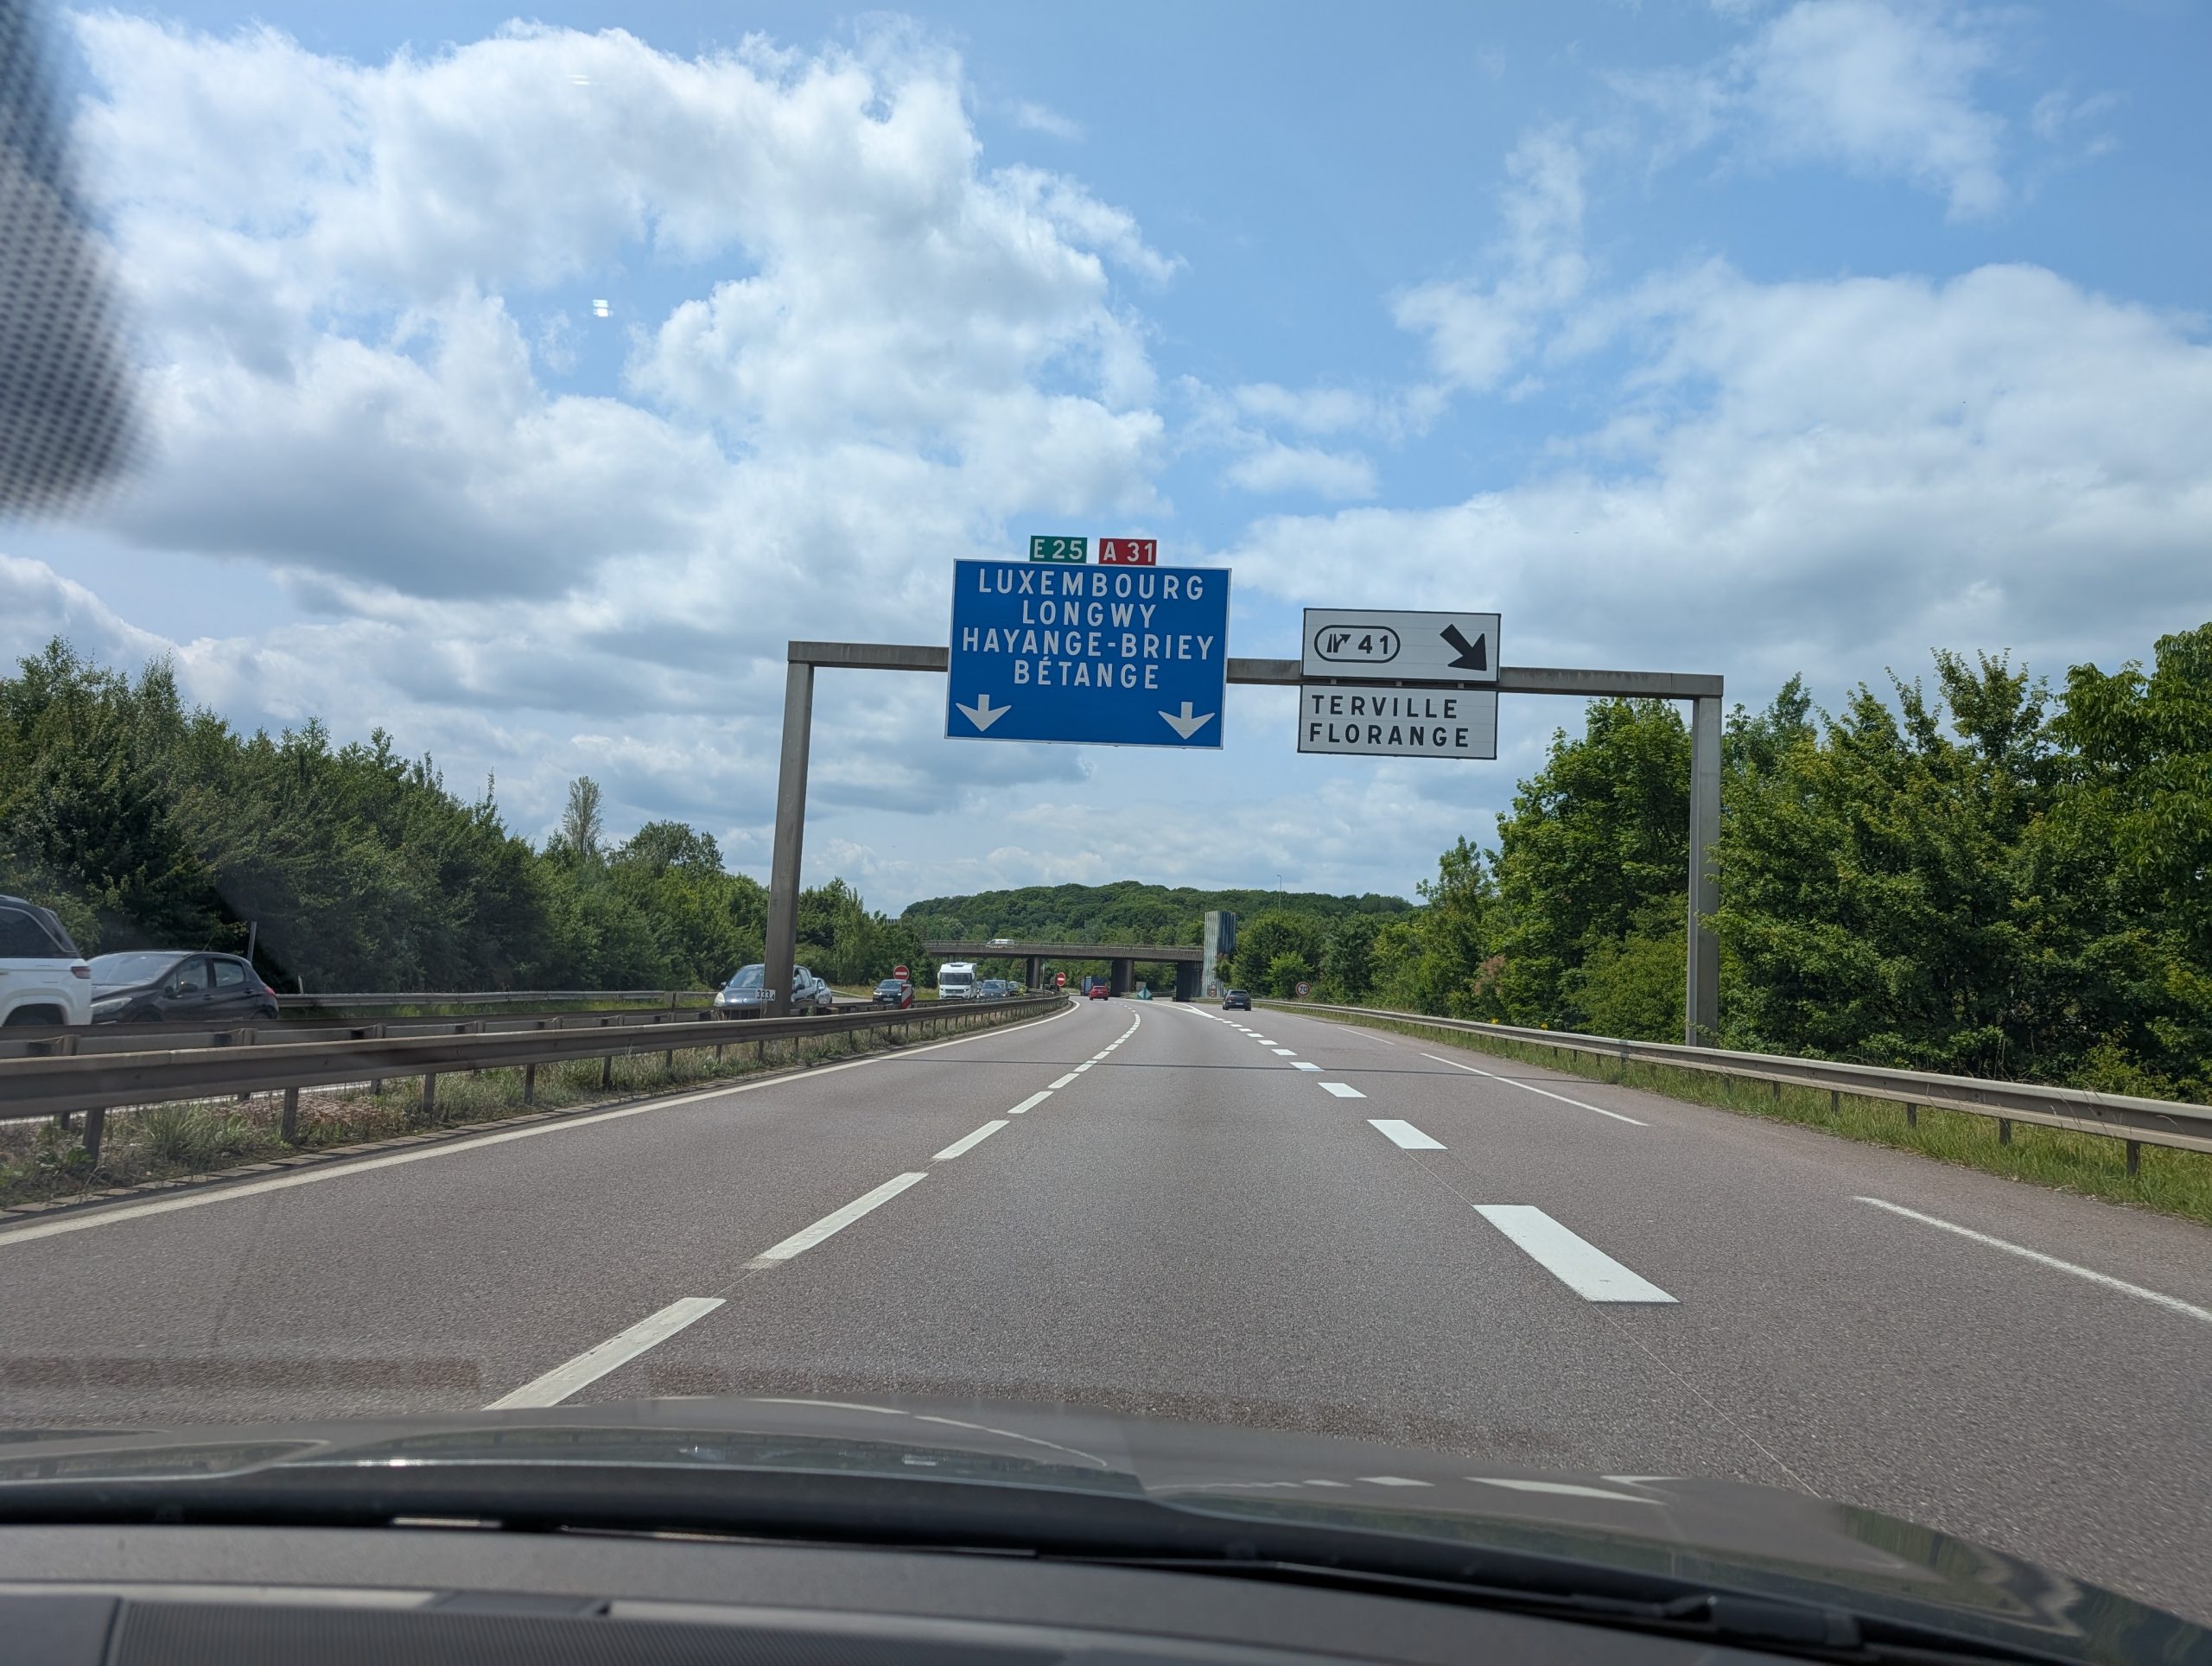
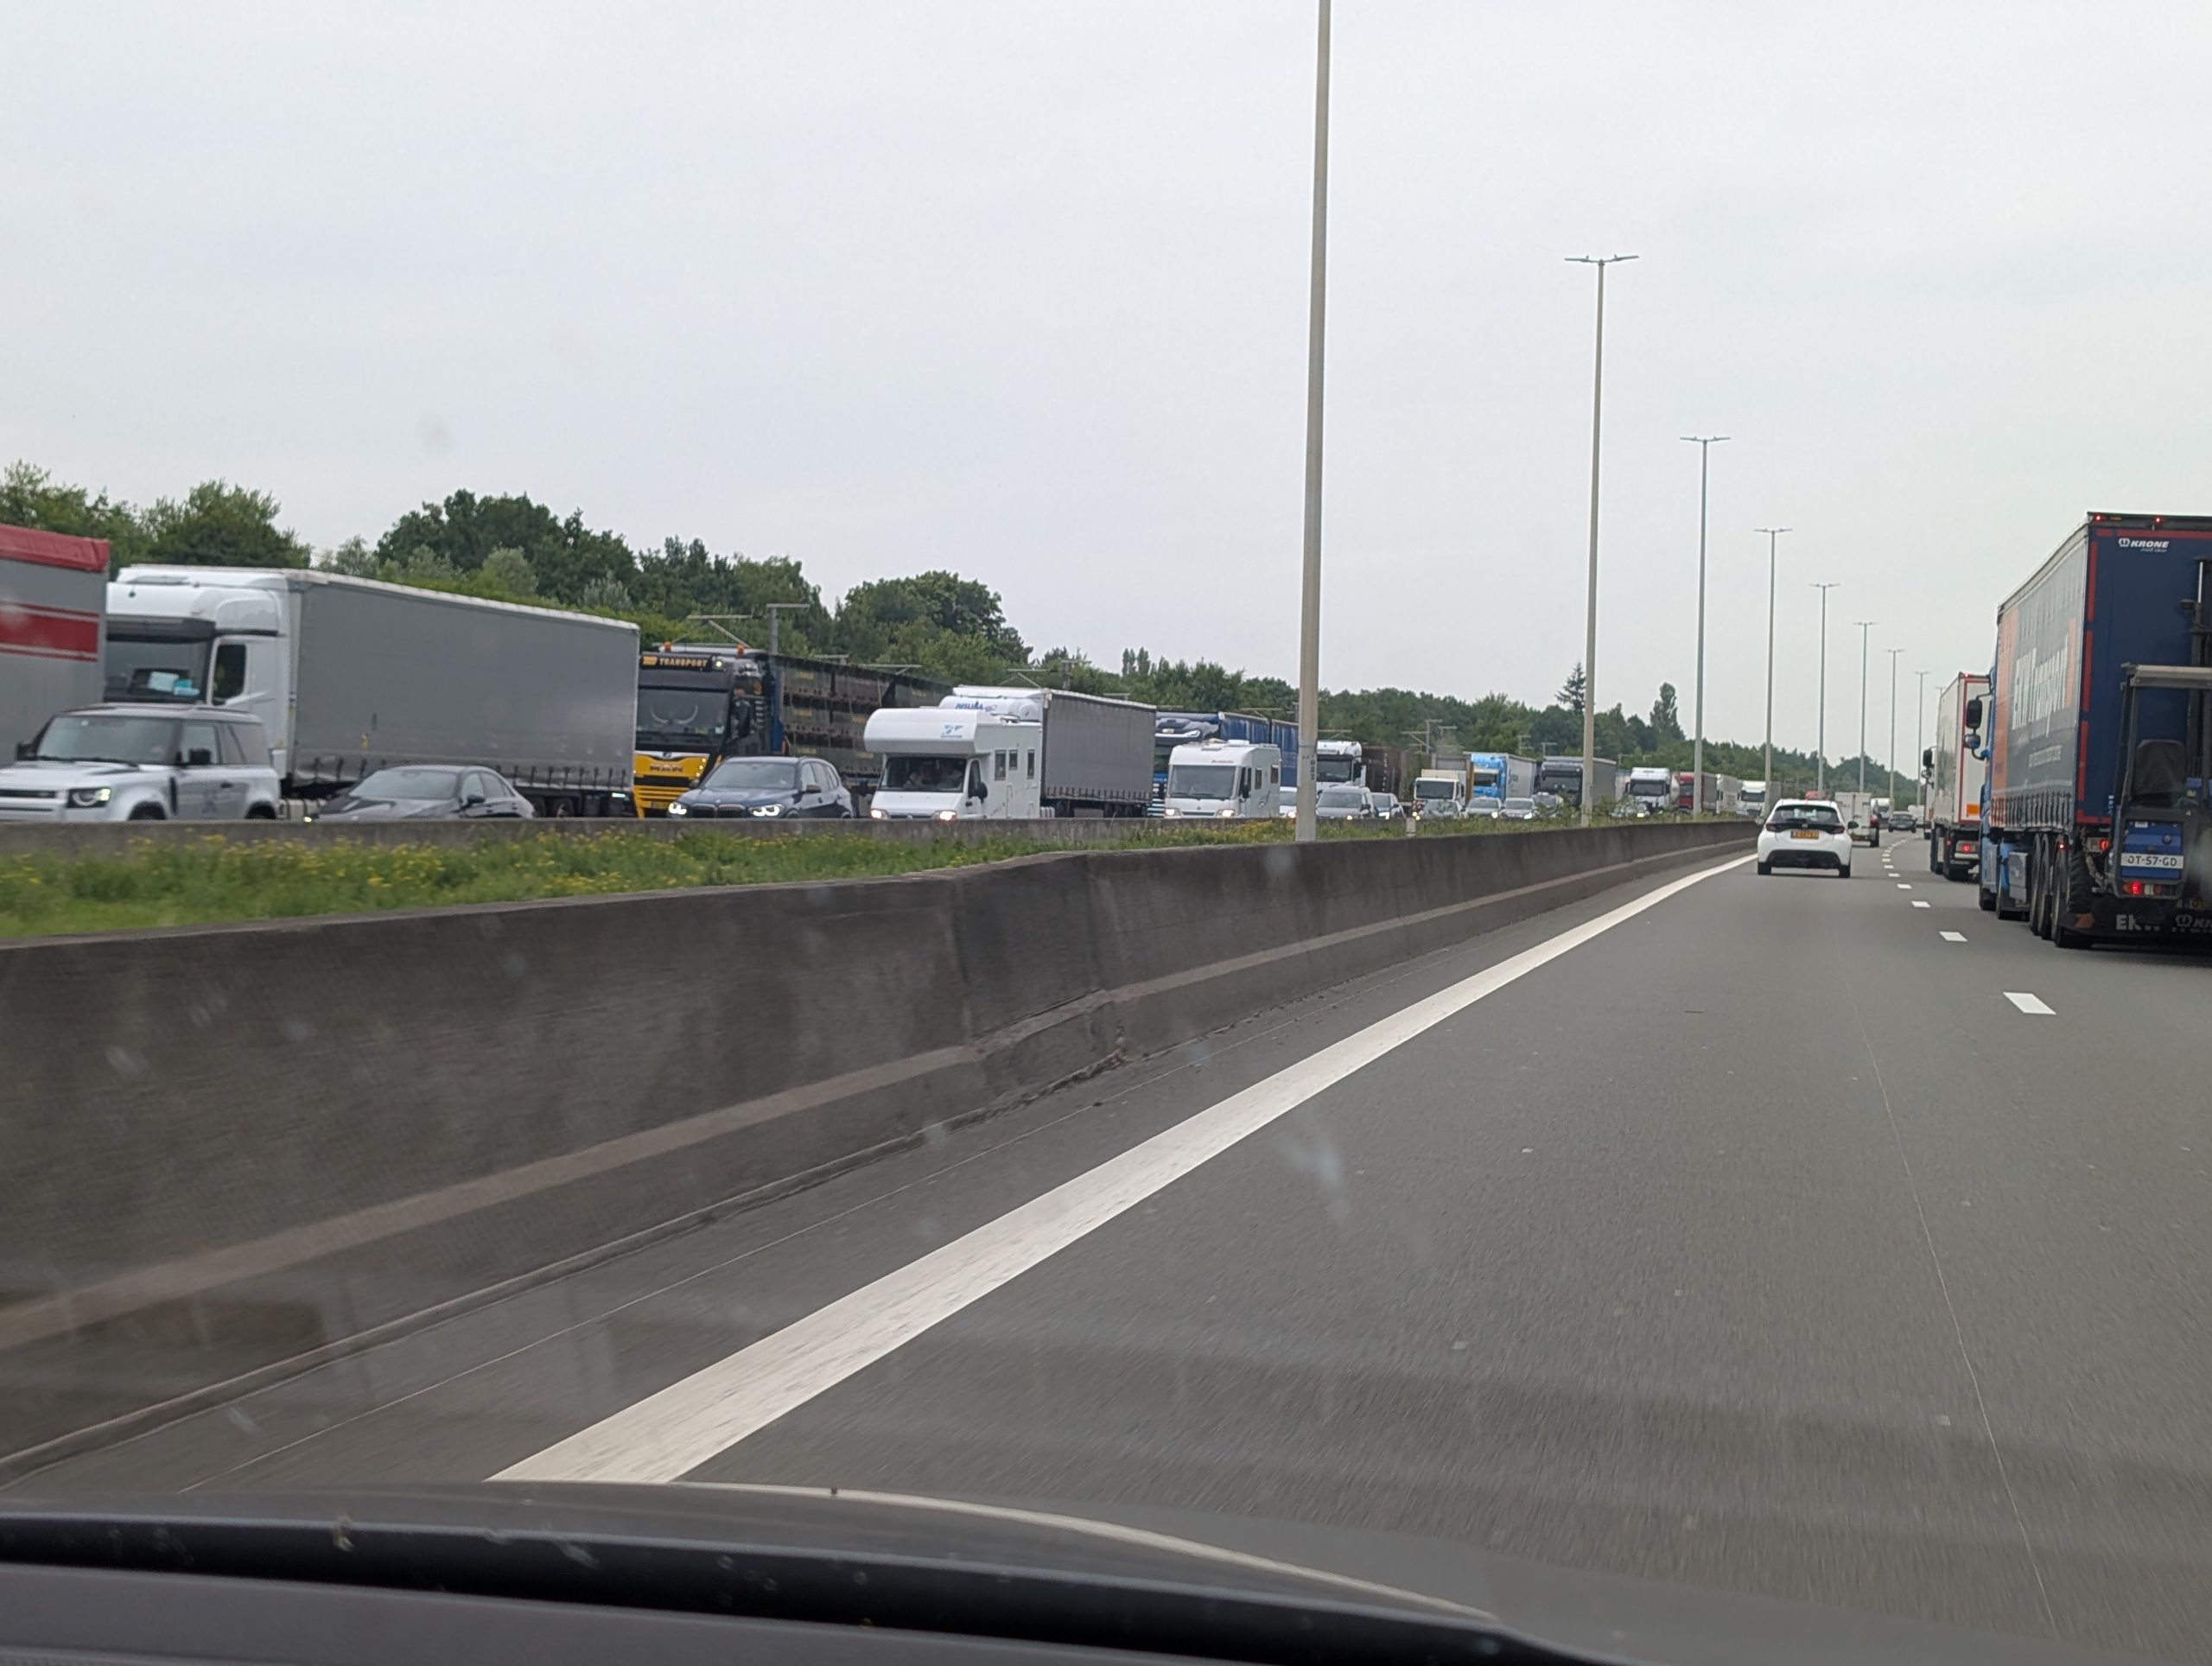
A lovely drive through farmland and through both Luxembourg (where we had lunch) and Belgium eventually making it back into France.
Along the way. And once again bicycles everywhere.
Luxembourg lookout. Here we come!
And big trucks on every major road.
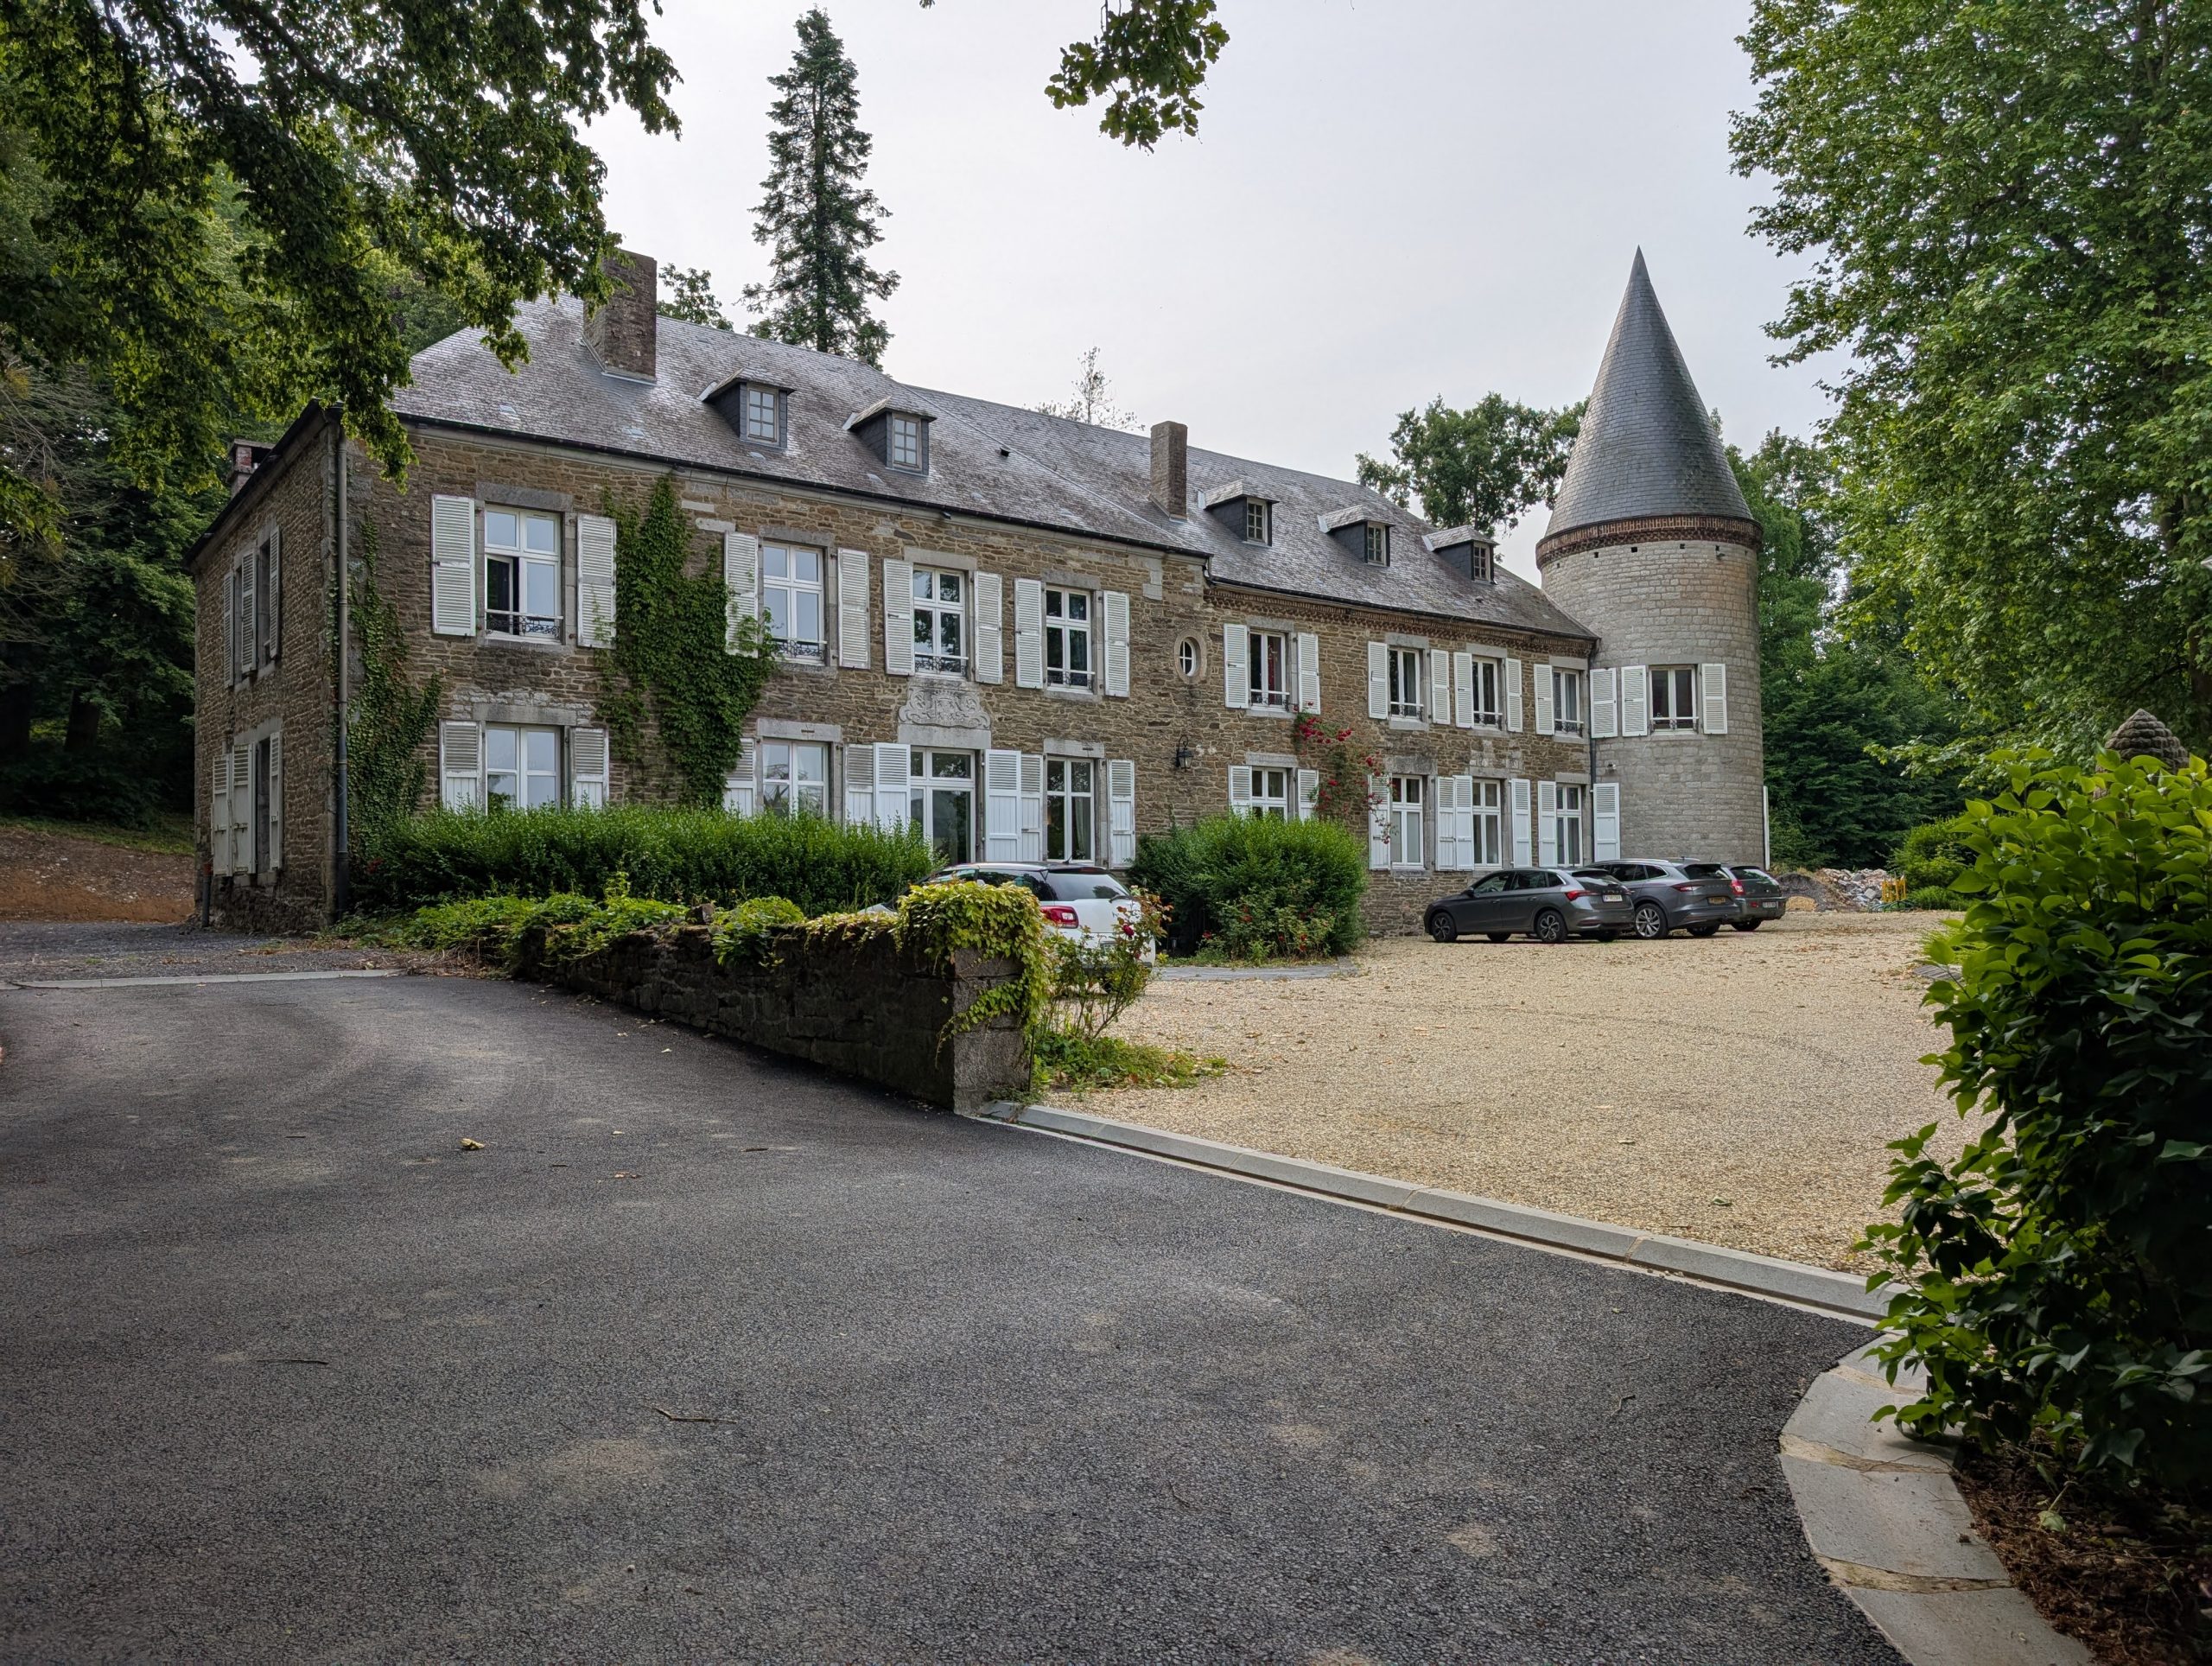
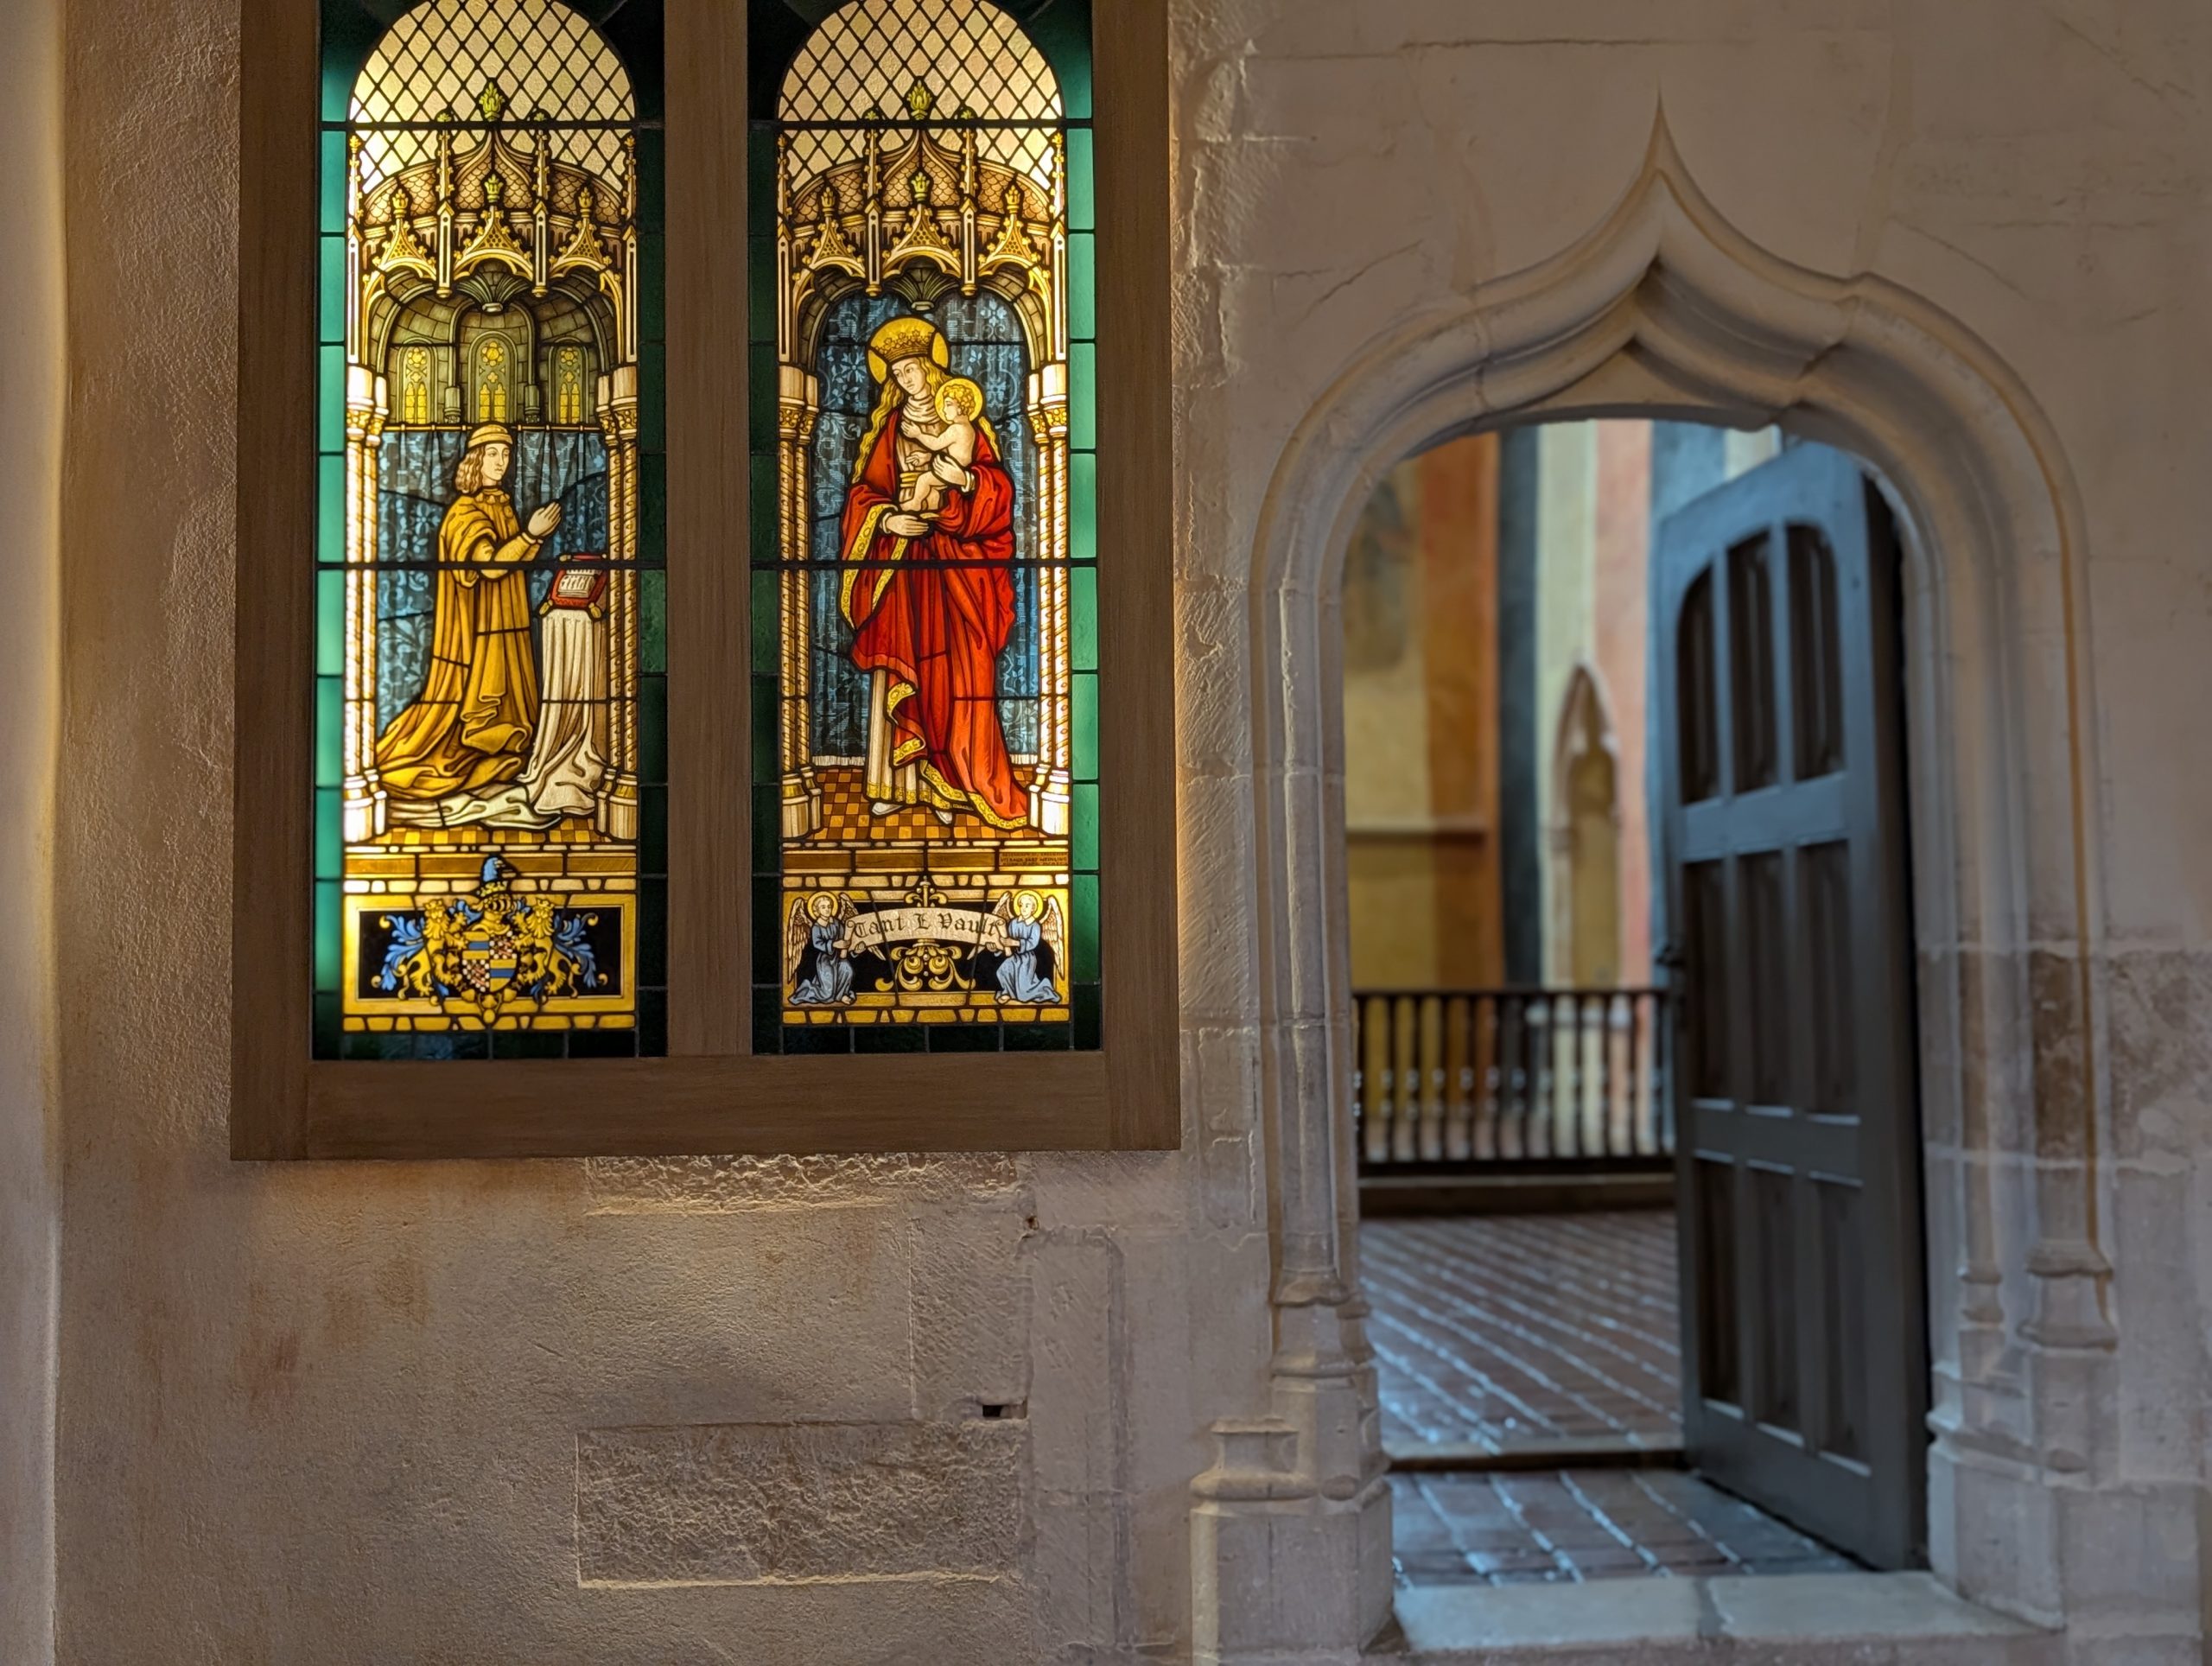
When we arrived at the castle/château, there seemed to be no one around. We just parked our car and walked in like we owned the place. Finally, the owner found us and took us on a mini tour of the castle. The owner referred to this imposing structure as a castle, but it is titled a château. Whatever you want to call it, it was built in the late 18th century, and it is a large, stately, imposing, fortified (it has a tower), luxurious, and historically significant building. What more could you ask for?
The chateau/castle.
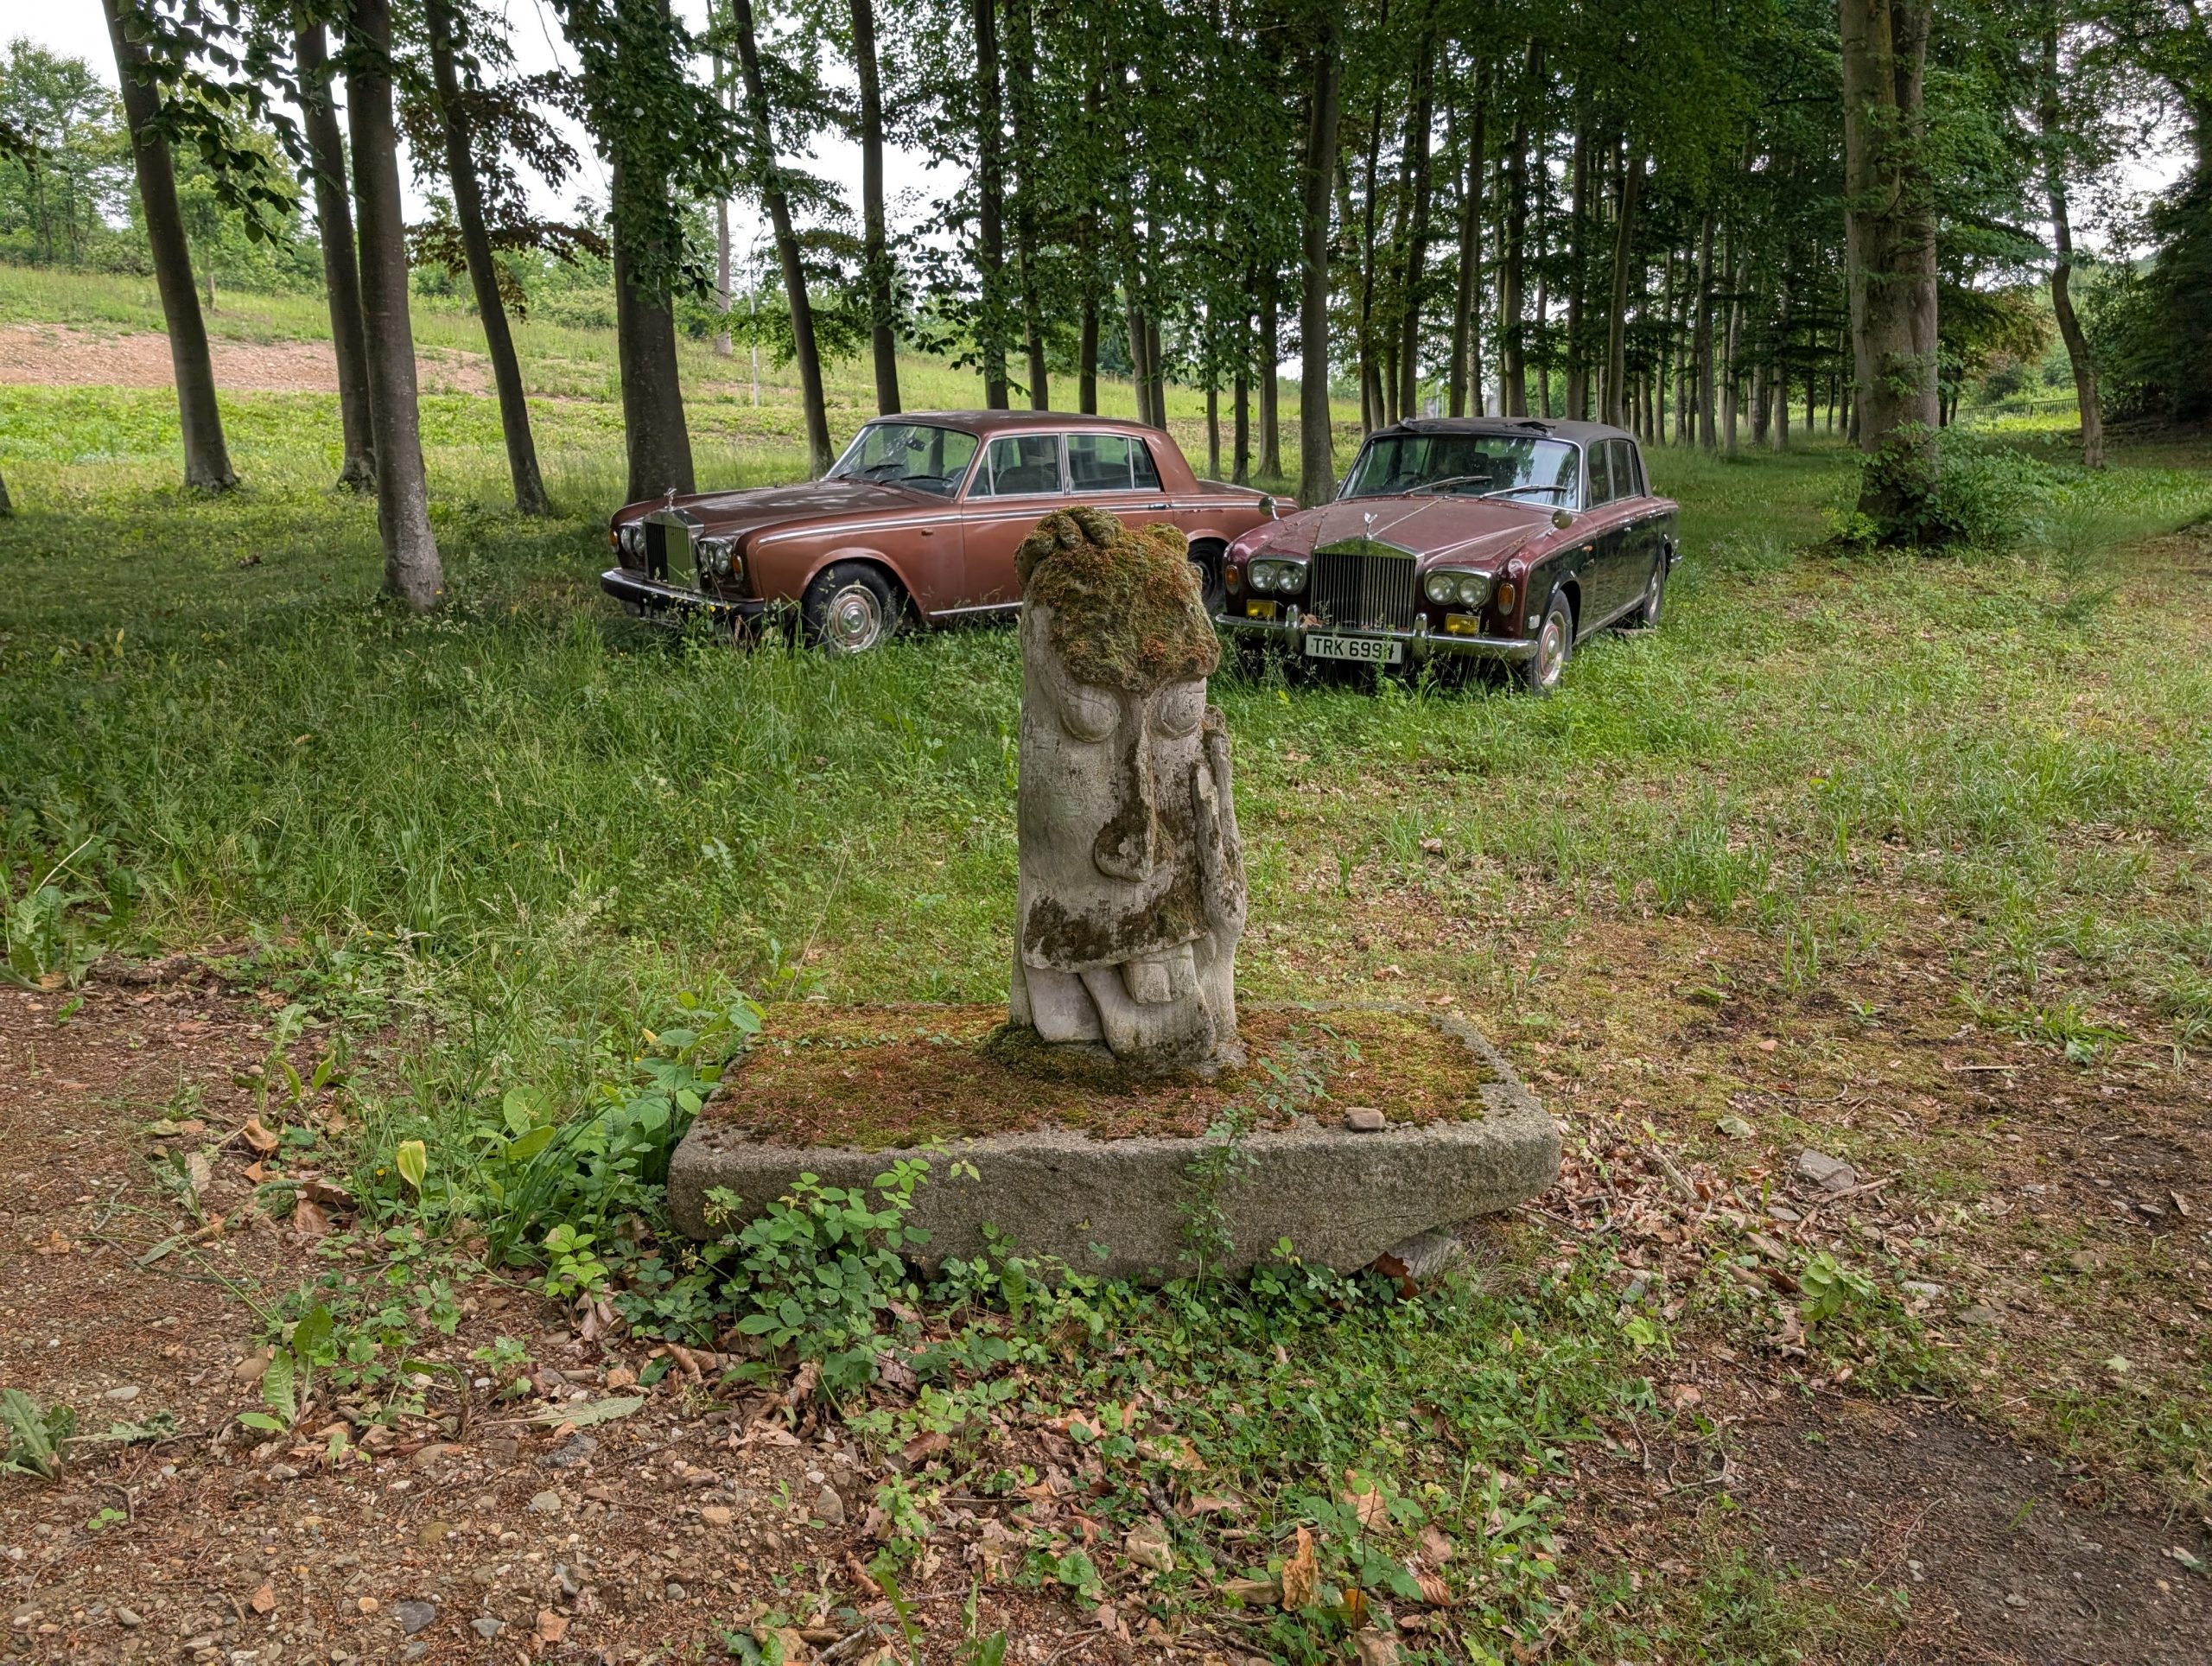
A couple of old Rolls Royce cars just waiting to be driven.
Lovely grounds around the chateau/castle.
After hauling our luggage up a winding wooden staircase to our room, we decided reading while sitting on the patio overlooking the river on this warm and sunny afternoon was absolutely the right thing to do. So, that’s what we did.
There was only one other couple staying at the castle. So, of course we had a delightful conversation with them as we enjoyed a late afternoon libation together. And as often happens, the subject of politics came up. We found we agreed on just about everything that is currently happening to our world.
When it came time for dinner, we drove into the small village while they rode their bikes. We happened to meet at the same restaurant, so we decided to dine together. We thoroughly enjoyed more convivial conversation with this interesting couple as we ate a nice dinner right beside the river Meuse.
All together a very nice way to spend a sunny day in France.
After a leisurely breakfast at the castle, we packed our luggage in the car and said goodbye to the lovely couple from the Netherlands and to our host, hostess, and their baby girl. Then we asked Rhoda Scala (our trusty cell phone directions guide) to plot our course to the Avis car rental-return location at the Amsterdam Schiphol airport.
Tuesday, June 10, 2025 – Hotel Corendon Amsterdam Schiphol Airport, Badhoevedorp, Netherlands
Well, in all my life I have never seen so many trucks on any highway anywhere! Seriously, there were as many trucks as there were cars. And the backups on our route were atrocious! Especially around Brussels, the Port of Antwerp, and the Port of Rotterdam. And then we came to the exit for the airport. I told Andy the traffic we witnessed today made going to SeaTac look positively tame by comparison! It literally took us 20 minutes to go only a few blocks. But after dropping off our car, which BTW was a breeze, there were very clear signs of where to go to catch a shuttle bus which would take us to our hotel.
When we arrived at the shuttle bus stop, there were masses of people waiting. But after a bit of time, we realized that every hotel had its own shuttle bus and ours came within 15 minutes. But a lot of people were also waiting for our hotel bus. So, all of us trying to get on the bus with our luggage would have made a great comedy routine. But we all found a place for luggage and some of us, me included, found a place to sit.
Then it was about a 7 to 8-minute ride to the hotel. Then, get off the bus, enter the hotel lobby, and get in line to check in. This also took about a 15-minute wait.
But before going up to our room, we made a reservation for dinner in the hotel’s restaurant and learned how to get a taxi for our ride into Amsterdam the next day for our visits to both the Rijks and Van Gogh museums.
Then, up to our room for me to write up today’s trip report and both of us to relax before dinner. And even though rain threatened to dump on us all day, nary a drop was shed.
After a simple dinner in the Bistro (we decided not to choose the “all you can eat buffet”) it was read our books for a while and hit the hay.
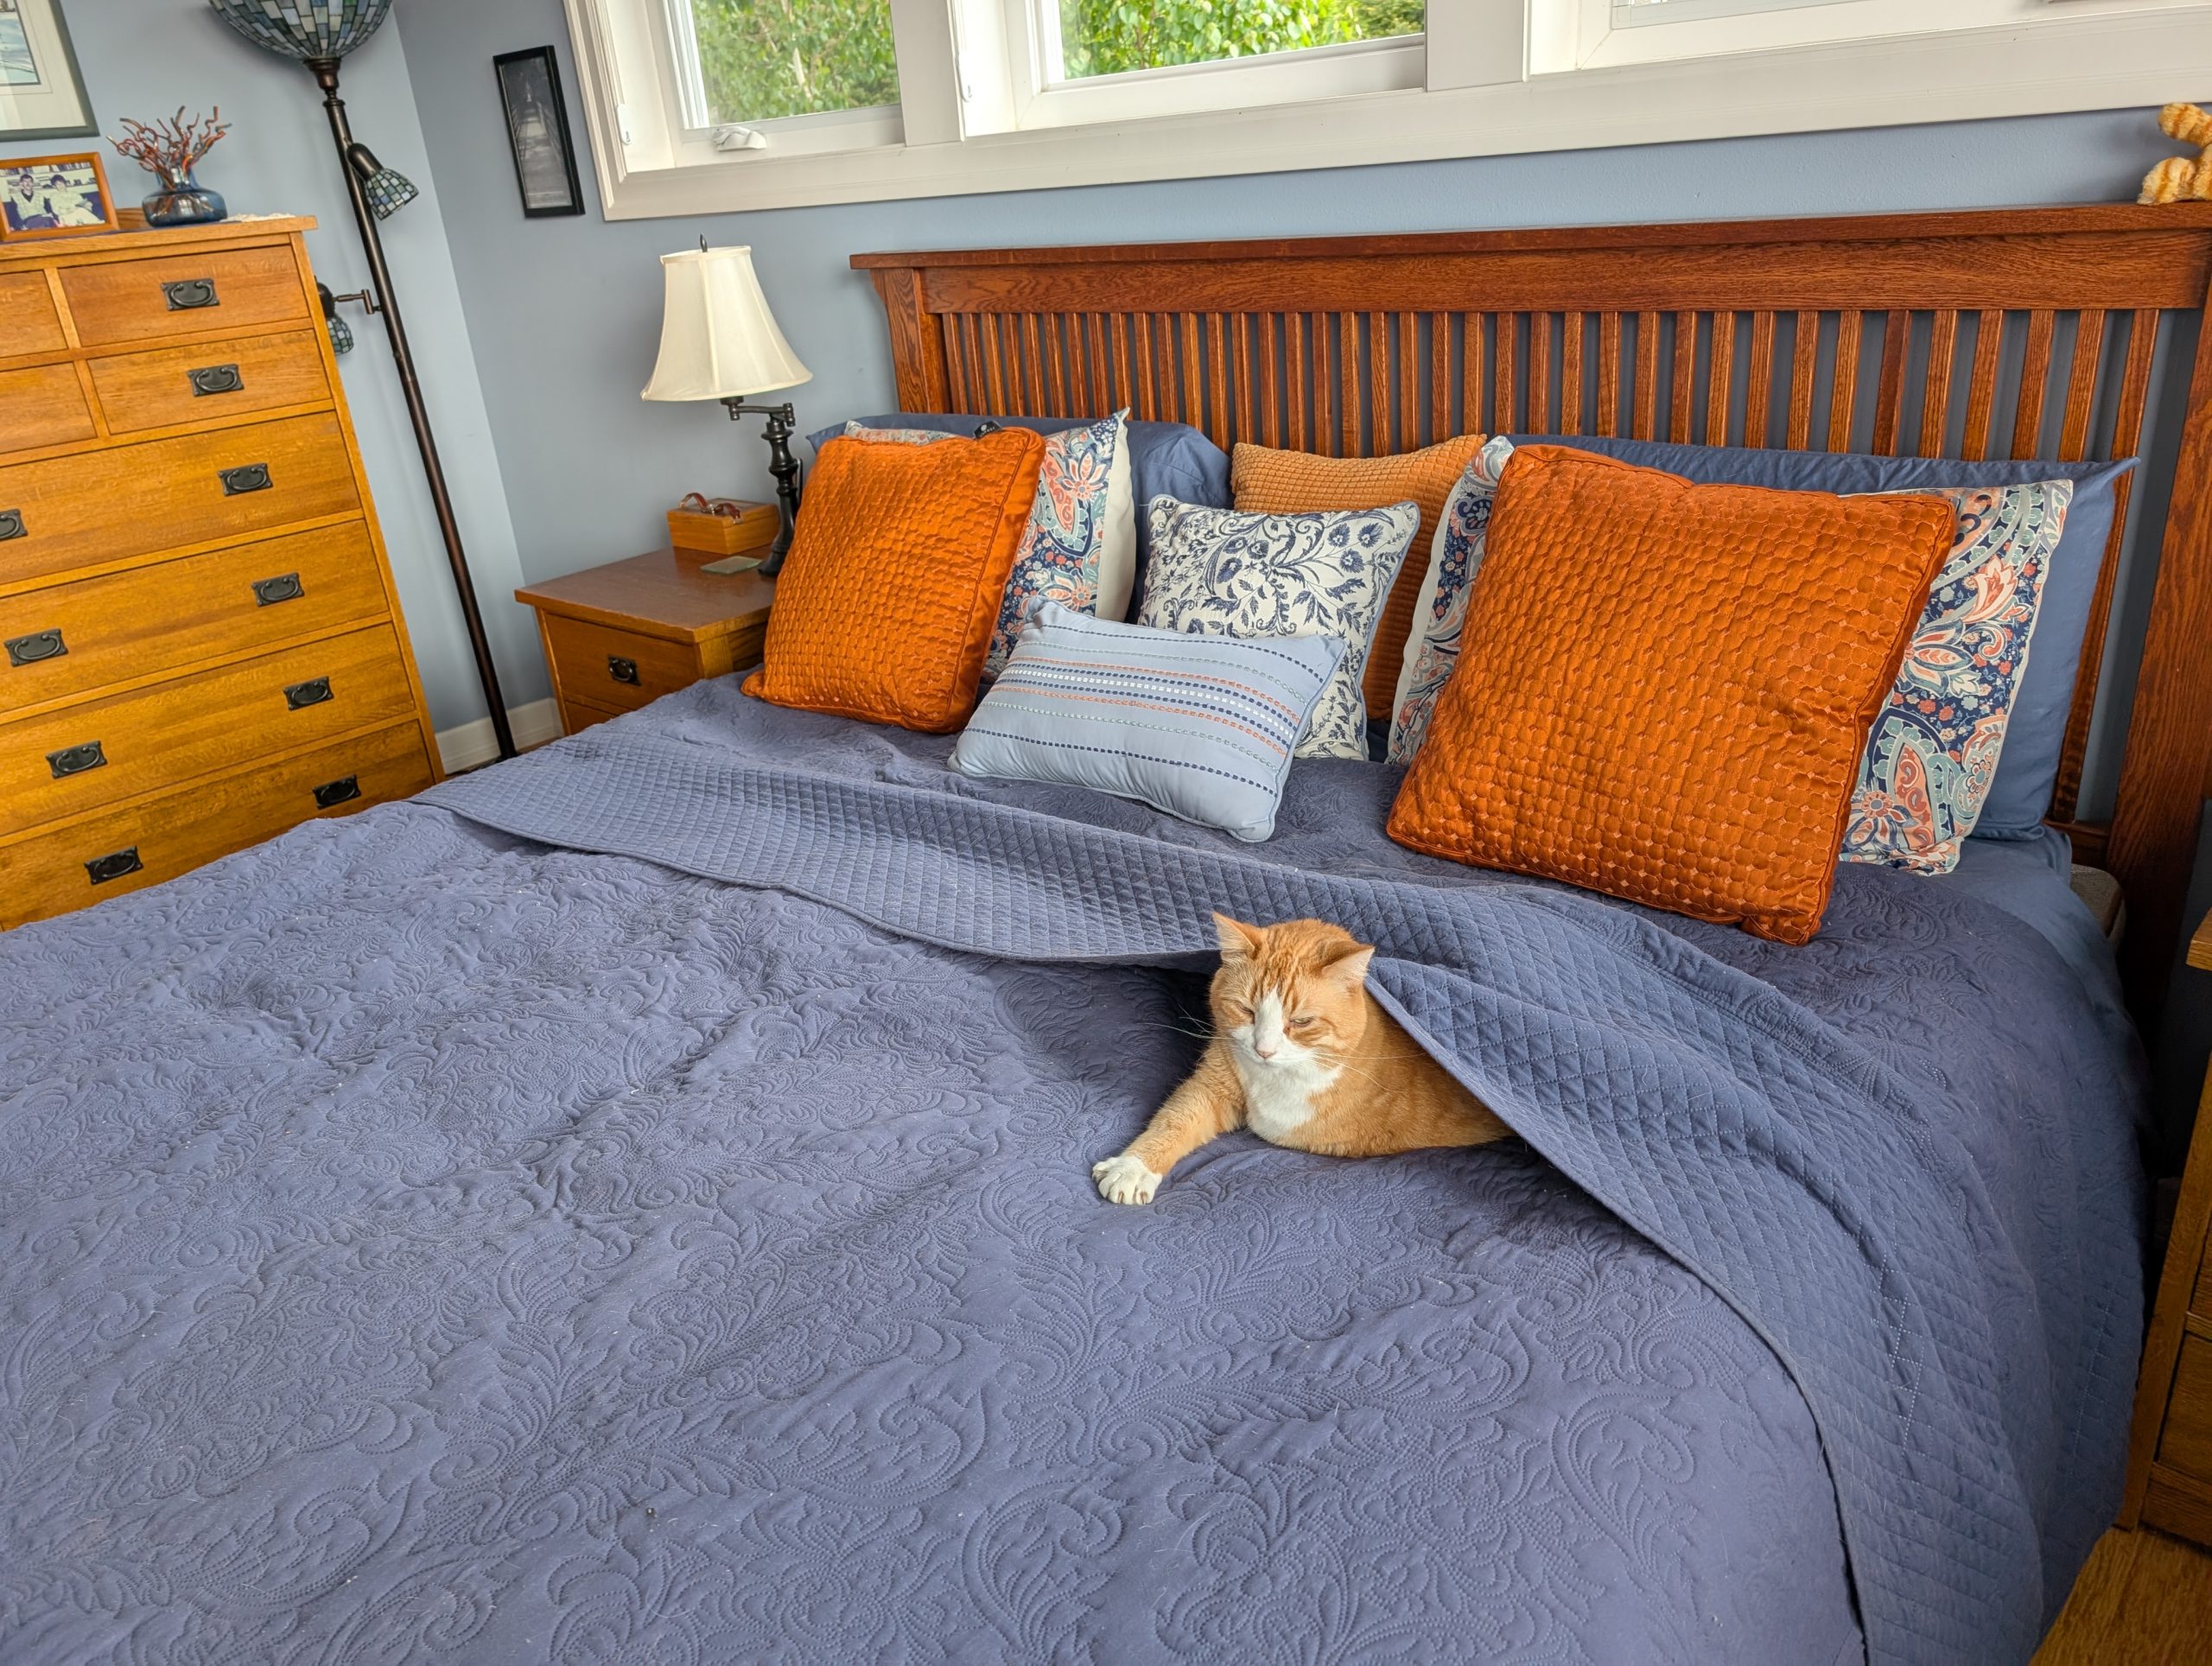
We slept OK, but pillows in this part of the world are huge and hard. And they always give you two each. So, why not make them different sizes? Nope. They are always the same size and hard as rocks! We both finally got to sleep, but I must be truthful when I say I am getting anxious to get home to my wonderful pillow. Of course, I miss Miles and Max too. I can’t wait to pet our two critters and tell them all about our travels.
Wednesday, June 11, 2025 – Hotel Corendon Amsterdam Schiphol Airport, Badhoevedorp, Netherlands
Well, that explains the horrific traffic we experienced while getting from Rancennes, France to our hotel near Schiphol Airport. There was a one-day train strike in the Netherlands yesterday which meant no one could get anywhere by train. And believe me, everyone rides the convenient and reasonably priced trains. So, of course, anyone who had counted on taking a train from Amsterdam to the airport had to be driven. And anyone who wanted to get to work, and then home again the same day, had to take their car instead of the train. What a mess! So, no wonder traffic was crazy bad everywhere yesterday. And based on the terrible traffic we experienced and not knowing that there was a reason for the huge delays at the time, we went so far as to allow an extra 45 minutes for our taxi ride this morning to make certain we were at the Rijks Museum by 10:30 am.
So, at 9:30, we were at the entrance. And because it must have been a slow day at the museum, they allowed us to enter a full hour before our reservation time. (Now, the nice folks at the museum must have seen this as a slow day, but there were still masses of people.) Everything from people even older than me, to pre-school age kidlets. And the clothing/costumes some museum attendees felt were acceptable, I could not possibly adequately describe. One young Asian woman was wearing what looked like a fancy layer cake. Not kidding. Another woman, old enough to know better, had on puffy short bloomers with short puffy sleeves to match. Good God! Have these women no clothing sense?
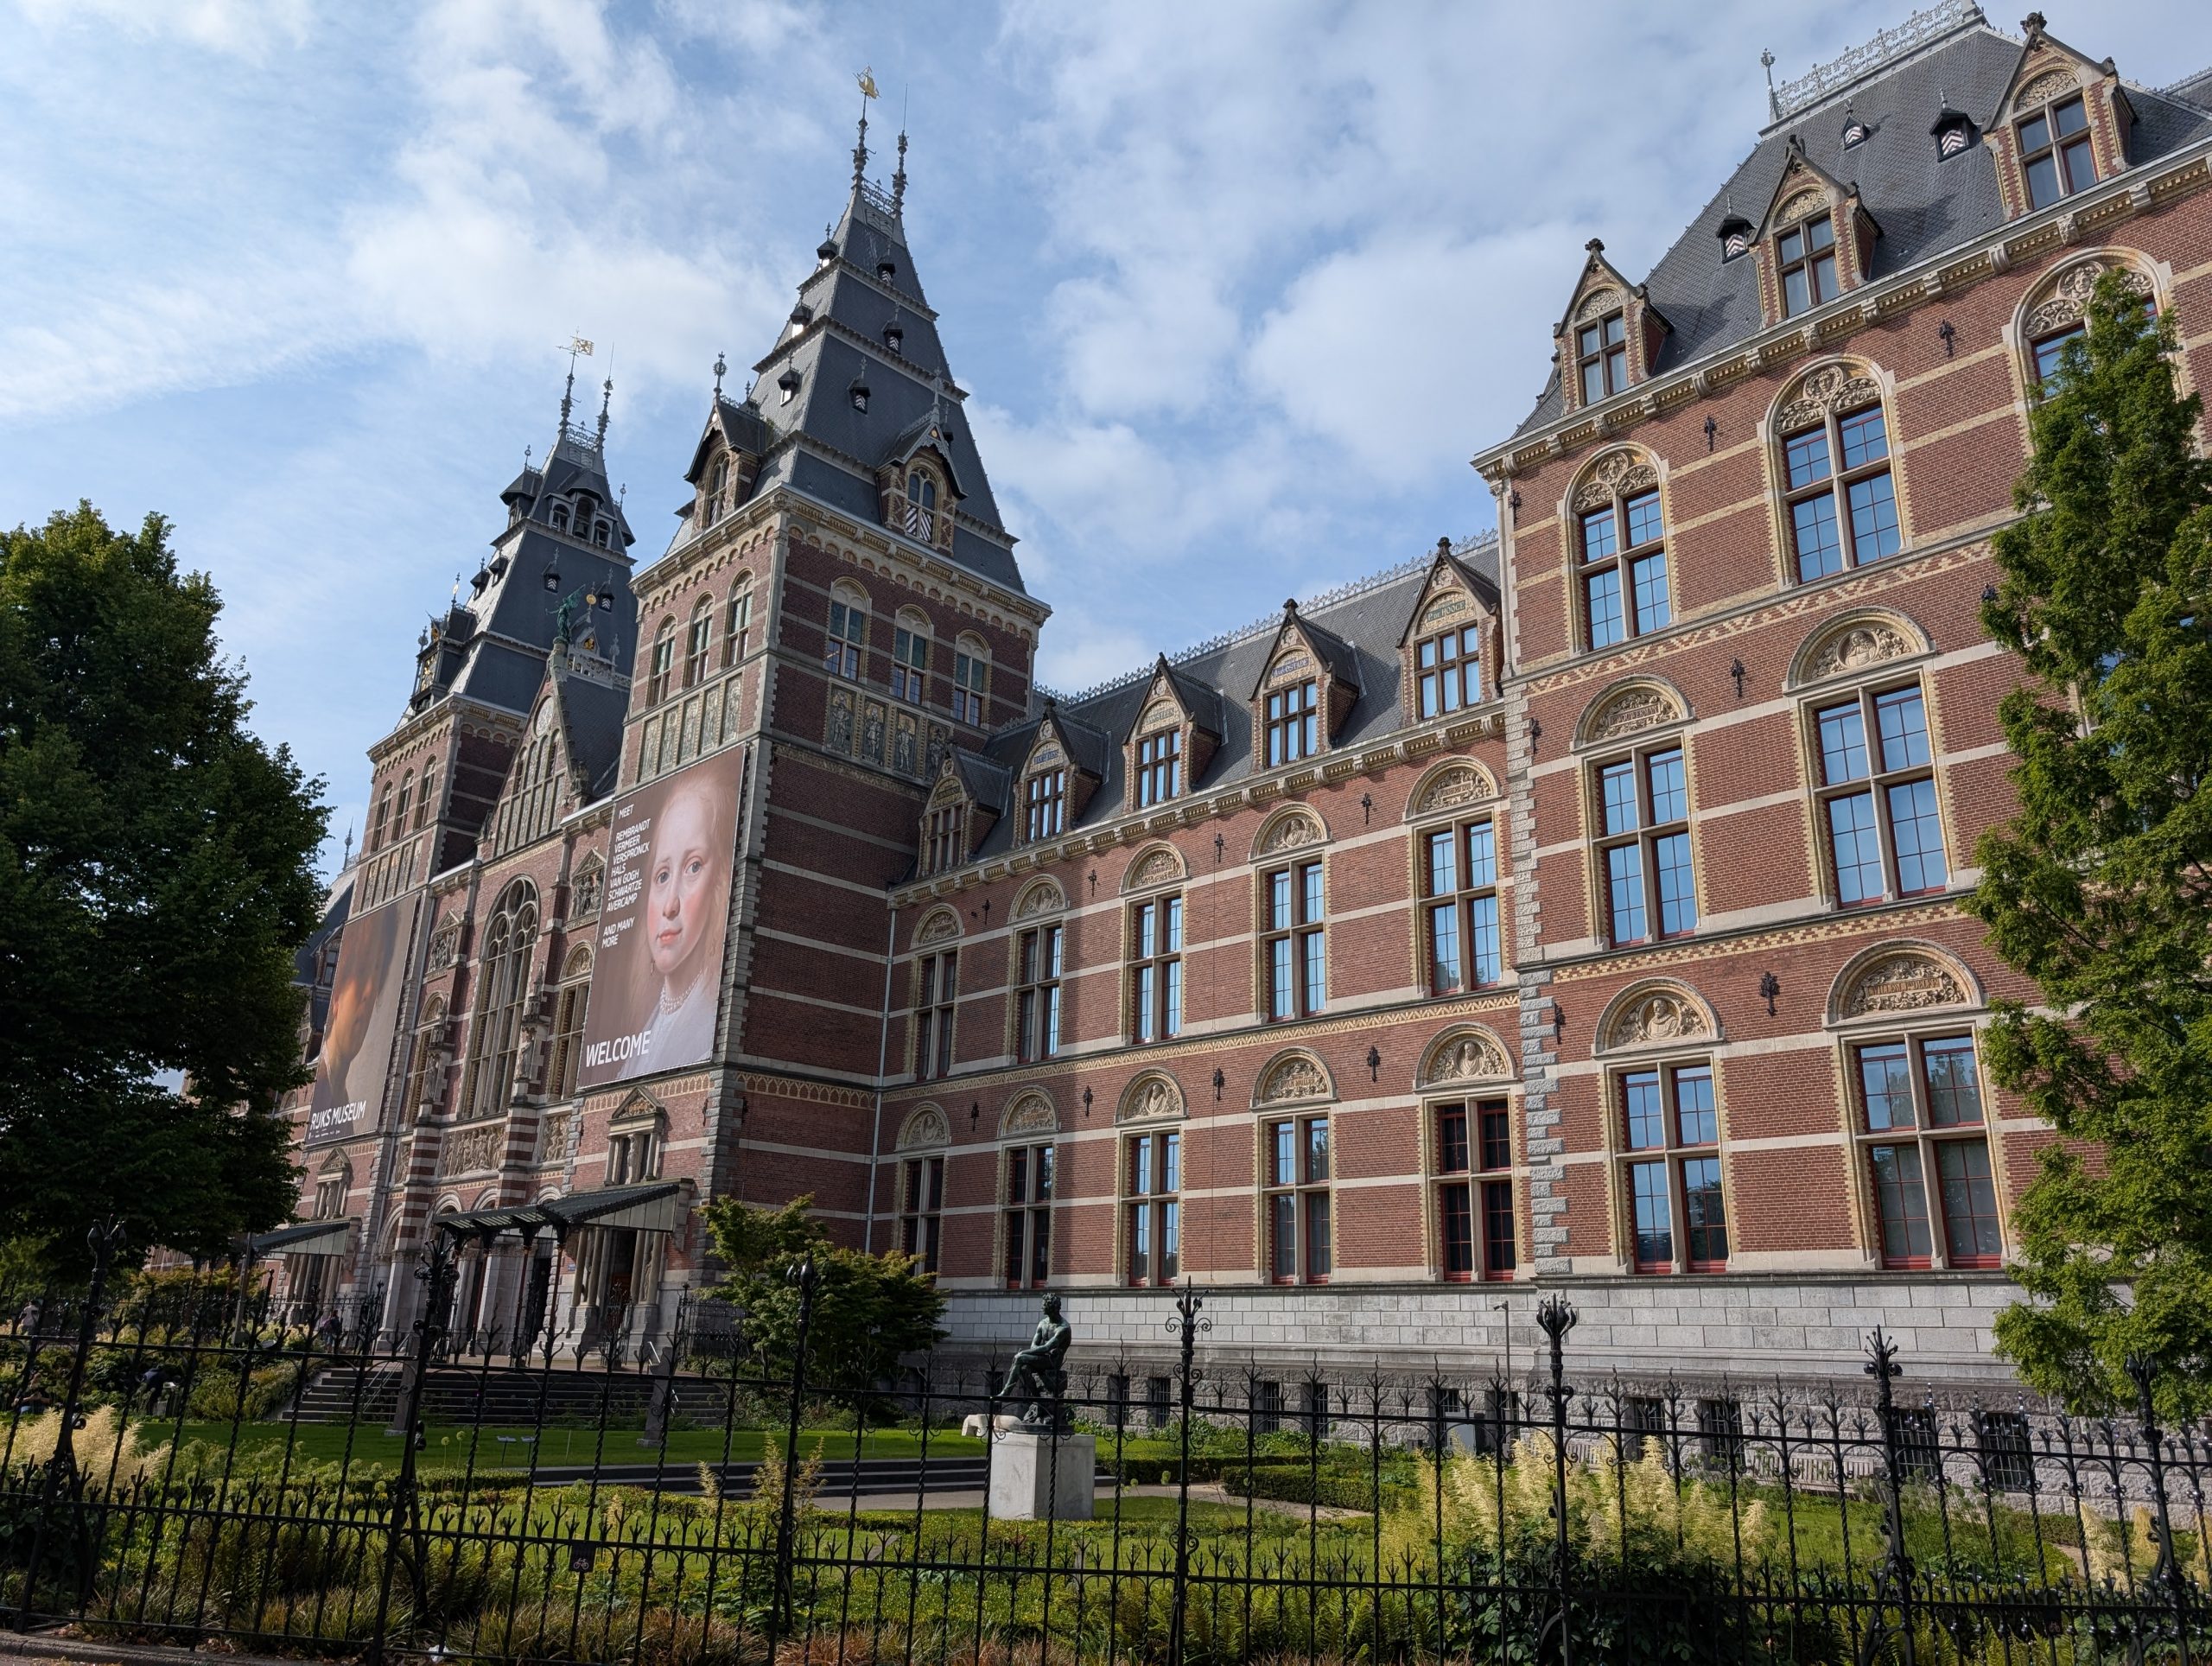
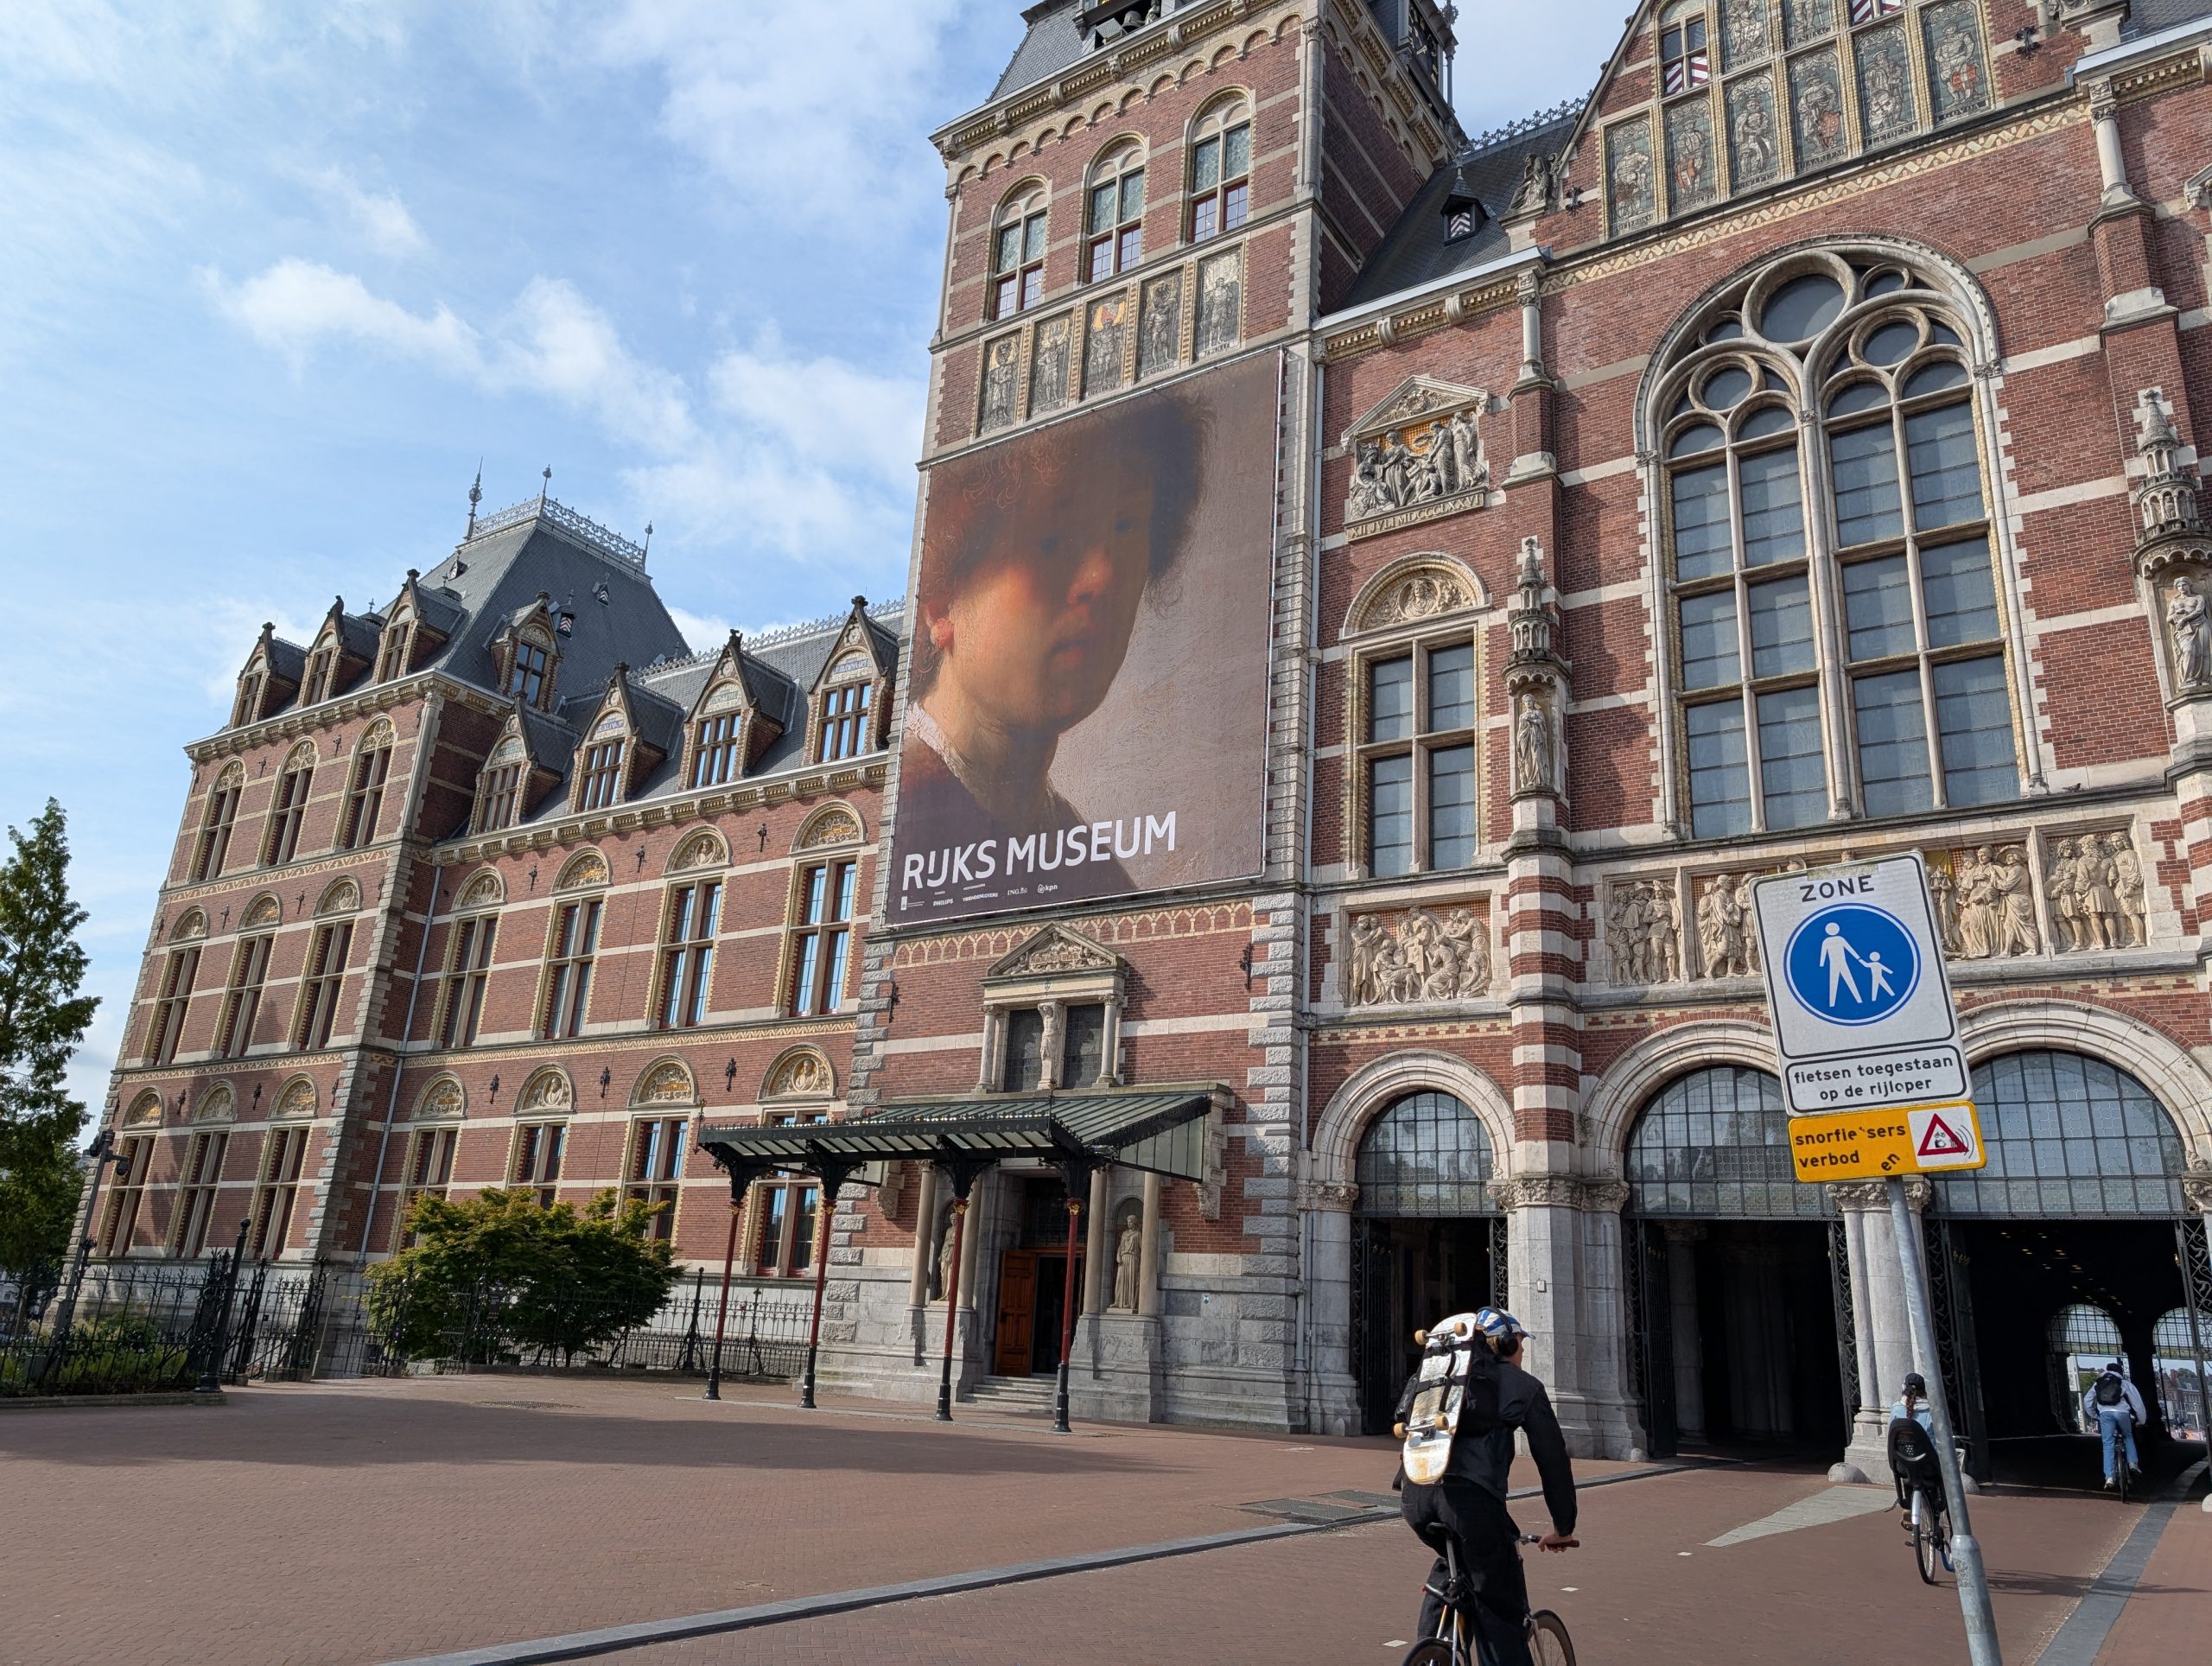
And tattoos! Almost everyone, young or old, had tattoos of some sort. And believe me, these folks weren’t afraid to show them off. Anyway, it was almost as exciting to watch the people as to view the amazing works of art. But a bit about the Rijks Museum before I share with you a few pictures of our favorite works of art.
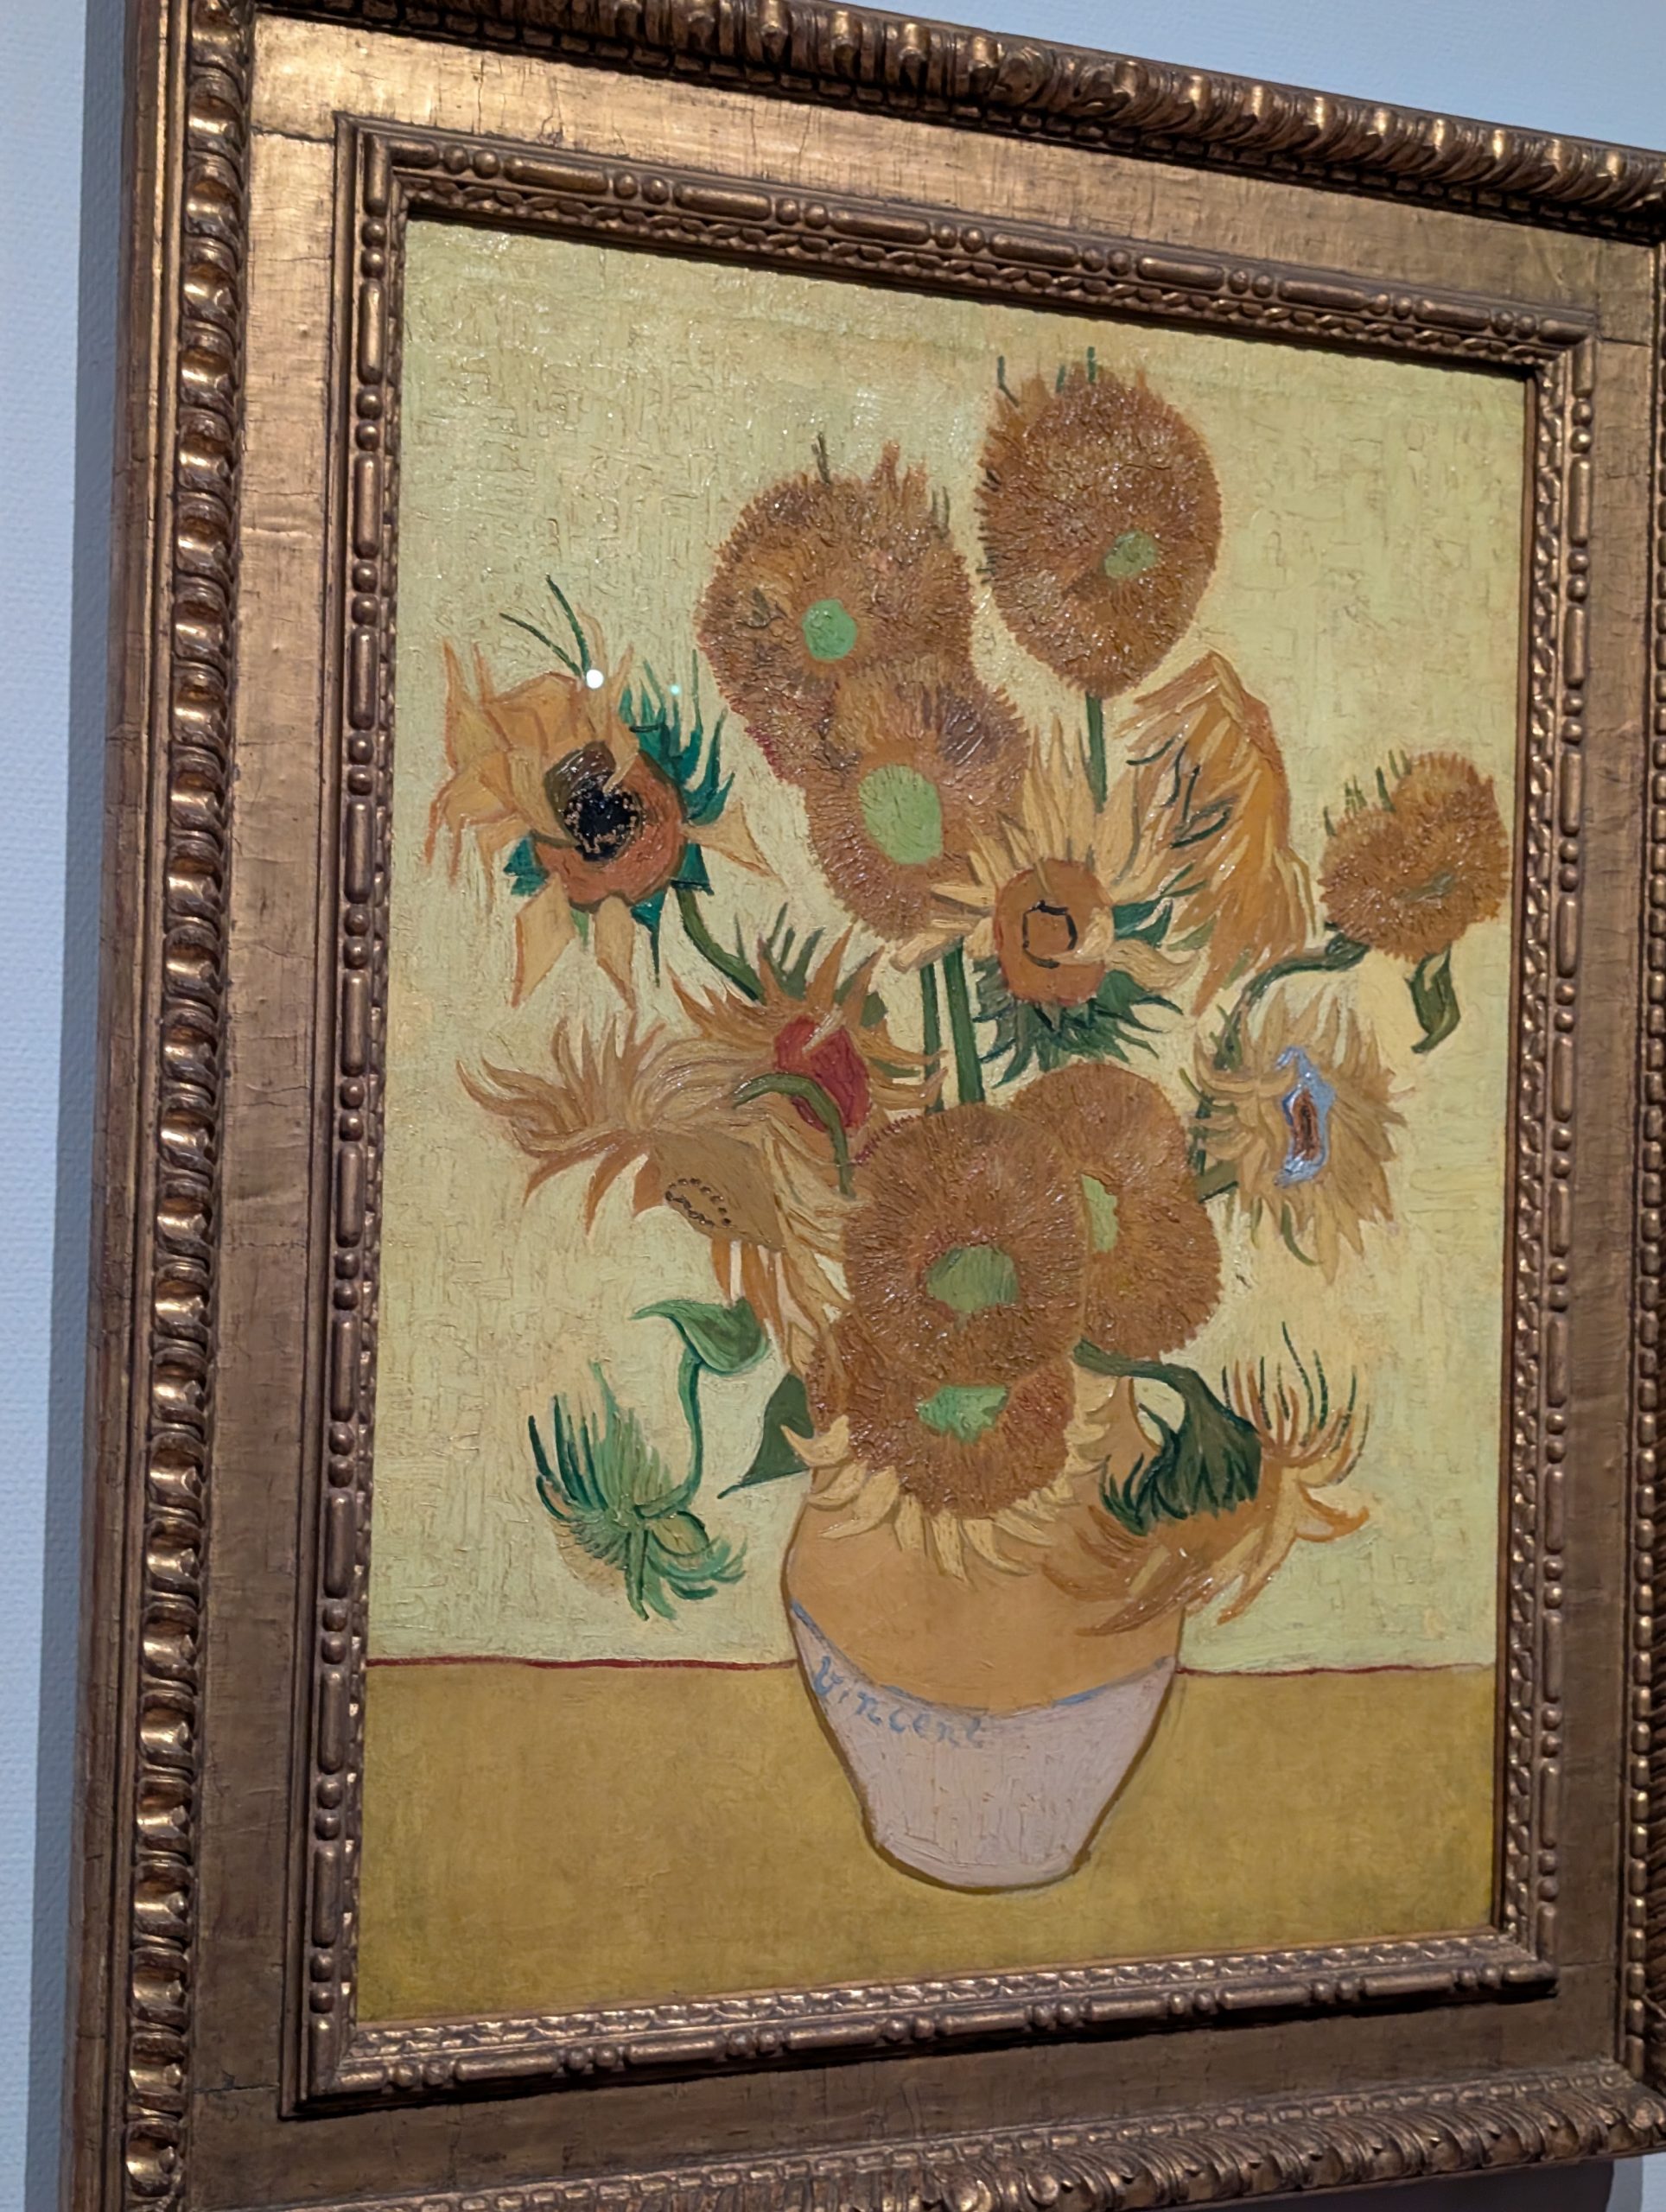
The Rijksmuseum is huge and considered one of the finest art museums in the world. It functions as the national museum of the Netherlands with the mission being to honor Dutch cultural heritage. Through the beautiful neo-Gothic design, the museum showcases eight hundred years of Dutch artistic and historical achievements which define pivotal moments in art development. Since 1885 “The Night Watch” by Rembrandt continues to guard the museum halls in a position of pride while attracting millions of viewers to the pictures luring interplay of lighting effects and darkness.
Another picture of the museum. Please note that bicycles have their own lanes right through the museum. And as always, walkers beware. In some ways, bicycles are more hazardous than cars.
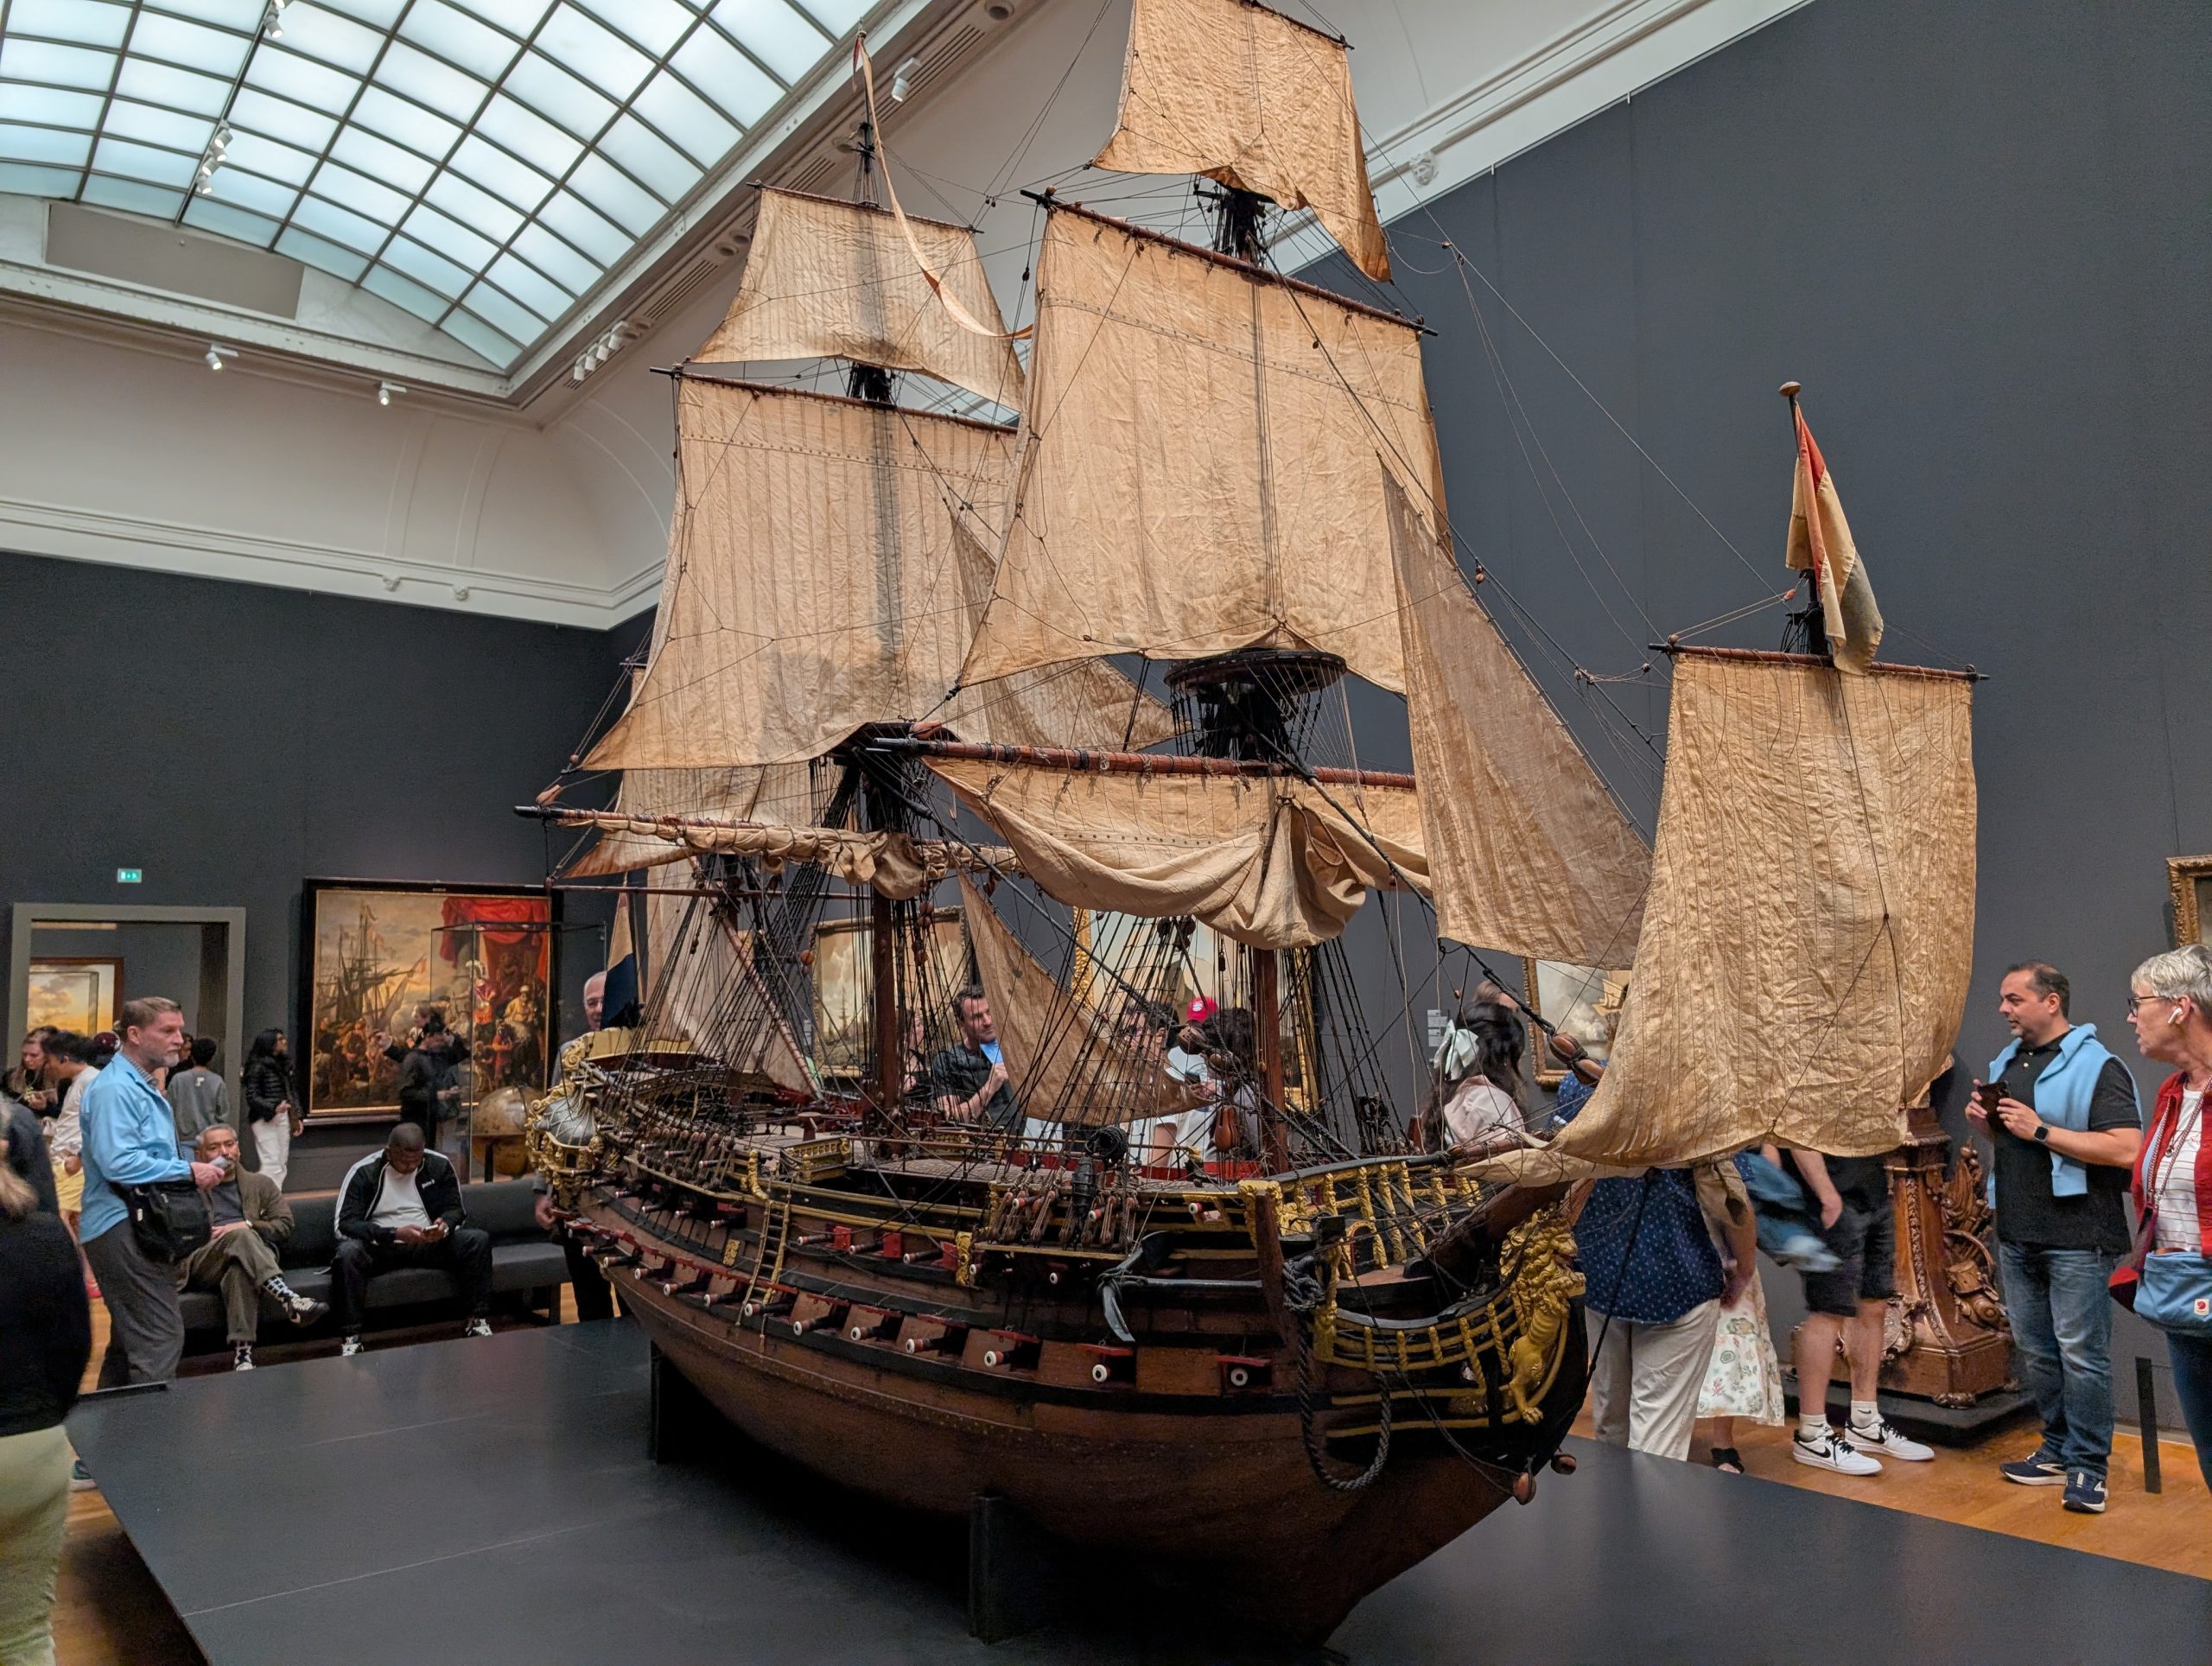
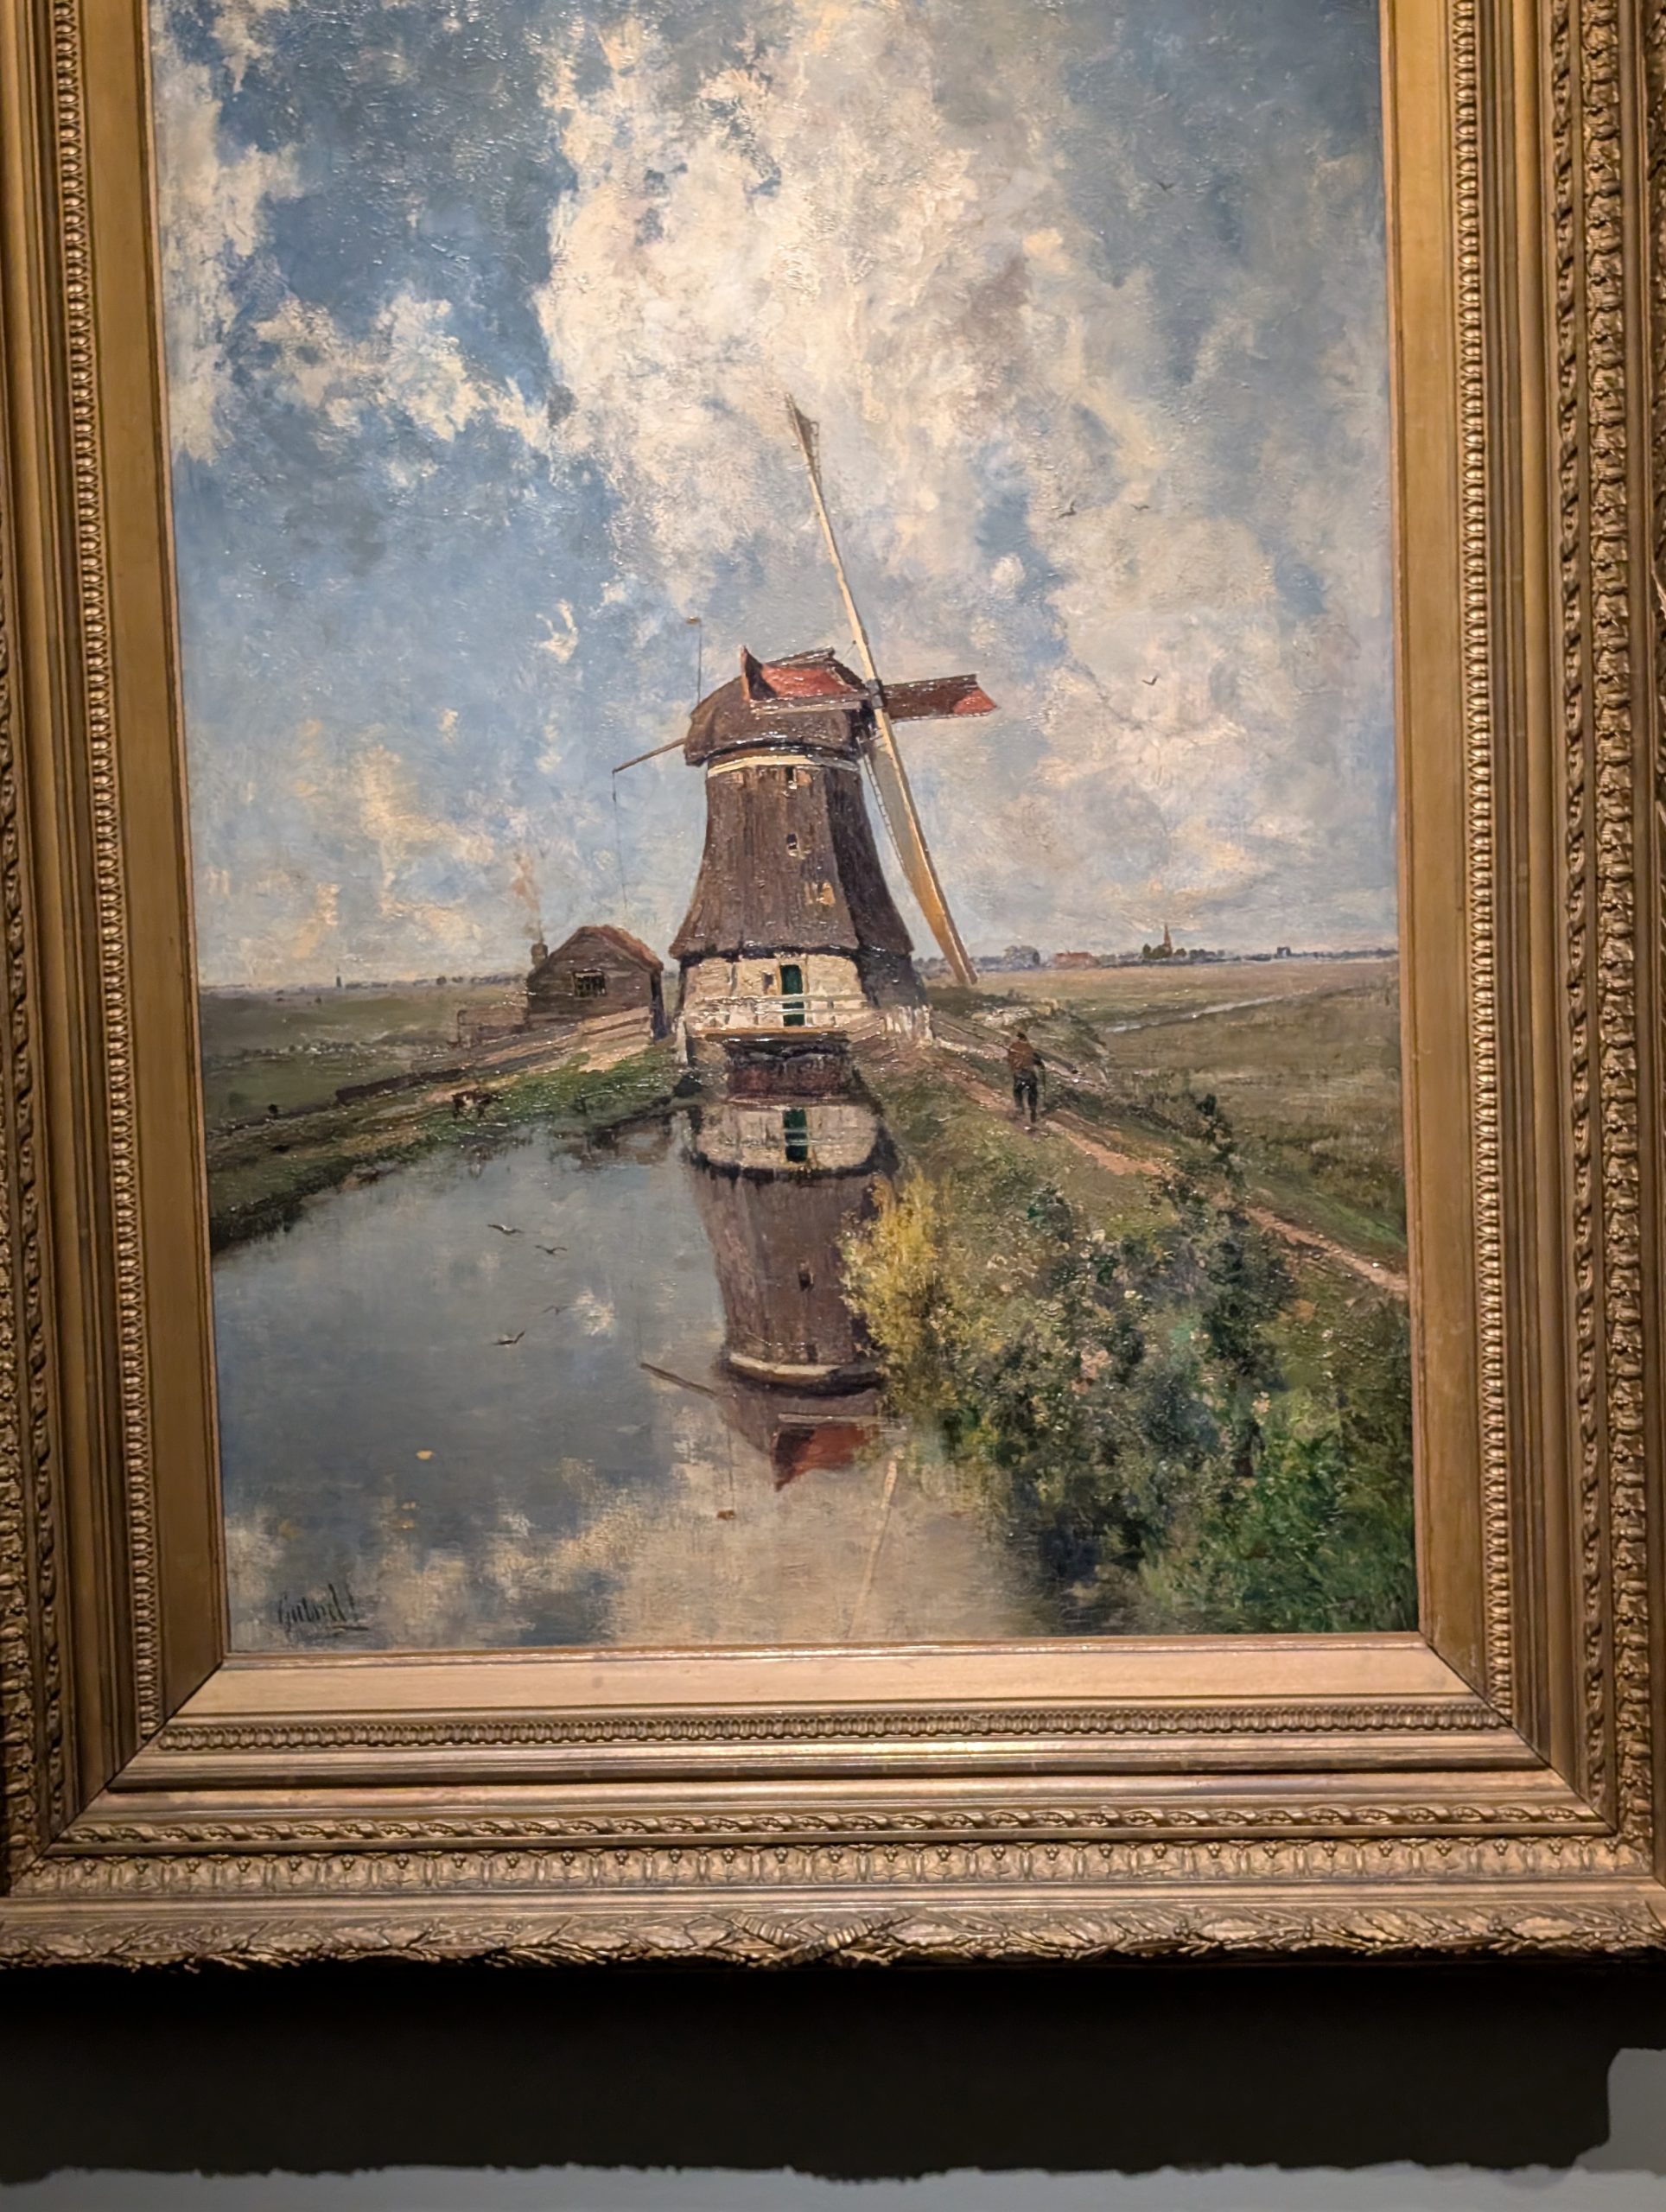
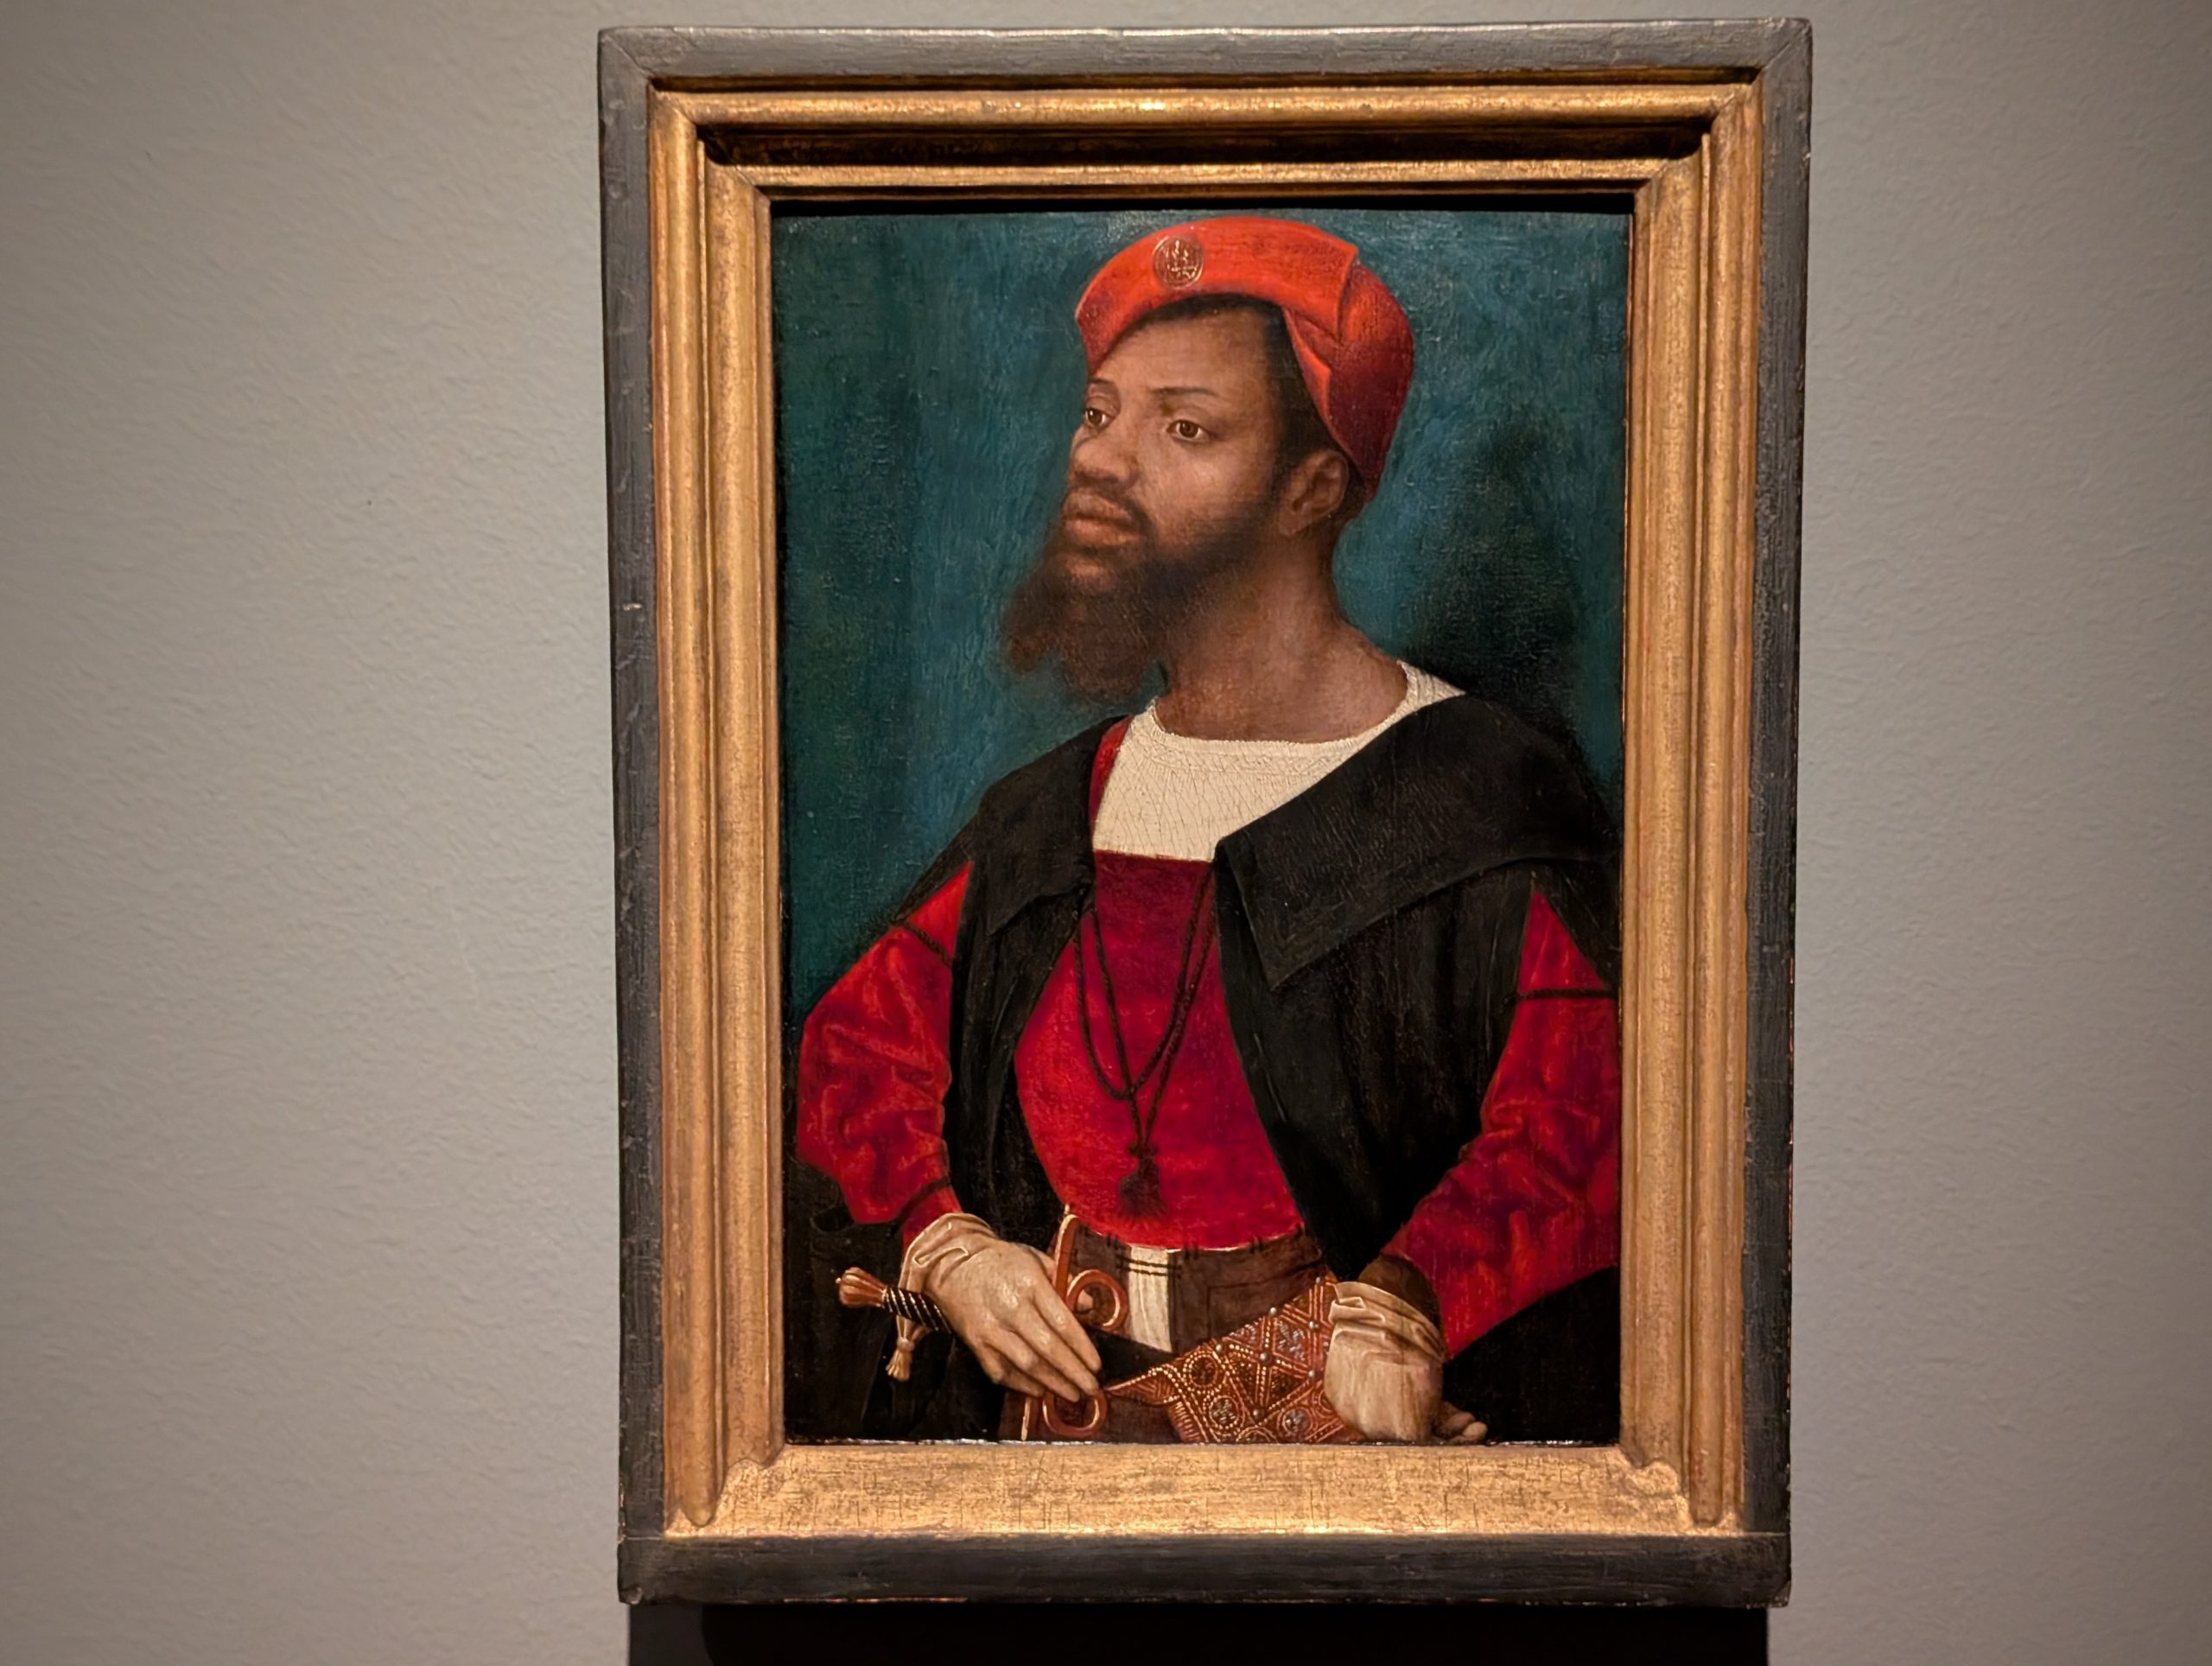
A few examples of the works of art we viewed.
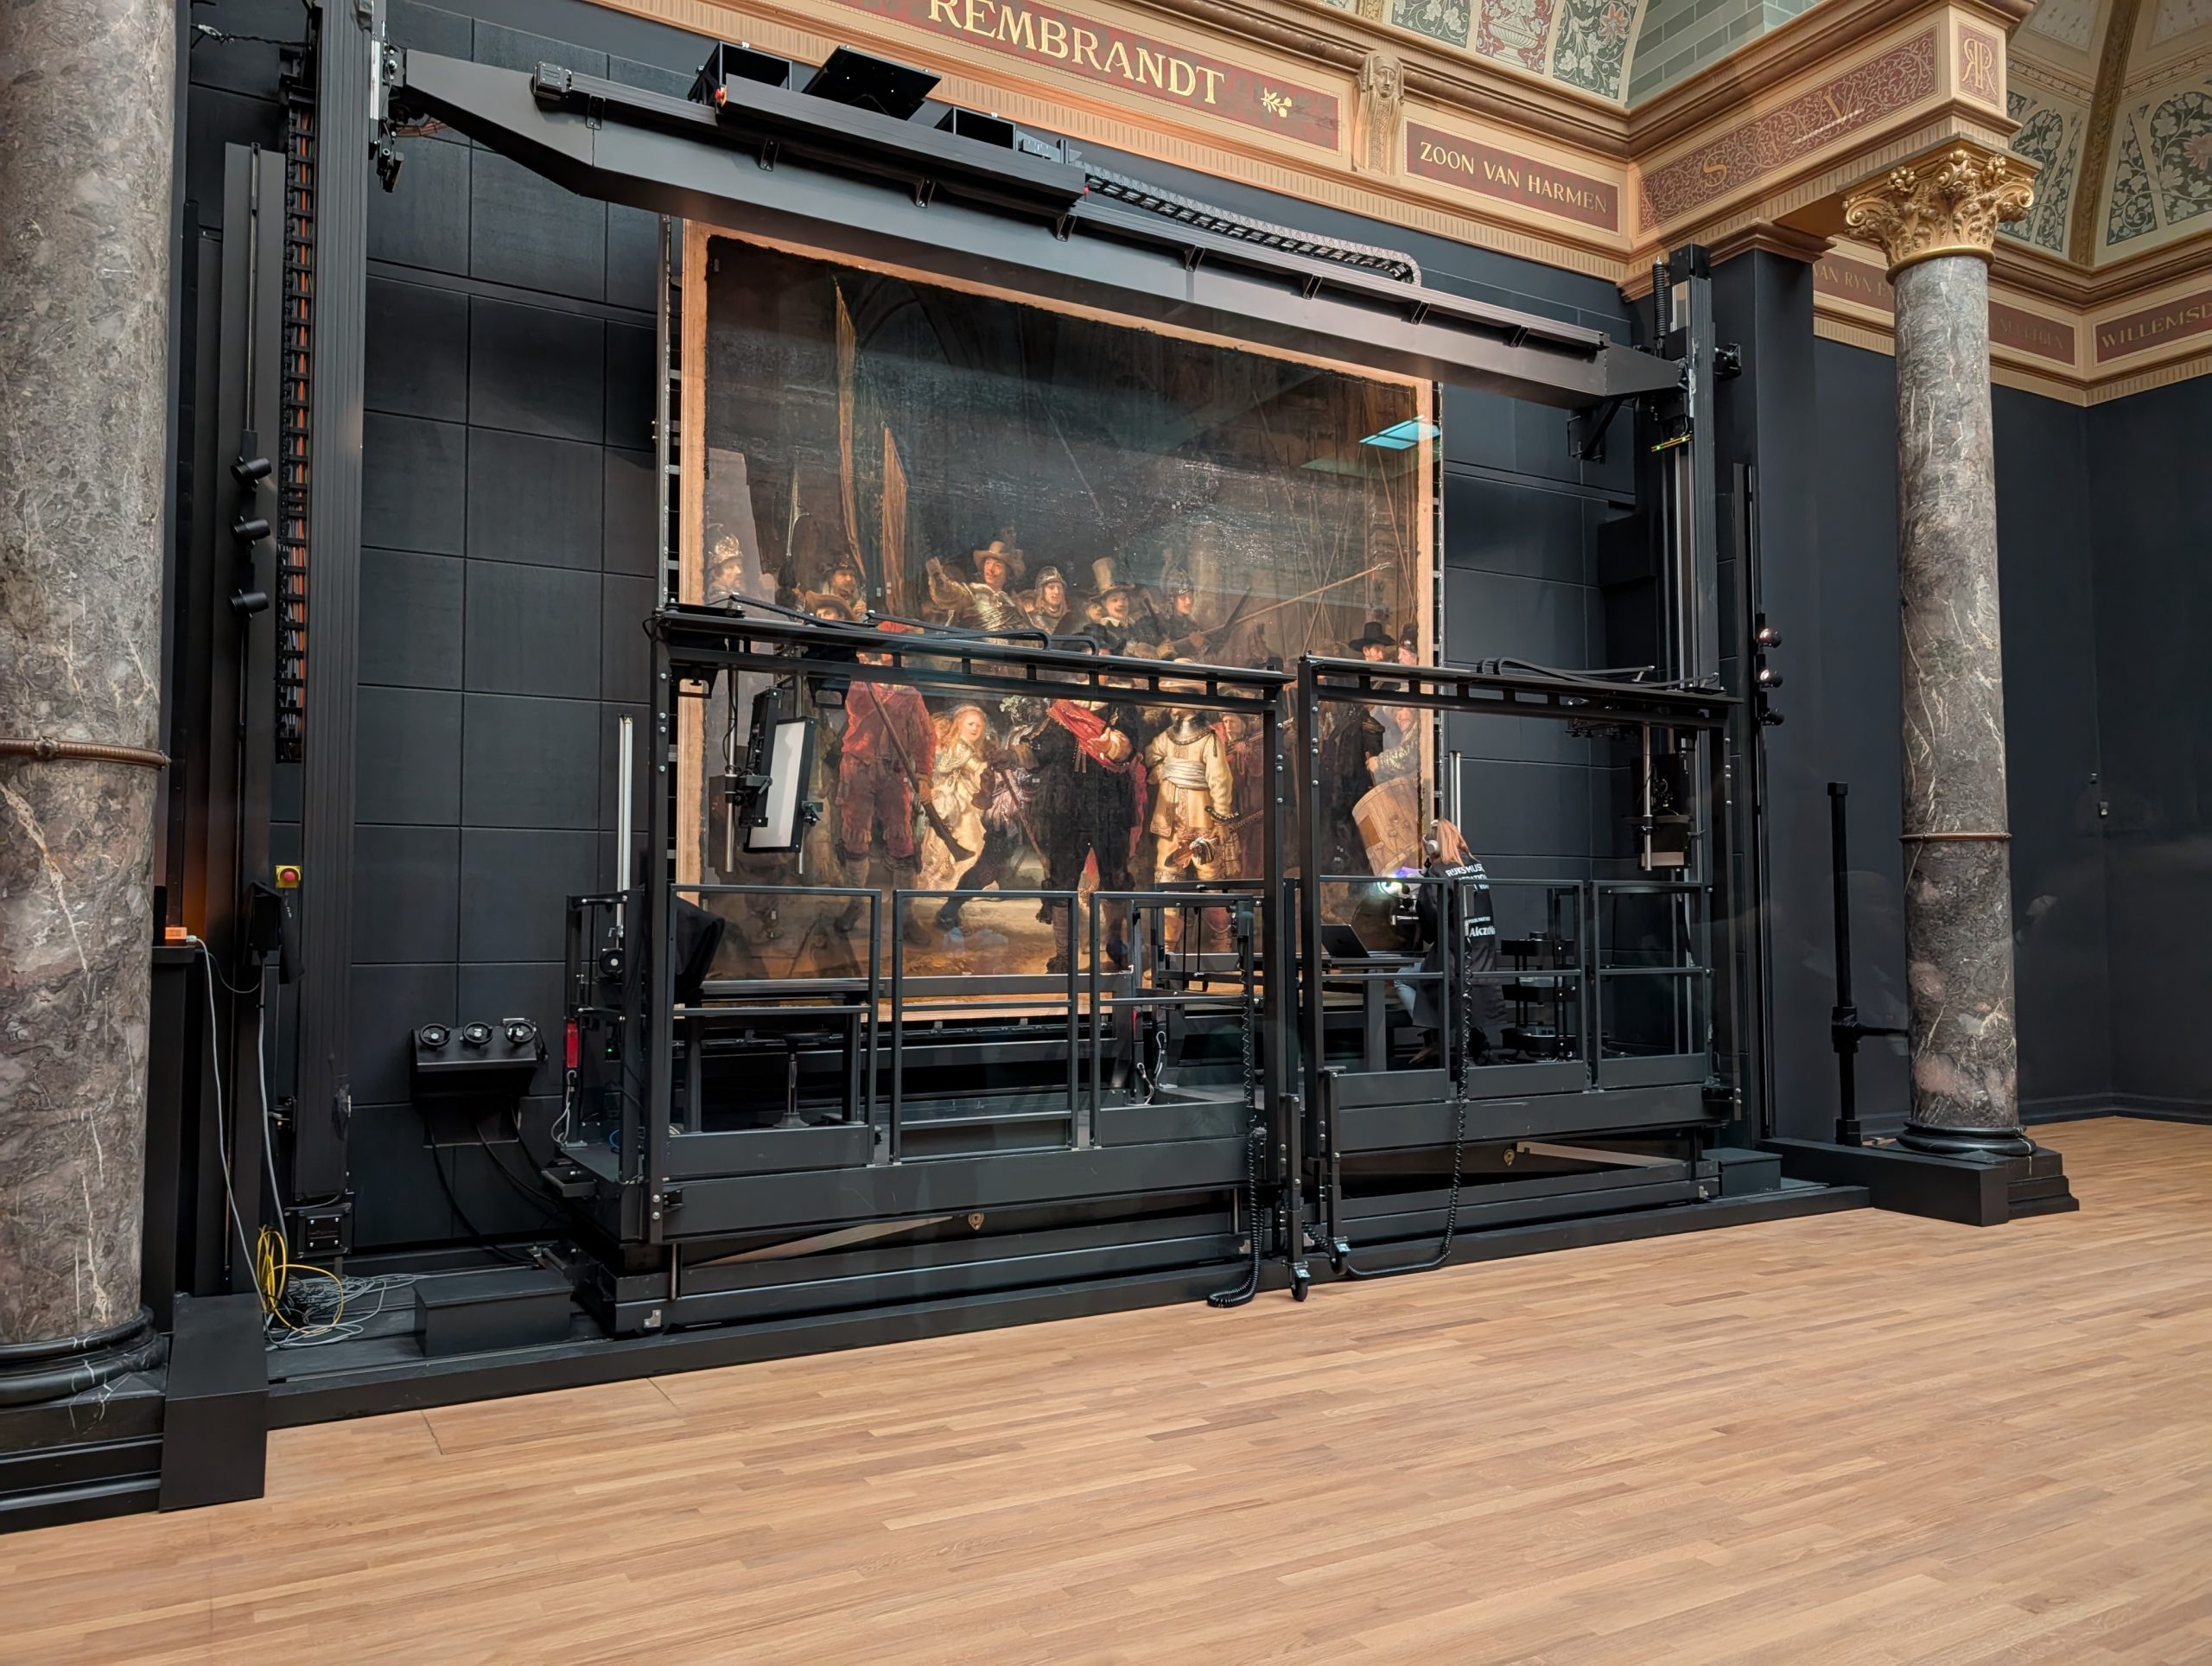
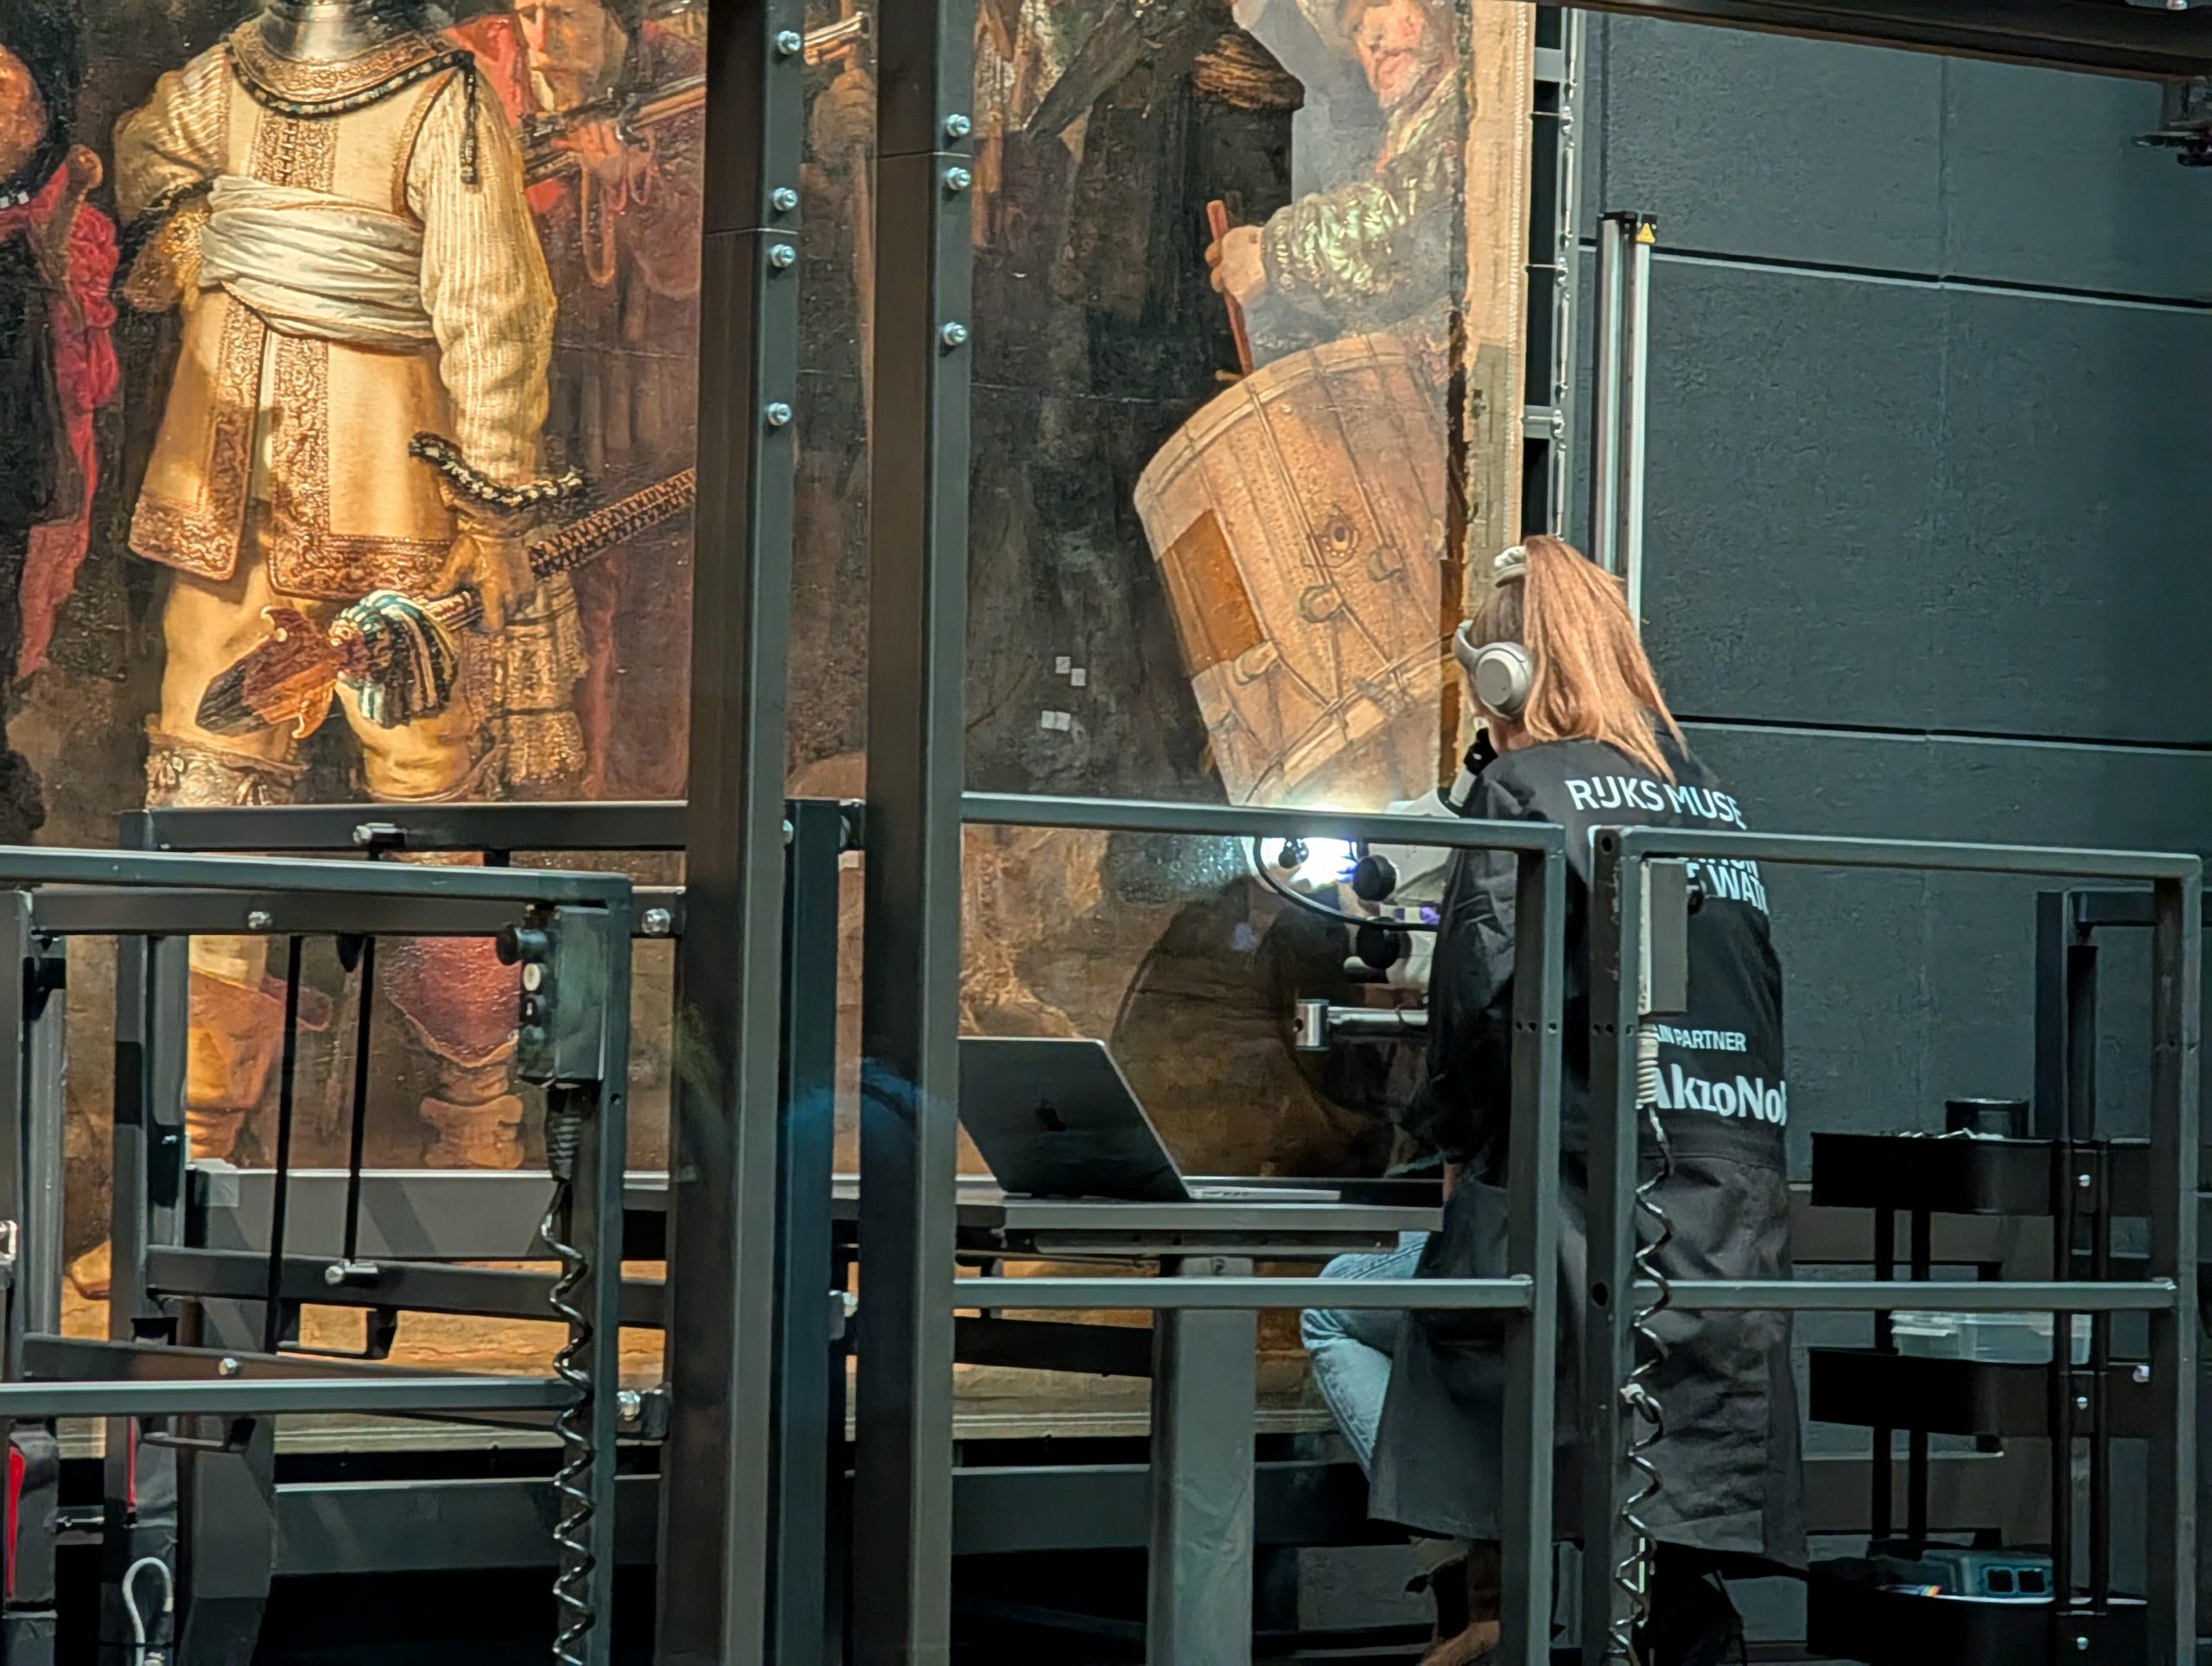
Rembrandt’s “The Night Watch”. Notice the scaffolding in front of the picture. An art restoration expert is working on the bottom right of the picture as you will see in the next picture.
The building itself is a work of art.
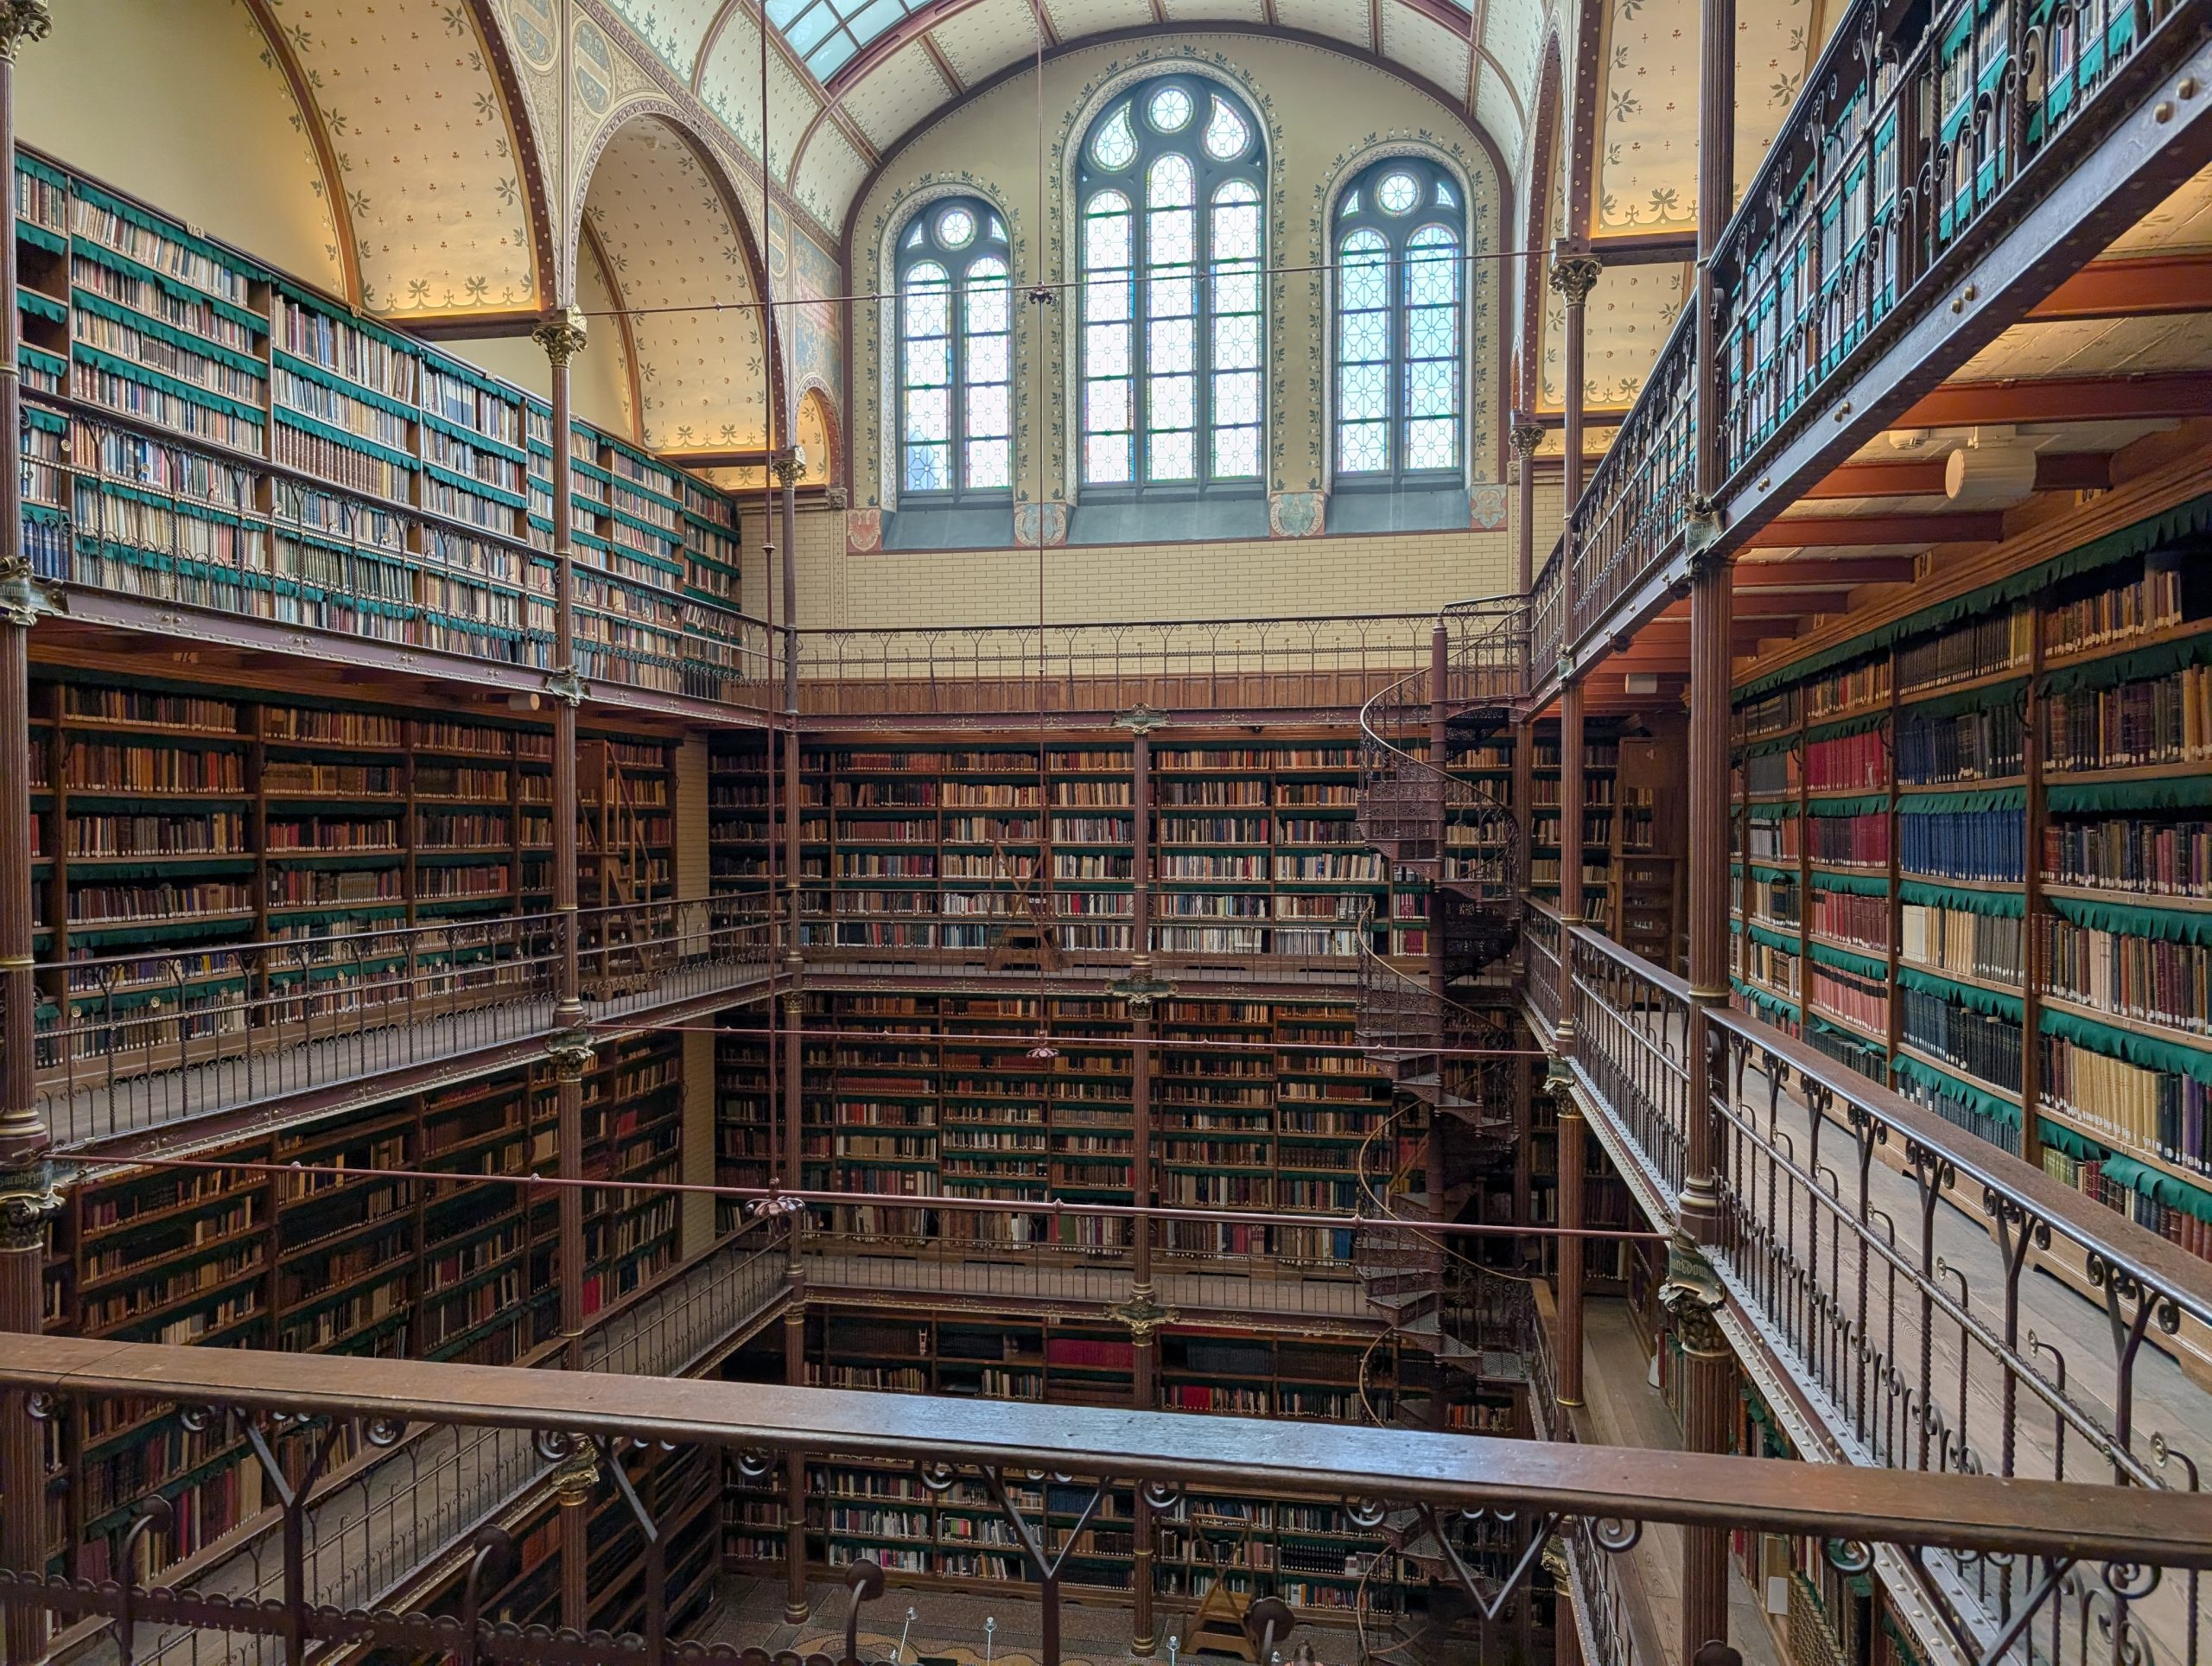
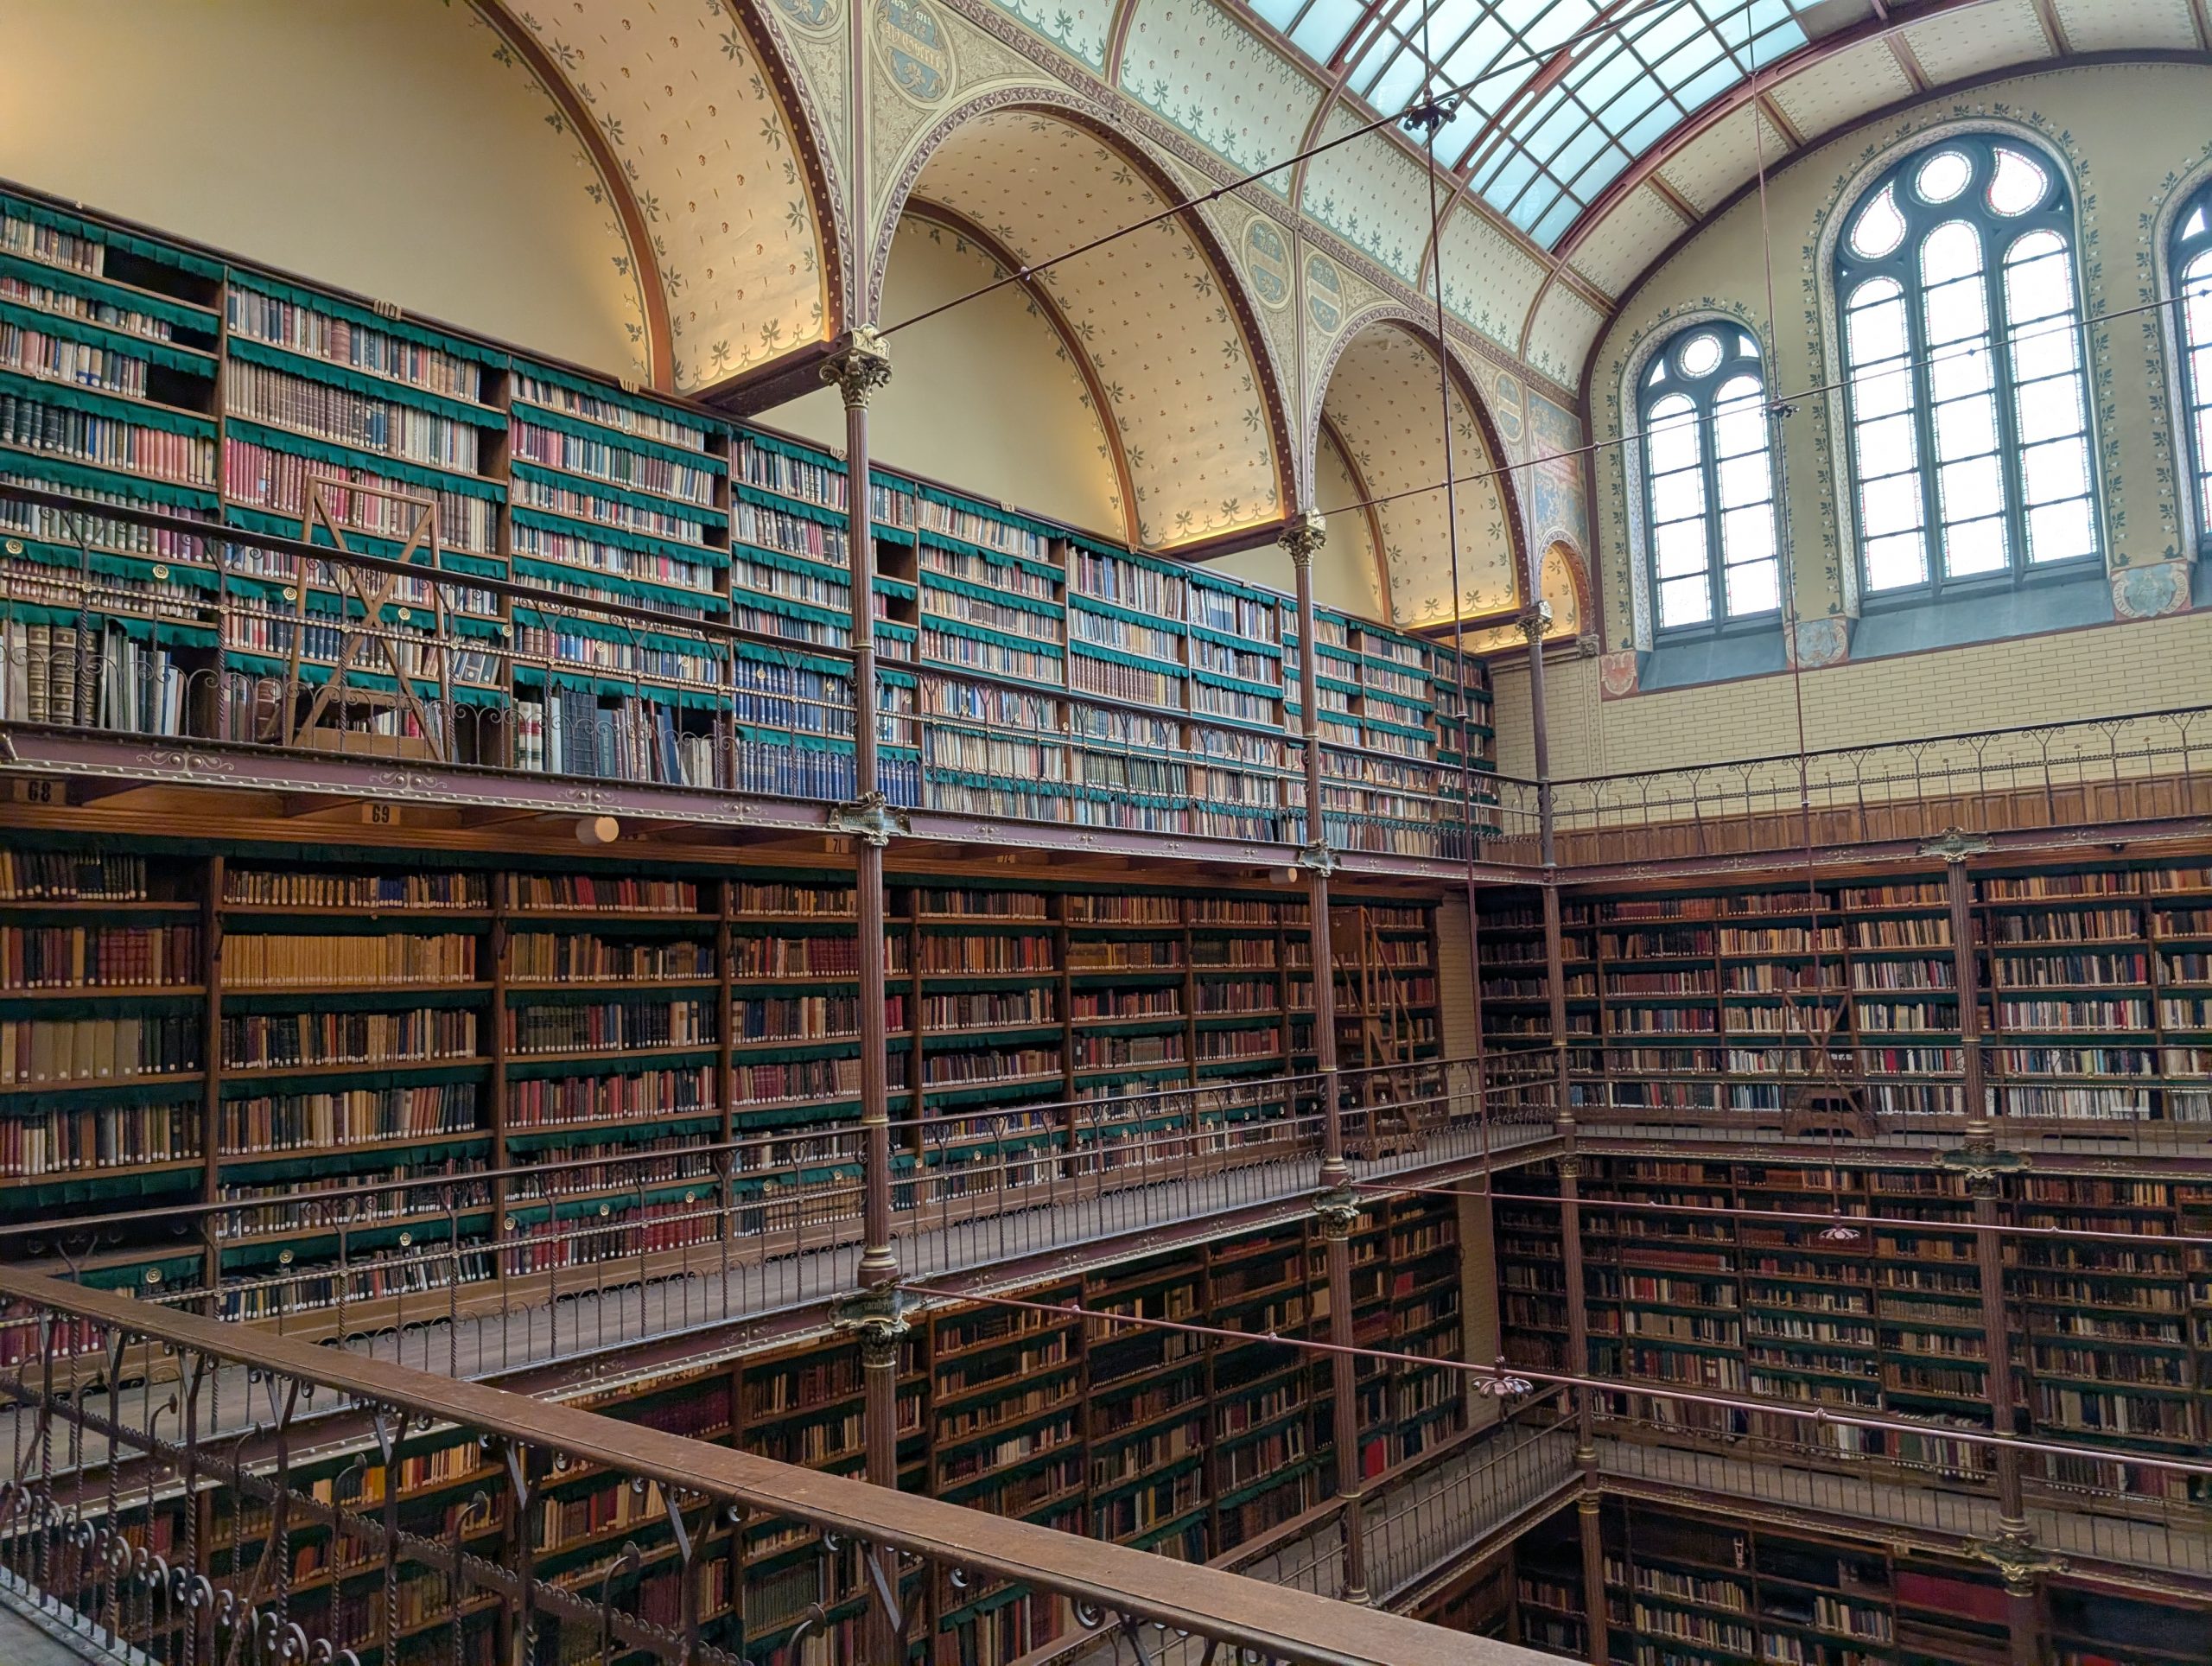
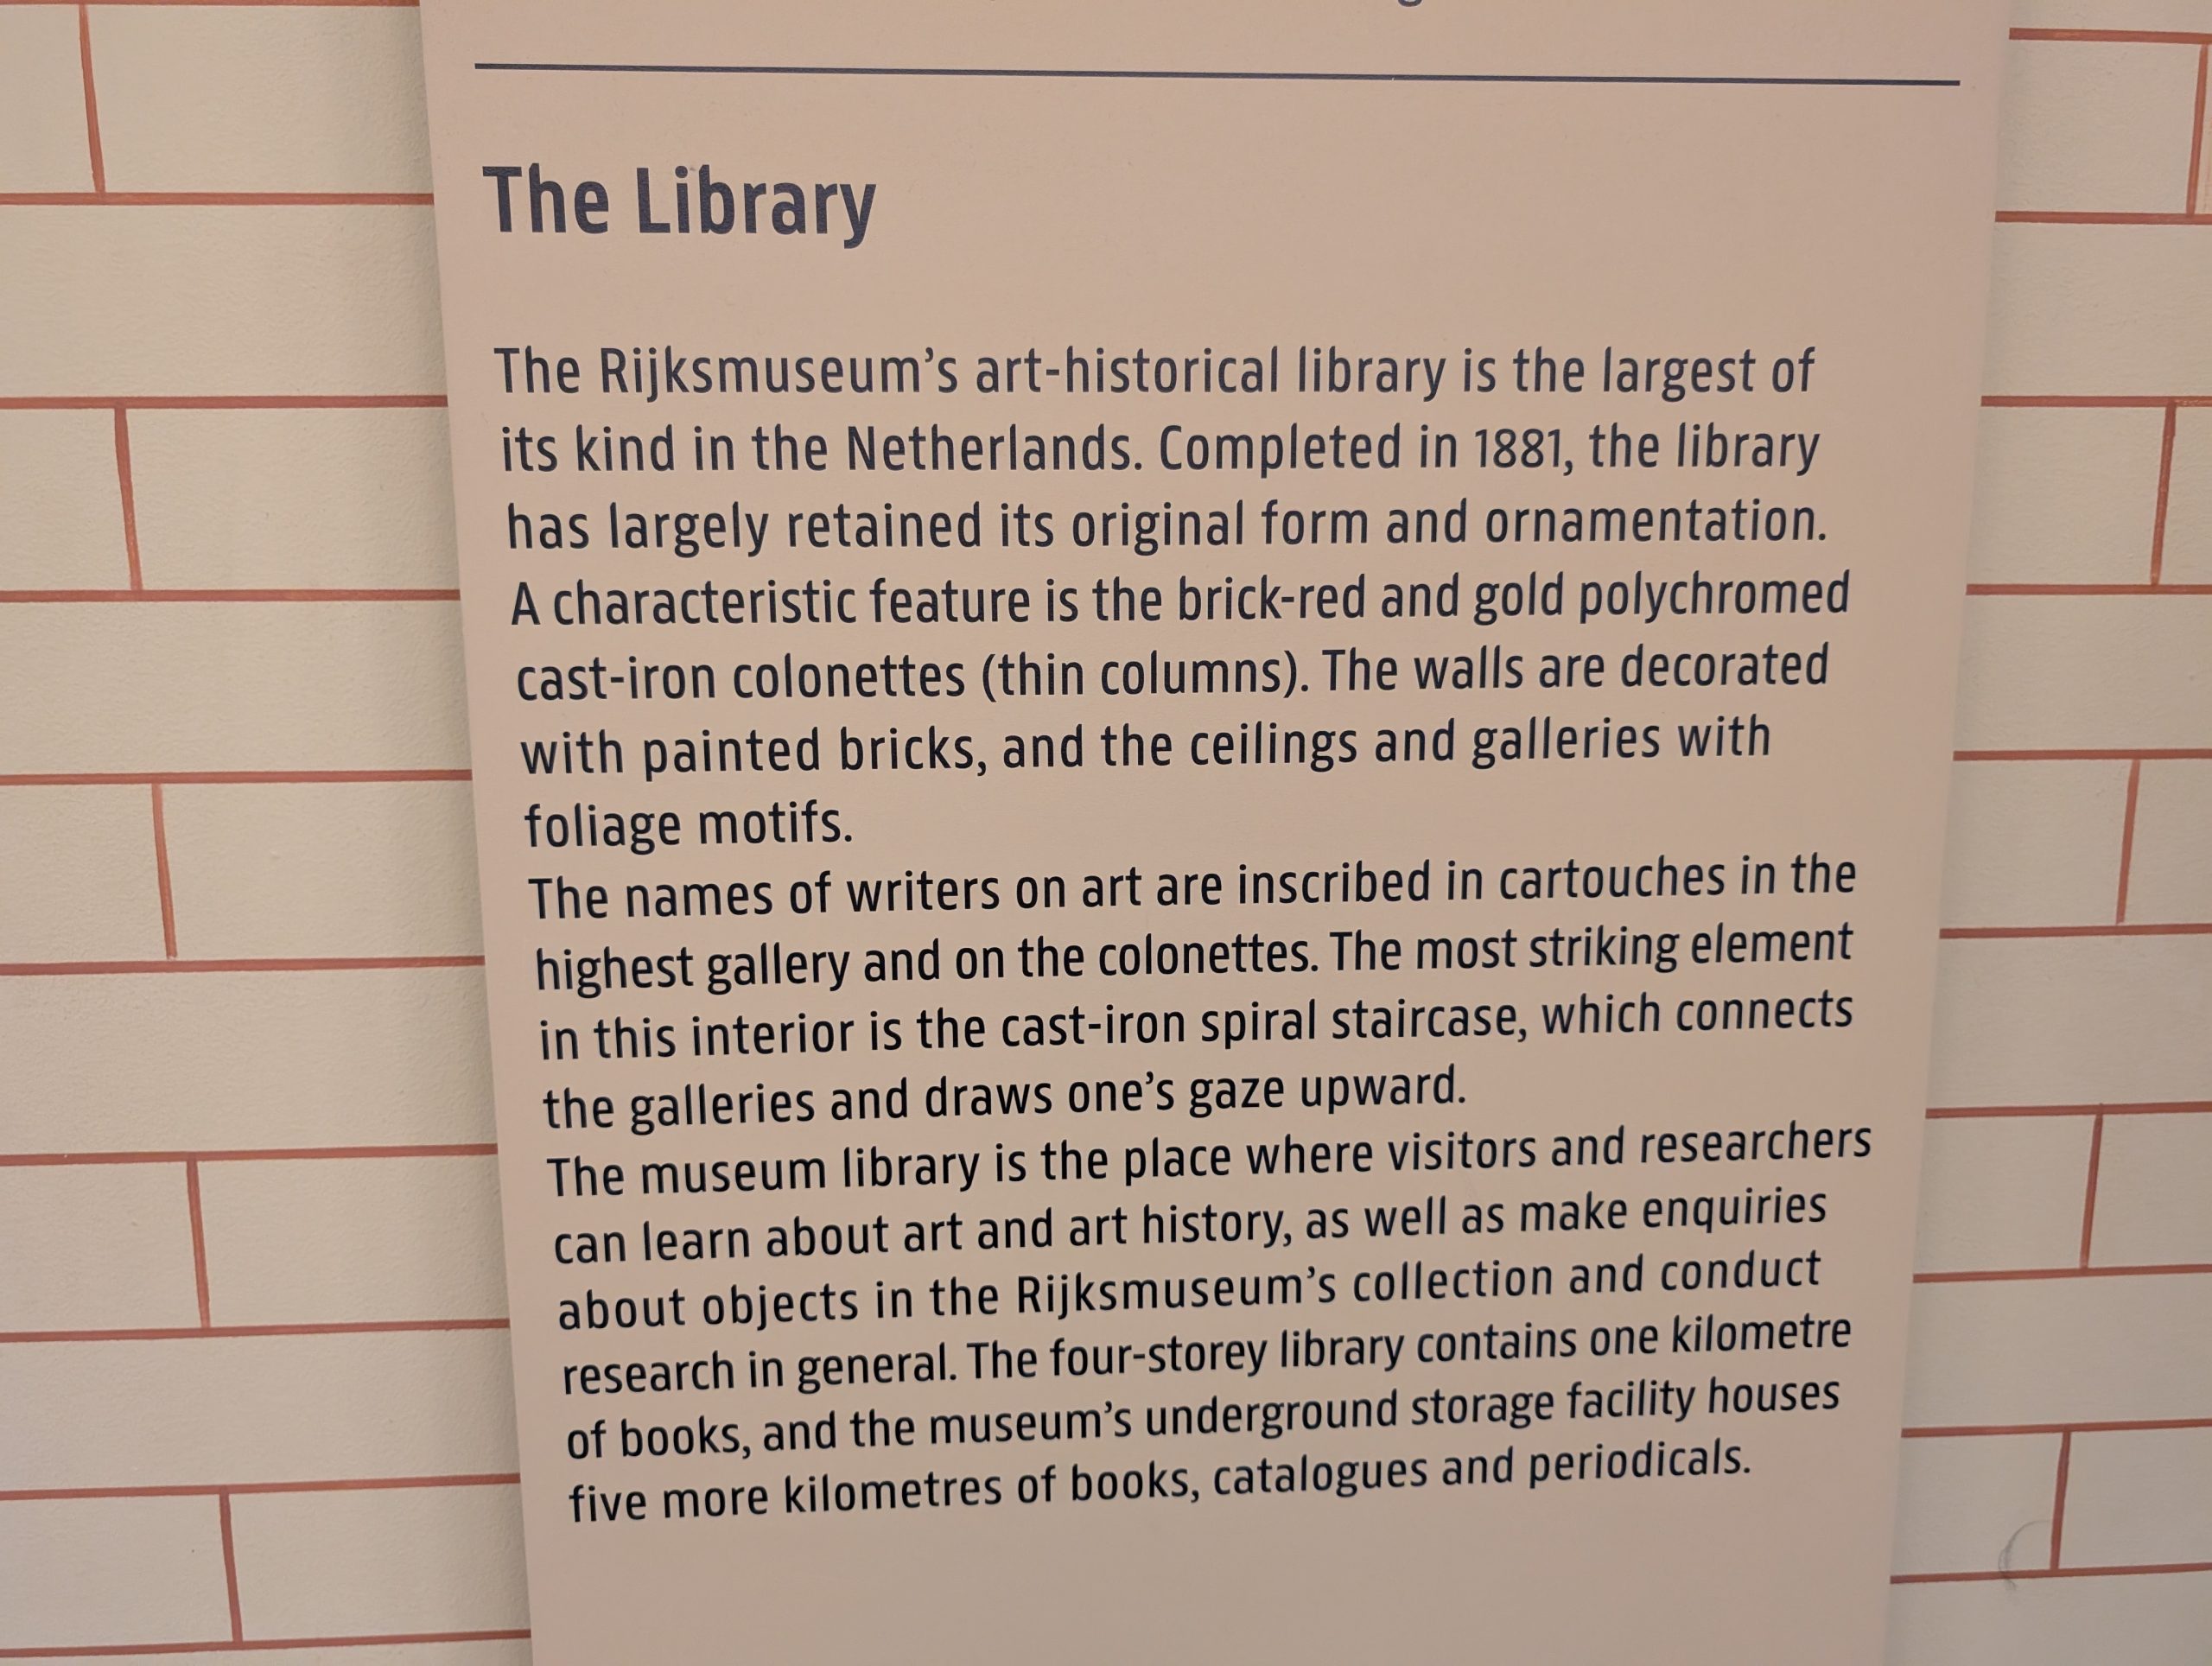
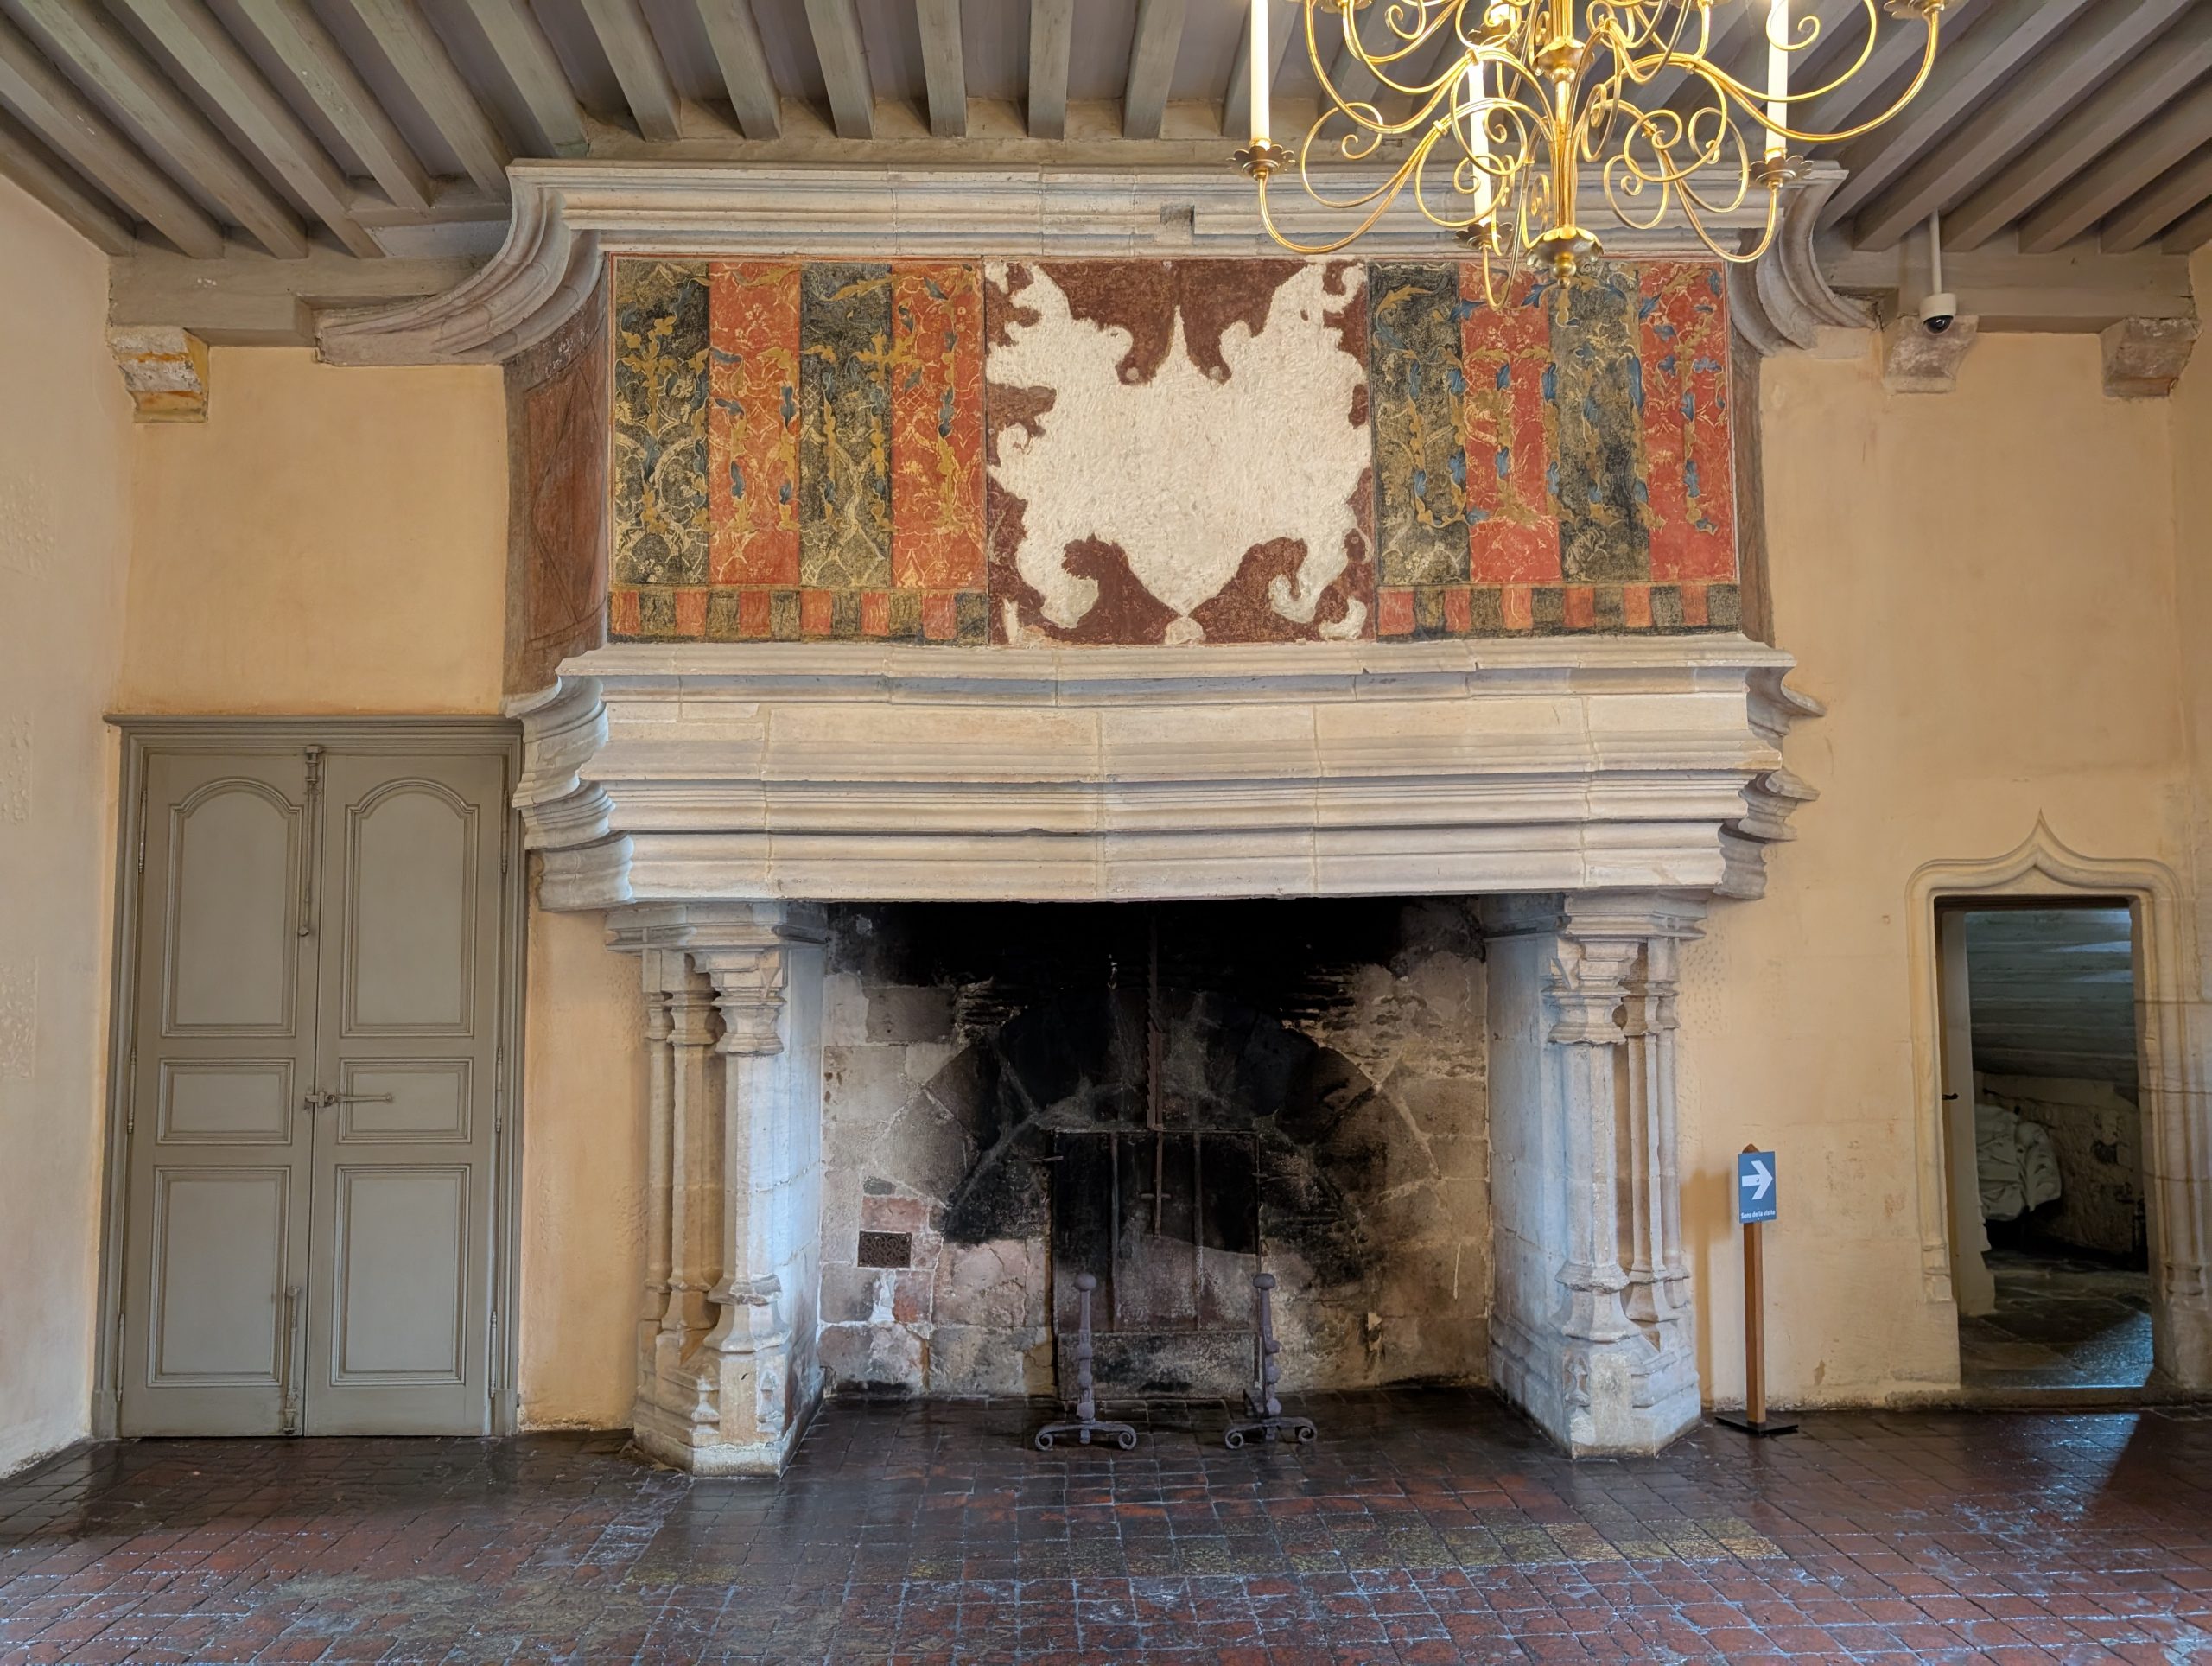
Now, this is what I call a library. And yes, those books are all real and people on the bottom floor were studying from them.
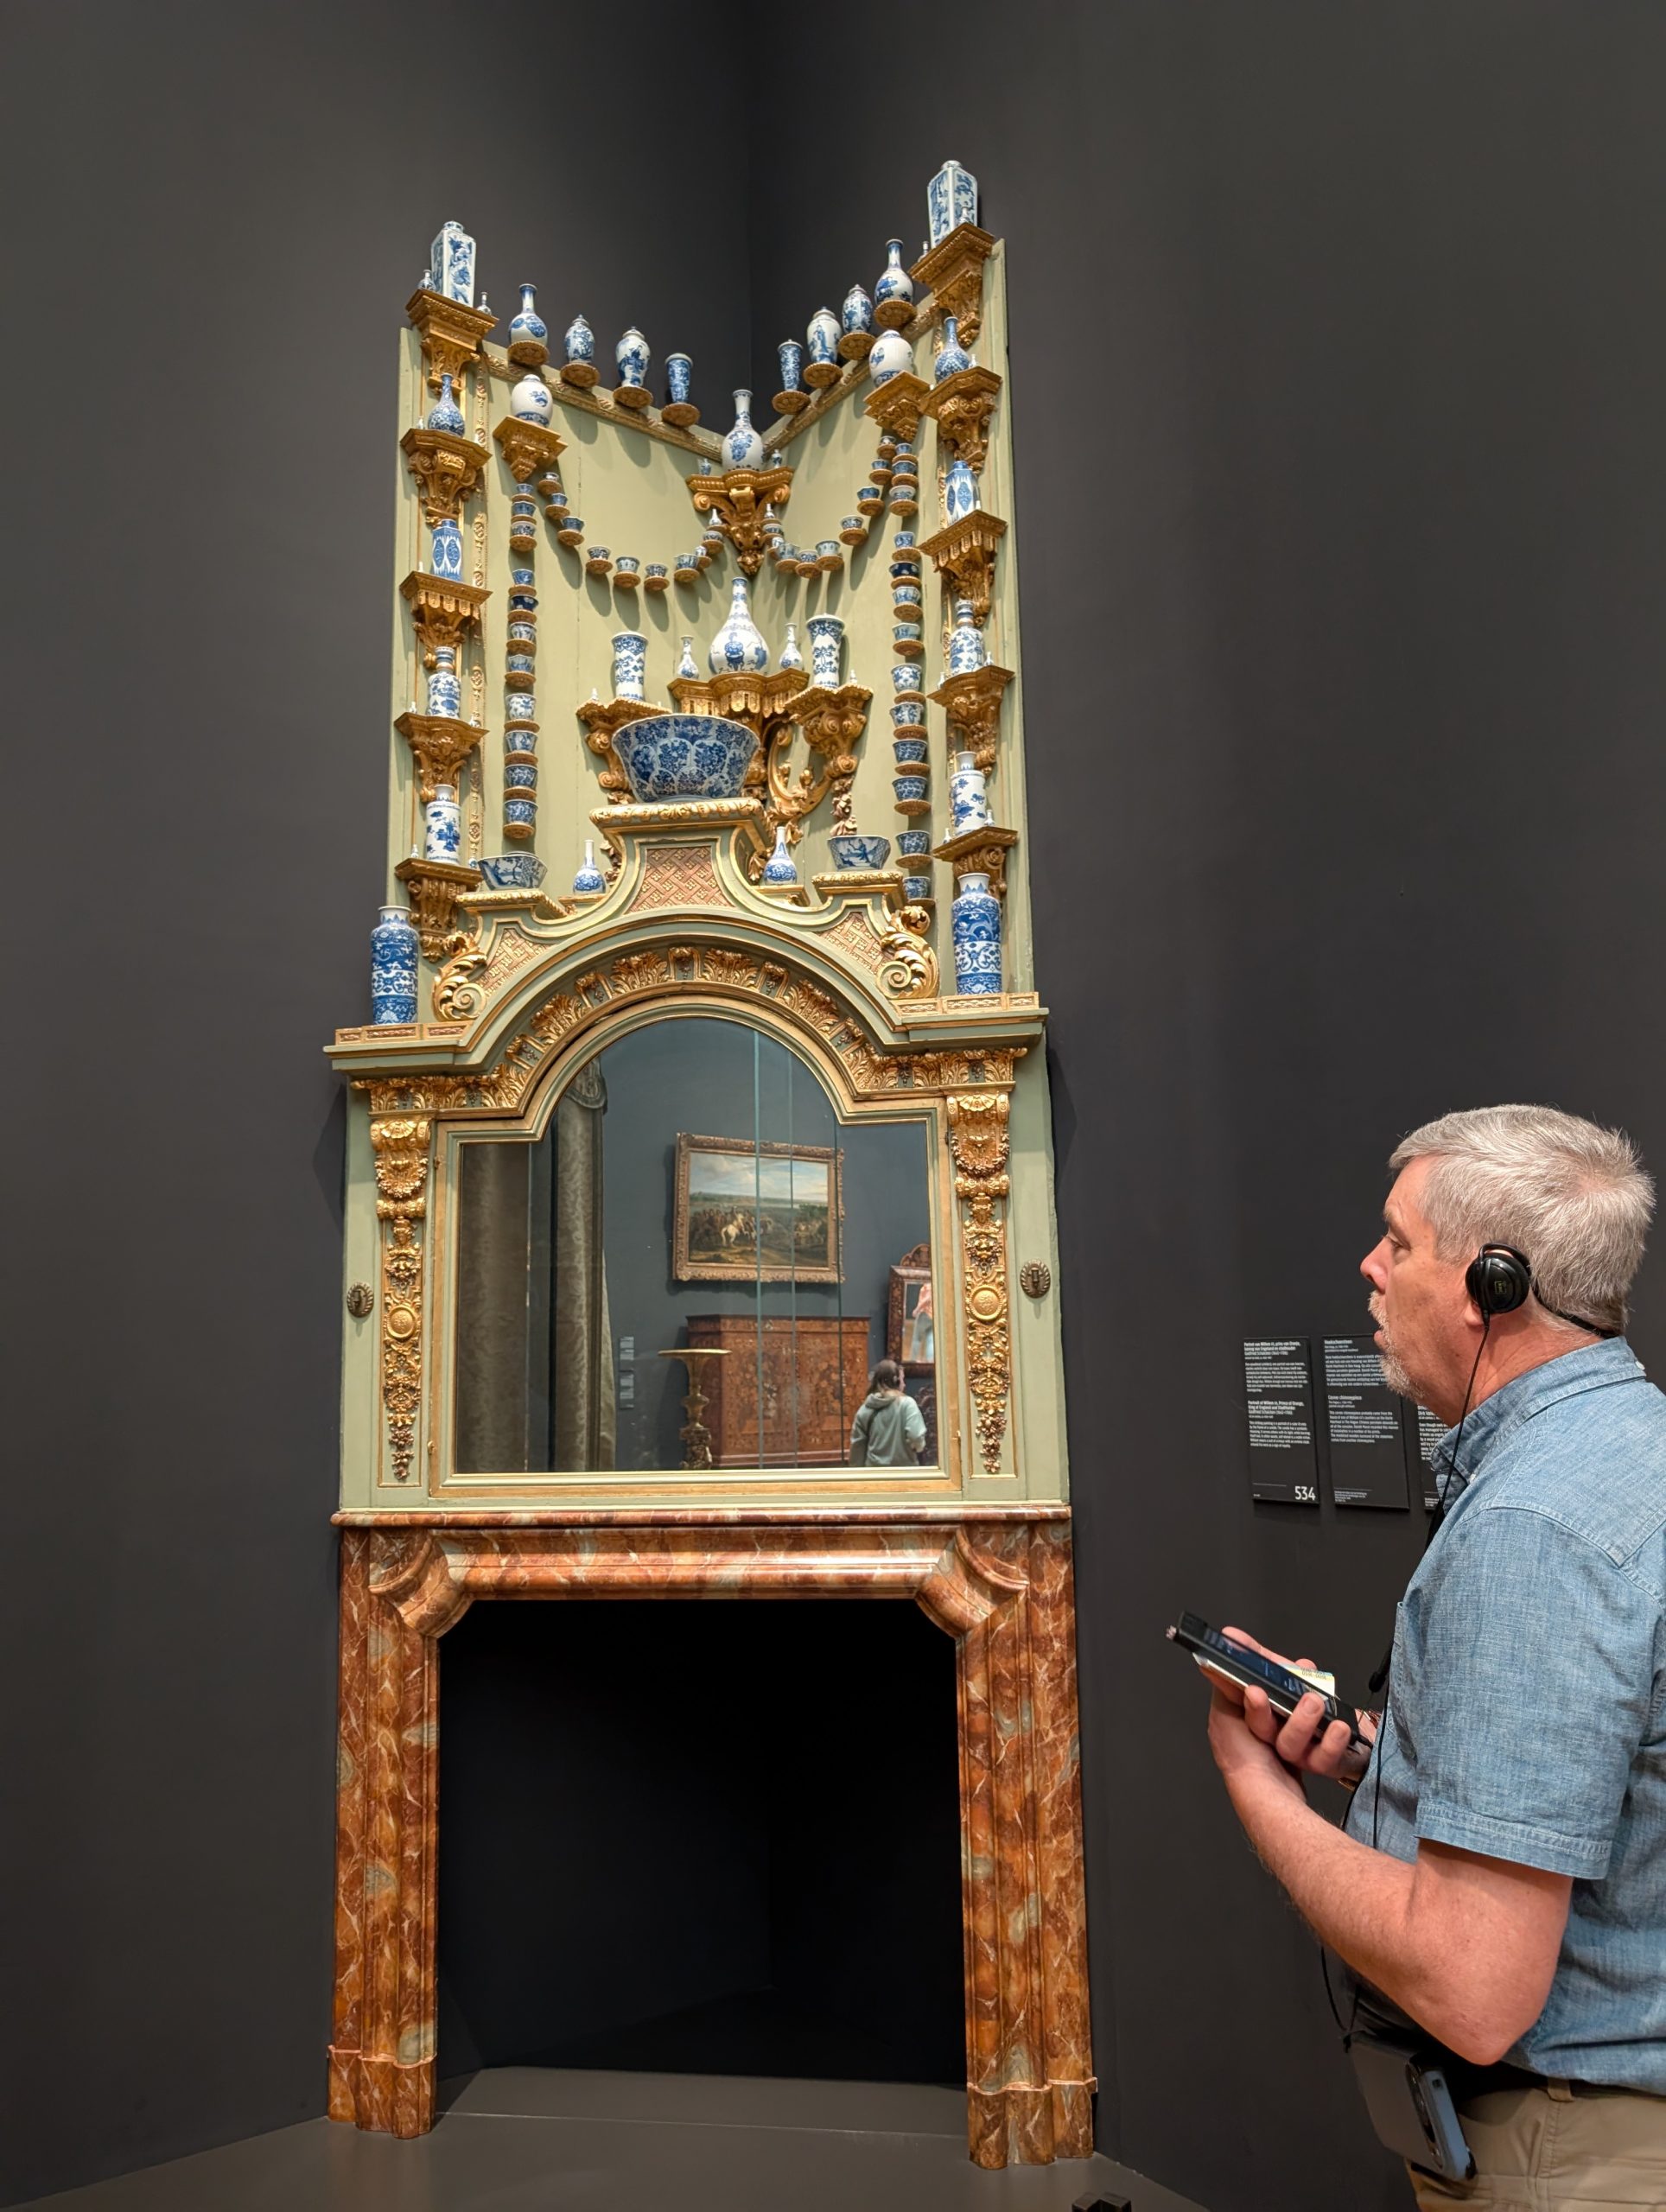
I want a fireplace like this one in our home. Andy is studying the detail so he can replace our current fireplace with one just like this. Not!
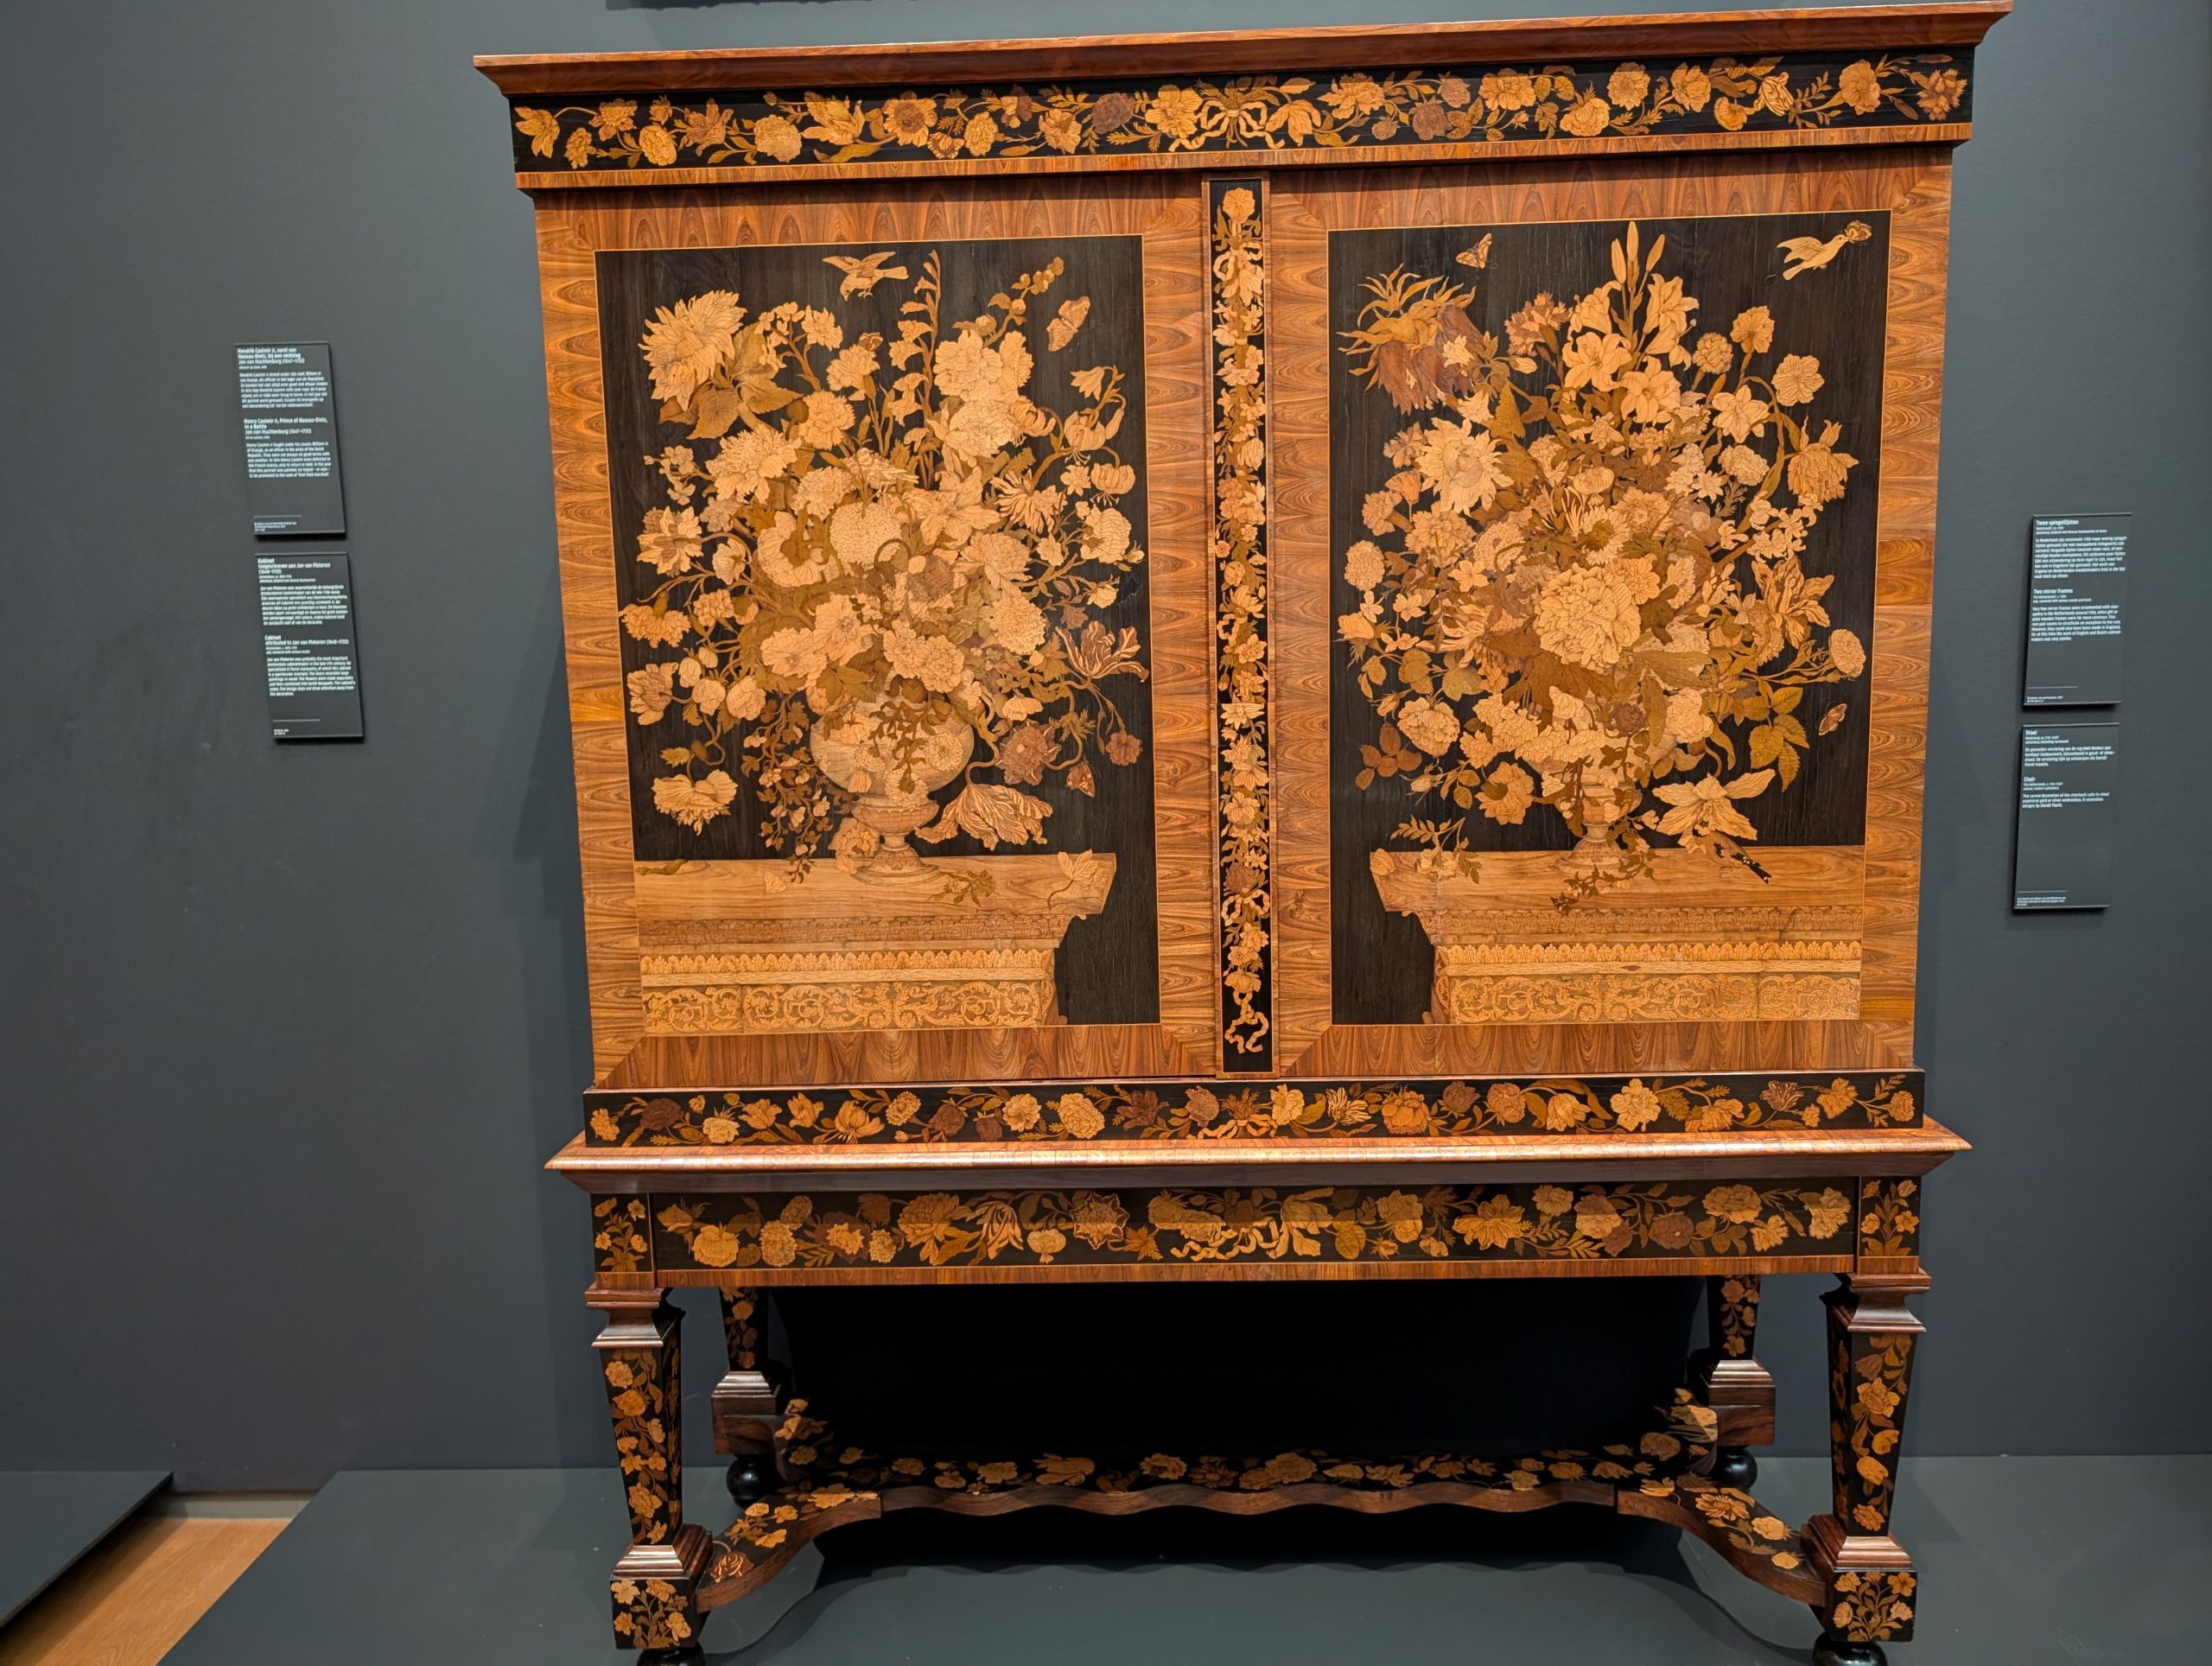
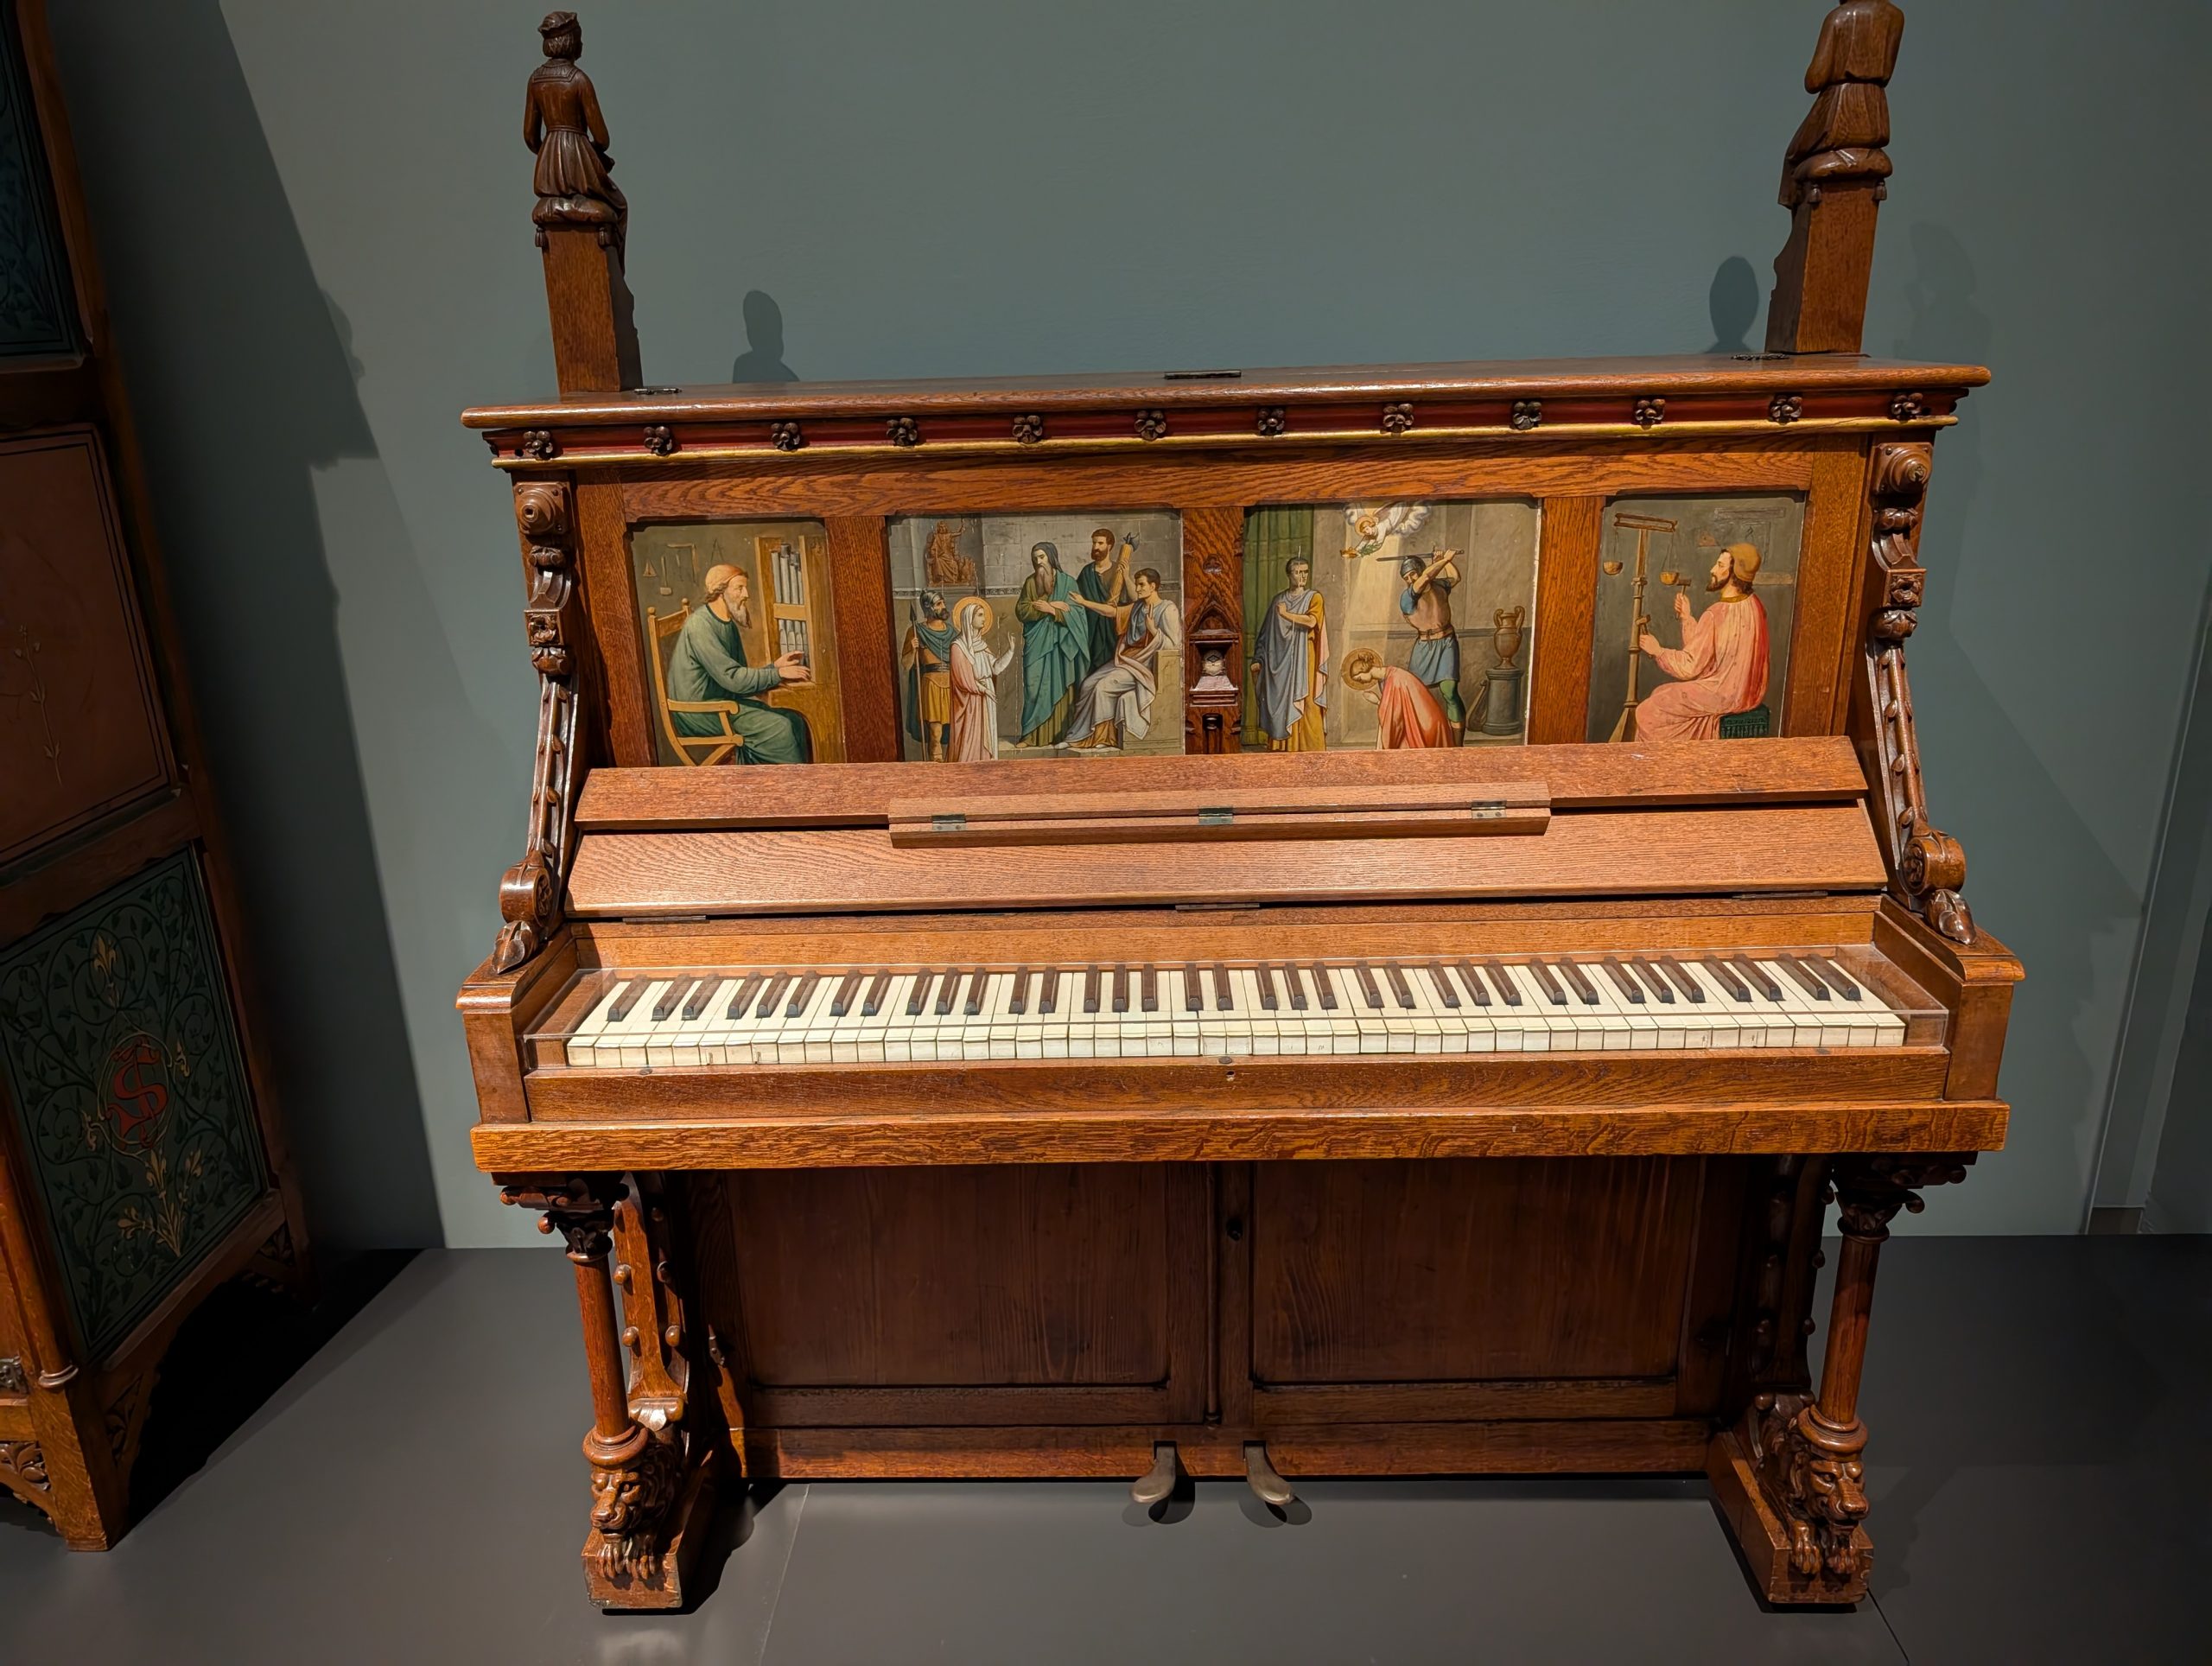
I’d like this piece of furniture too.
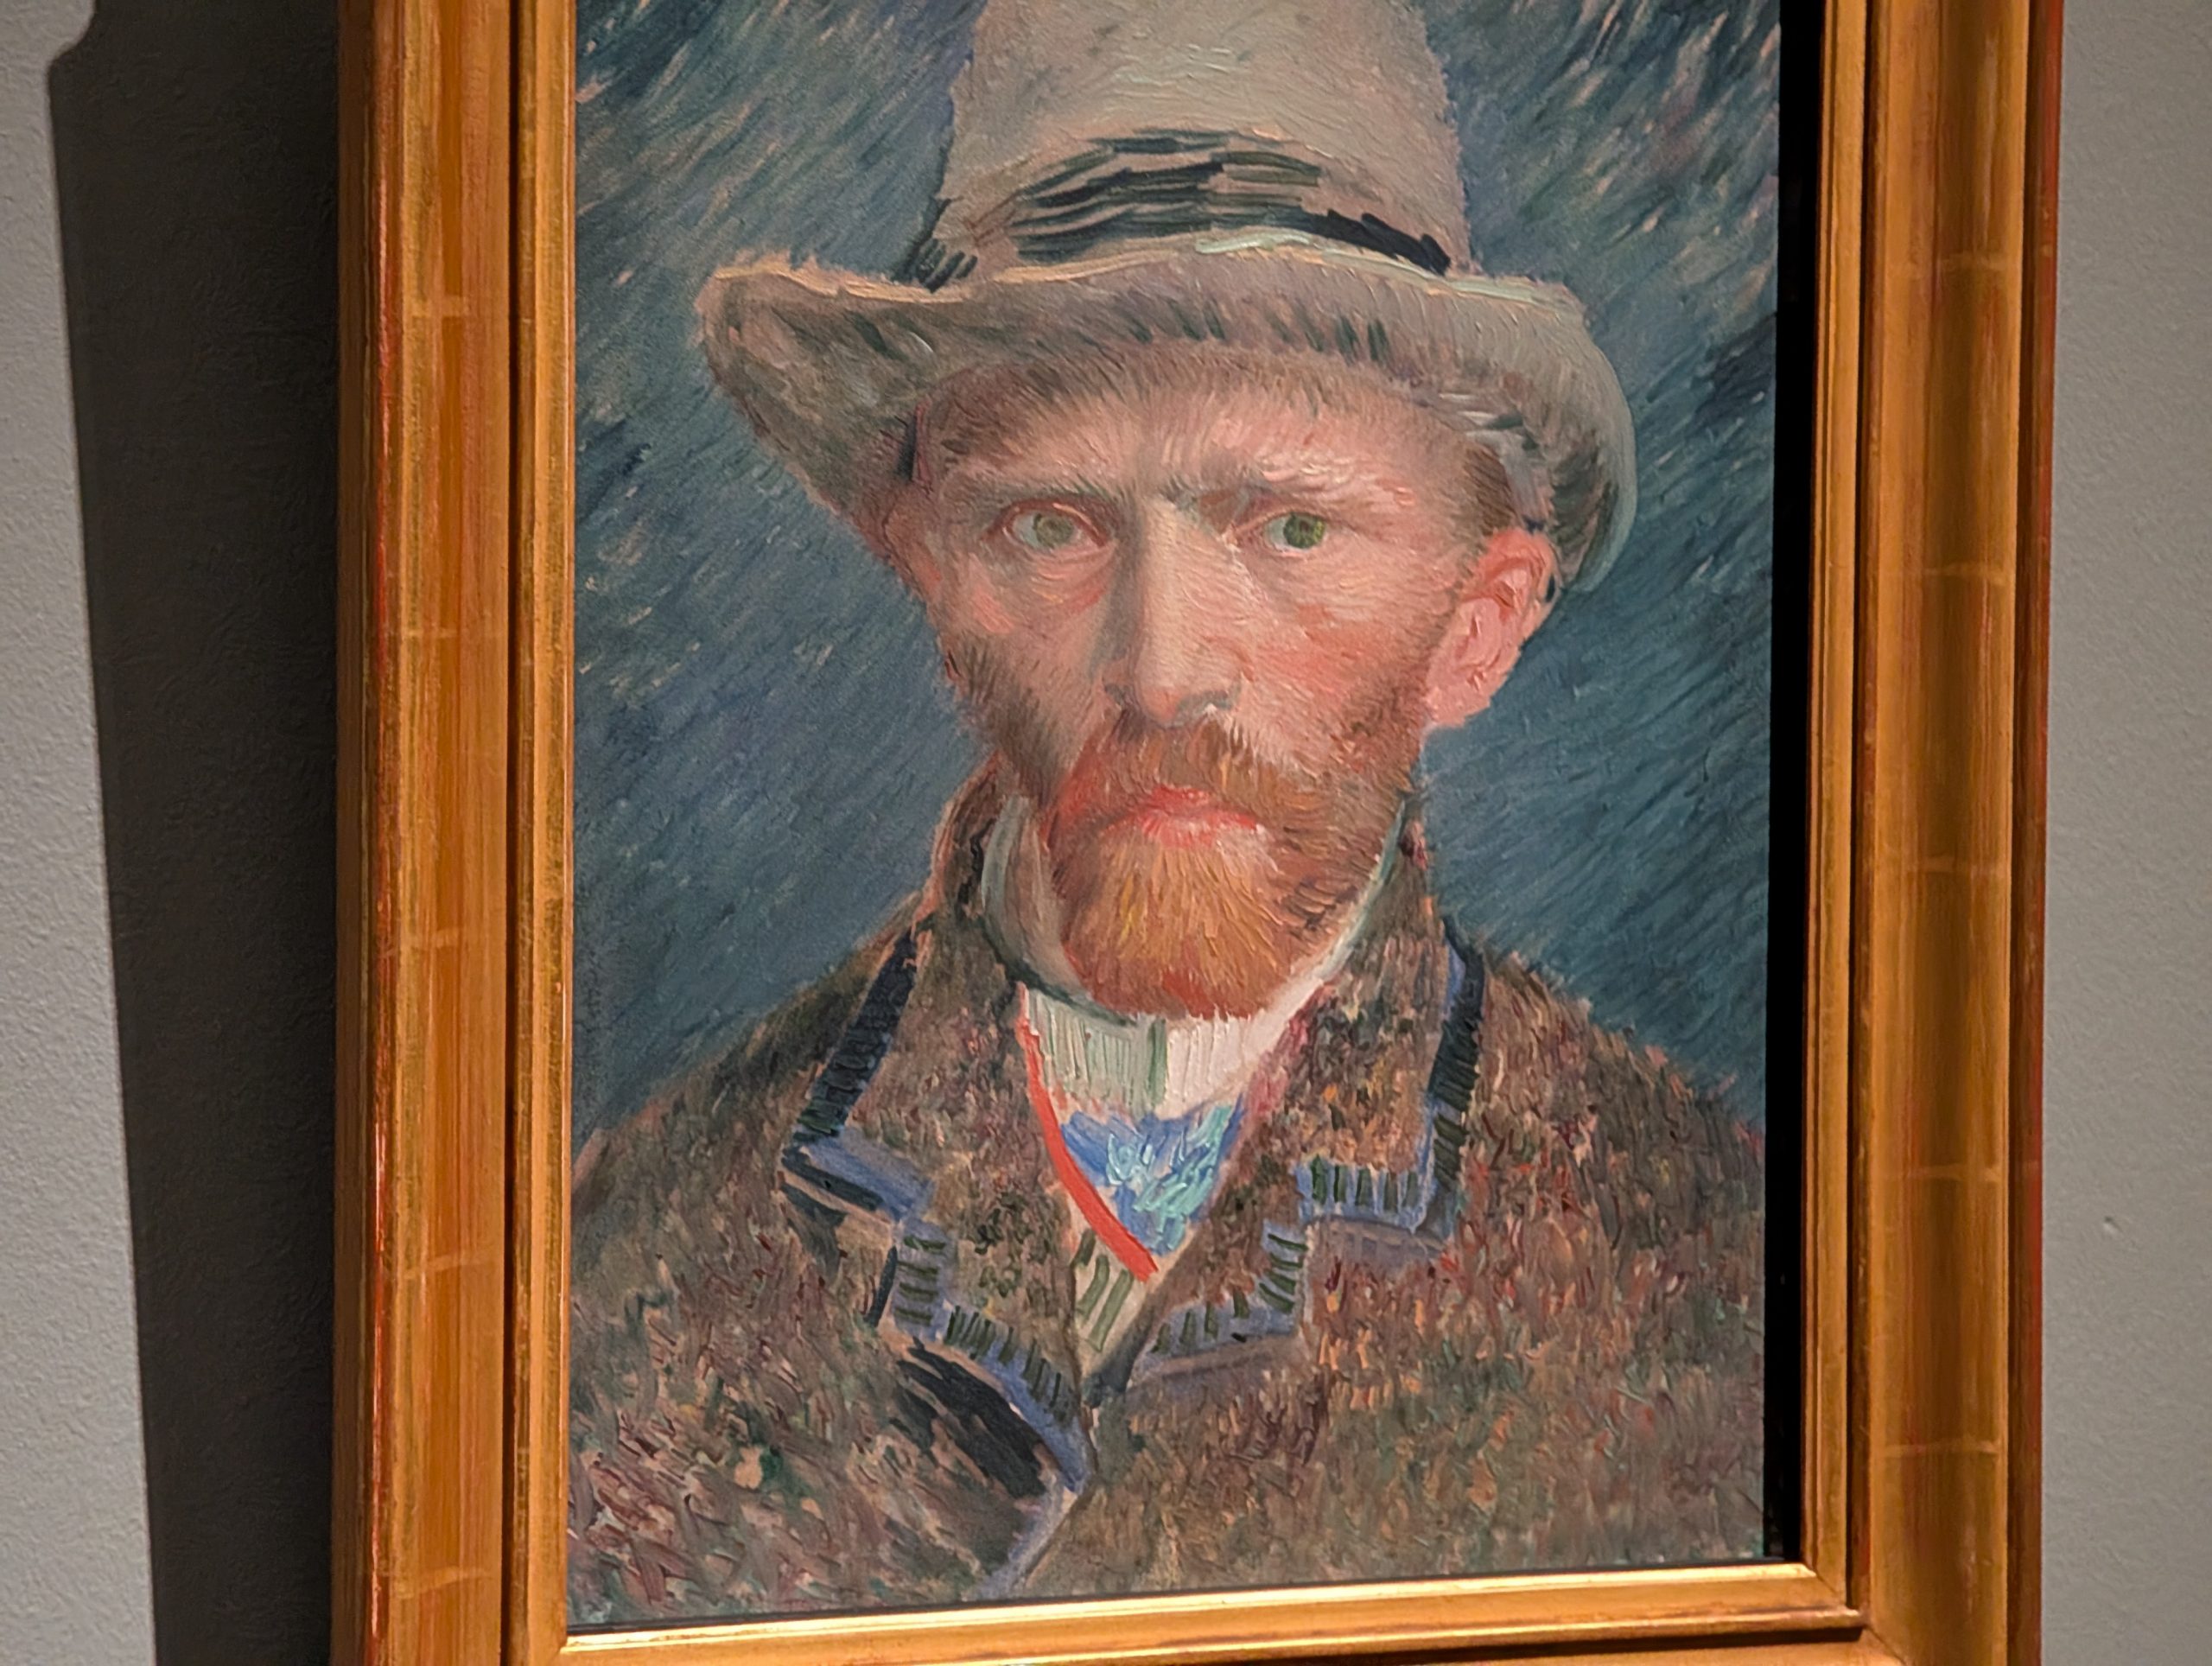
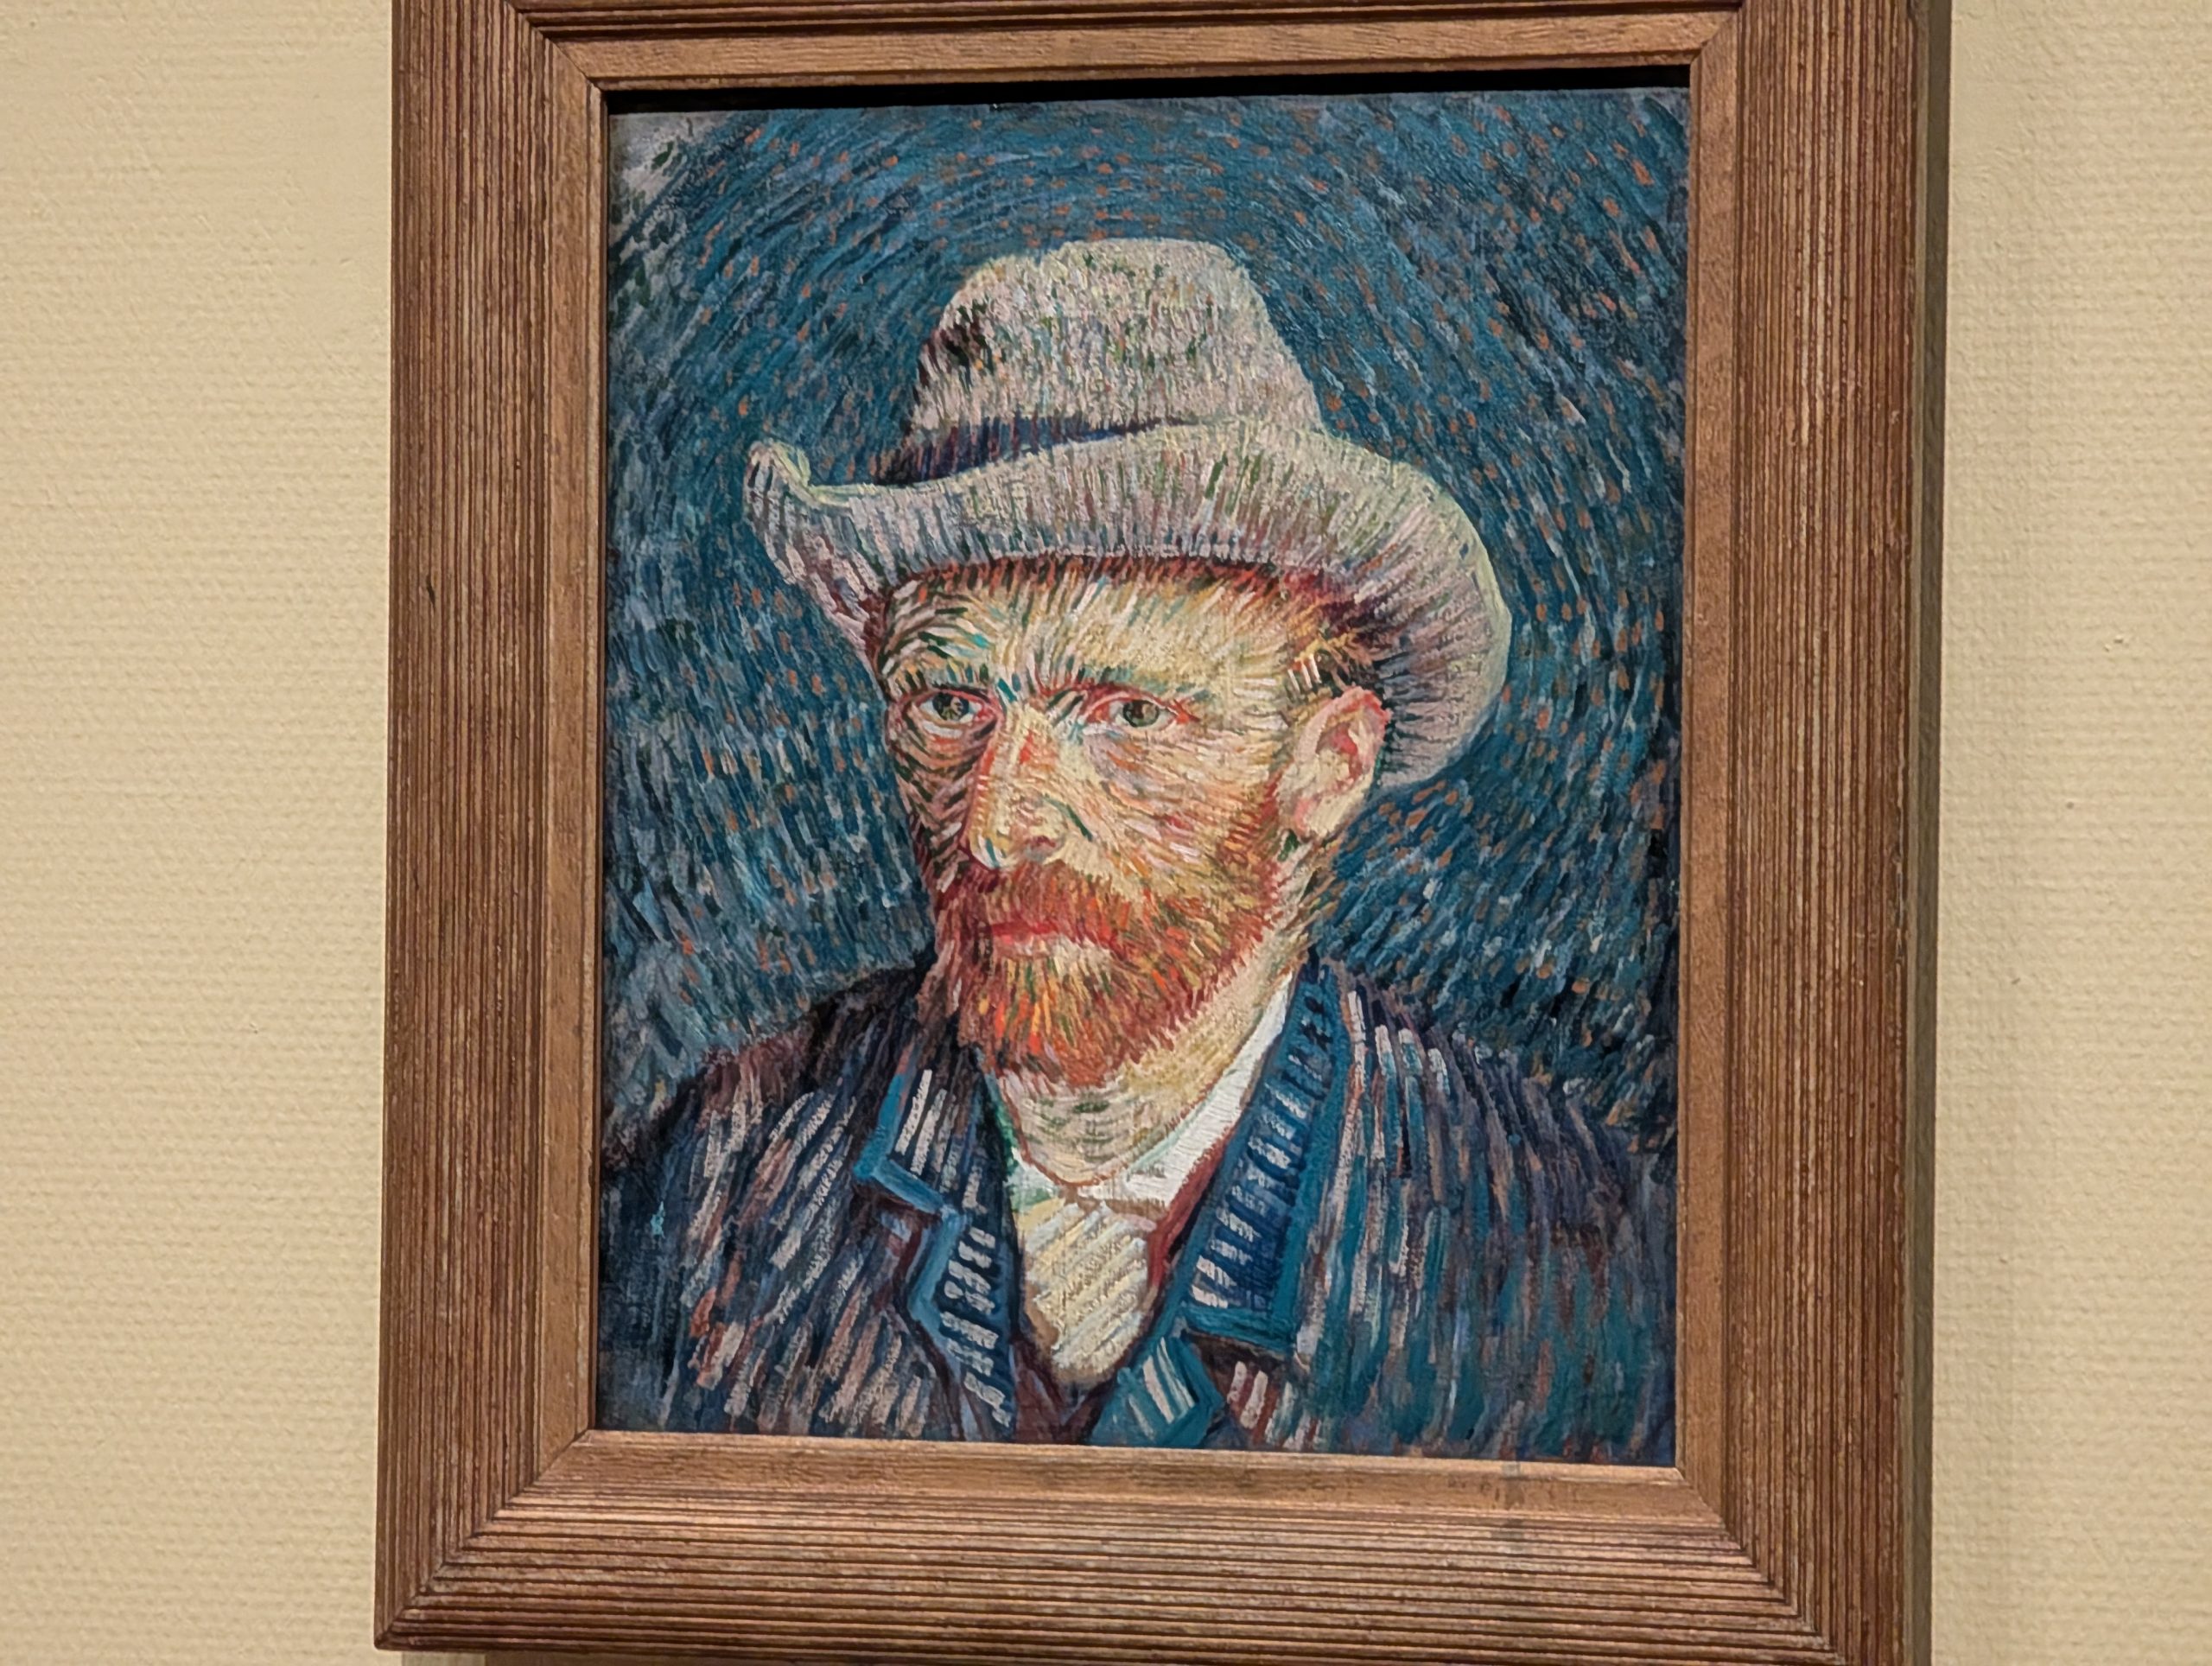
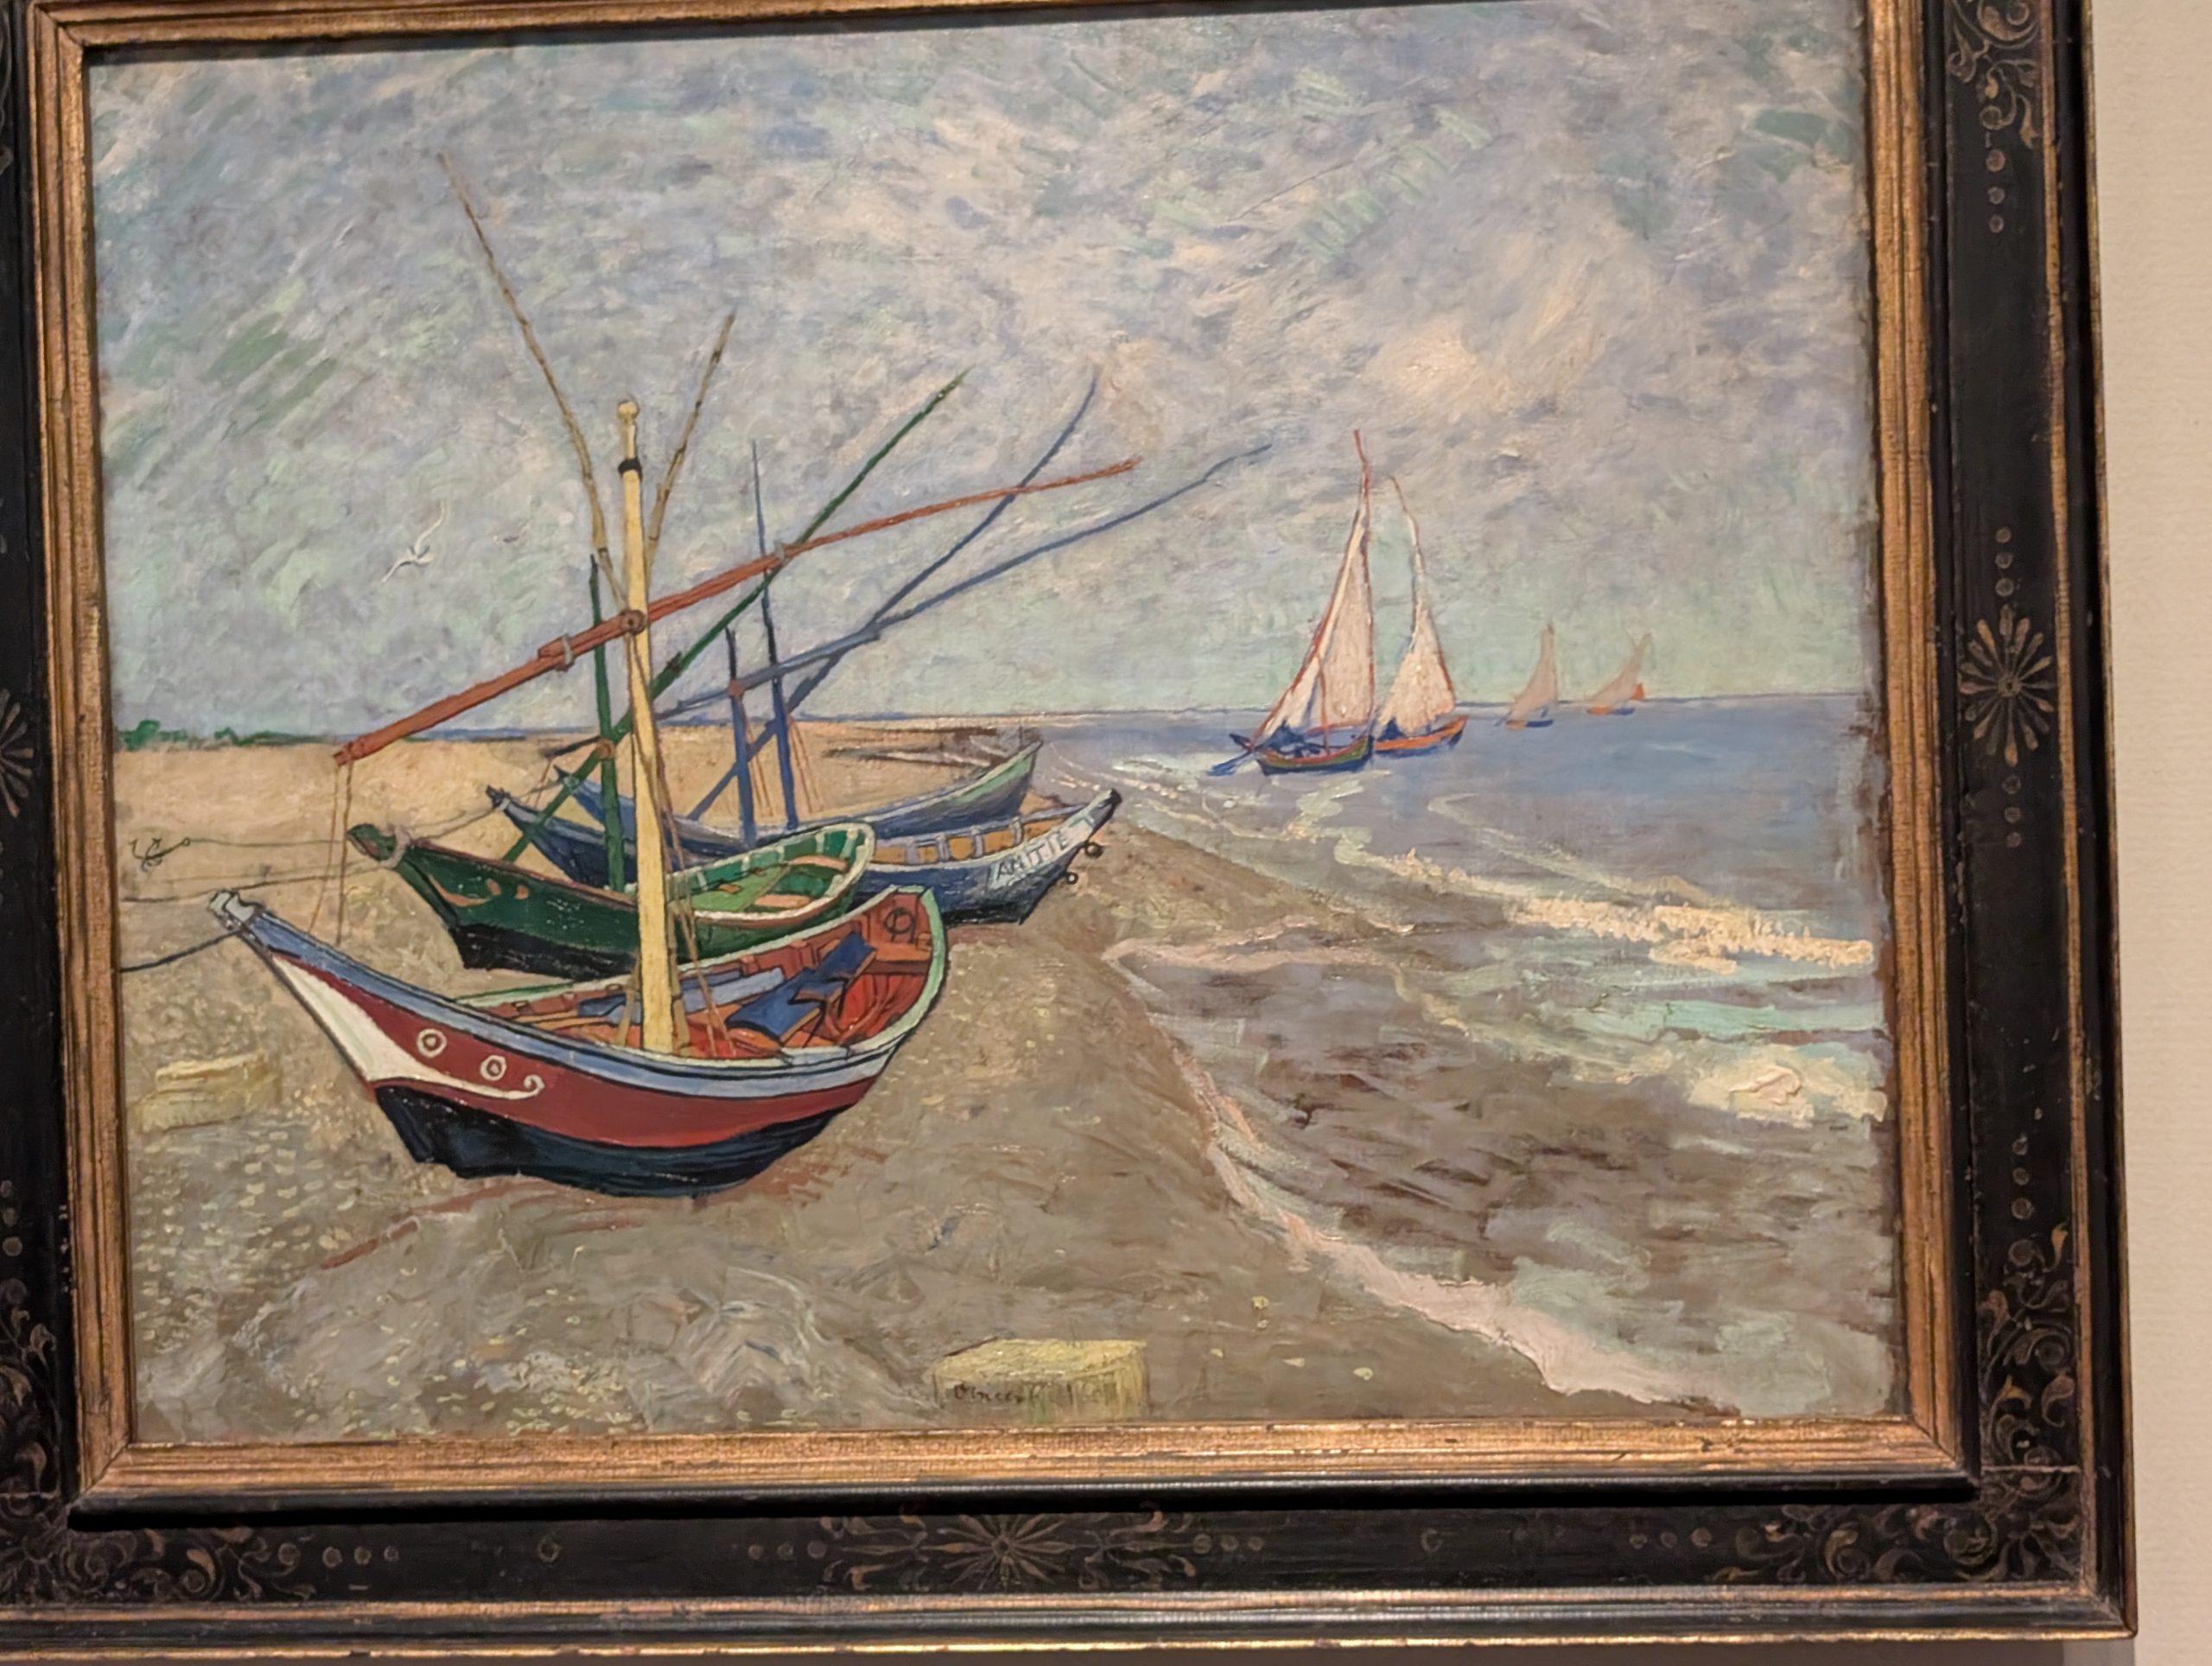
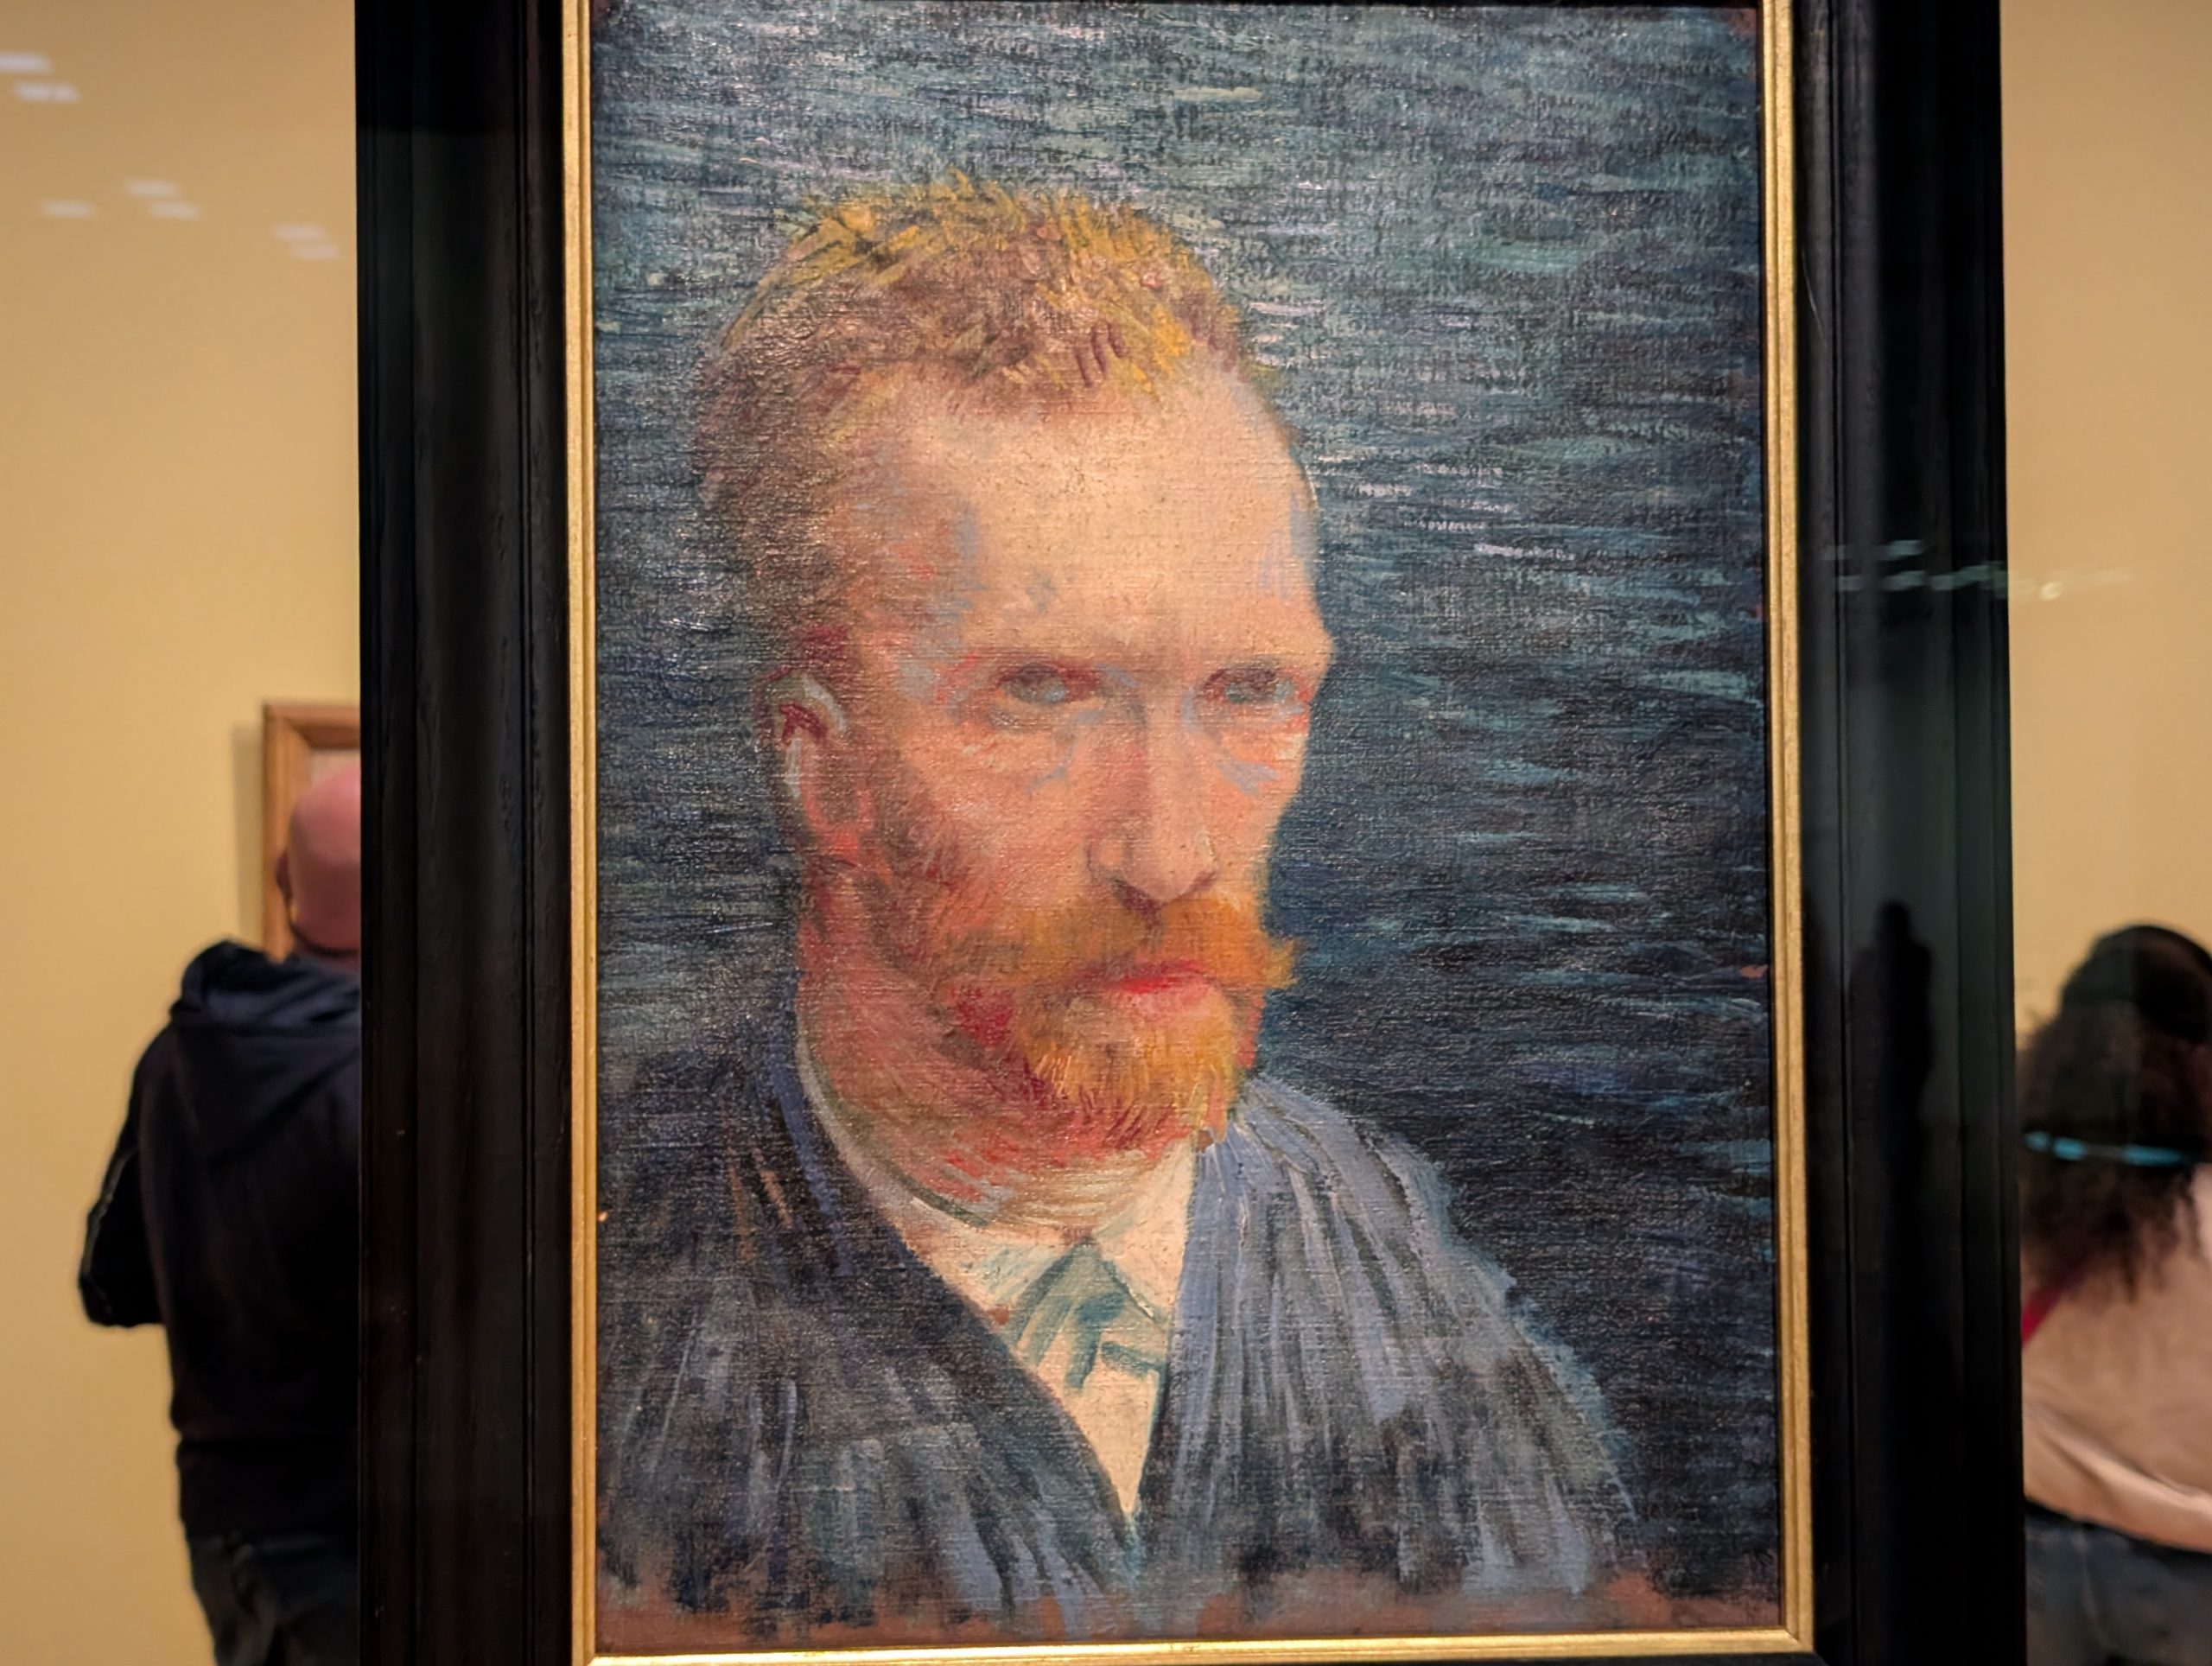
A Van Gogh self portrait.
After a light lunch in the Rijks Museum Cafe, it was time to walk the couple of blocks to the Van Gogh Museum. What a way to spend a day. My idea of heaven, that’s for sure!
But before I show you a few pictures from the Van Gogh Museum, a bit of information about this incredible facility and about the painter himself.
The Van Gogh Museum in Amsterdam houses the world’s largest collection of works by Vincent Van Gogh, including over 200 paintings, 500 drawings, and 700 letters. It also features exhibitions on 19th-century art history.
Vincent van Gogh, born in 1853, was a Dutch Post-Impressionist painter whose work, though not widely appreciated during his lifetime, became highly influential in the 20th century. He is renowned for his bold colors and dramatic brushwork, contributing to the rise of Expressionism. Van Gogh created approximately 2,100 artworks, including around 860 oil paintings, in a little over a decade. His life was marked by periods of mental instability and intense artistic activity. He died in 1890 at the age of 37, likely from a self-inflicted gunshot wound. It is believed that only one of his paintings was sold while he was still alive.
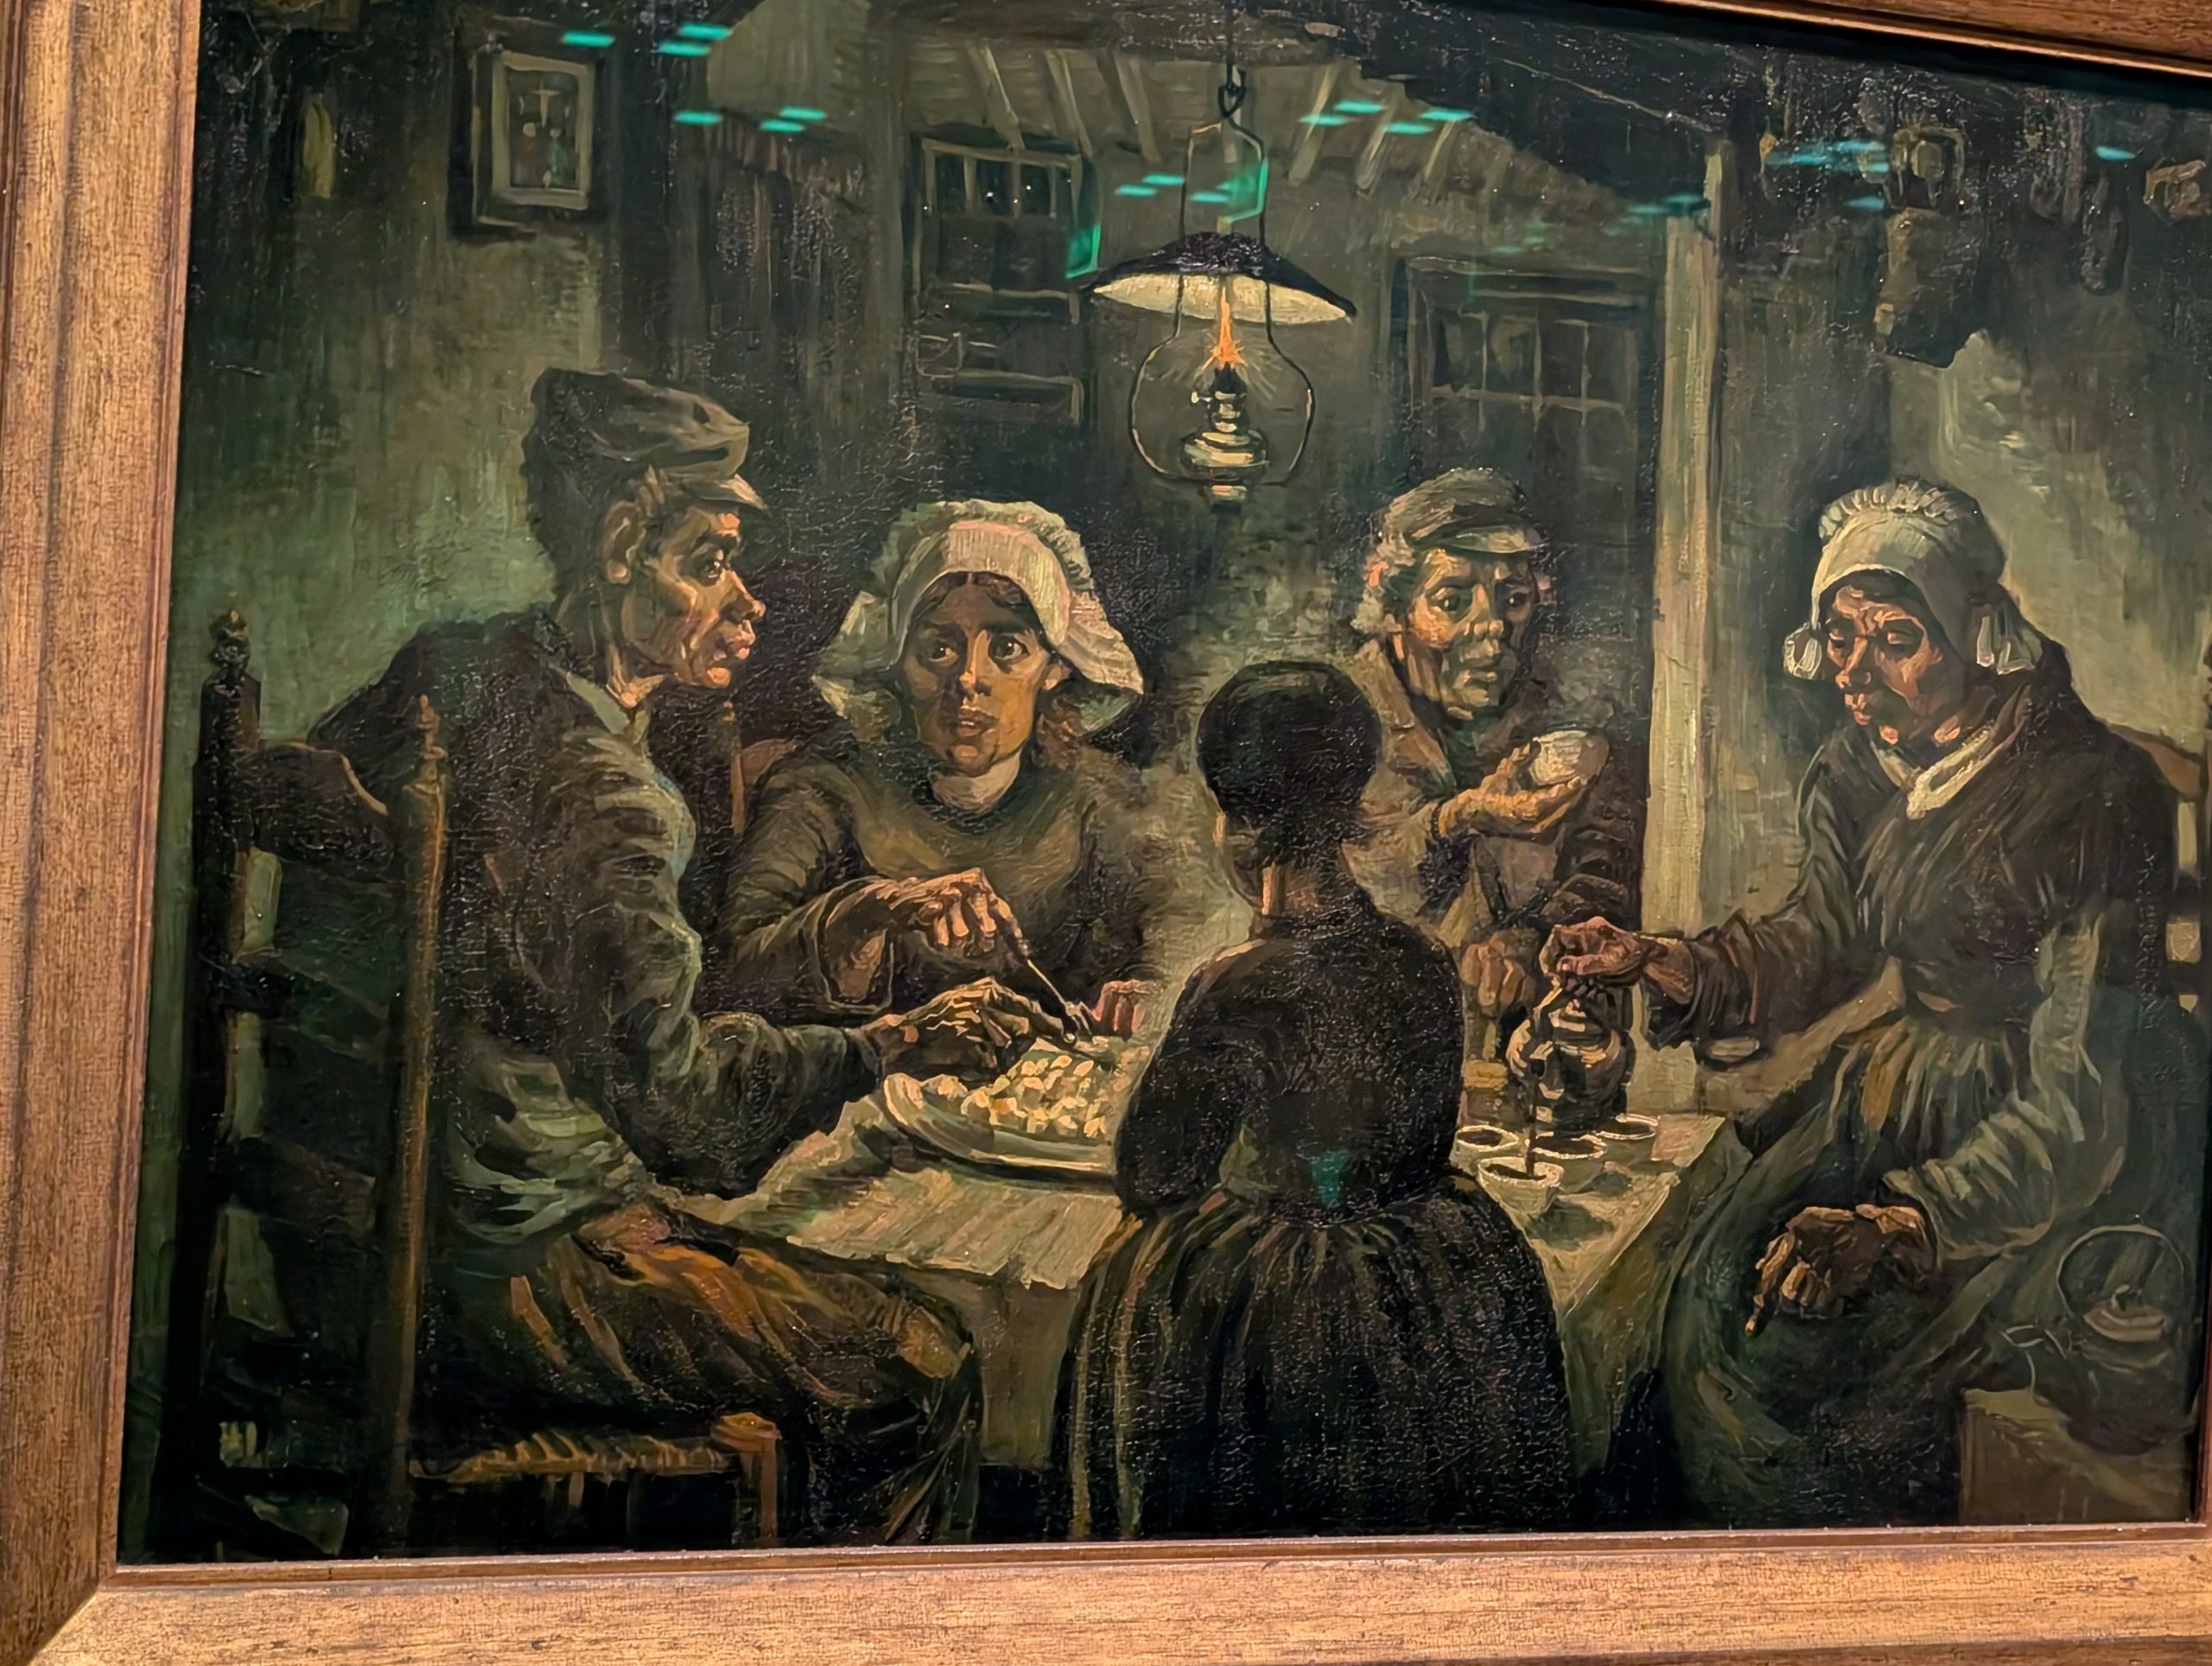
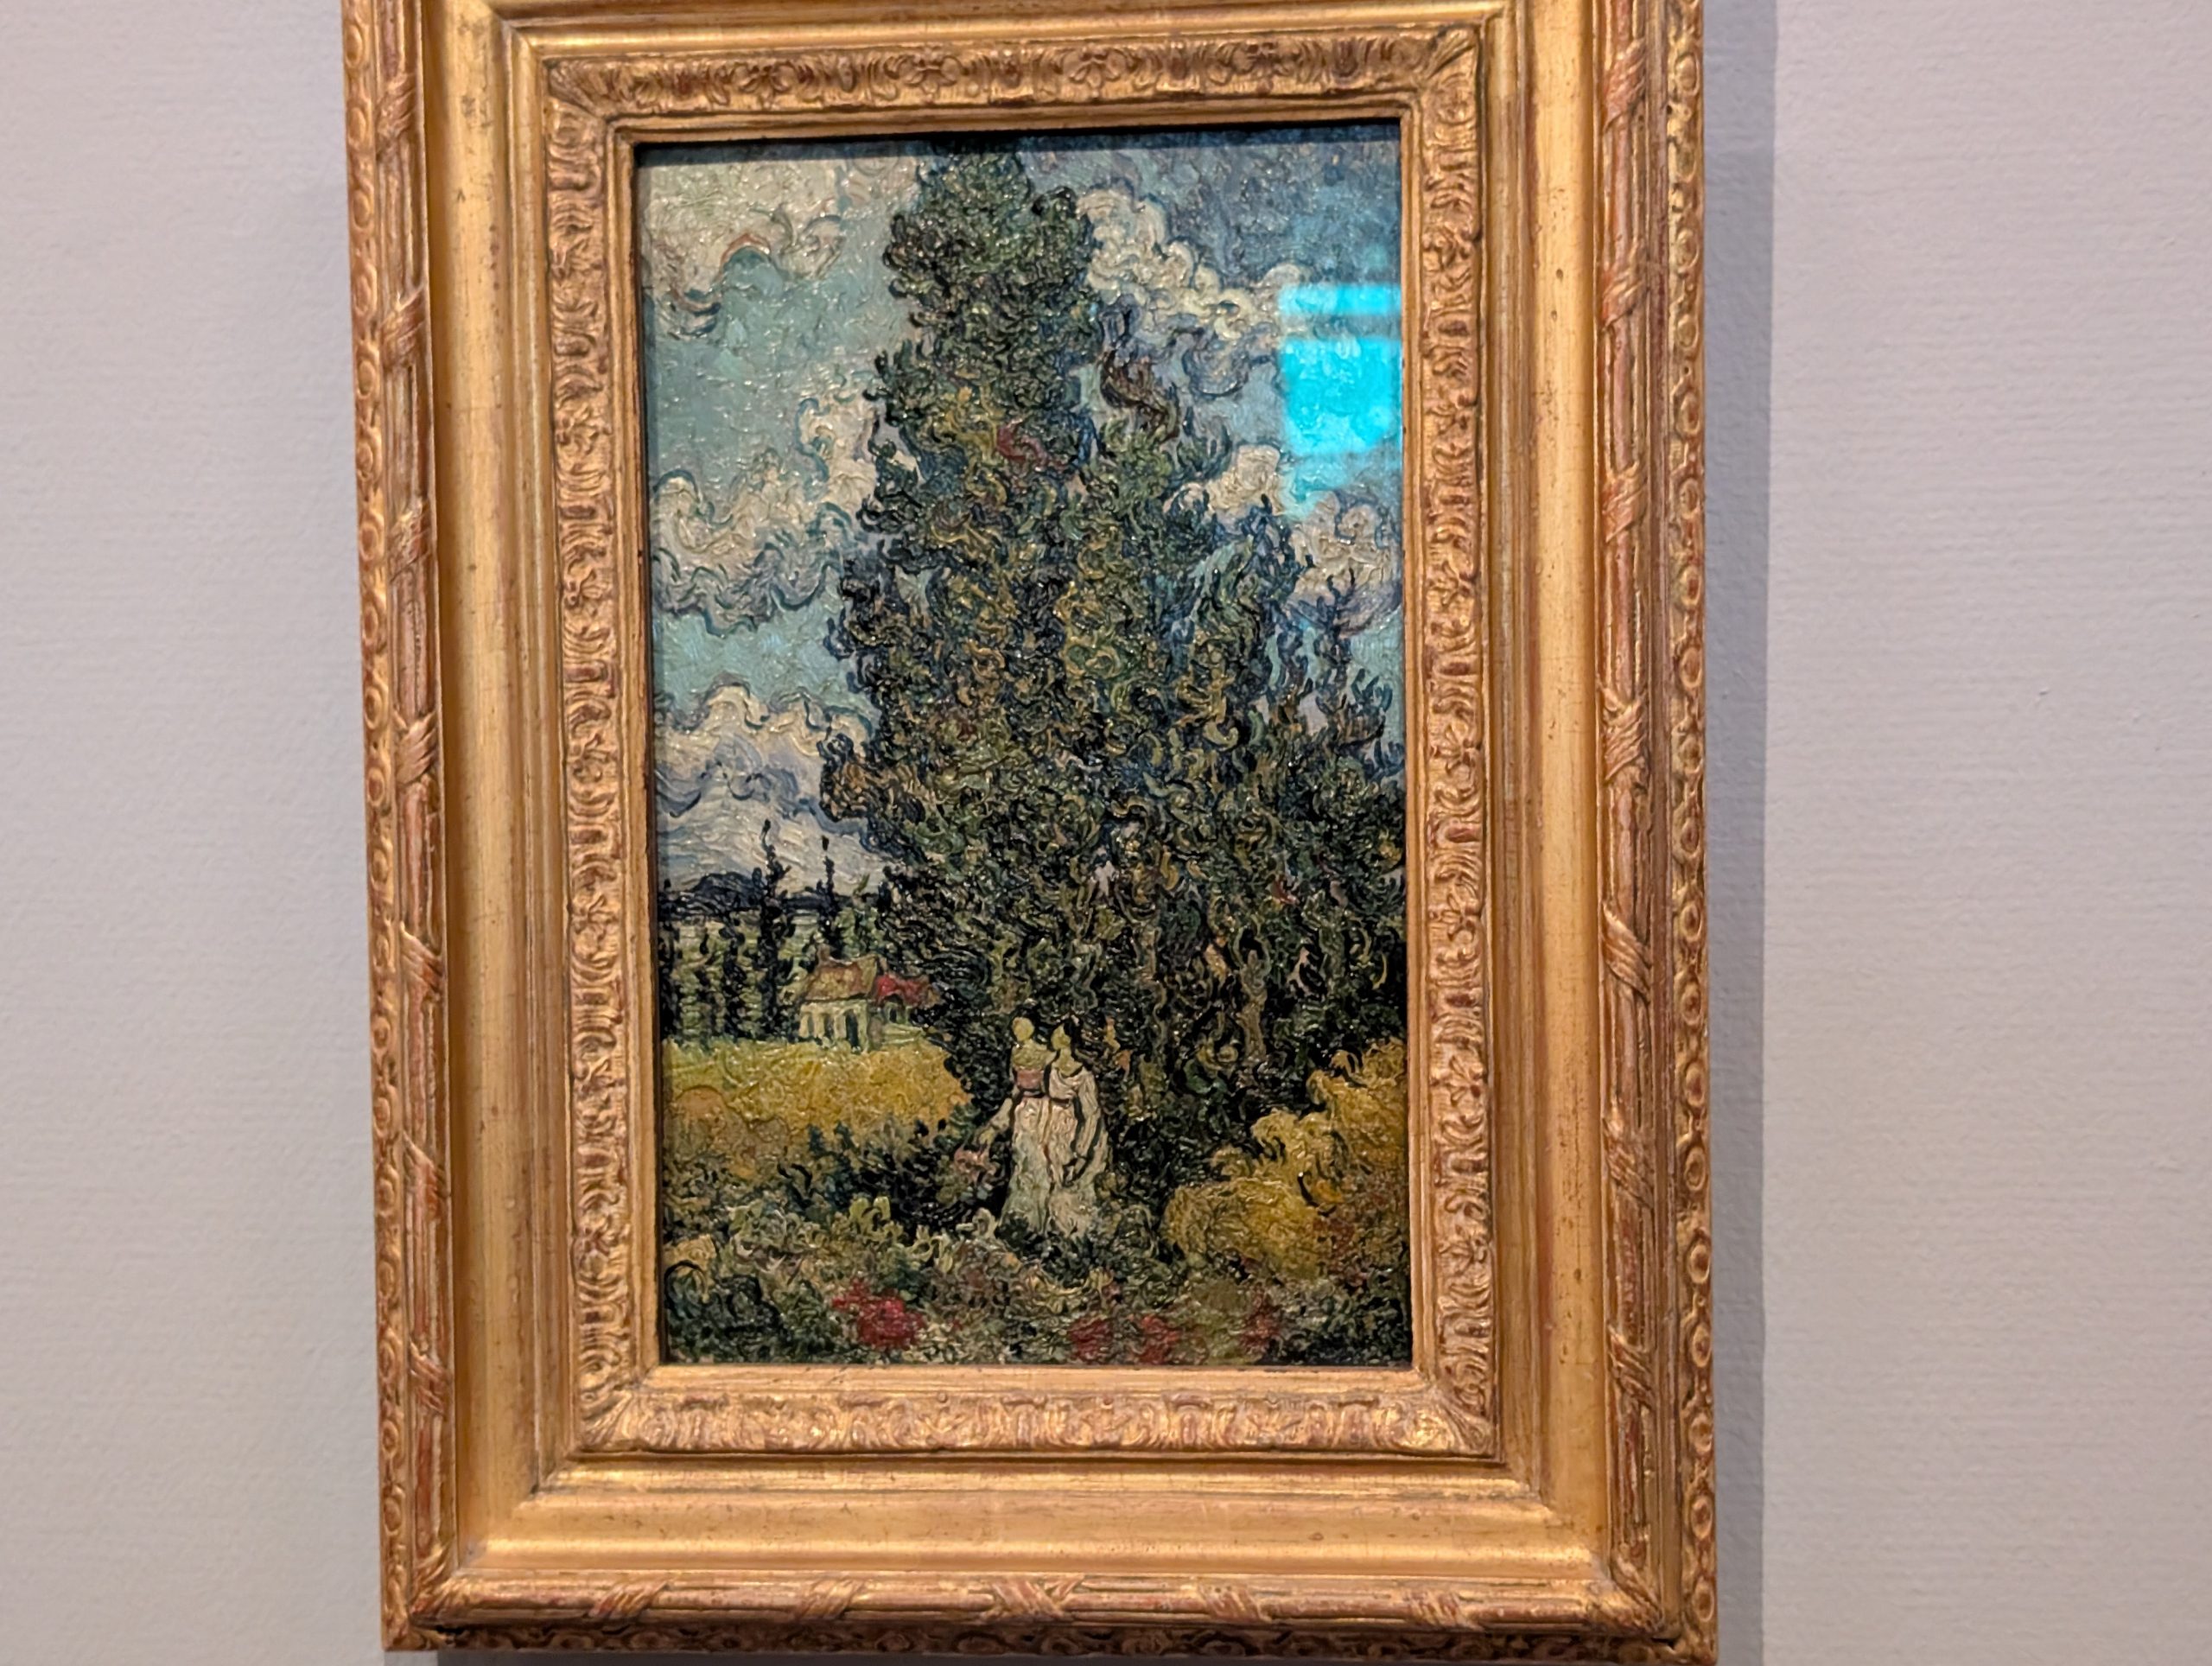
Another Van Gogh self-portrait. We were told by our guide that Van Gogh painted himself a lot because he had no money to hire a model.
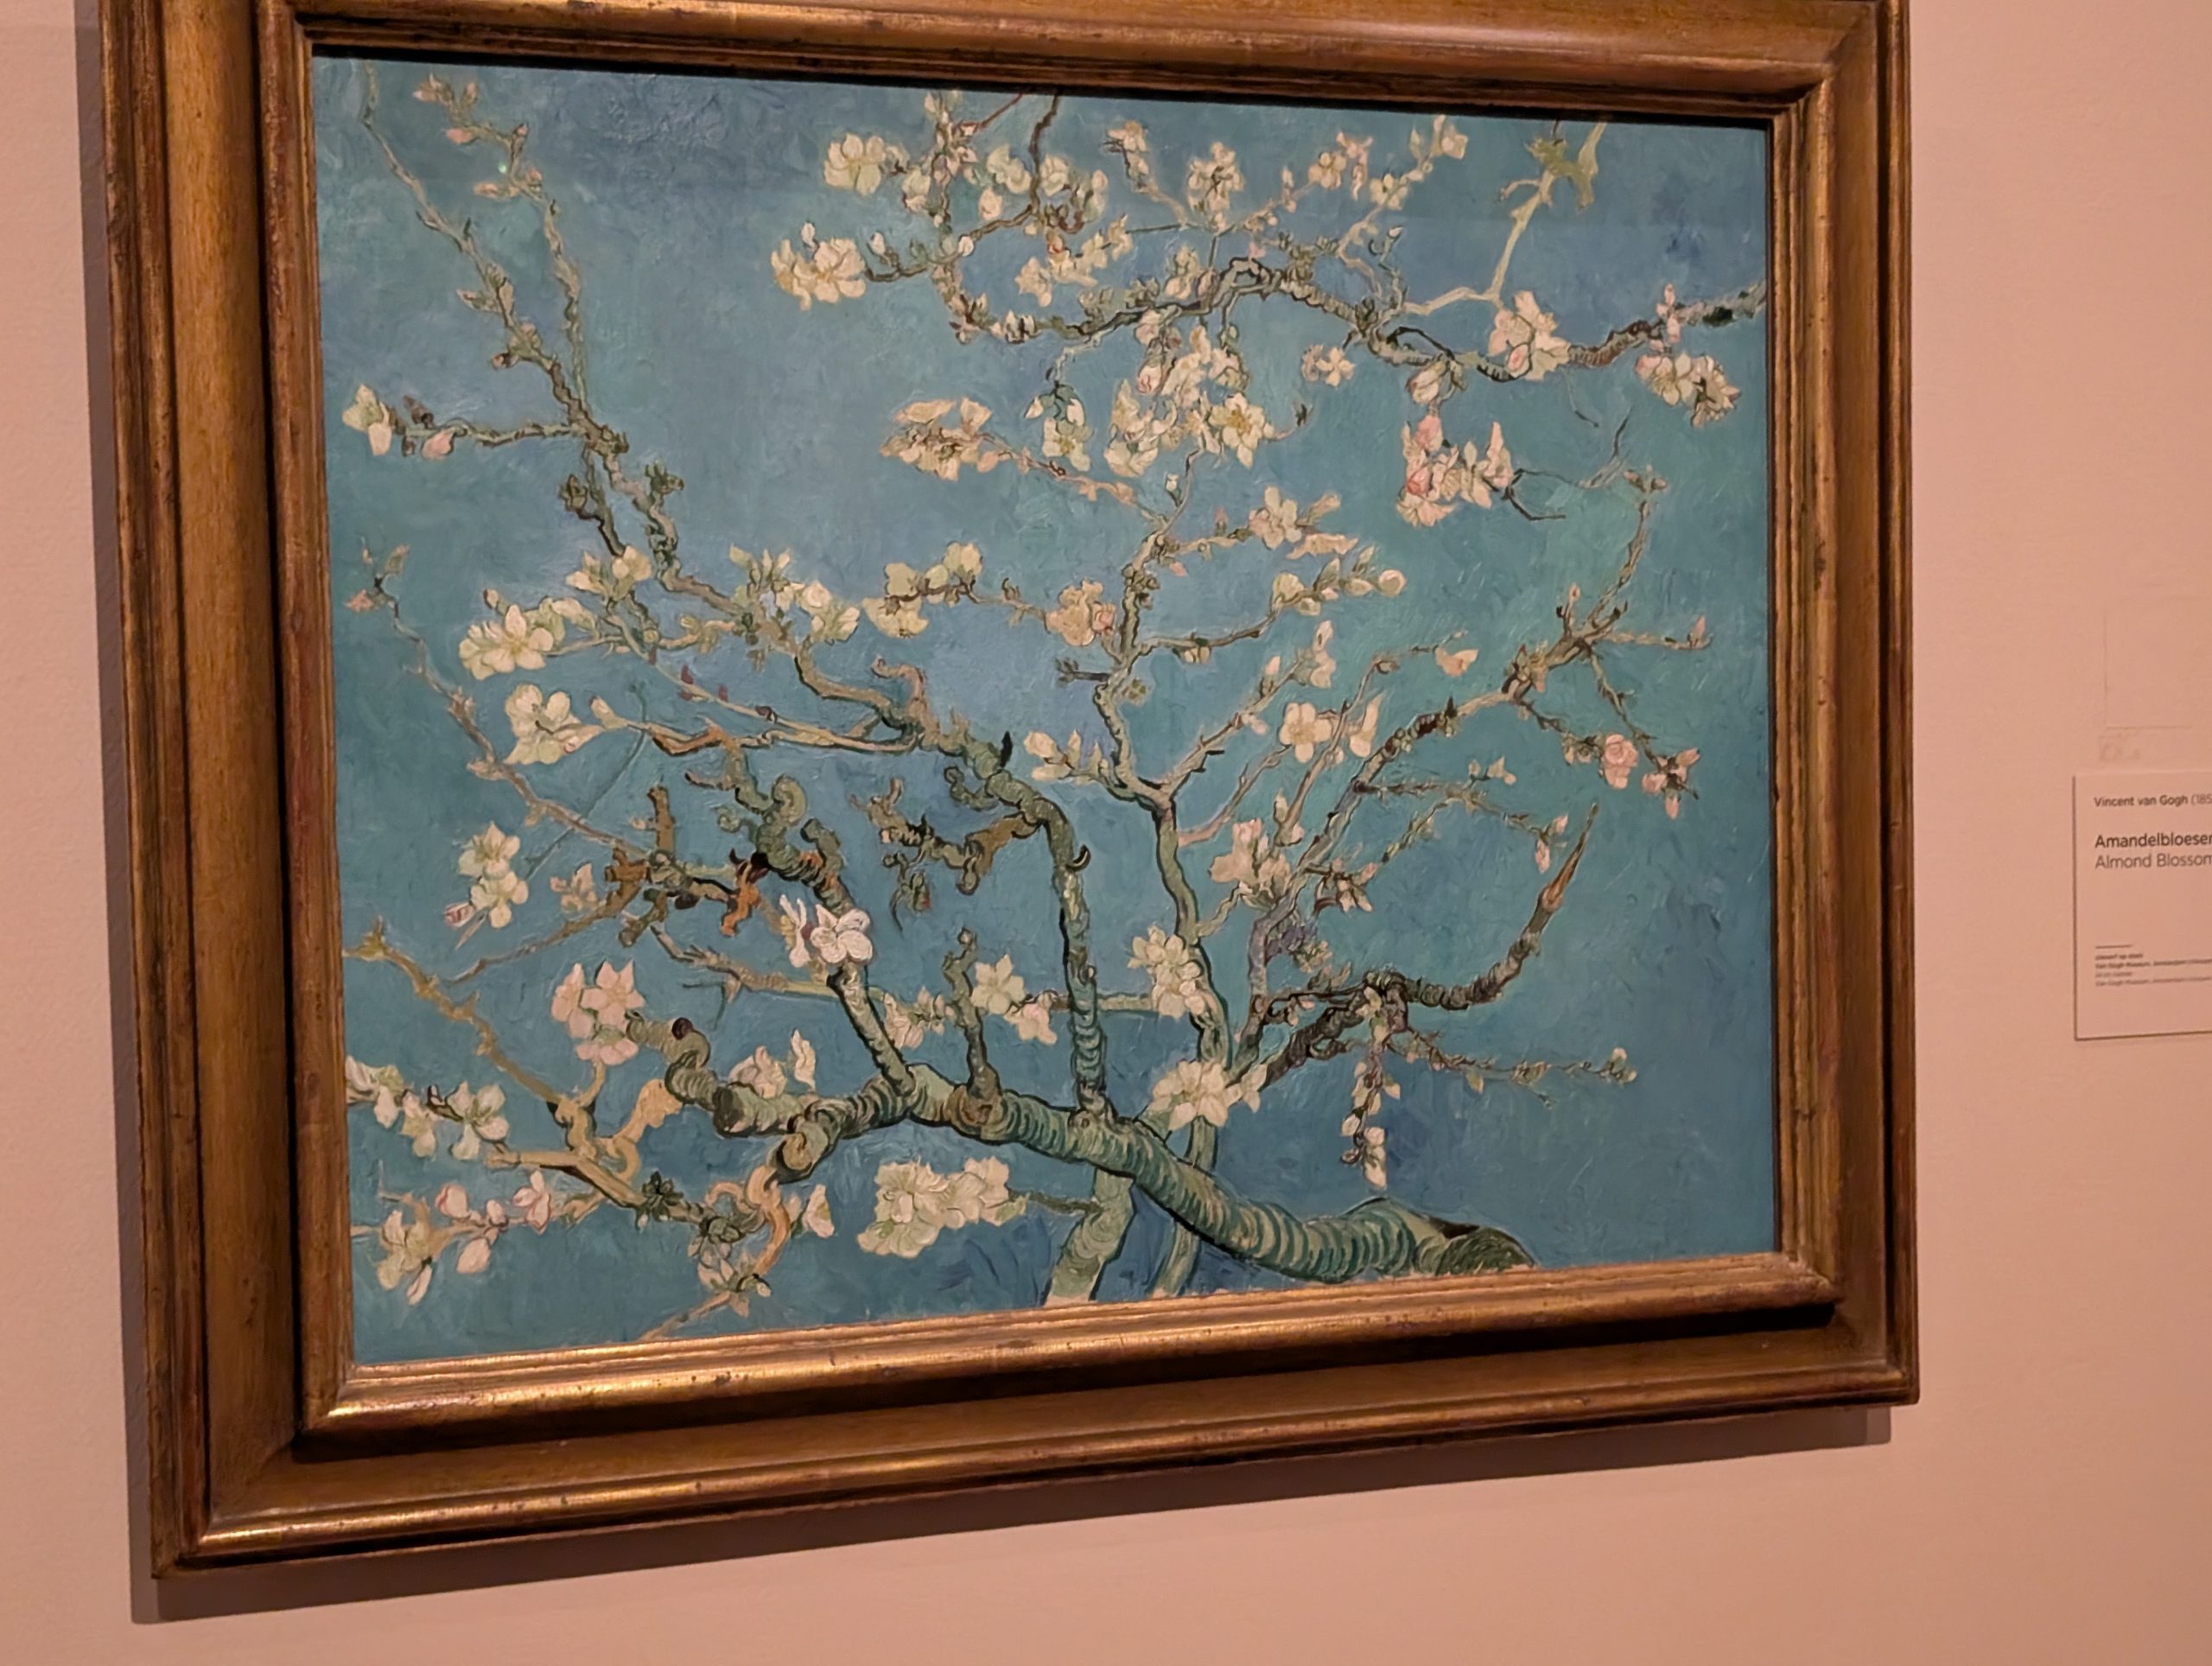
Van Gogh, in his later years, tried to replicate Japanese works of art he admired.
Another self-image.
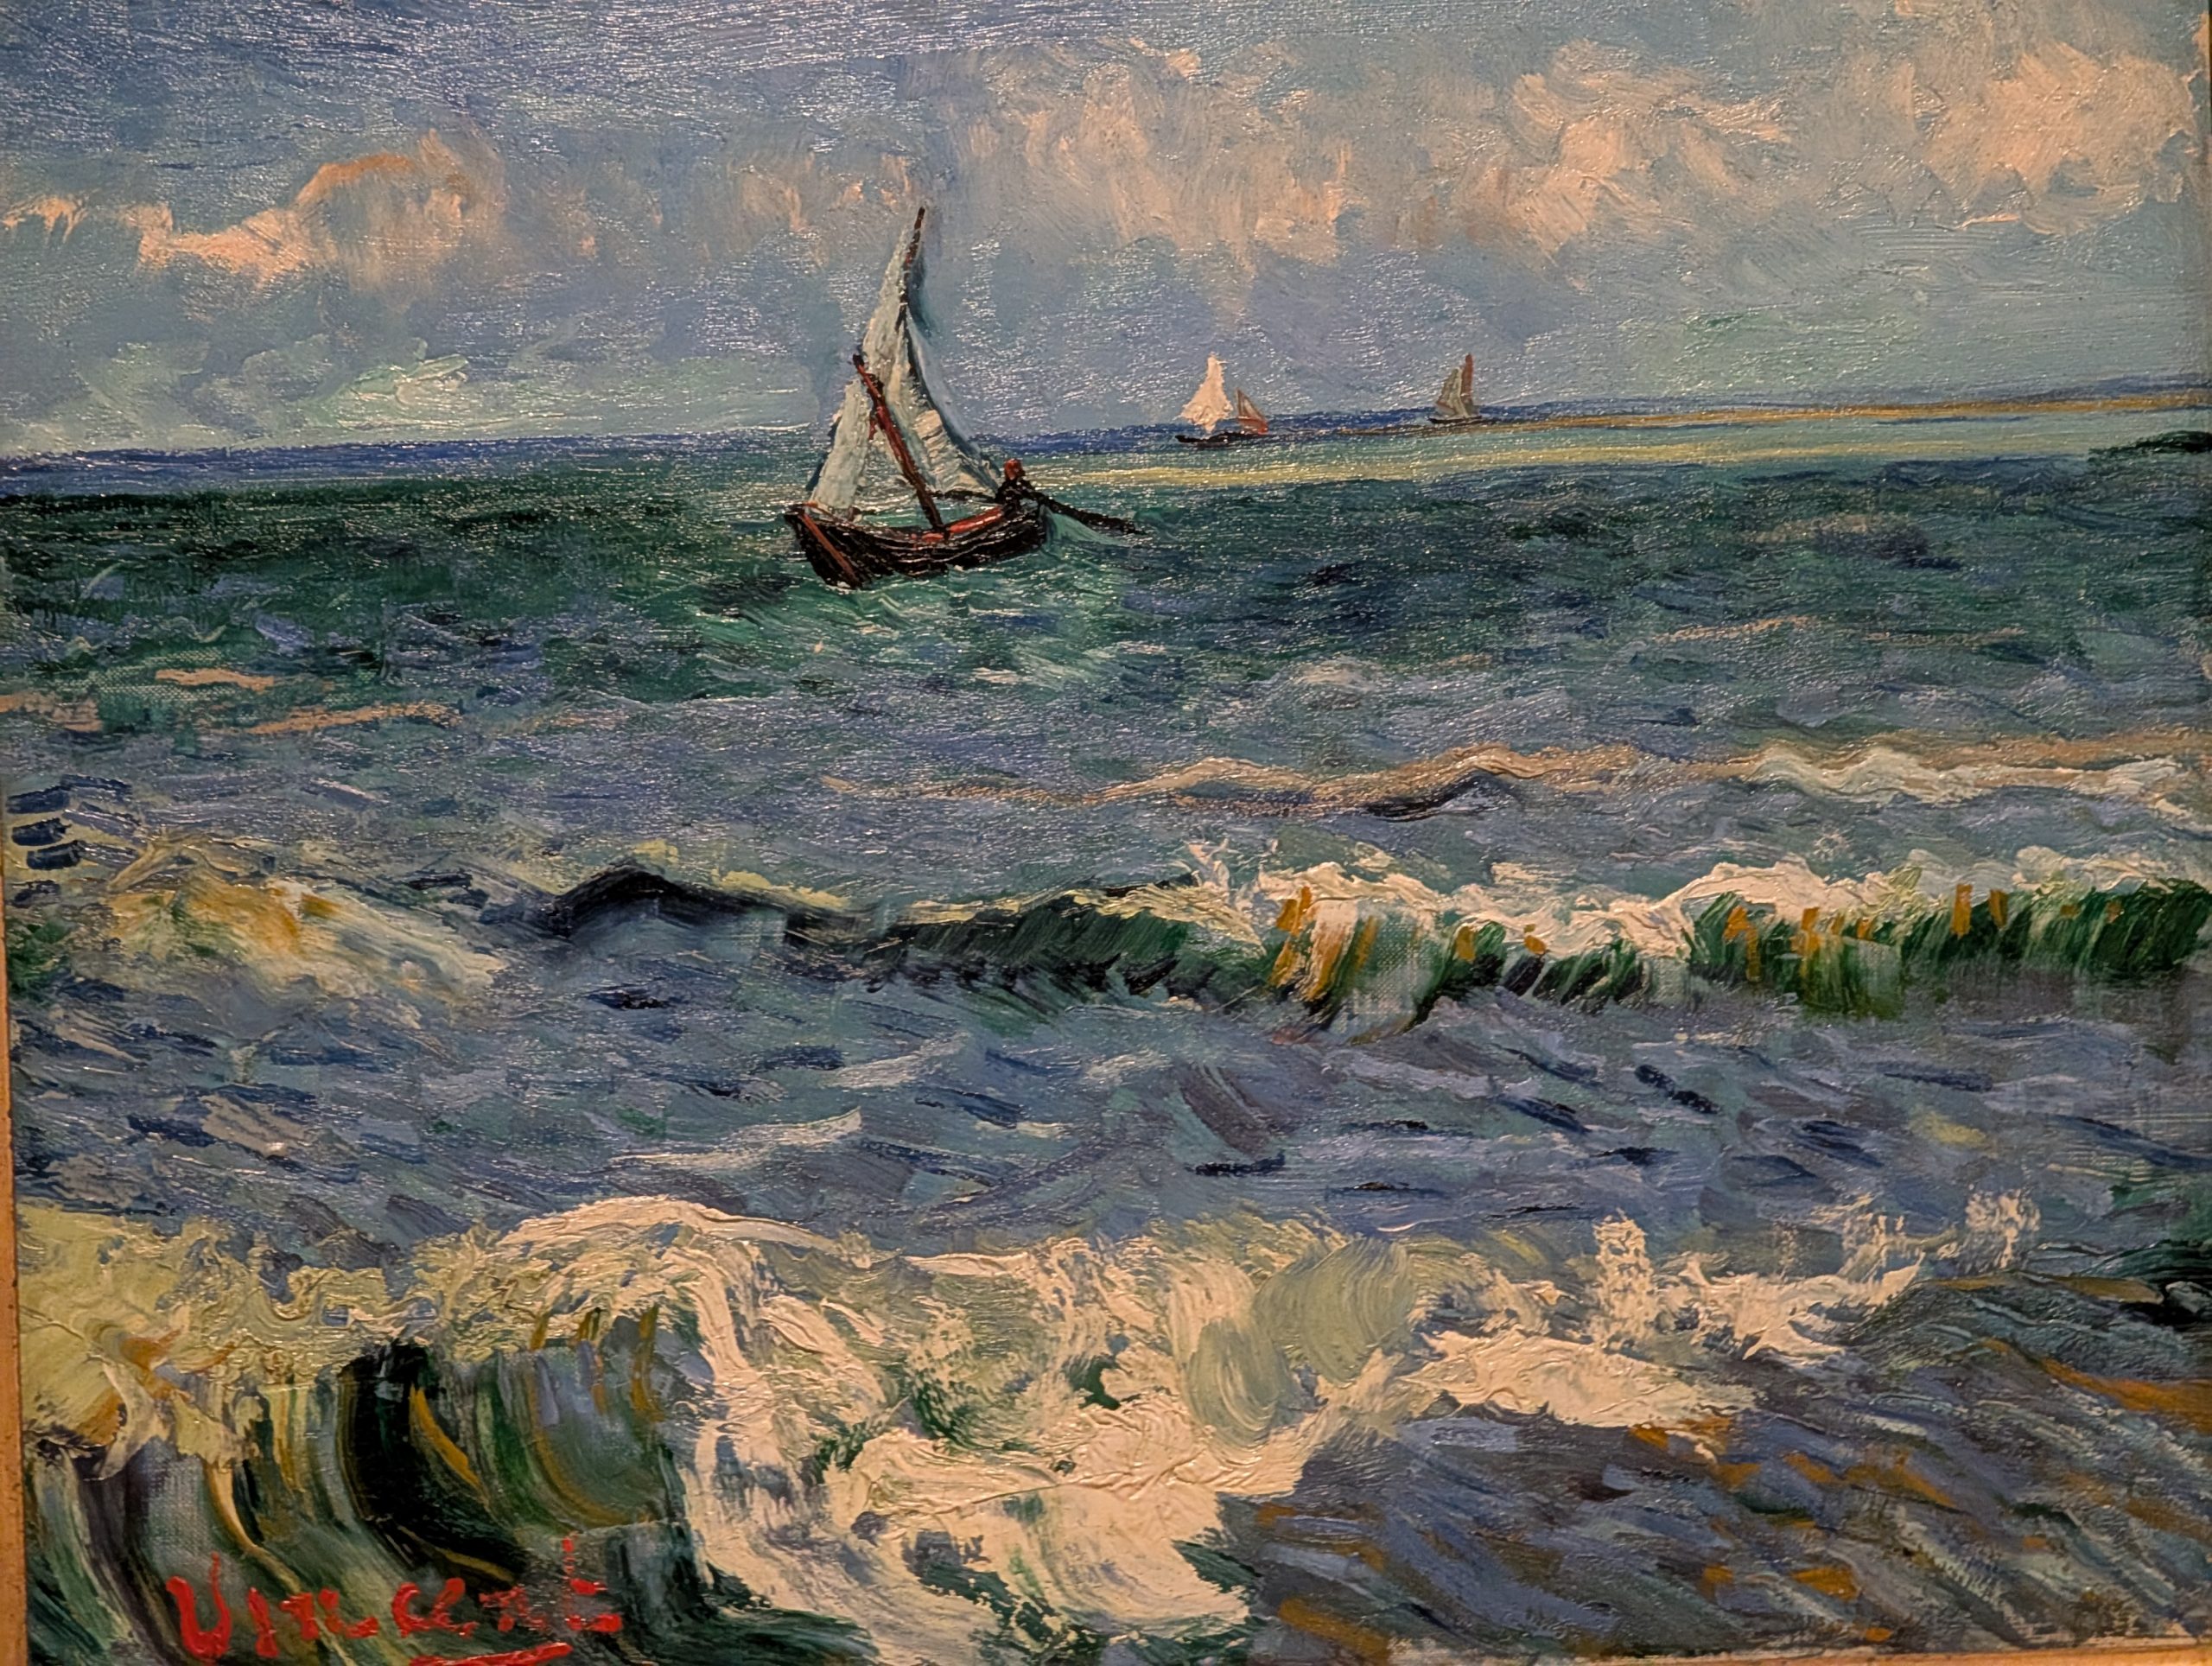
And my personal favorite. It would look so wonderful in our living room.
As you can imagine, we thoroughly enjoyed both the Rijks and Van Gogh museums. But by the time we were done with both museums and on our way back to our hotel, my feet had pretty much stopped working. Actually, I did much better on this trip than I thought I would. We did a lot of walking and standing. Much more than at home. And somehow, we both were able to keep going even if at times, the going got kind of tough. Hurray for us.
Back at the hotel we had a nice dinner at the Bistro again. Then it was time to go up to our room and for me to check in for our flight home the next day.
So, now, after typing up today’s adventure and checking in with the airlines, I read until I can no longer tell an “a” from an “o”.
I had asked the front desk people at the hotel to print our boarding passes, but I have yet to get any kind of reply. I am keeping my fingers crossed. It’s not really necessary to print your boarding passes ahead of time. But for people like me who have anxiety issues when in a foreign country and don’t know what the heck they are doing, it can cause concern.
The morning of our flight, Andy went down to the front desk and sure enough, he came back to our room with boarding passes in hand.
One thing this trip proved once again, was that most people are considerate. I had younger people give up their seats on buses for me. I had people help me with my luggage. Everyone seemed eager to help. It’s simply refreshing to experience. No one seems to assume that you are out to get them. Or in some way take advantage of them. Their readiness and openness to offer assistance is remarkable and something I would like to see happening more often in America.
Thursday, June 12, 2025 – Chez Carr
After a reasonably good night’s sleep, hard pillows and all, we both woke up ready to pack and go find us an airplane to take us home.
Our flight was scheduled to take off on June 12th at 3:20 pm and land in Vancouver at 3:55 pm on June 12th. Wonderful when a flight only takes 35 minutes (right!). But due to issues with the airplane’s toilets not flushing properly, the flight was delayed by about 1½ hours. But even on a 35-minute flight, it really is necessary to have toilets available.
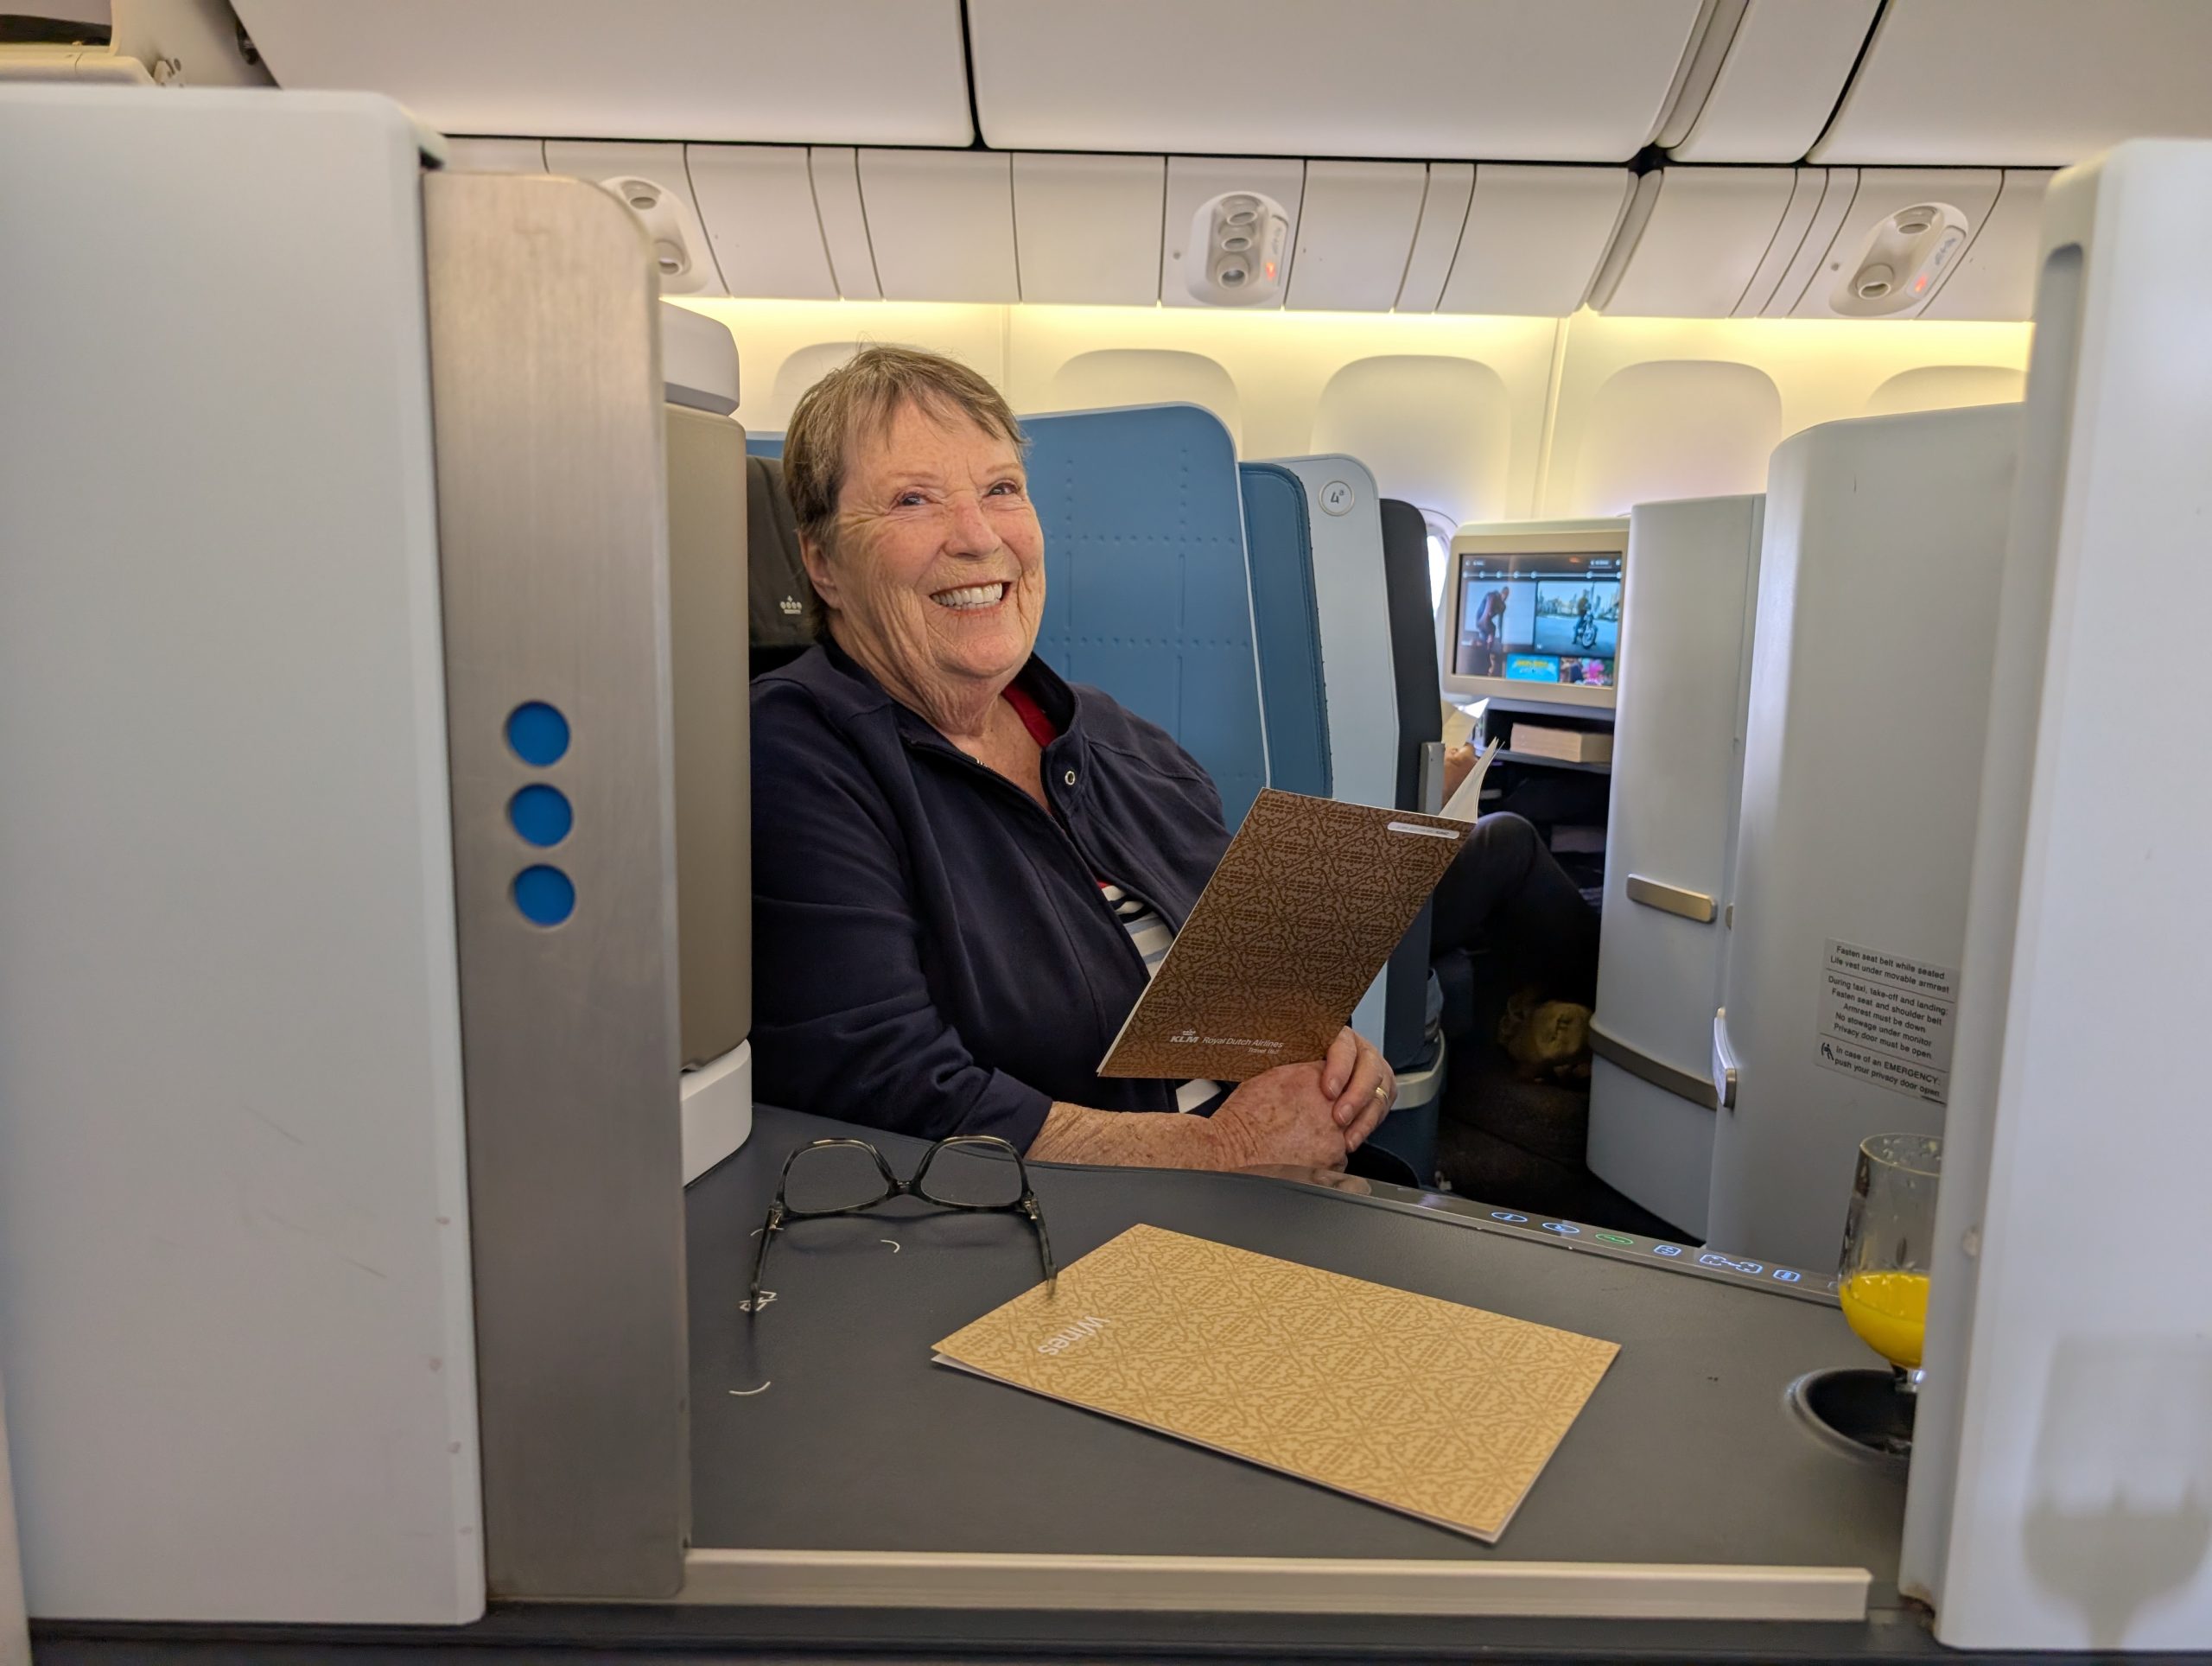
But once on board, and in our comfy business class seats, we were in the air for only 9 hours.
One thing I must mention is that KLM got us to Europe and back to Vancouver BC with no problems. However, whoever fixes the food for KLM both in Vancouver and Amsterdam should be fired. In my estimation, at least 80% of the food was inedible. They were trying too hard. Too many ingredients they felt would impress even the most sophisticated gourmet, just didn’t work well together. So, needless to say, I was not less than impressed.
But the flight attendants were marvelous. And being able to stretch out and try to sleep was lovely. But I was getting a cold, so I couldn’t sleep on the return flight.
After we landed and collected our luggage, we caught the shuttle bus back to collect our car. In all our trips, we have never experienced an easier long term car rental experience. Jetset made it so we could not go wrong.
Then on to the border crossing which took us about 90 seconds. And home by 8:45 pm and in bed by 8:47 pm. Well, not quite, but almost.
All in all, a wonderful European getaway. Even though at times during our overseas travels I have wondered if we would make it out alive (not really, but close), I would not trade even the worst of times for just staying safety at home. Because our planet has so much to offer. And the main thing you learn when you travel, is that everyone, no matter their color, ethnicity, religious beliefs, etc. all want the same thing. People everywhere want to be able to provide for themselves and their family. They want to be treated with respect. And they want to live in peace and harmony. There are no real differences in people no matter where they happen to live or how they choose to live their lives. It’s only people’s perceptions of someone who appears different that causes all the turmoil. That’s where travel comes in.
So, do yourself a favor. Travel. Go places and see things. Learn about our fabulous world.
And on that happy note, as always, peace and love to all.
Tuesday, June 3, 2025 – Beaune, France – Golf Hotel Colvert
After another fine breakfast, we (and that’s the royal “we”) trundled our luggage down to our car at about 9:30 am. Then off we went on our quest to find Hôtel Golf Colvert – Rue du Golf – Levernois – 21200 Beaune, France.
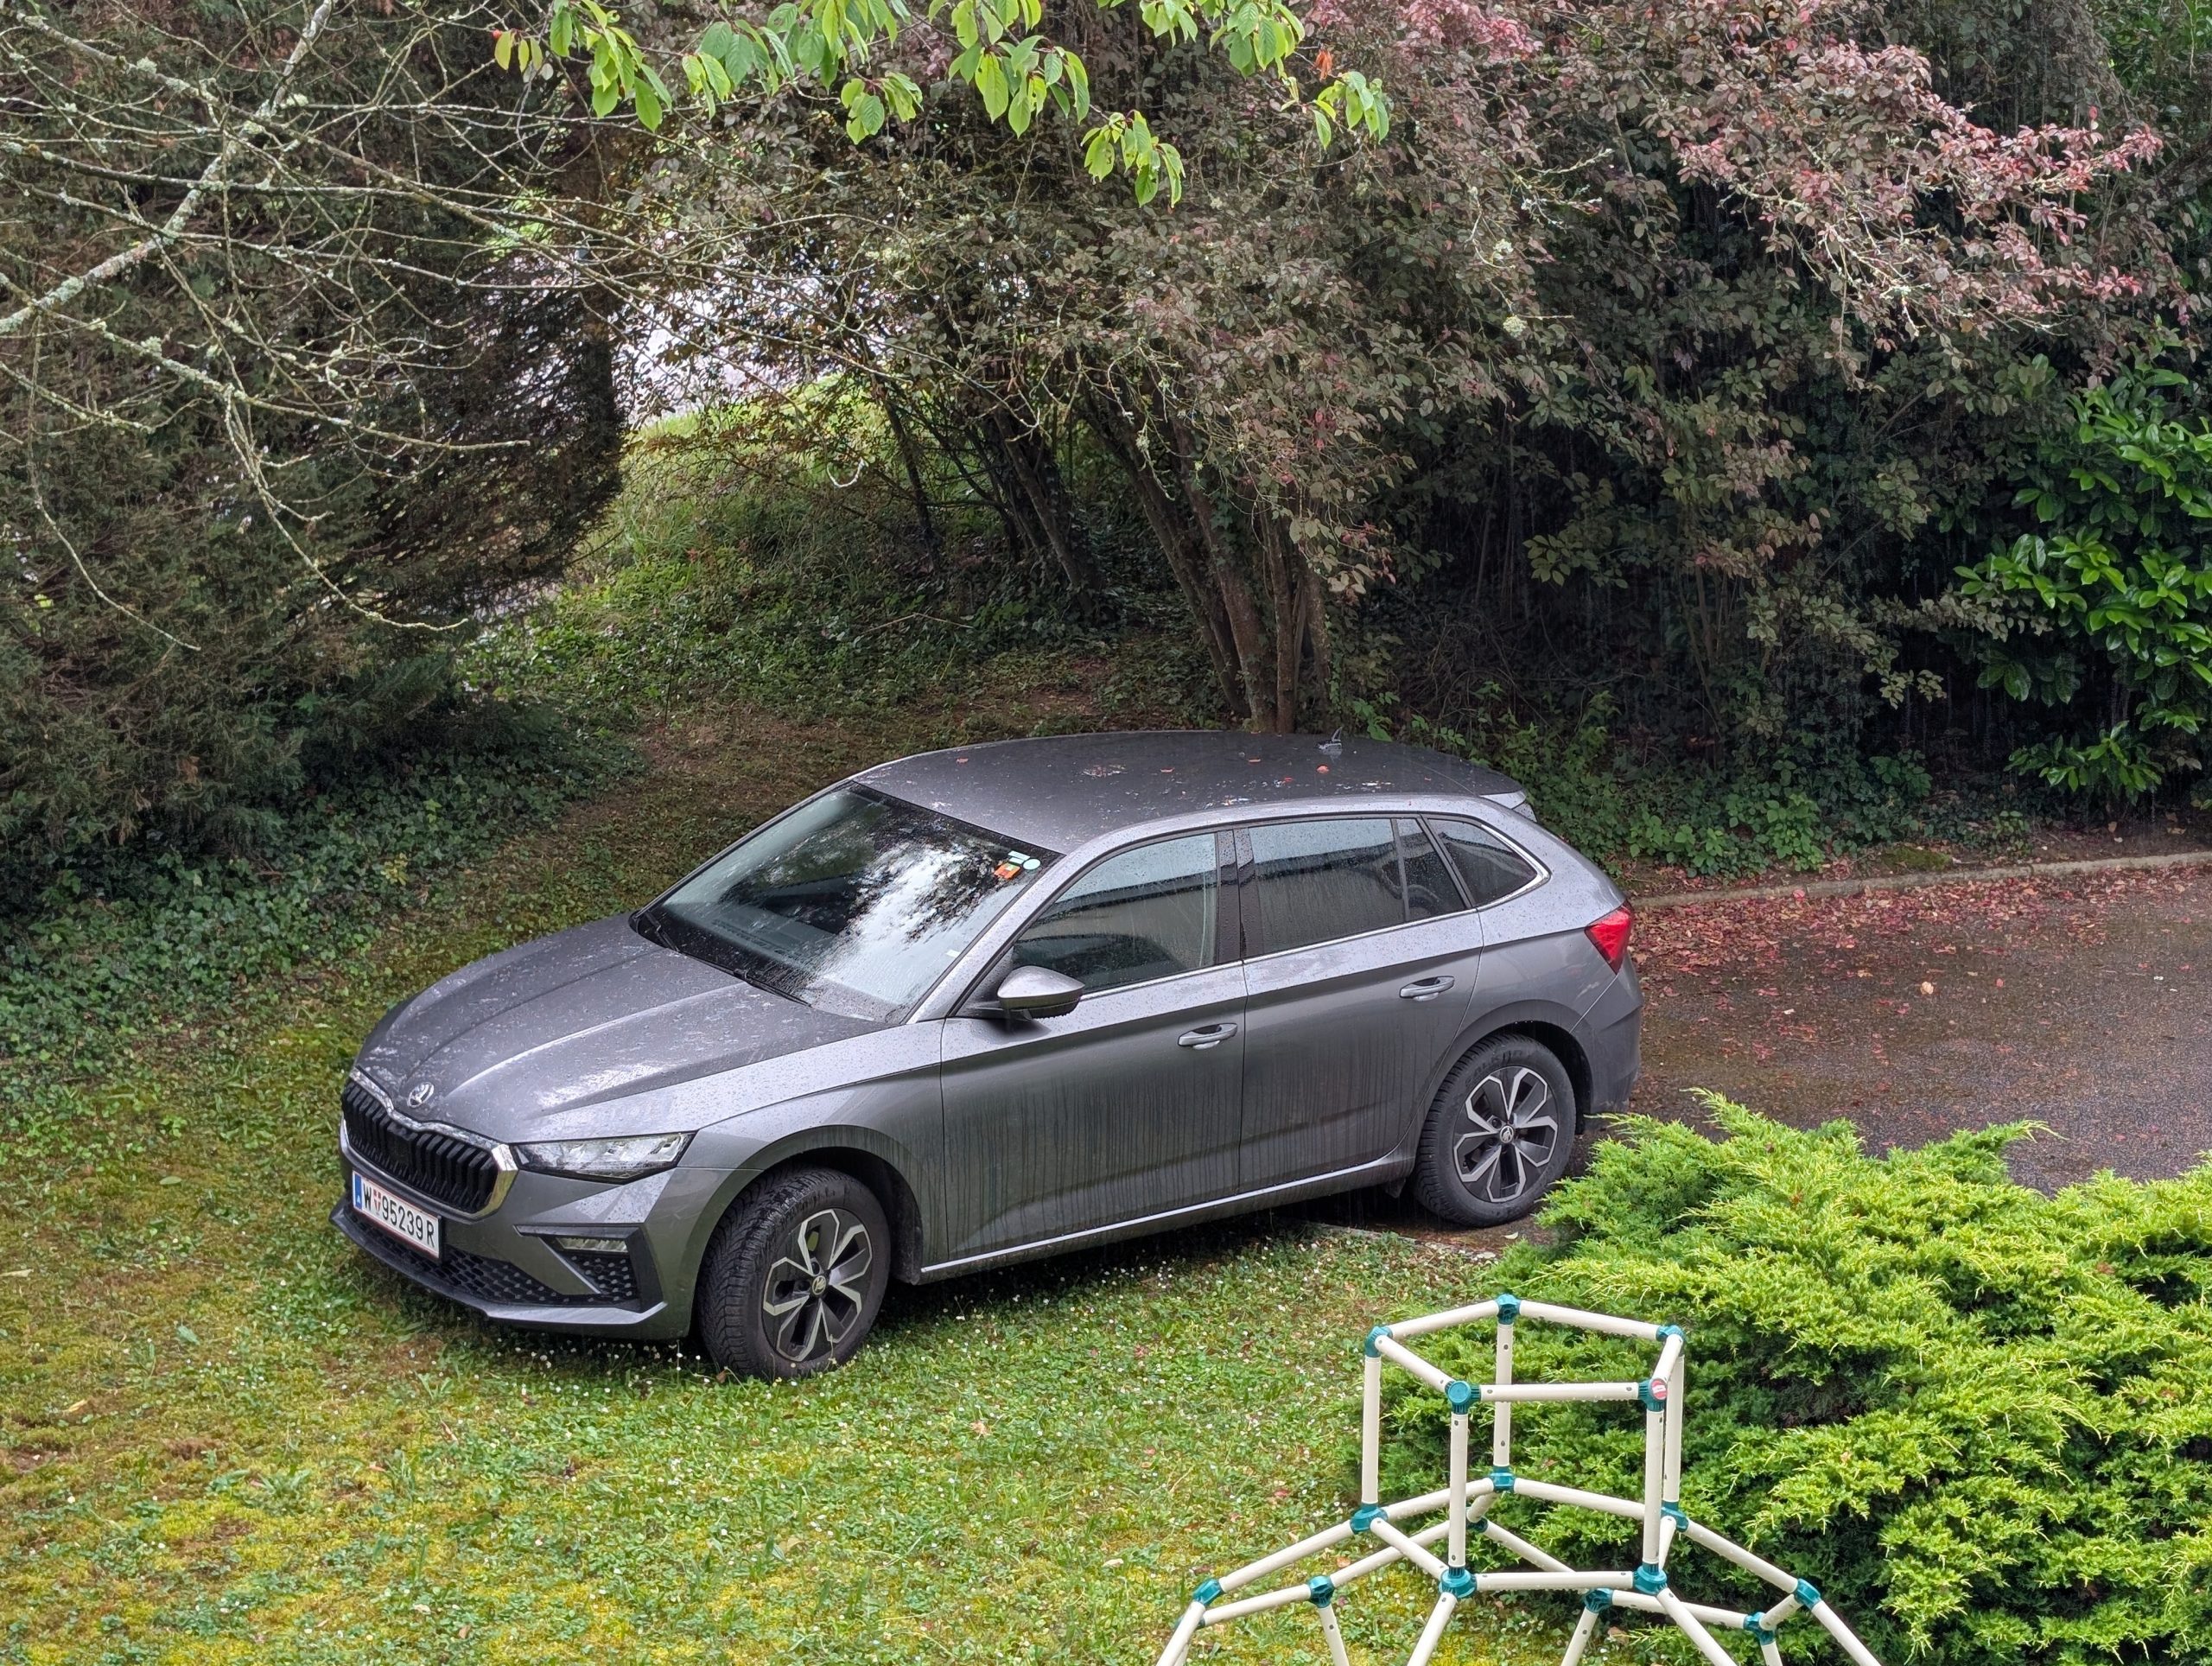
Andy had mapped it out, but while we stopped at a rest stop along the first leg of our journey for a quick shared sandwich and potty break, my genius husband realized that there was a lovely woman who lived in his cellphone that would talk to us all the way to our hotel. Now, she took us on a rather unbeaten path. But with her directions, we didn’t make even one wrong turn. We named her Rhoda. Rhoda Scala, to be exact, since the model of our Skoda rental car is a Scala. She seemed fine with her new name because she didn’t direct us into a river or over a cliff.
When we arrived at our hotel, we were greeted by a very helpful young man. We asked about dining opportunities, and he gladly made reservations for both tonight and tomorrow night.
The entire ride today was through beautiful country. We were initially worried that we wouldn’t enjoy the countryside as much as we did the Alps, but we soon realized that so far on this trip, we hadn’t seen anything that wasn’t lovely to behold. And unlike many agricultural areas of the US, things are different in this region. All the land is not cultivated the way it is in America. You can’t look in any direction without seeing a stand of trees. There are as many forest areas as there are fields of crops or livestock. None of this, take every tree down and plant, plant, plant. It is truly lovely to witness what at least appears to be the case, that generations of people who have lived off this land are conscientious about preserving it for future generations.
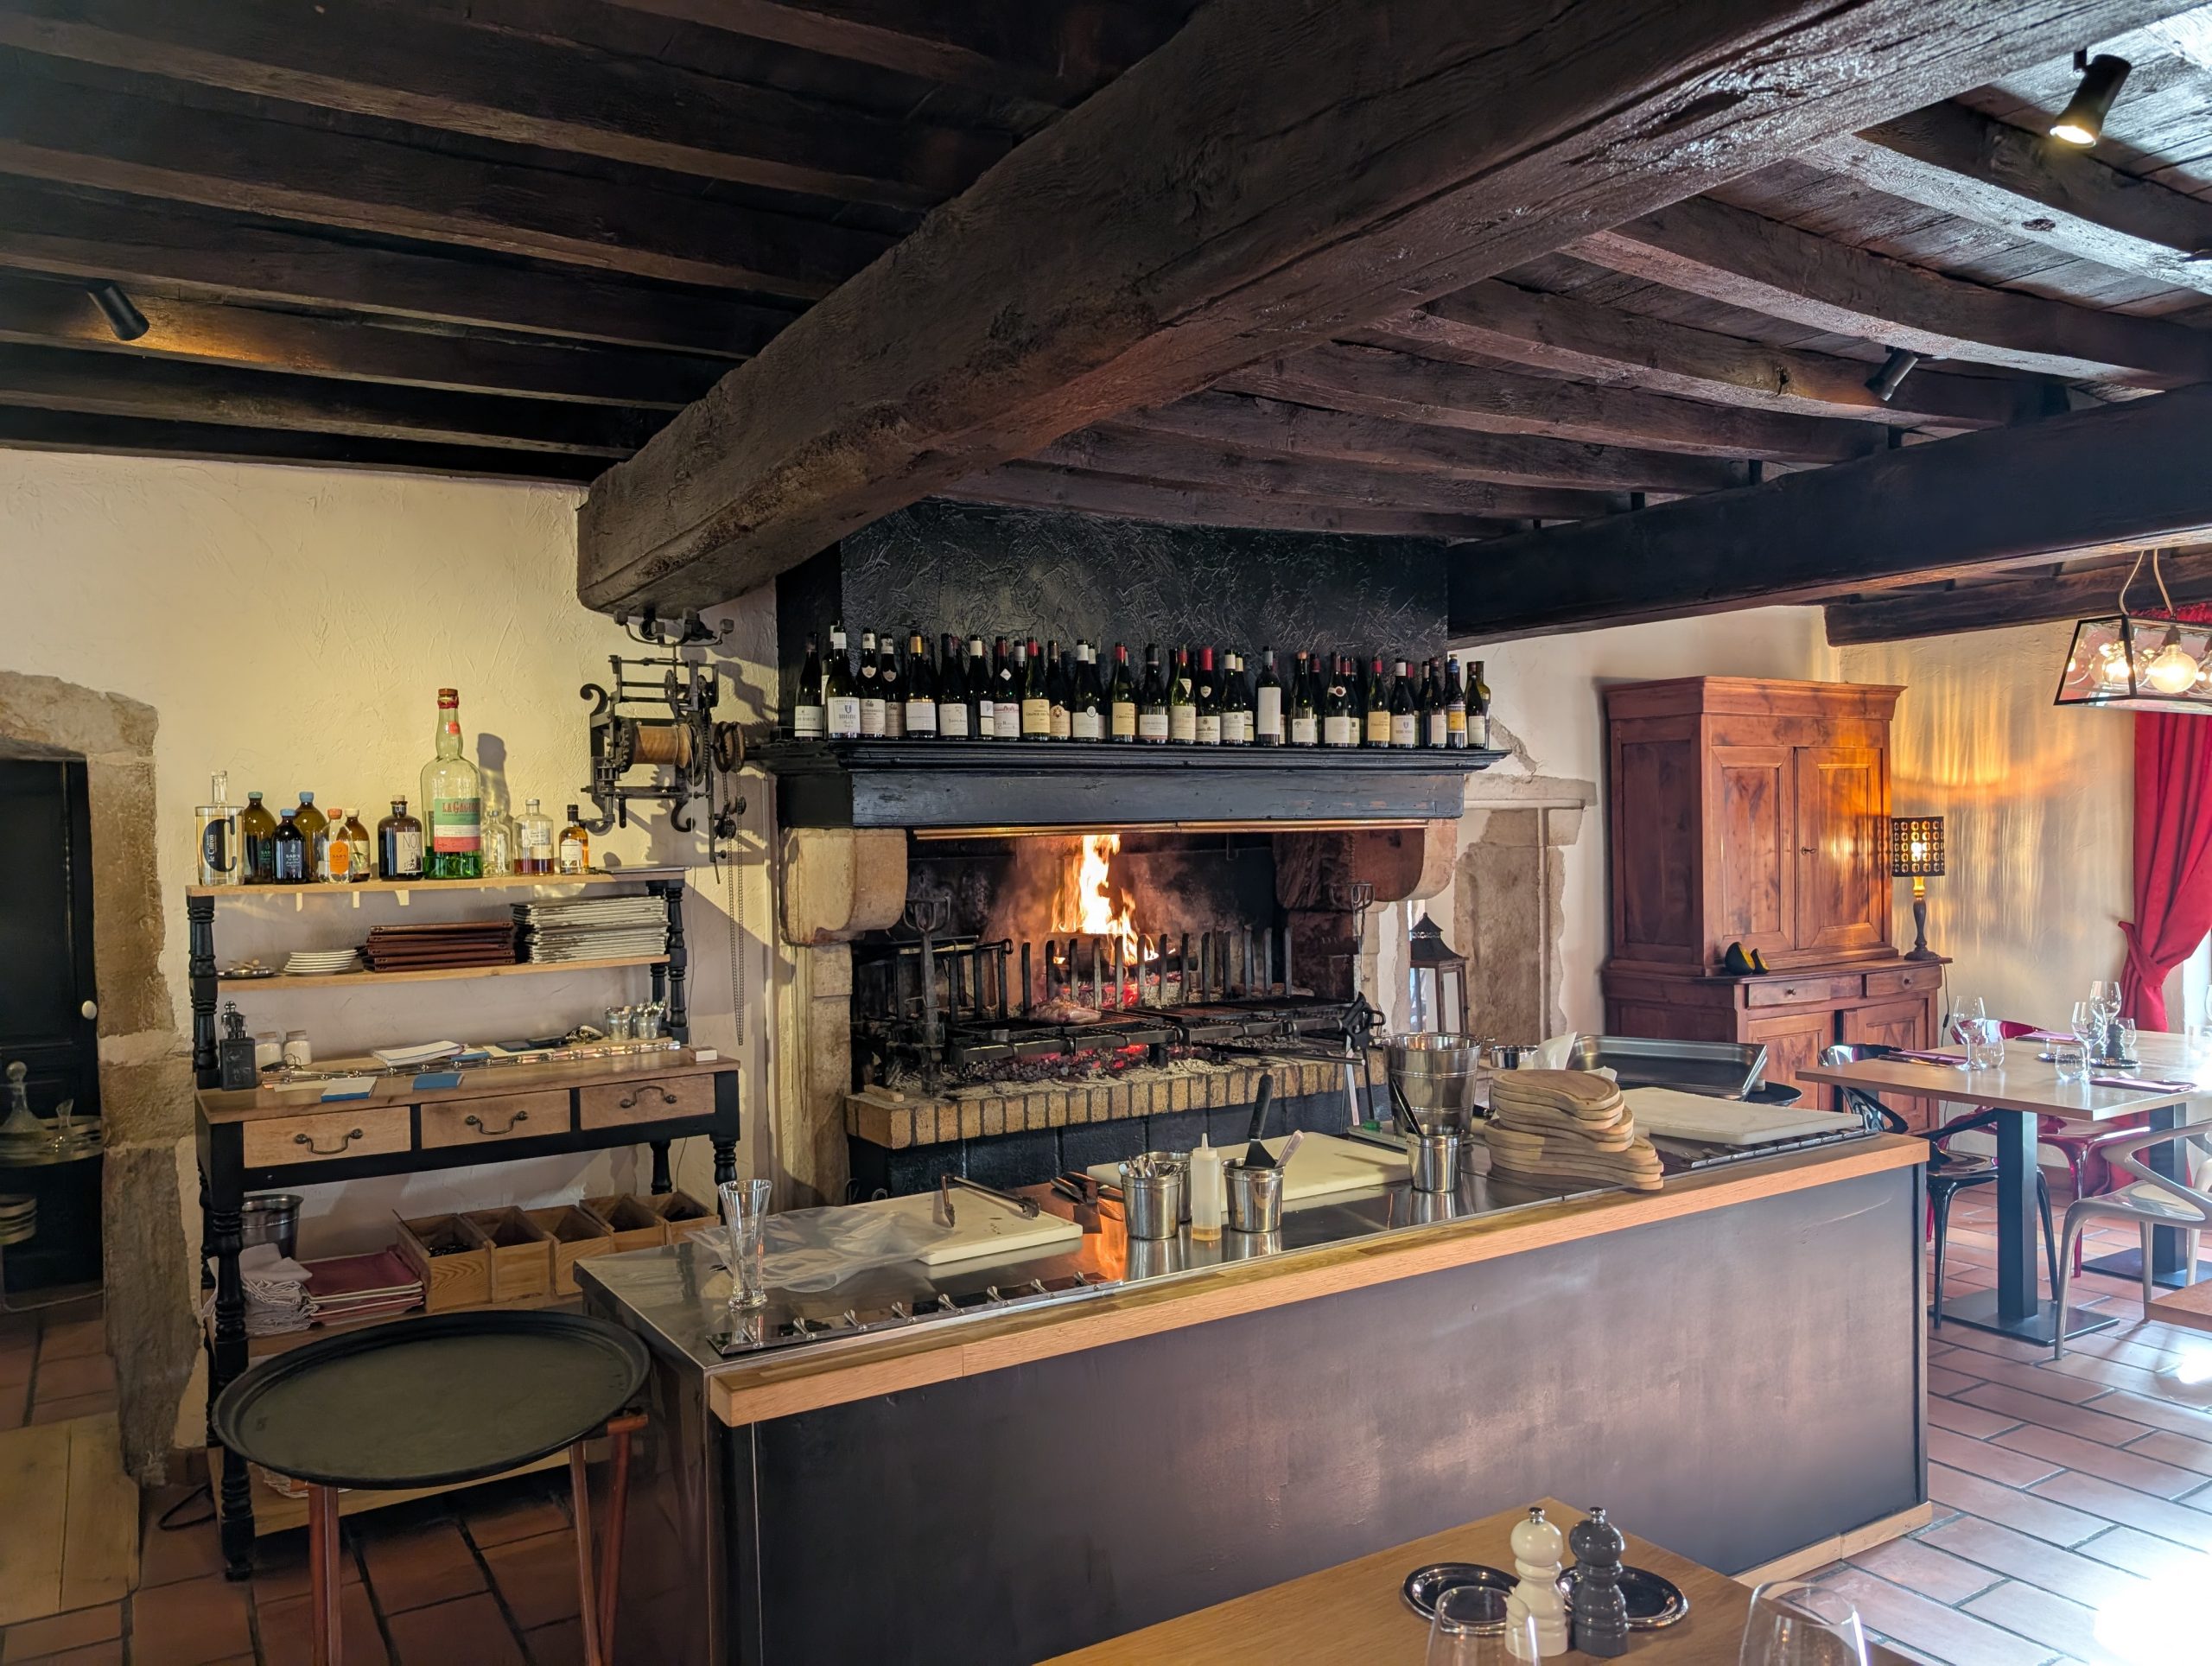
After getting settled in our room, very nice BTW, we took turns using the one computer we brought along, while the other settled out on our small deck with Kindle in hand. After a quiet couple of hours, it was time to head off for dinner at La Garaudière, which specializes in regional homemade cuisine with a great selection of different meats cooked over an open fire.
Andy pronounced it one of the best meals he had ever had. He ordered steak, I decided on chicken, which was delicious, but very hard to cut. So, there I sat, trying to saw into the half bird with a table knife. Finally, I used my hands to break the various parts into reasonable sized parts. But because the chicken had been cooked in basically a fireplace, by the time I was done, my hands were covered in black embers. Oh, what fun it is to look like a sophisticated world traveler with blackened hands! Oh well, it was absolutely apparent that we were not even from another European nation, because we even hold our utensils differently. In this part of the world, you hold your knife in your right hand, and your fork upside down in your left hand. Then you use your knife to shovel or push food onto your fork. Then you put the food in your mouth with the fork still wrong side down. Weird, but effective. But a sure sign that Americans don’t even have a clue as to how to use a fork and knife properly!
After dinner, which lasted an hour and a half, it was back to our hotel. There was some kind of wine tasting event still in progress, and no place to park our car. So, the nice very English concierge, told us to just park on the grass.
Truly another wonderful day in Europe.
Wednesday, June 4, 2025 – Beaune, France – Golf Hotel Colvert
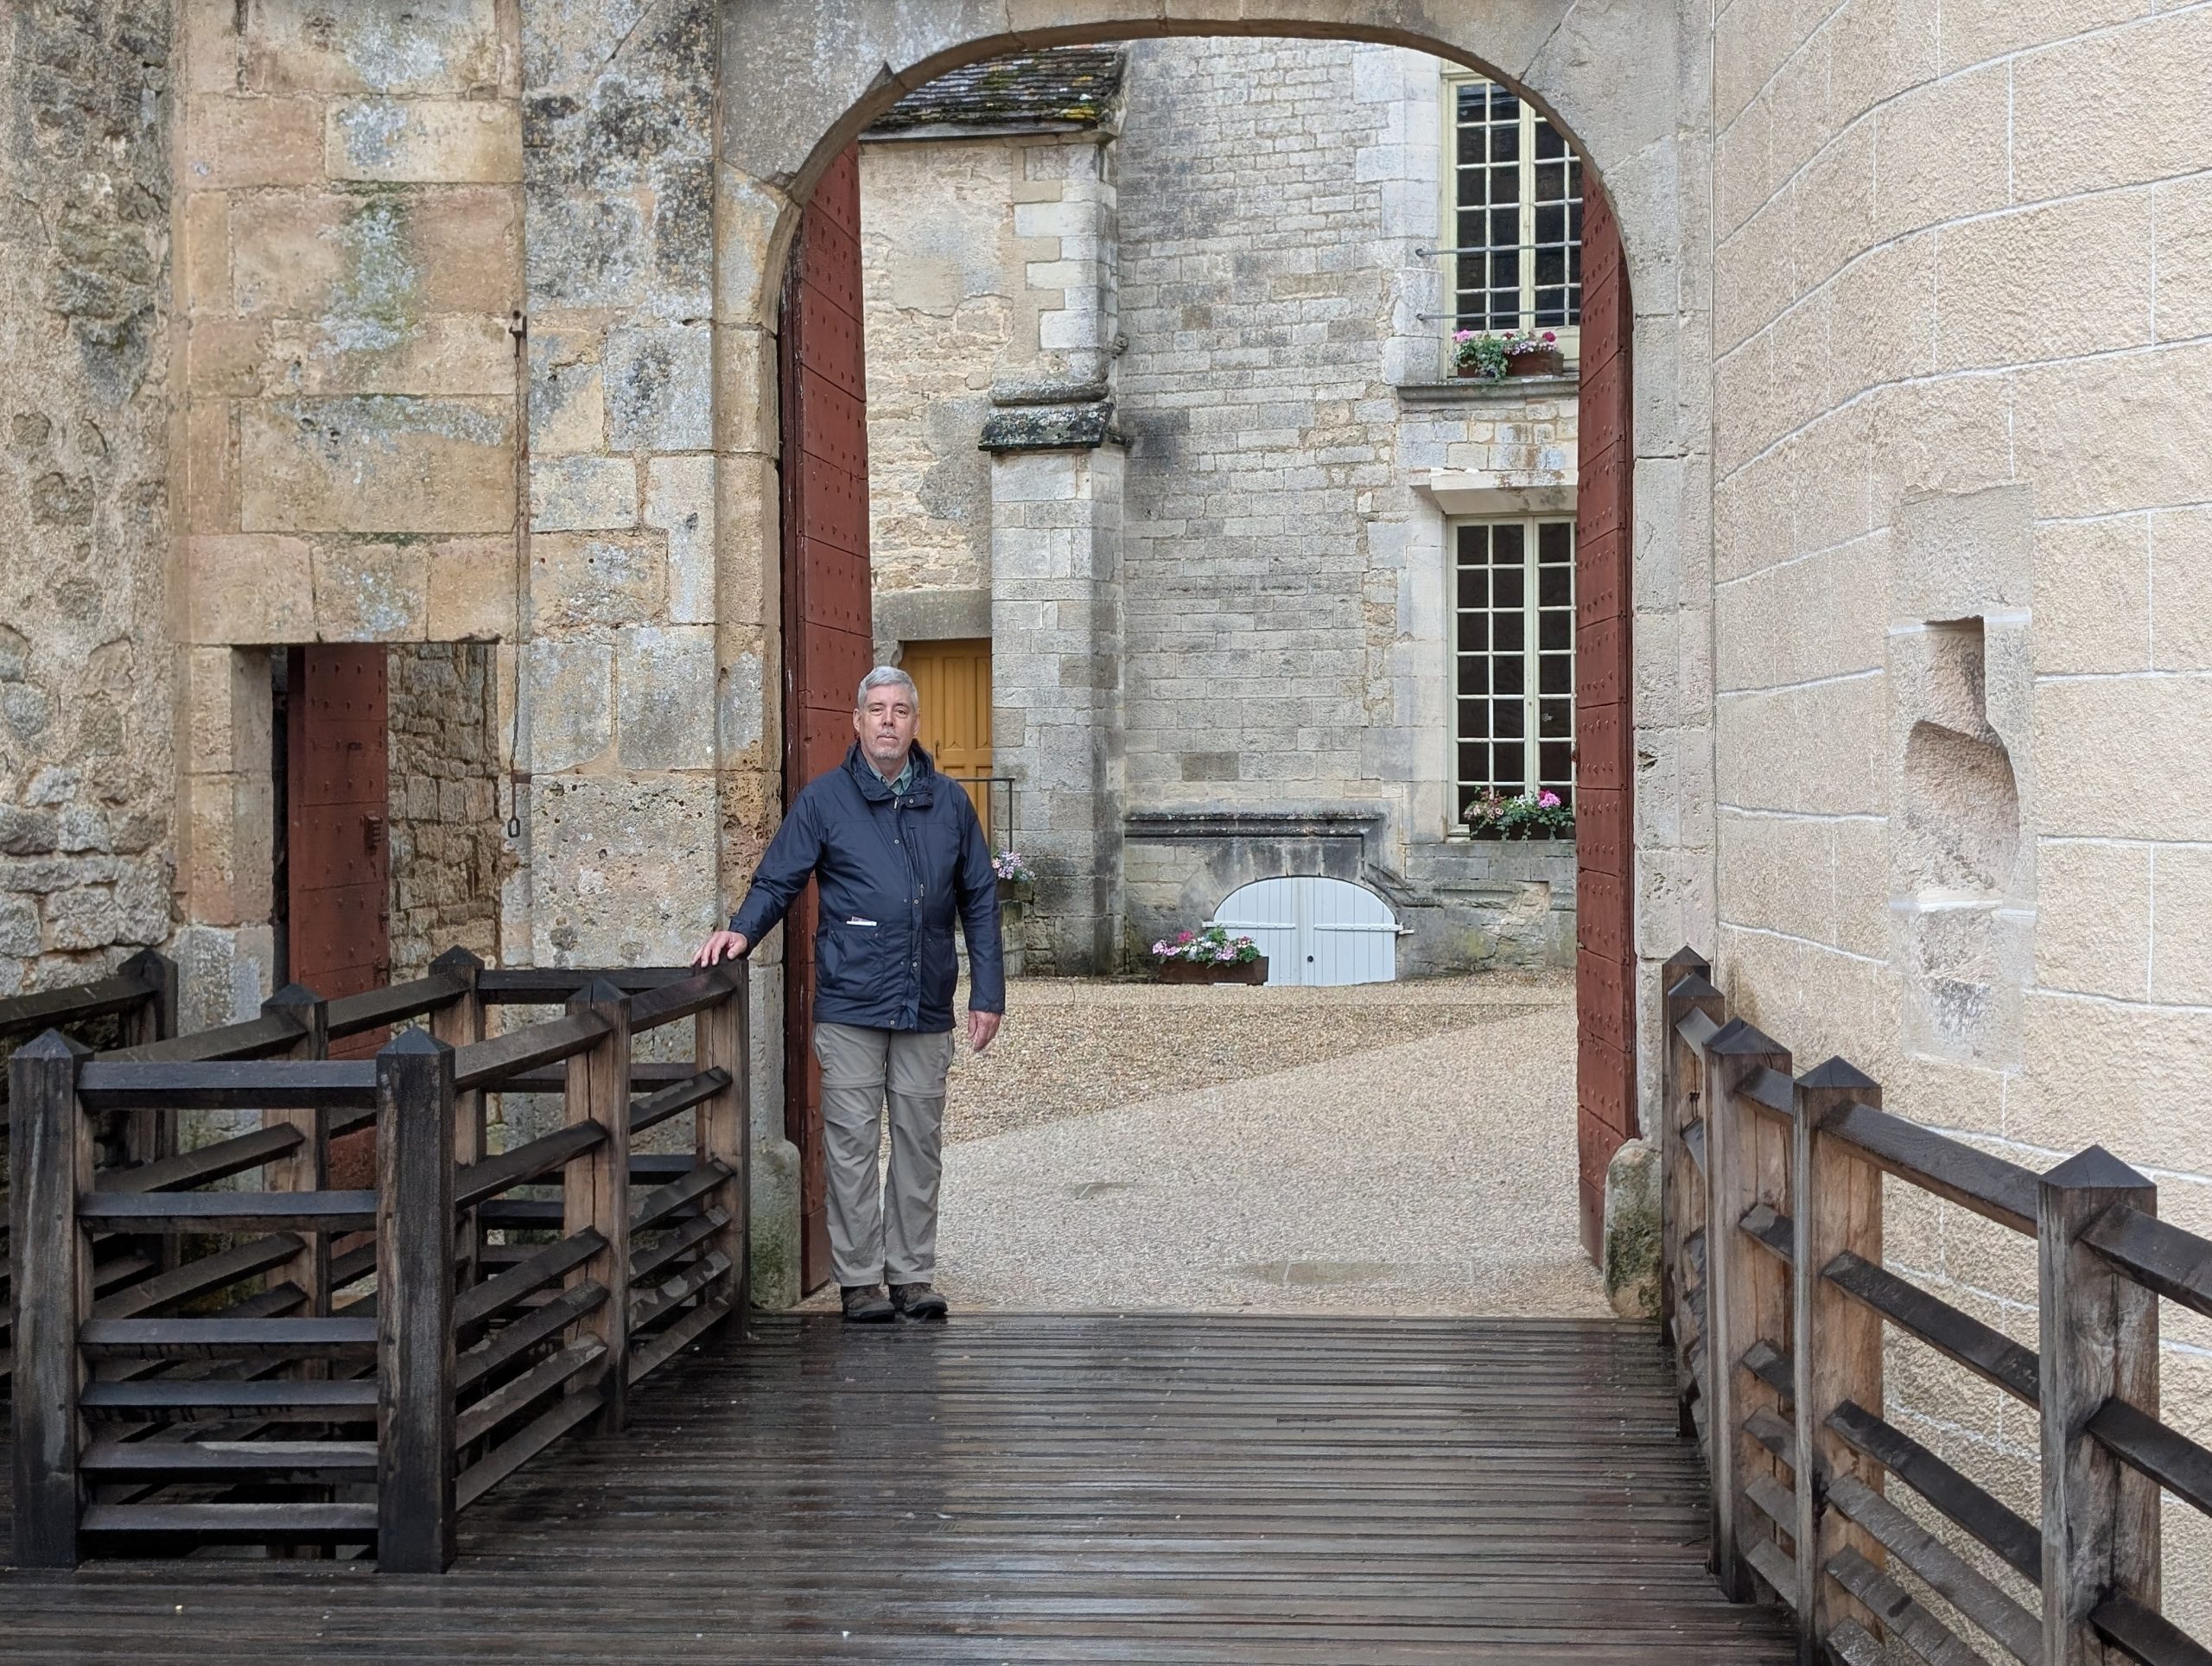
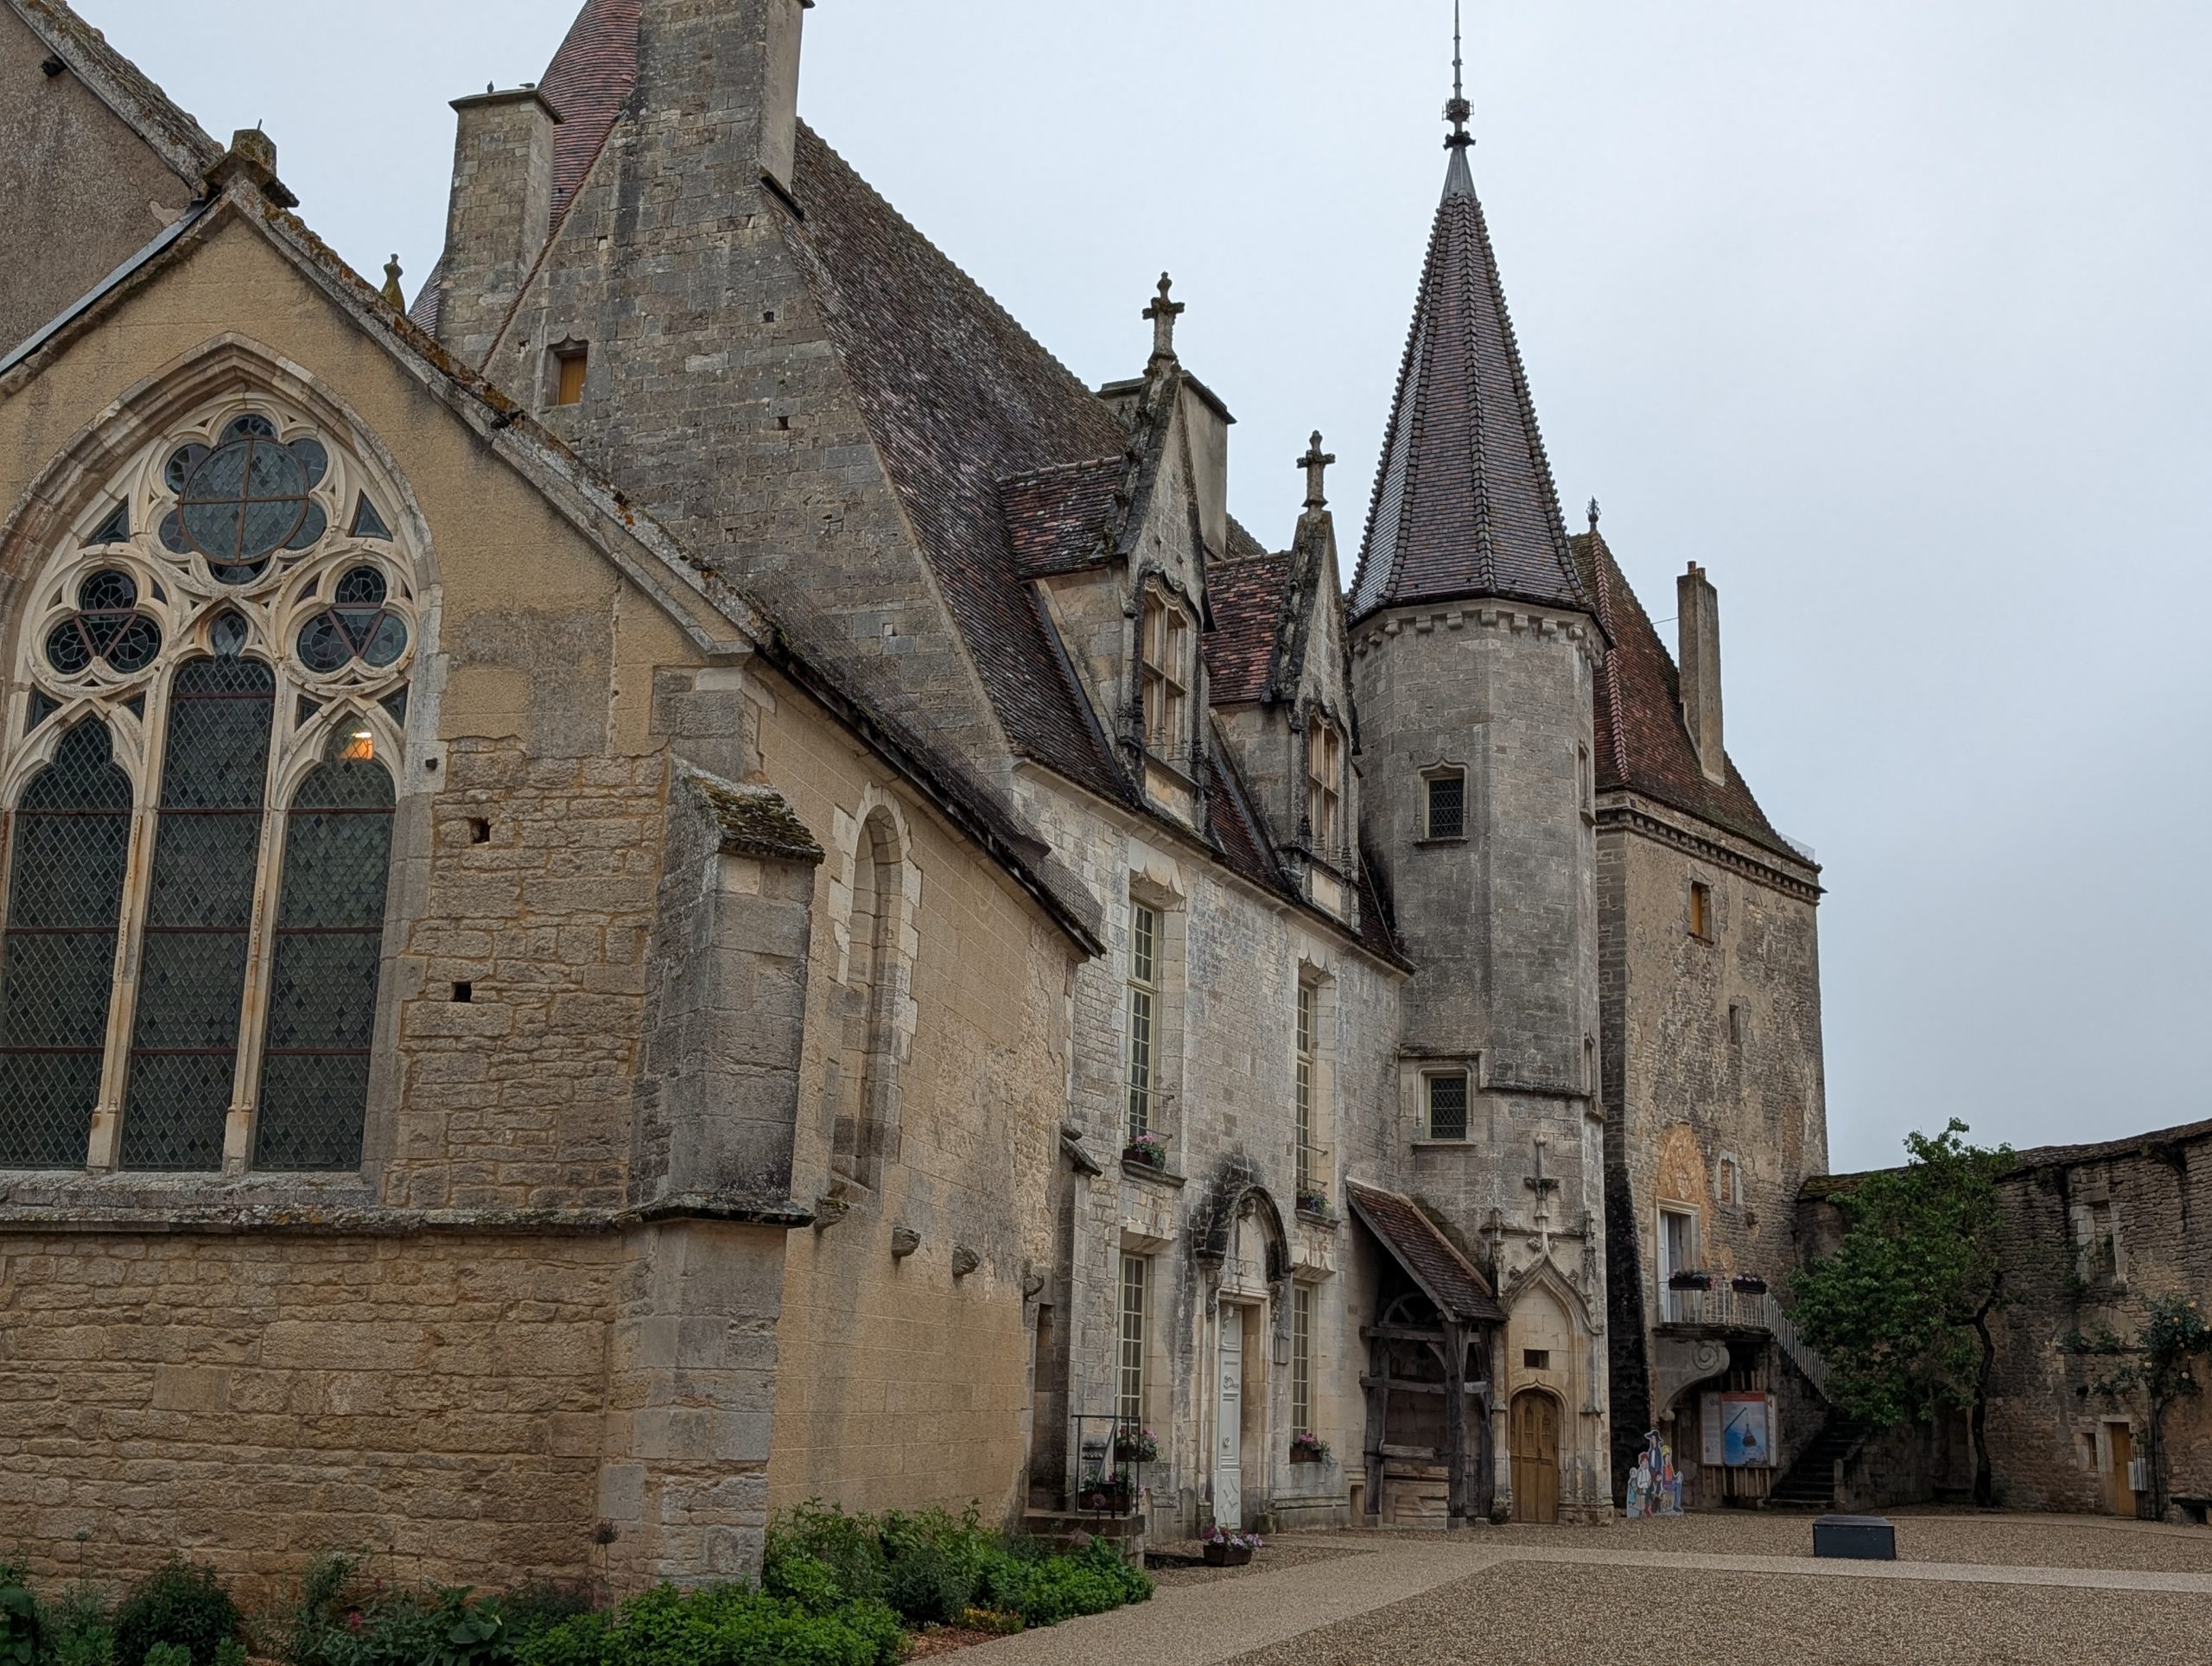
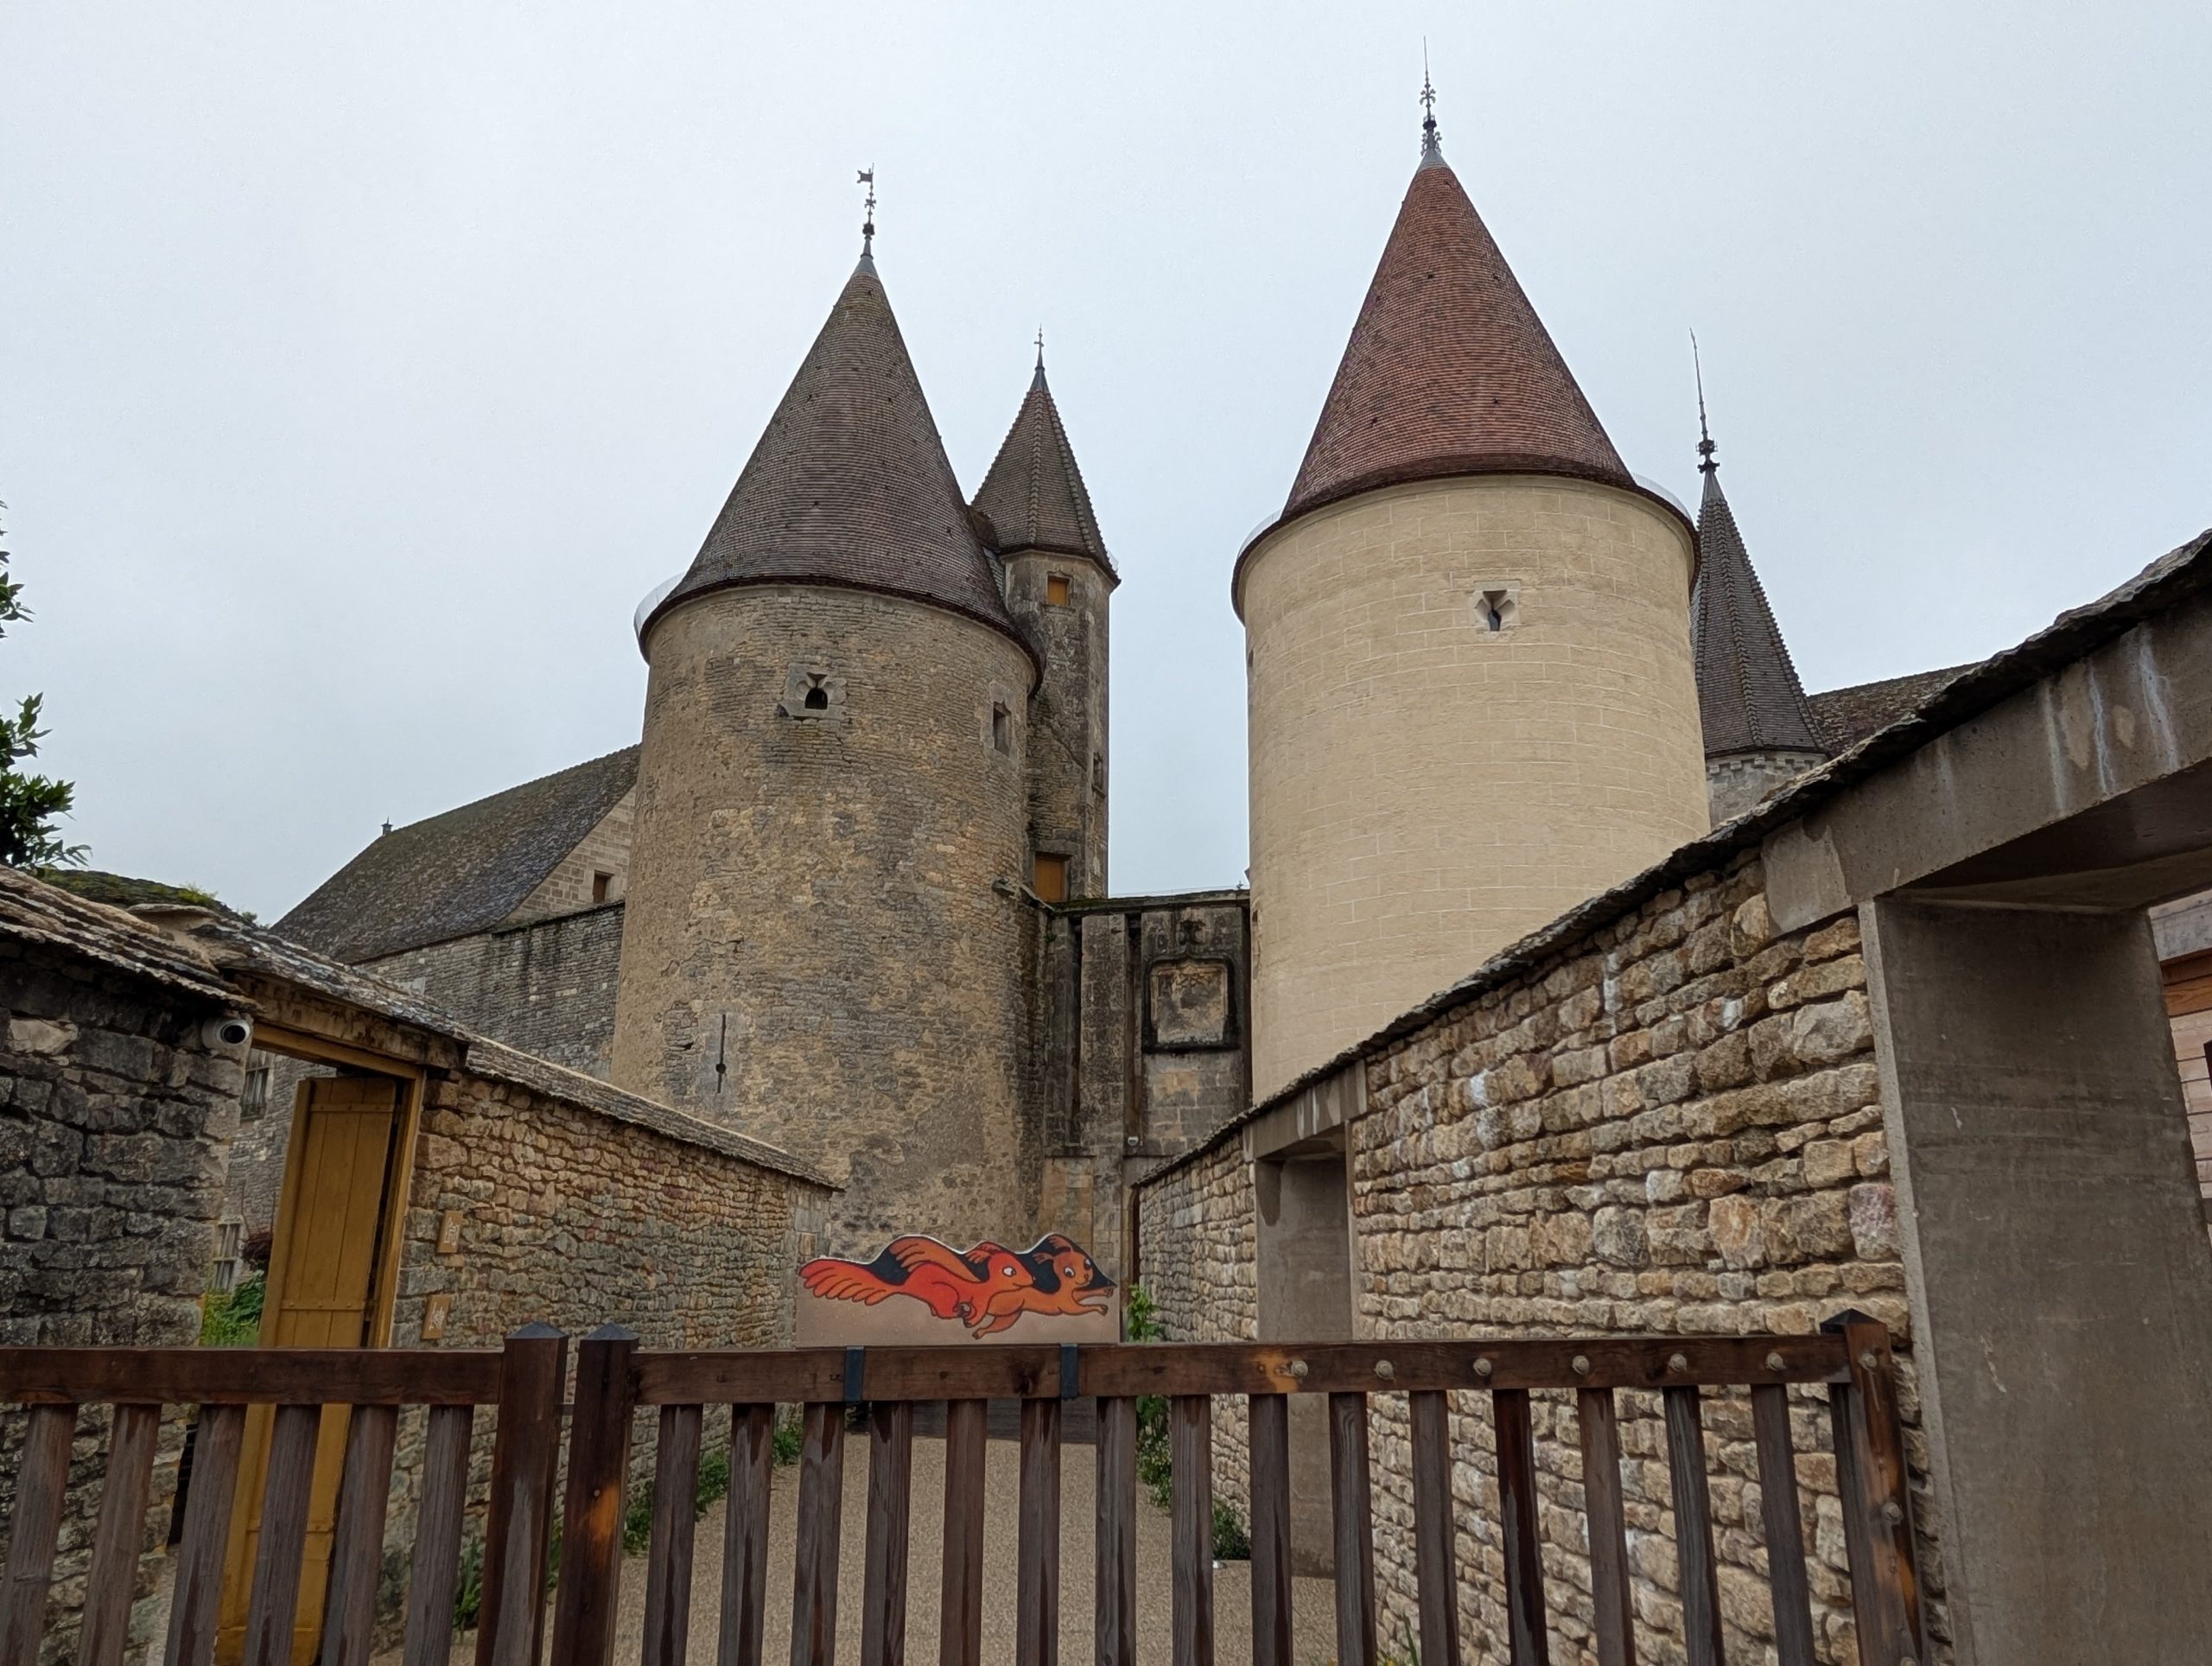
After a nice breakfast at the hotel, we asked Rhoda Scala to direct us to the Château de Châteauneuf, an impressive medieval fortress perched on a rocky spur overlooking a fertile plain. Around the castle lies Châteauneuf-en-Auxois, one of the loveliest villages in France. Châteauneuf-en-Auxois is a prosperous little village, bedecked with flowers and with fine stone houses adorned with pediments and turret staircases dating from the 15th and 16th centuries. The narrow medieval streets are lined with houses built for rich Burgundian merchants in the Middle Ages and lead up to a viewing point offering a magnificent panorama. And today, even though it was raining, art galleries were open to the public.
The history of castle Château de Châteauneuf began in 1175 when a keep was constructed on a promontory overlooking the valley which the Canal de Bourgogne flows through today. During the Hundred Years’ War, it was fortified by a strong outer wall and five towers.
Along our walk from the car to Château de Châteauneuf.
Into the inner sanctum we go.
Back up through the remaining gates to this lovely village Châteauneuf-en-Auxois.
After touring the Château and leaving this beautiful little village behind, we decided to drive to Flavigny-sur-Ozerain, a picturesque medieval village surrounded by bucolic countryside, vineyards, and lush green hillsides. We were unable to walk into the village because there were only 2 or 3 remaining places to park and the walk into the village would have been a bit too much for me. Uphill all the way! Plus, it was raining. But we thoroughly enjoyed the drive to this village.
On the way down from the village, at a couple of points, we were quite sure Rhoda, our tour director was trying to get us killed by sending us up and down steep roads designed for donkeys. Never-the less, we managed to survive. And we saw a red fox crossing the road in front of us. (No, I didn’t get a picture. Mr. or Mrs. Fox did not doddle as he or she made their careful way across the tree-lined road.)
The red fox (Vulpes vulpes) is the largest of the true foxes and one of the most widely distributed members of the order Carnivora, being present across the entire Northern Hemisphere including most of North America, Europe, and Asia, plus parts of North Africa.
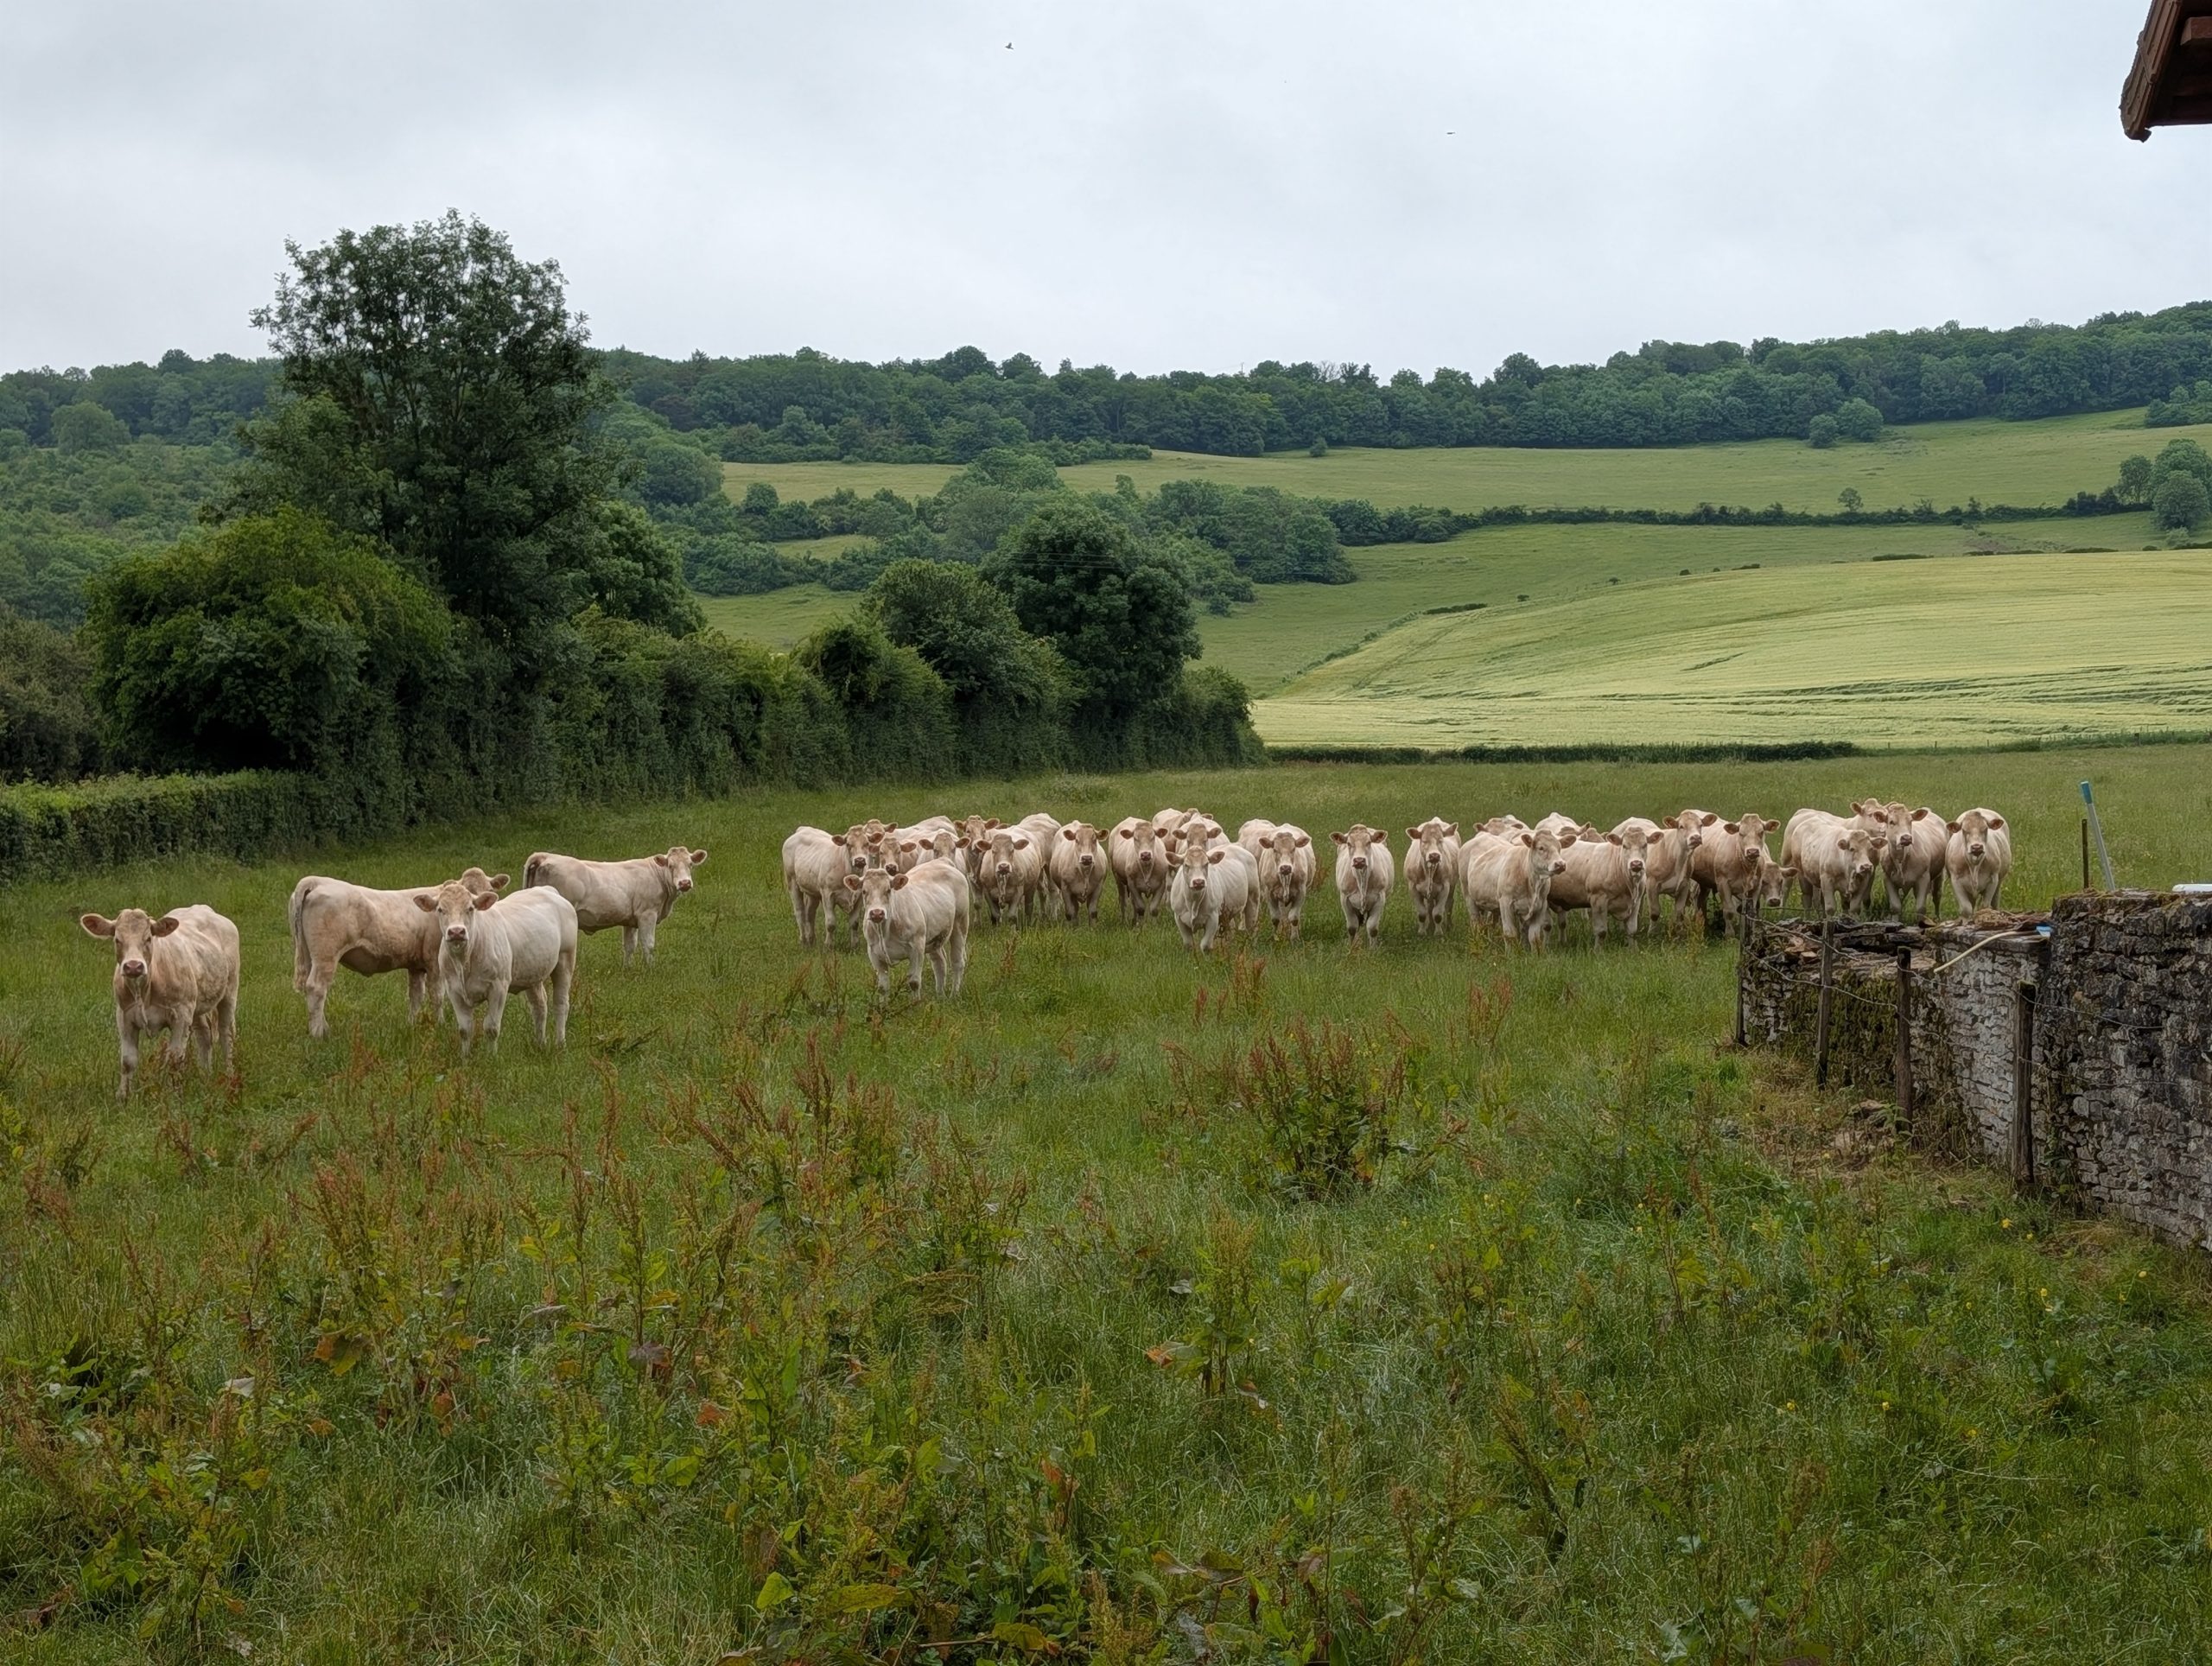
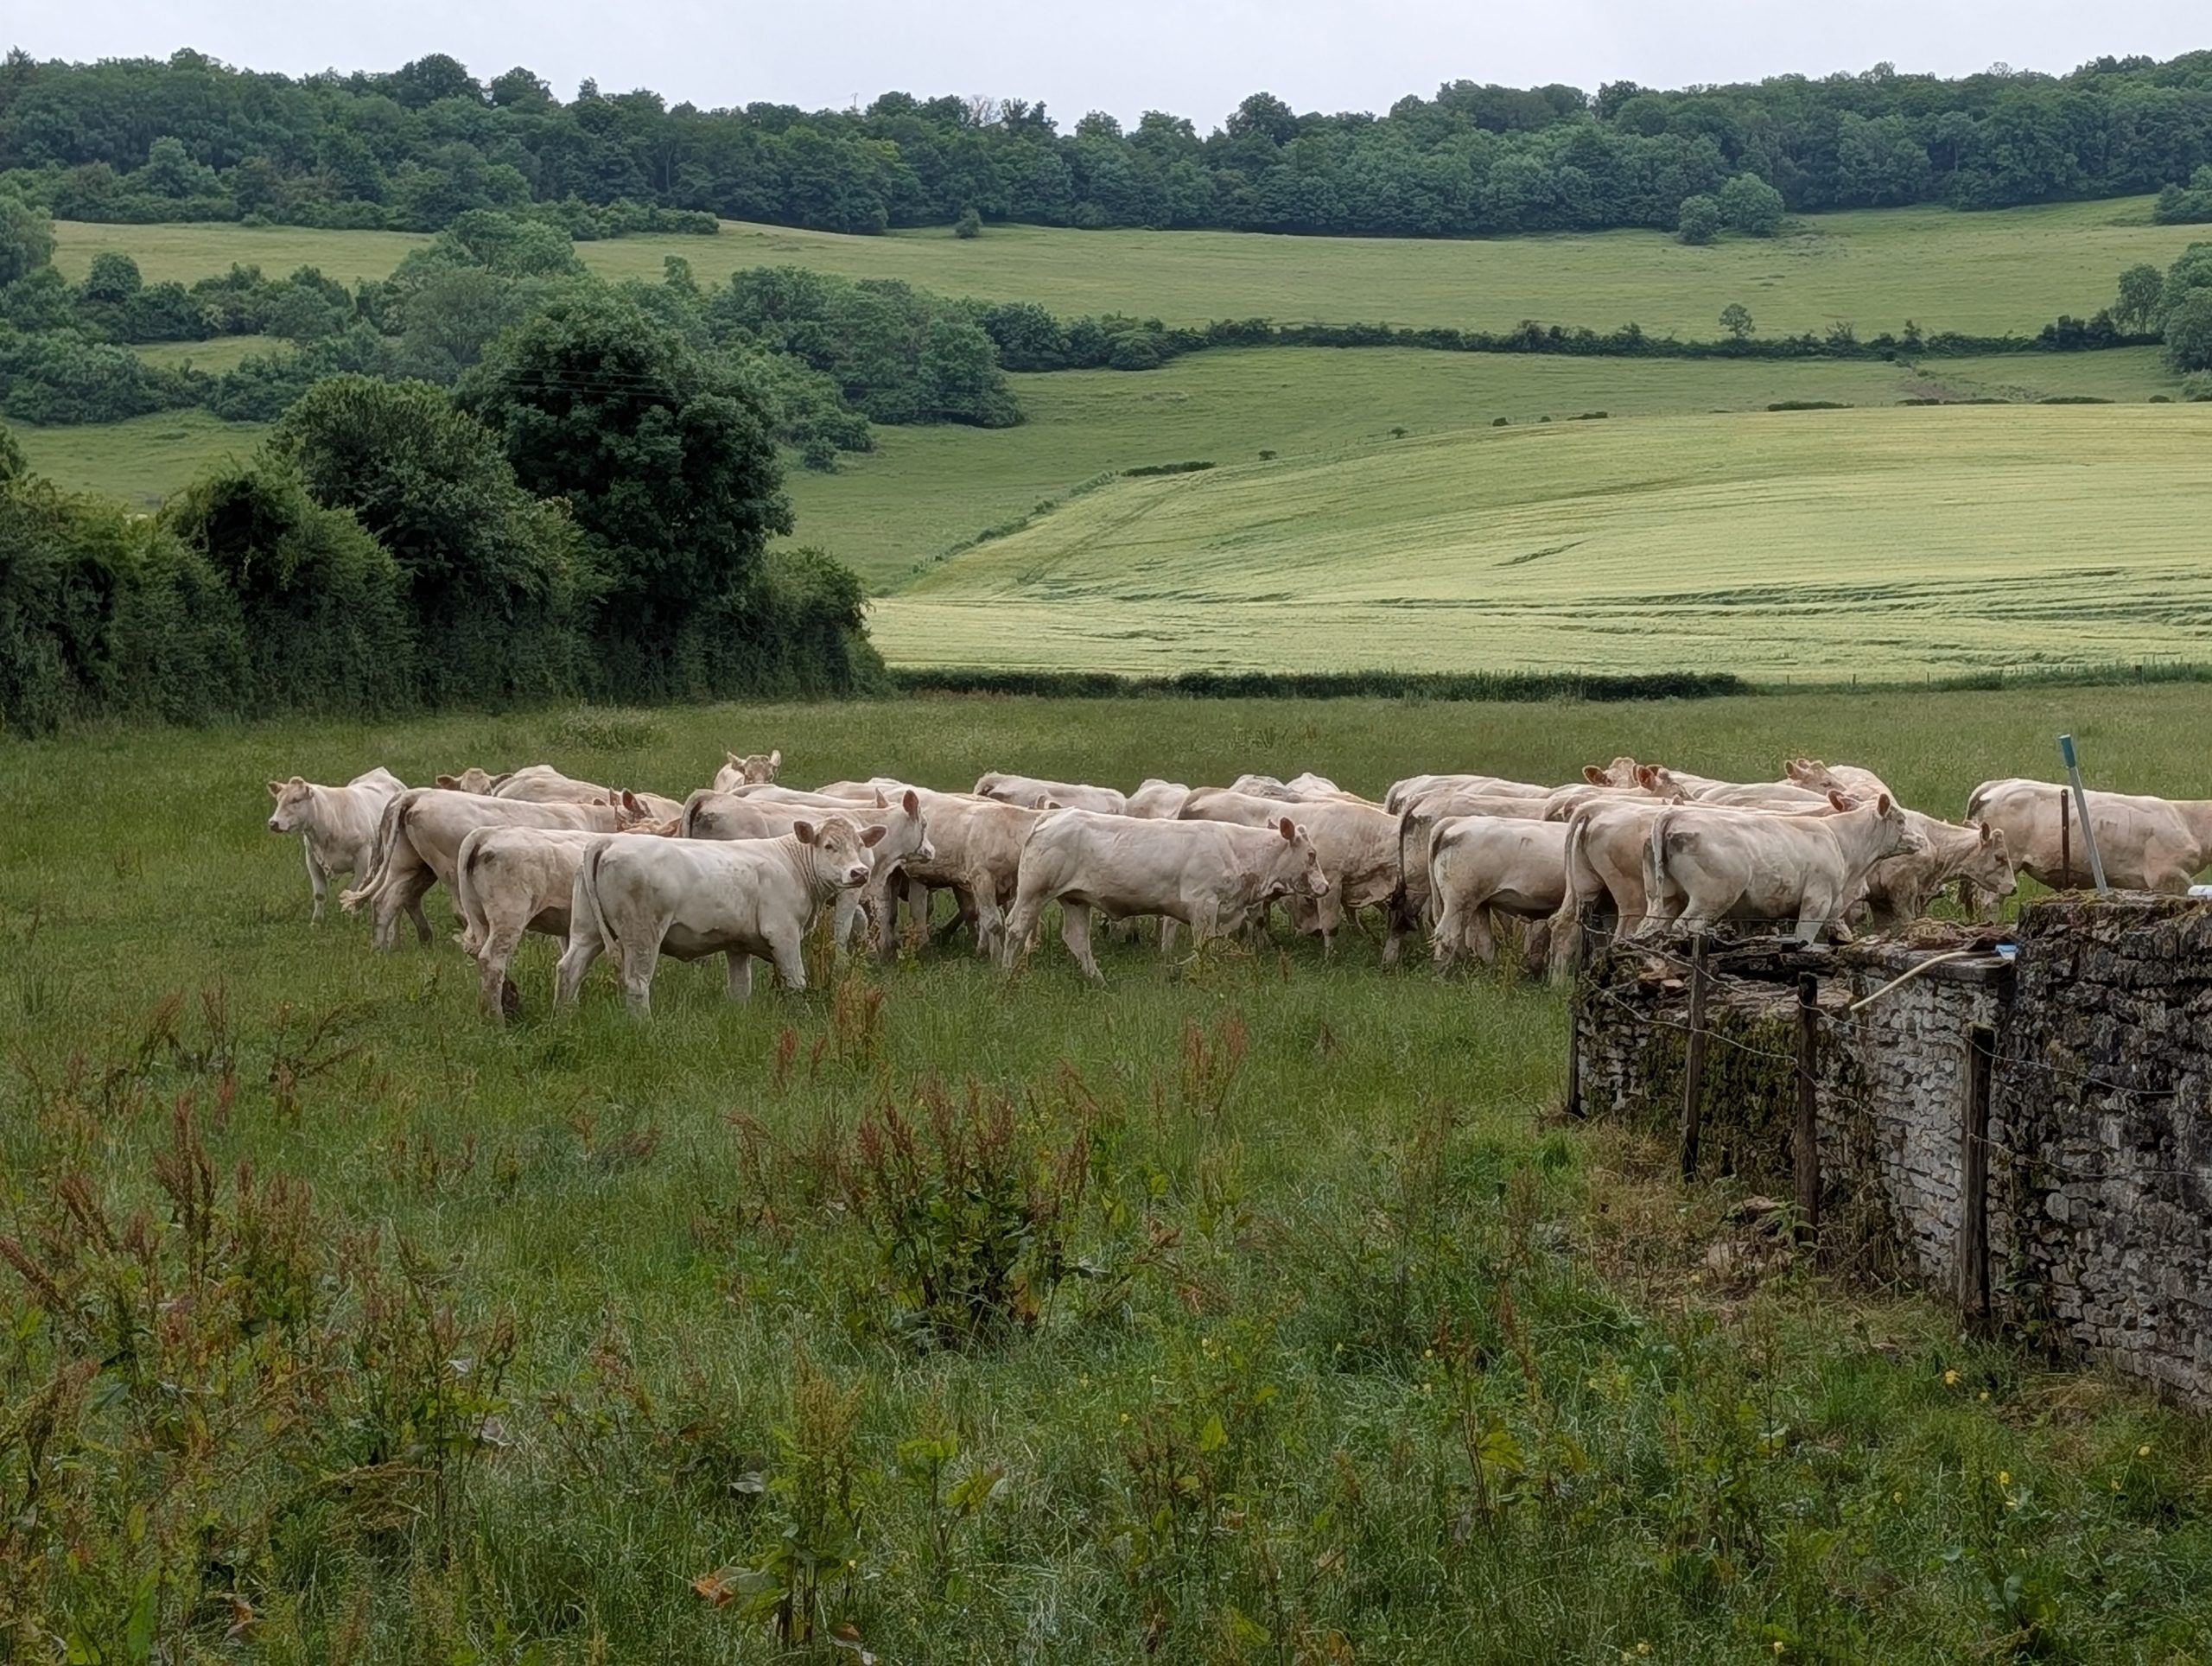
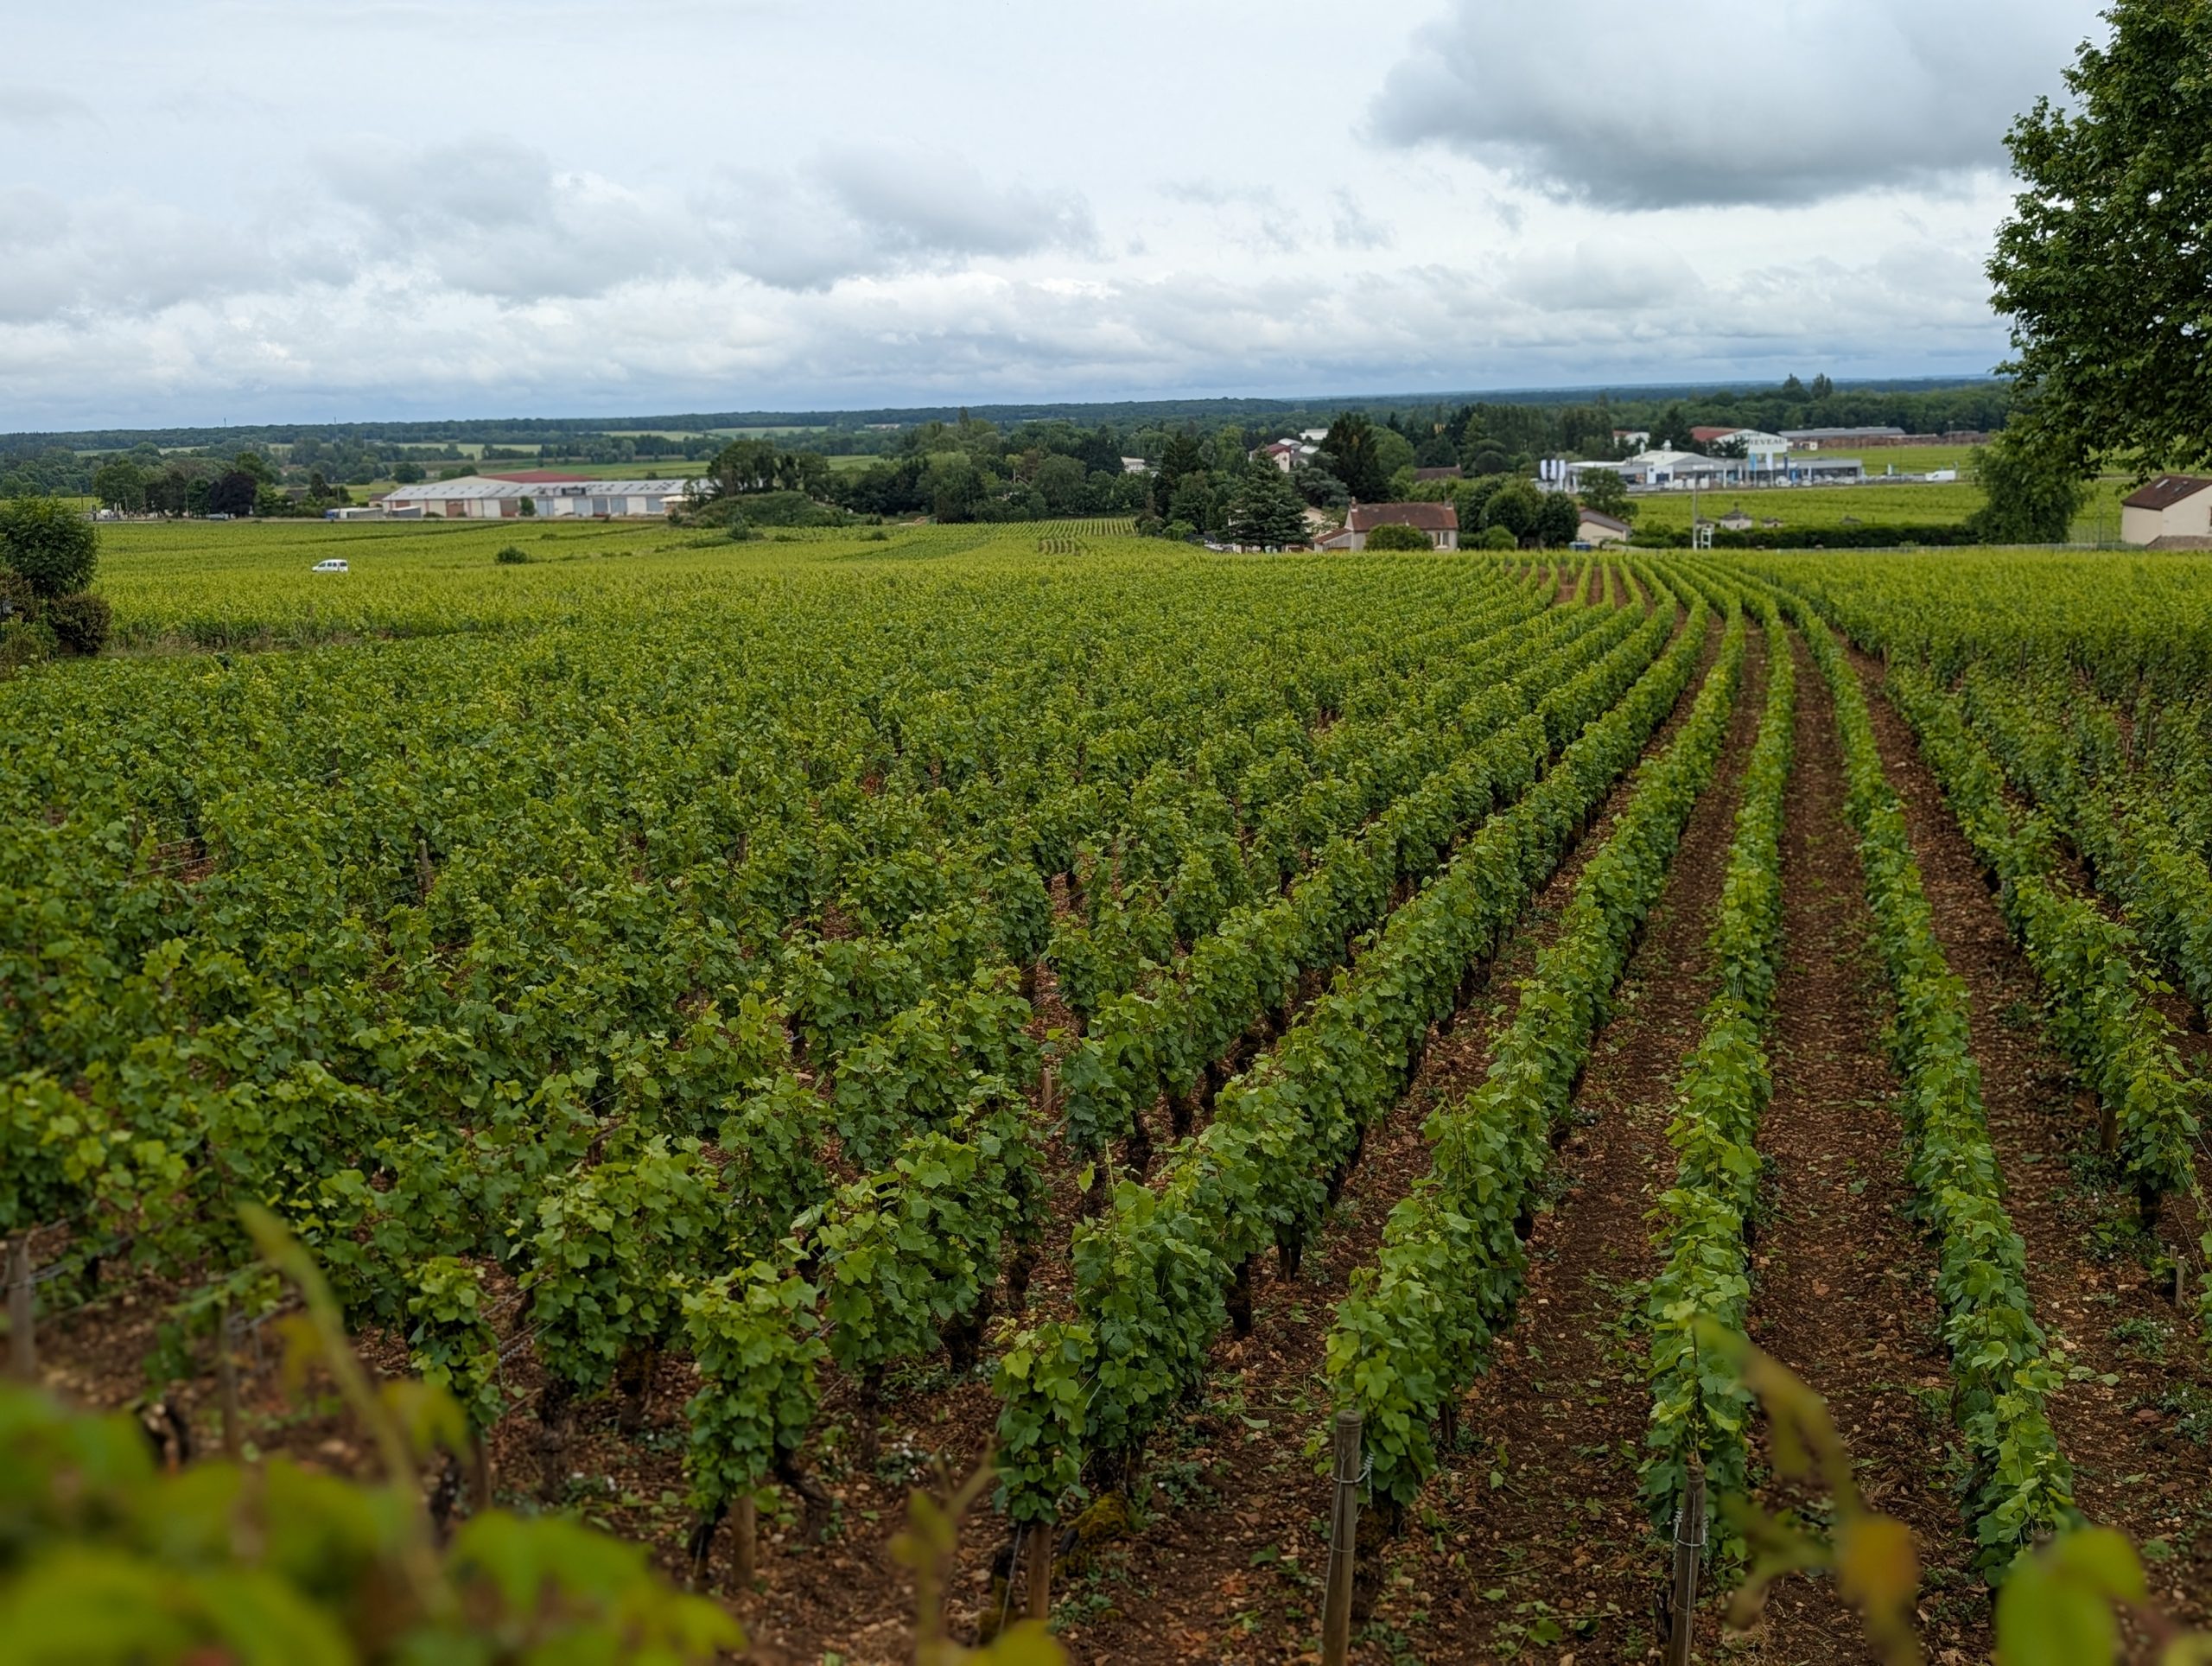
At this point we decided it was time to turn around and head back to camp. But first, a little side trip to Aloxe-Corton, a village claiming three château and Grands Crus. Grand cru (French for ‘great growth’) is a regional wine classification that designates a vineyard known for its favorable reputation in producing wine. I had stepped out of the car to take pictures of the château. While I was crossing the street to get back in the car, I noticed a small herd of white cows absolutely transfixed by my beauty. They were all, to a cow, staring at me. I quietly informed them that I was a tourist and had no apples on me. Immediately they turned and walked away from me. I had no idea French cows spoke English!
The winery.
All eyes on me.
Fine. No treats! We’re out of here!
After taking a picture of the winery and my new but fickle bovine friends, we decided it was time to head for home. Some pictures along our way back to Beaune.
Once back in our room, a little quiet time before dinner. Dinner tonight was fantastic. We had tried to get a reservation at Le Bistrot Du Bord De L’eau when we first arrived yesterday, but they had no openings. We now know why! But our concierge had managed to get us in tonight. Wow, what a restaurant. A must visit if you are ever in this area.
If I had to describe the Burgundy region of France in just one word, it would be magnifique!
Thursday, June 5, 2025 – Colmar Hotel – Colmar, France
Today was a drive day. From Beaune, France to Colmar France. And through departments (think regions) Bourgogne – Frenche-Comte, Lorraine – Grand Est, and arriving in Alsace (also part of the Grant Est). And what a drive it was. Through beautiful pastures, fields of agriculture, and mini forests. Then up and over the Vosges Mountains. The Vosges are very similar to the corresponding range of the Black Forest across the Rhine since both lie within the same degrees of latitude, have similar geological formations and are characterized by forests on their lower slopes, above which are open pastures and rounded summits of a rather uniform altitude.
But for today’s adventure, we decided against taking any toll roads and stuck to alternate routes. Therefore, it took us much longer to get from point A to point B. And searching for places to have lunch, toilets, and gas stations in foreign countries has never been, or probably never will be, our forte. (BTW – The word forte, when pronounced correctly, is pronounced “fort”). Forte being a French word meaning “strength” that is used in English to refer to one’s talent or ability. Example: English is my forte. This word is often mispronounced “FOR-tay” because it is confused with the Italian word forte (pronounced “FOR-tay”) meaning strong in Italian. (Your French lesson for today.) But back to our drive.
I don’t care much if we don’t find lunch, but at our ages, we bloody well need a toilette when we need a toilette! And I get super anxious when the gas tank is even at a quarter tank. Gas stations aren’t always easy to find. And then when we do find one, it doesn’t always have the type of gas we need.
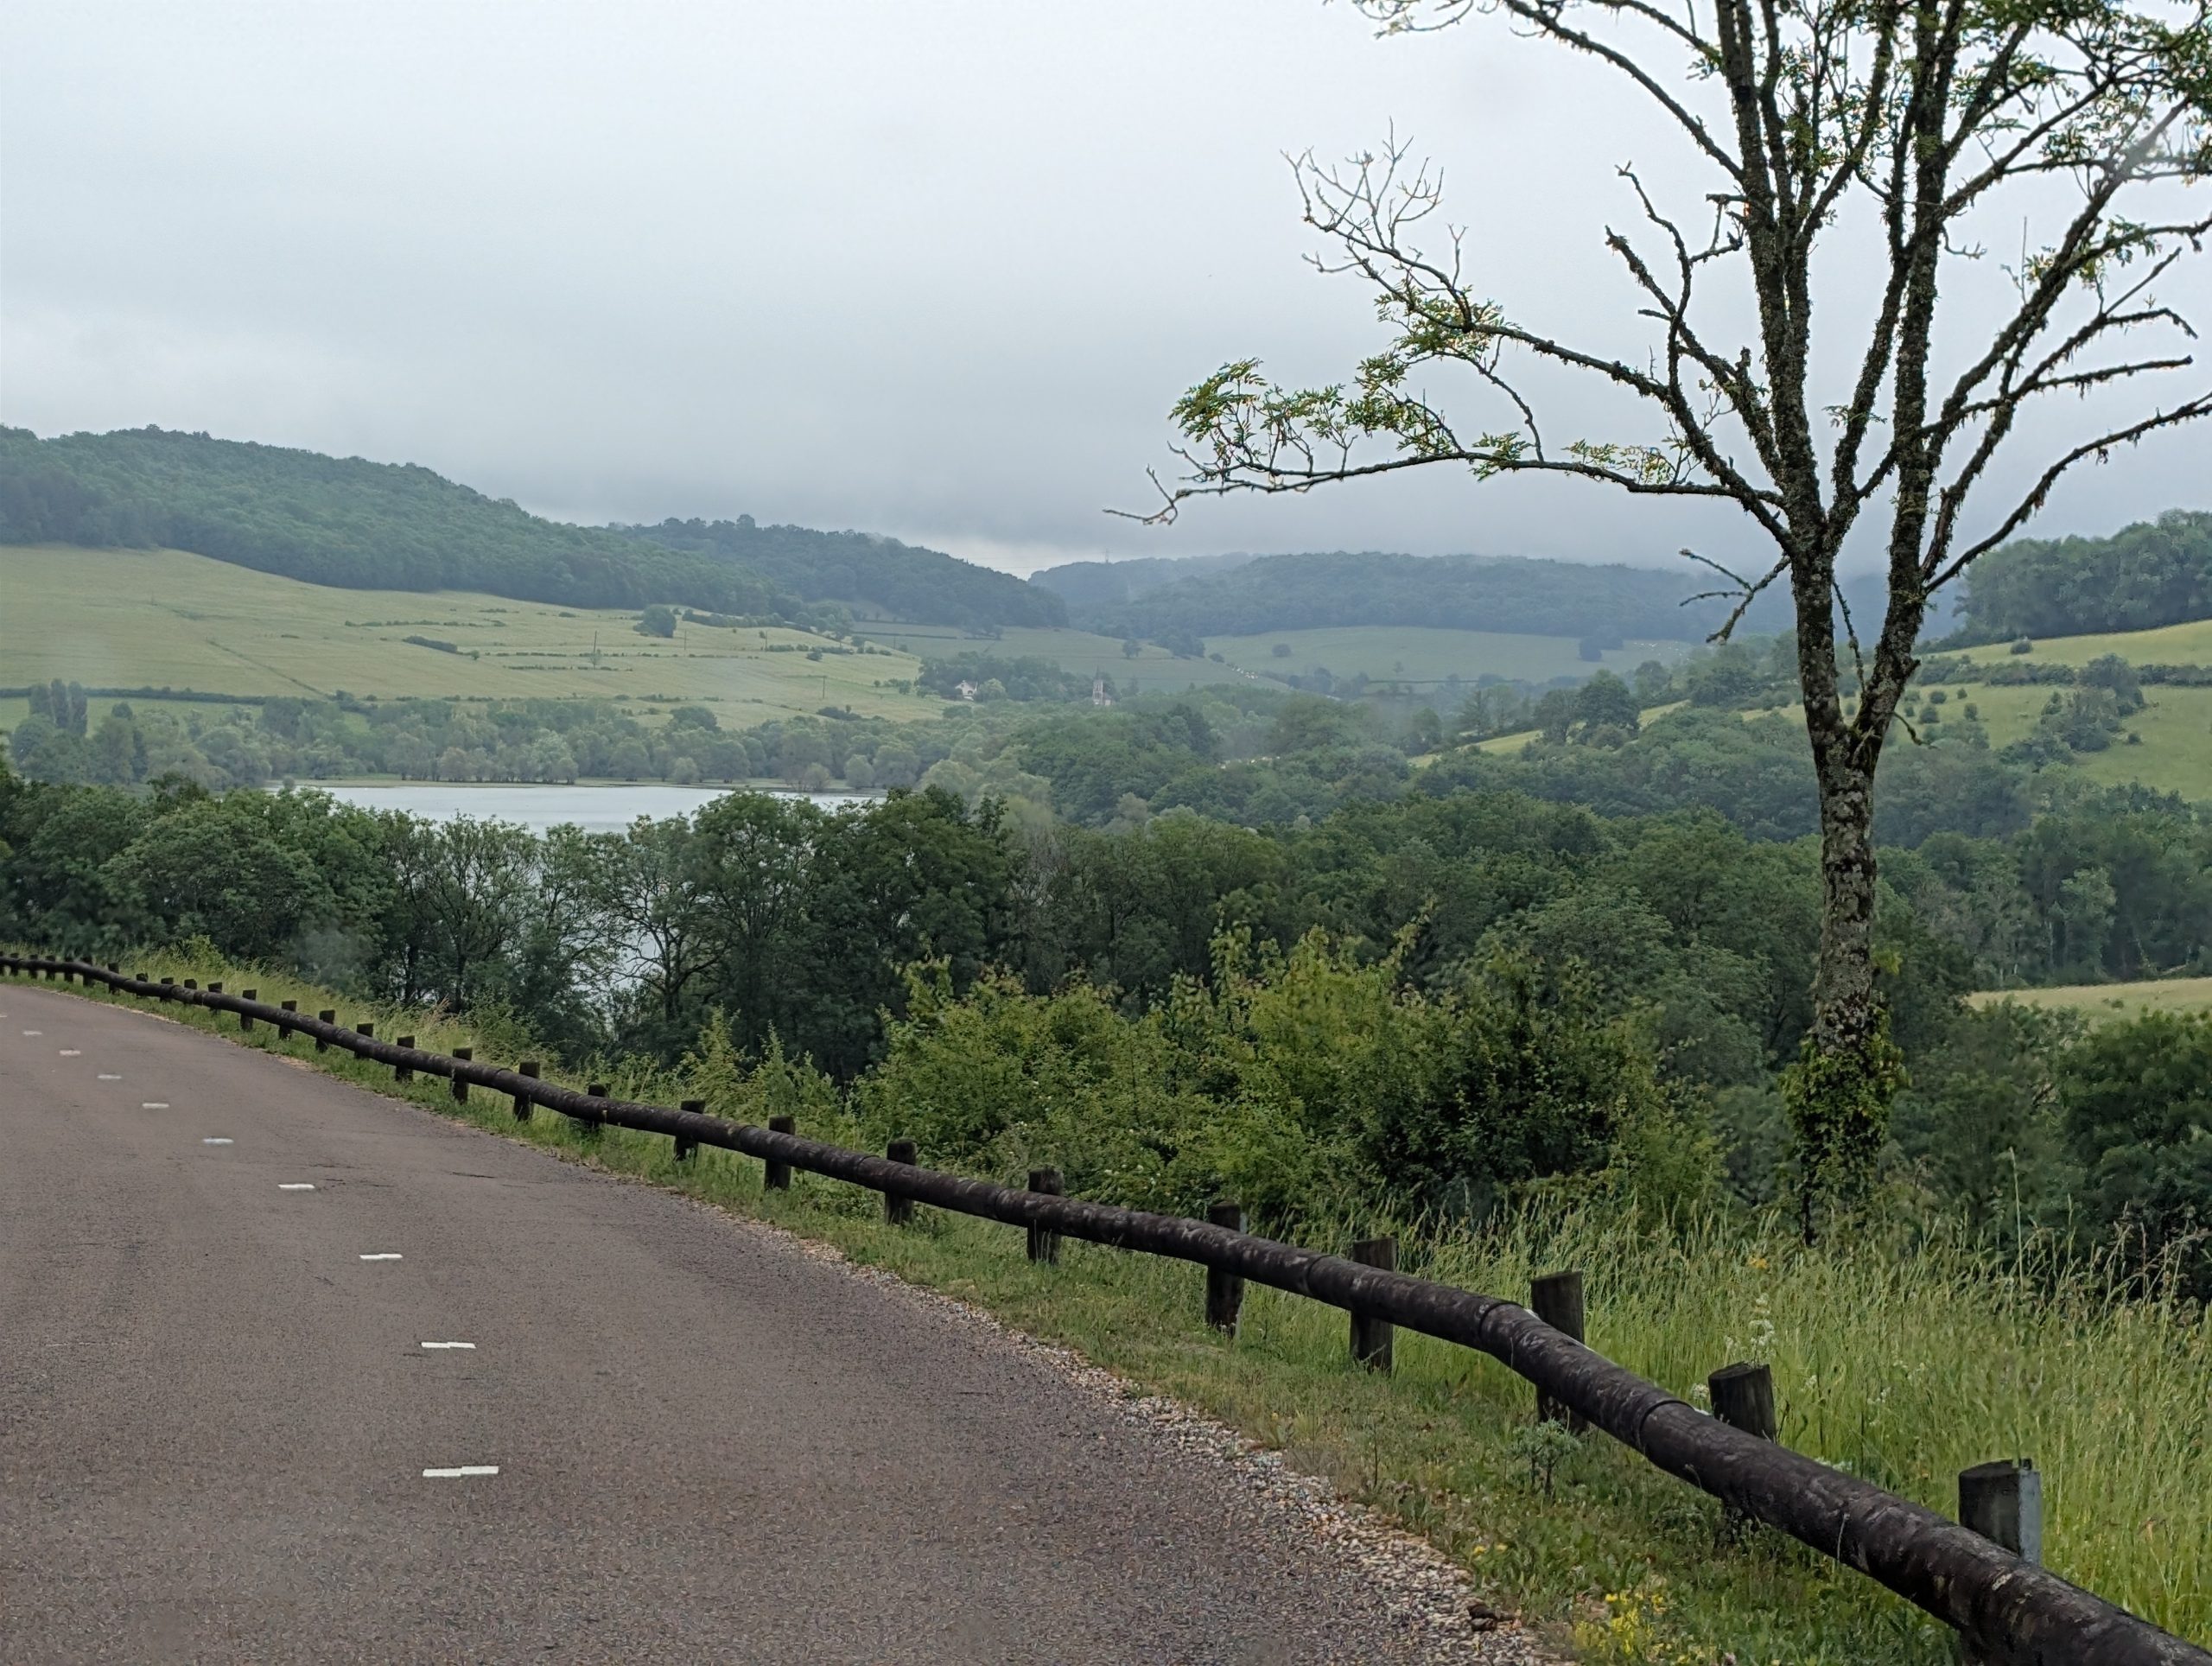
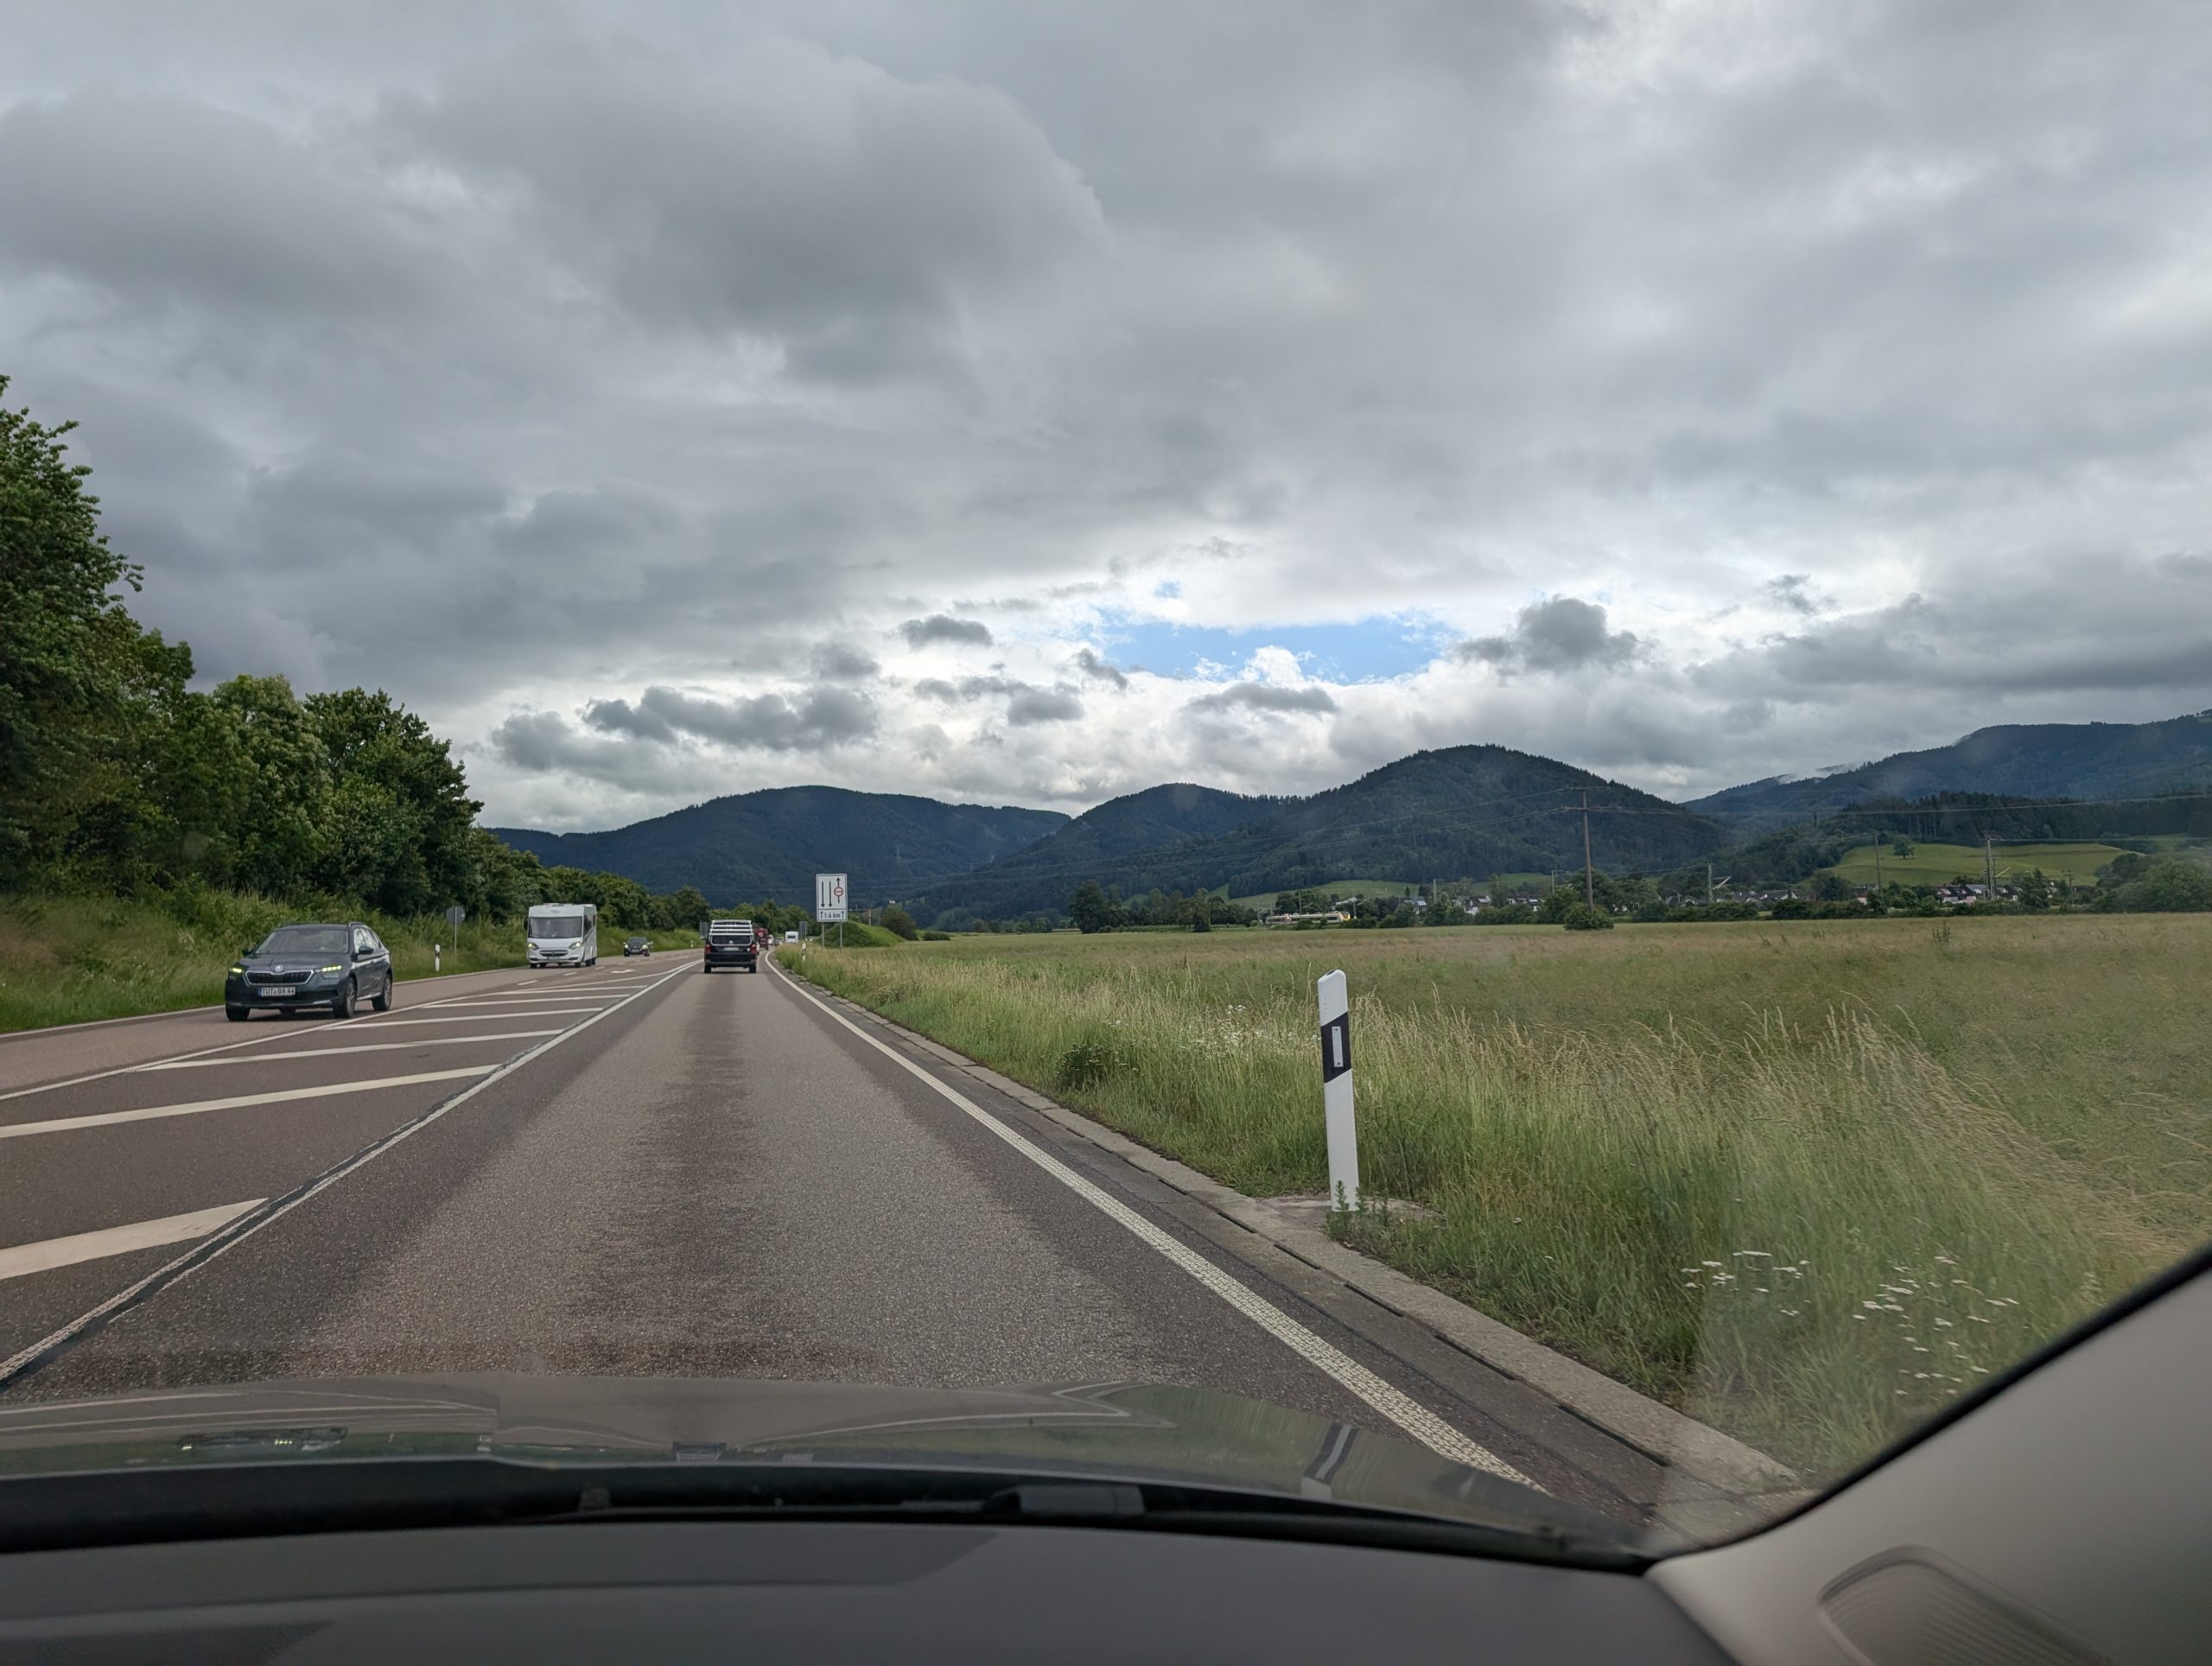
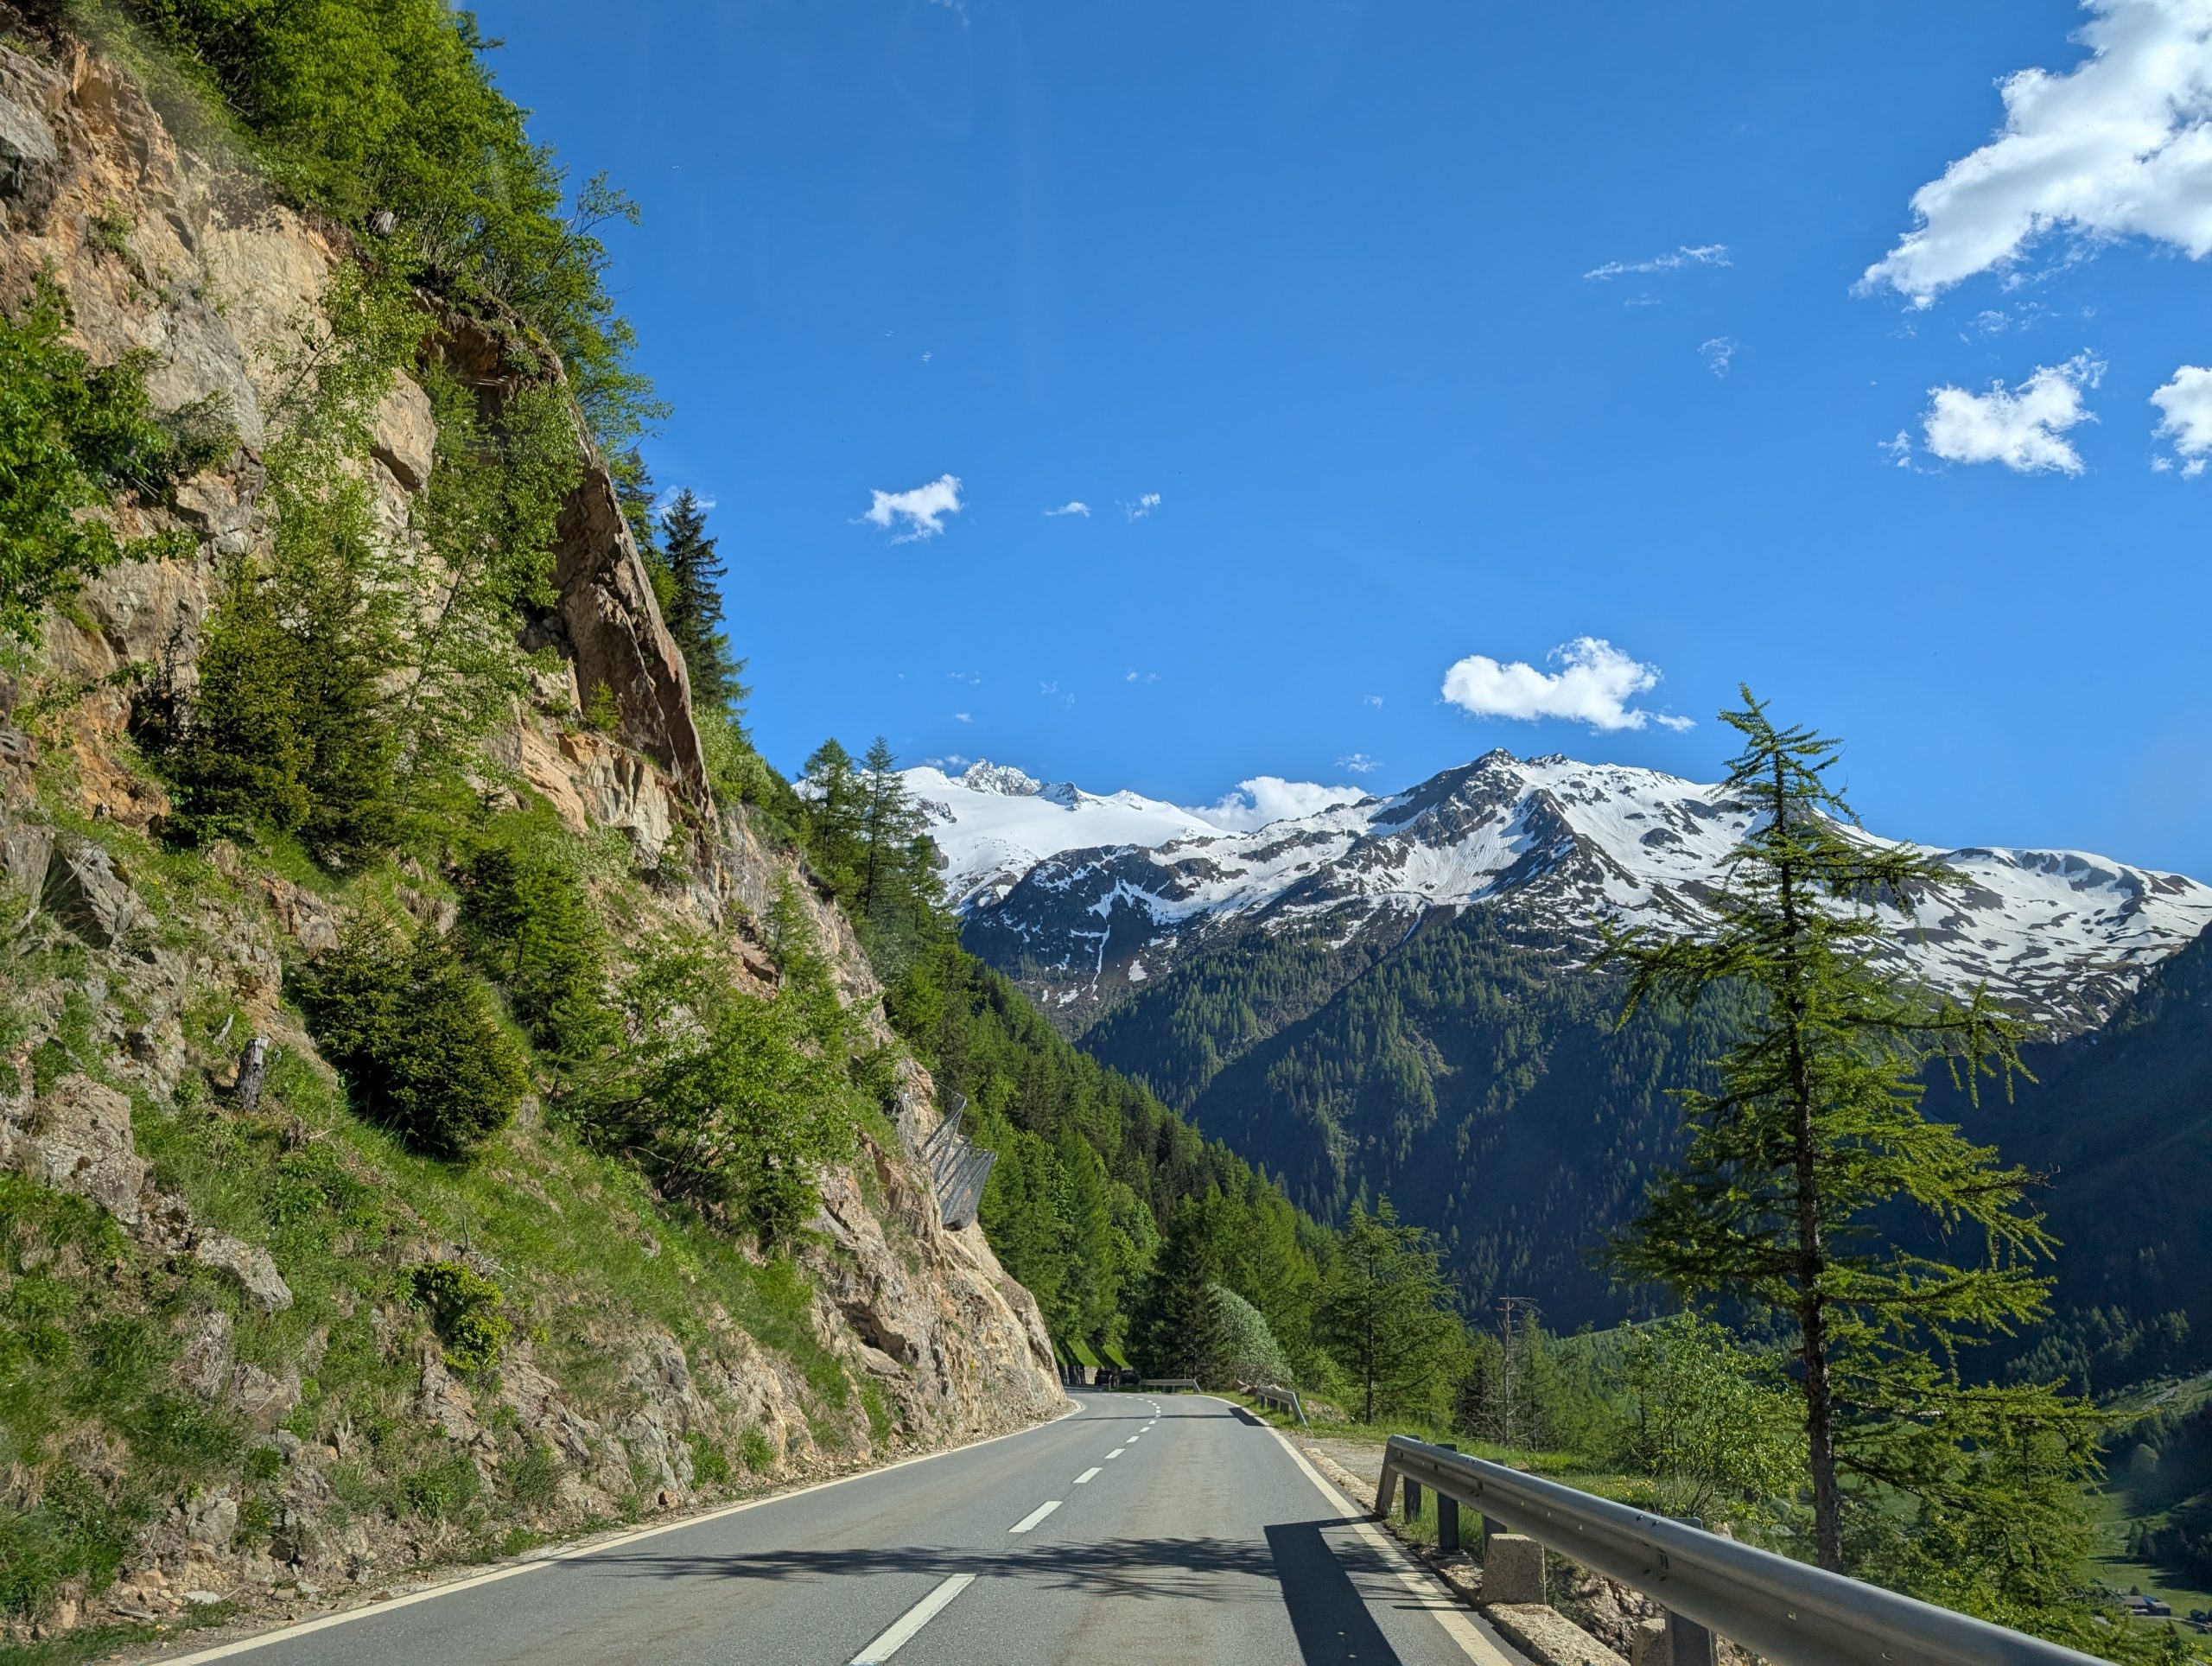
This was the only picture I took along our route today. It was just so beautiful. I must have been just mesmerized.
But we made it to our hotel with Rhoda’s help. And on the way we found a nice lunch spot, made it to toilettes without having to change clothes, and after finally finding a gas station, they were around every corner. Why does that happen?
After checking into our hotel, I lay down for about 30 minutes while Andy played on the computer.
At 7:00 pm, we headed out to find dinner. While we were dining at Restaurant Brasserie l’Auberge, Andy commented that France was truly a civilized country. I only wish I could say the same for the USA.
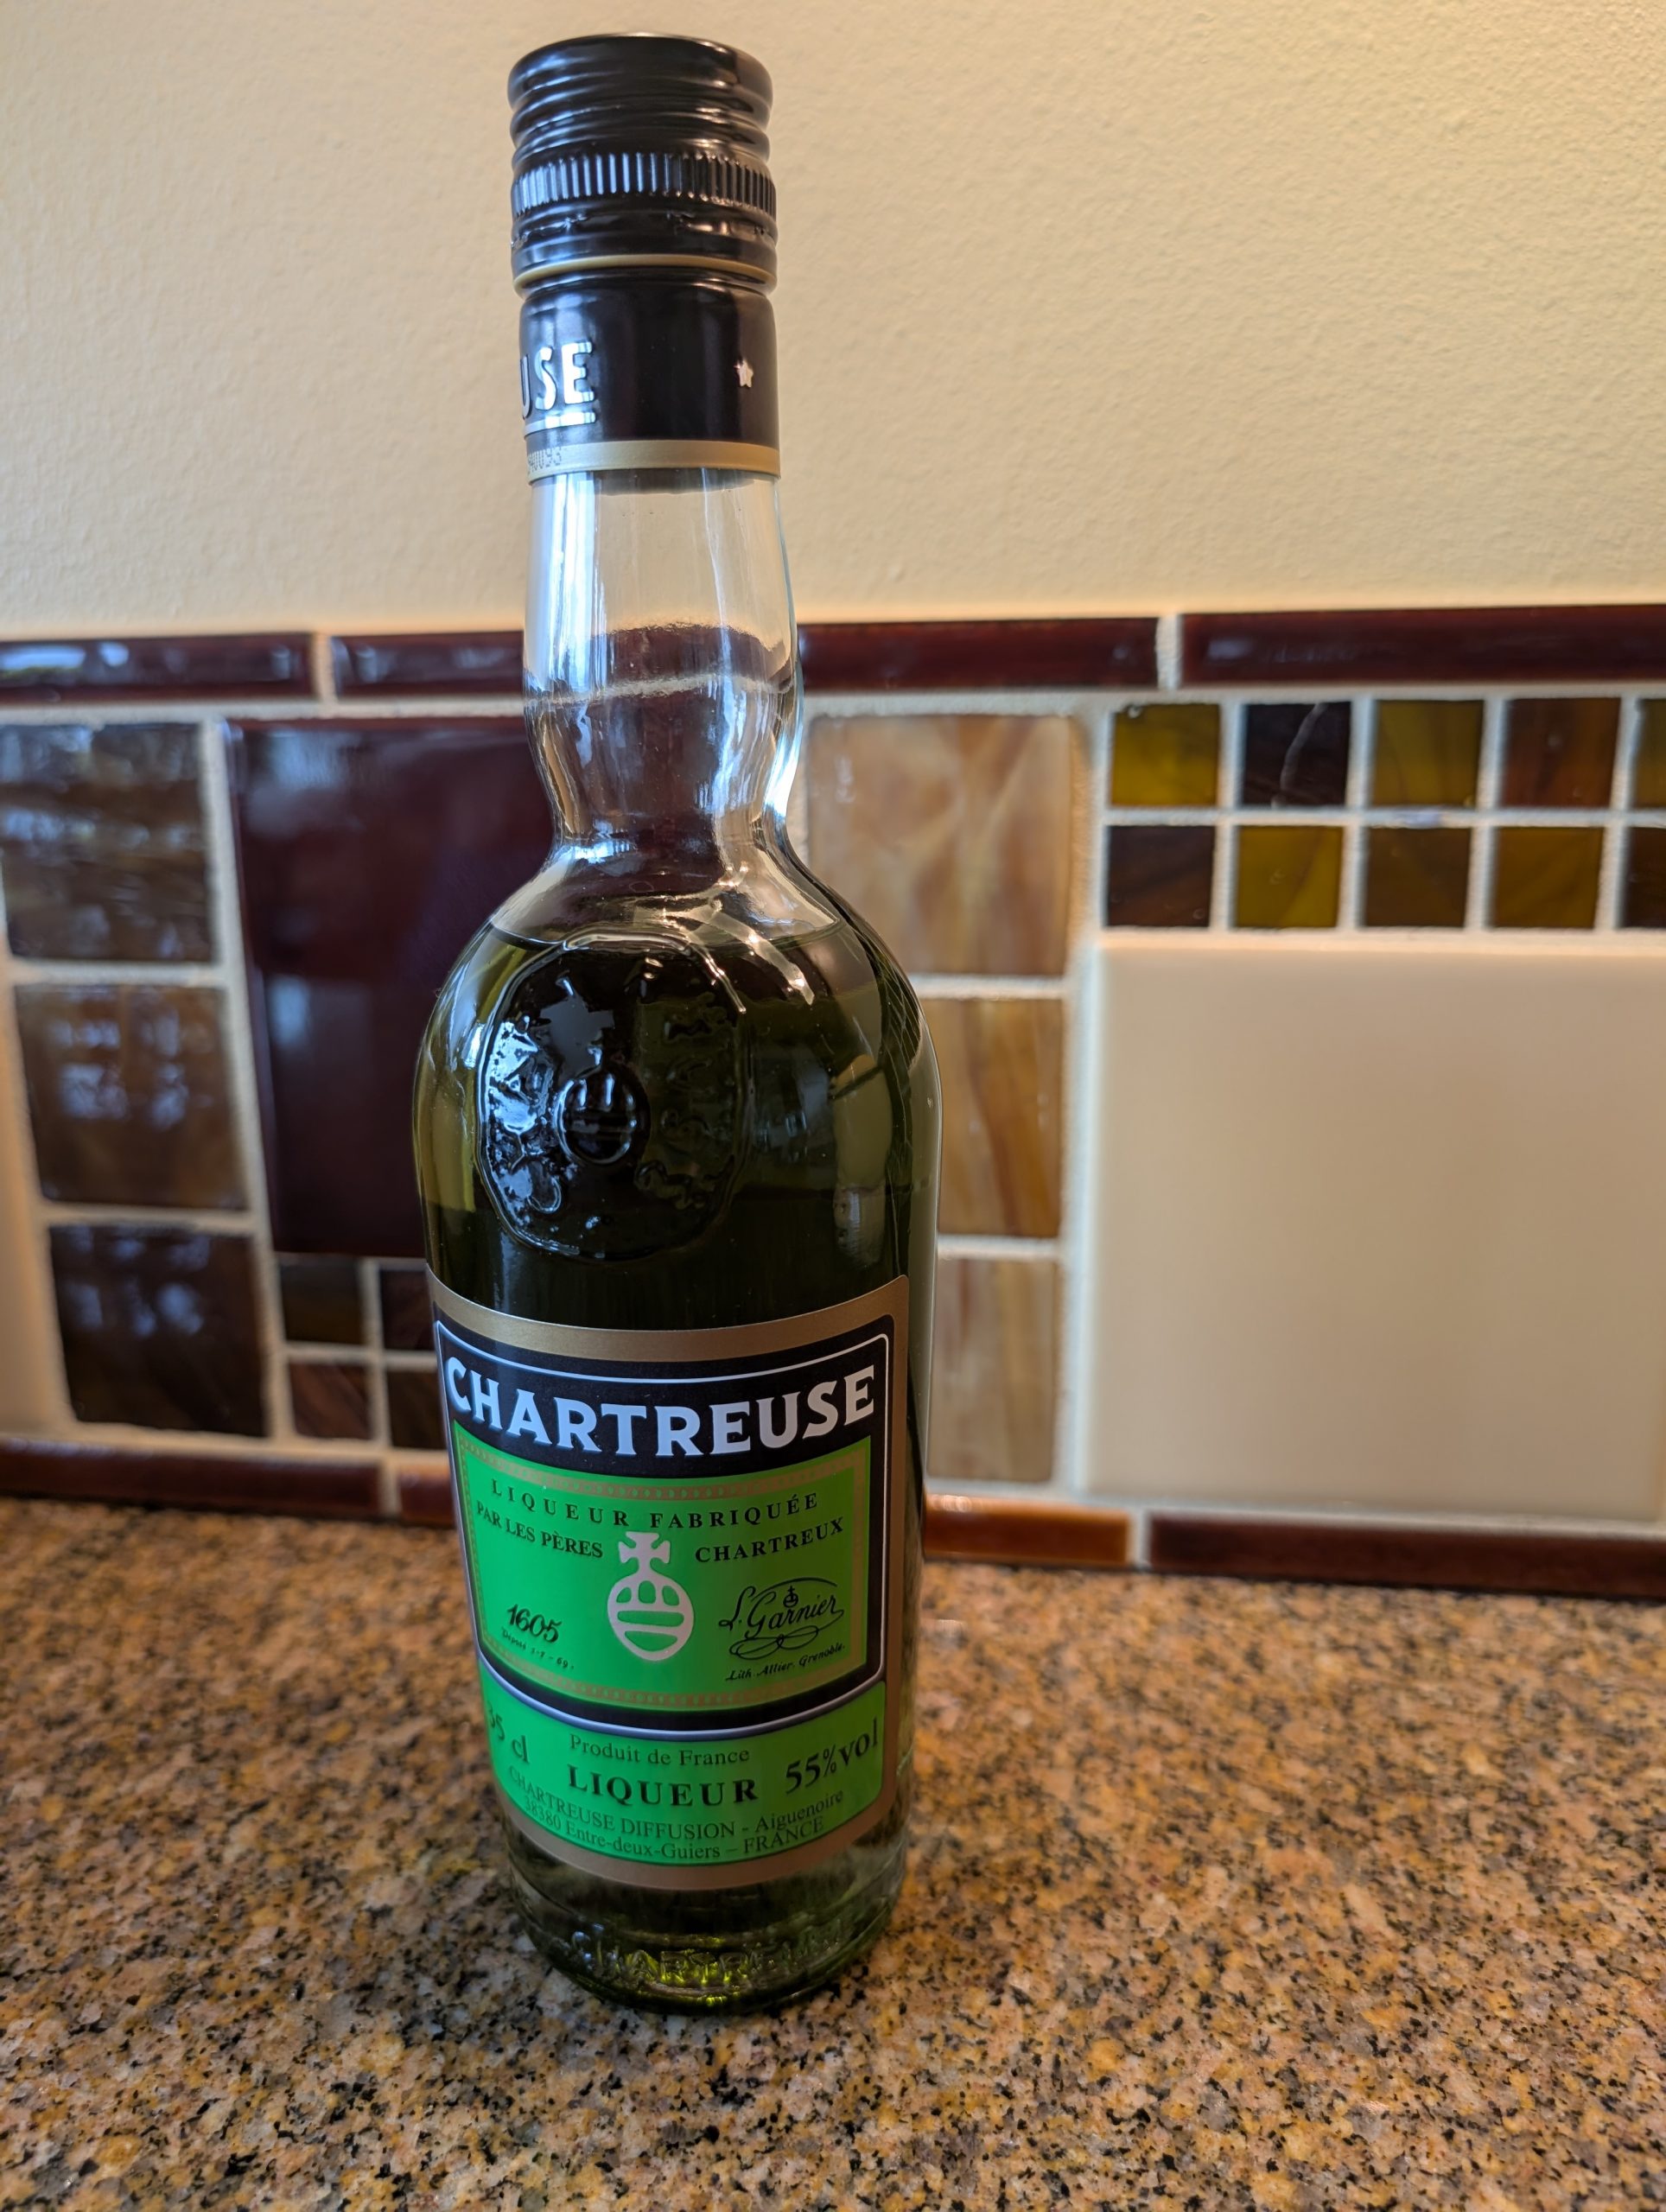
After spending almost 2 hours over dinner, which included Yellow Chartreuse, an after dinner “digestive” for Mr. C., we headed back to our tiny but modern hotel room. Me to write up today’s trip report, and Andy to read, leisurely sprawled on our comfy bed. Not a bad way to spend the day.
FYI: Chartreuse is a French liqueur made with 130 herbs and botanicals, known for being one of the only liqueurs that improves with age. First produced by Carthusian monks in 1737, the recipe was discovered by François Annibal d’Estrées in 1605.
Chartreuse is exclusively crafted at the Aiguenoire distillery in Entre-deux-Guiers, a town located in Isère, in the heart of the French Alps (about an hour’s drive from Grenoble).
The secret recipe for Chartreuse has been passed down by Carthusian monks for generations. Green Chartreuse uses a sugar beet-based spirit, while Yellow Chartreuse uses a grape-based spirit. Both are distilled in copper pots, macerated with botanicals, and aged in charred French oak barrels. Only two monks, Dom Benoit and Frère Jean-Jacques, know the exact blend of herbs, sourced from around the globe. Ranging from citrus rind to thyme, to saffron and beyond, the precise recipe has remained a well-guarded secret for centuries.
Our precious bottle of Chartreuse safely home cozied in with our other favorite liqueurs.
And instead of plotting tomorrow’s grand adventure, I’m going to push Andy to his side of the bed and help Hercule Poirot solve yet another mystery. Life is good!
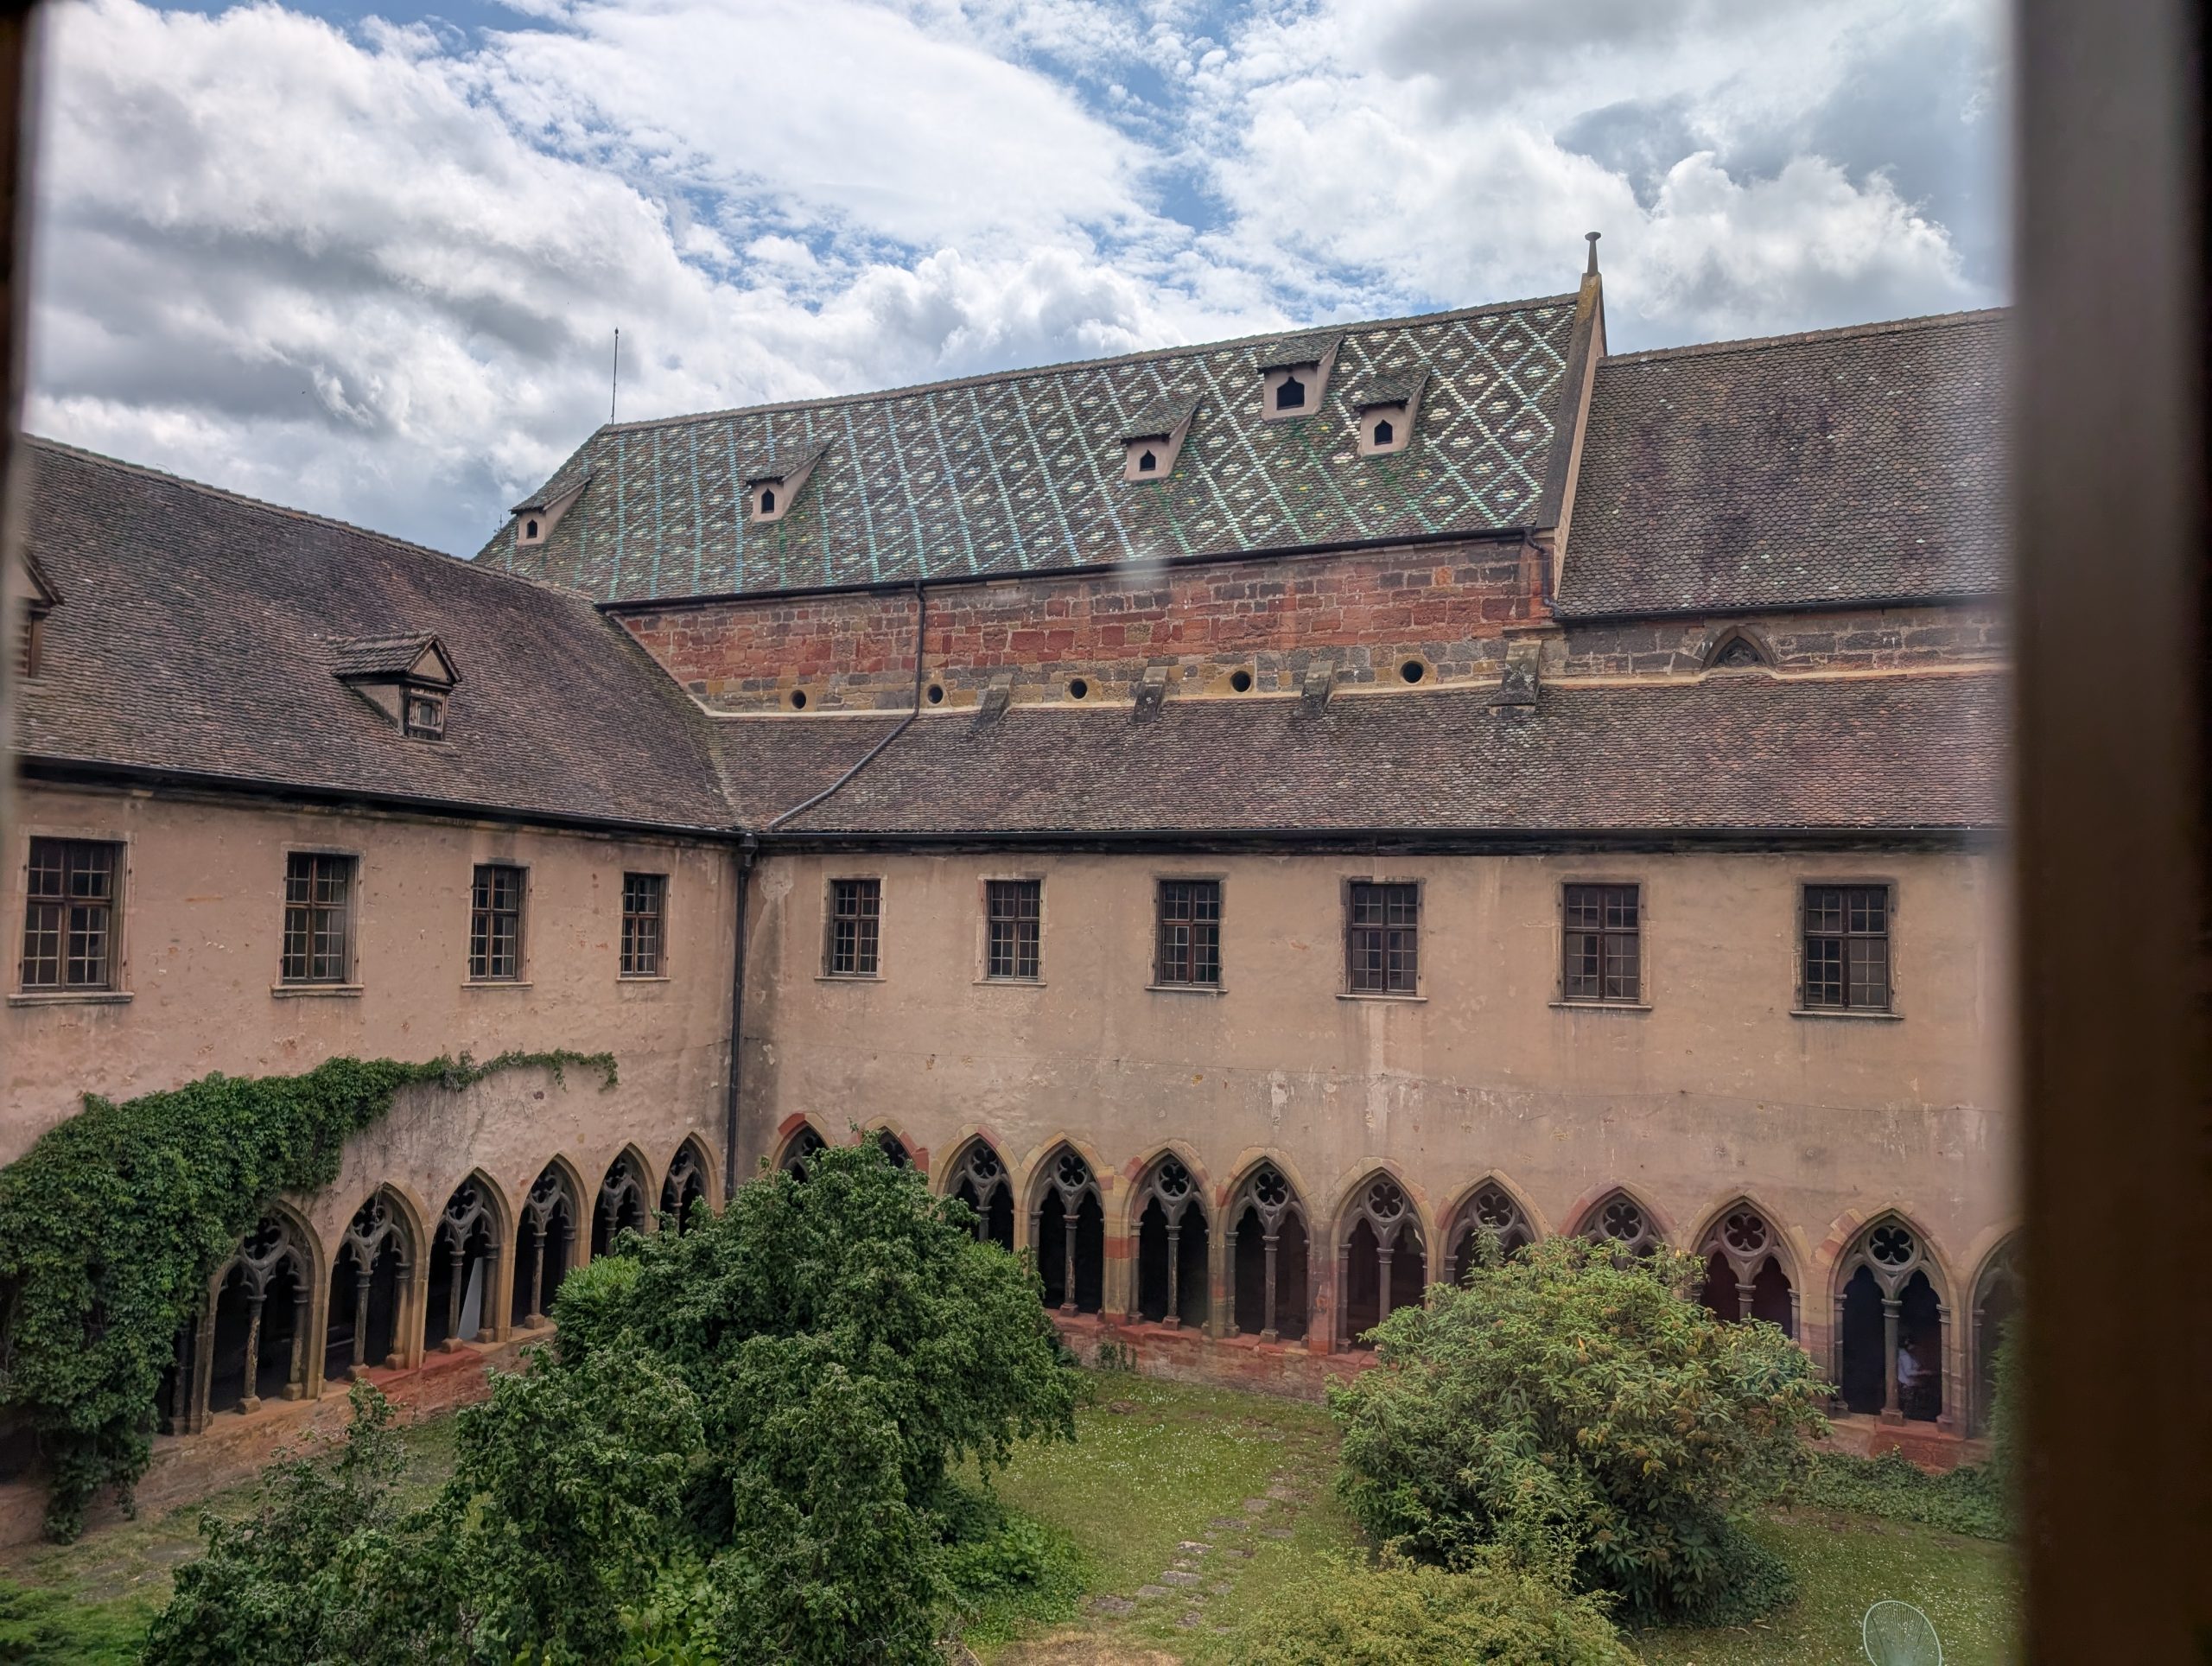
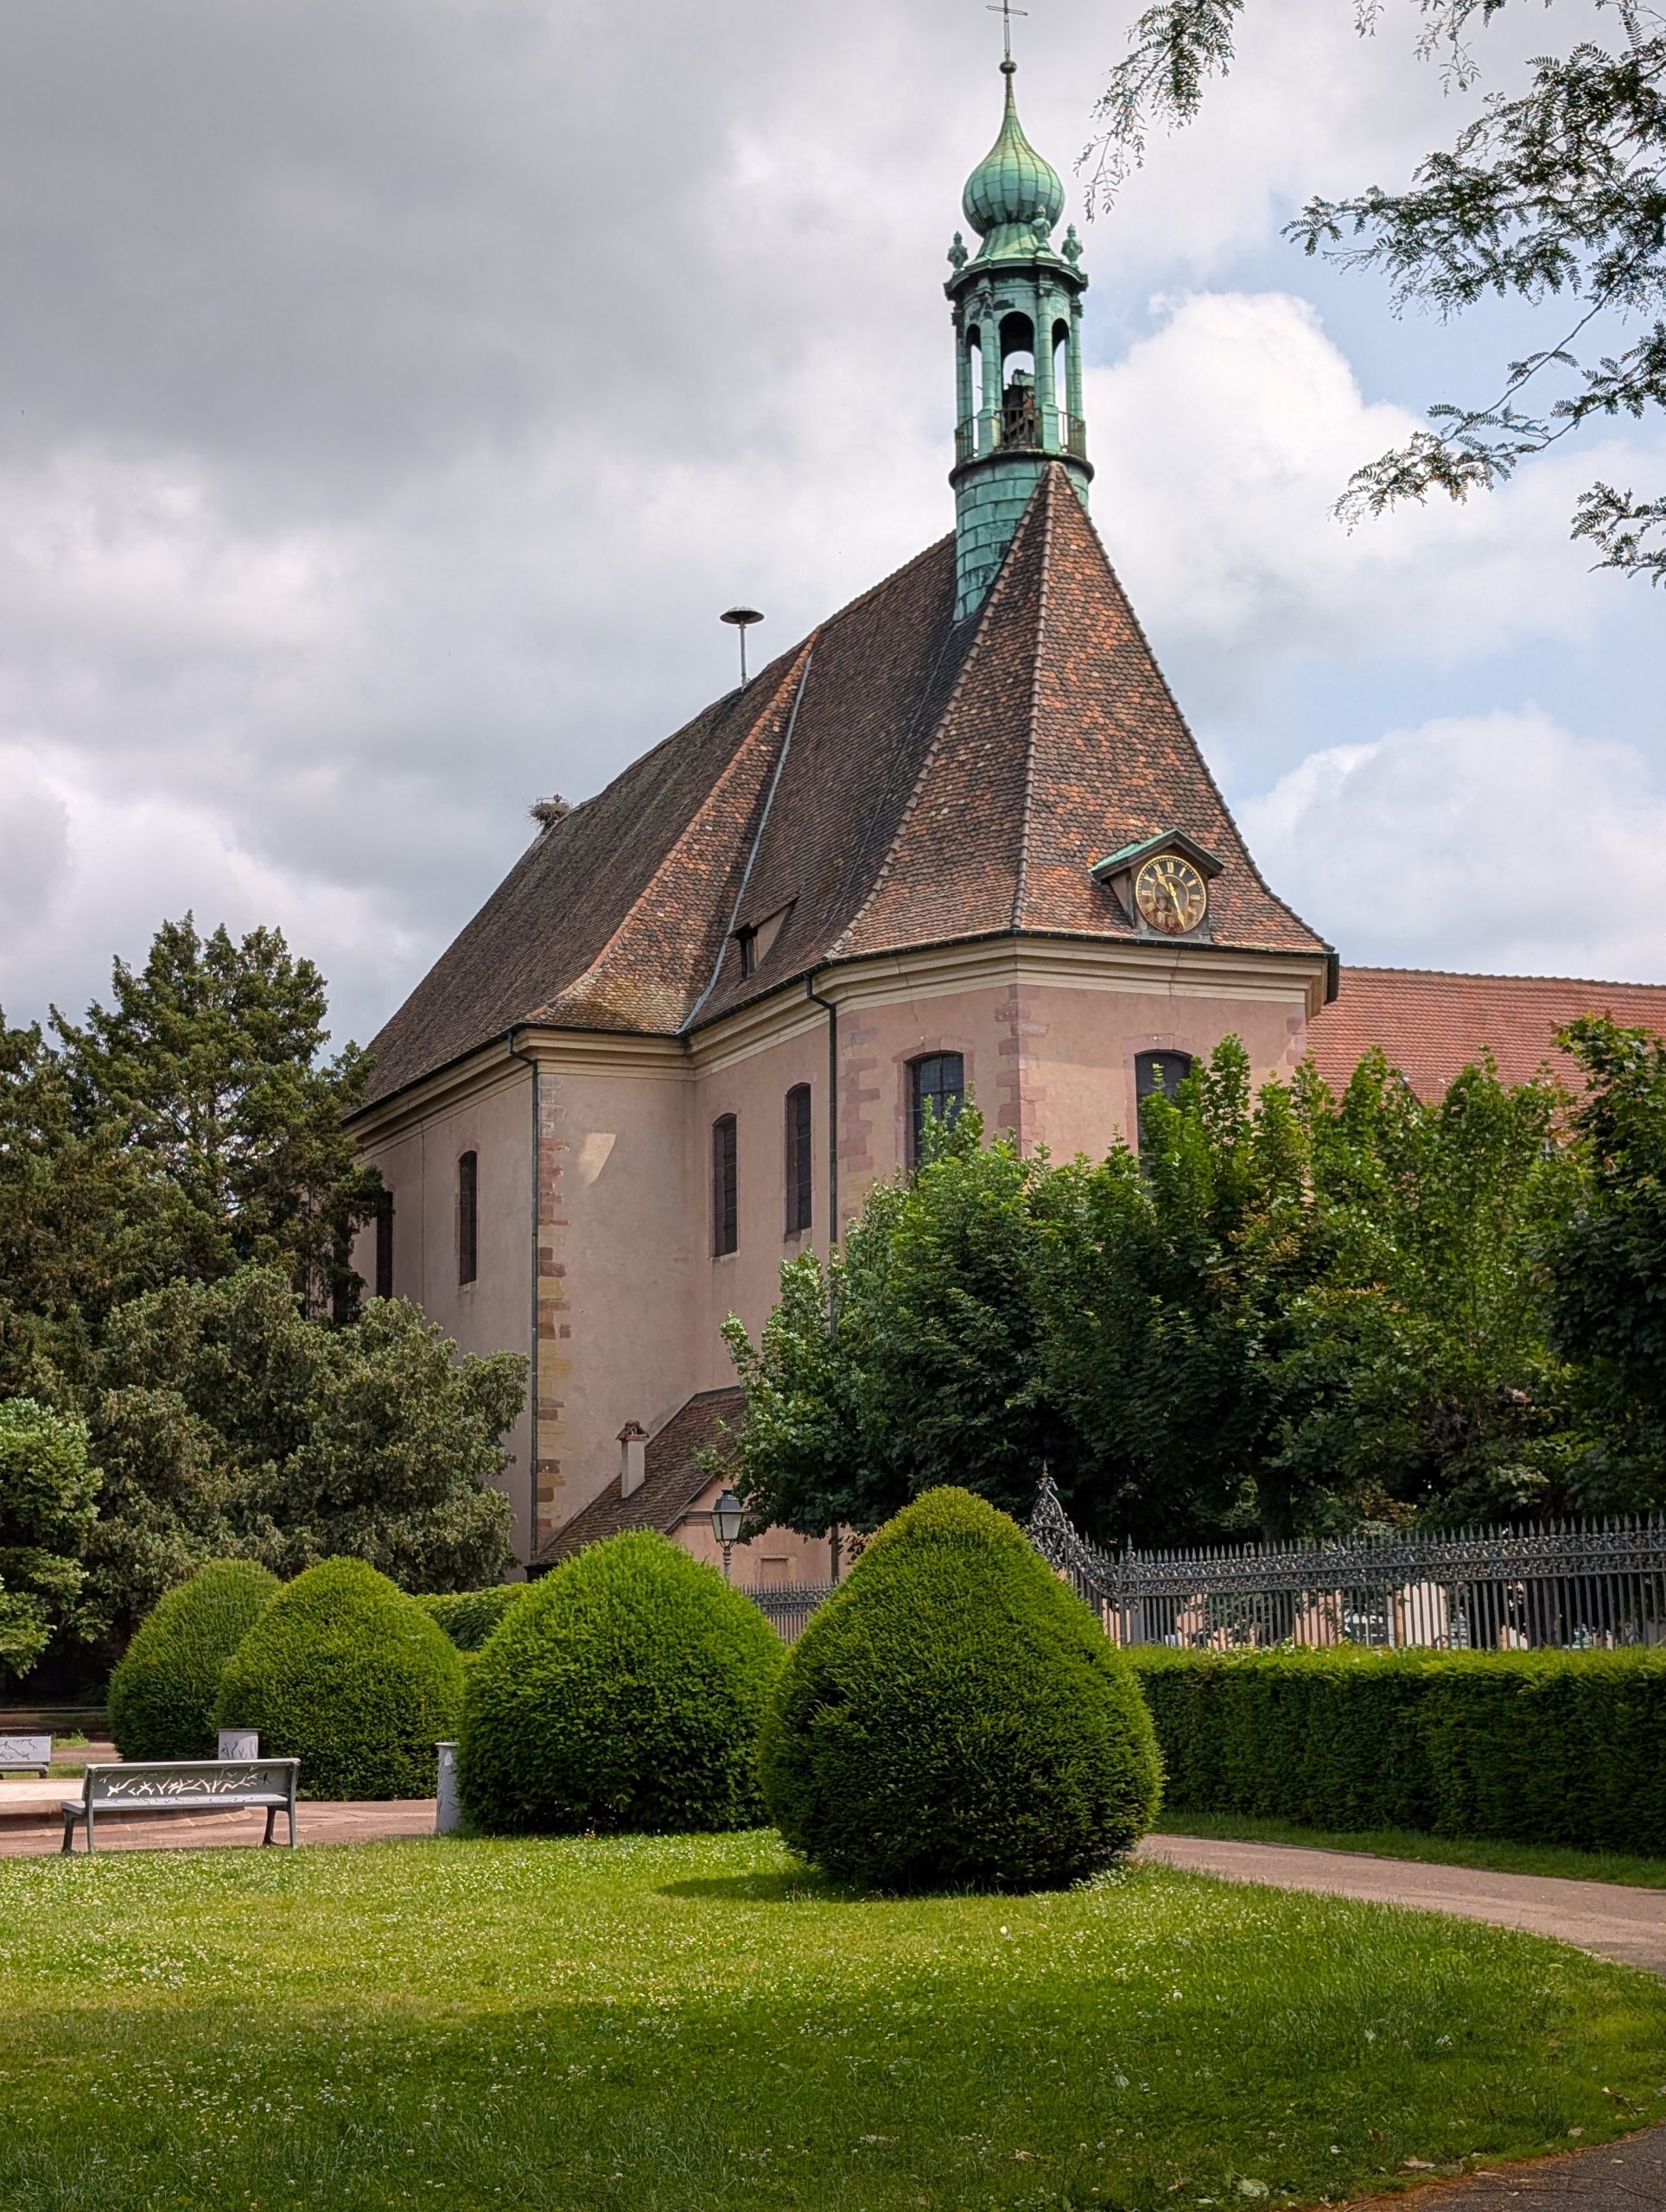
Friday, June 6, 2025 – Colmar Hotel – Colmar, France
After a lovely breakfast provided by our hotel, we decided today was the day to visit the Musée Unterlinde (Unterlinden Museum). But how to get there? (Walking was out of the question, at least for me.) So, Andy figured out the bus system, and away we proceeded.
After arriving at the museum, paying our entrance fee, and each collecting our own audio guide, off we went in search of knowledge.
This incredible museum was established in 1849, housed in a 13th-century Dominican religious sisters’ convent and a 1906 former public baths building.
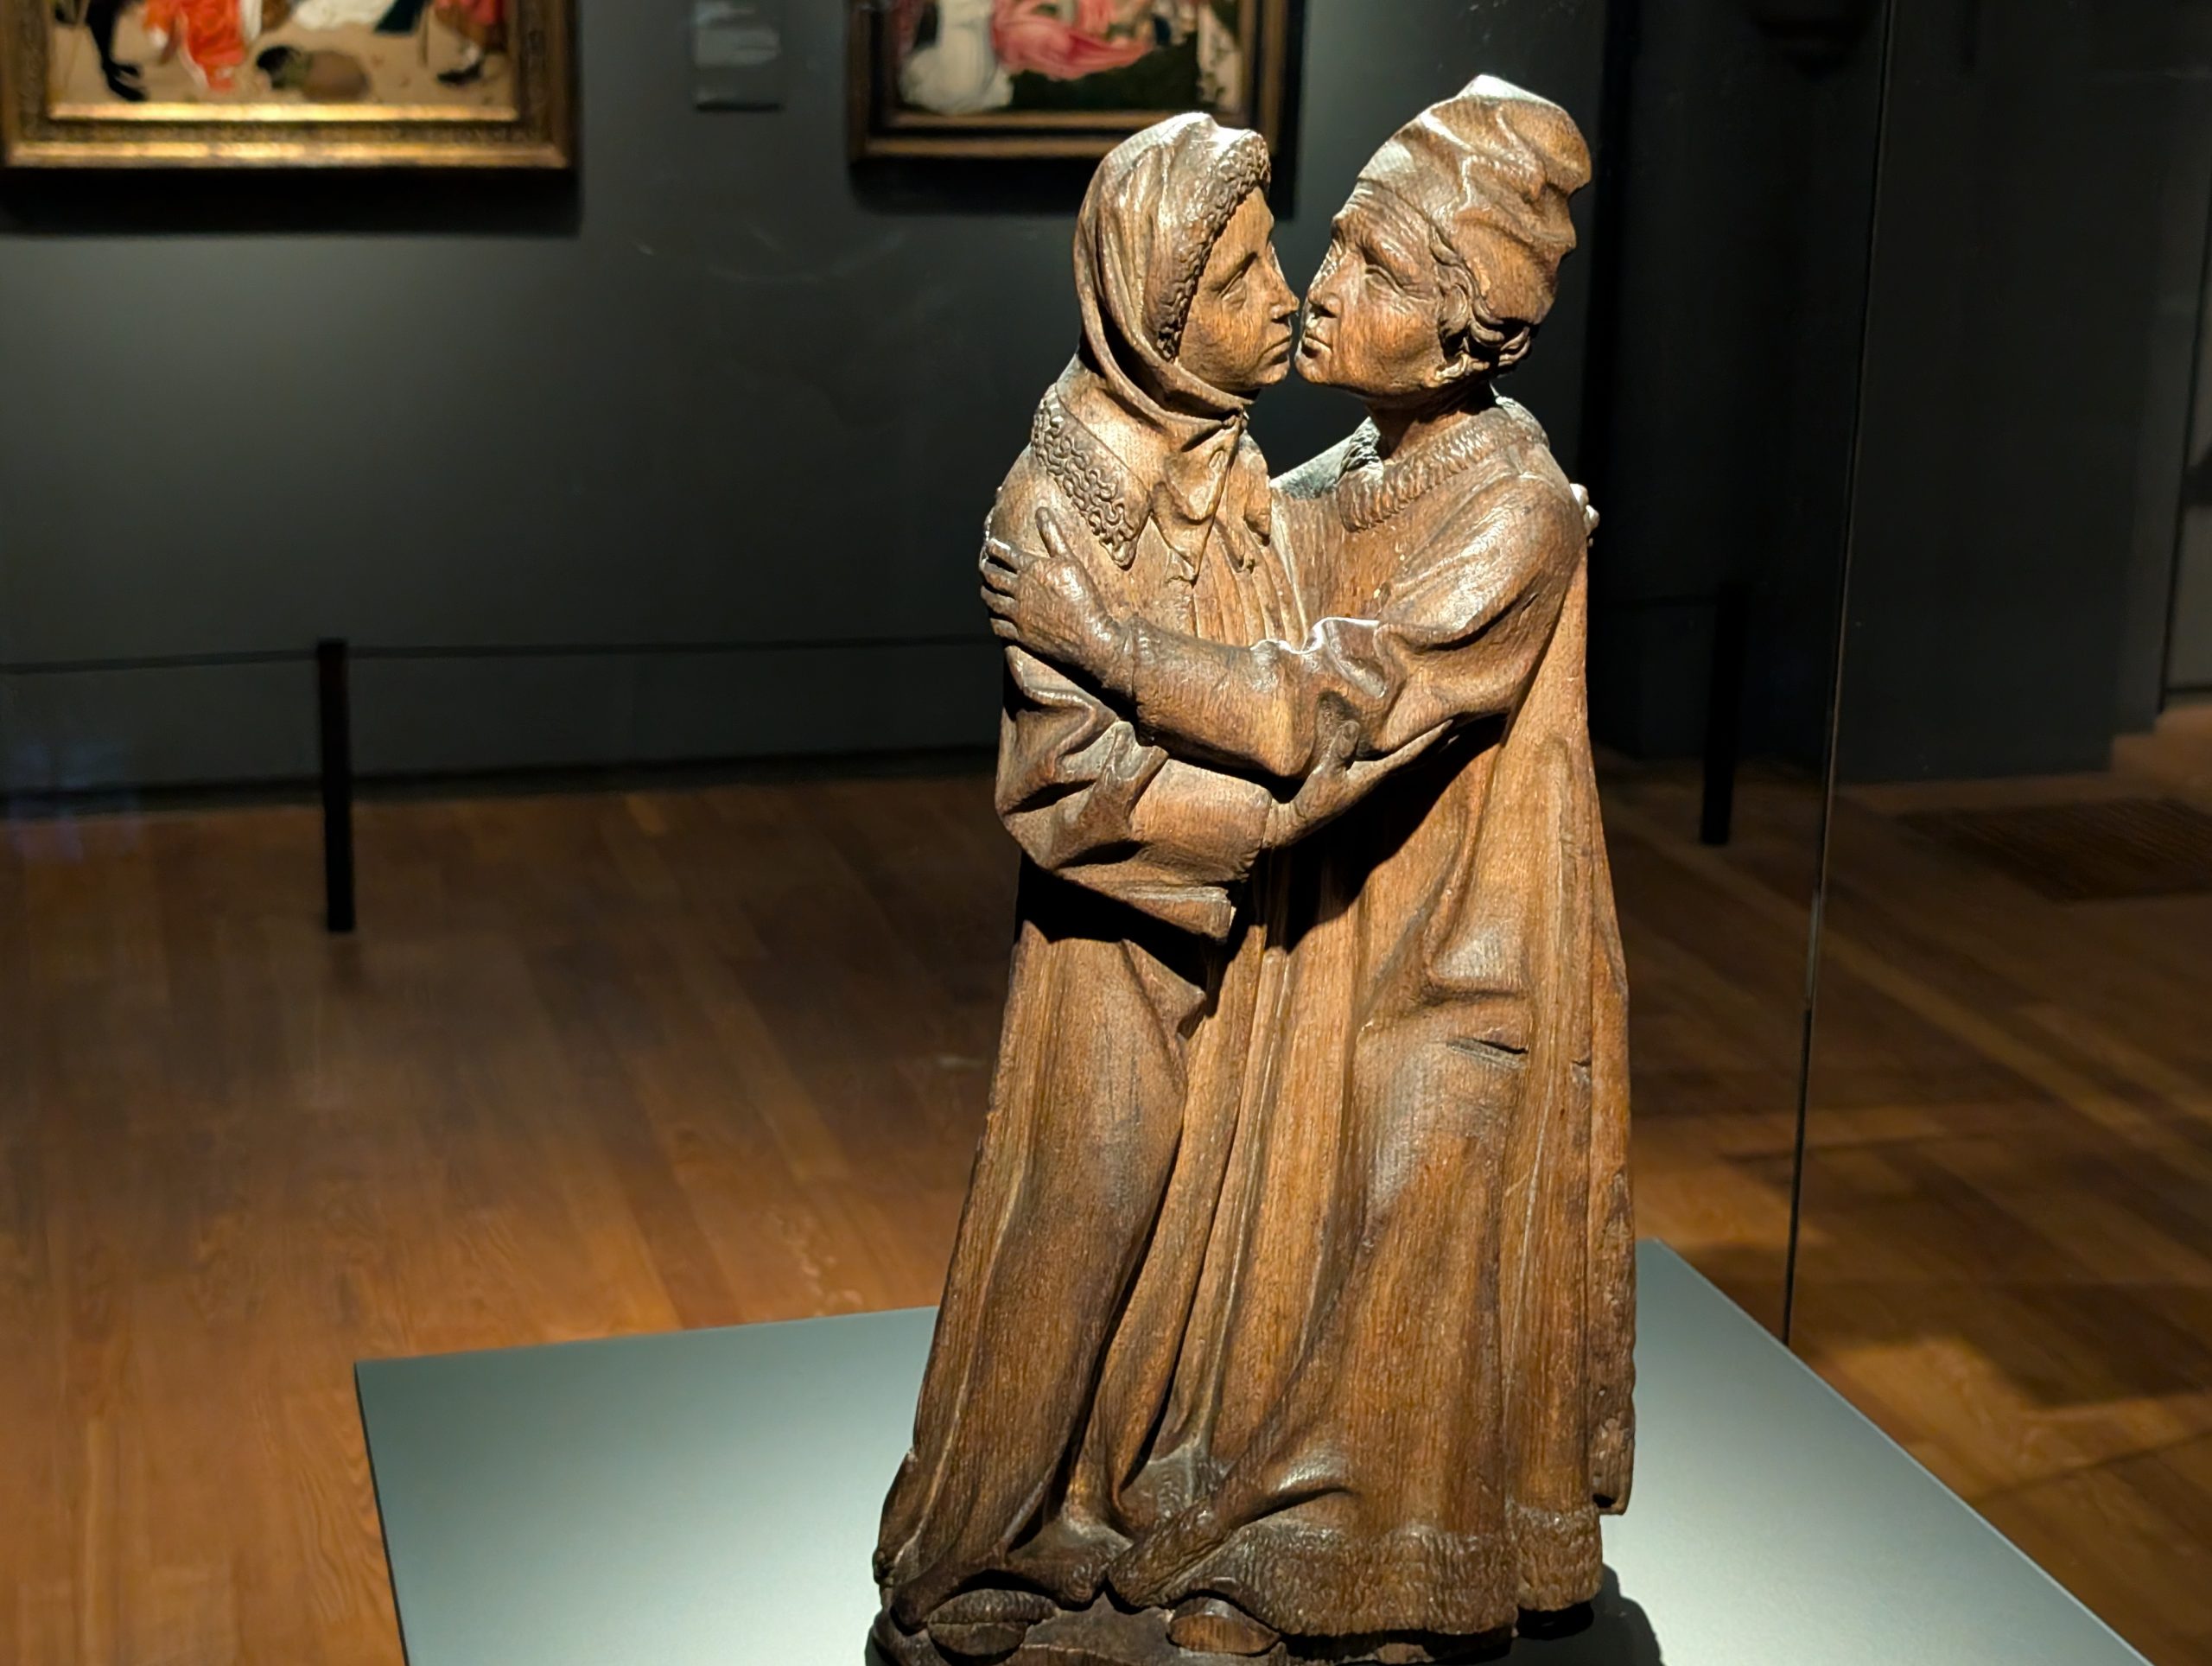
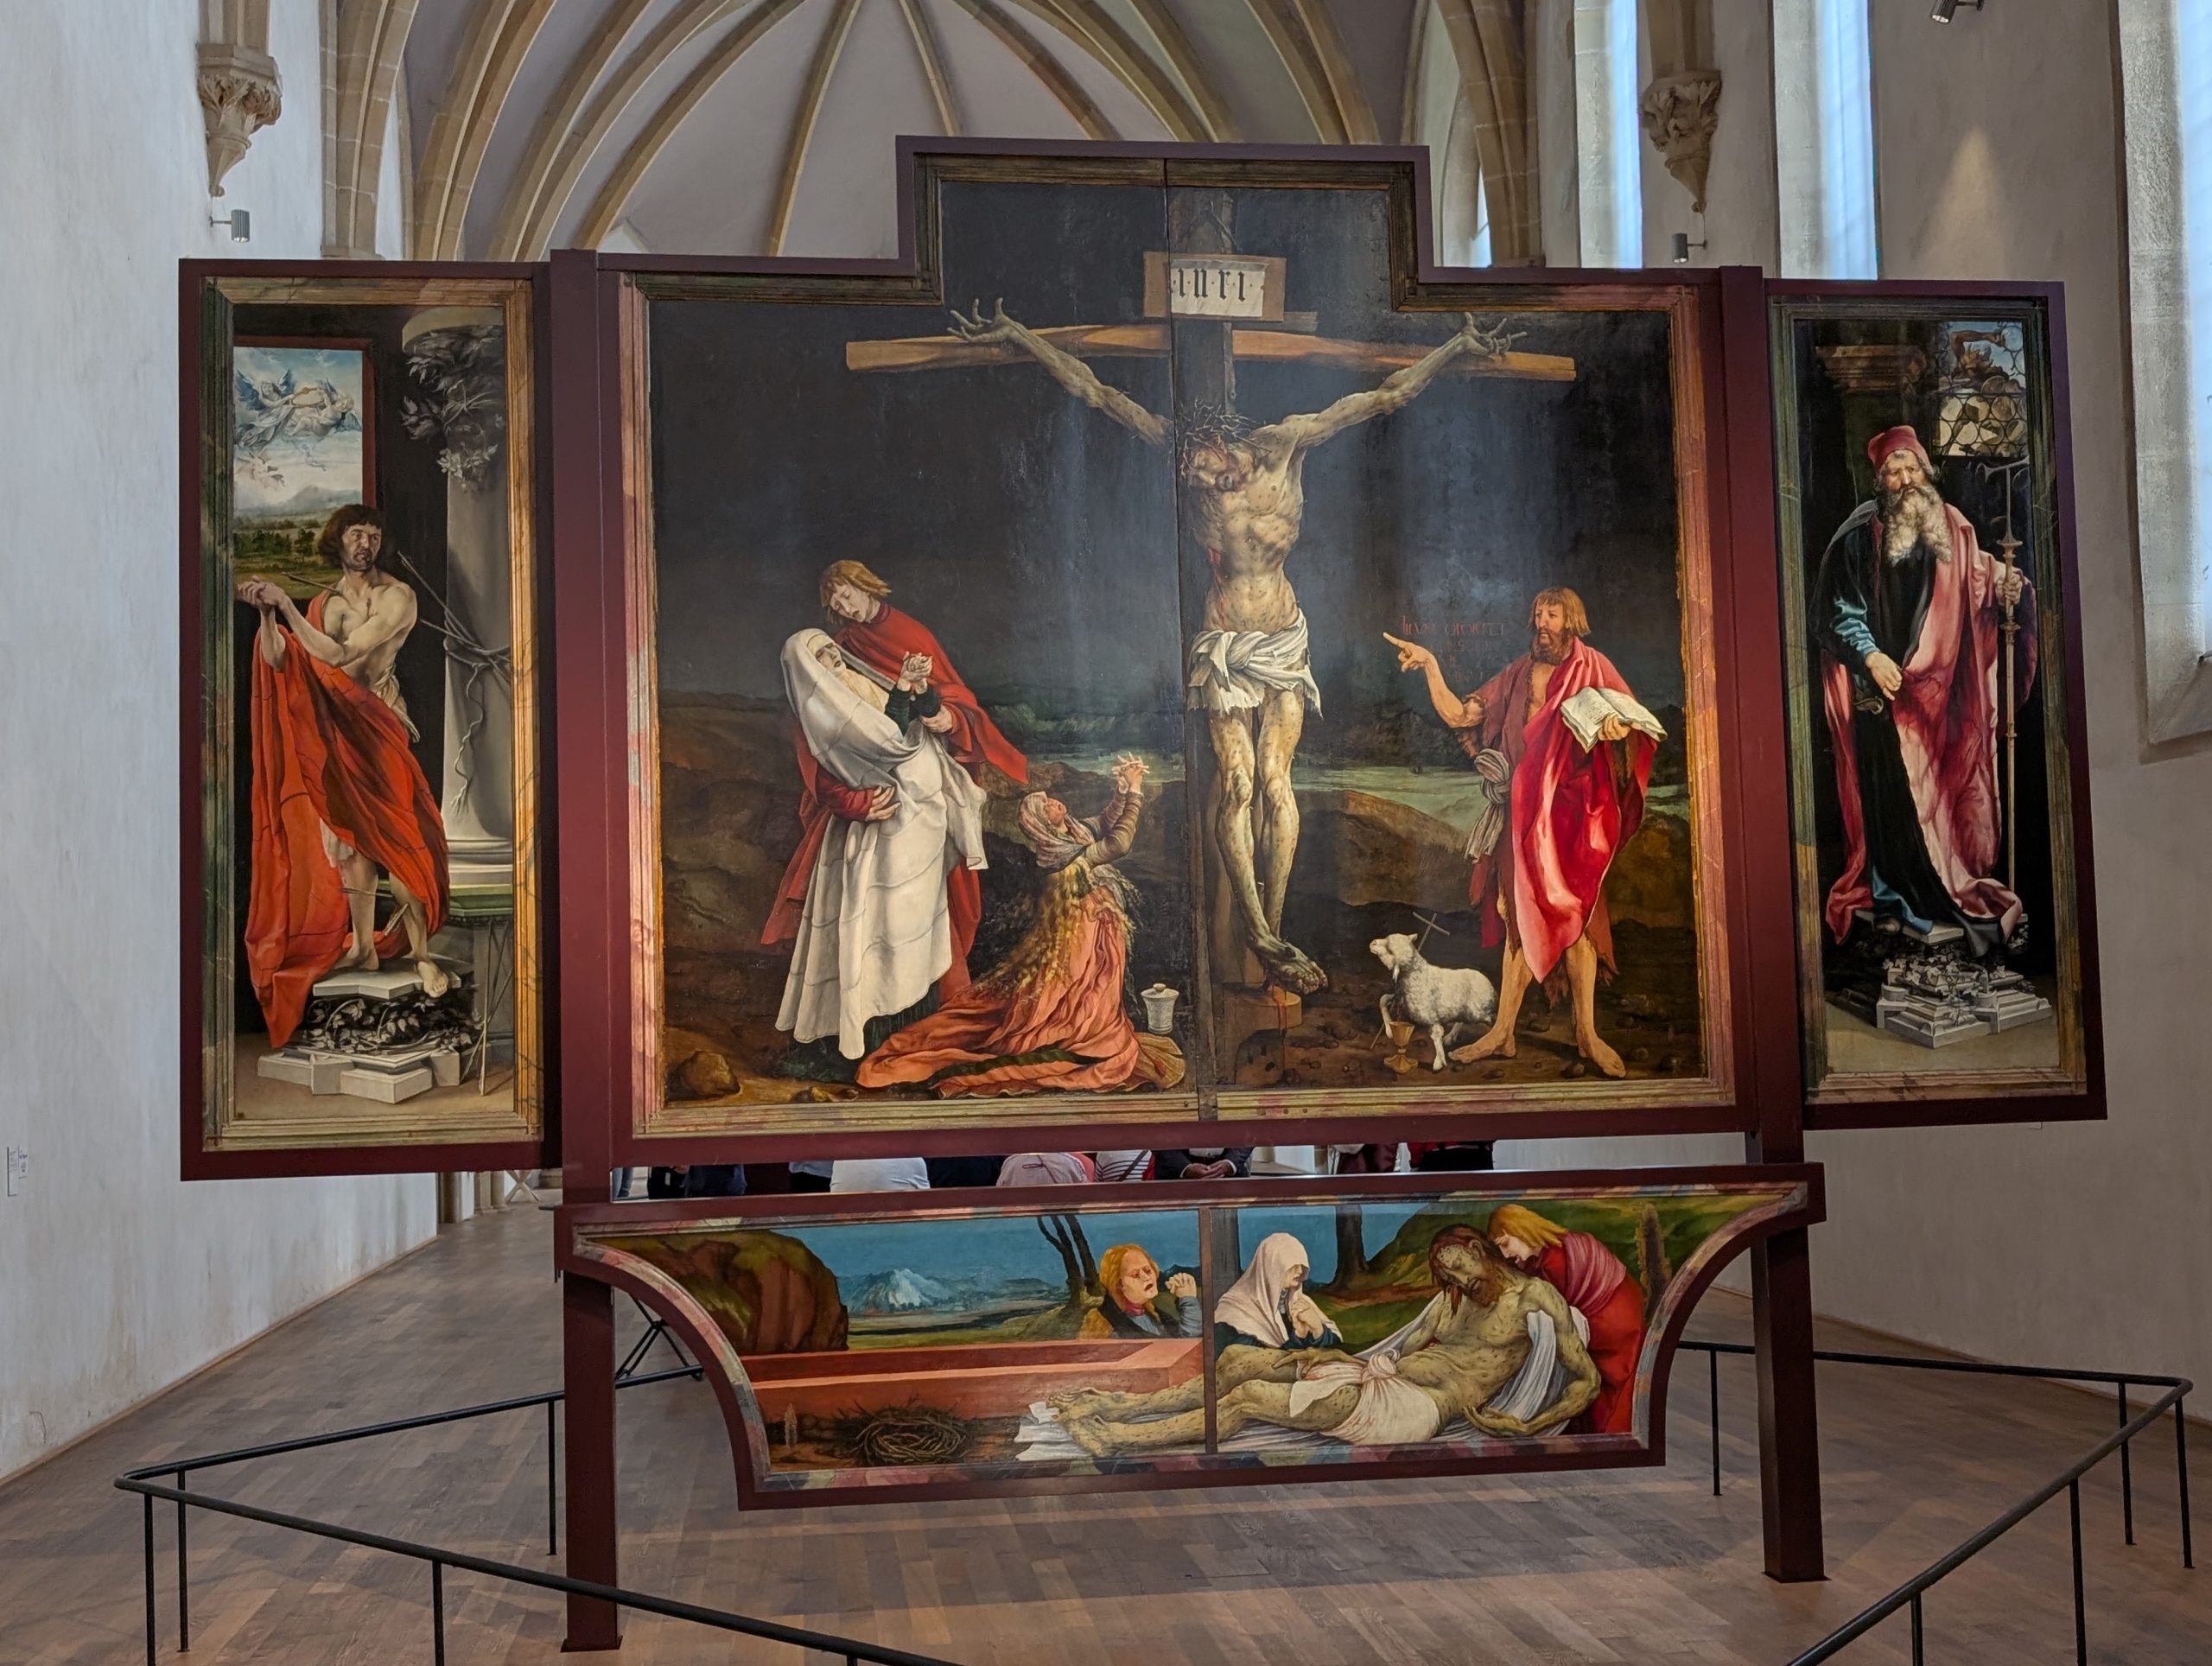
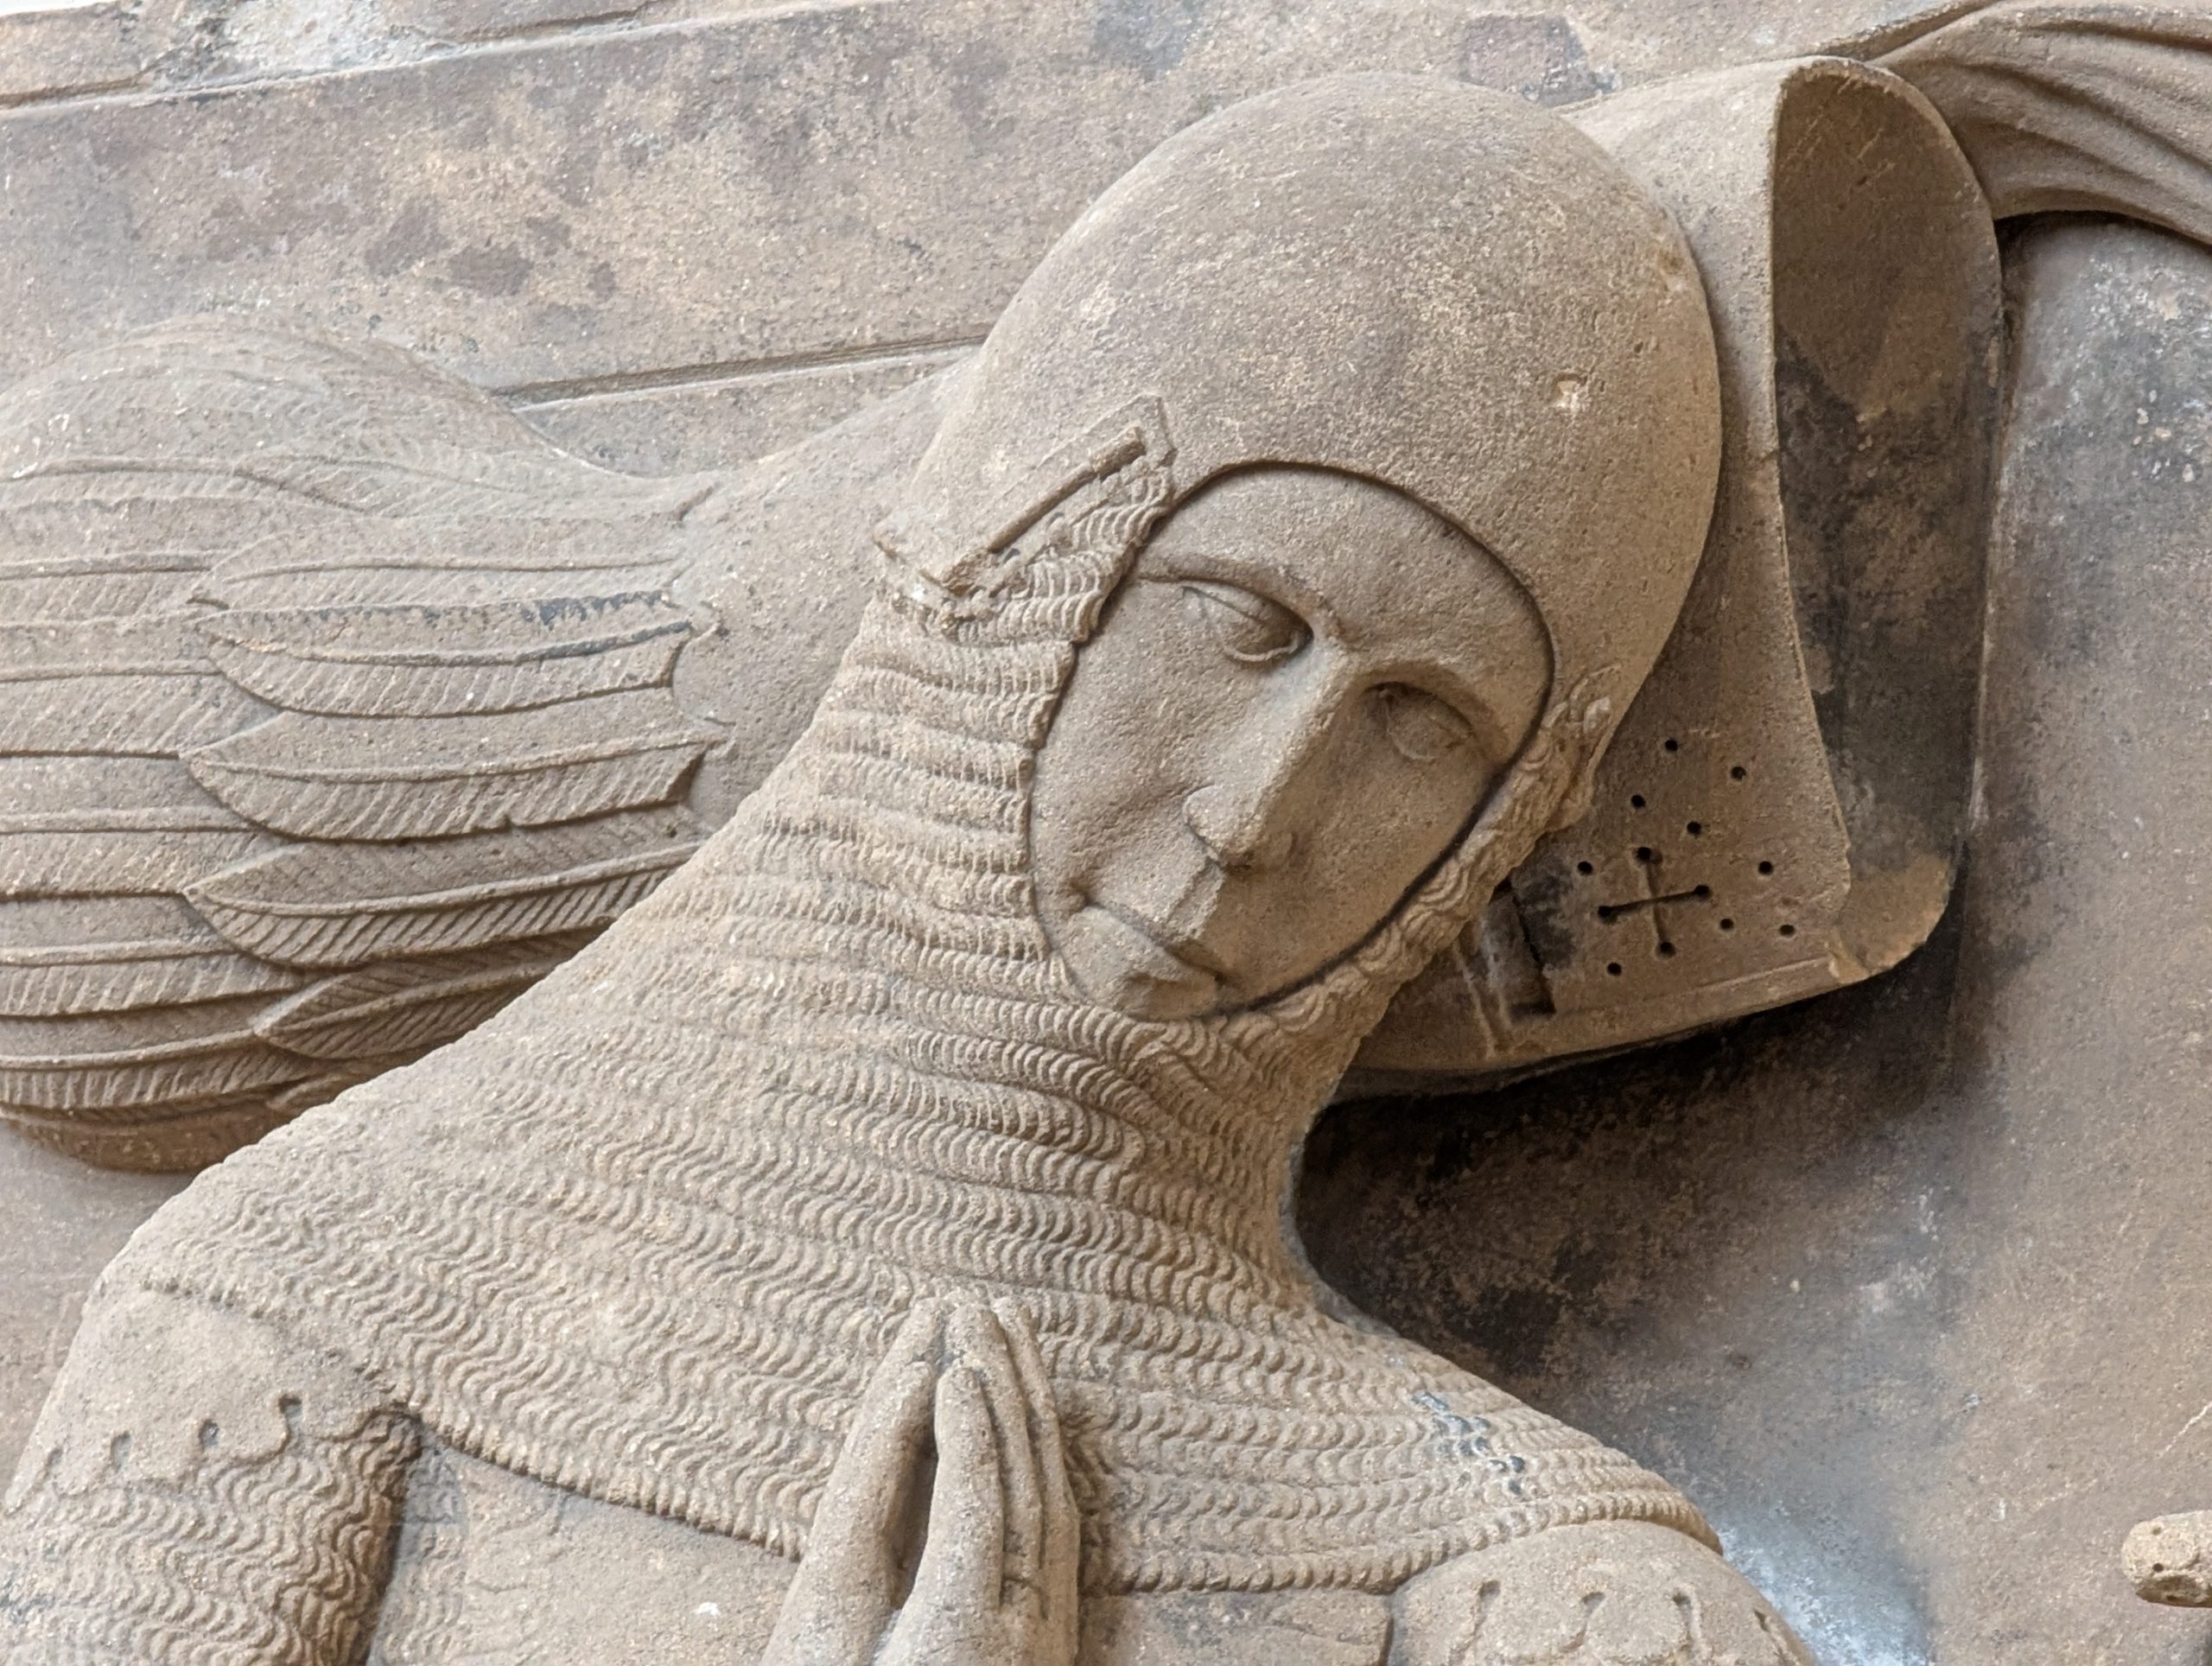
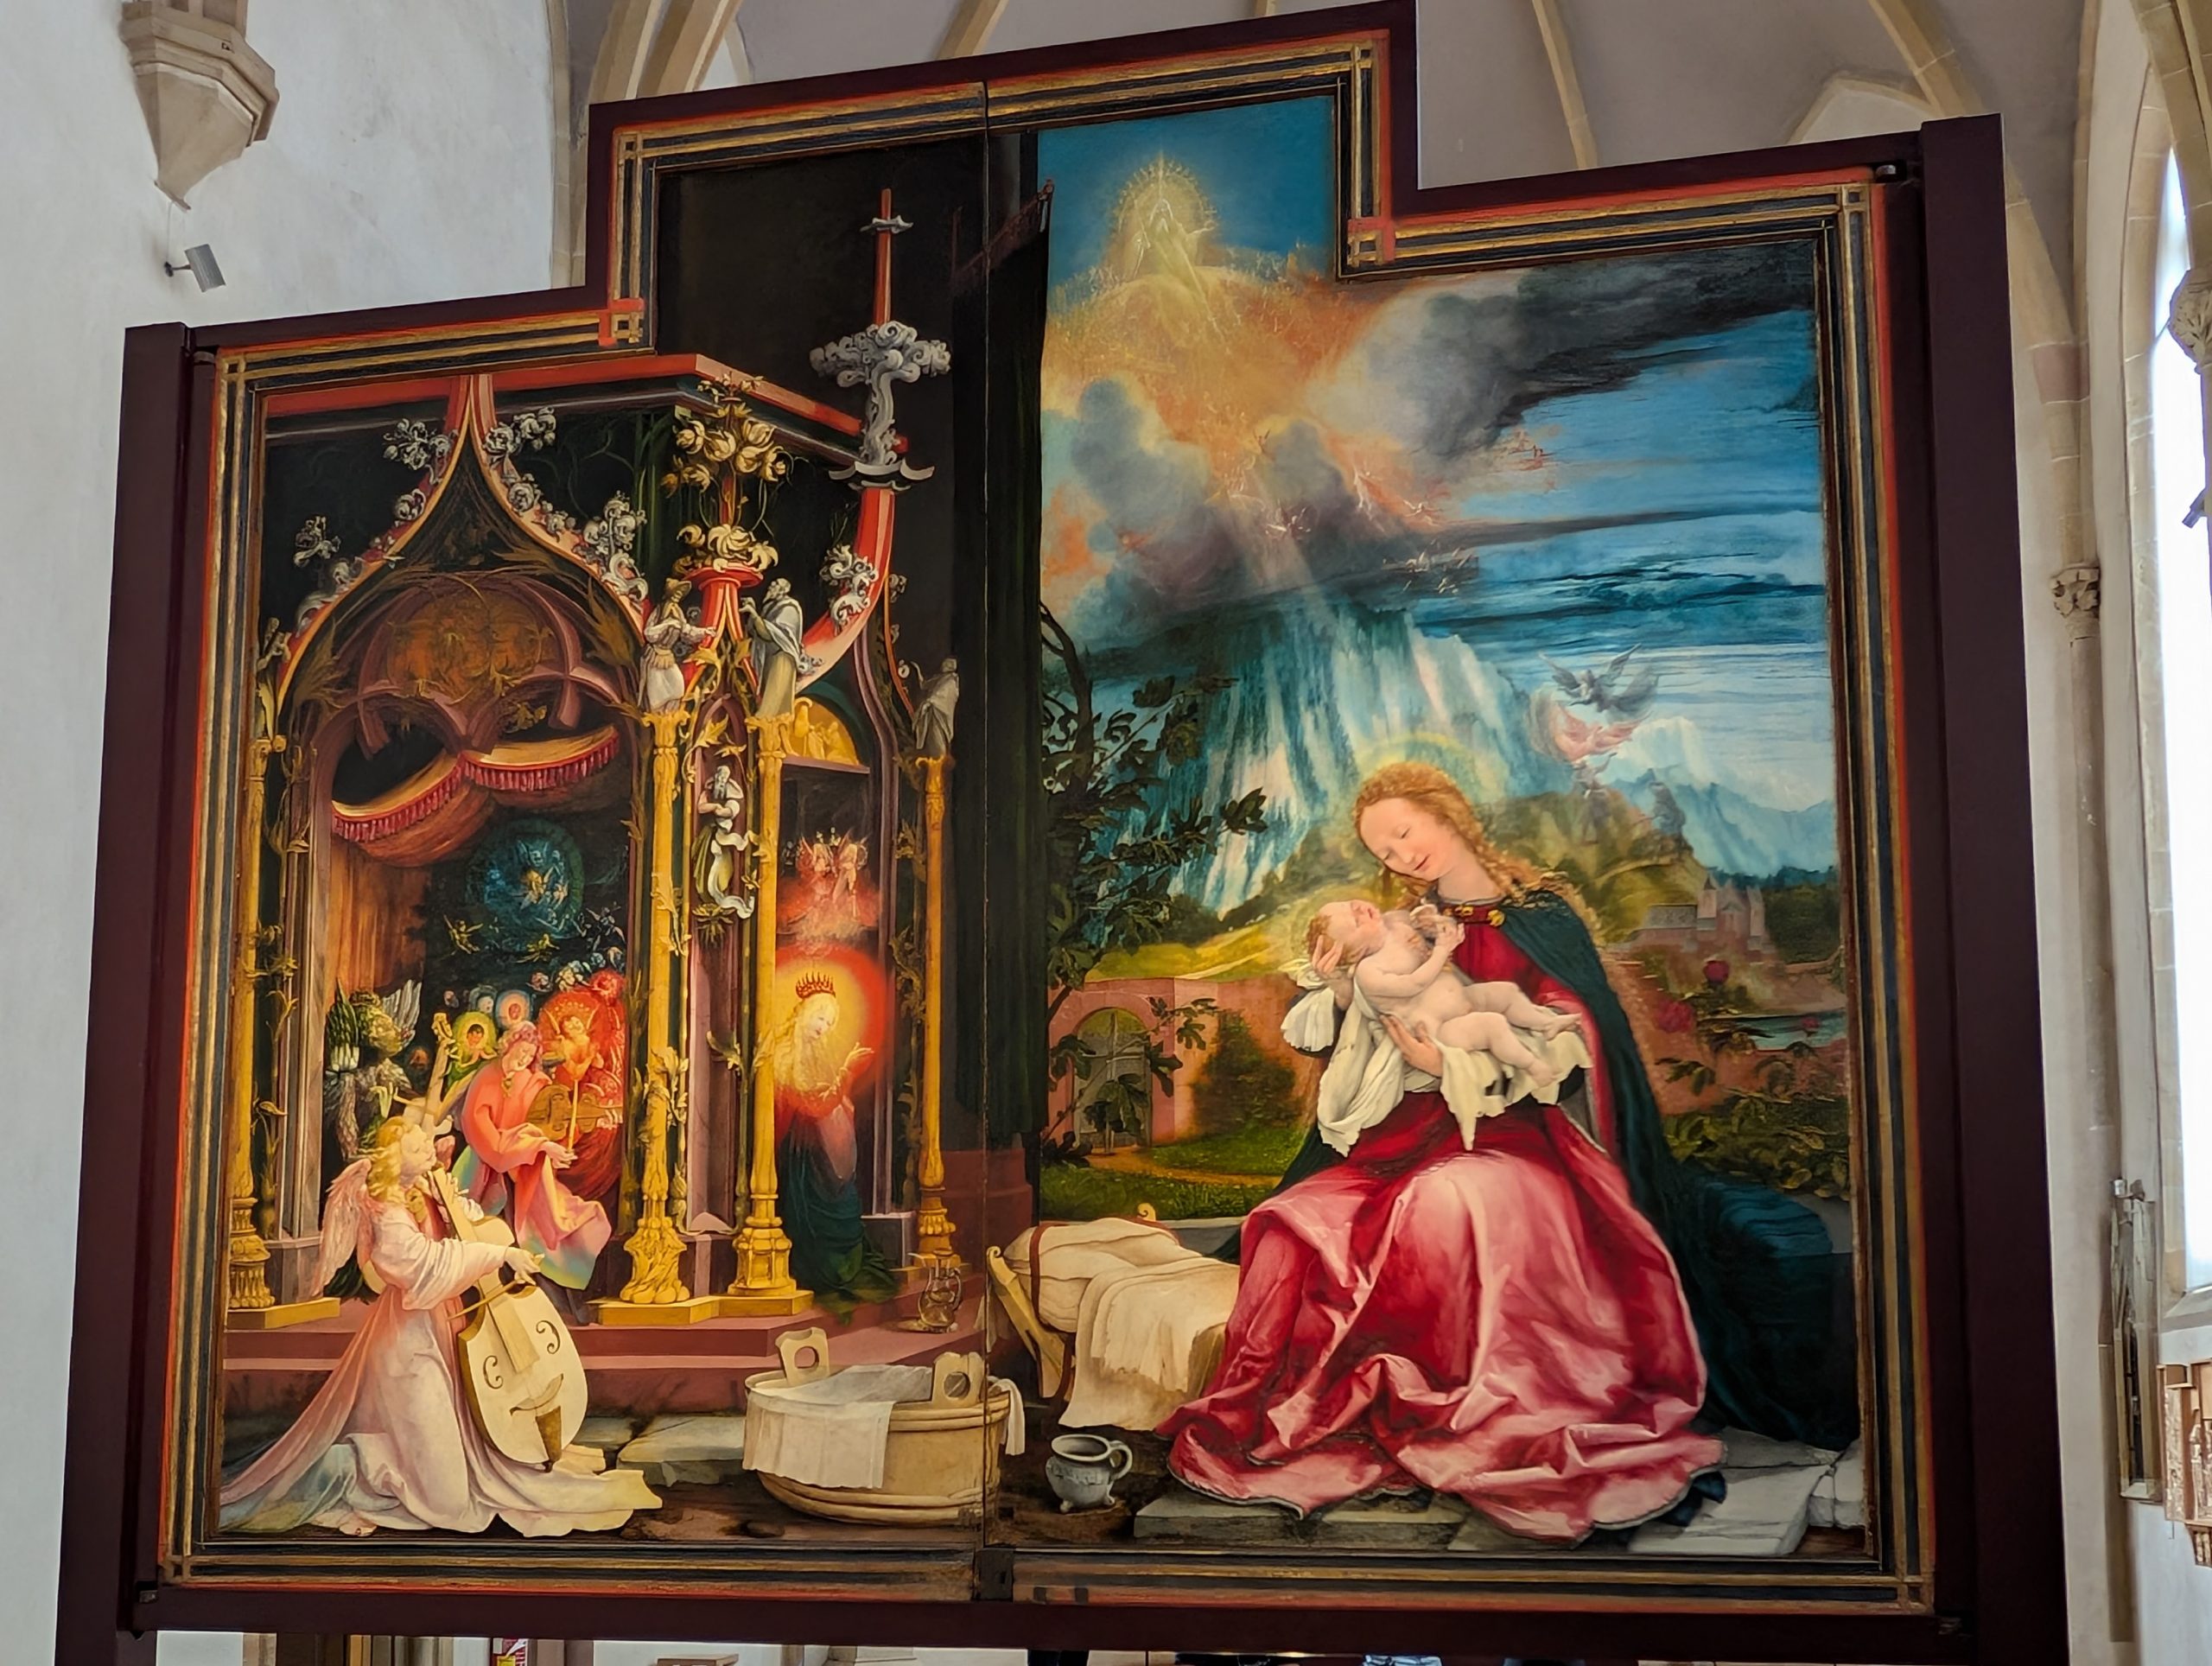
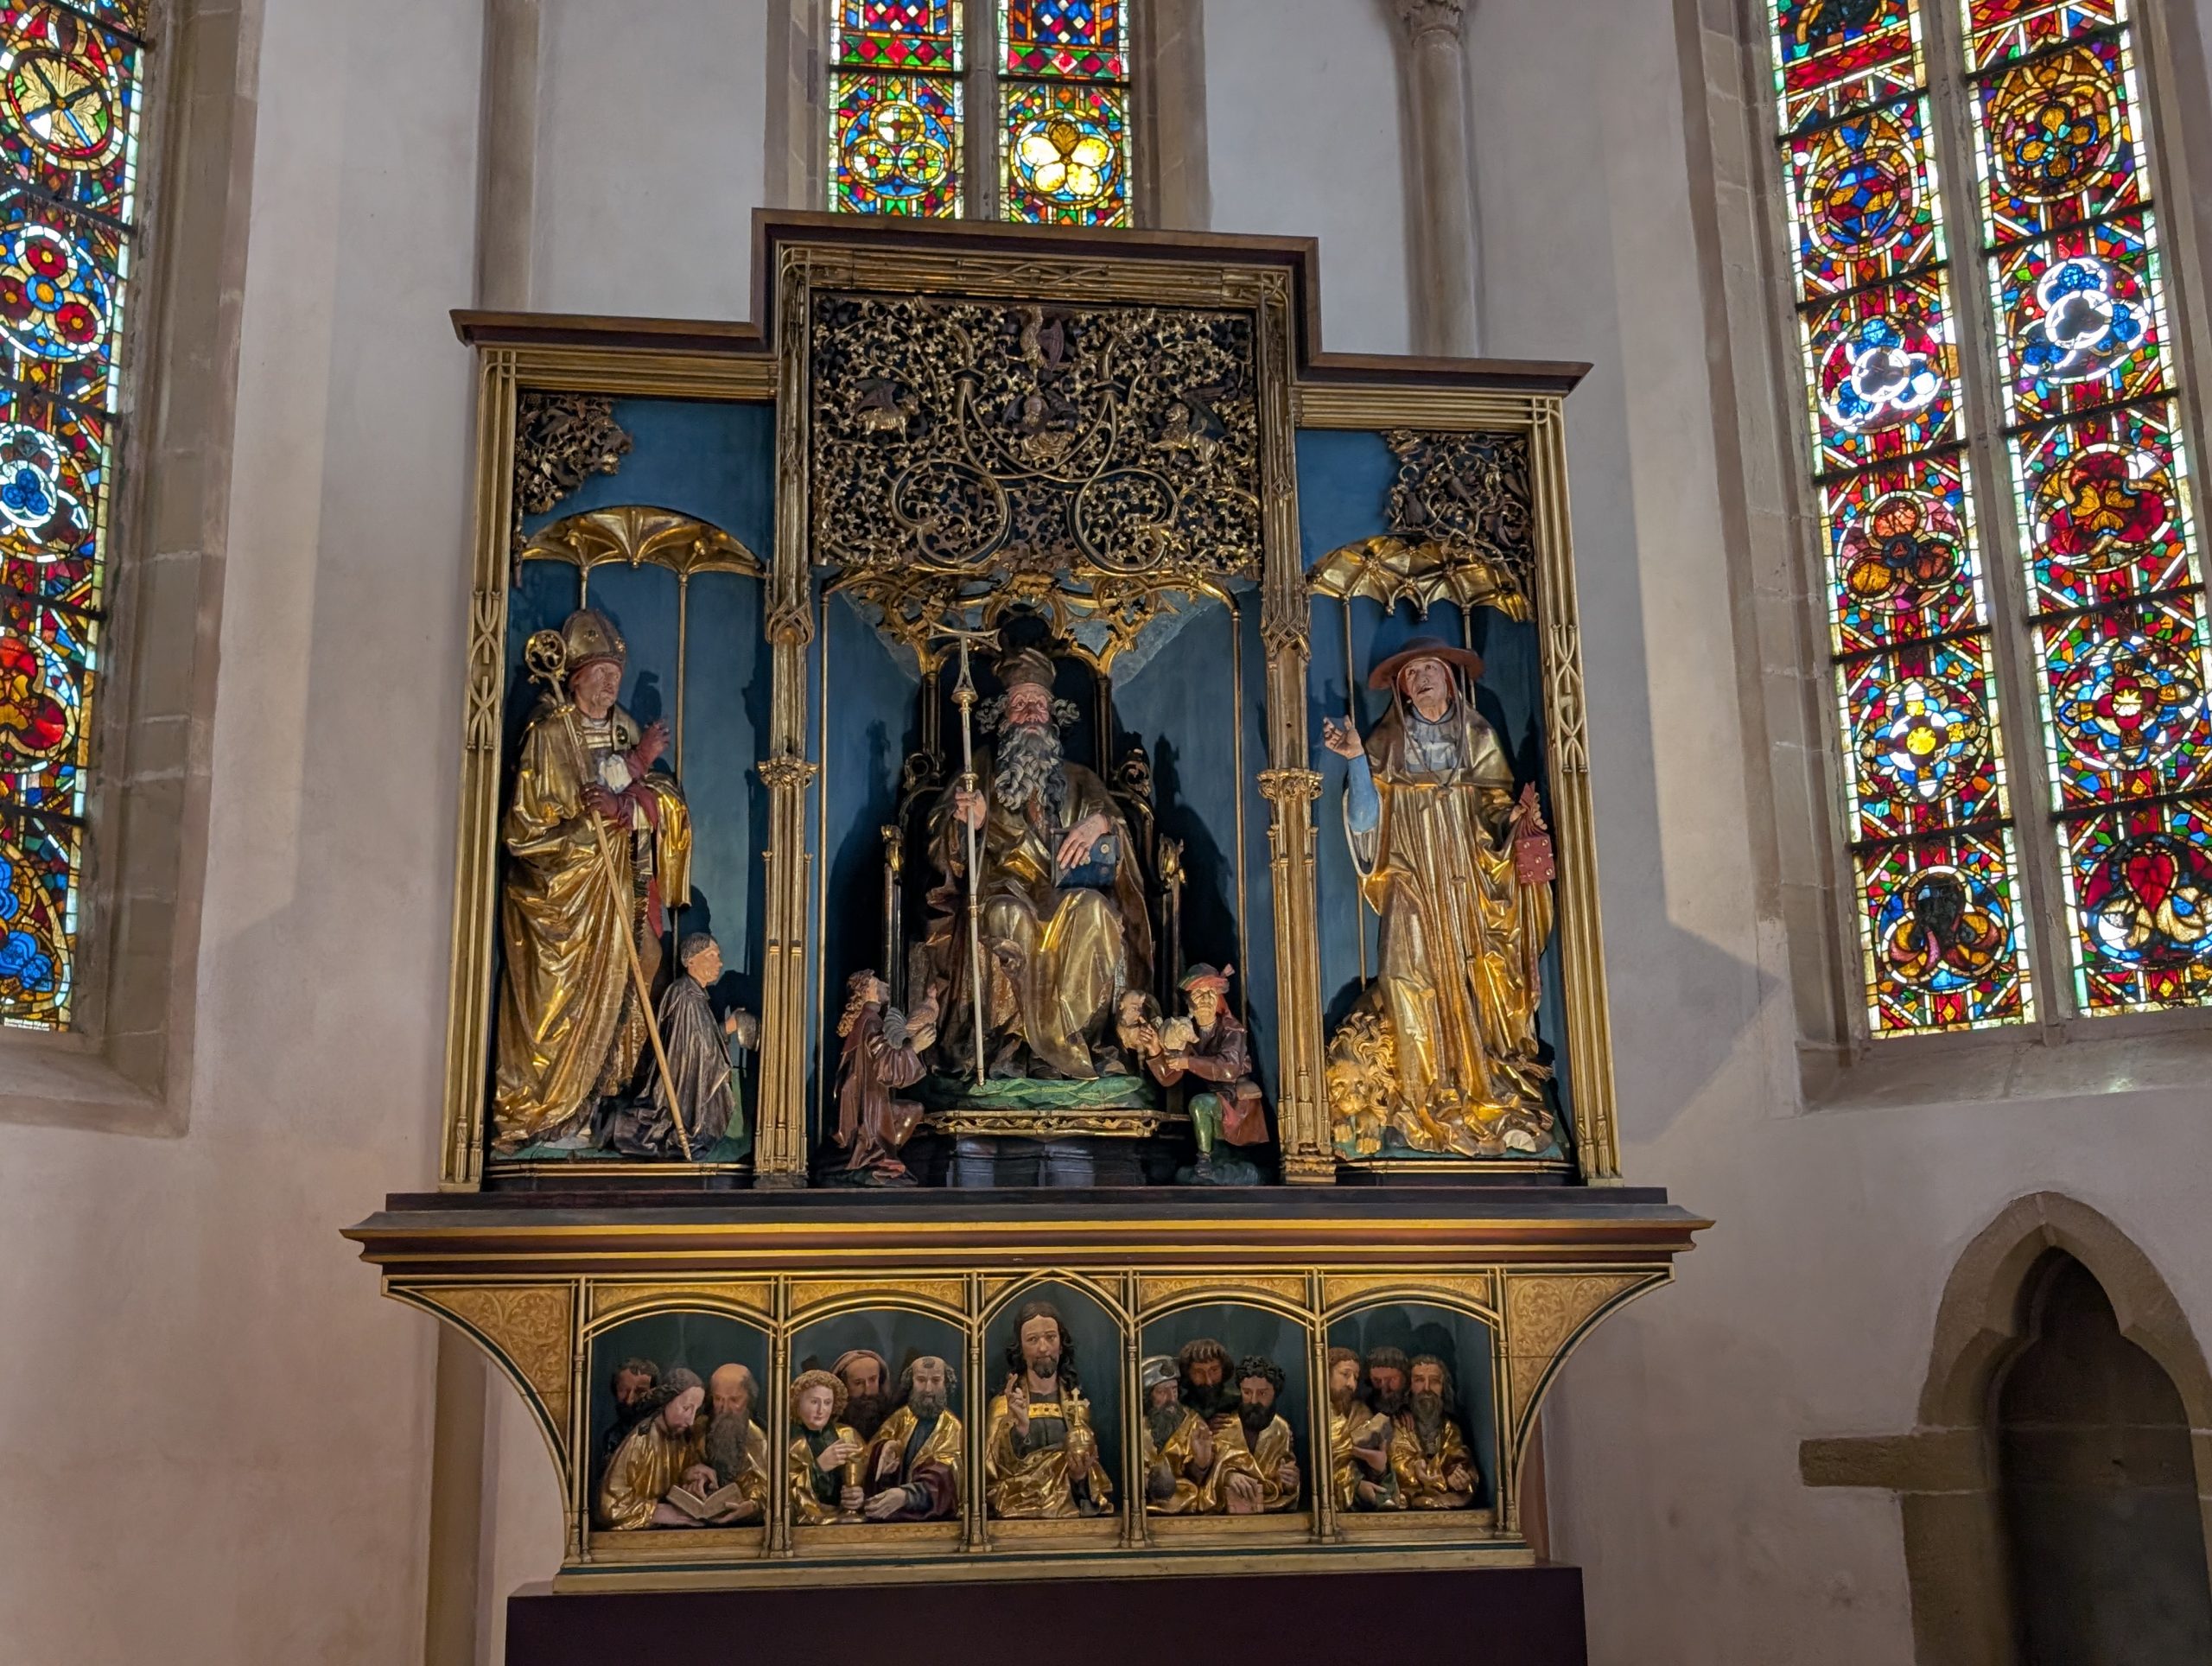
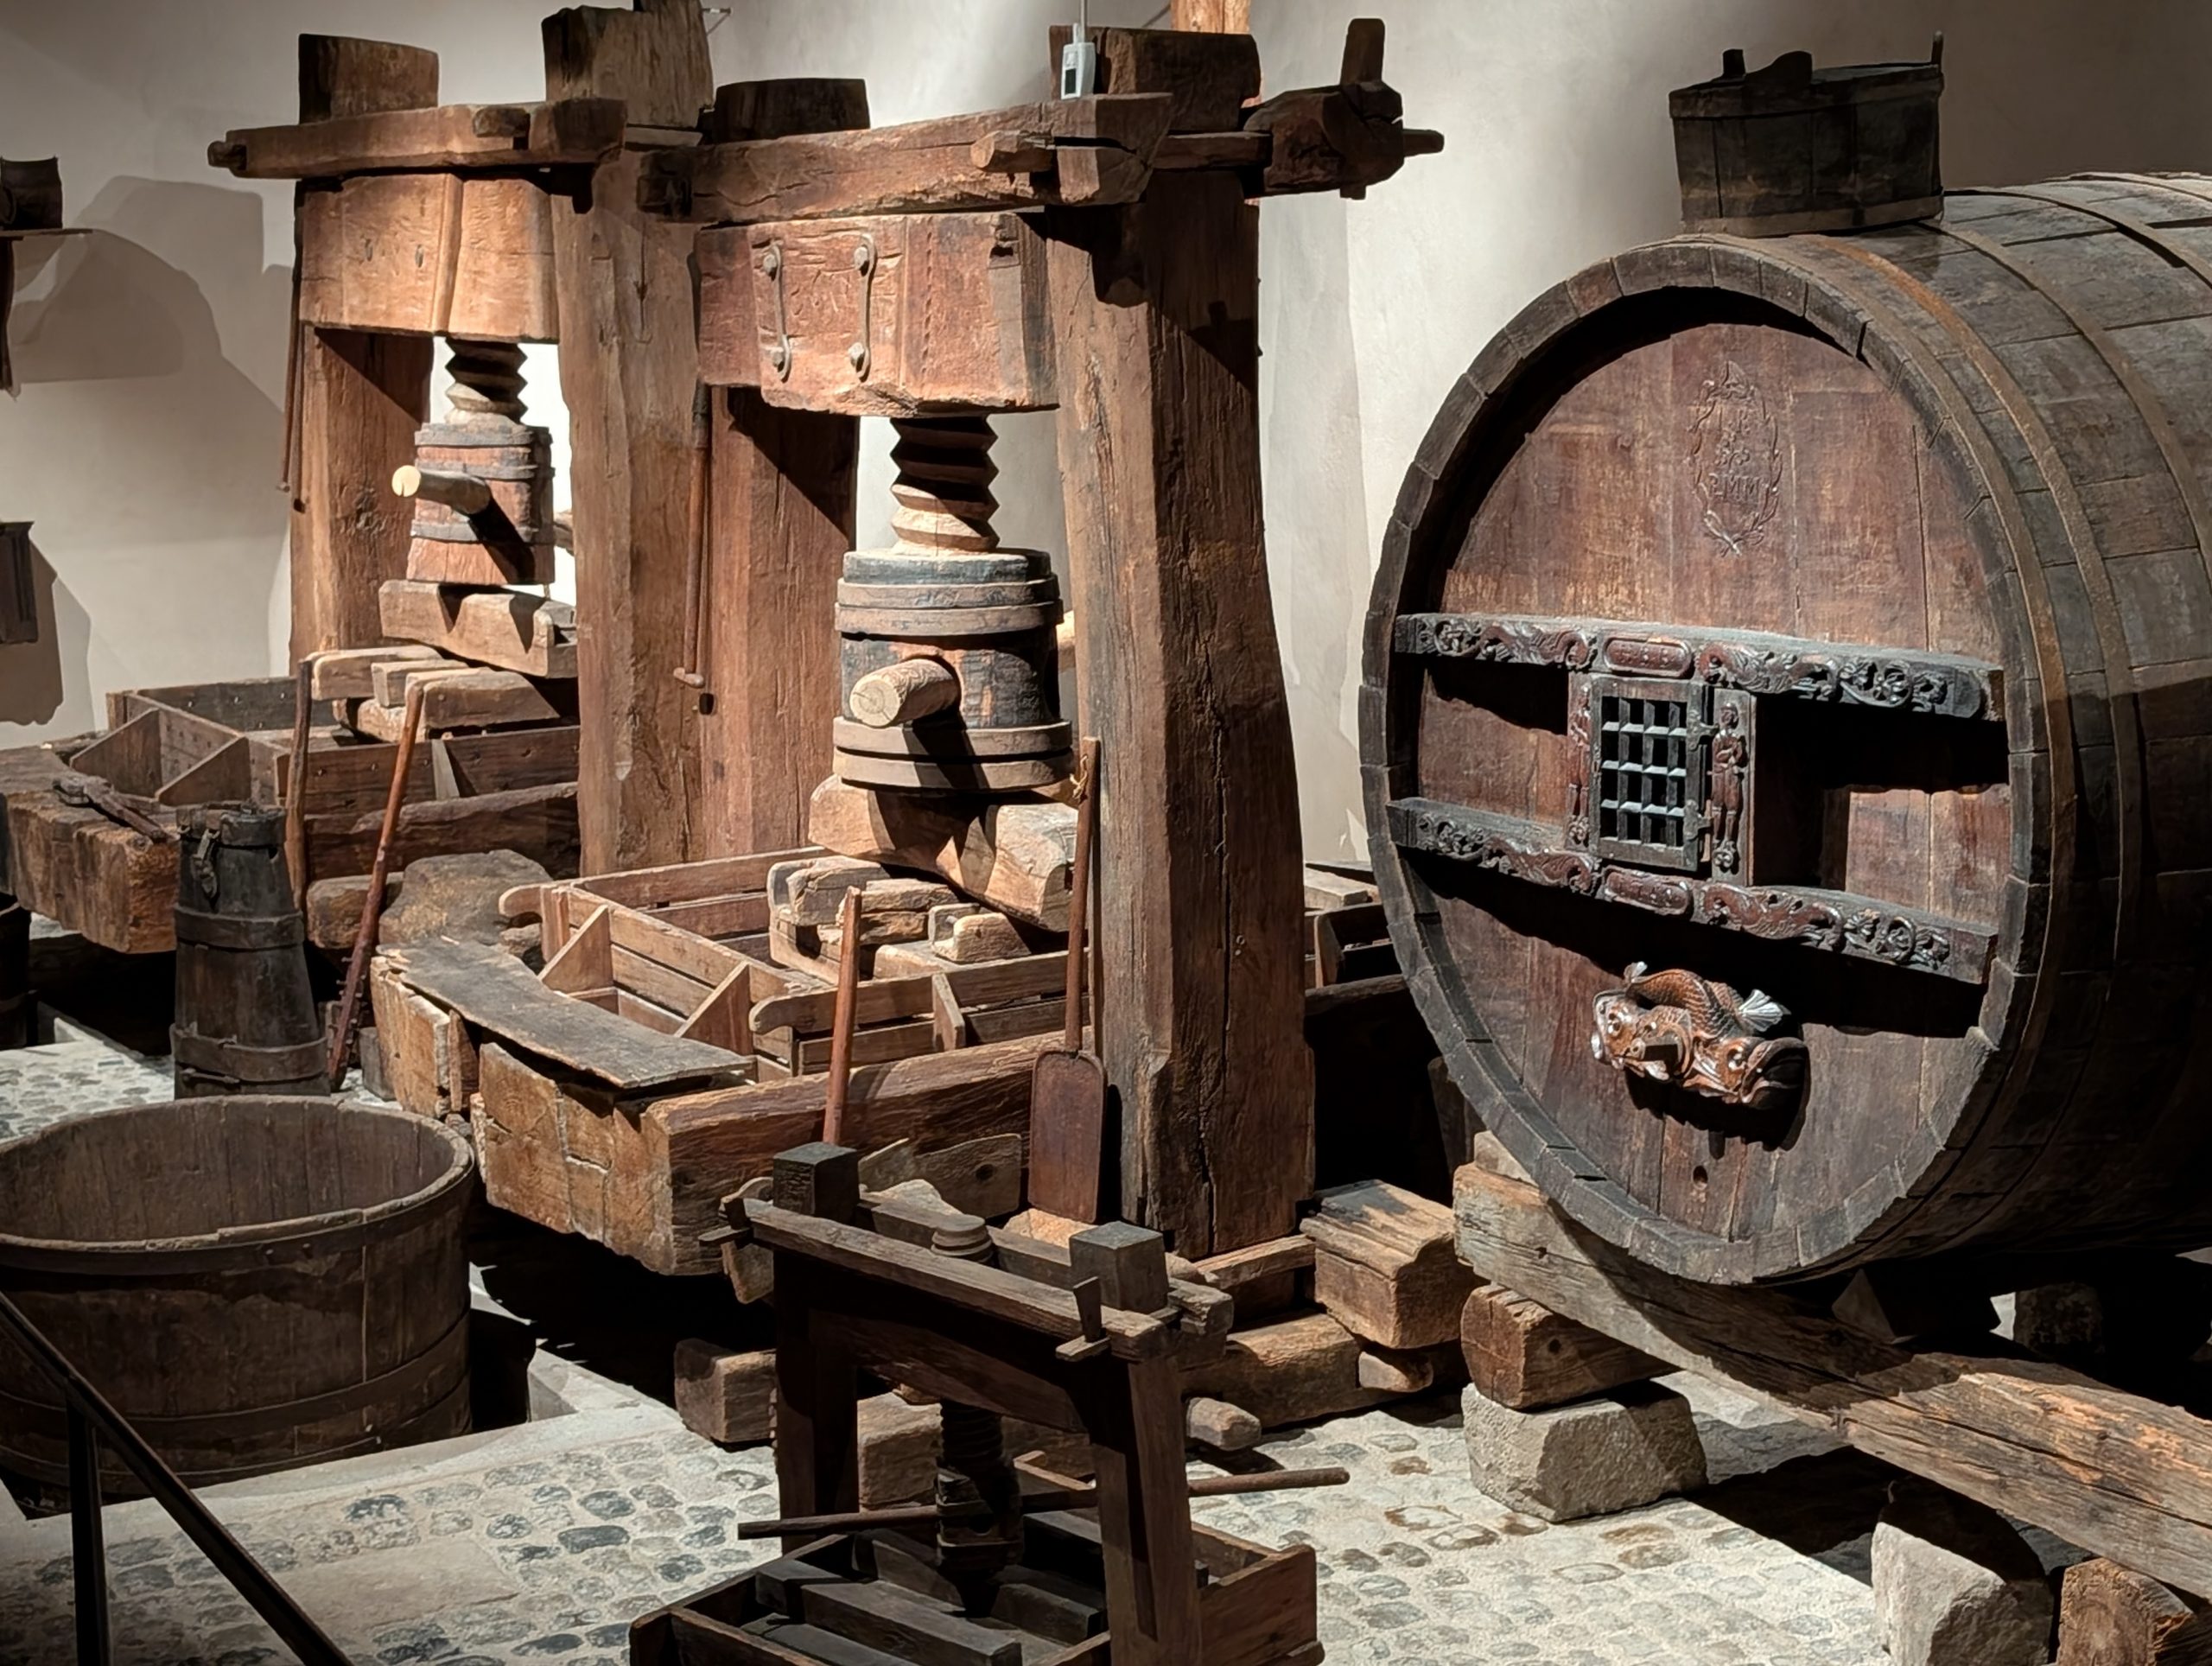
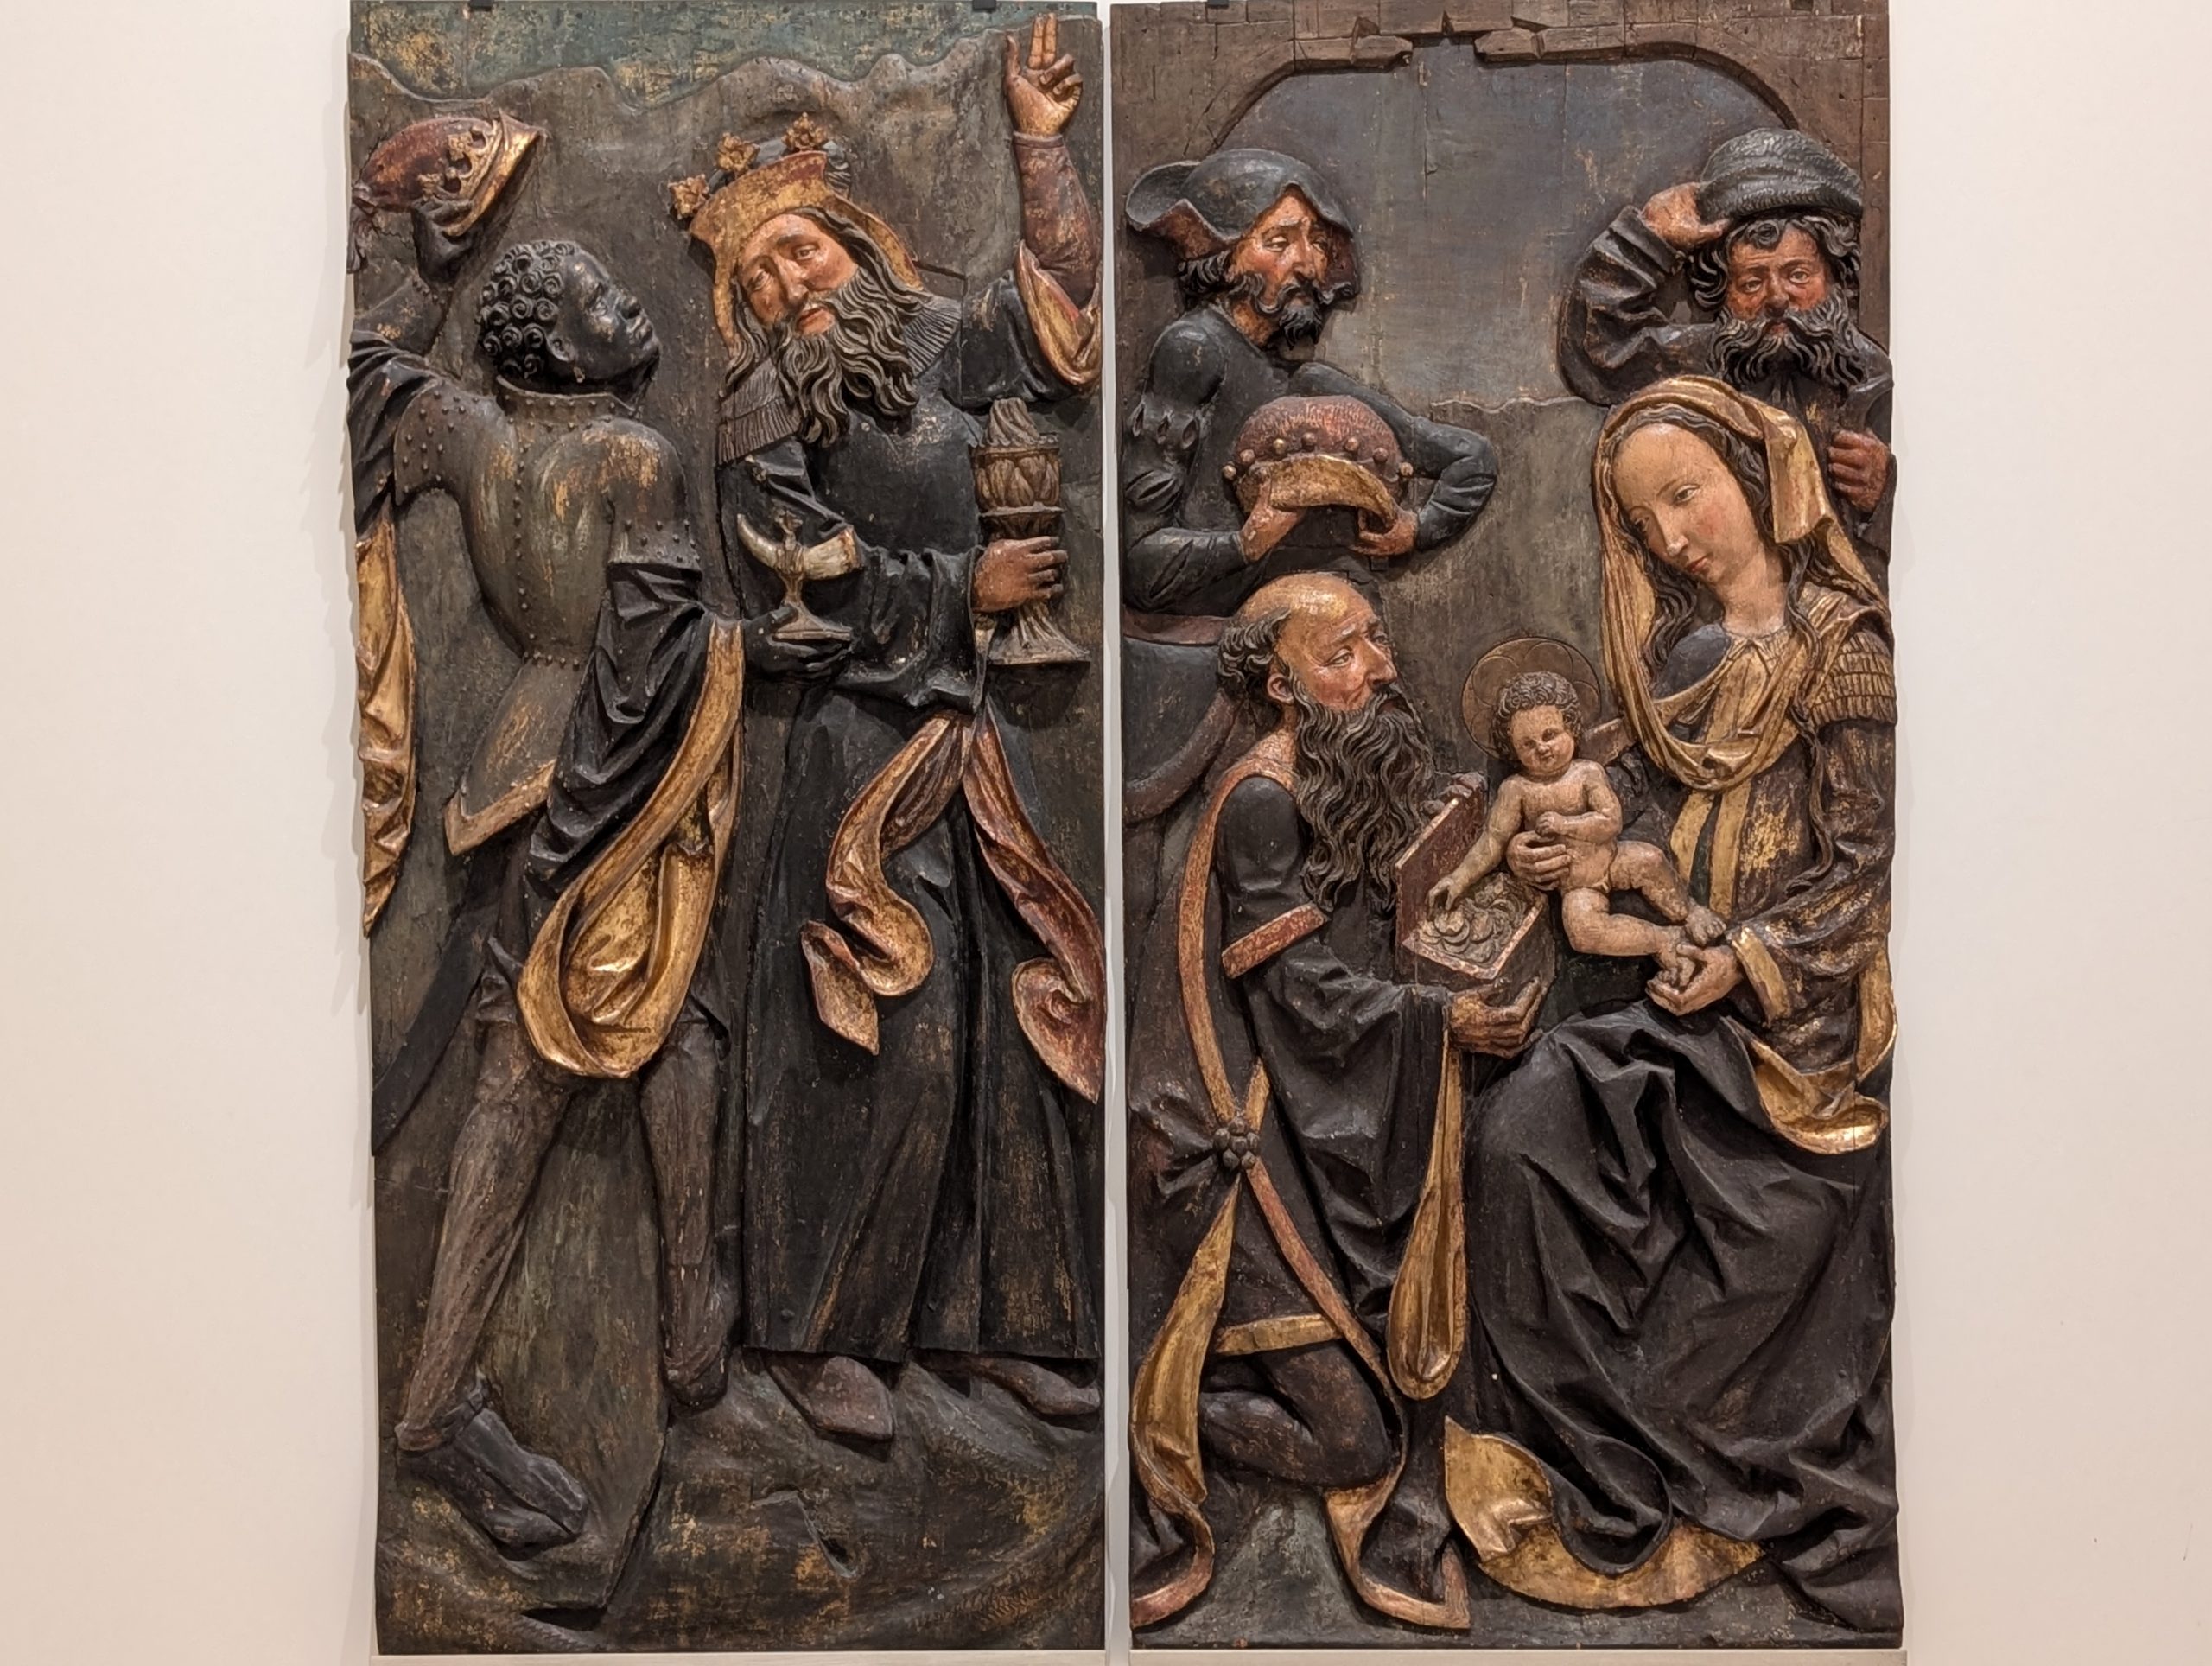
Famous above all for the Isenheim Altarpiece by Matthias Grunewald. it also displays a major collection of Upper Rhenish medieval and early Renaissance art. Other sections displayed by the museum include local and international archeology, medieval, Renaissance, and baroque sculpture (religious as well as profane), stained glass, weapons, furniture, musical instruments, toys from the 14th to the 19th century, ancient, ornate wine barrels, and modern and contemporary art. All and all, a fantastic museum.
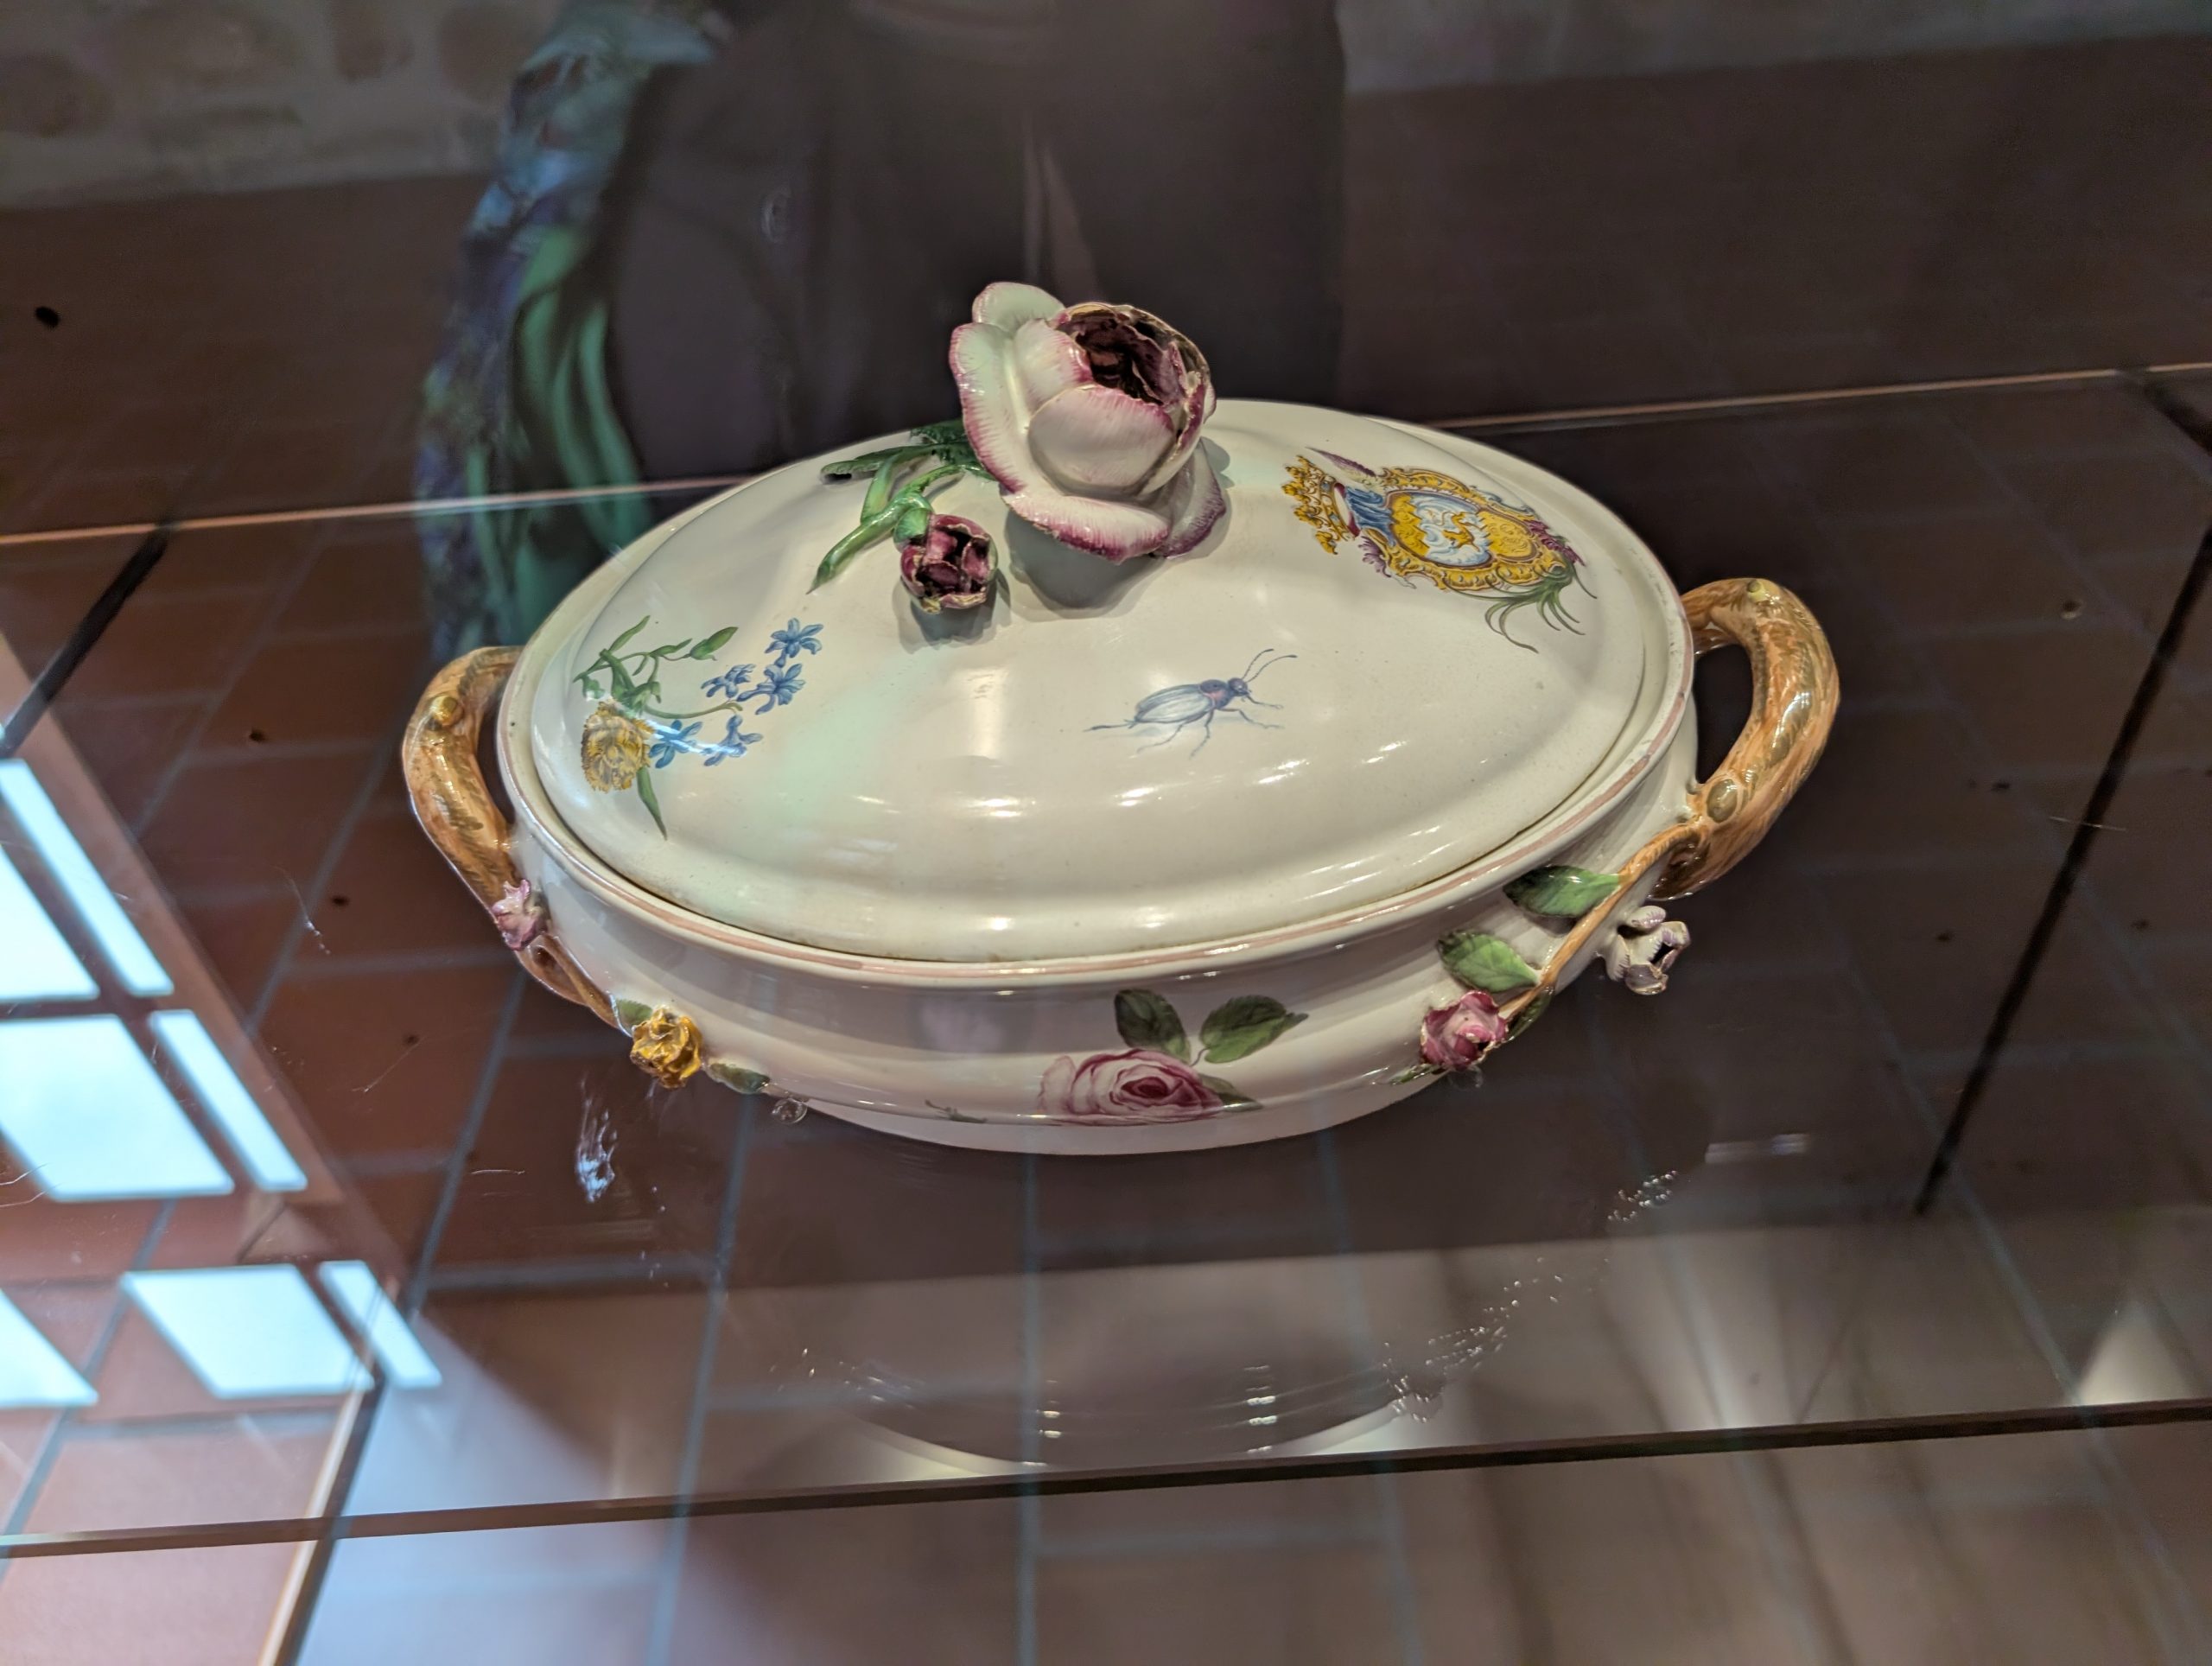
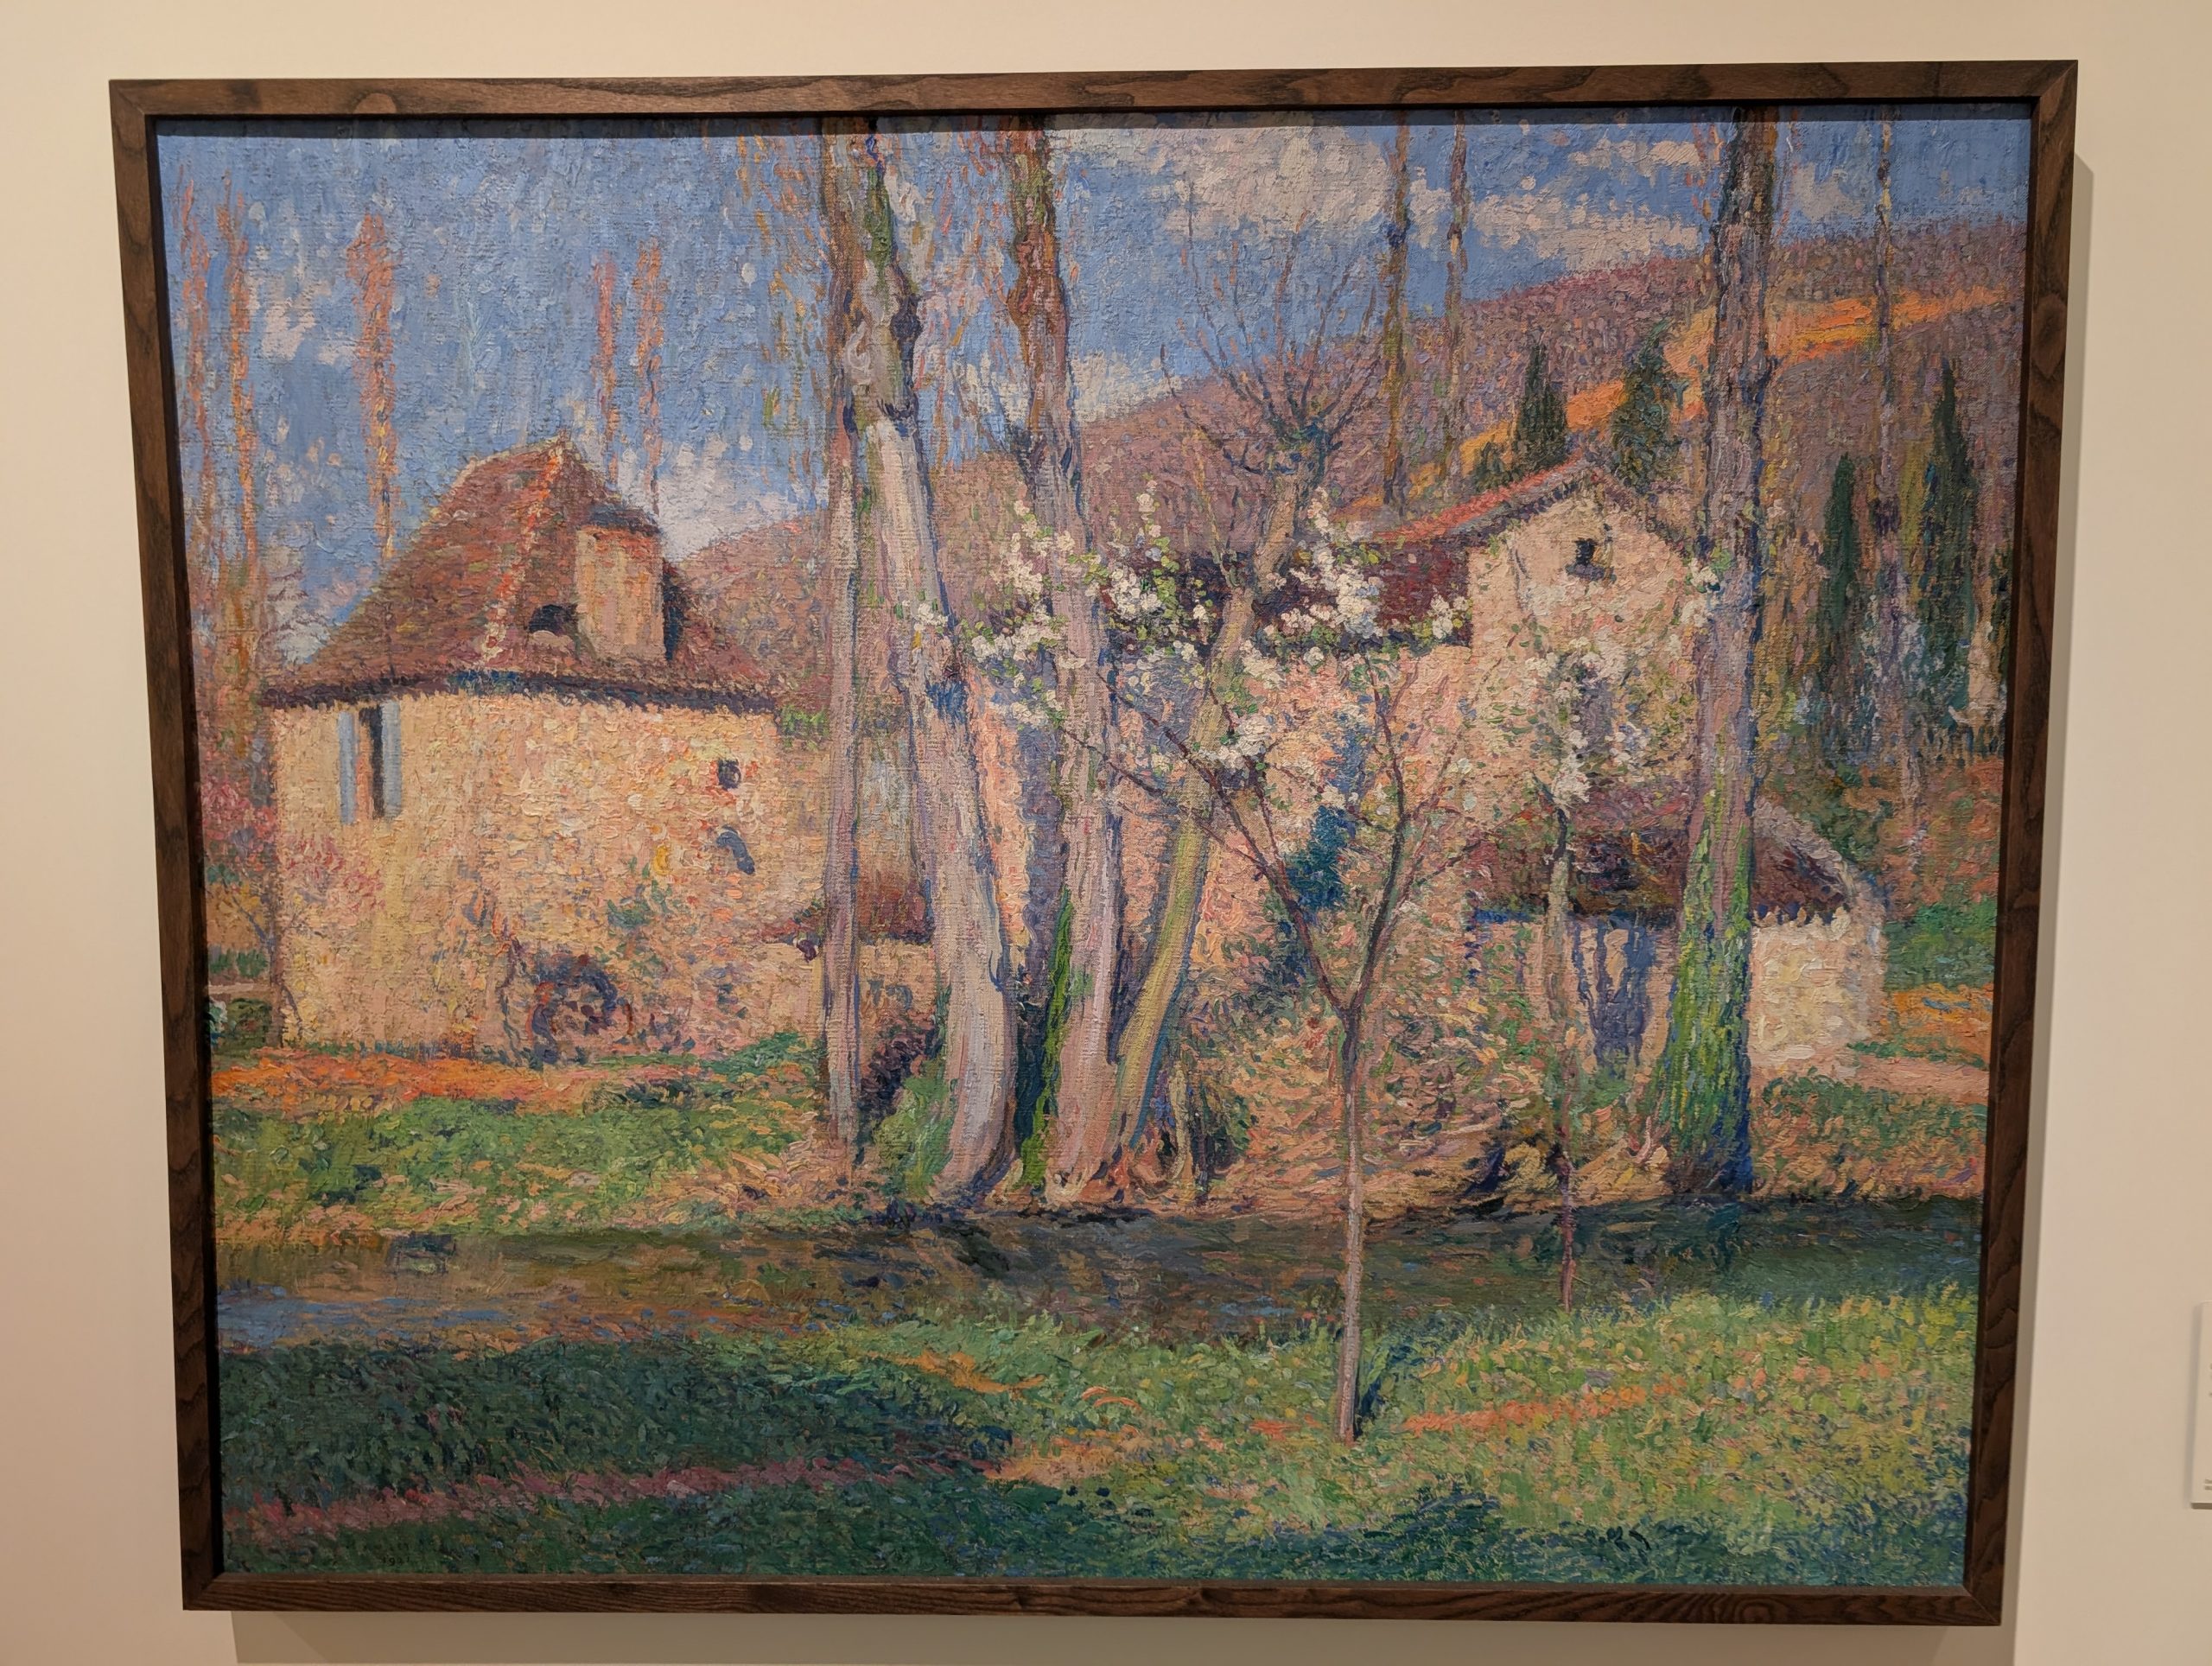
Some of the fantastic paintings, etc. we saw in this wonderful museum.
Looking into the courtyard of this fantastic museum.
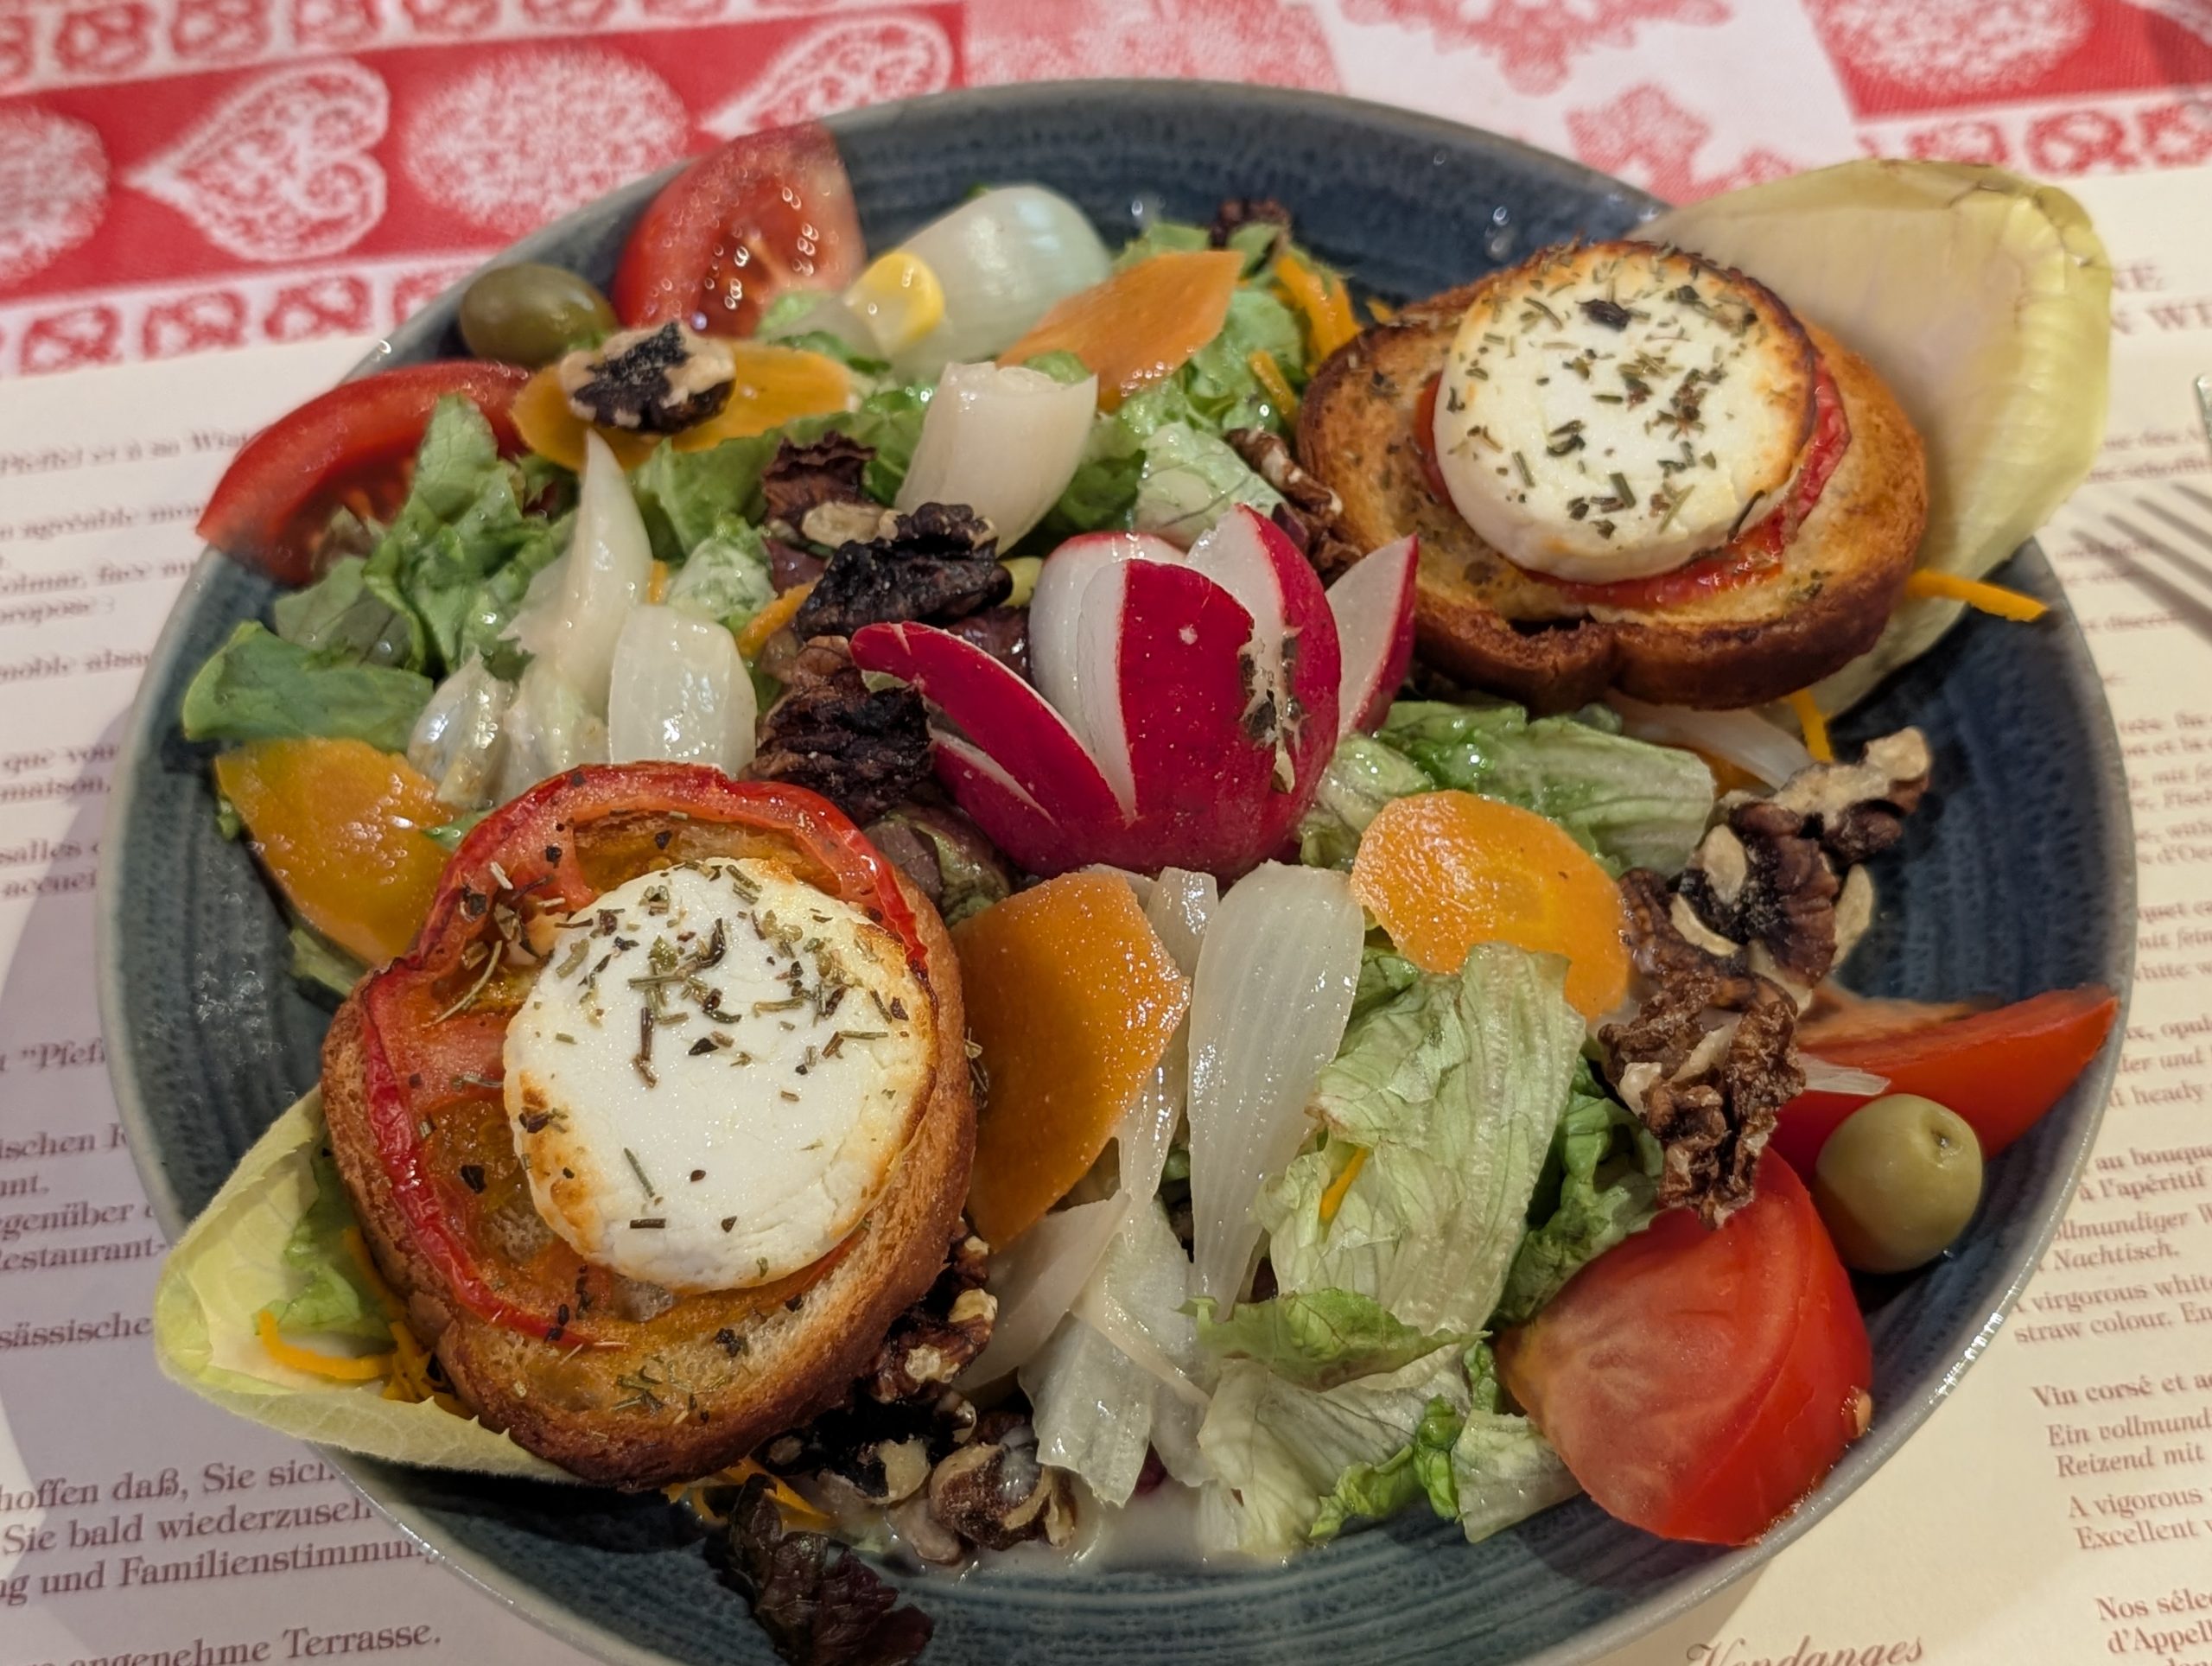
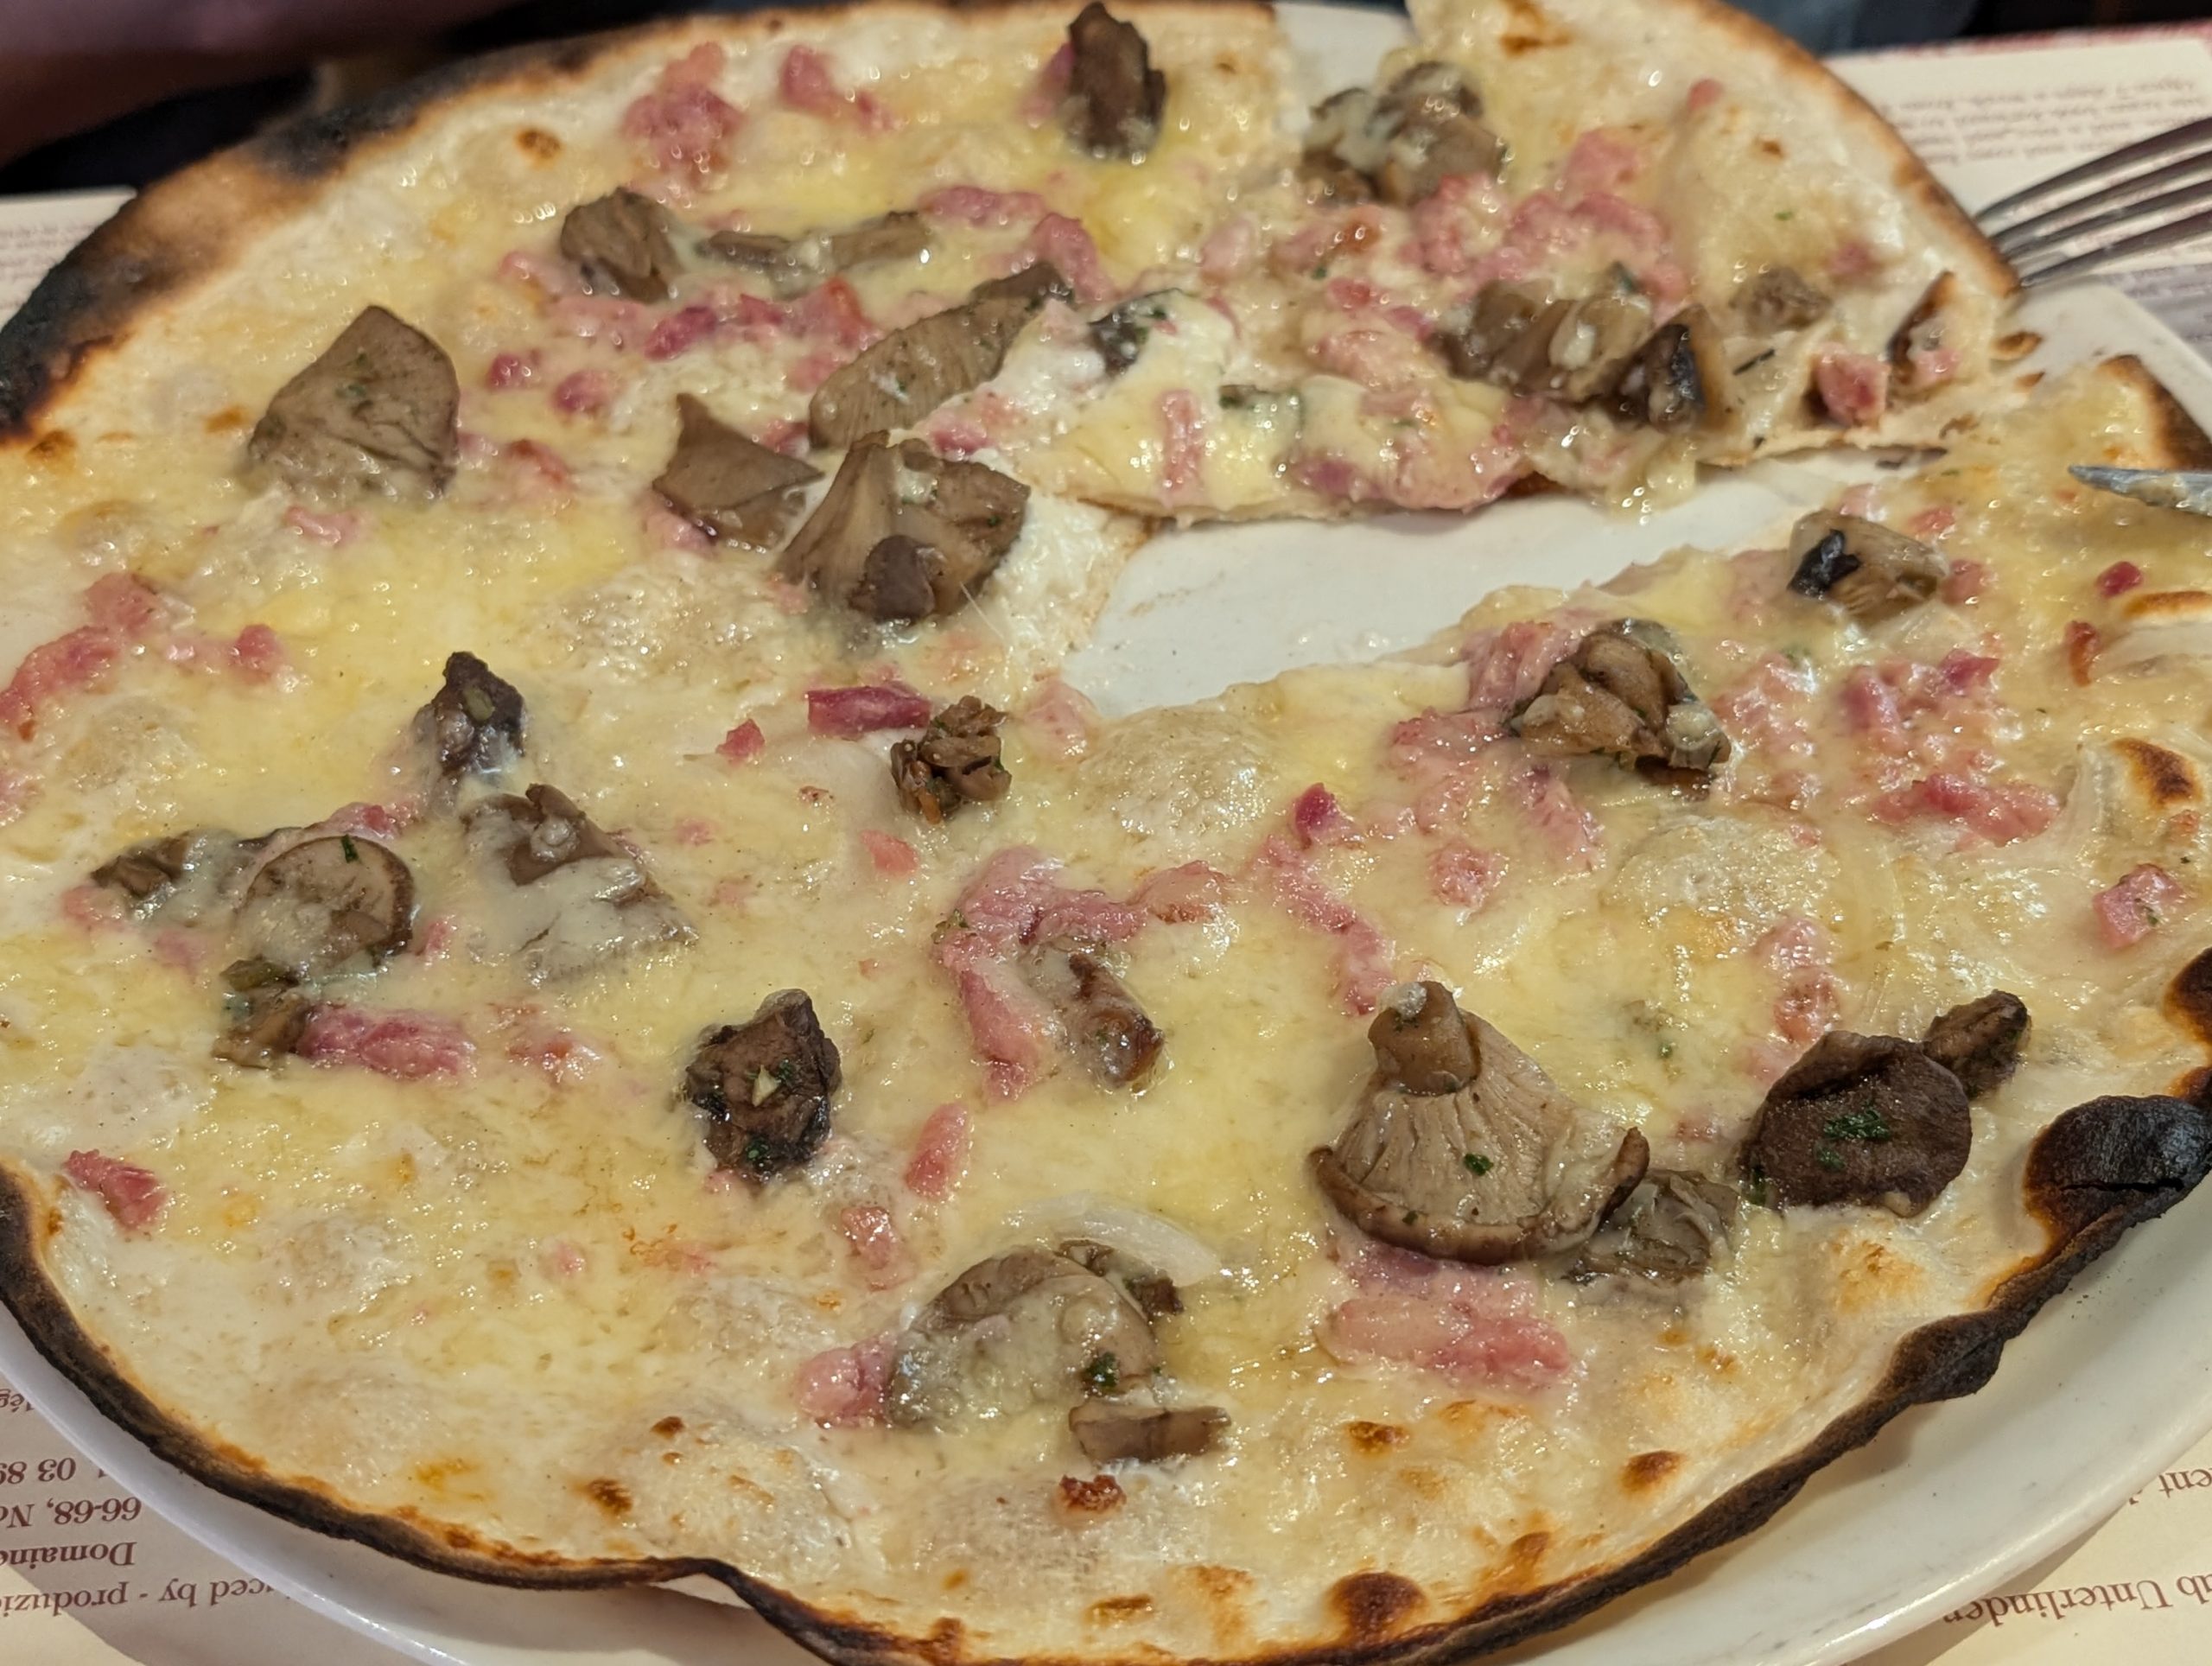
After leaving the museum after a mere 4 hours, we decided lunch was in order. So, we stopped to share a tarte flambée, a cross between a savory tart and a pizza. Basically, a tarte flambée consists of a thin sheet of unleavened dough spread generously with crème fraîche, and sprinkled with slivered onions and bacon. The result is a study in contrasts: crisp-chewy crust, tangy cream, and nuggets of salty, smoky pork. I ordered a small Salade Cléophée. Continental leaves topped with 2 hot goat cheese toasts, tomato slices, walnuts, and olives. Both dishes were absolutely delicious.
Beautiful building on our way to find lunch.
My salad.
Andy’s tarte flambée.
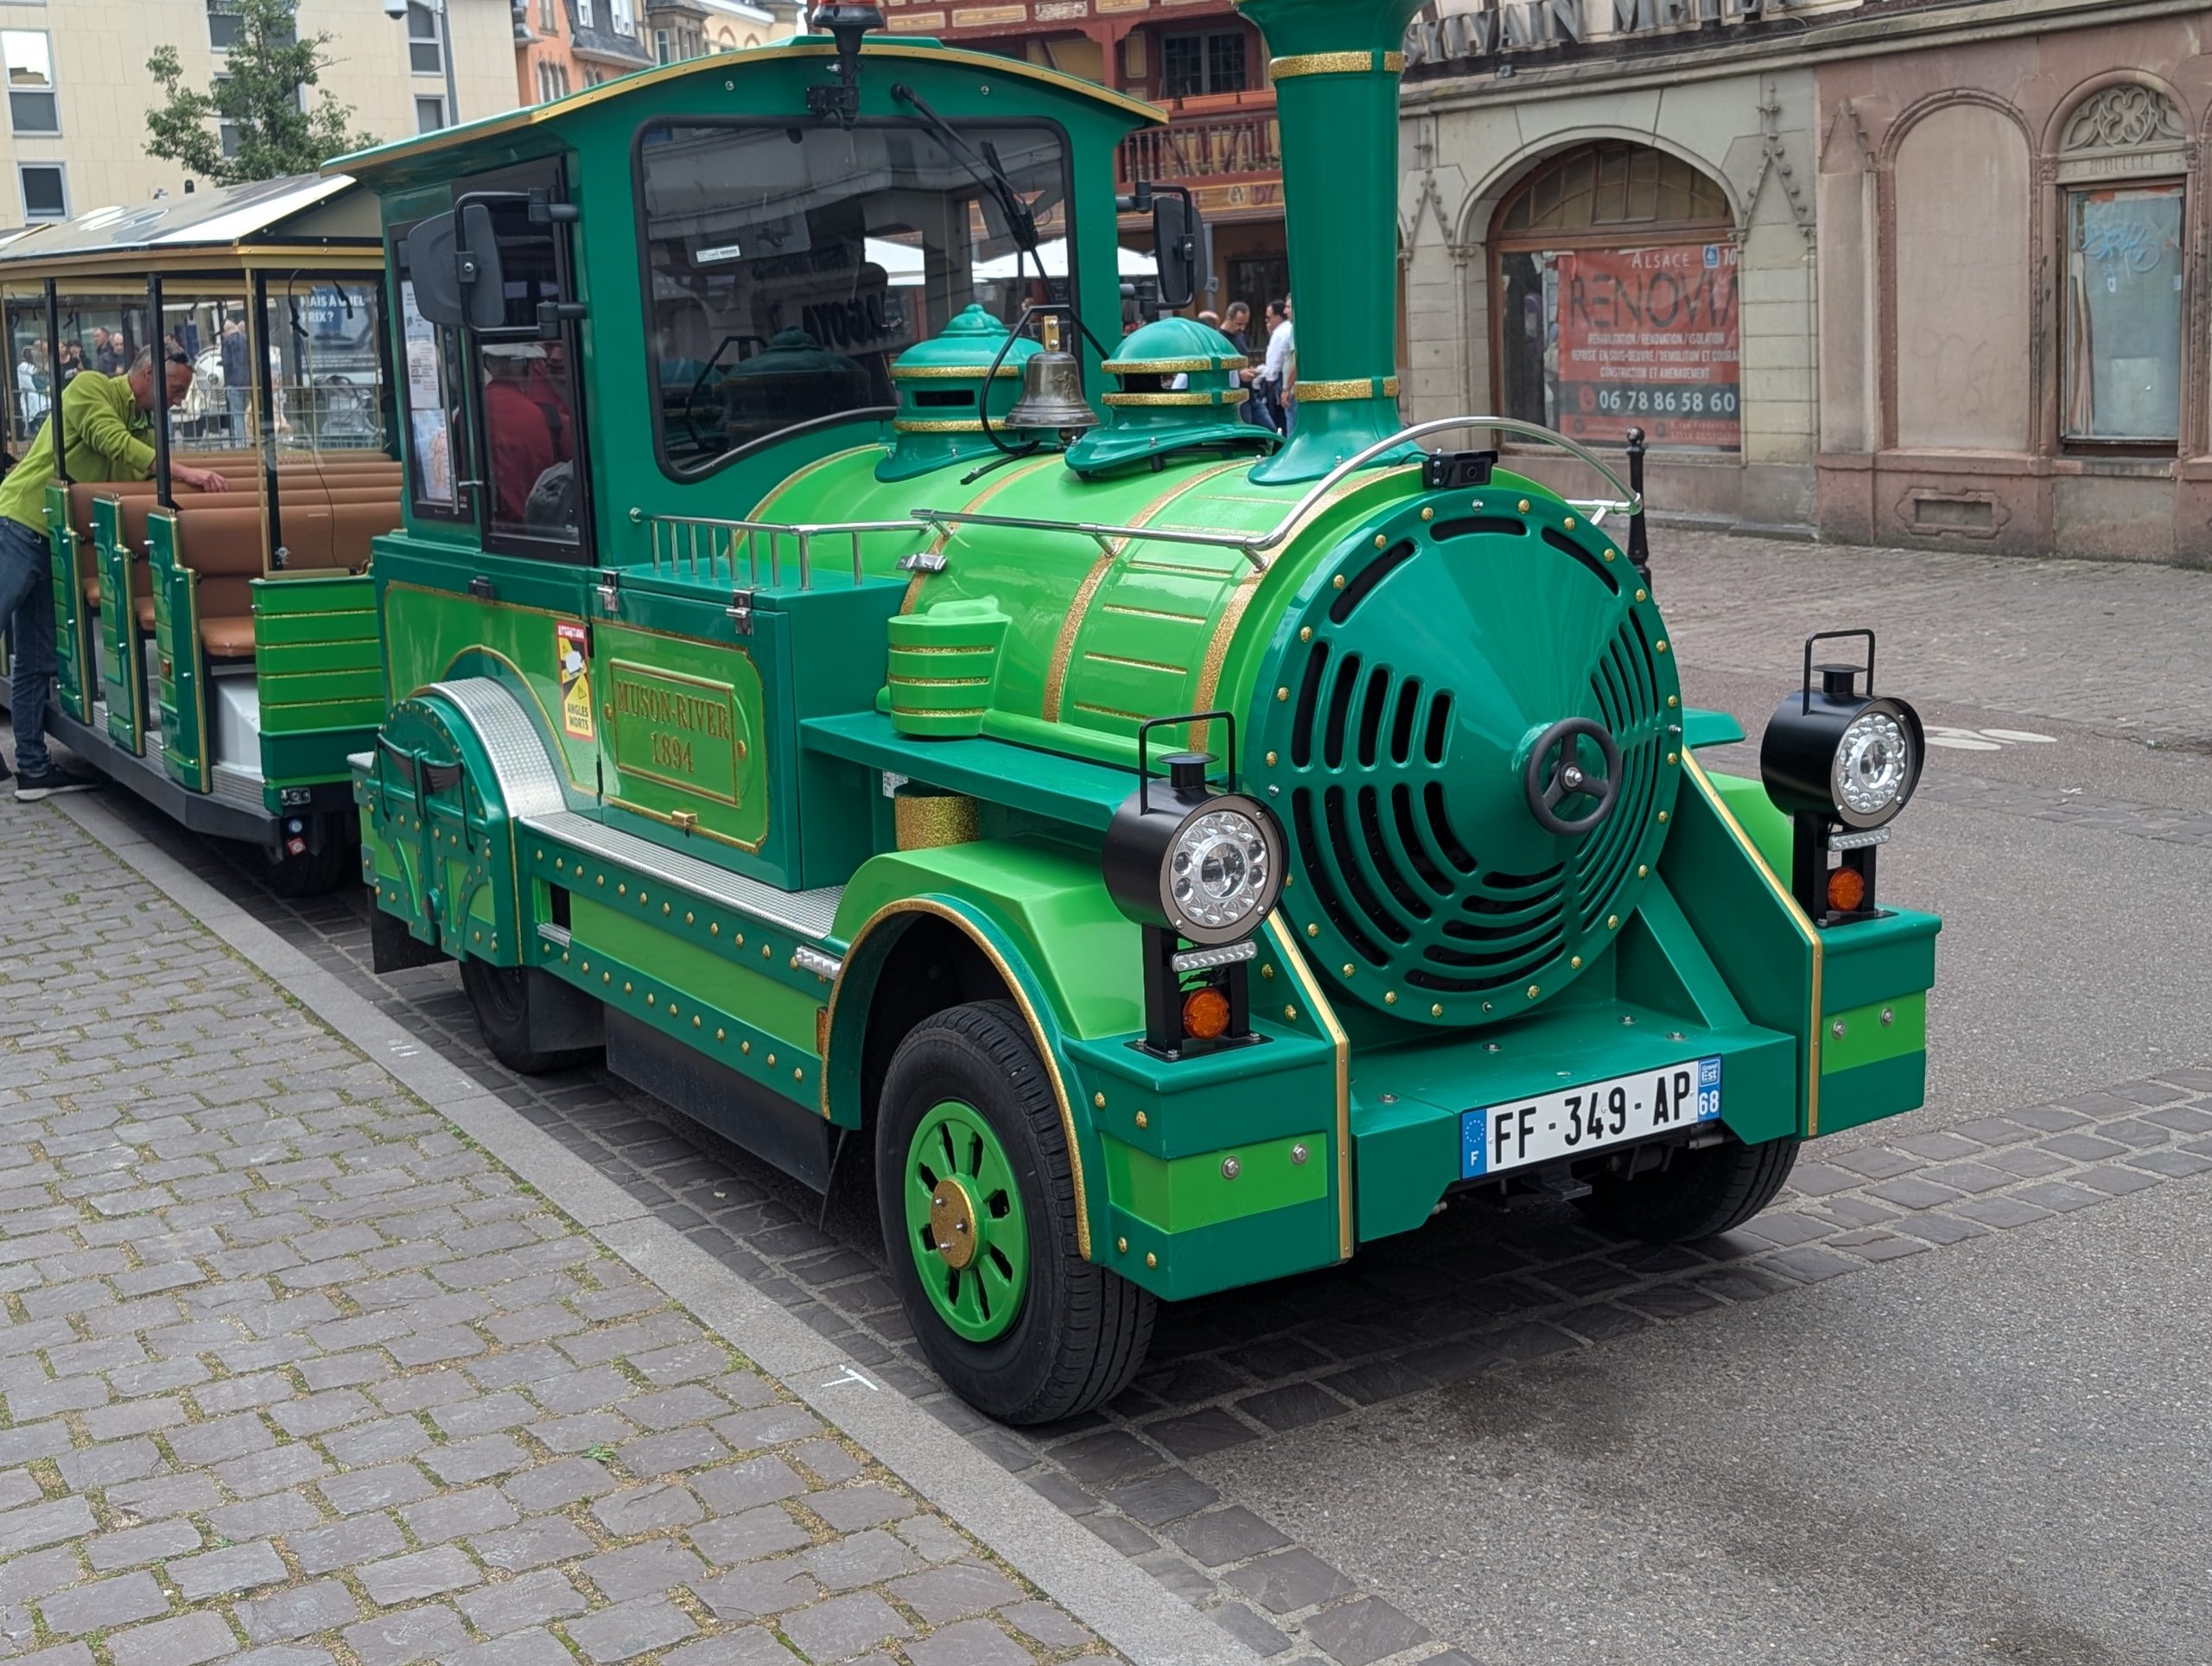
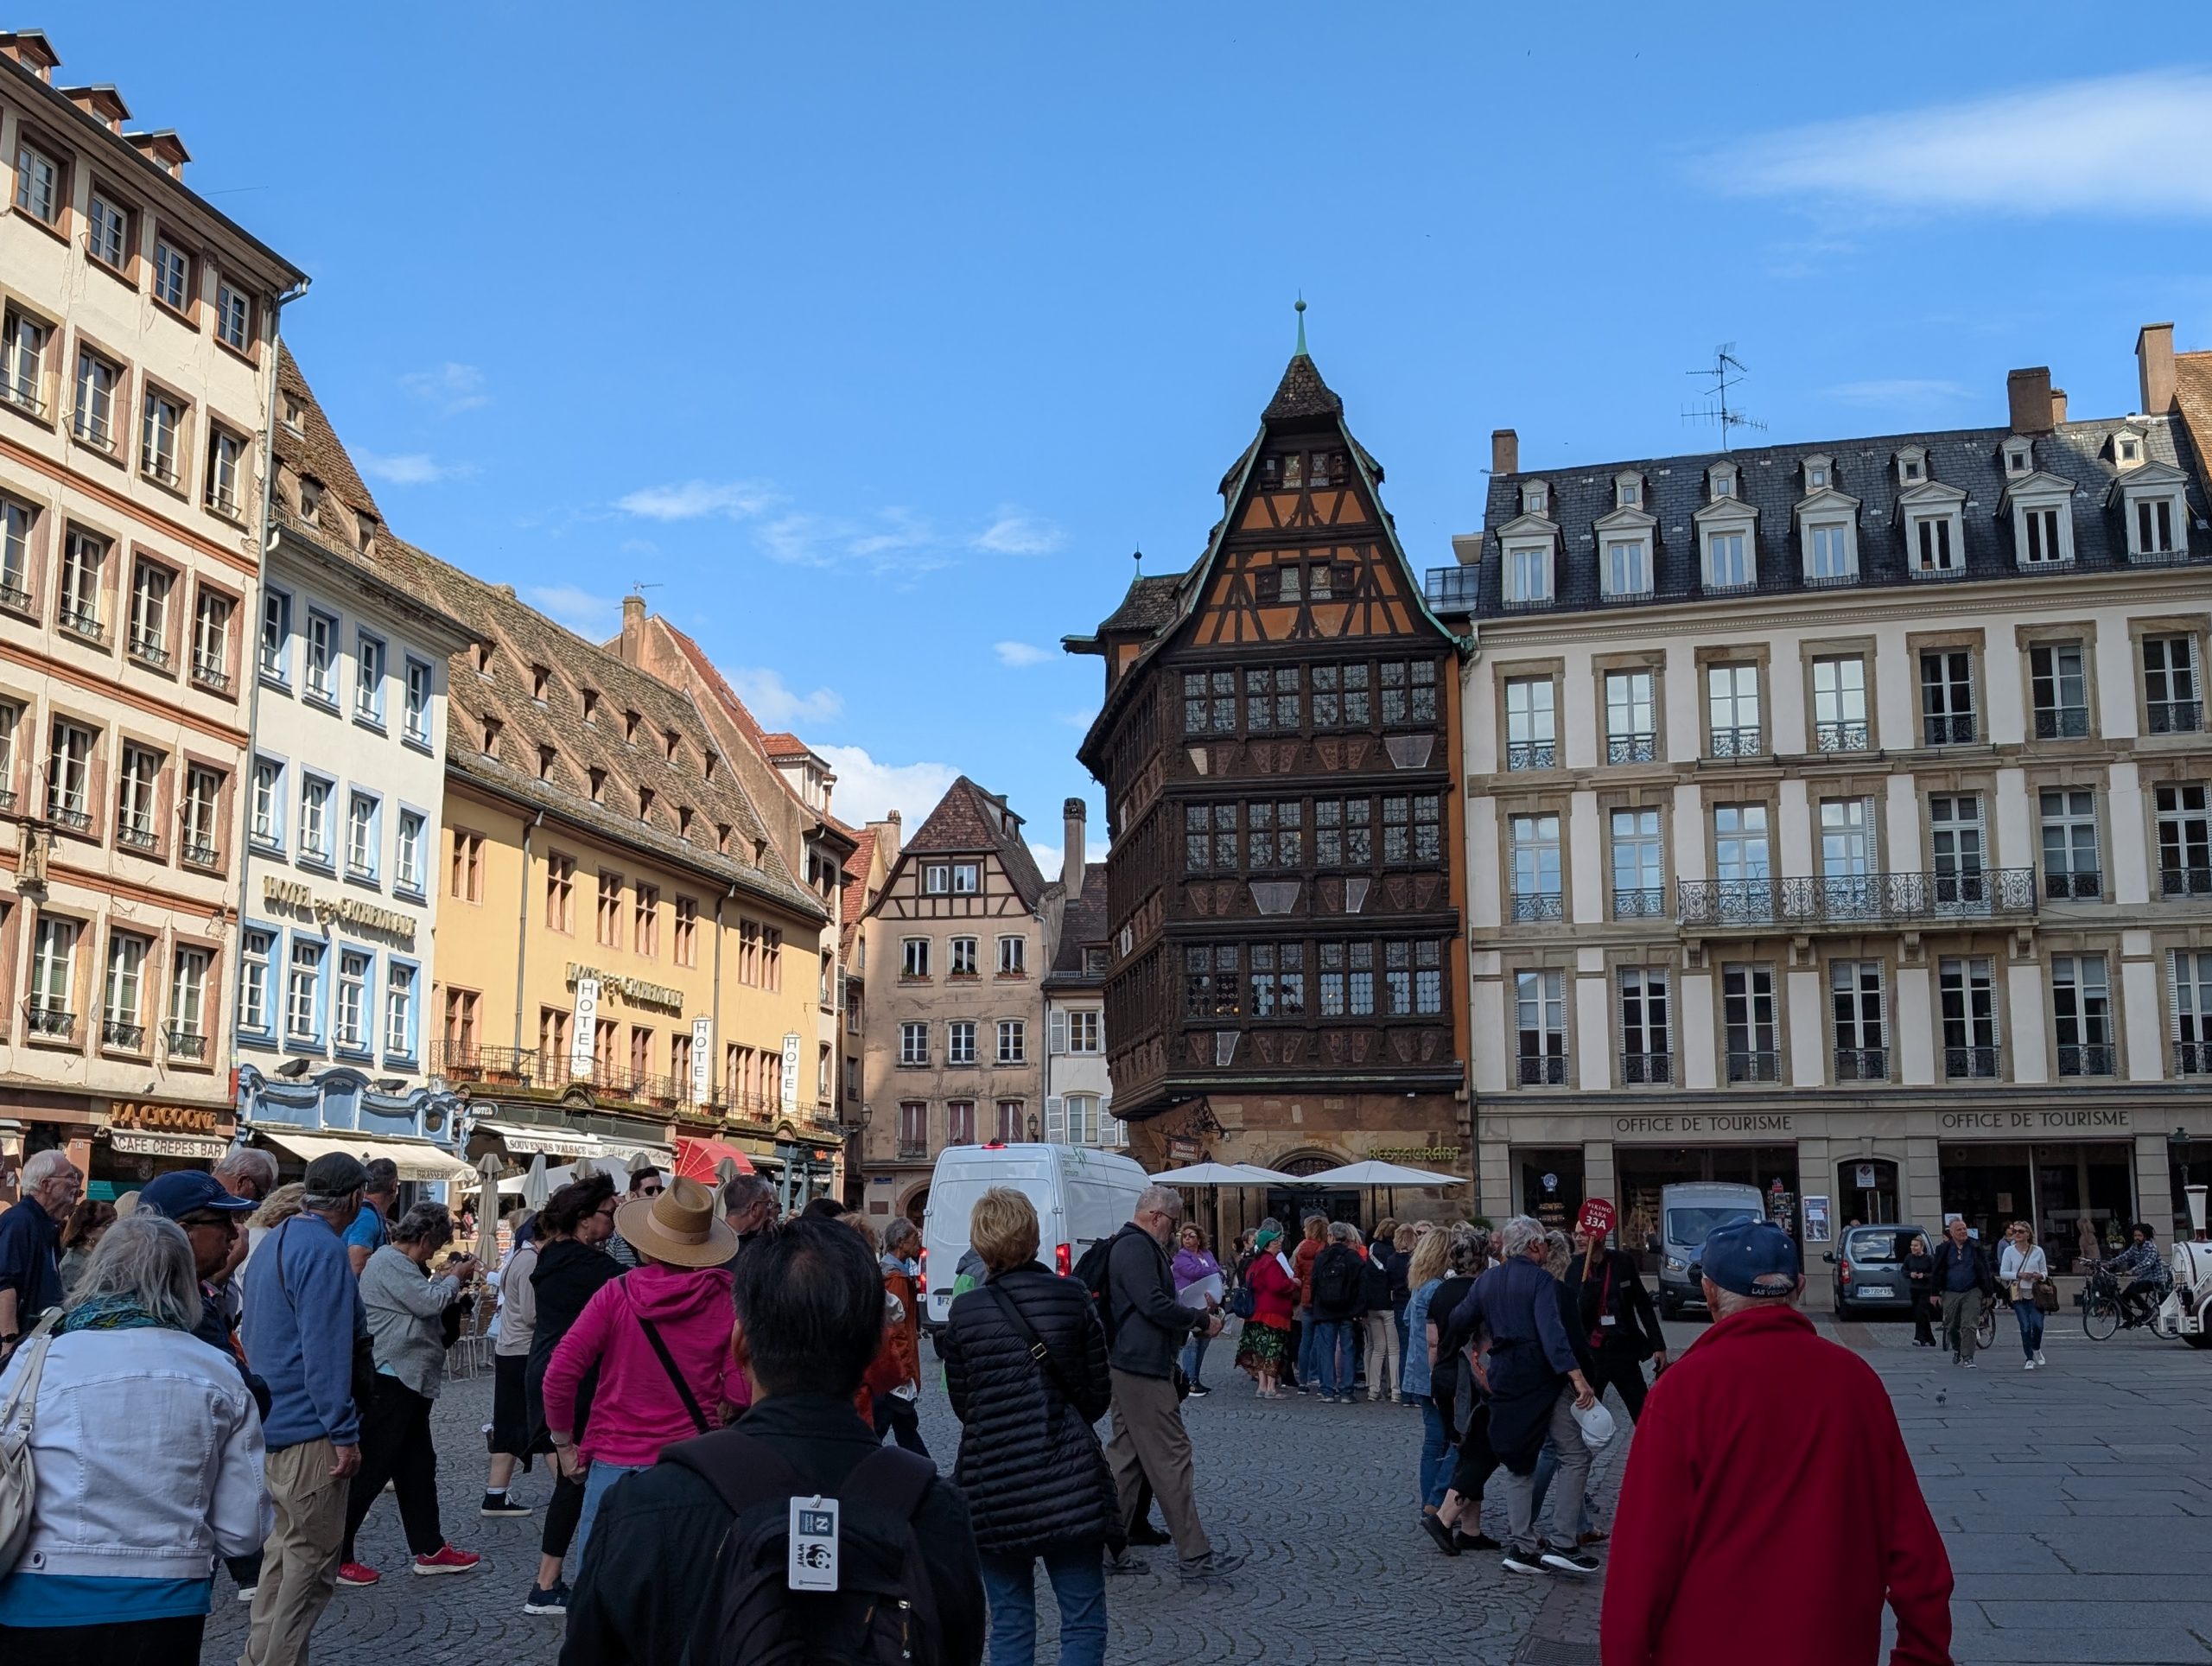
At this point both of us were a bit weary. So, we decided to hop aboard a train. Now, this was not an ordinary train. This was a Petit Train Colmar. The Green Train of Colmar.
As you can see, not a train at all. But rather an easy way to discover the old town of Colmar, which happened to begin and terminate on rue Kléber, next to the Unterlinden Museum. (I mean really. How could we not ride a train that went along rue Kléber! My mother’s maiden name was Kléber.)
The Green Train of Colmar offered us a glimpse into the historical center of Colmar. Basically, the heart of Colmar with its varied natural and architectural topography. Which also happens to be a pedestrian zone, except of course for the petite trains. A few of the highlights included the Maison des Têtes (The House of Heads), Collegiate Church of St Martin, the Pfister House, and Petite Venise (Little Venice). I couldn’t take any pictures along the way because we were stuffed into a bench seat meant for 2 or possible three people, and there were 4 of us. I couldn’t have gotten to my cell phone if my life depended on it!
After arriving back at the museum, we retraced our path (via public transportation) back to our hotel where we both literally crumpled. Andy announced that he needed a drink while I lay down to do some serious reading.
After a bit I was refreshed enough to write up today’s travel report. After writing for about 30 minutes, I realized there was a bit of soft, even breathing going on behind me. Mr. C. had crawled under the bed covers and was sound asleep. We may make it to dinner tonight, but then again, maybe not.
Saturday, June 7, 2025 – Colmar Hotel – Colmar, France
Before I start writing about today’s adventure, I need to write about dogs. Yup, pups! They are bloody well everywhere. In hotel rooms, with their owners at breakfast, in upscale restaurants, in cafeterias, attached to bicycles panting as their owner gets his or her exercise, and often part owner of whatever establishment you happen to visit. But the other evening was absolutely surreal. A family of four sat at a table right next to us in a very fancy restaurant. The dog, smaller than one of our cats, was brought into the restaurant in his or her own little basket, complete with three doggie toys. Of course, the little critter didn’t stay in its basket but proceeded to circle the table looking for God knows what! But in defense of these pampered pets, there was no barking even if there were unknown canines also enjoying an evening out. Amazing. But it is just so different from what we know to be true. No shoes, no shirt, no service! And what about those poor people with allergies to dogs? Was that never considered? Oh well. When in Rome etc. etc.
The most beautiful and well-behaved dog we encountered was in the breakfast room at the Golf Hotel. I asked the owner what breed it was, and he told me she was a White German Shepherd. And then he told us the story of White German Shepherds.
The white color comes from a gene that all German Shepherd dogs carry. There has been no other breed crossed with German Shepherds to produce the white shepherd, however, for years the white coloring was considered a major fault, and those dogs were culled from breeding programs and spayed or neutered. Since then, we have seen one other white shepherd, who was not at all well behaved. He insisted on sniffing the French fries the people at the next table were trying hard to protect, while the owners looked on with pride. Anyway, back to how we spent our day.
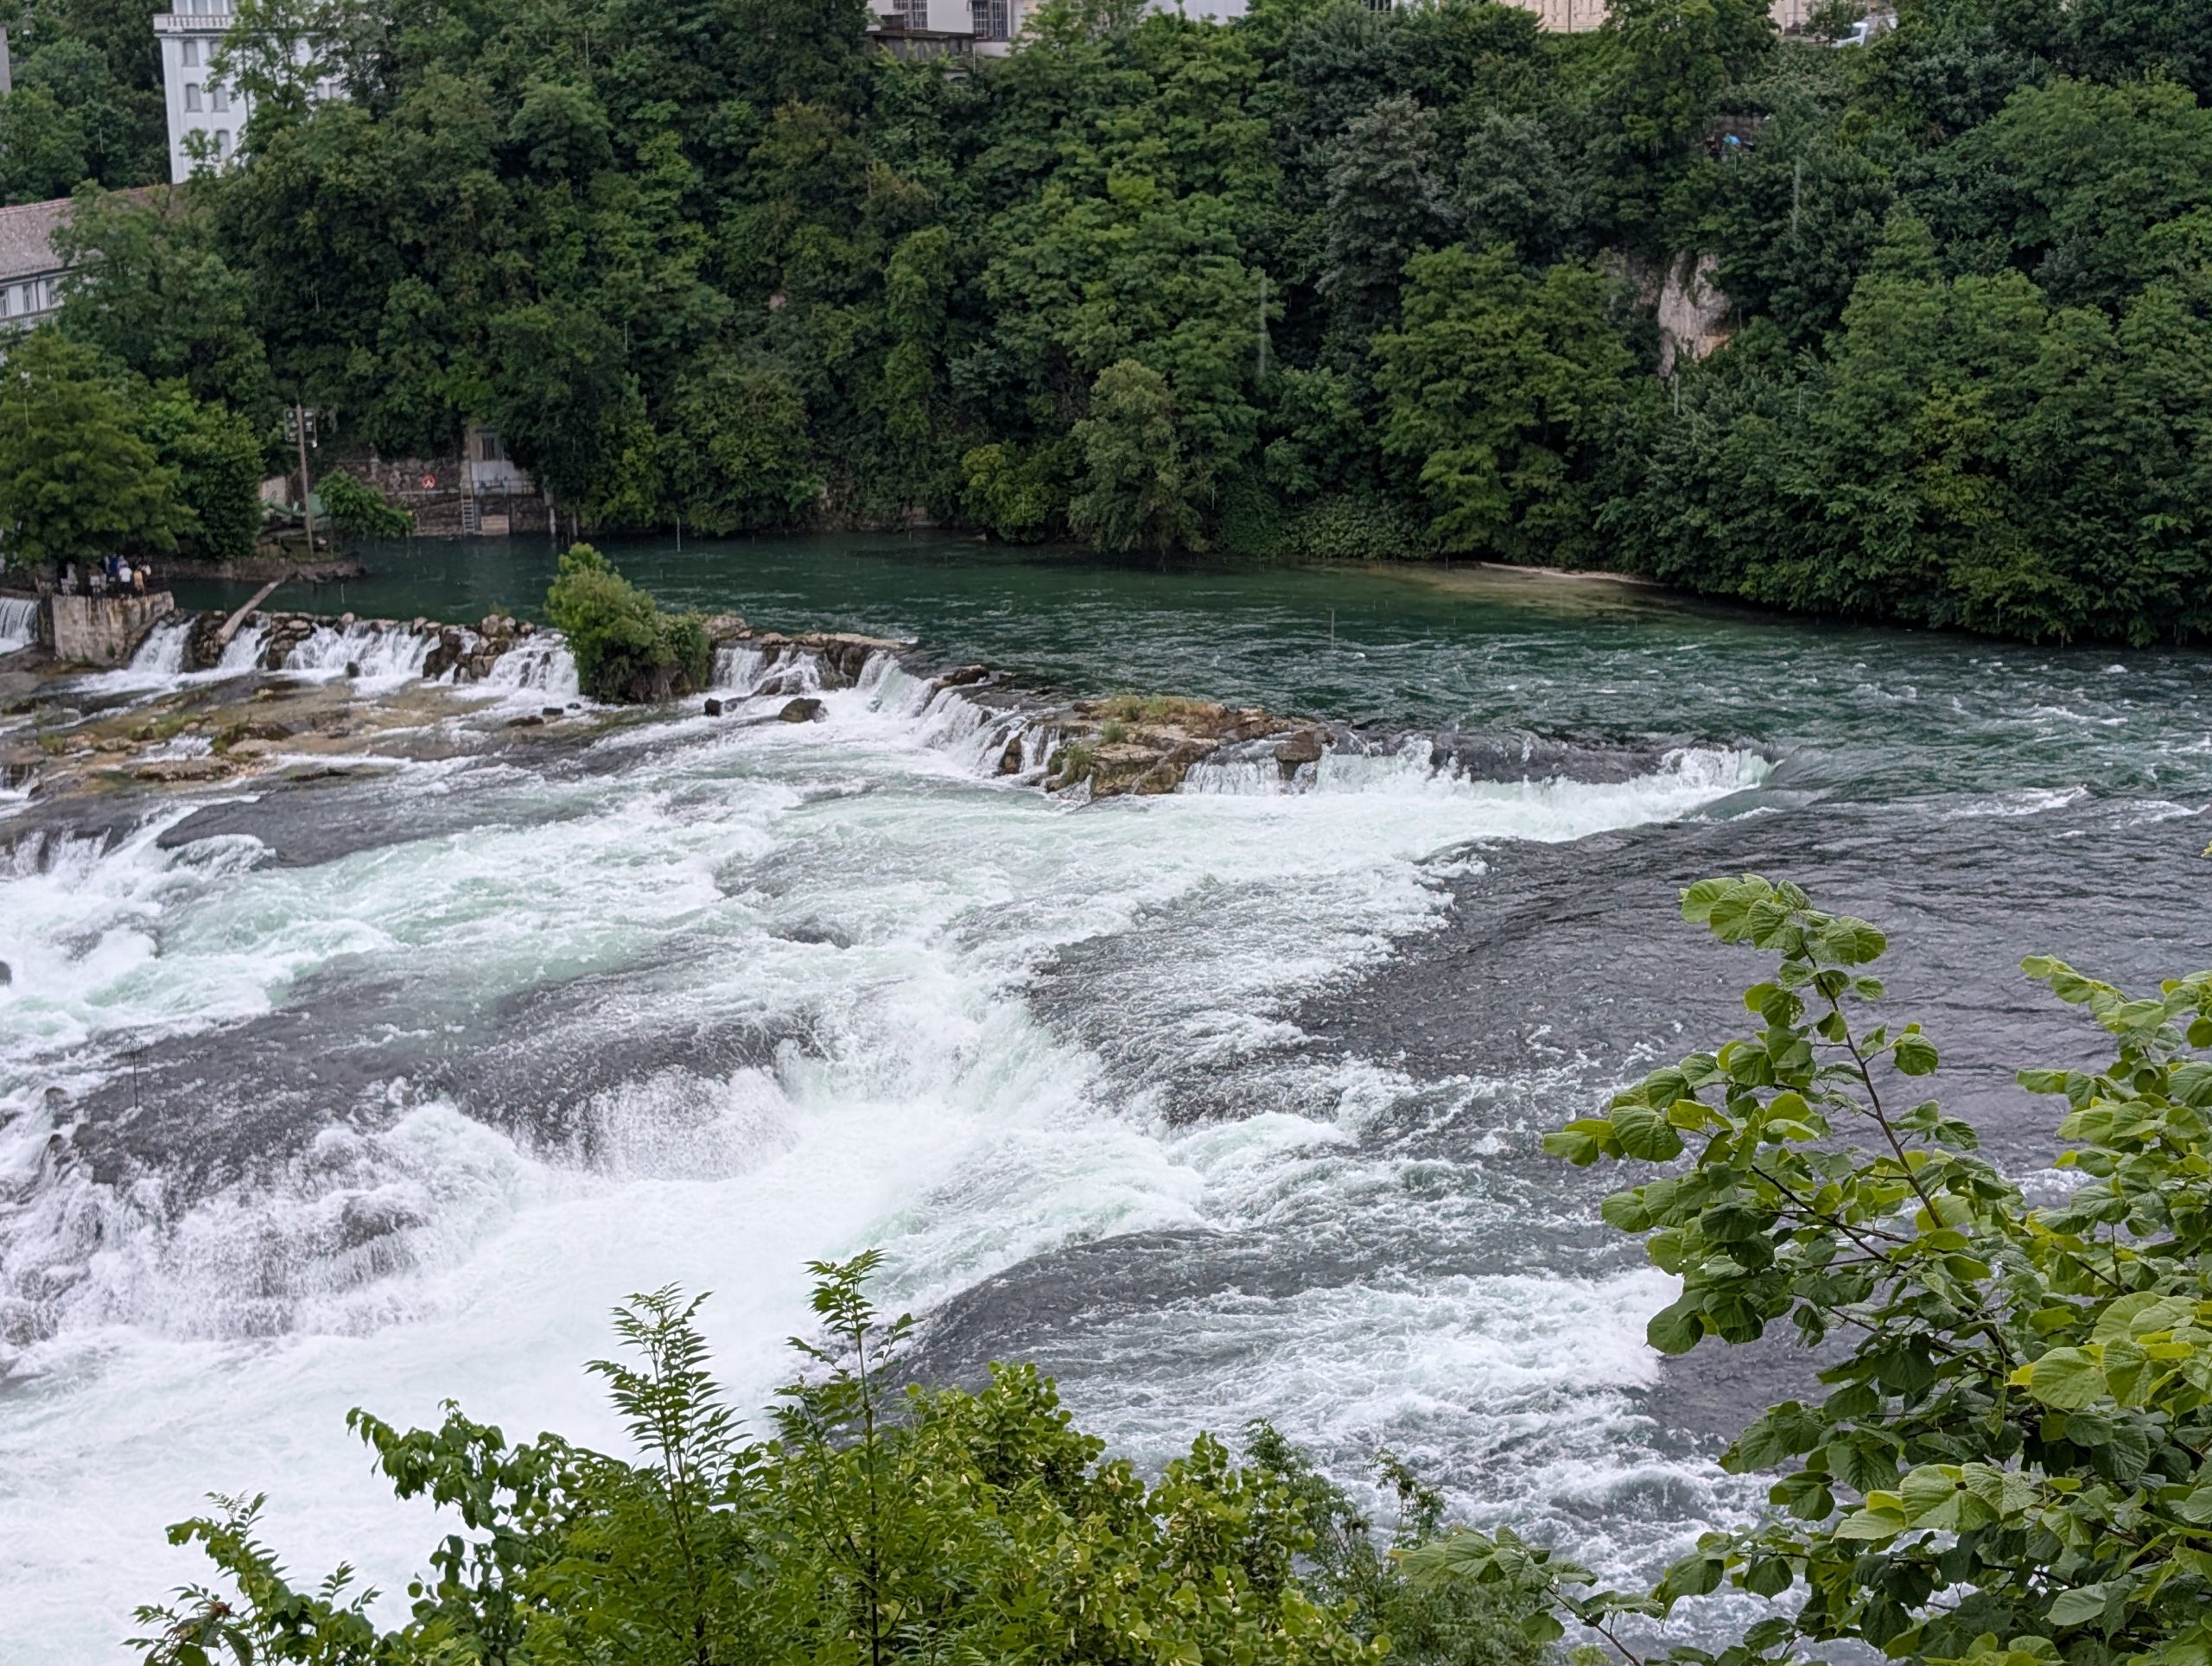
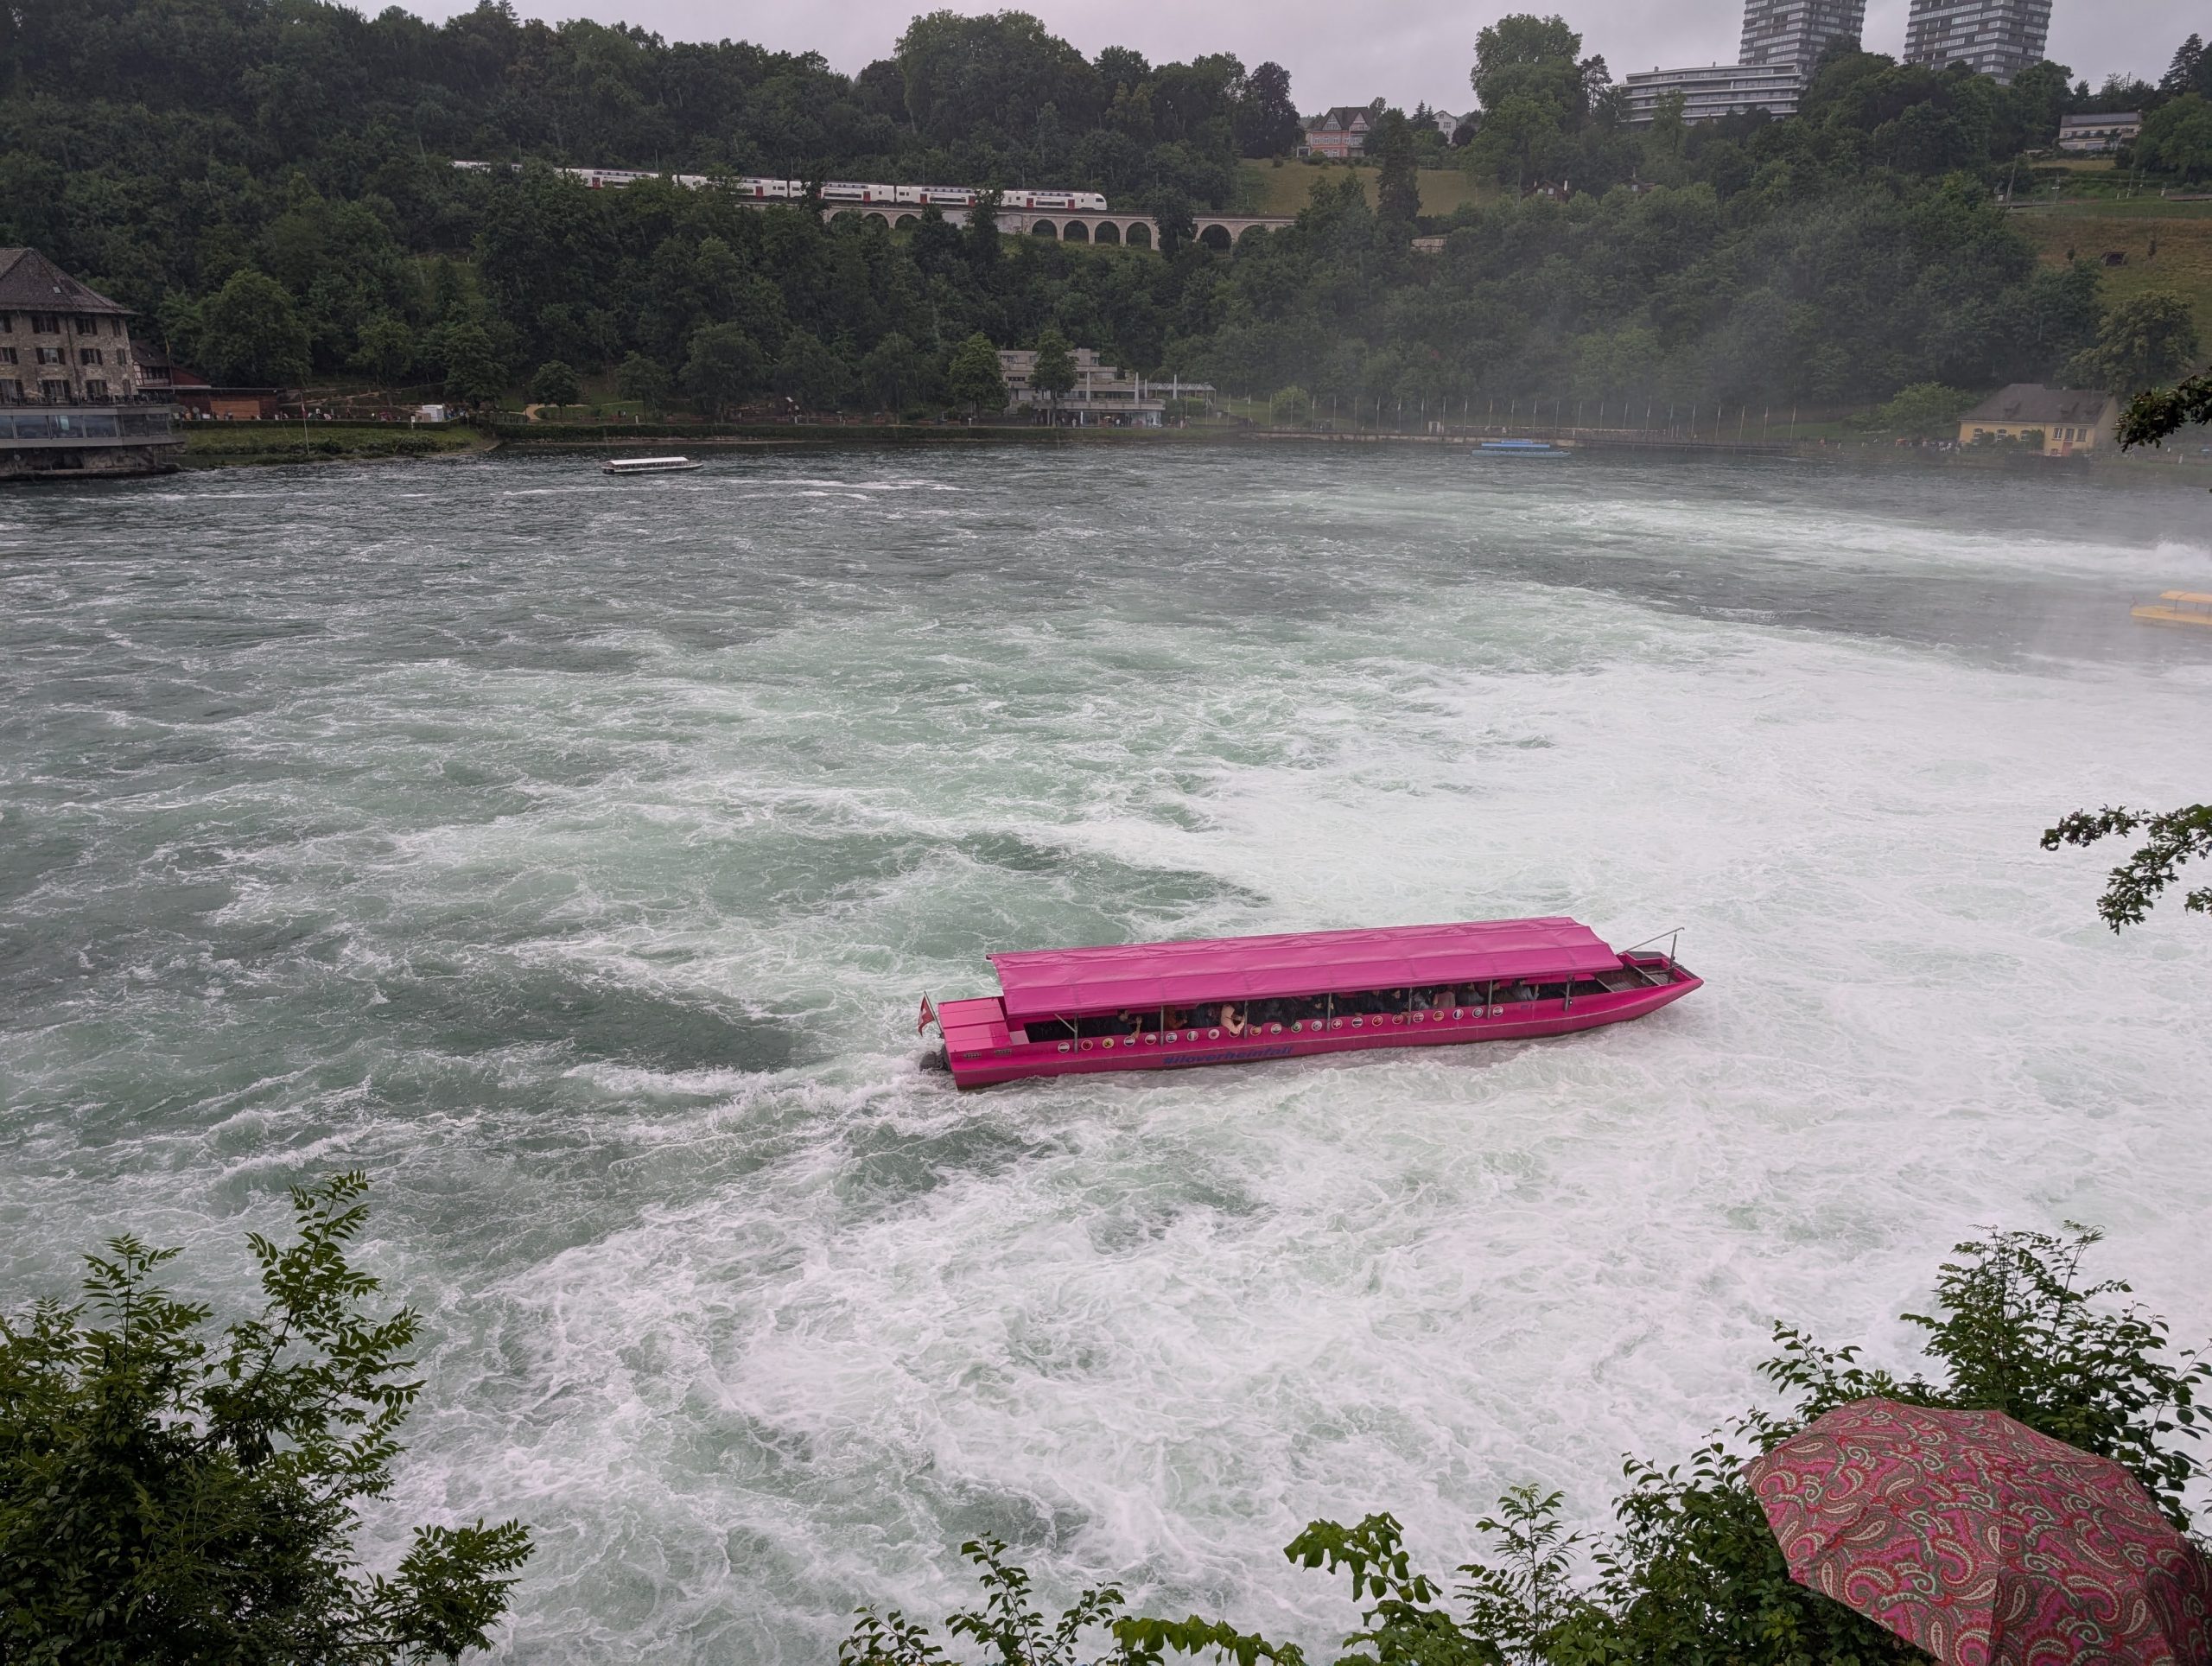
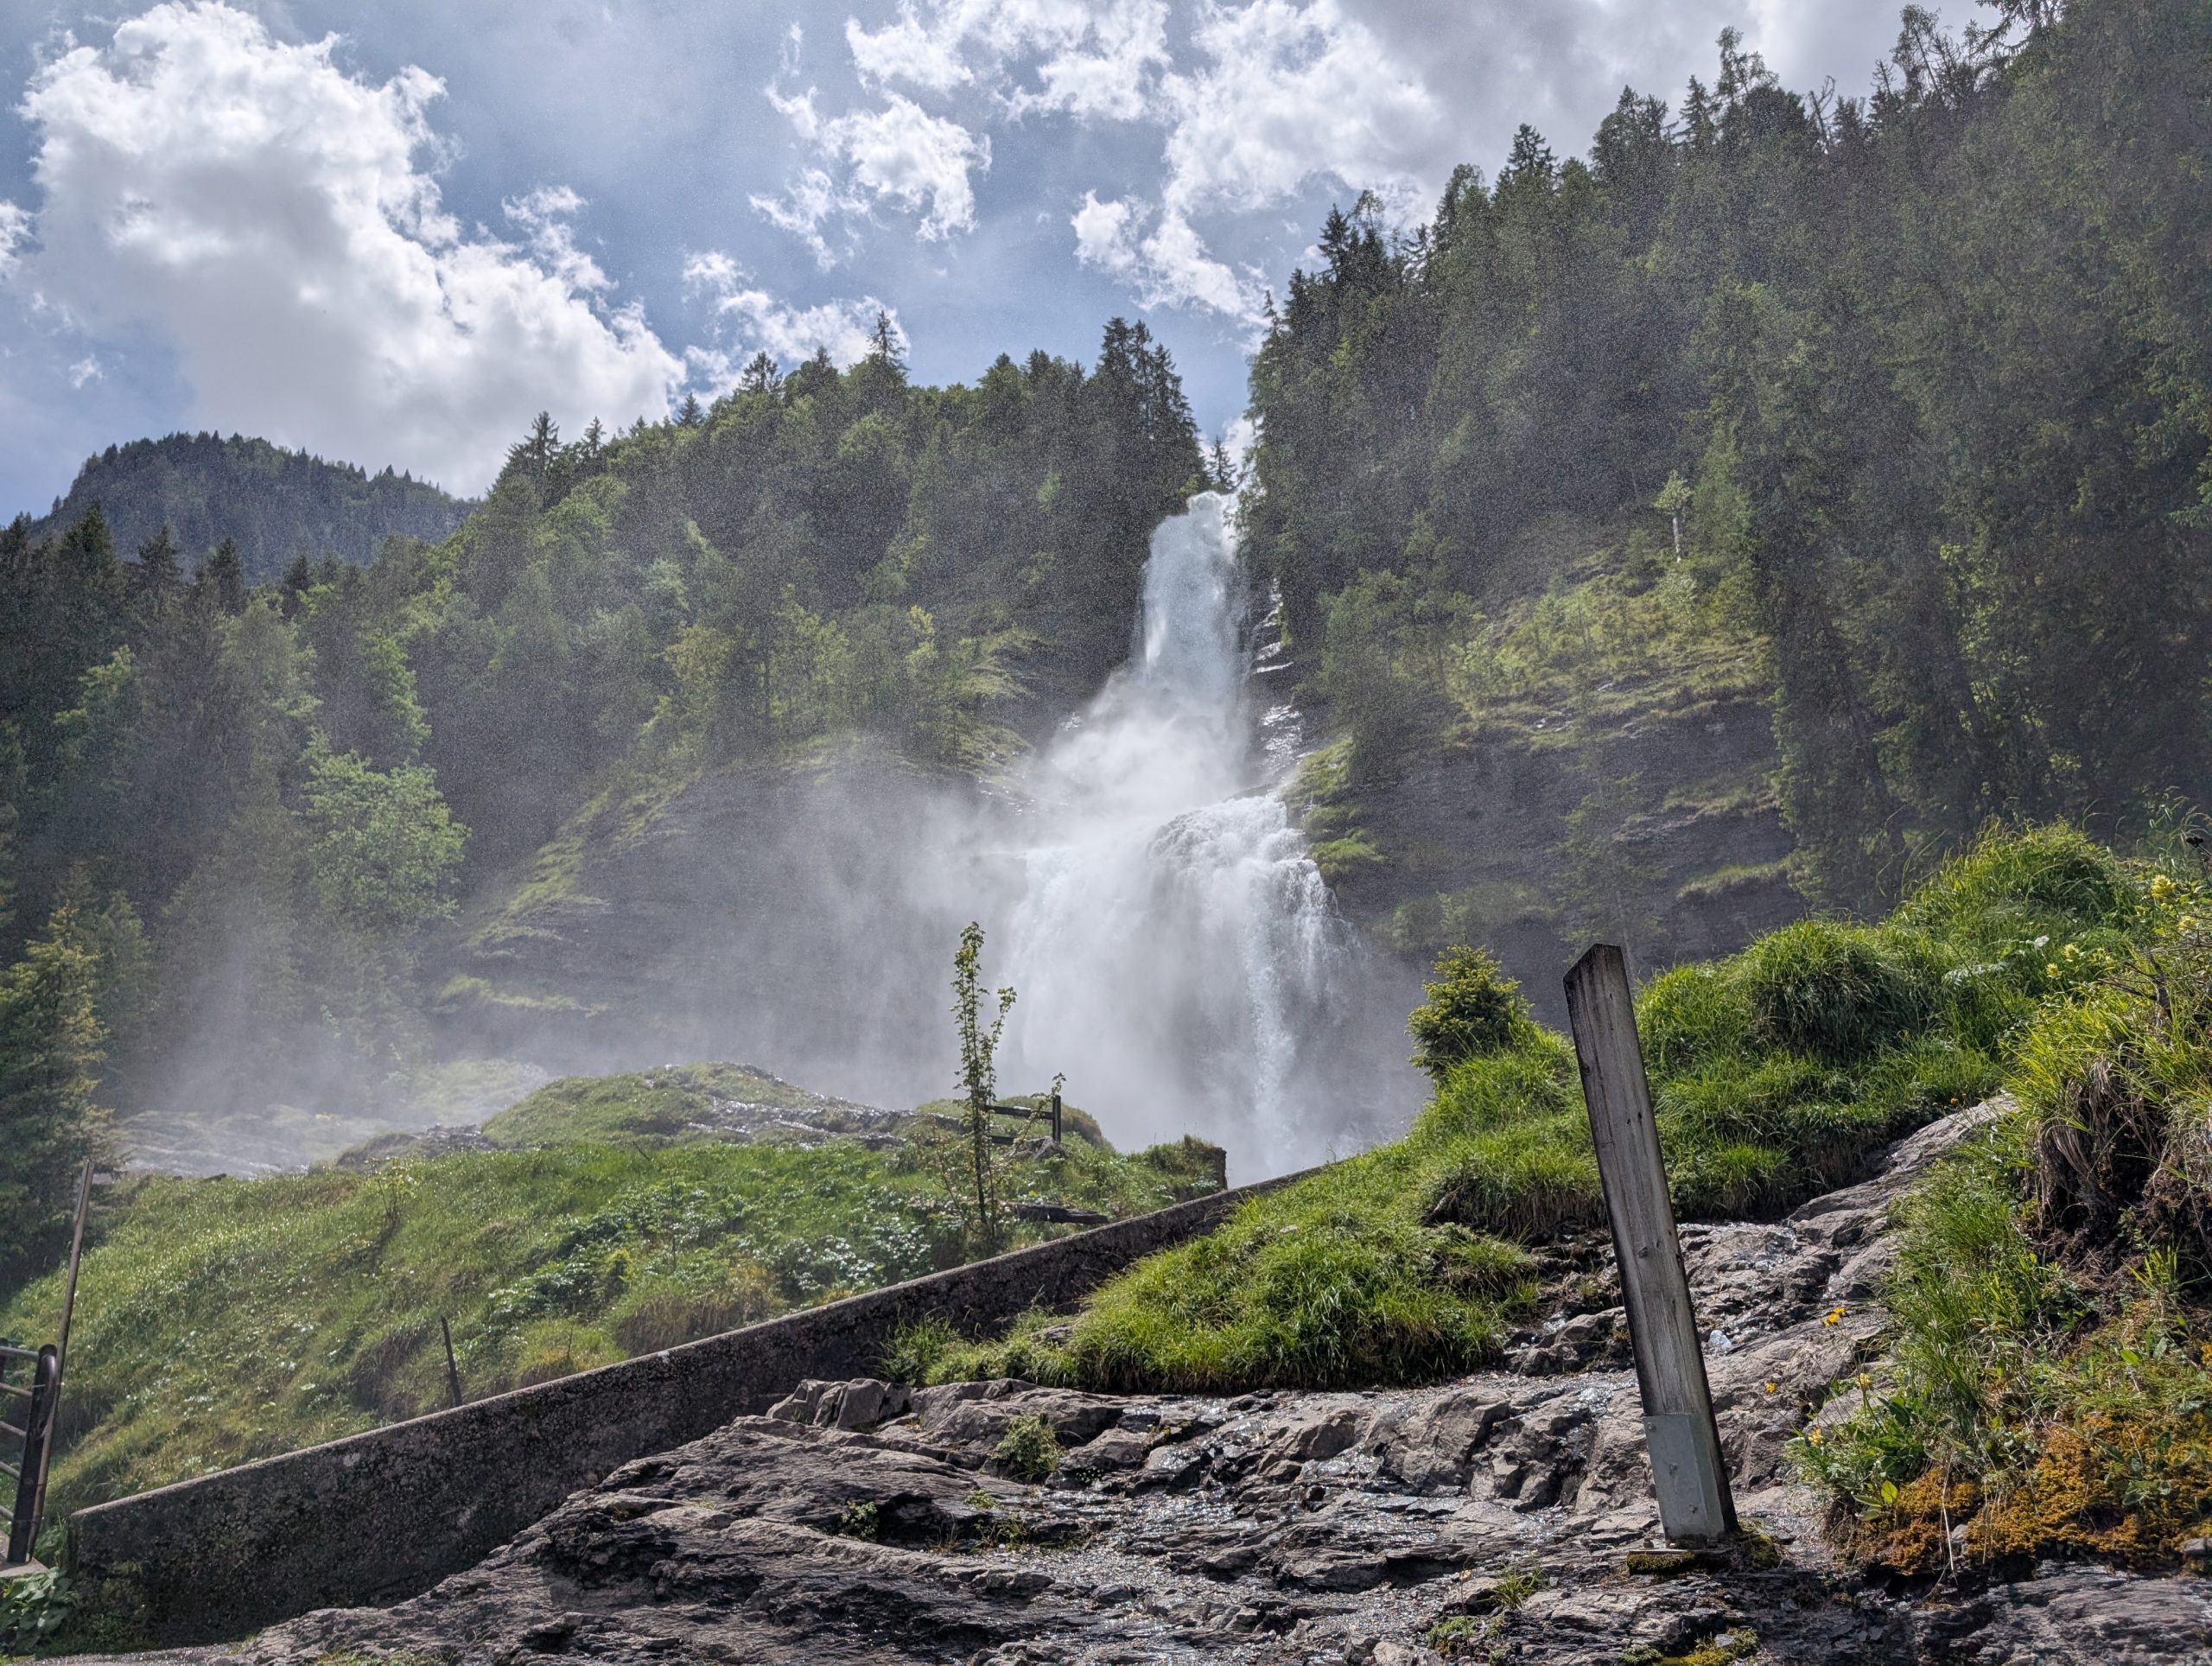
After breakfast we headed back through Germany’s Black Forest for a visit to Rhine Falls in Switzerland which is Europe’s biggest waterfall.
Rhine Falls provides a magnificent spectacle. Across a width of 492 feet and a height of 76 feet, water plunges over terraced falls.
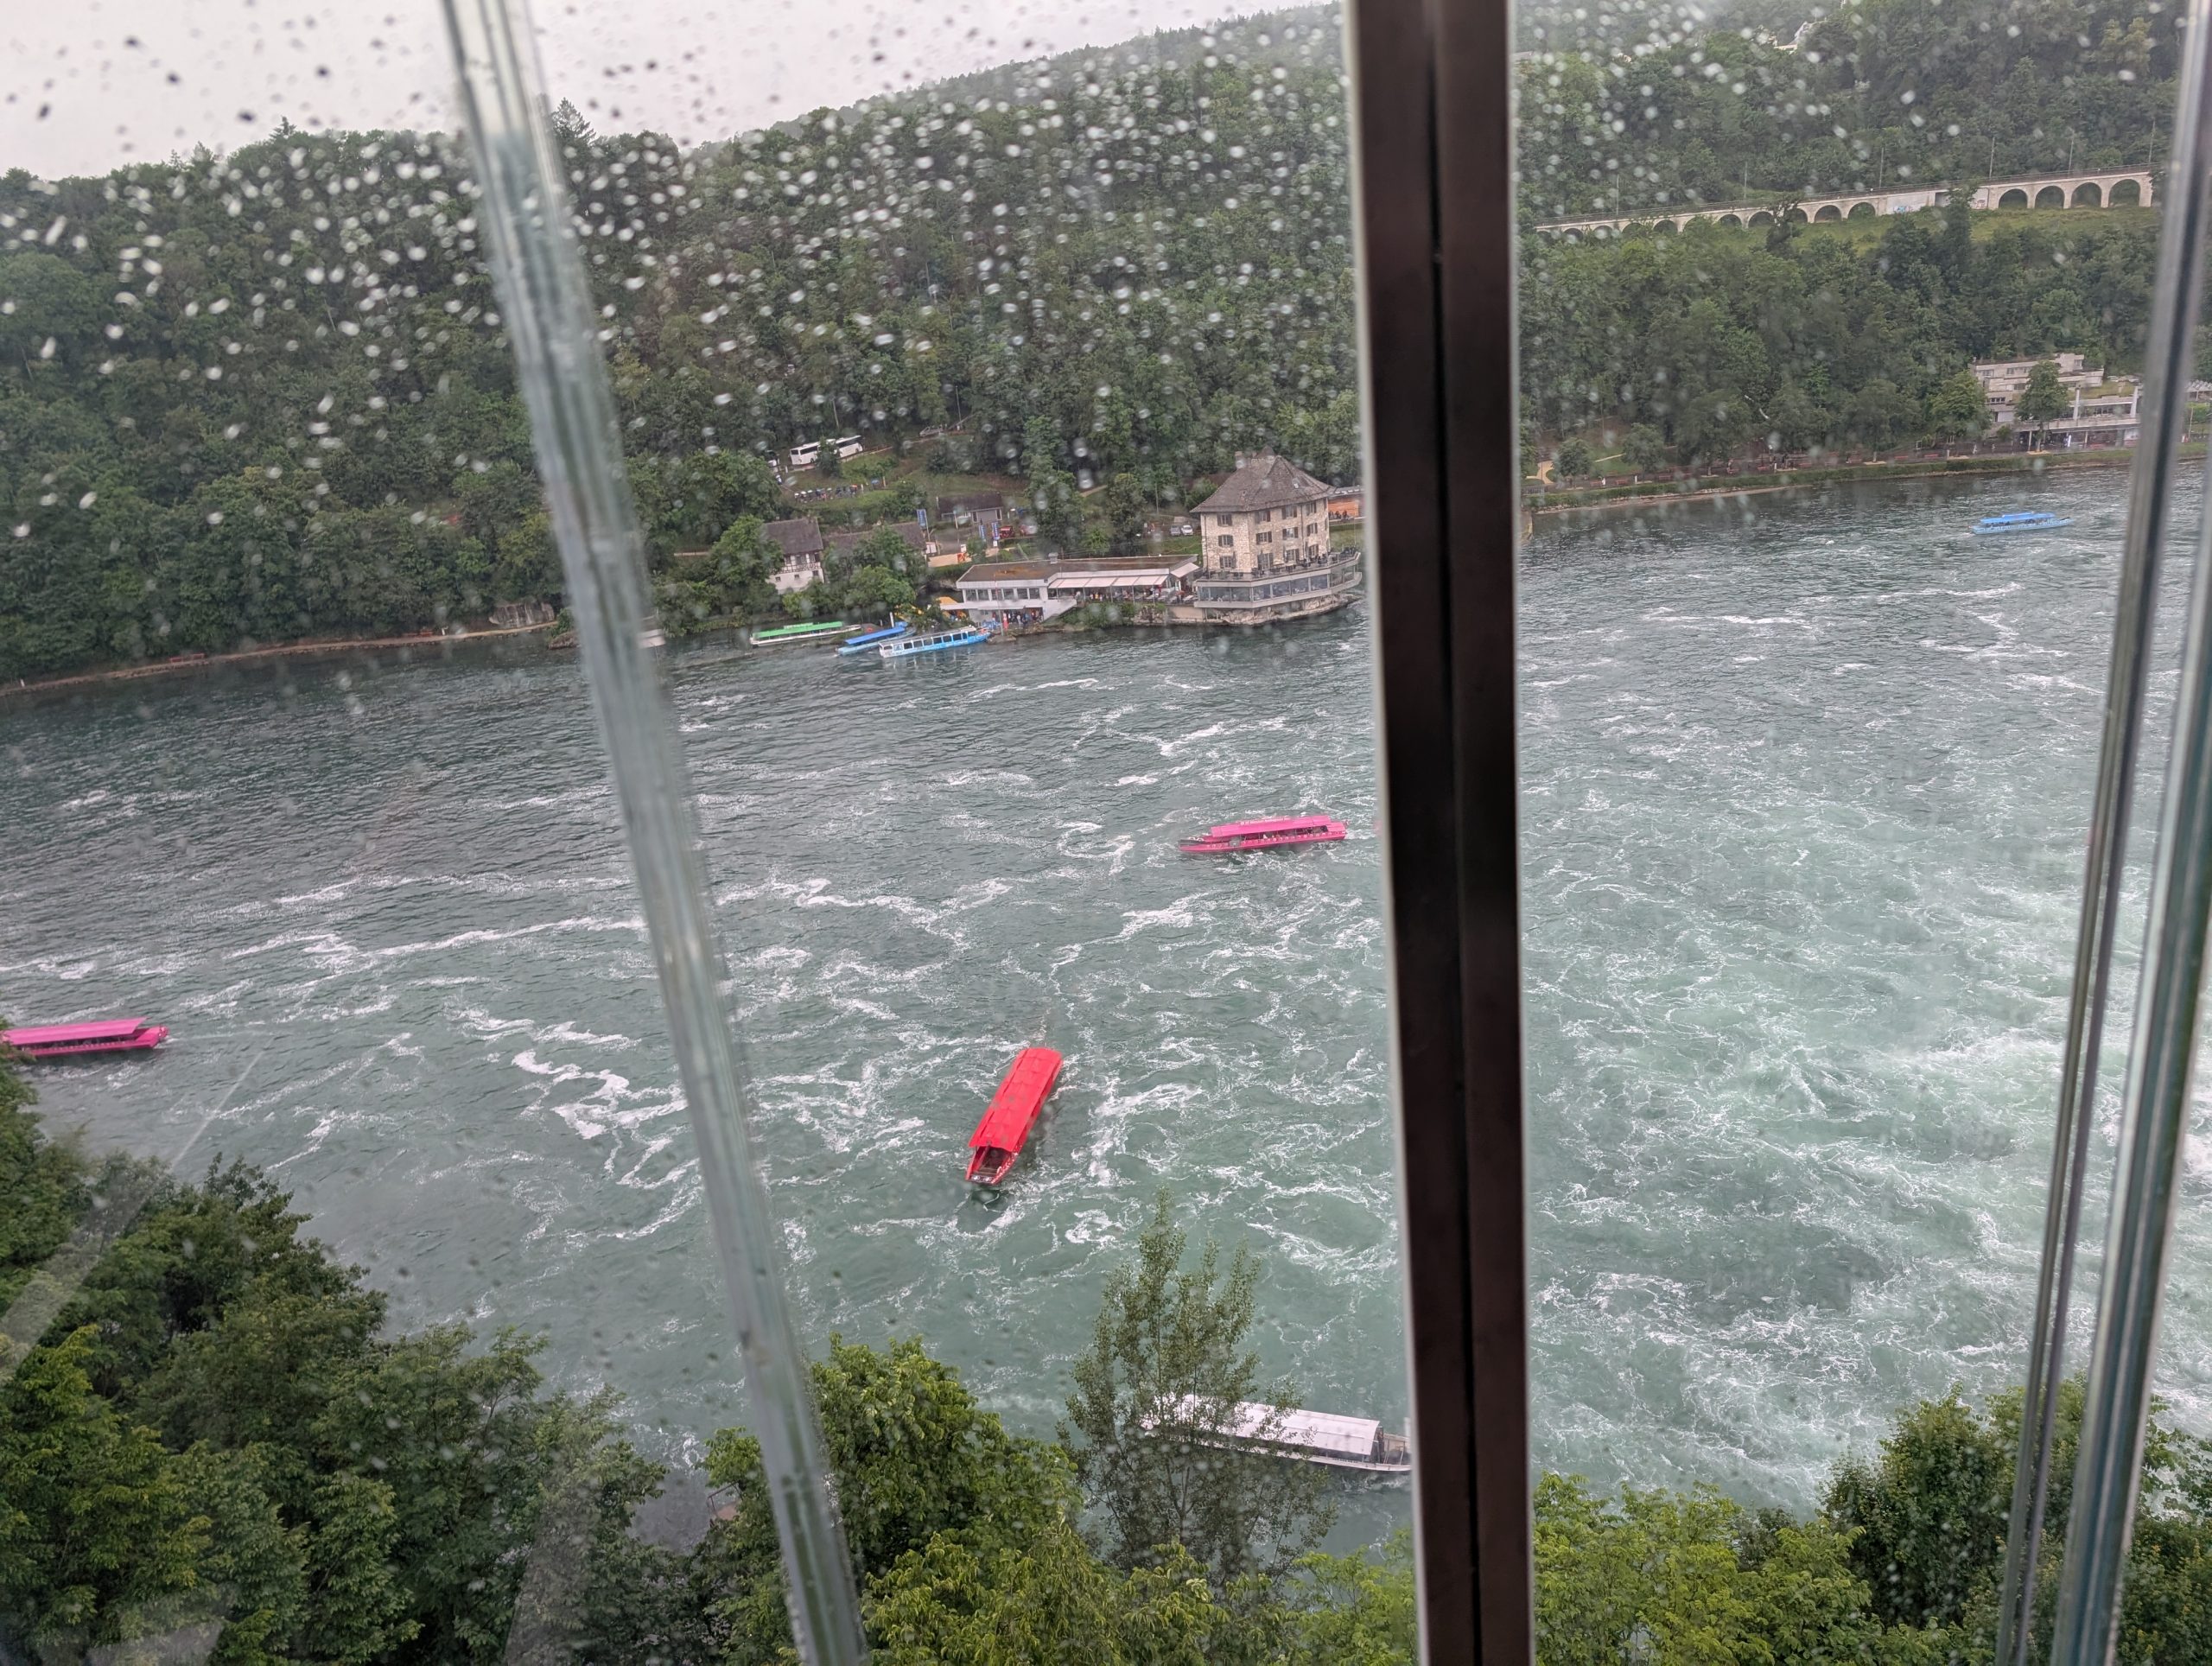
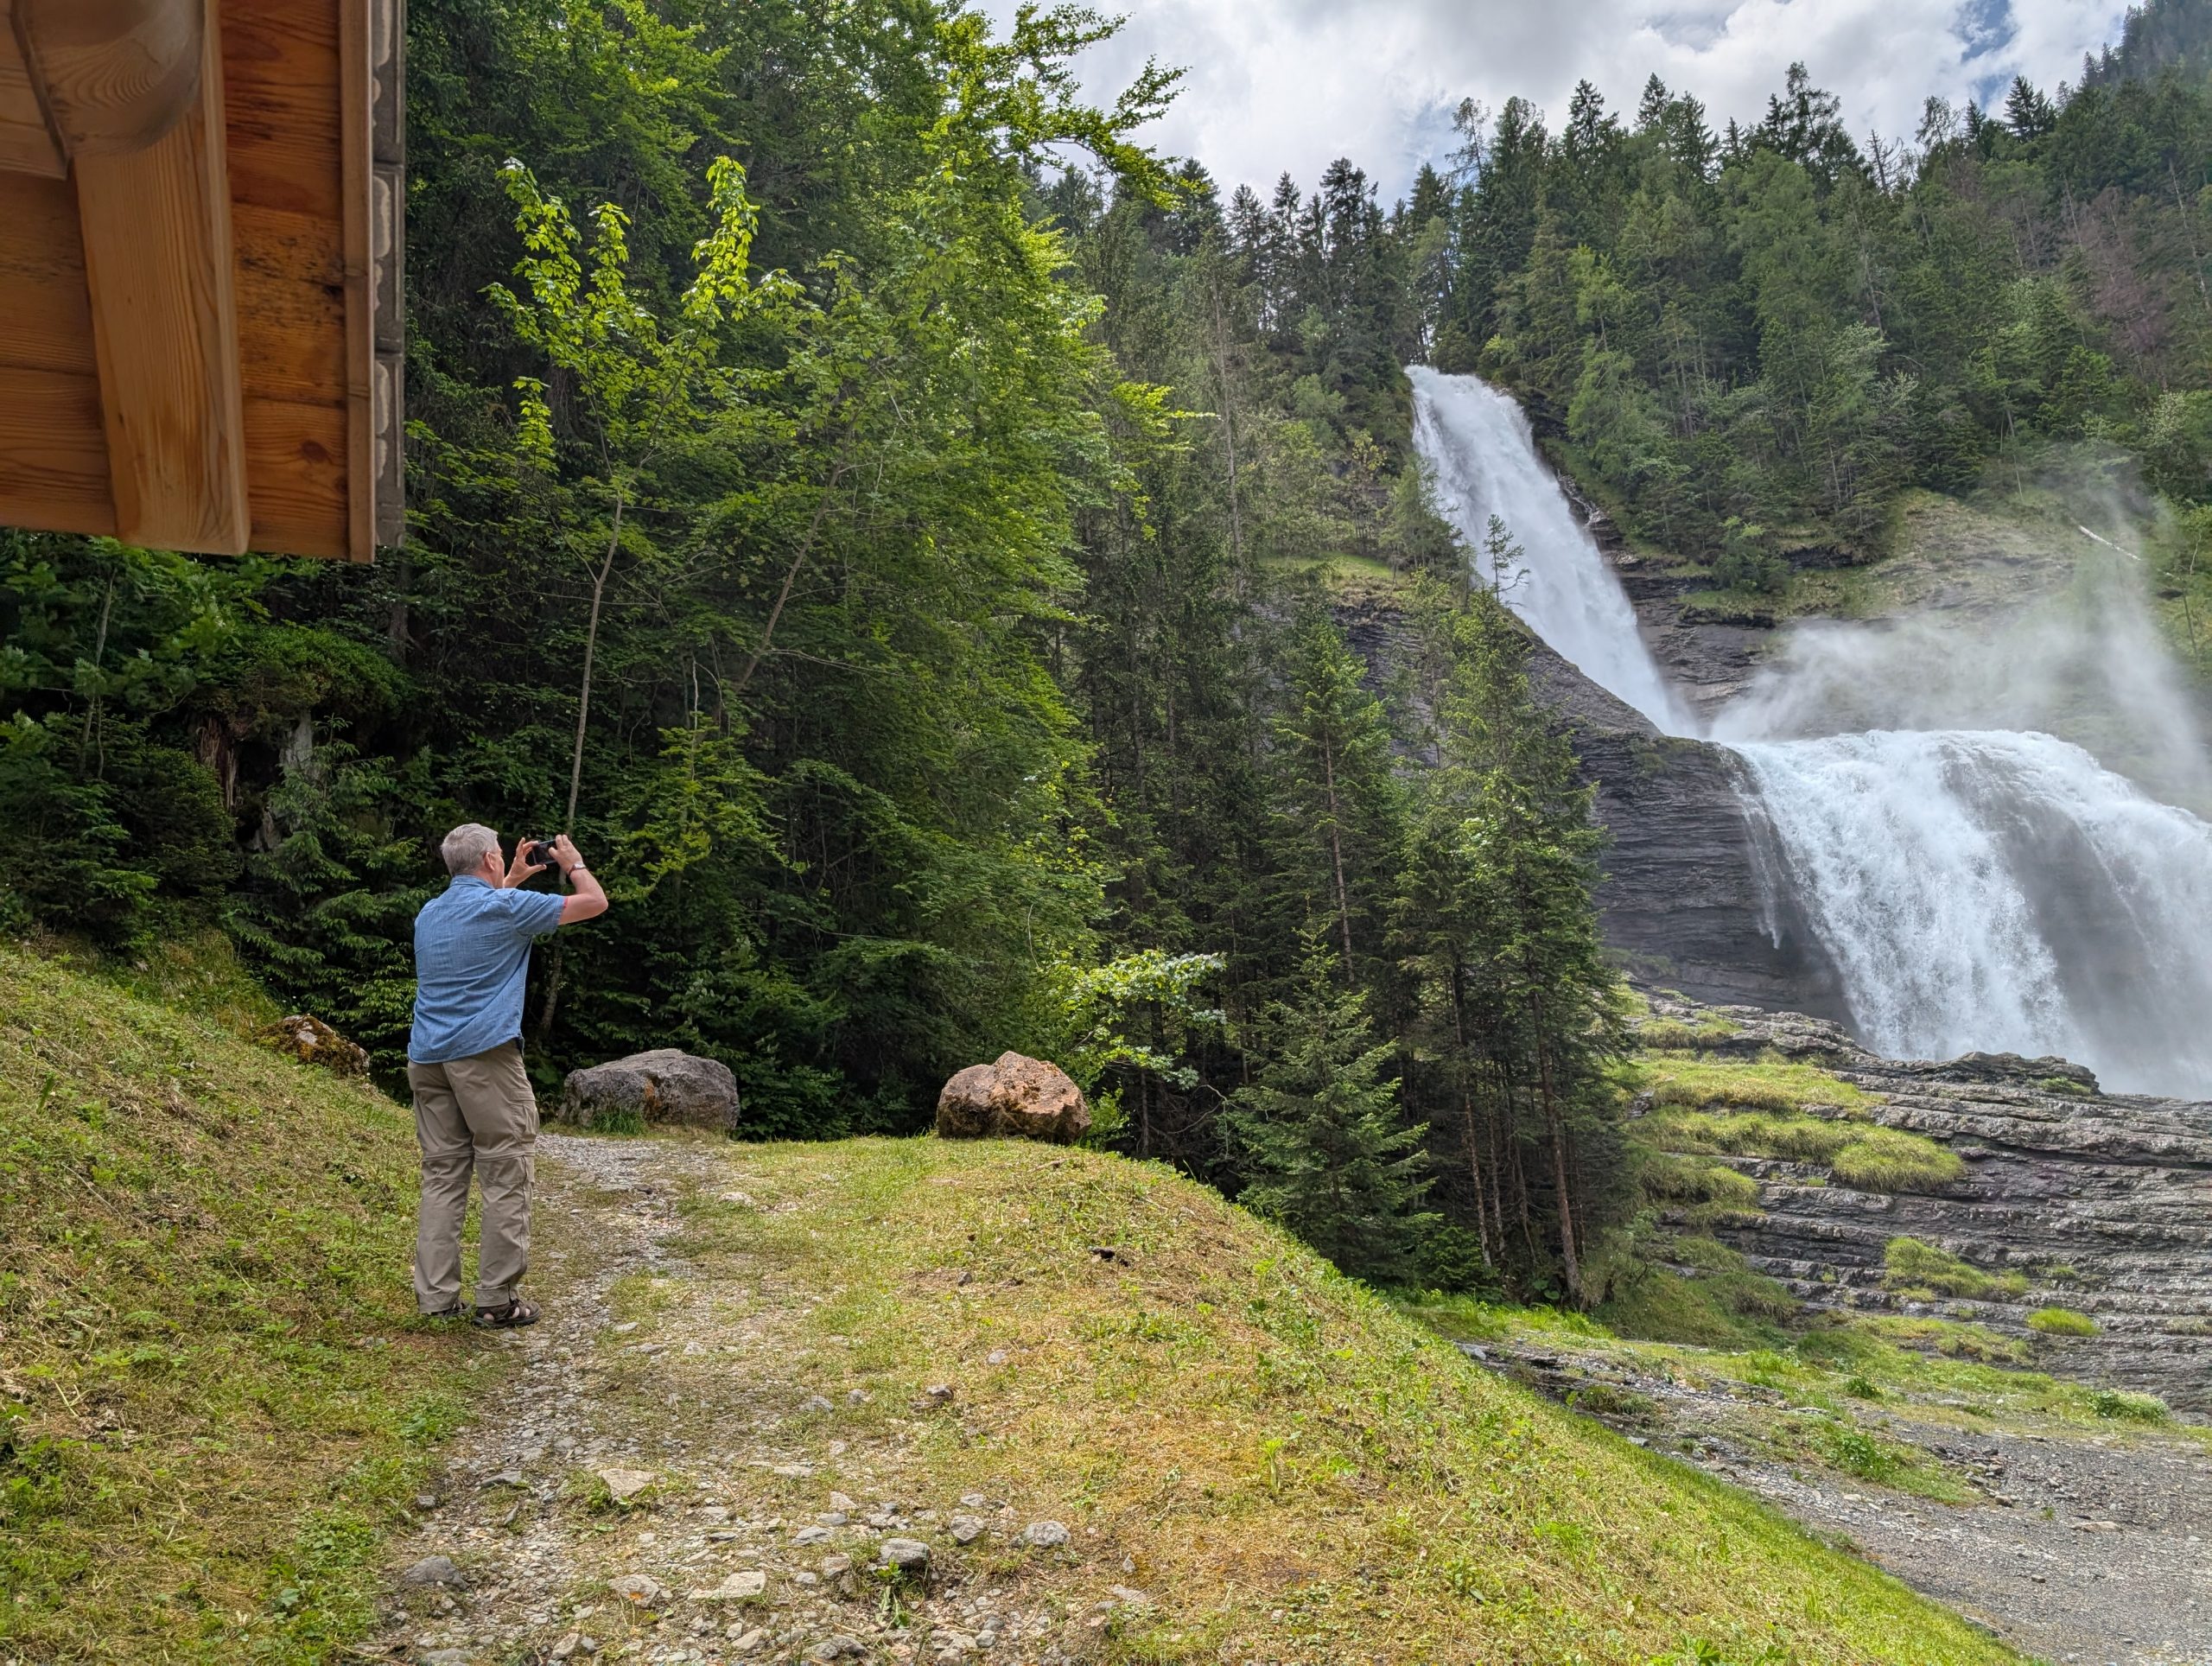
A path, complete with a glass elevator for part of the way down to lower platforms, takes you from Laufen Castle to outlook places that enable an unobstructed view of this amazing natural wonder. And the thing that is most interesting is that the falls begin in what is basically the middle of Neuhausen am Rheinfall Village and just below Schaffhausen in the northern part of Switzerland.
To make things even more dramatic, it was pouring down rain. But the rain did nothing to deter visitors. The place was packed with soggy people carrying umbrellas. But even with all the dampness, it was a marvelous experience.
Threatening sky as we drive to the falls.
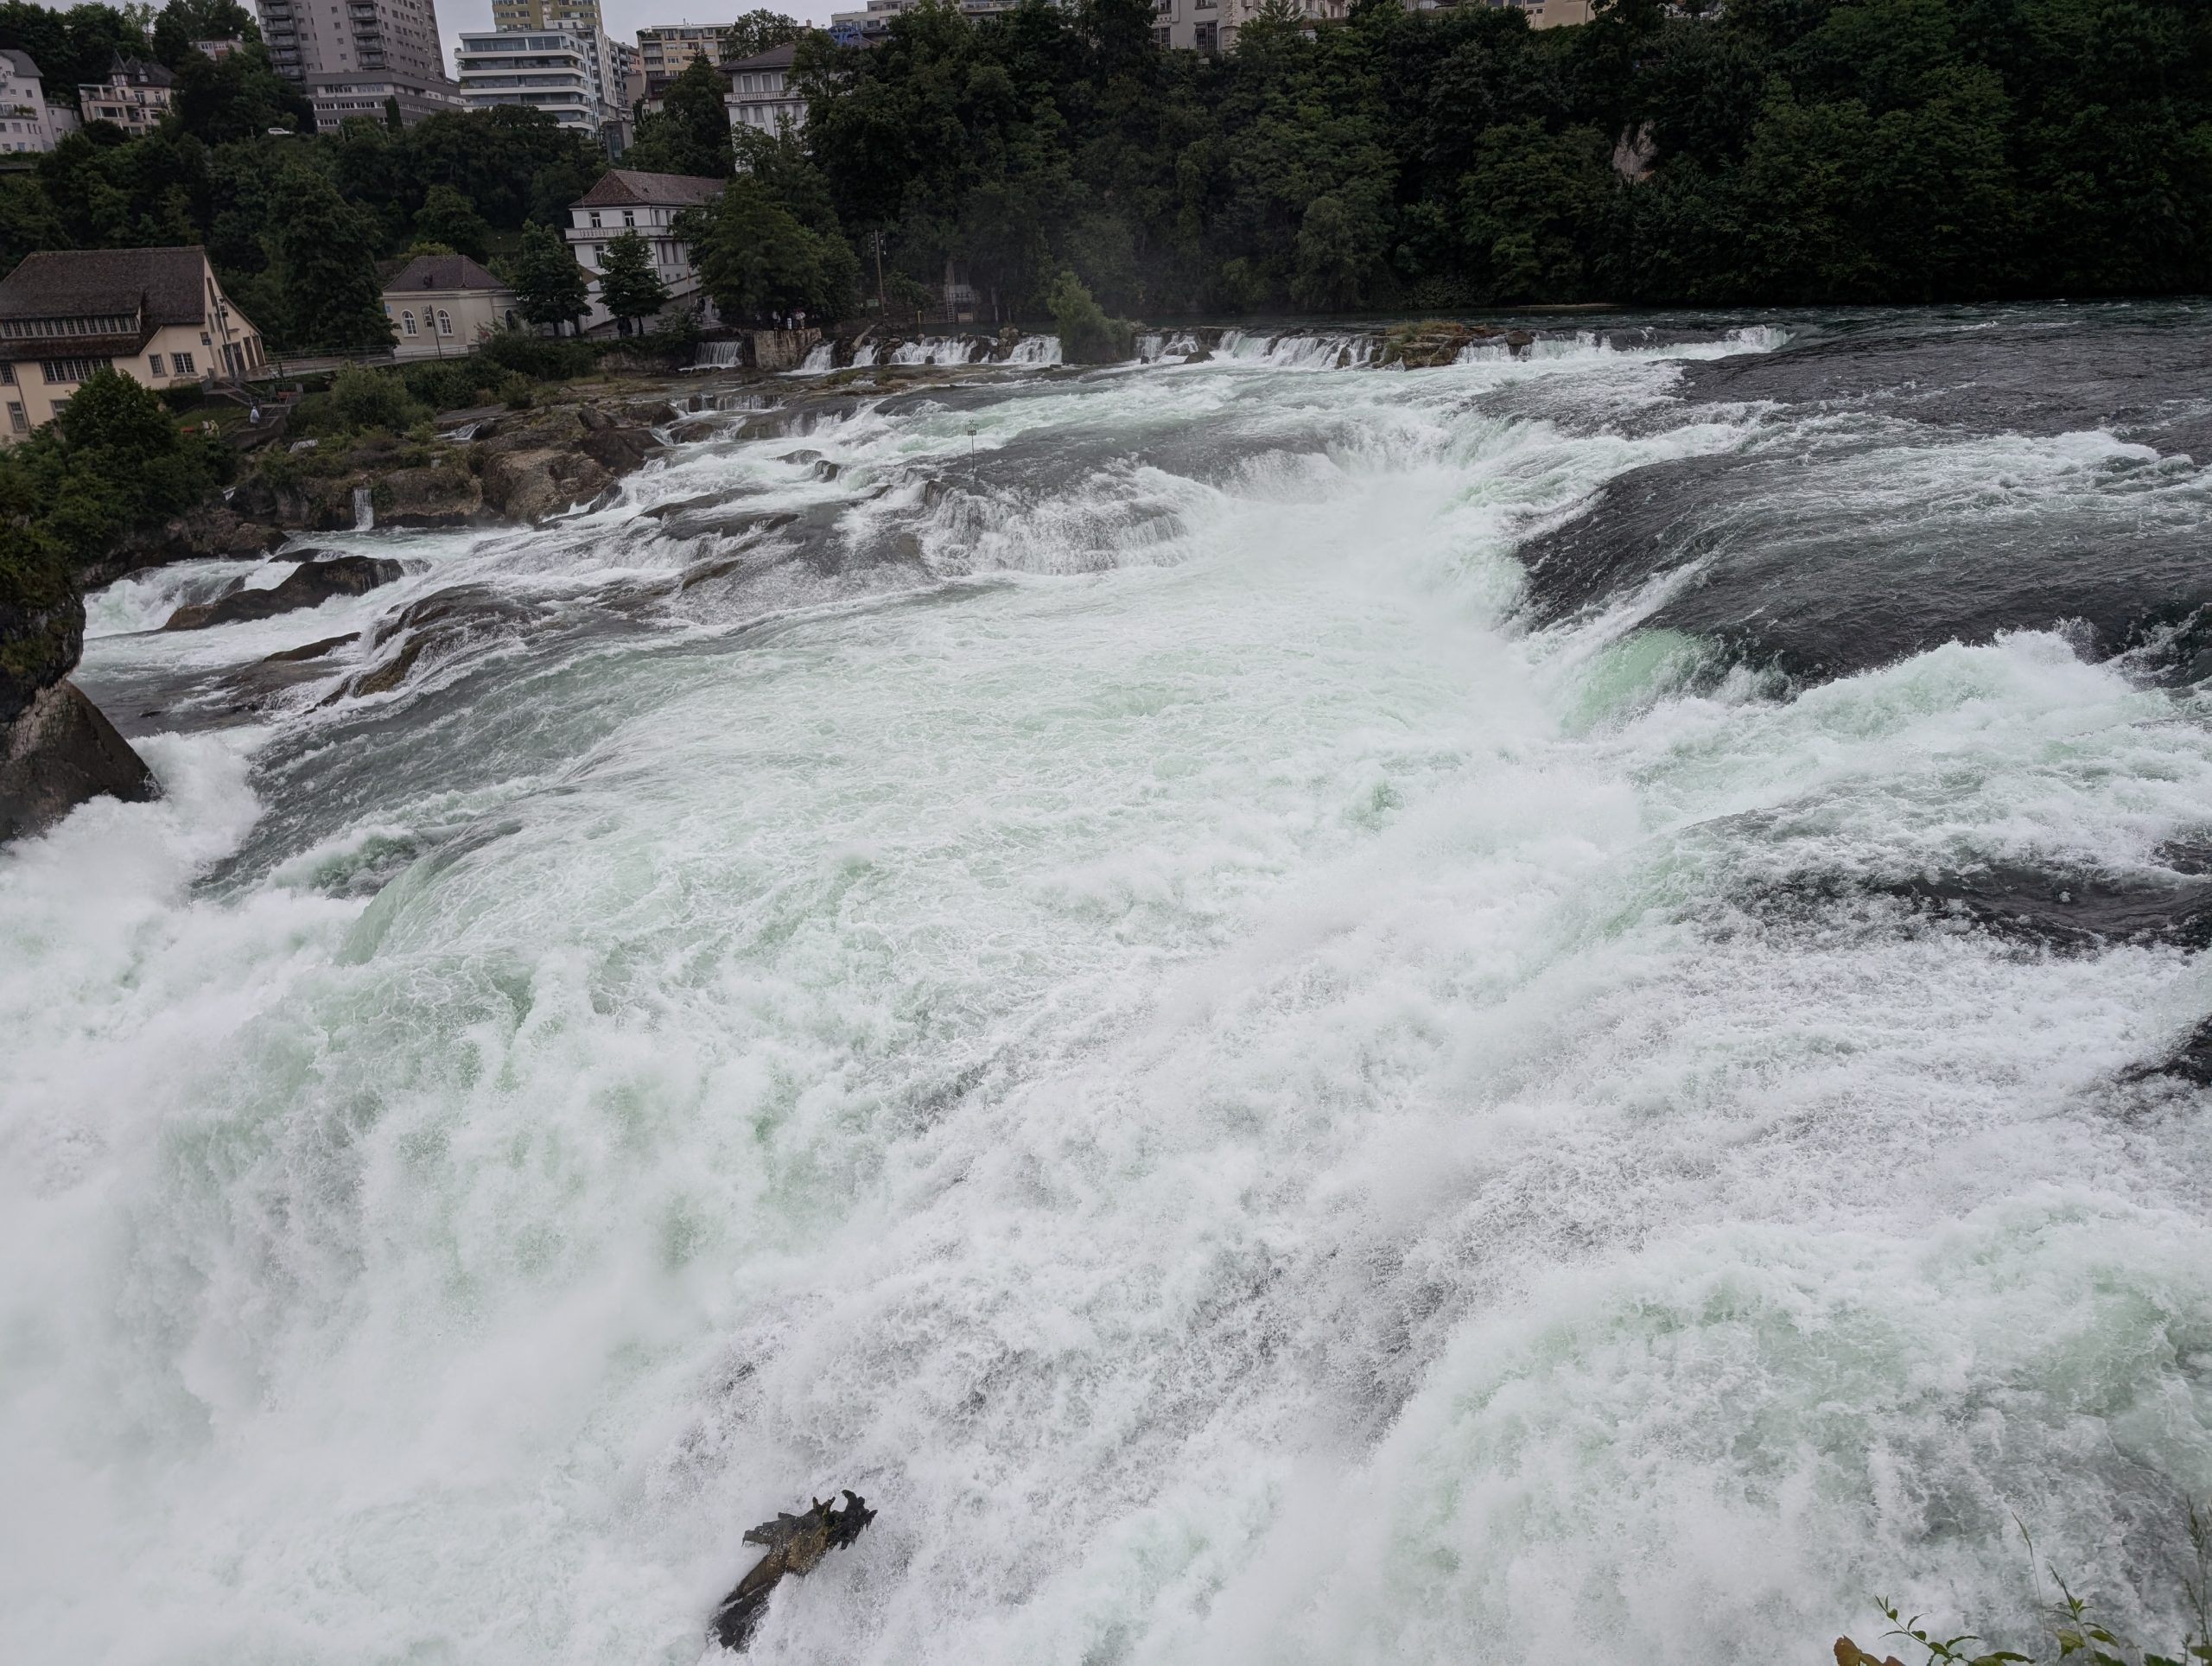
The top of the falls.
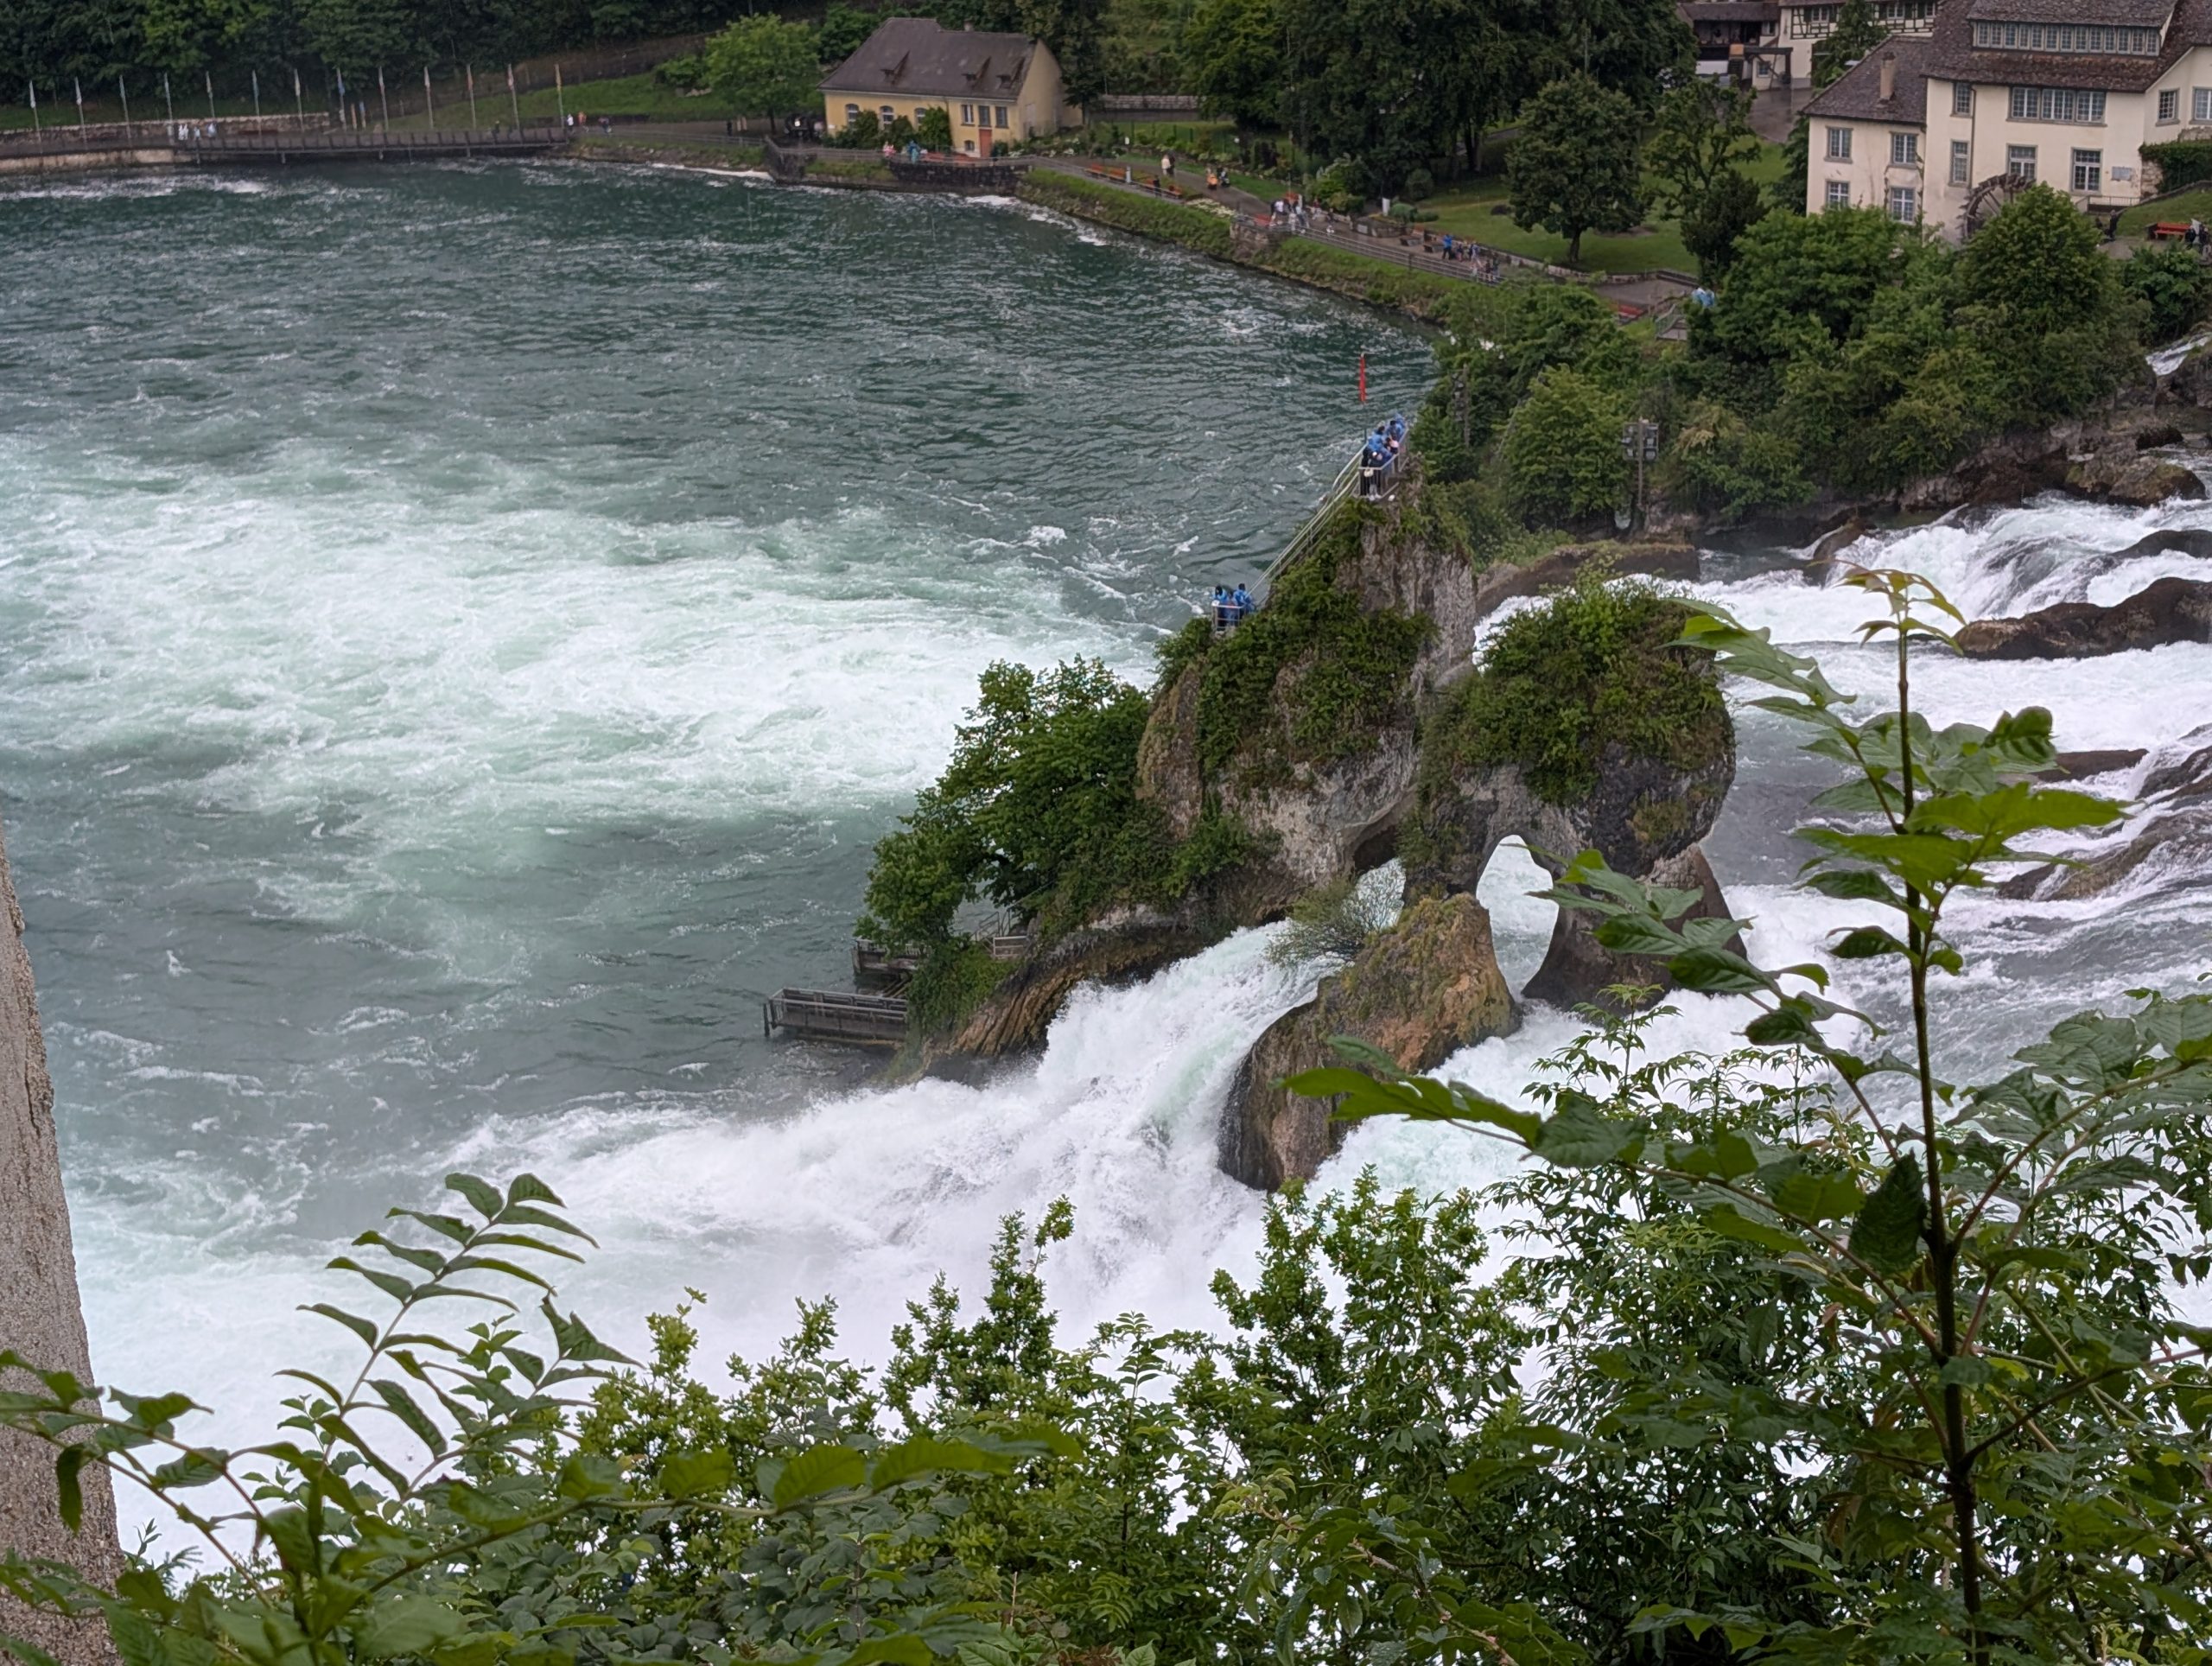
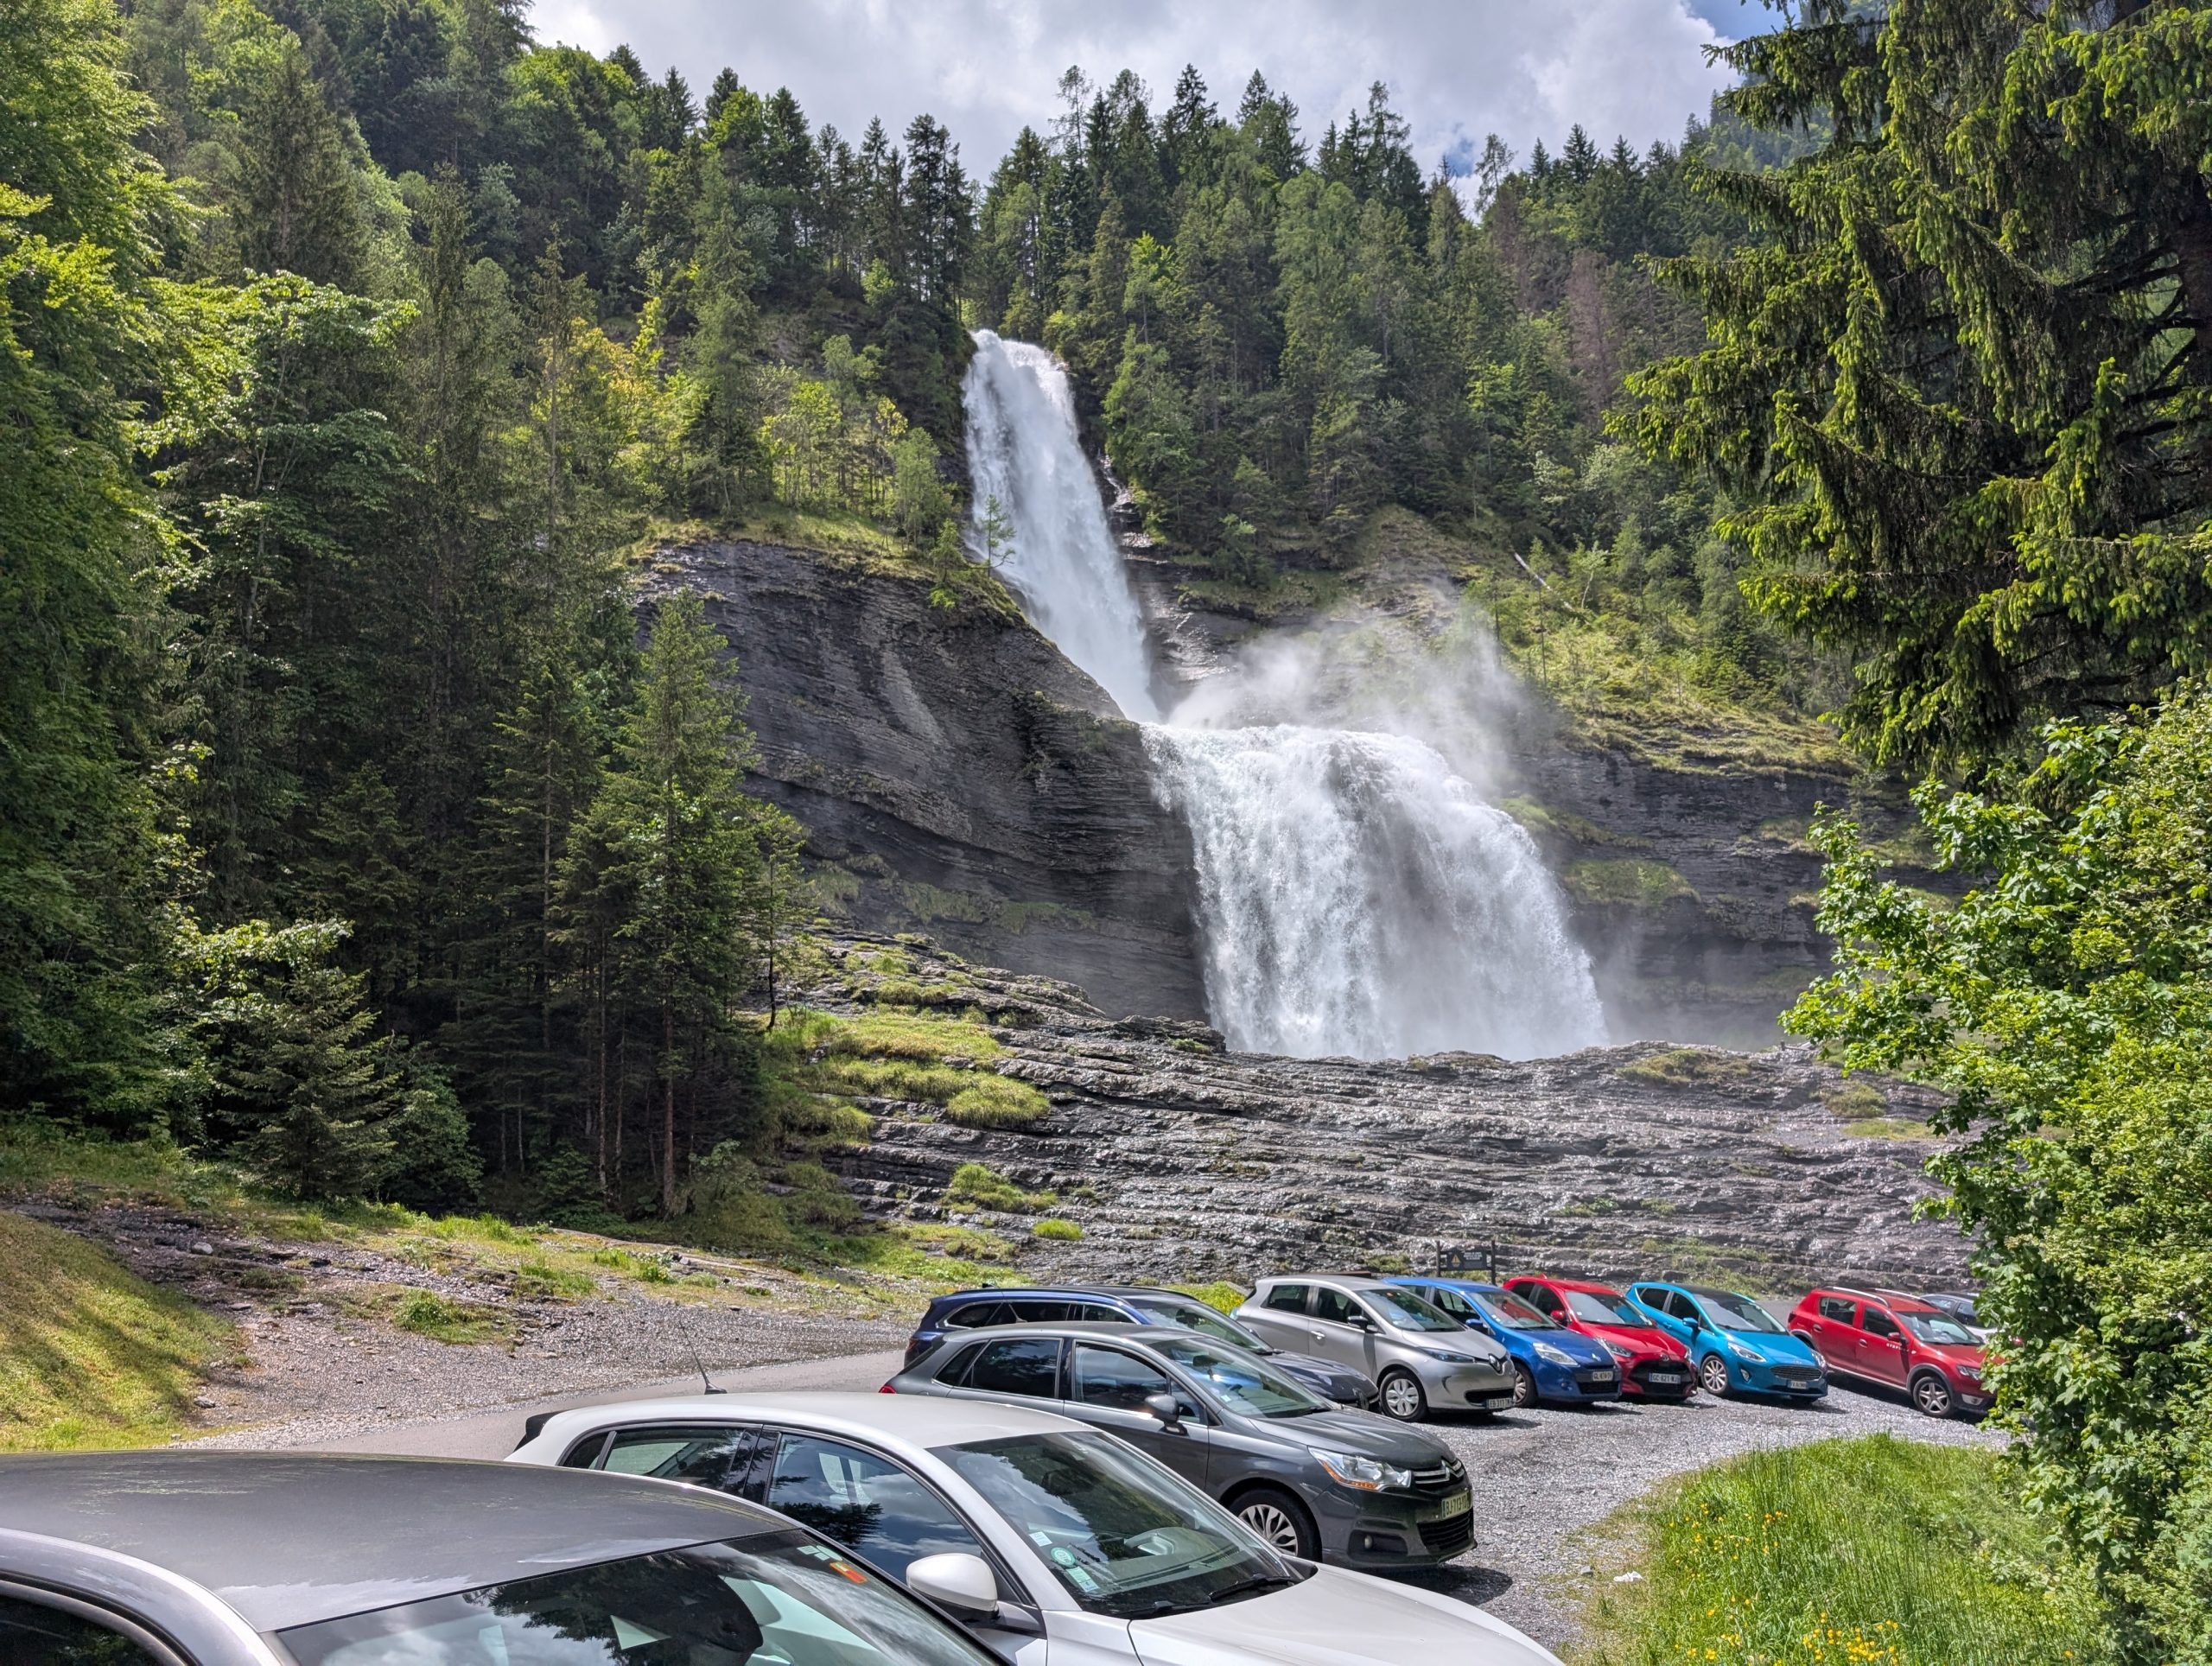
The bottom of the falls.
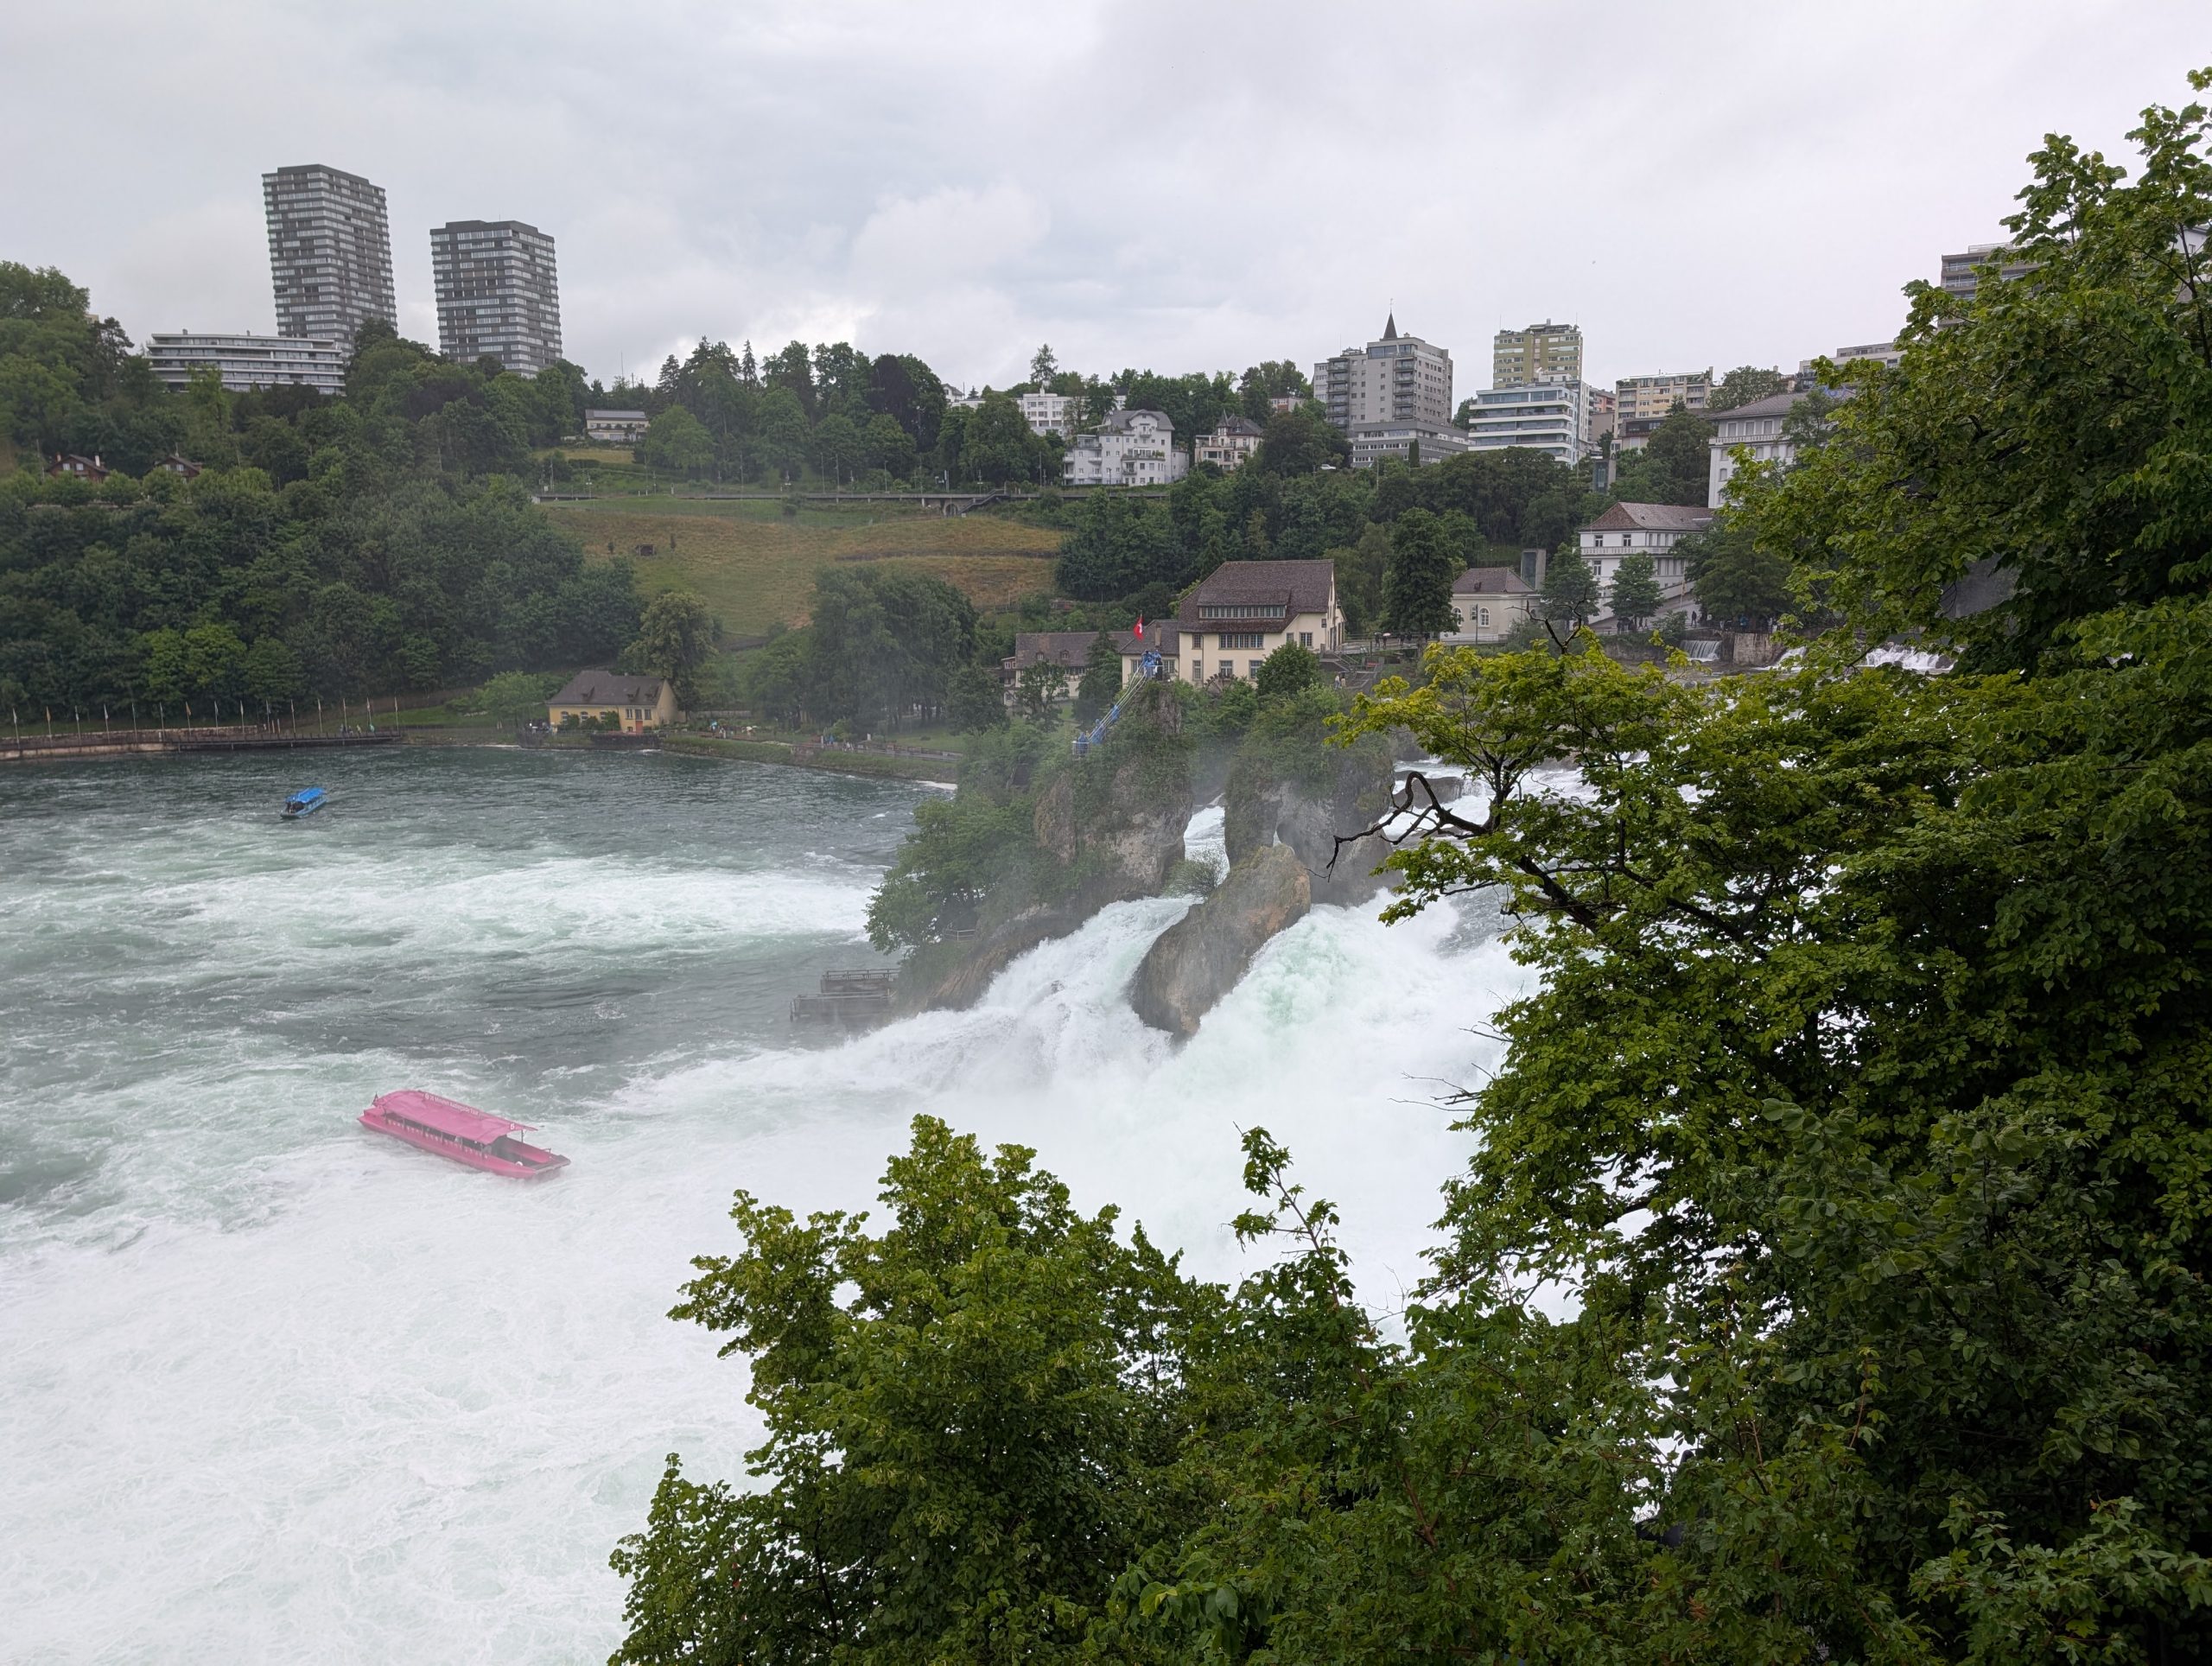
The bottom from another angle. Notice the boat at the bottom of the falls. The captain of the boat would steer the boat right into the falls. Then let the boat drift sideways back downstream. We chose not to see the falls from a boat. We were wet enough as if was!
A closer look at one of the boats giving their passengers quite the thrill, I’m sure.
A picture from our glass elevator on our way up from the viewpoints. Note the raindrops on the glass.
Then back on the road to Colmar. After dinner we both opened our Kindles for a short time, then nighty night.
Sunday, June 8, 2025 – Colmar Hotel – Colmar, France
What fun we had today. After breakfast we walked out of our hotel but quickly turned around. It was beginning to sprinkle and looked like it would soon turn into a deluge. So, we turned around and decided to wait it out. Good decision, because after about 20 minutes the rain had stopped completely. So, off we went again.
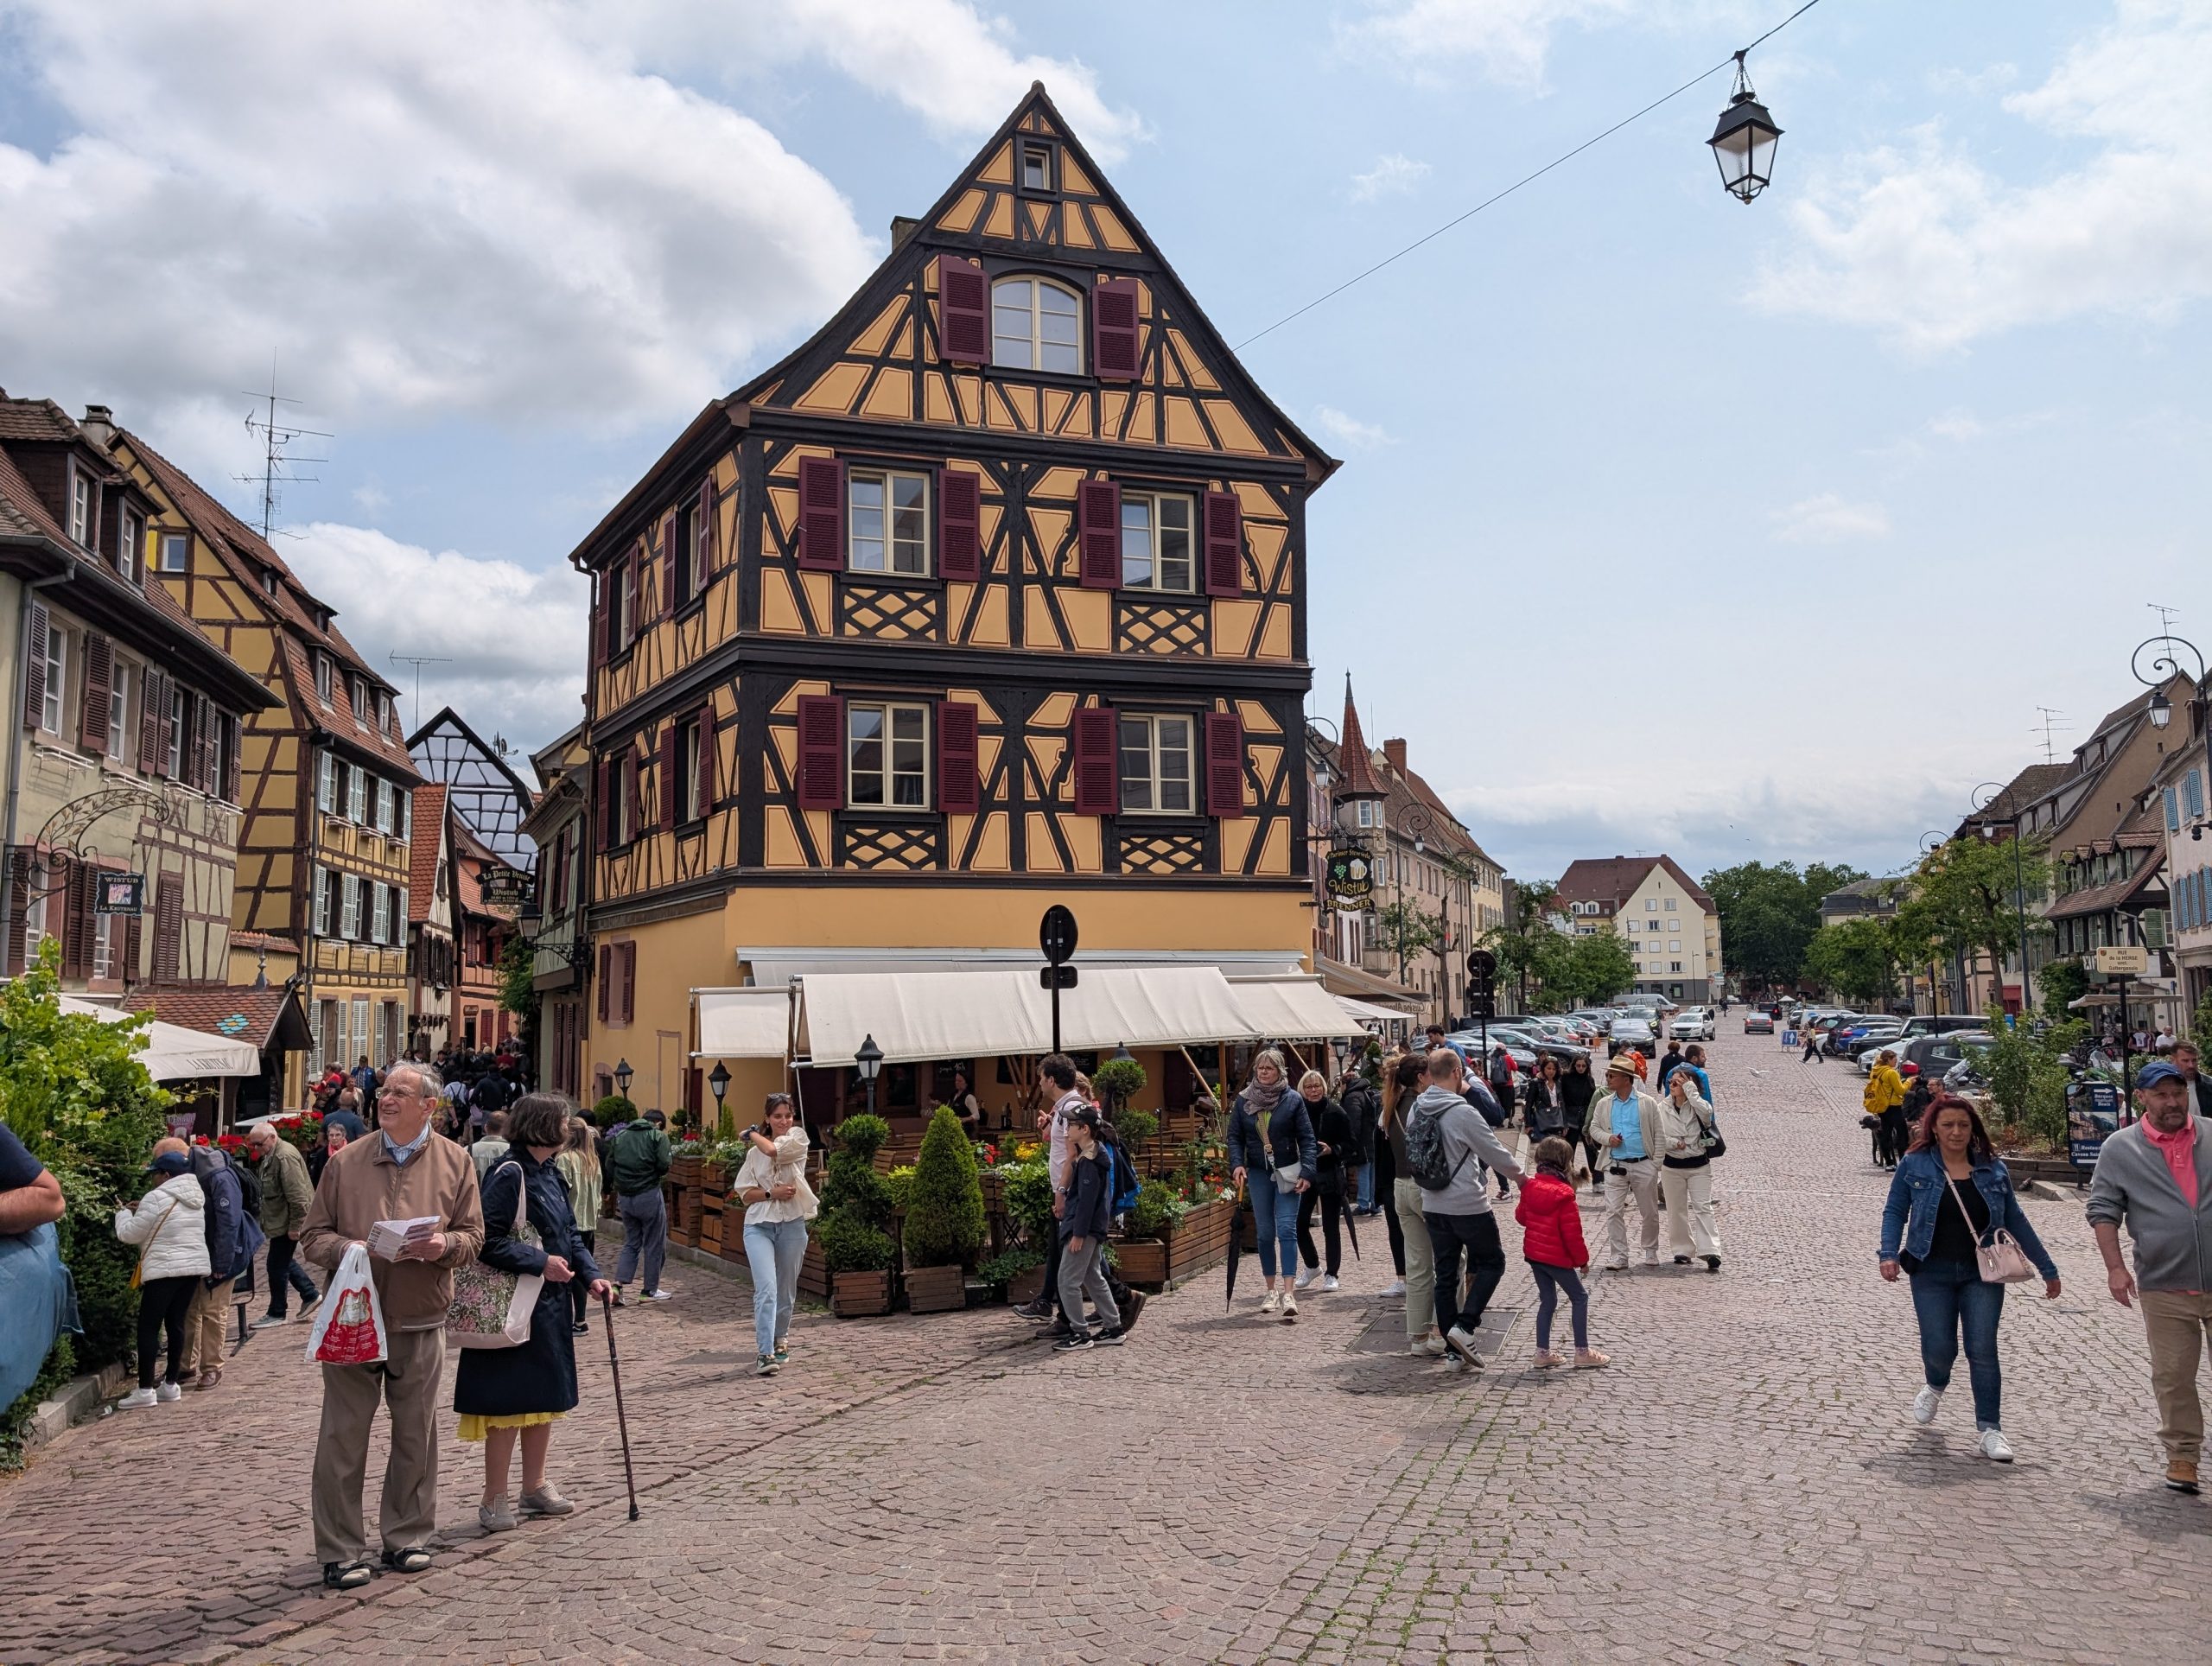
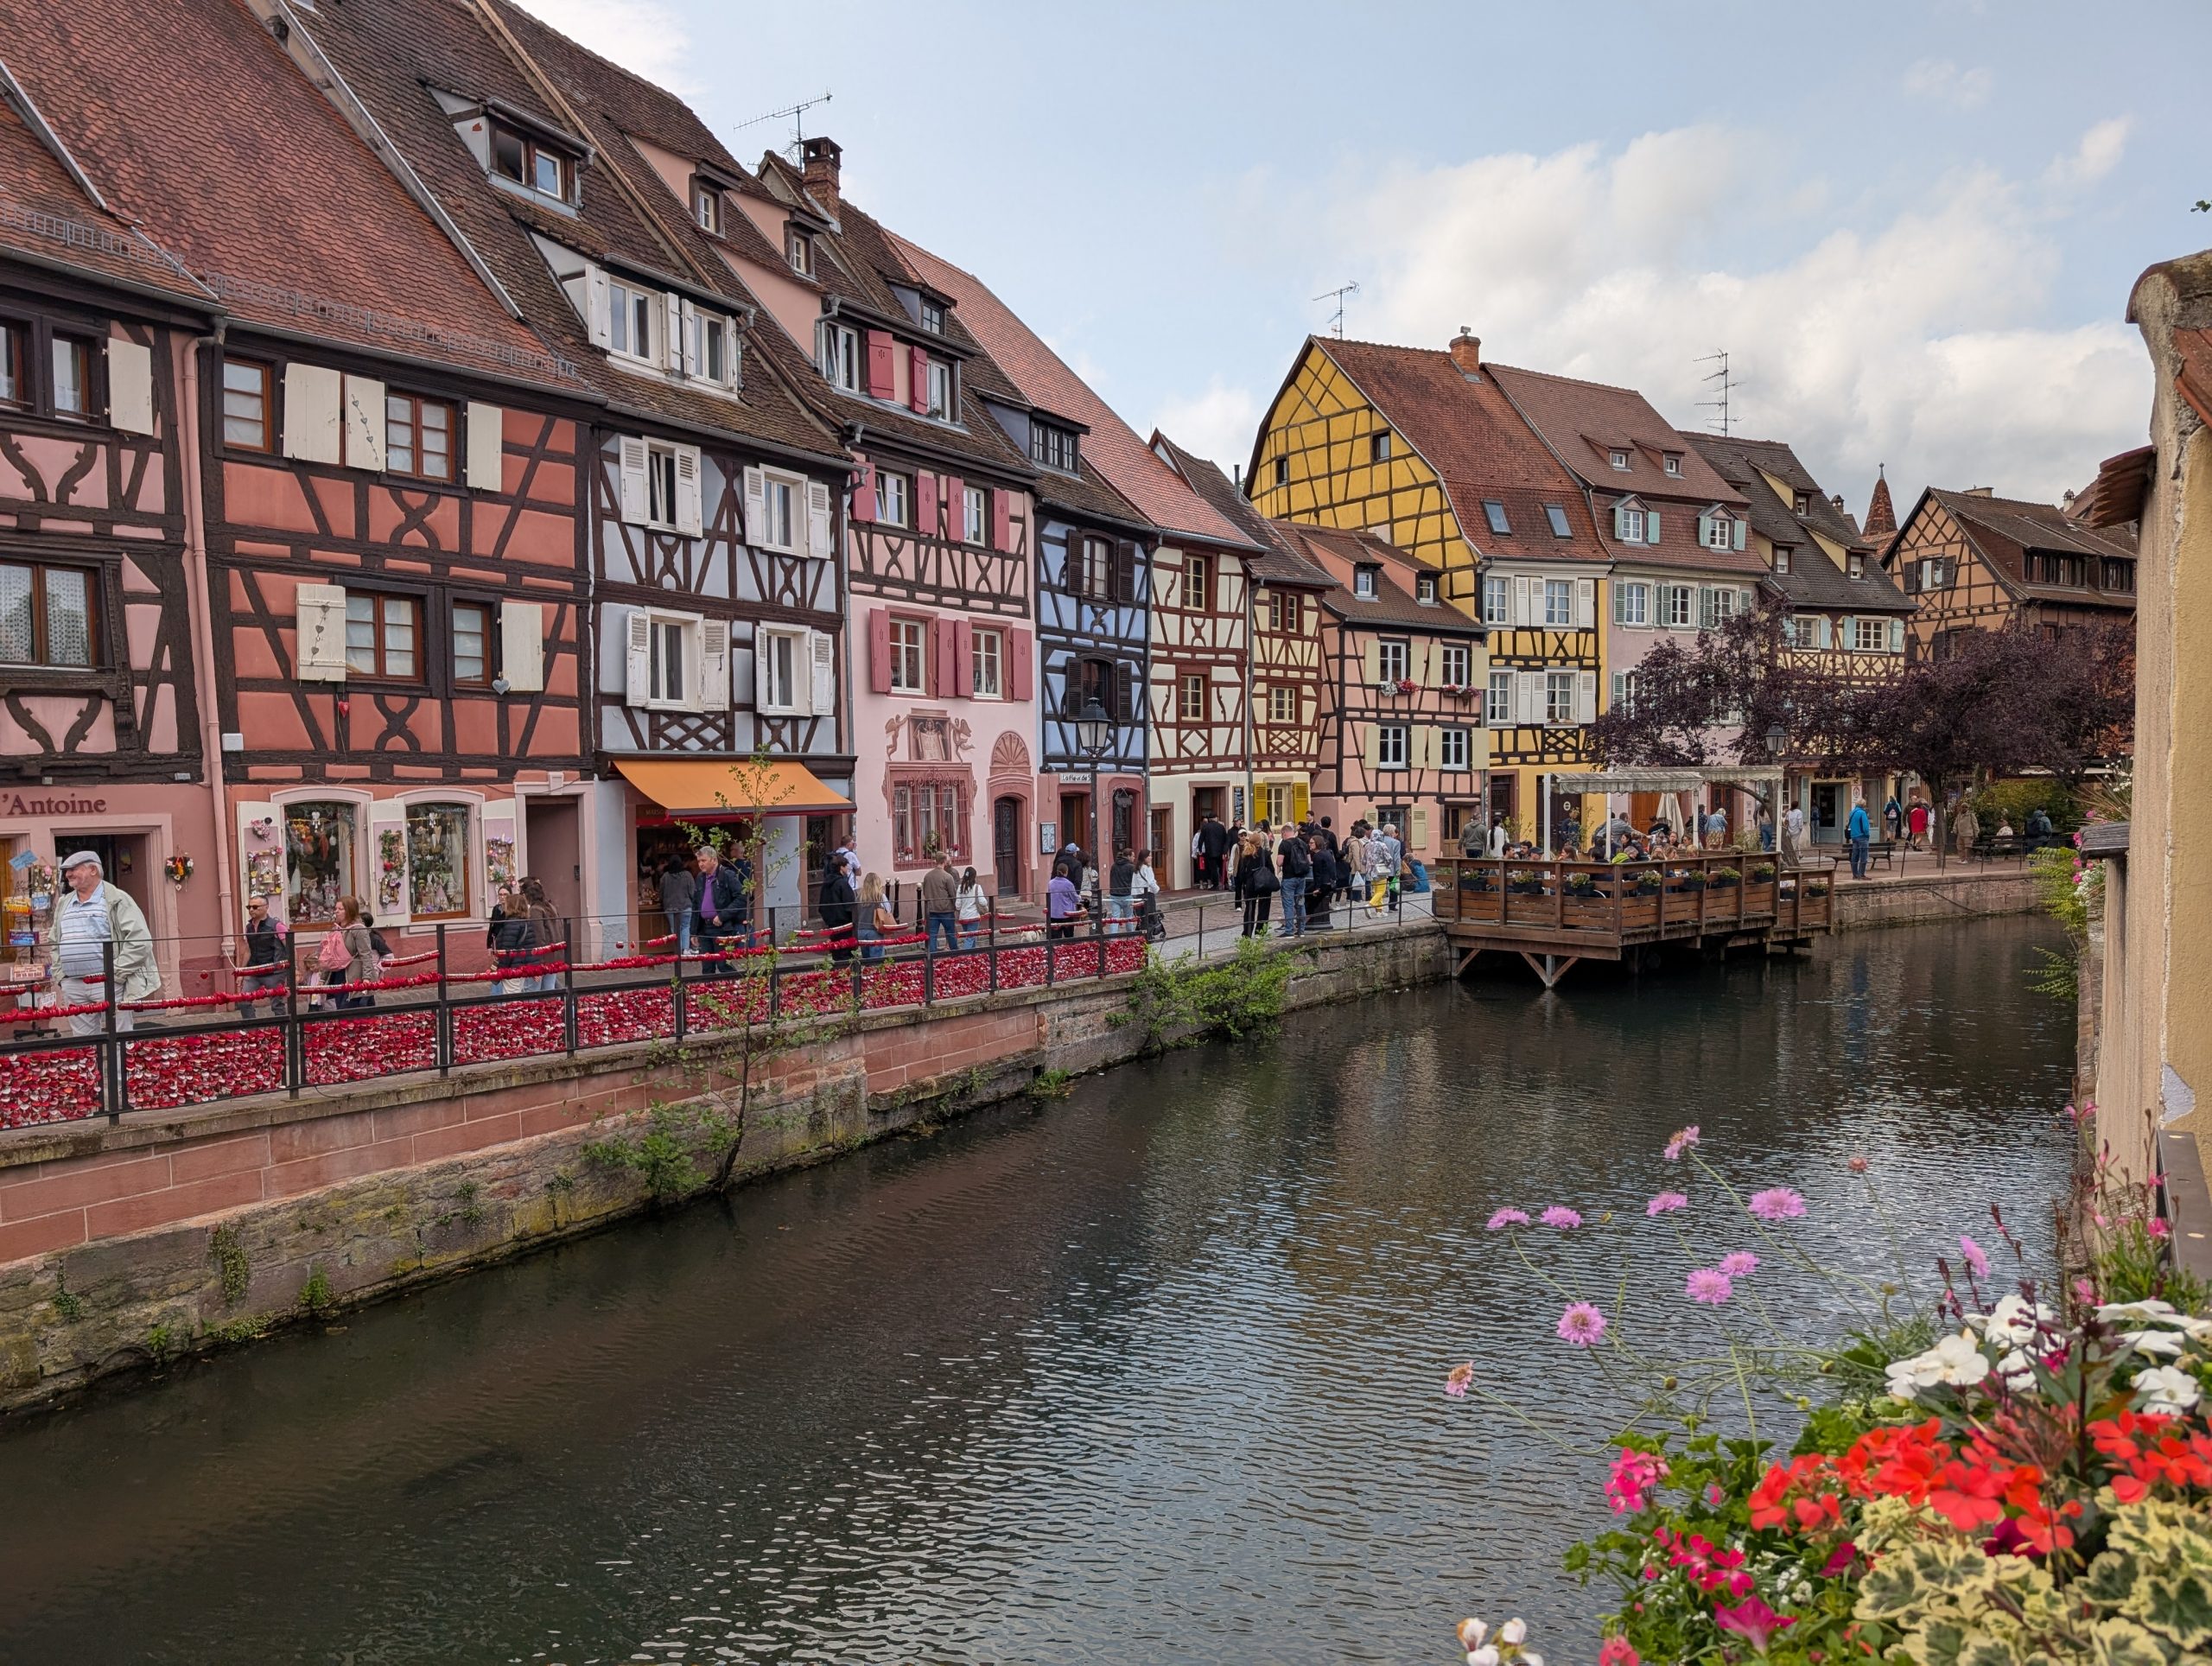
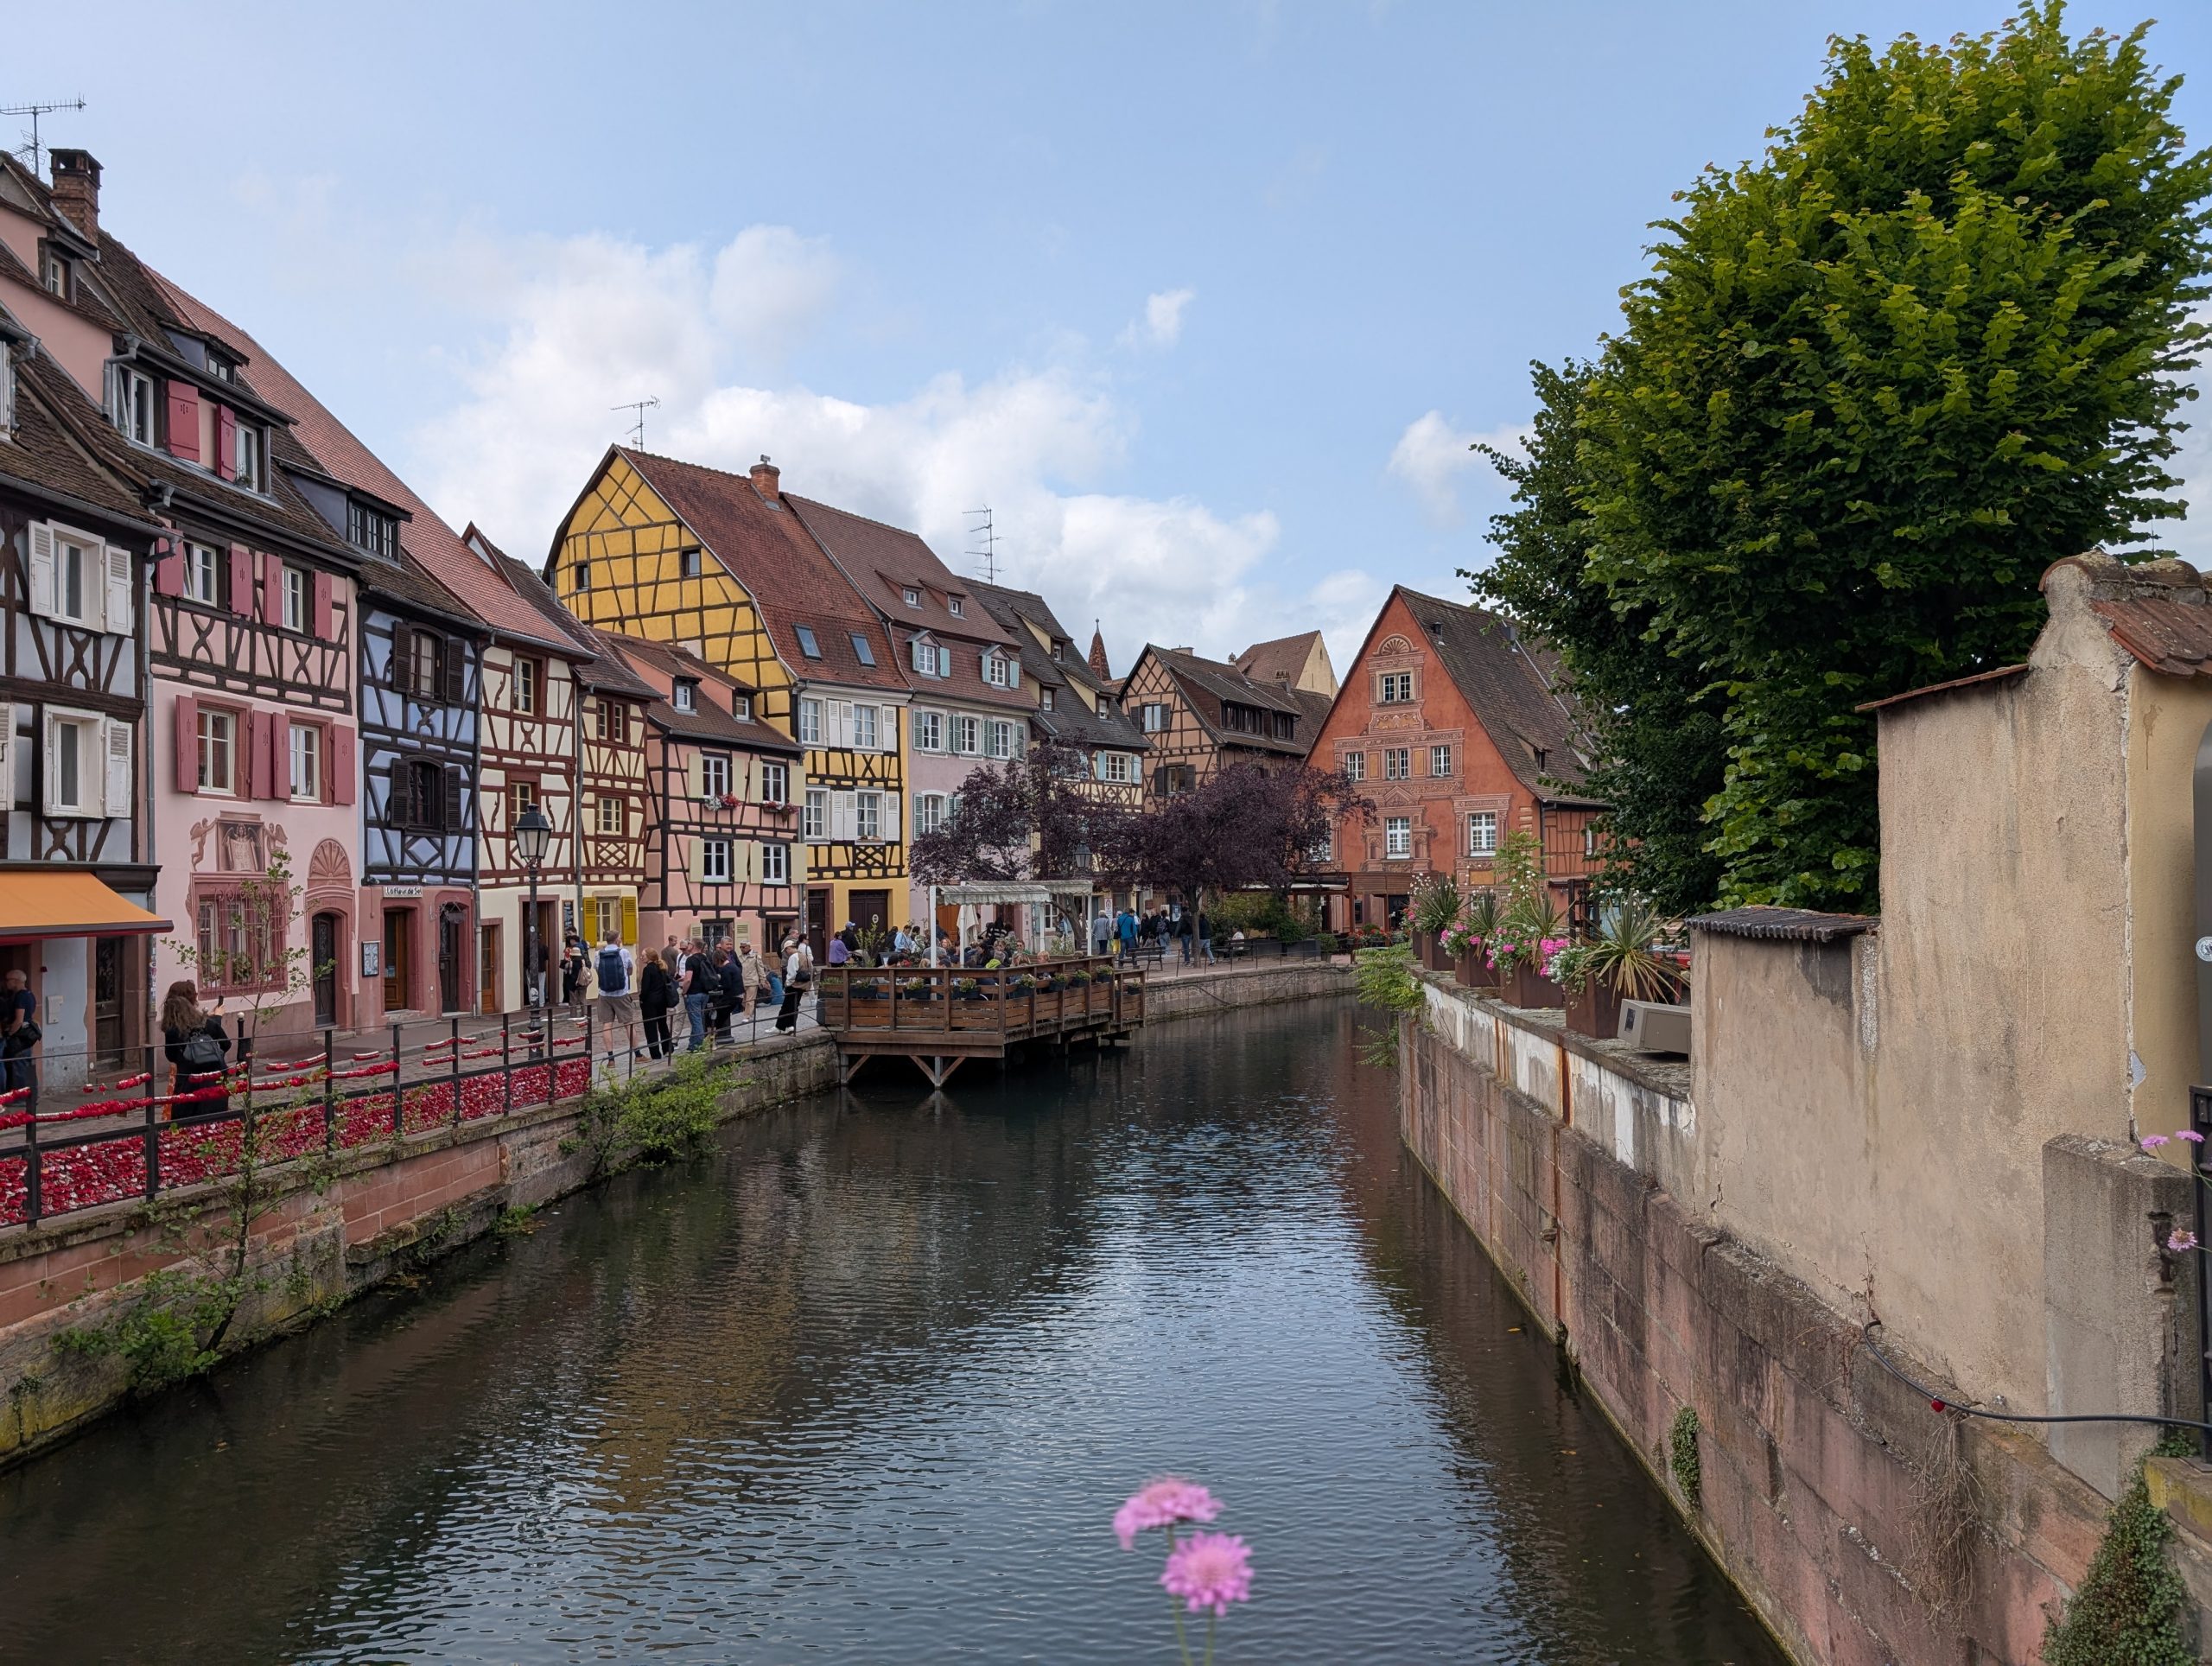
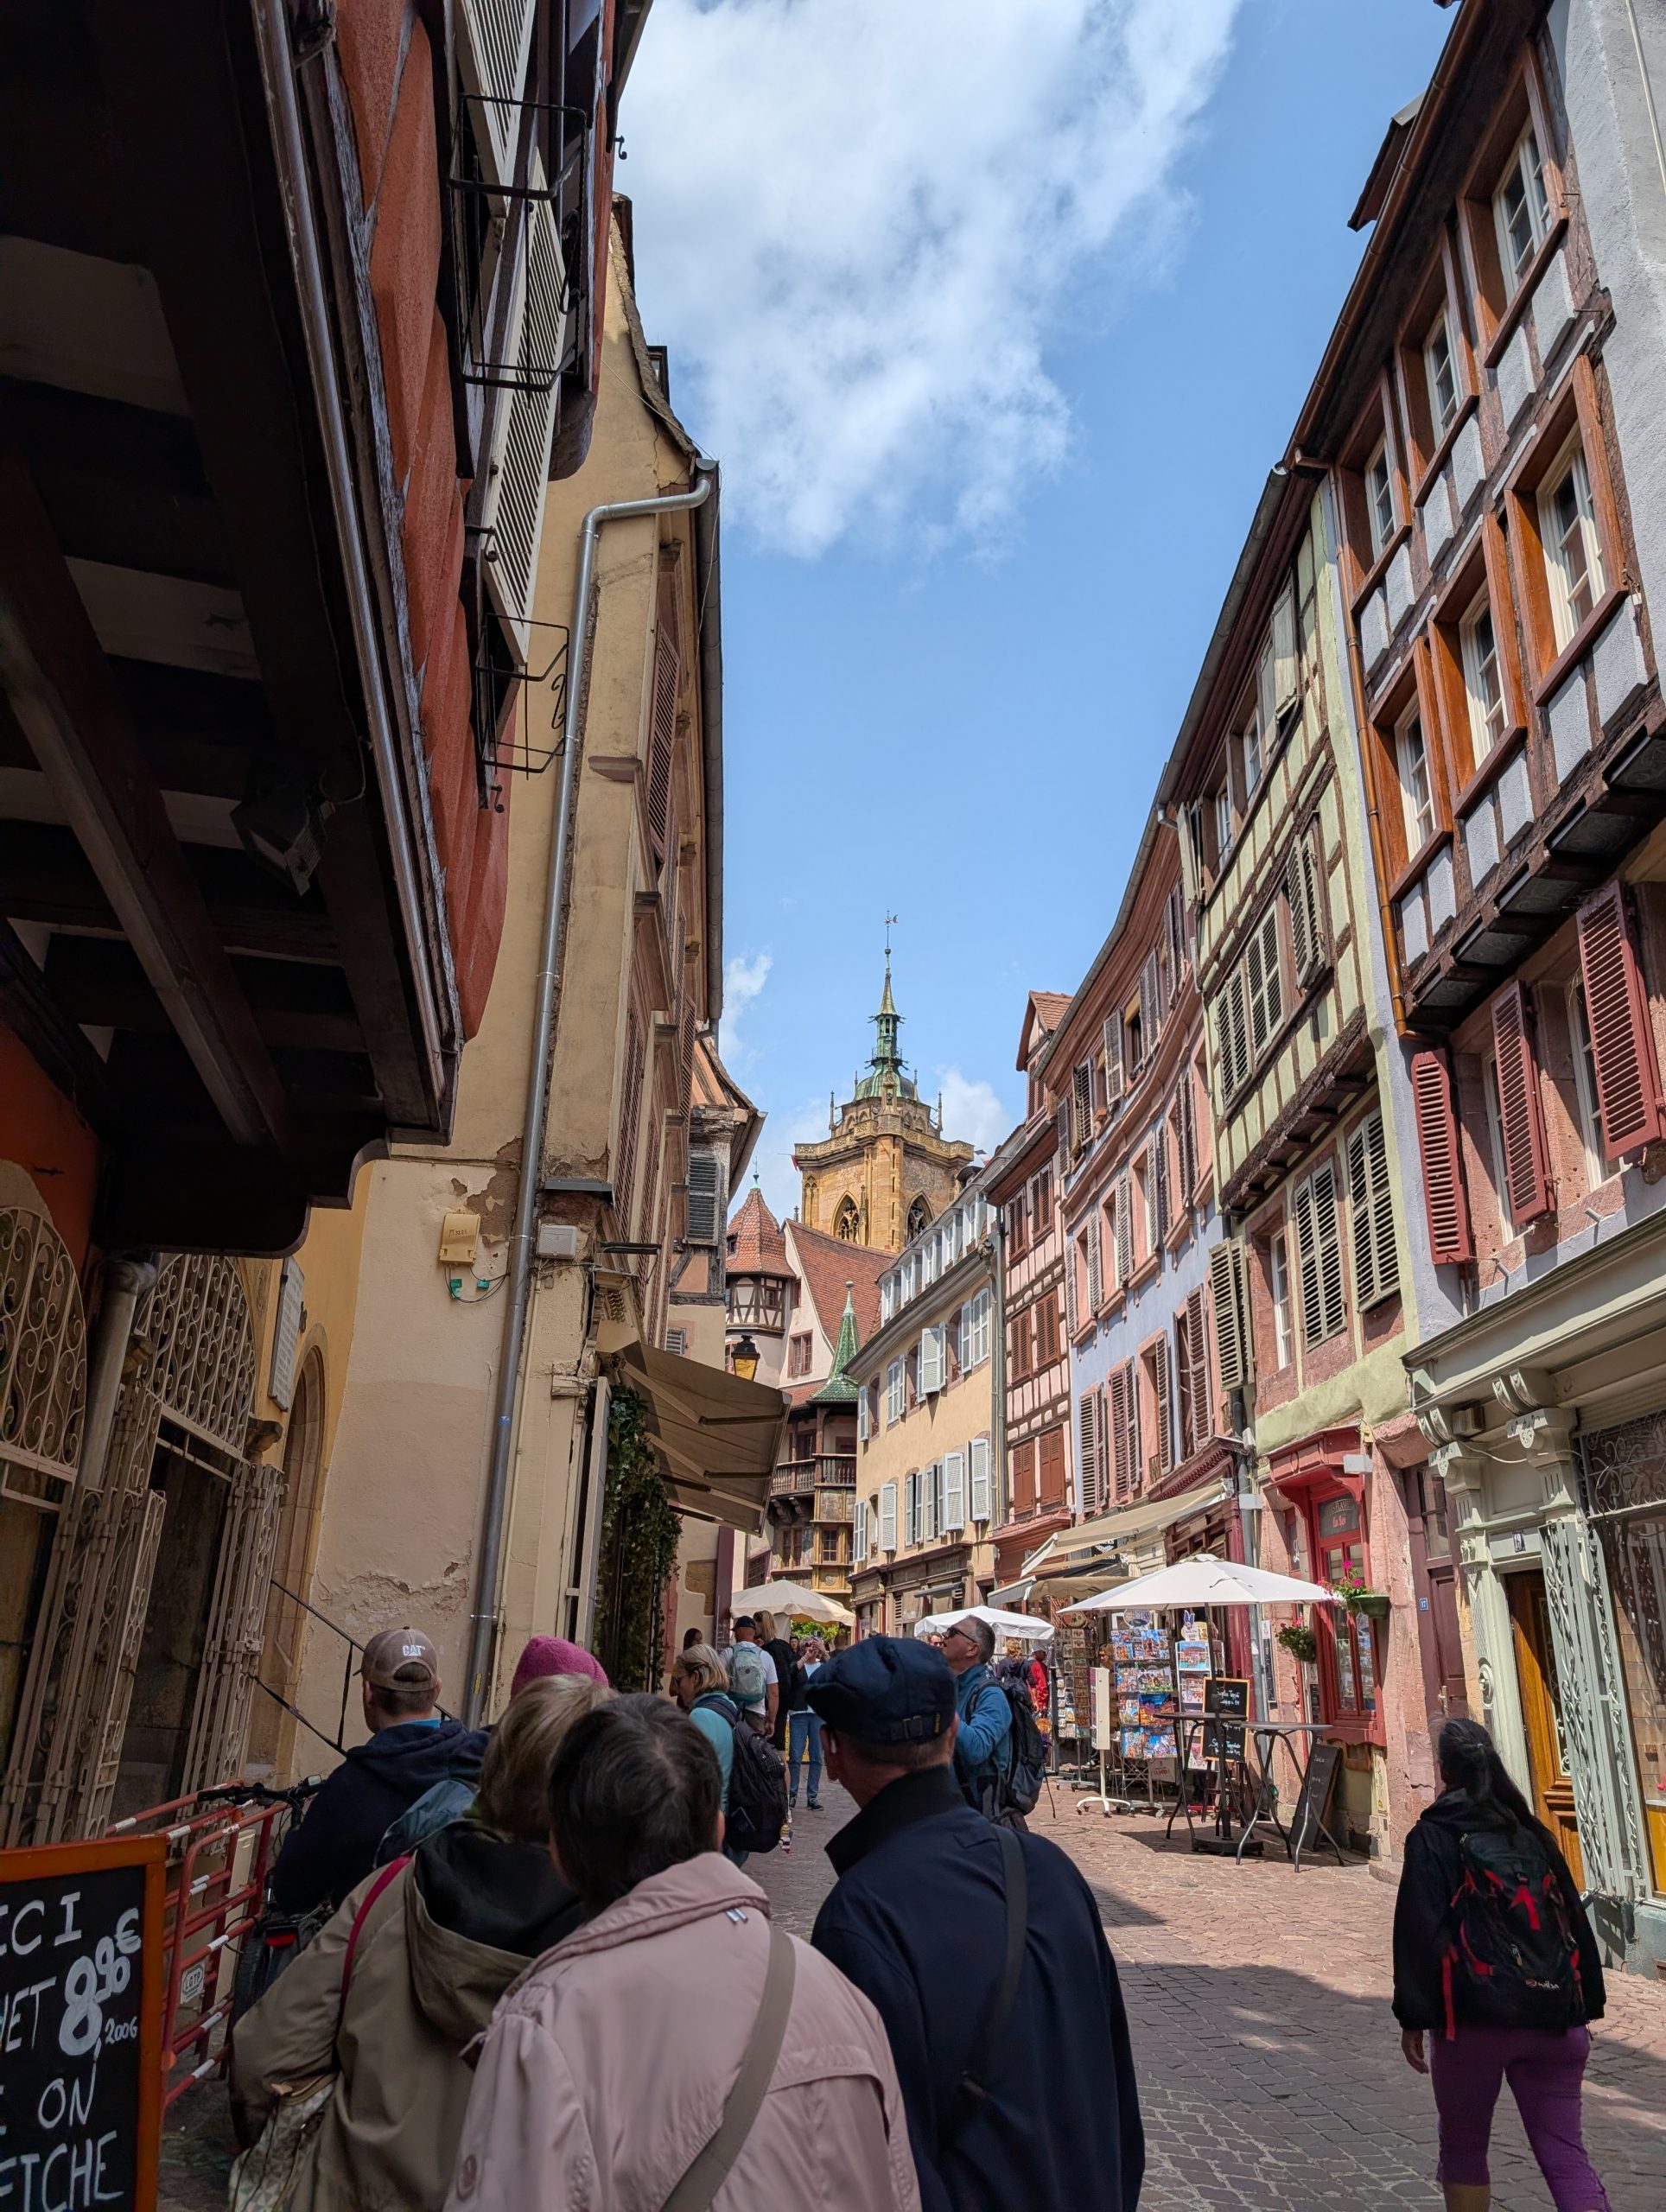
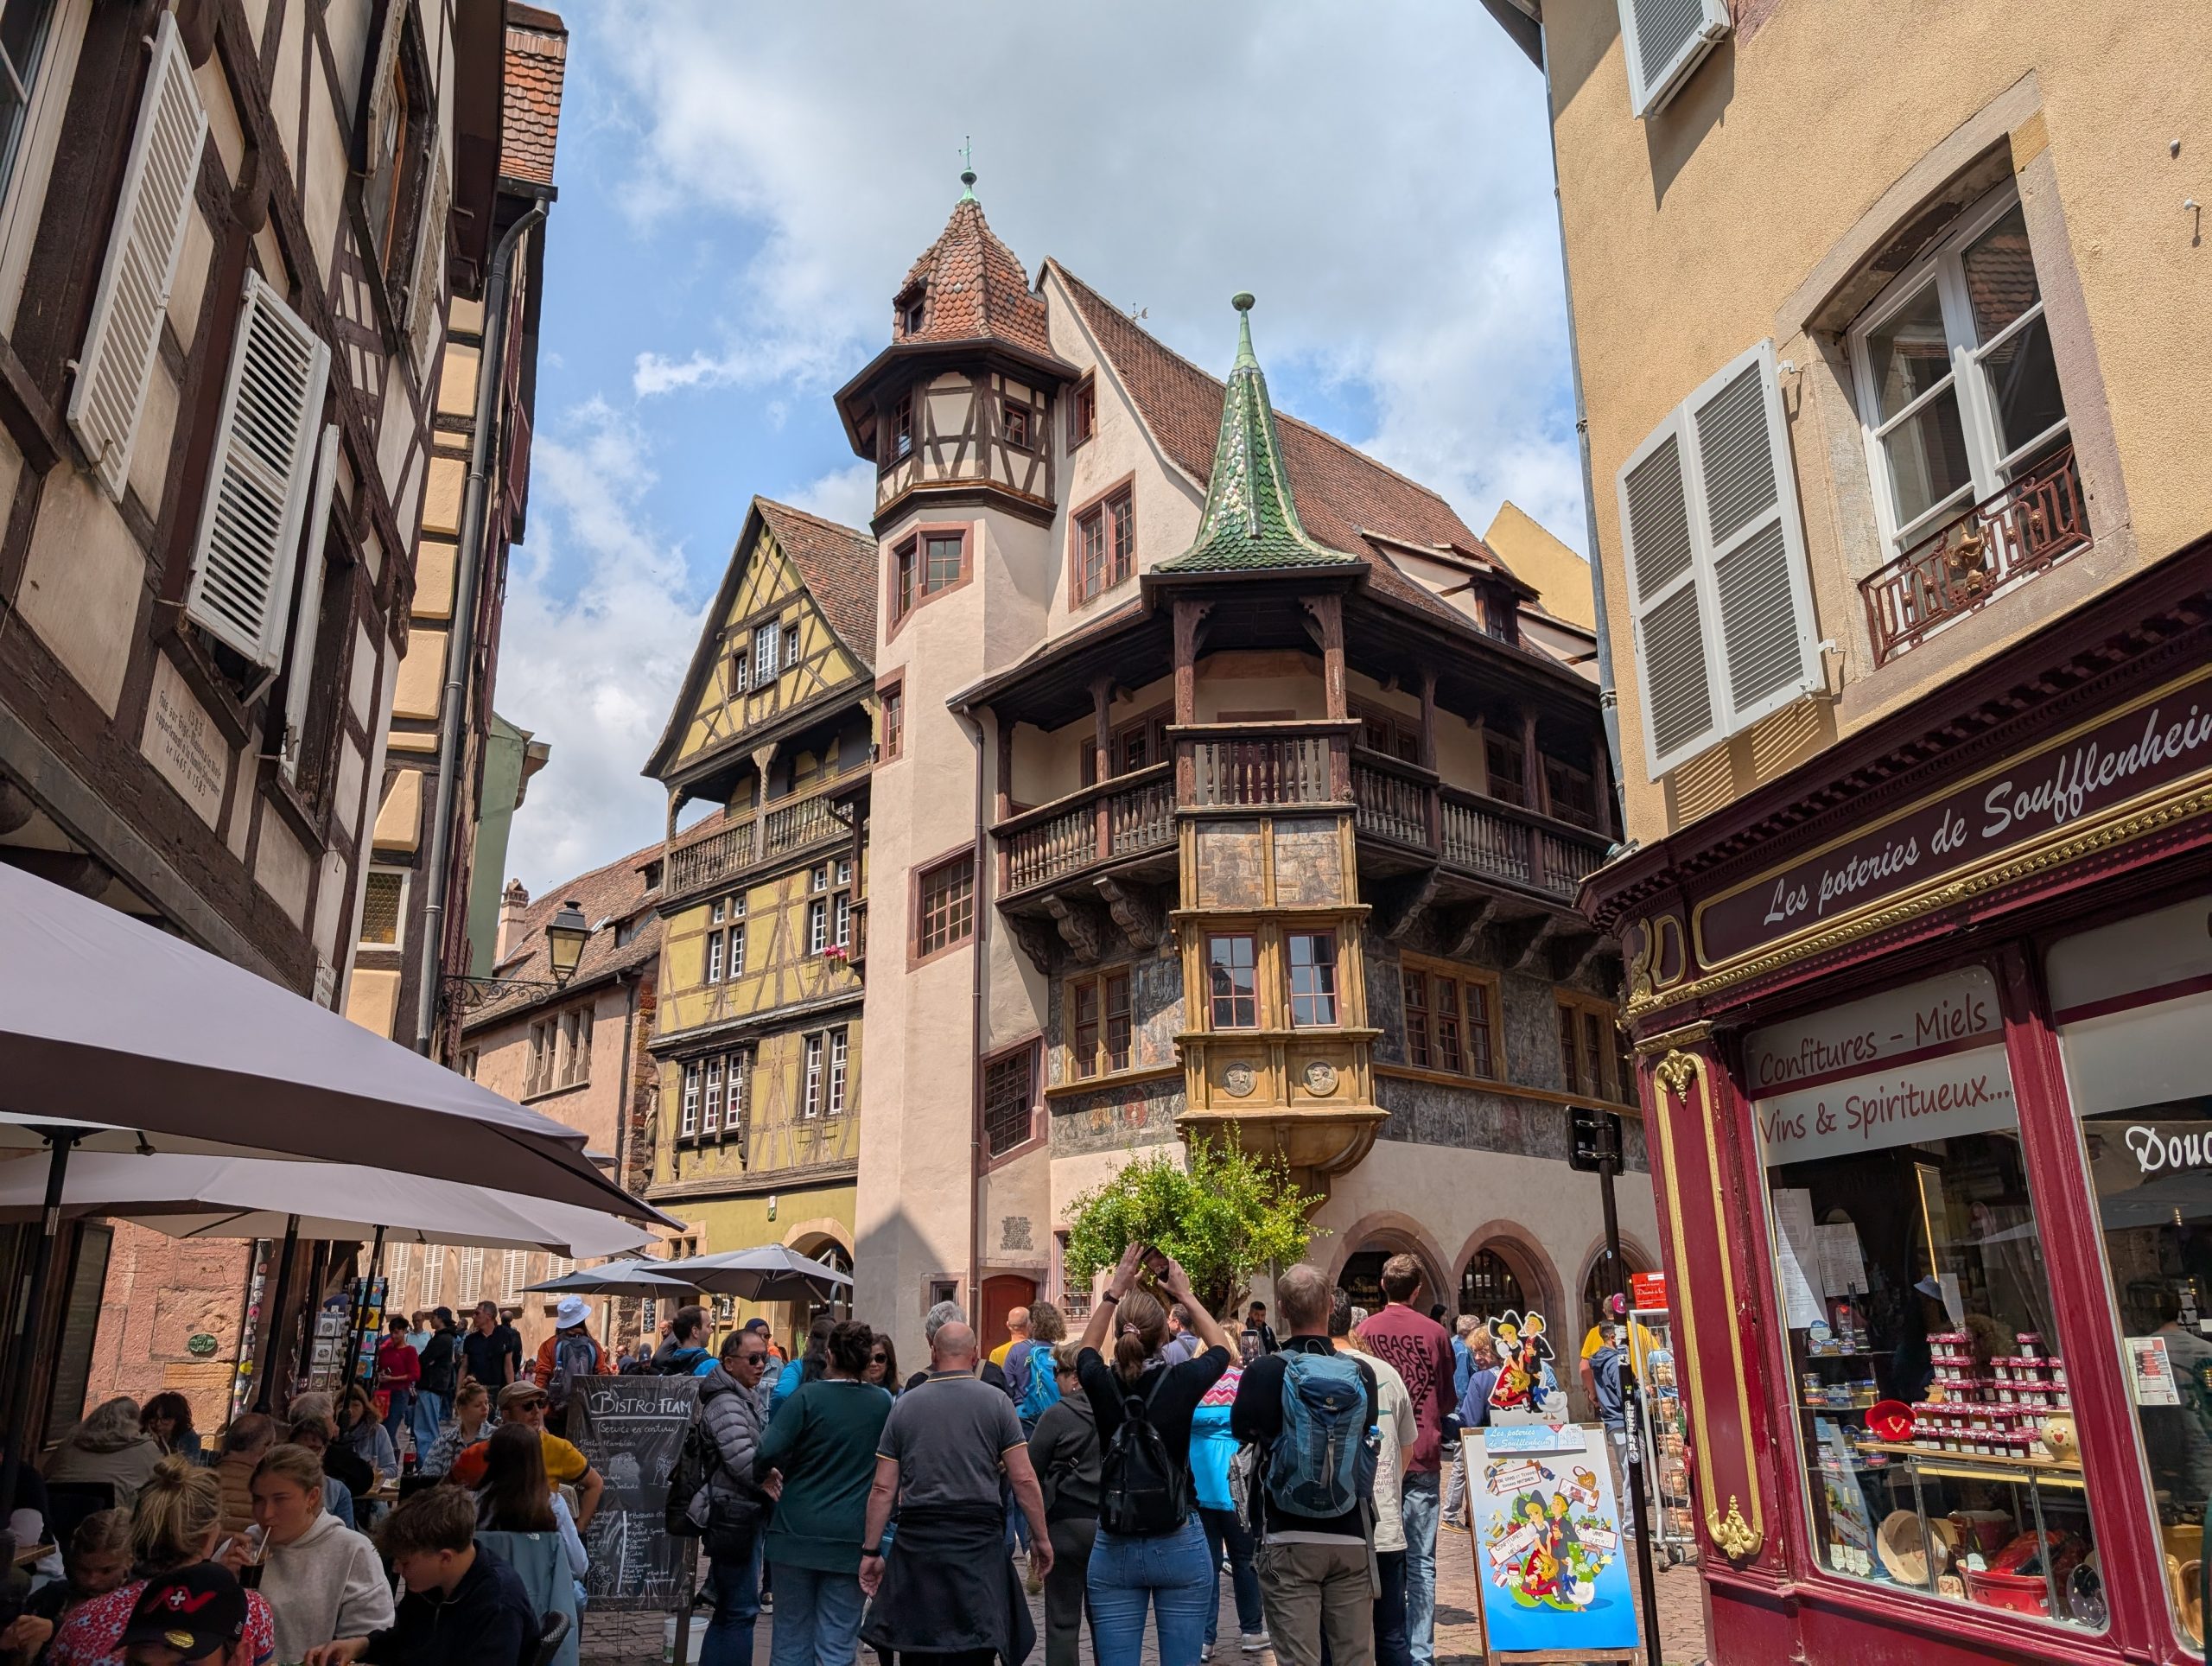
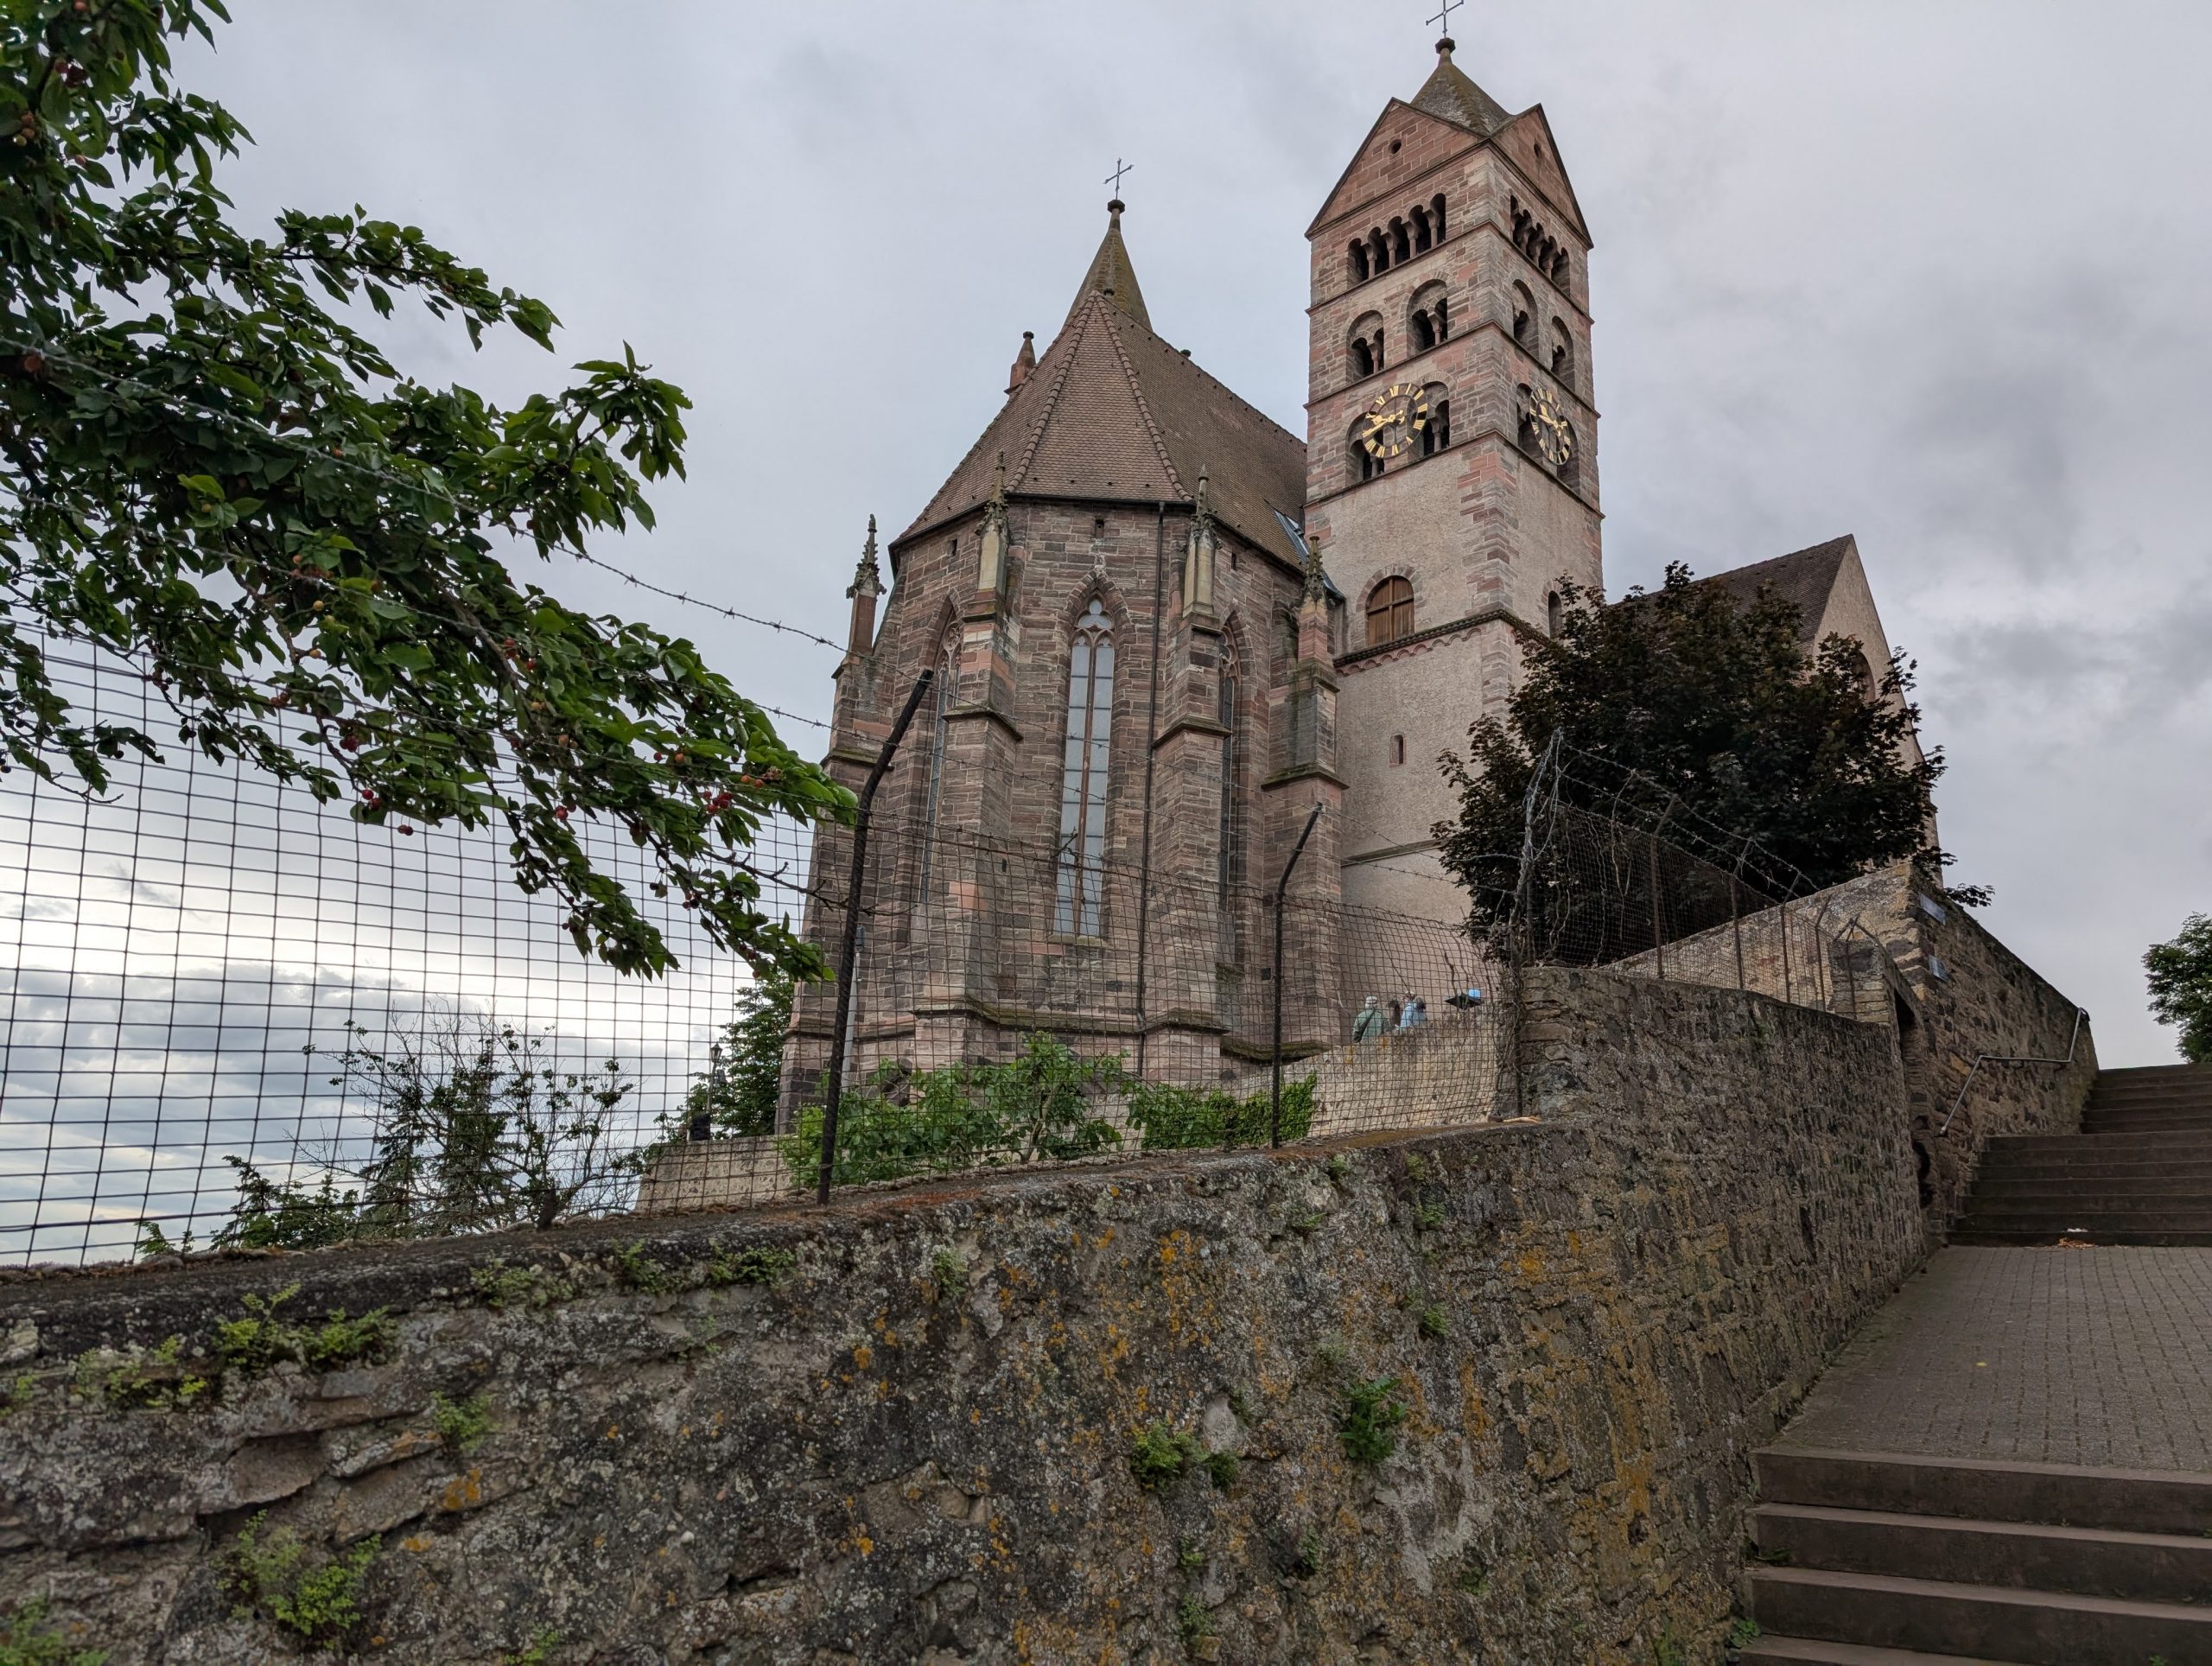
Today’s adventure was mostly on foot. I was a bit worried about walking all the way to the old center of Colmar and “the Little Venice”, but somehow, I managed. Mainly because Colmar’s charming old town is a flat captivating maze of winding cobbled streets lined with typical Alsatian bourgeois houses. And even though Colmar is home to about 67,000 inhabitants, it has managed to retain a ‘country town’ atmosphere which contributes so much to its charm. The city offers visitors a fascinating insight into 1,000 years of European history through its exceptional heritage. Wonderfully preserved from the ravages of time, its historical “centre” is classed as a ‘protected area’ and has benefited from careful restoration and ongoing improvements for more than 25 years.
On our way to visit Colmar’s historic center. An official building if I ever saw one!
Lovely old homes along the way.
And through a park.
And everywhere, beautiful old churches.
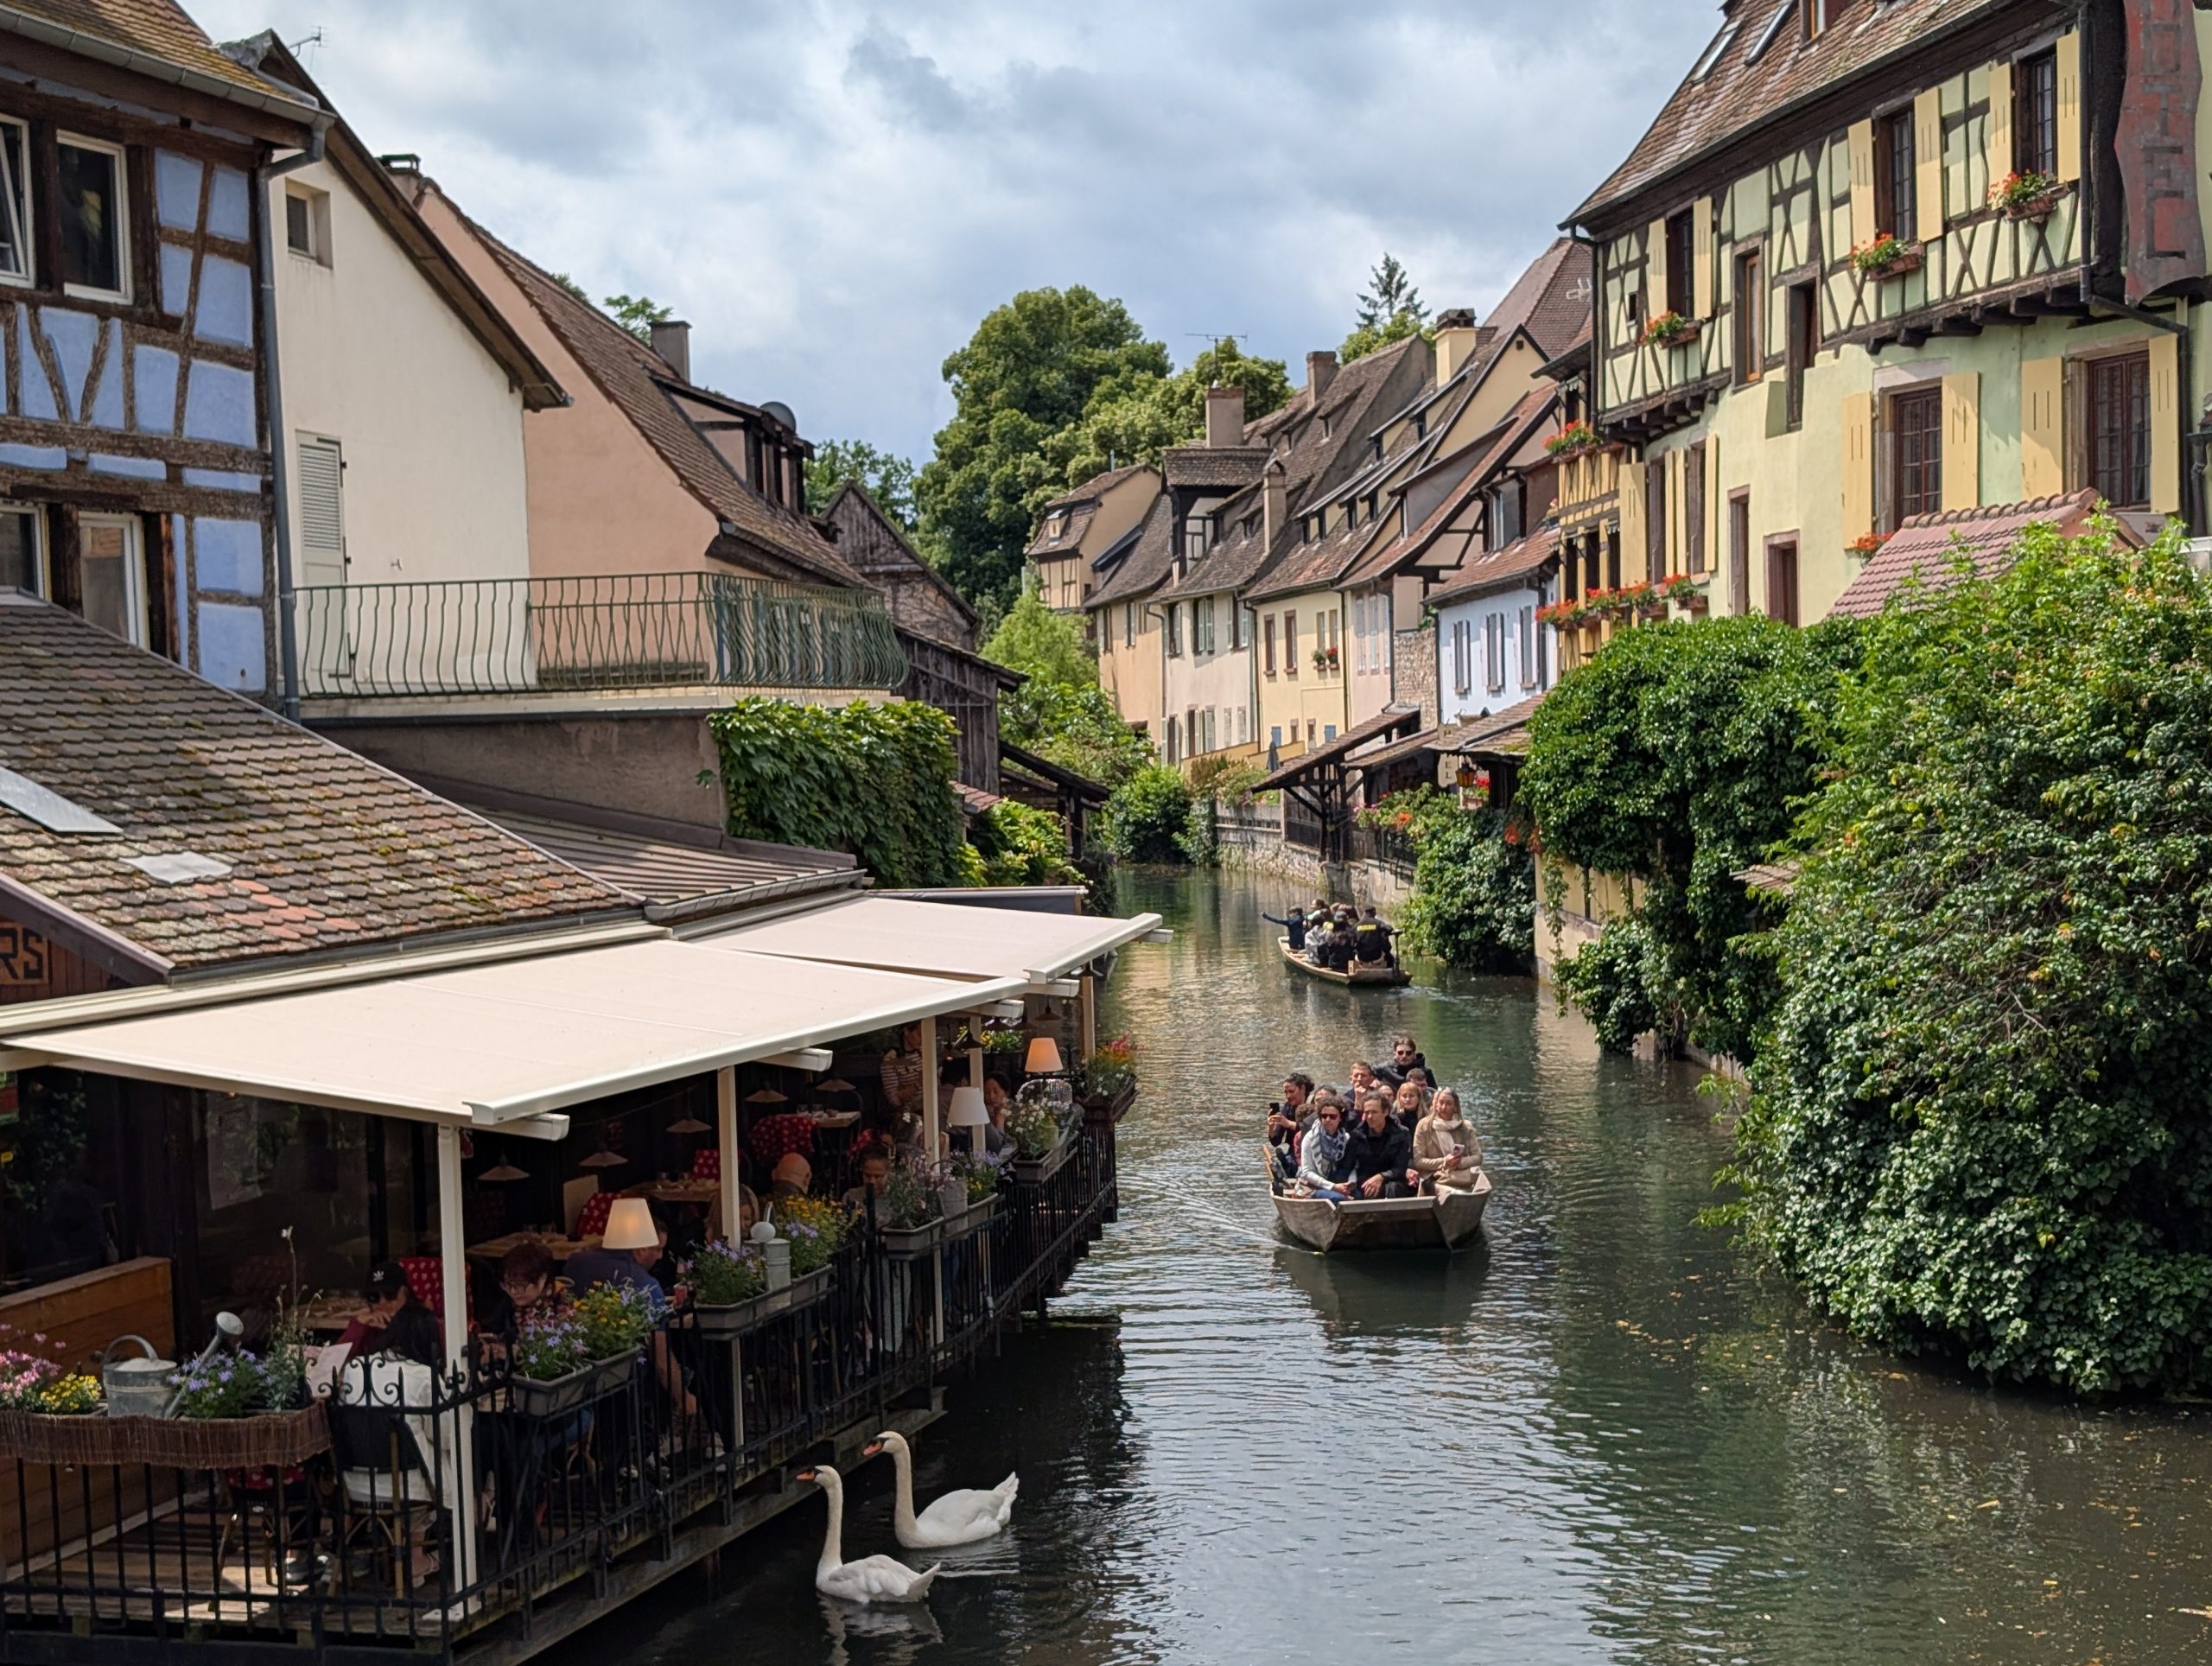
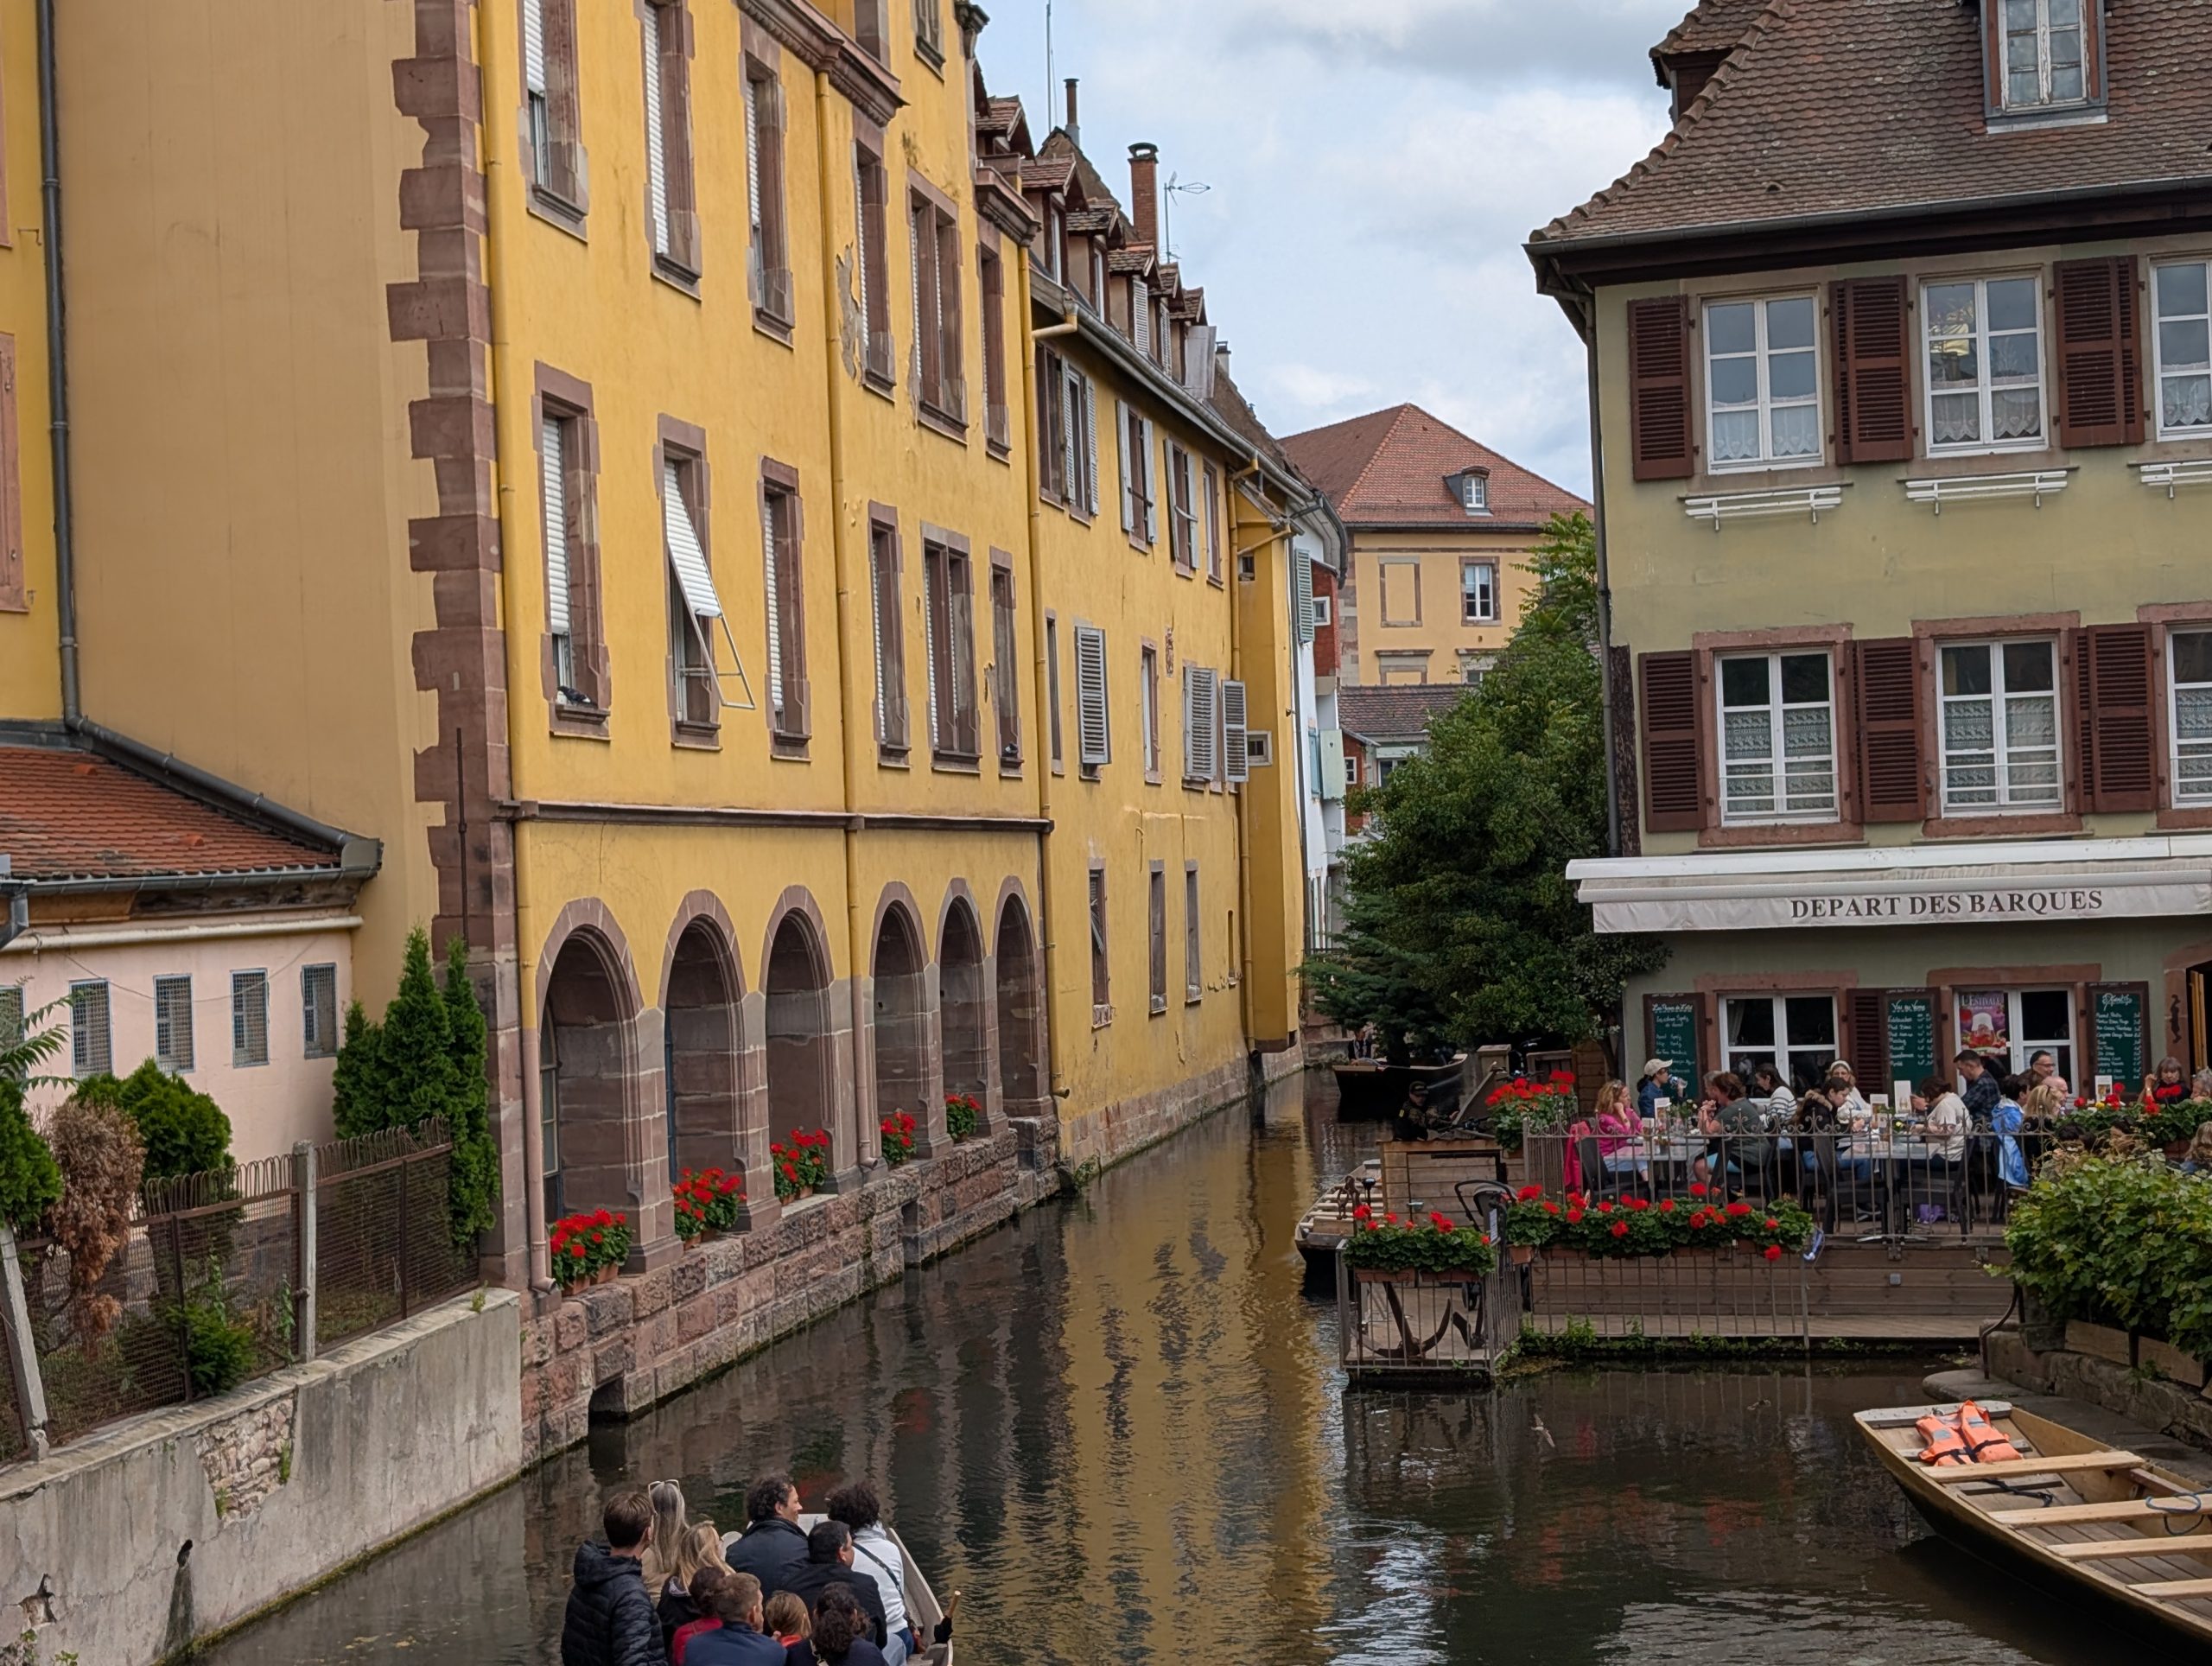
Colmar is really a condensed version of the Alsace region. Walking on its streets is like visiting à huge movie set with hundreds of century-old half-timbered houses, lovely canals, and a flourishing pedestrian town center. And of course, the romantic and world-famous district of ‘the Little Venice’ is just charming.
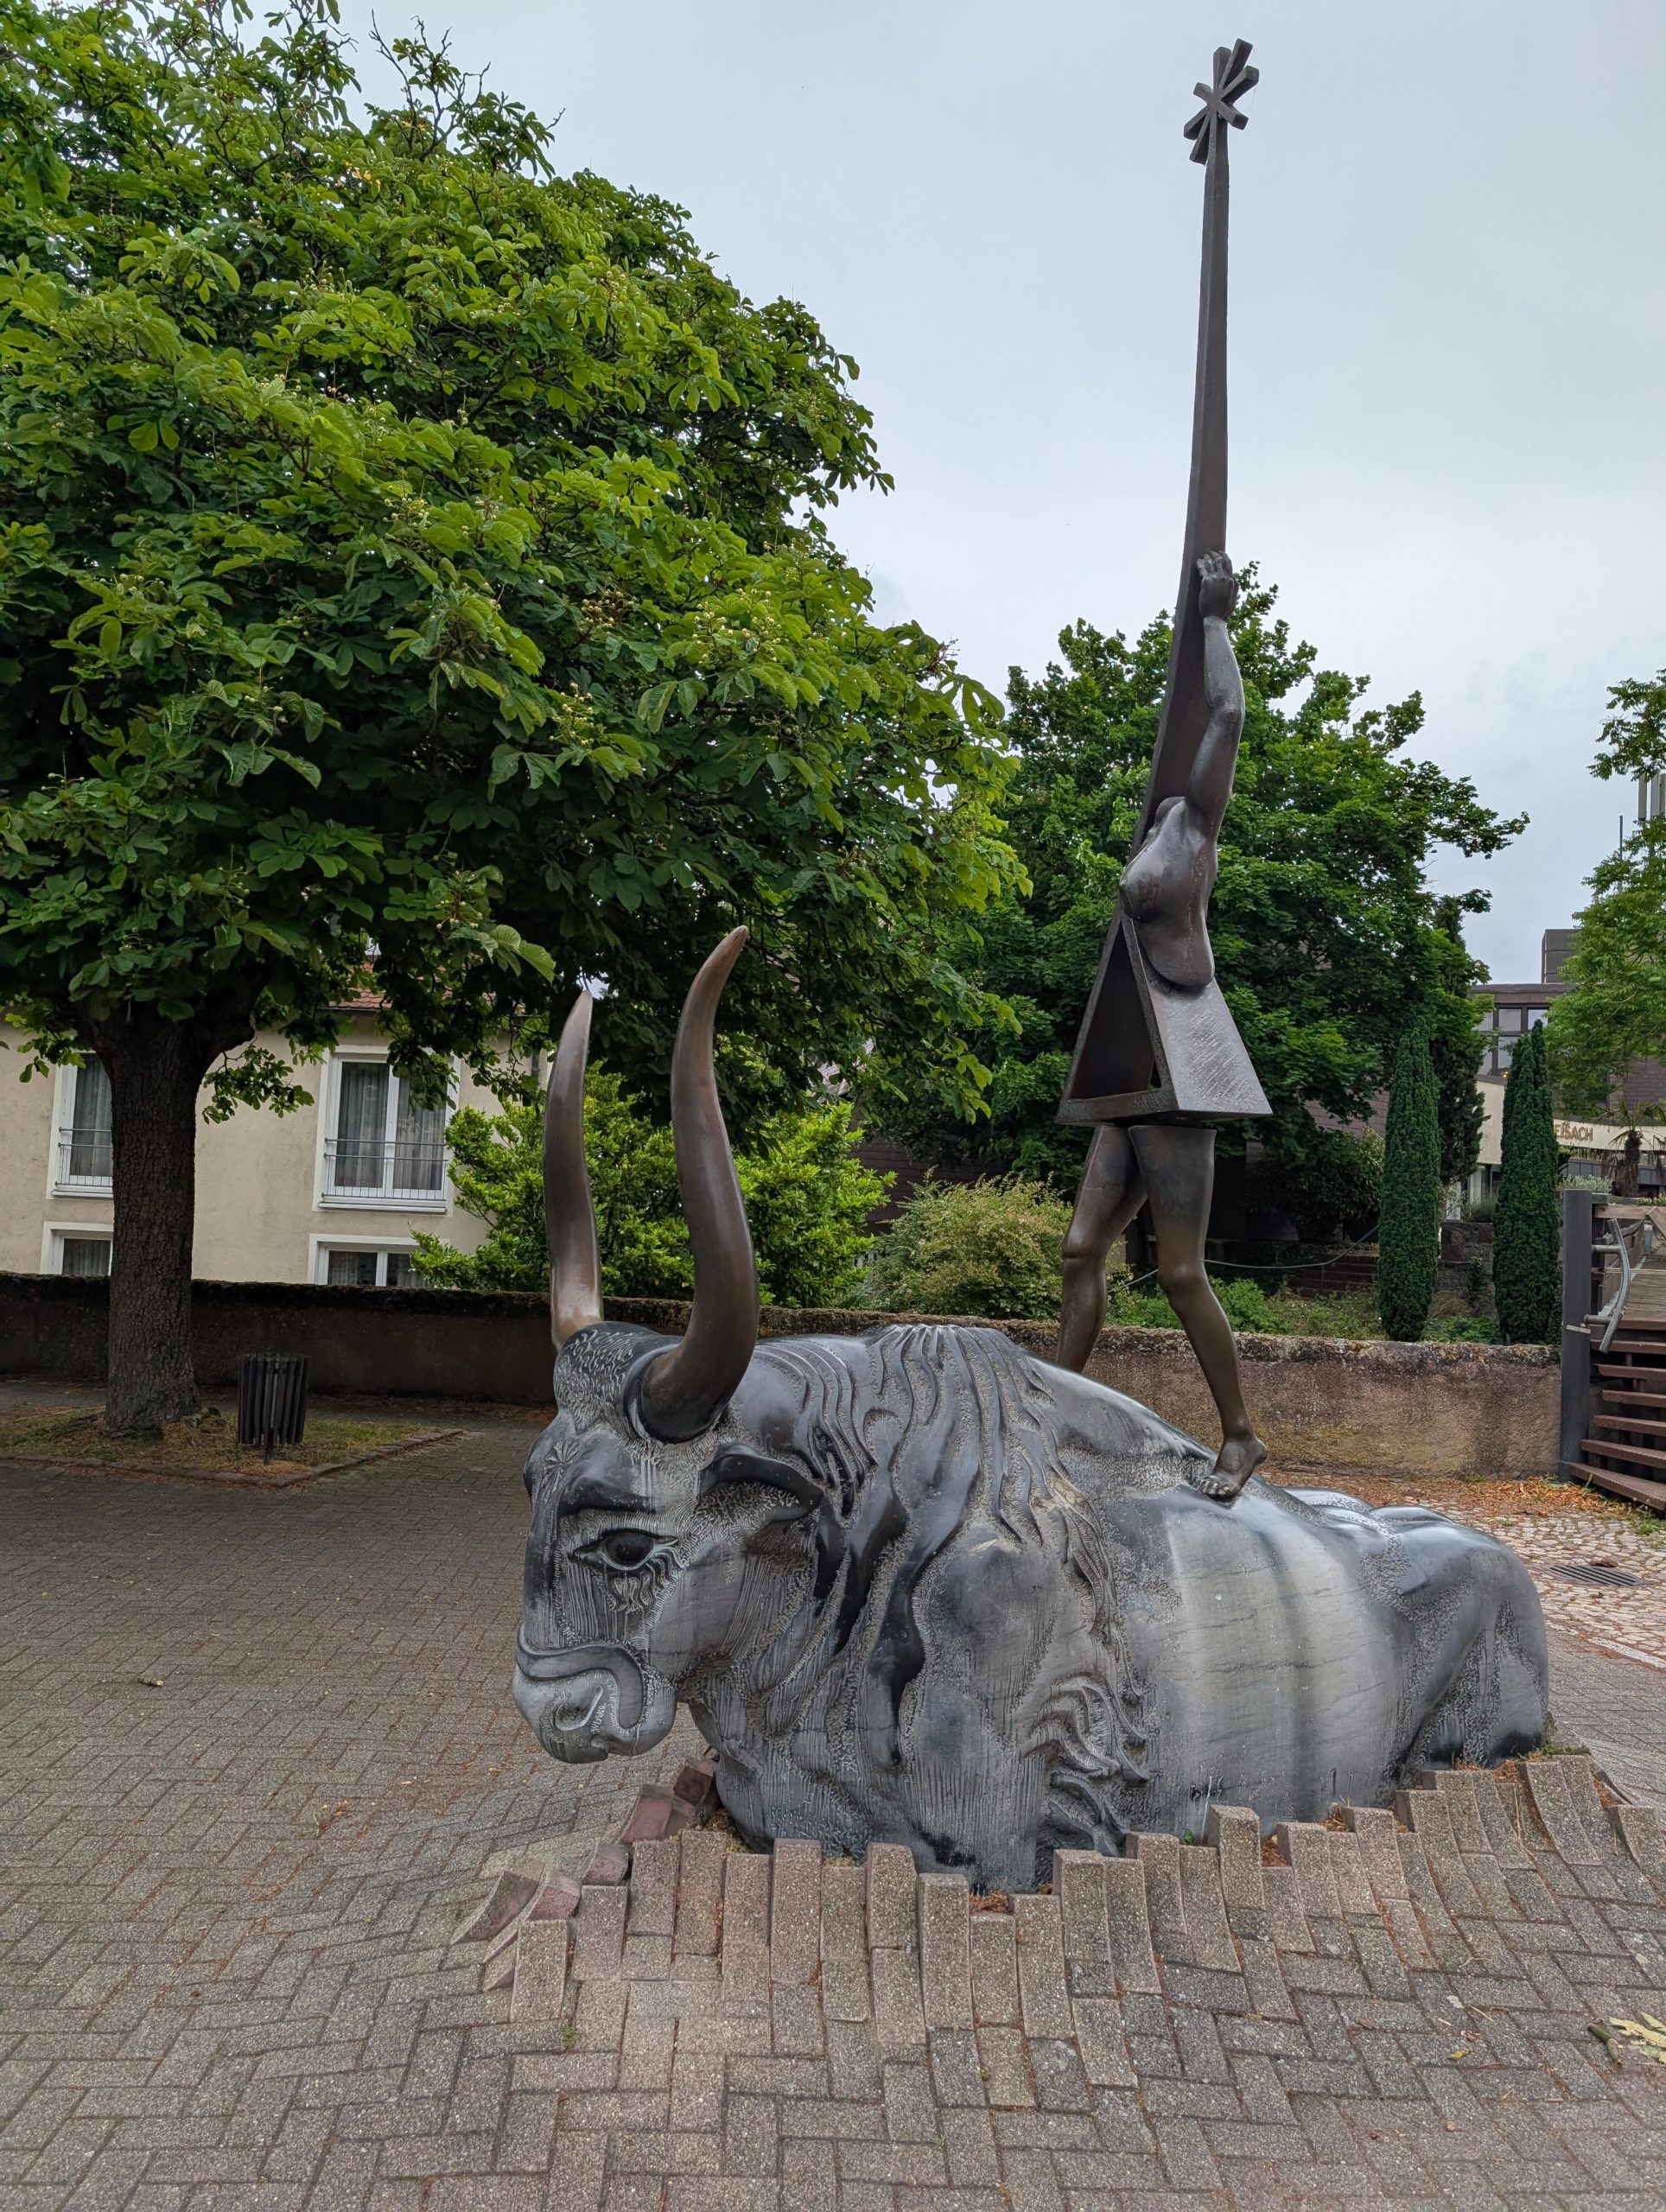
The city of Colmar, with its beautiful multicolored houses, is also the birthplace of sculptor Frédéric Auguste Bartholdi, father of the famous Statue of Liberty in New York. (FYI – The copper-clad statue of liberty, a gift to the United States from the people of France, was designed by French sculptor Frédéric Auguste Bartholdi. Most people give all the credit to Gustave Eiffel, but Eiffel’s contribution was the metal framework.)
A beautiful statue of French sculptor Frédéric Auguste Bartholdi.
Now we are near the center of the city and “Little Venice”.
Those swans are not just idly passing by this restaurant; they are very aggressively demanding food!
In this picture at just below middle right, you will see happy diners where we too enjoyed a simple lunch.
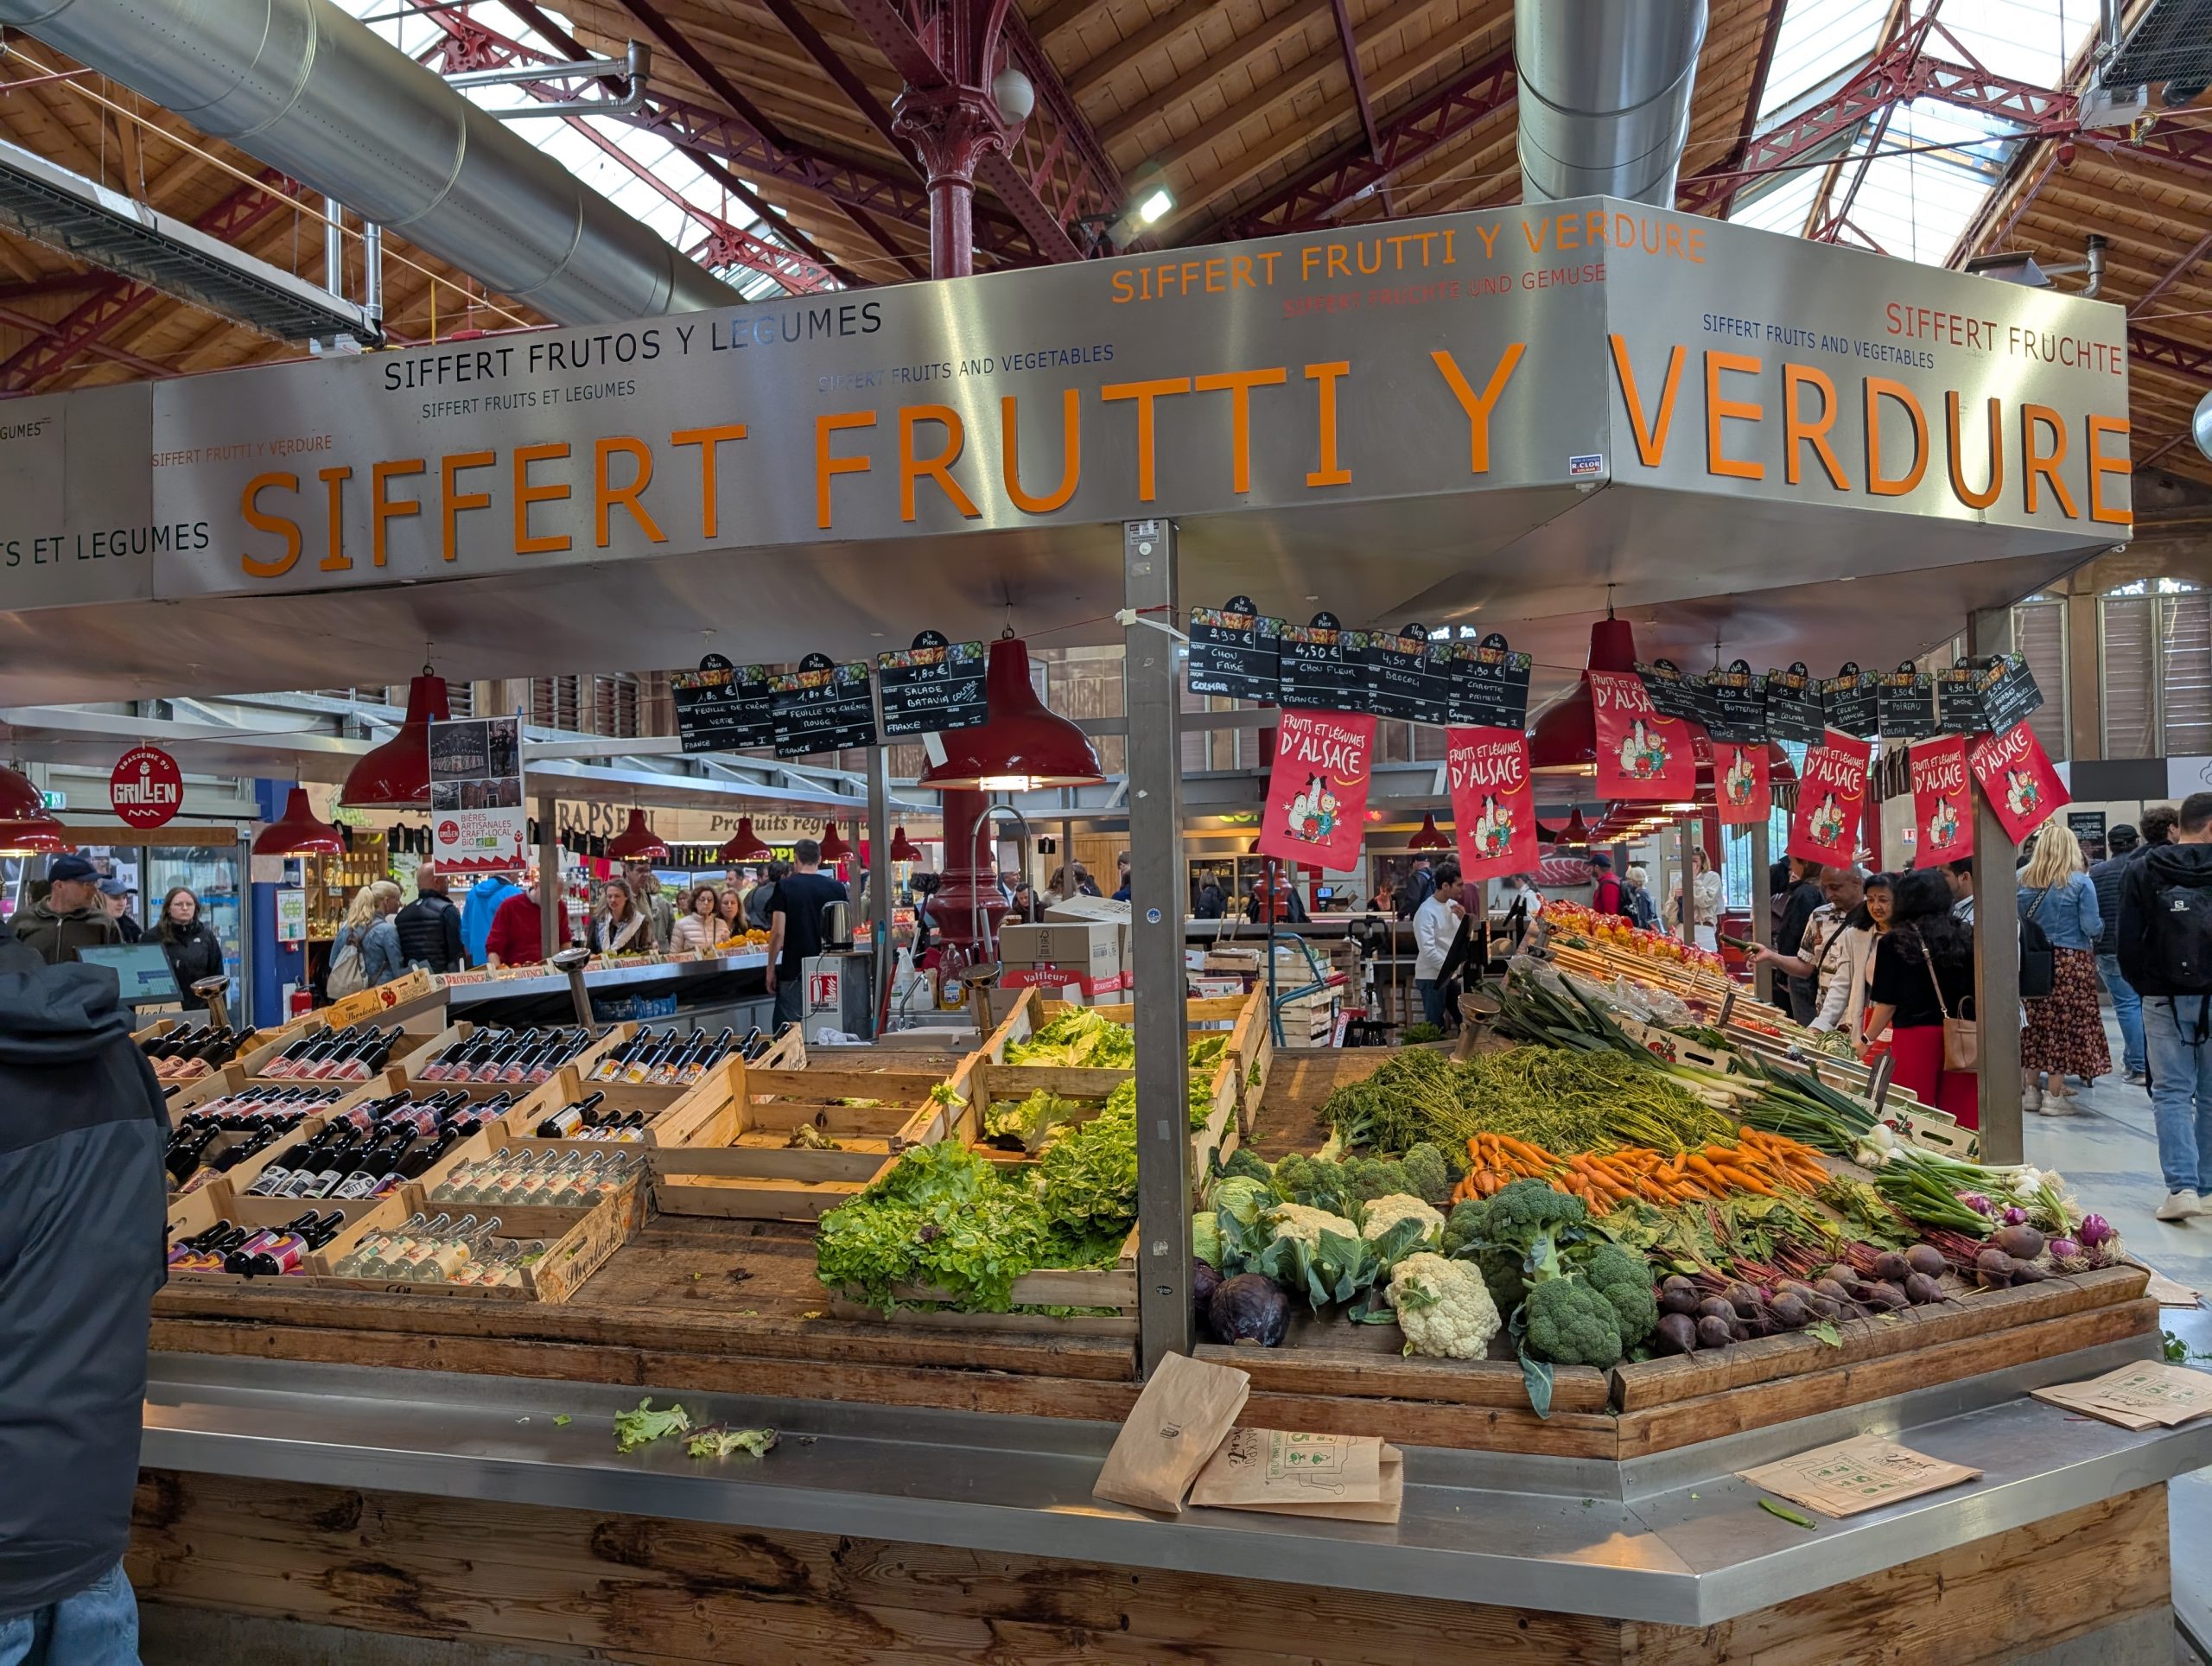
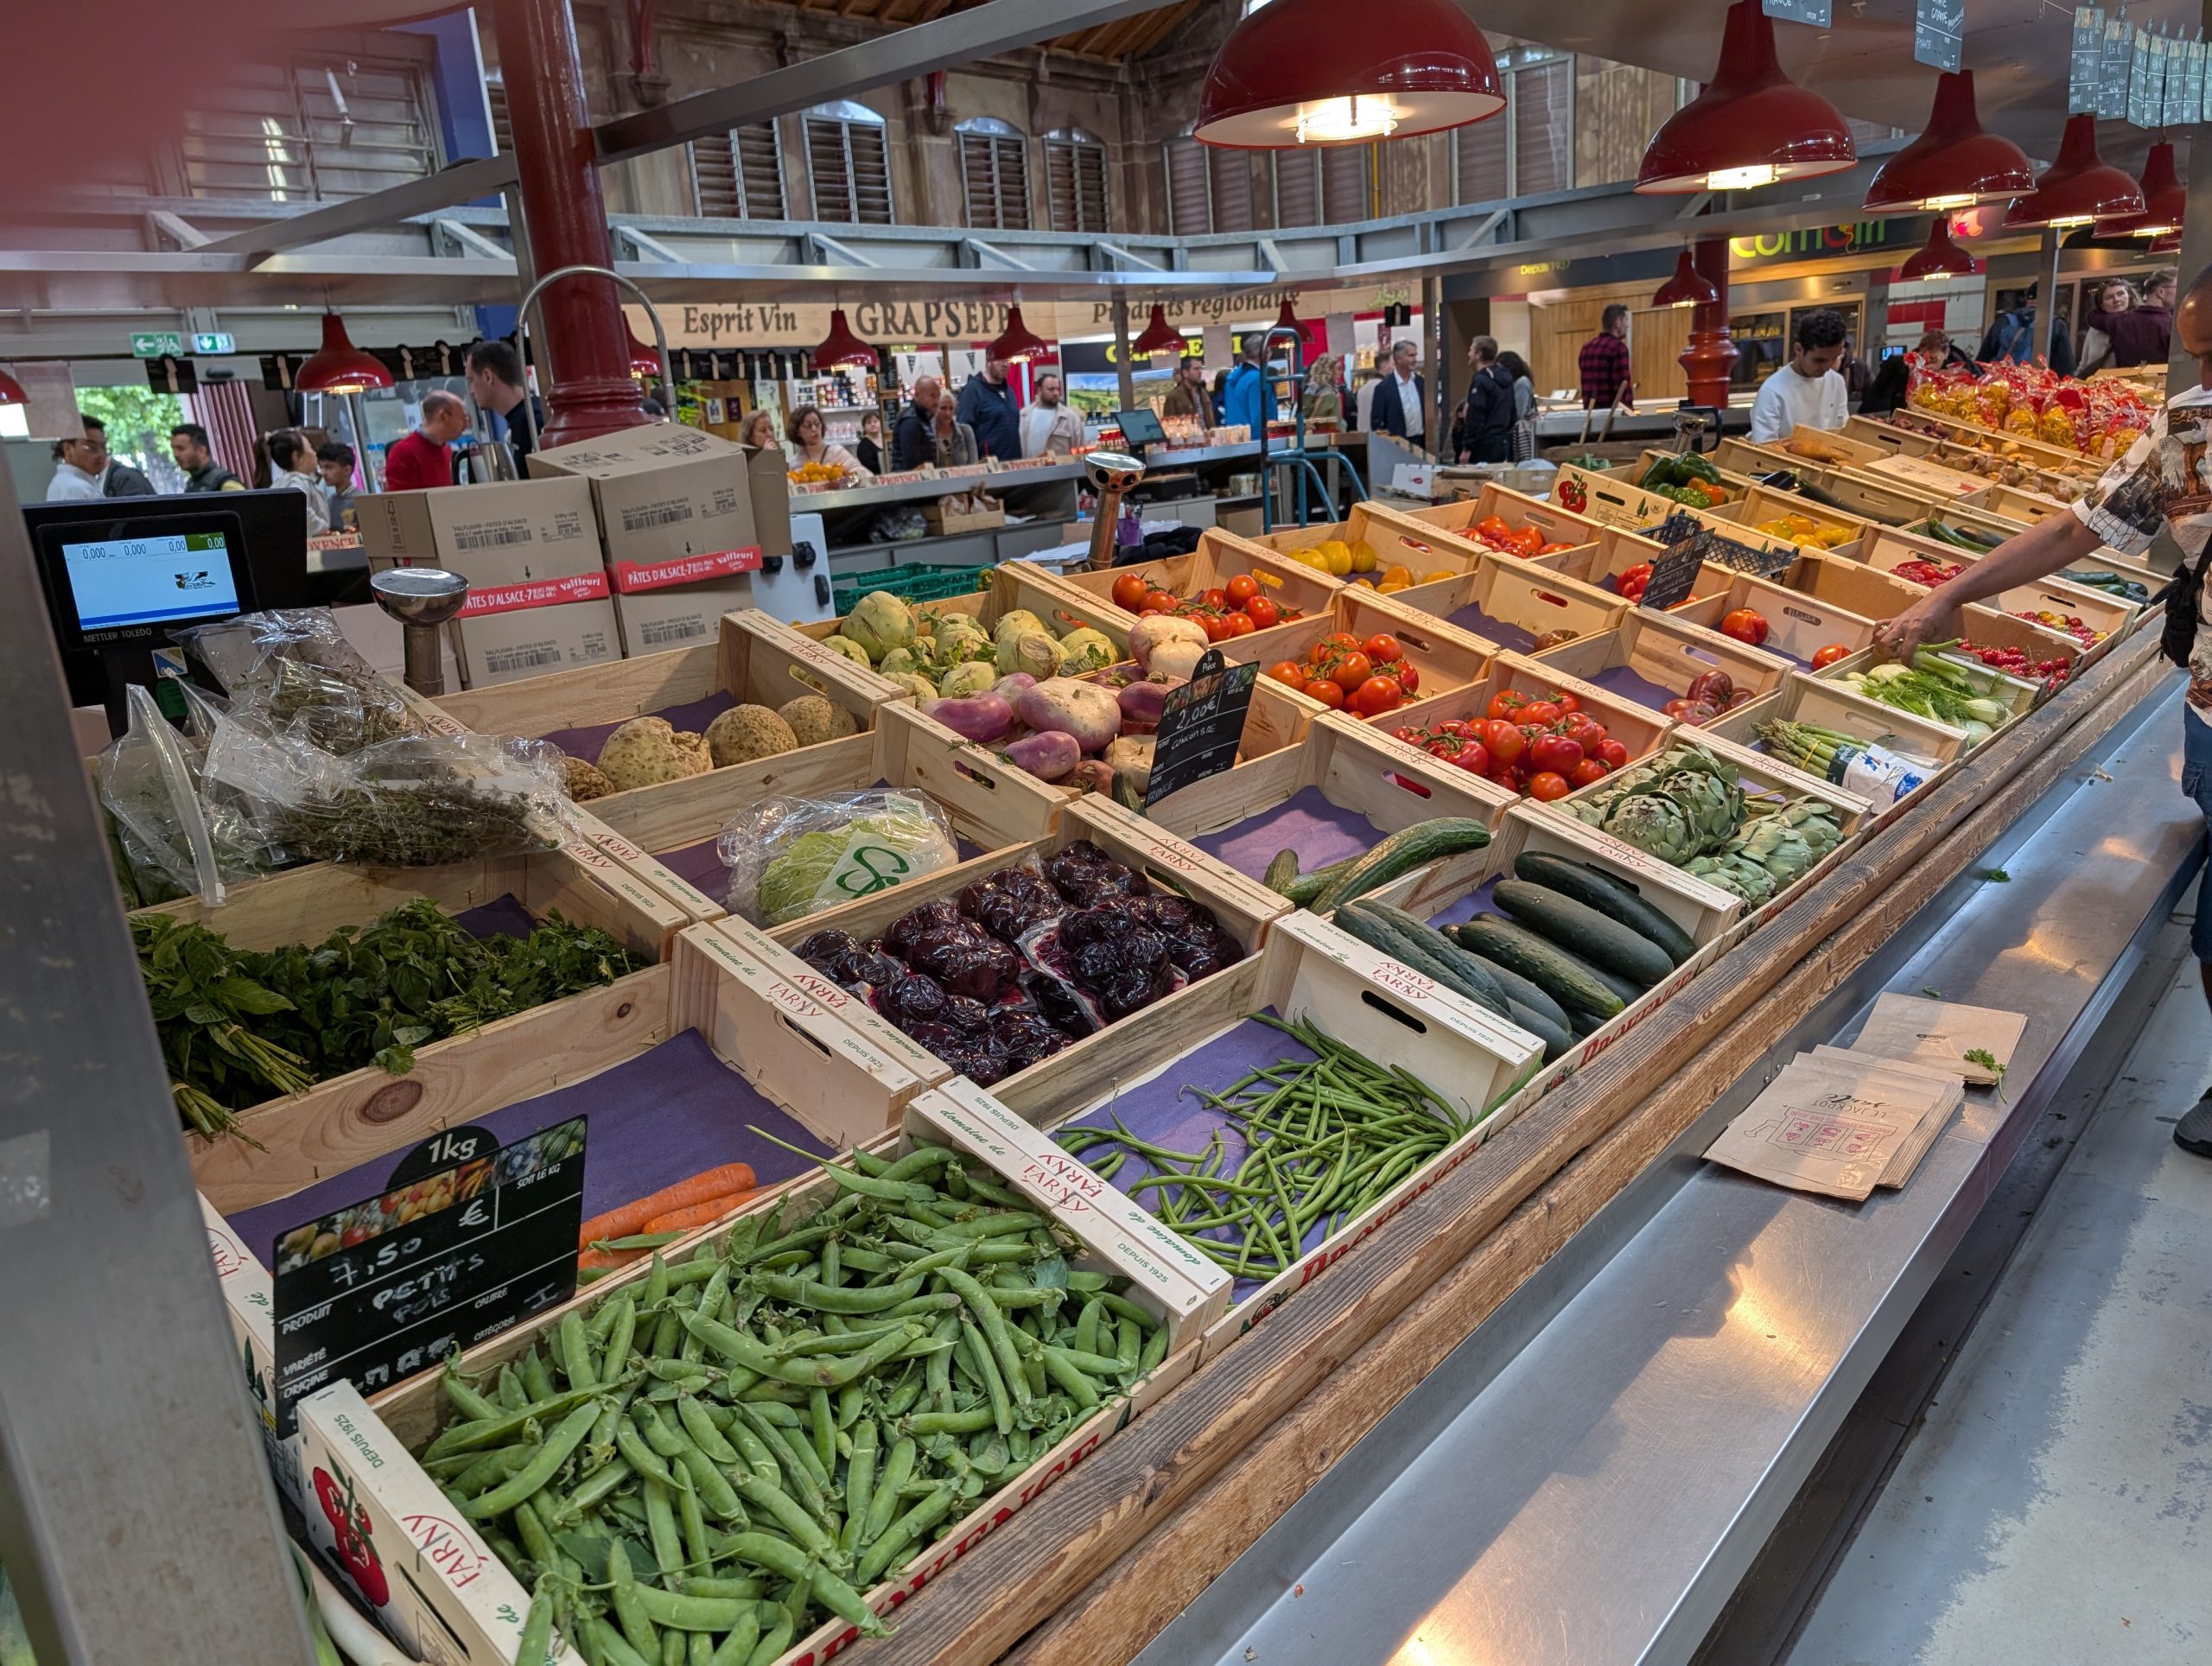
The Indoor Market. My kind of place. Fresh fruit and veggies right next to a lovely assortment of local wines.
Oh, for a market like this in Stanwood.
I just love streets with no cars. But bicycles are permitted, and bicycle riders are ruthless!
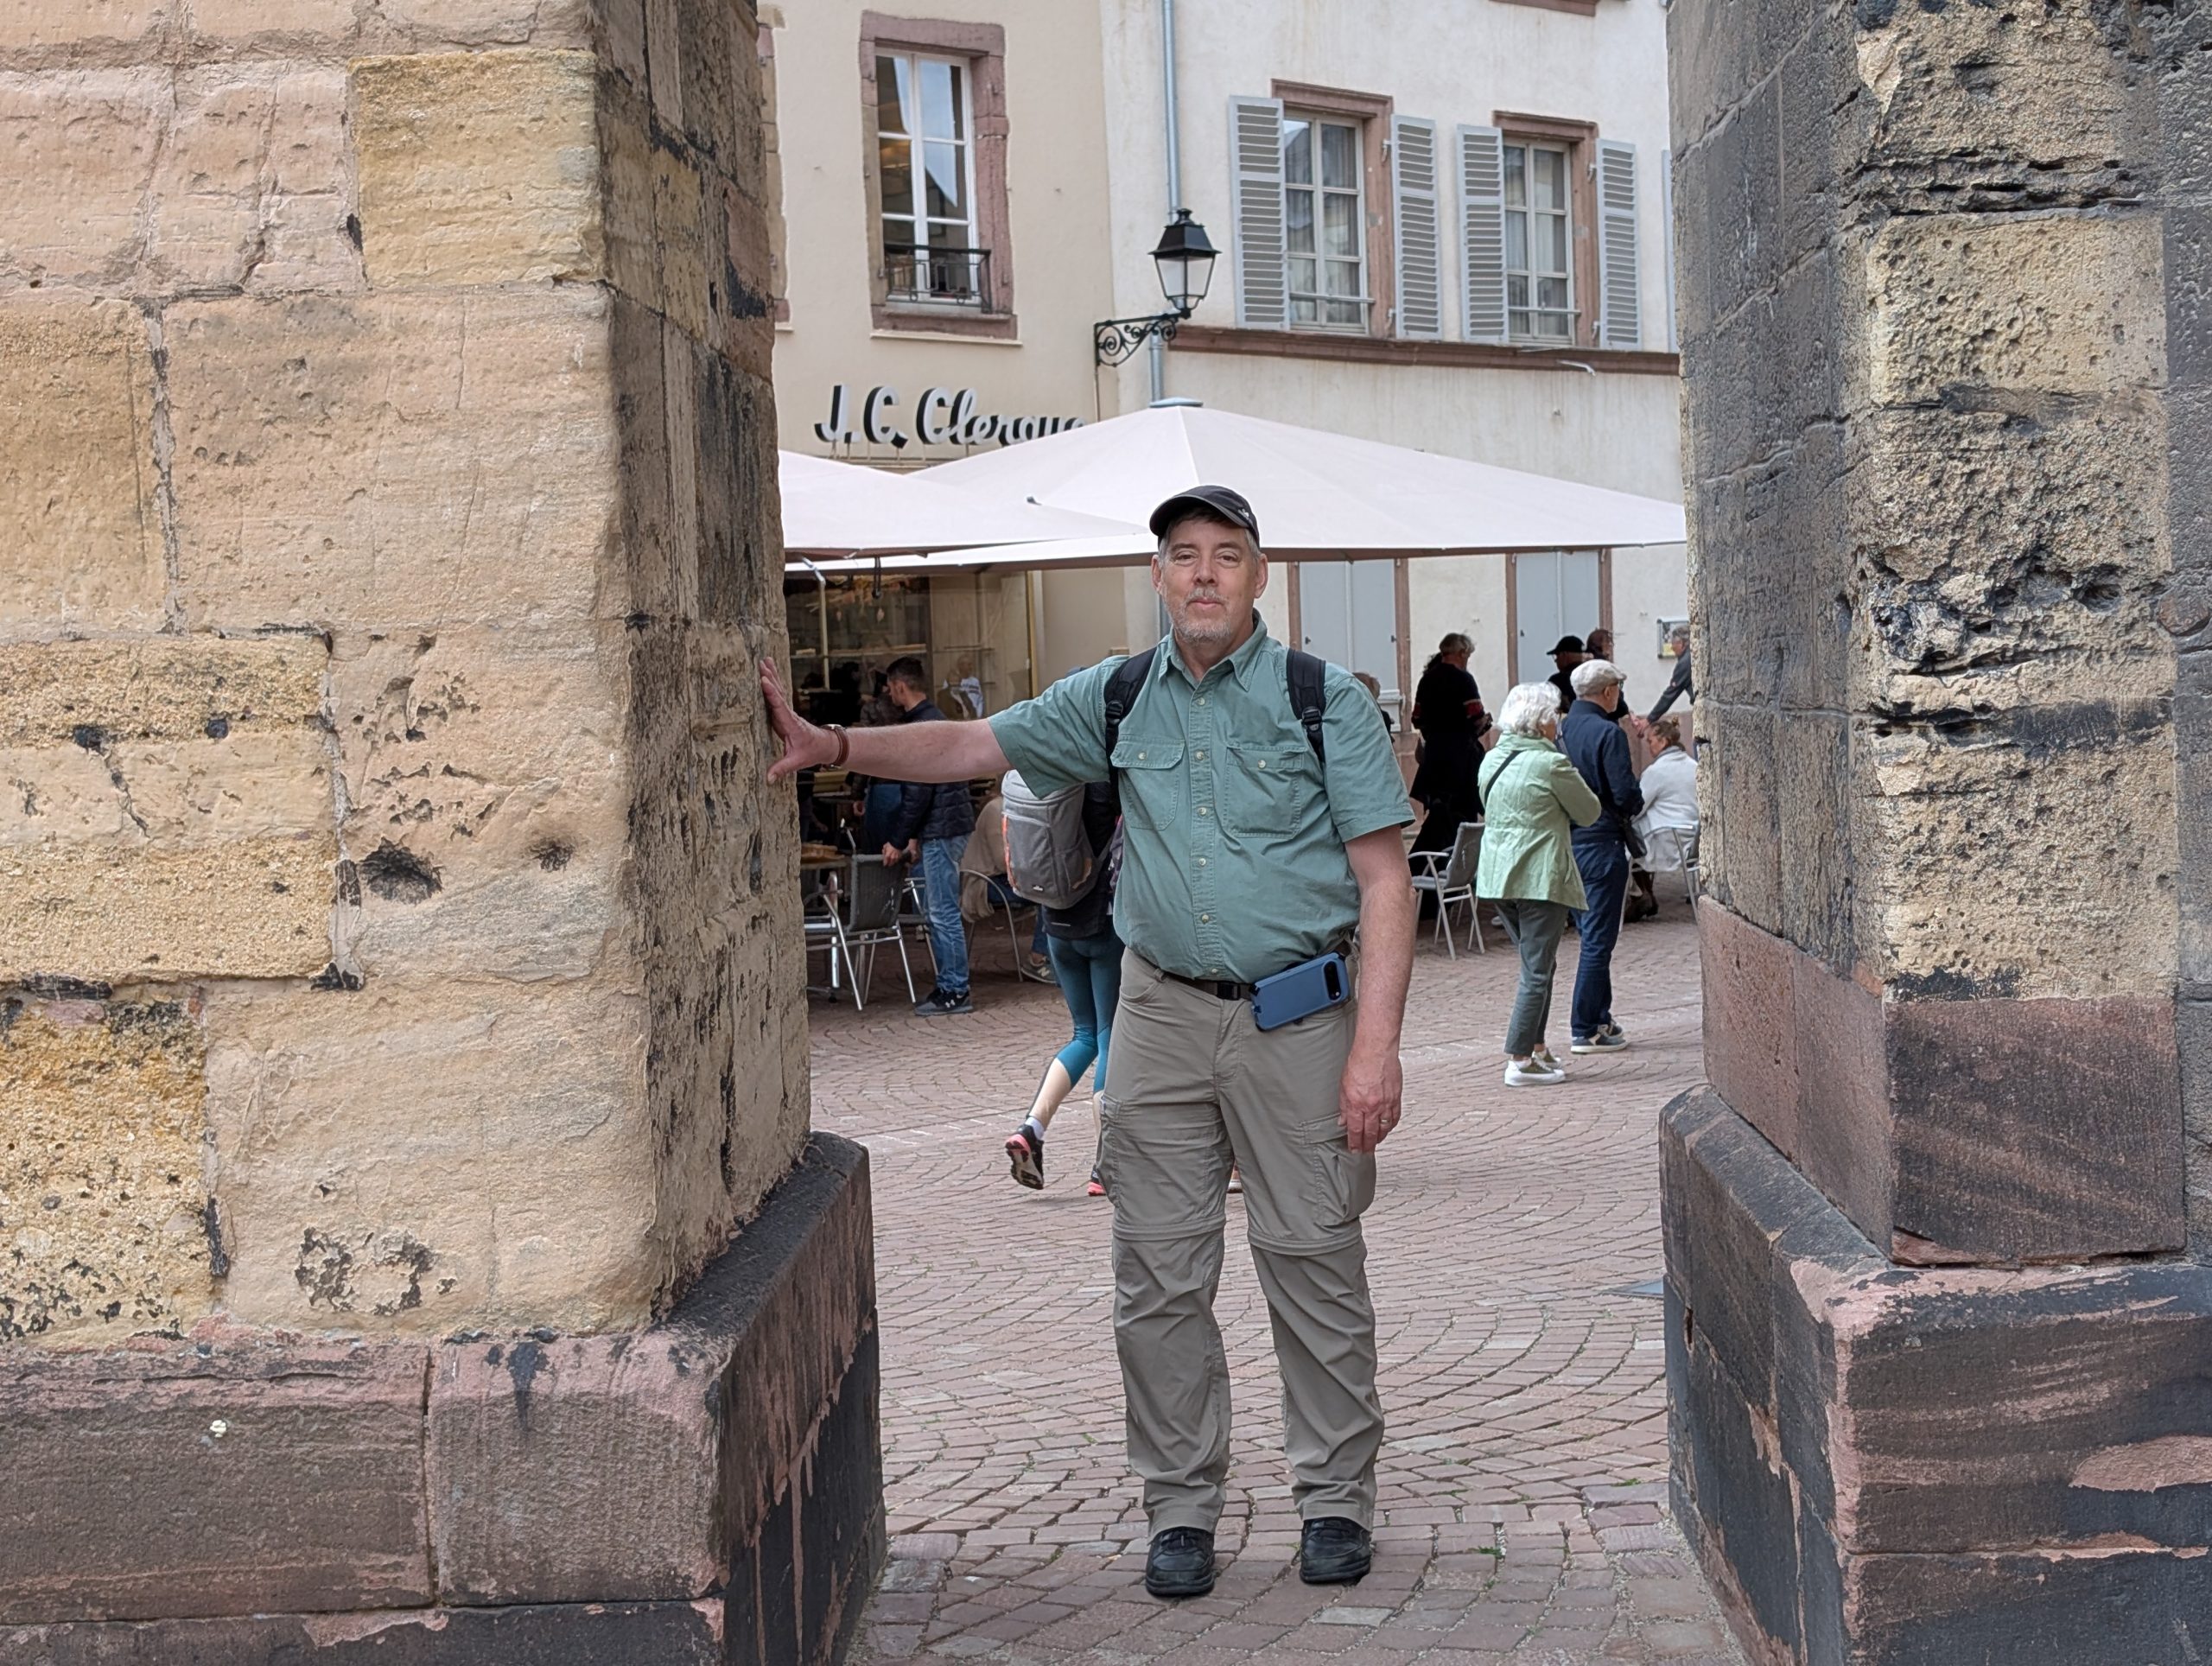
Mr. C. holding up the gates to the city.
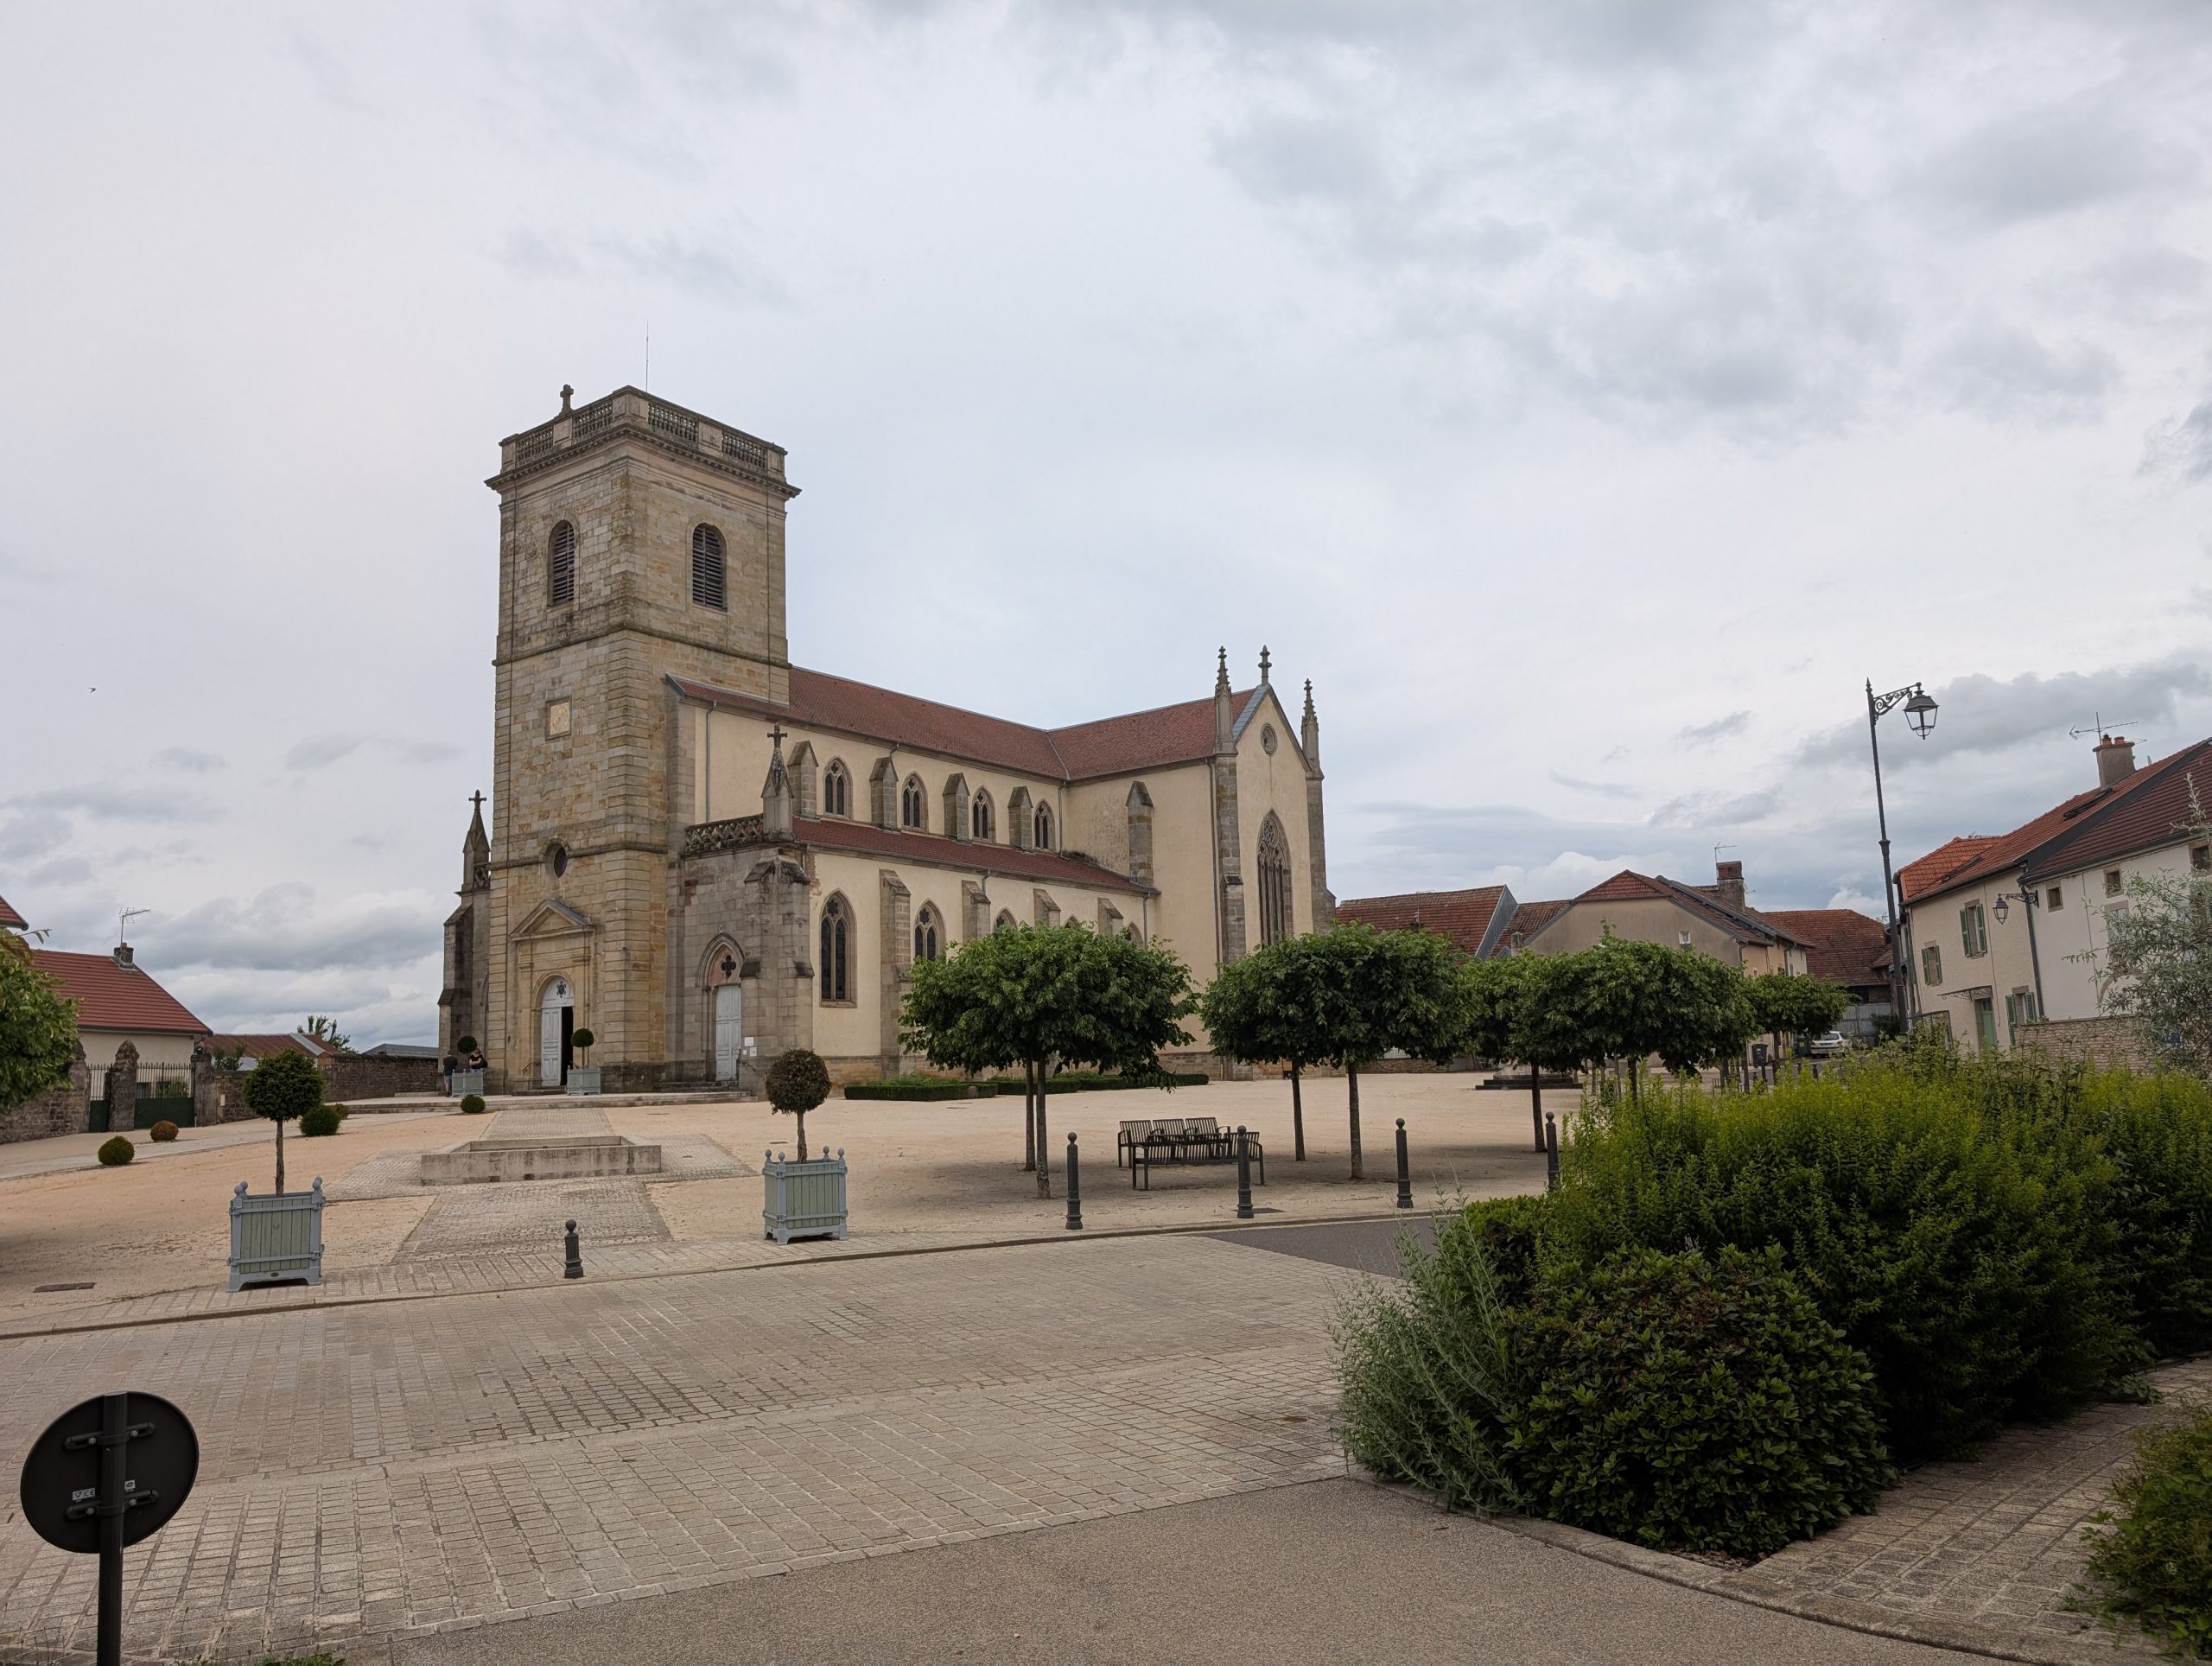
Saint Martin’s Collegiate Church.
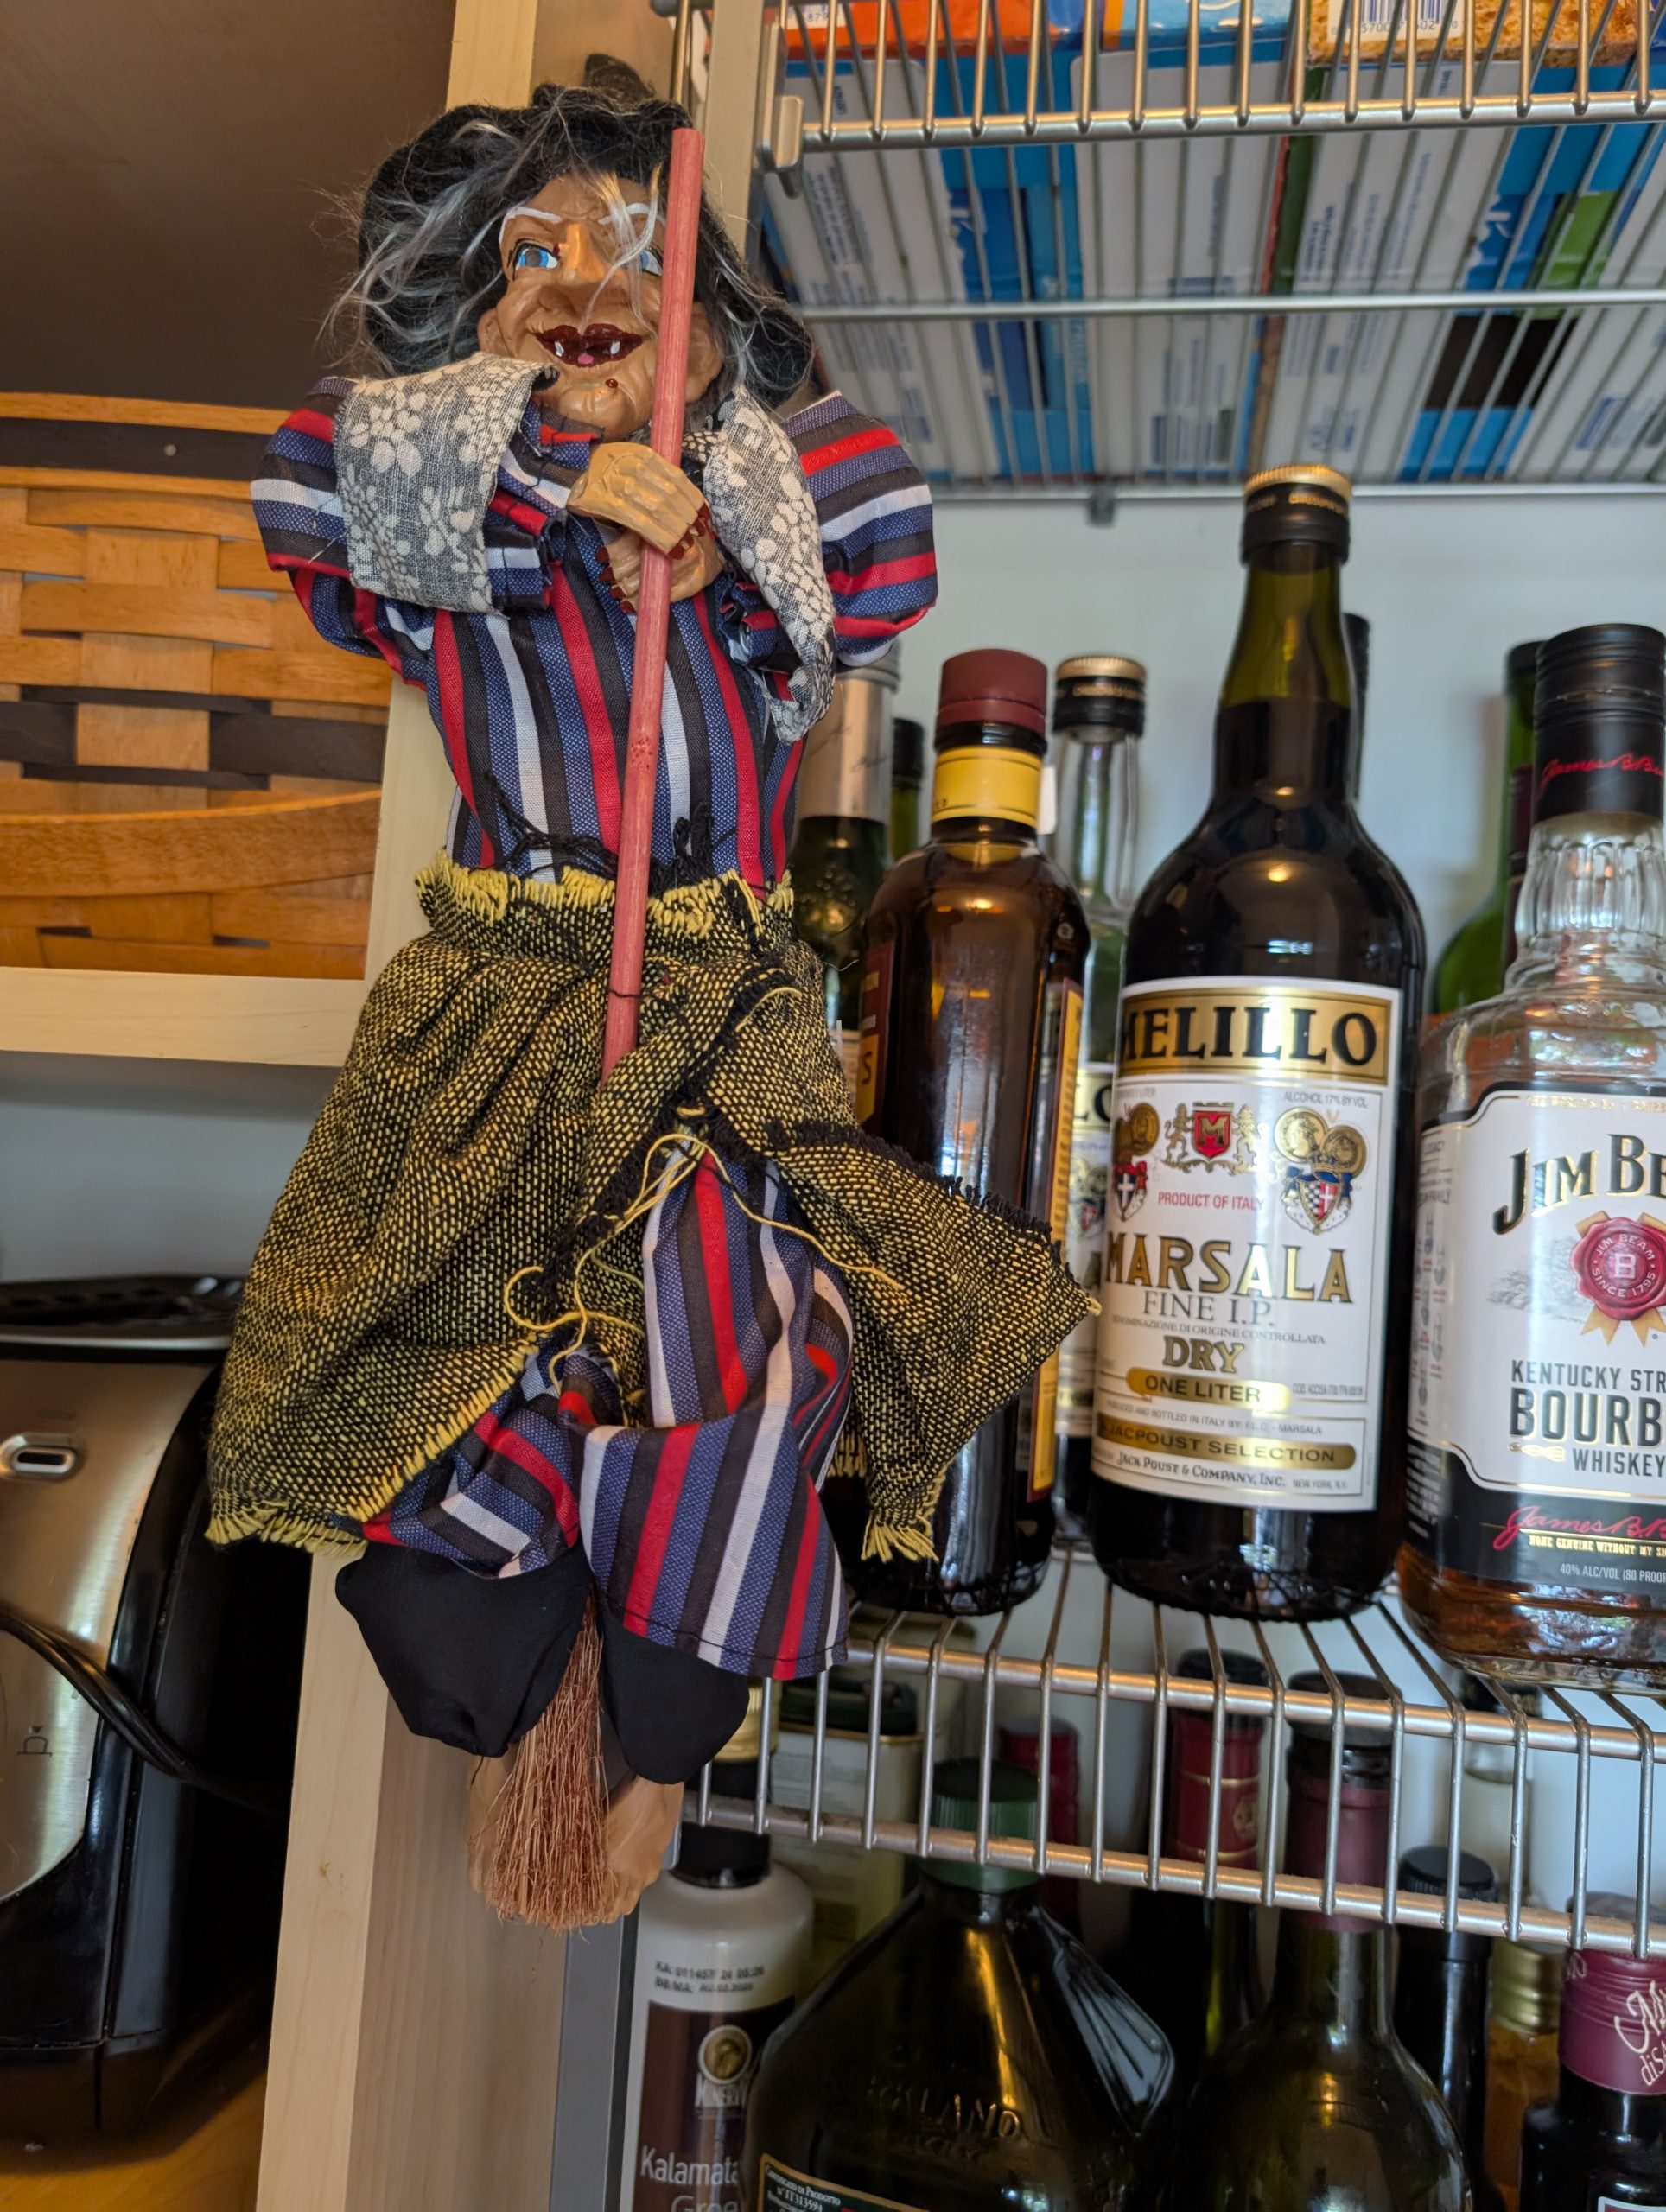
After spending several hours roaming through the narrow streets, having lunch next to one of the canals, exploring the indoor market, visiting Saint Martin’s collegiate church*, making a couple of purchases (a bottle of La Chartreuse – 35 euros for Andy and a Kitchen Witch** – 16 euros for me) we decided it was time to take a bus back to our hotel.
*Built between 1235 and 1365, Saint Martin’s Collegiate Church is an important example of Gothic architecture in Alsace. Because of a fire in the south tower in 1572 the framework and all the various roofs were destroyed. The tower was replaced three years later by a construction on the top of the dome which has the form of a lantern, which gives the Church its characteristic silhouette. The church has been restored several times. In 1982 during the most recent restoration, foundations of a church from the year 1000 and traces of extensions from the 11th and the 12th centuries were found.
** When you hang a Kitchen Witch, legend indicates that cakes and breads will rise, rice, beans, and toast will not burn, pots will never boil dry, and there will never be too much salt when baking, boiling, or stewing. The spices you mix will be perfect, as will the tea and coffee you serve.
Notice my Kitchen Witch is in good company in my pantry. Right next to my cooking supply of alcoholic additives. Could a witch want for anything more? Plus, she has a straight on view of me at my stove. I believe she is very happy to be where she is because she knows she is much loved and respected.
Upon returning to our room, we both decided except for dinner, our fun for one day was at 110%. So, while Andy researched our route for tomorrow, I read for a bit until I’m told I nodded off for a bit. When I awoke, very refreshed, I was eager to write up today’s adventure.
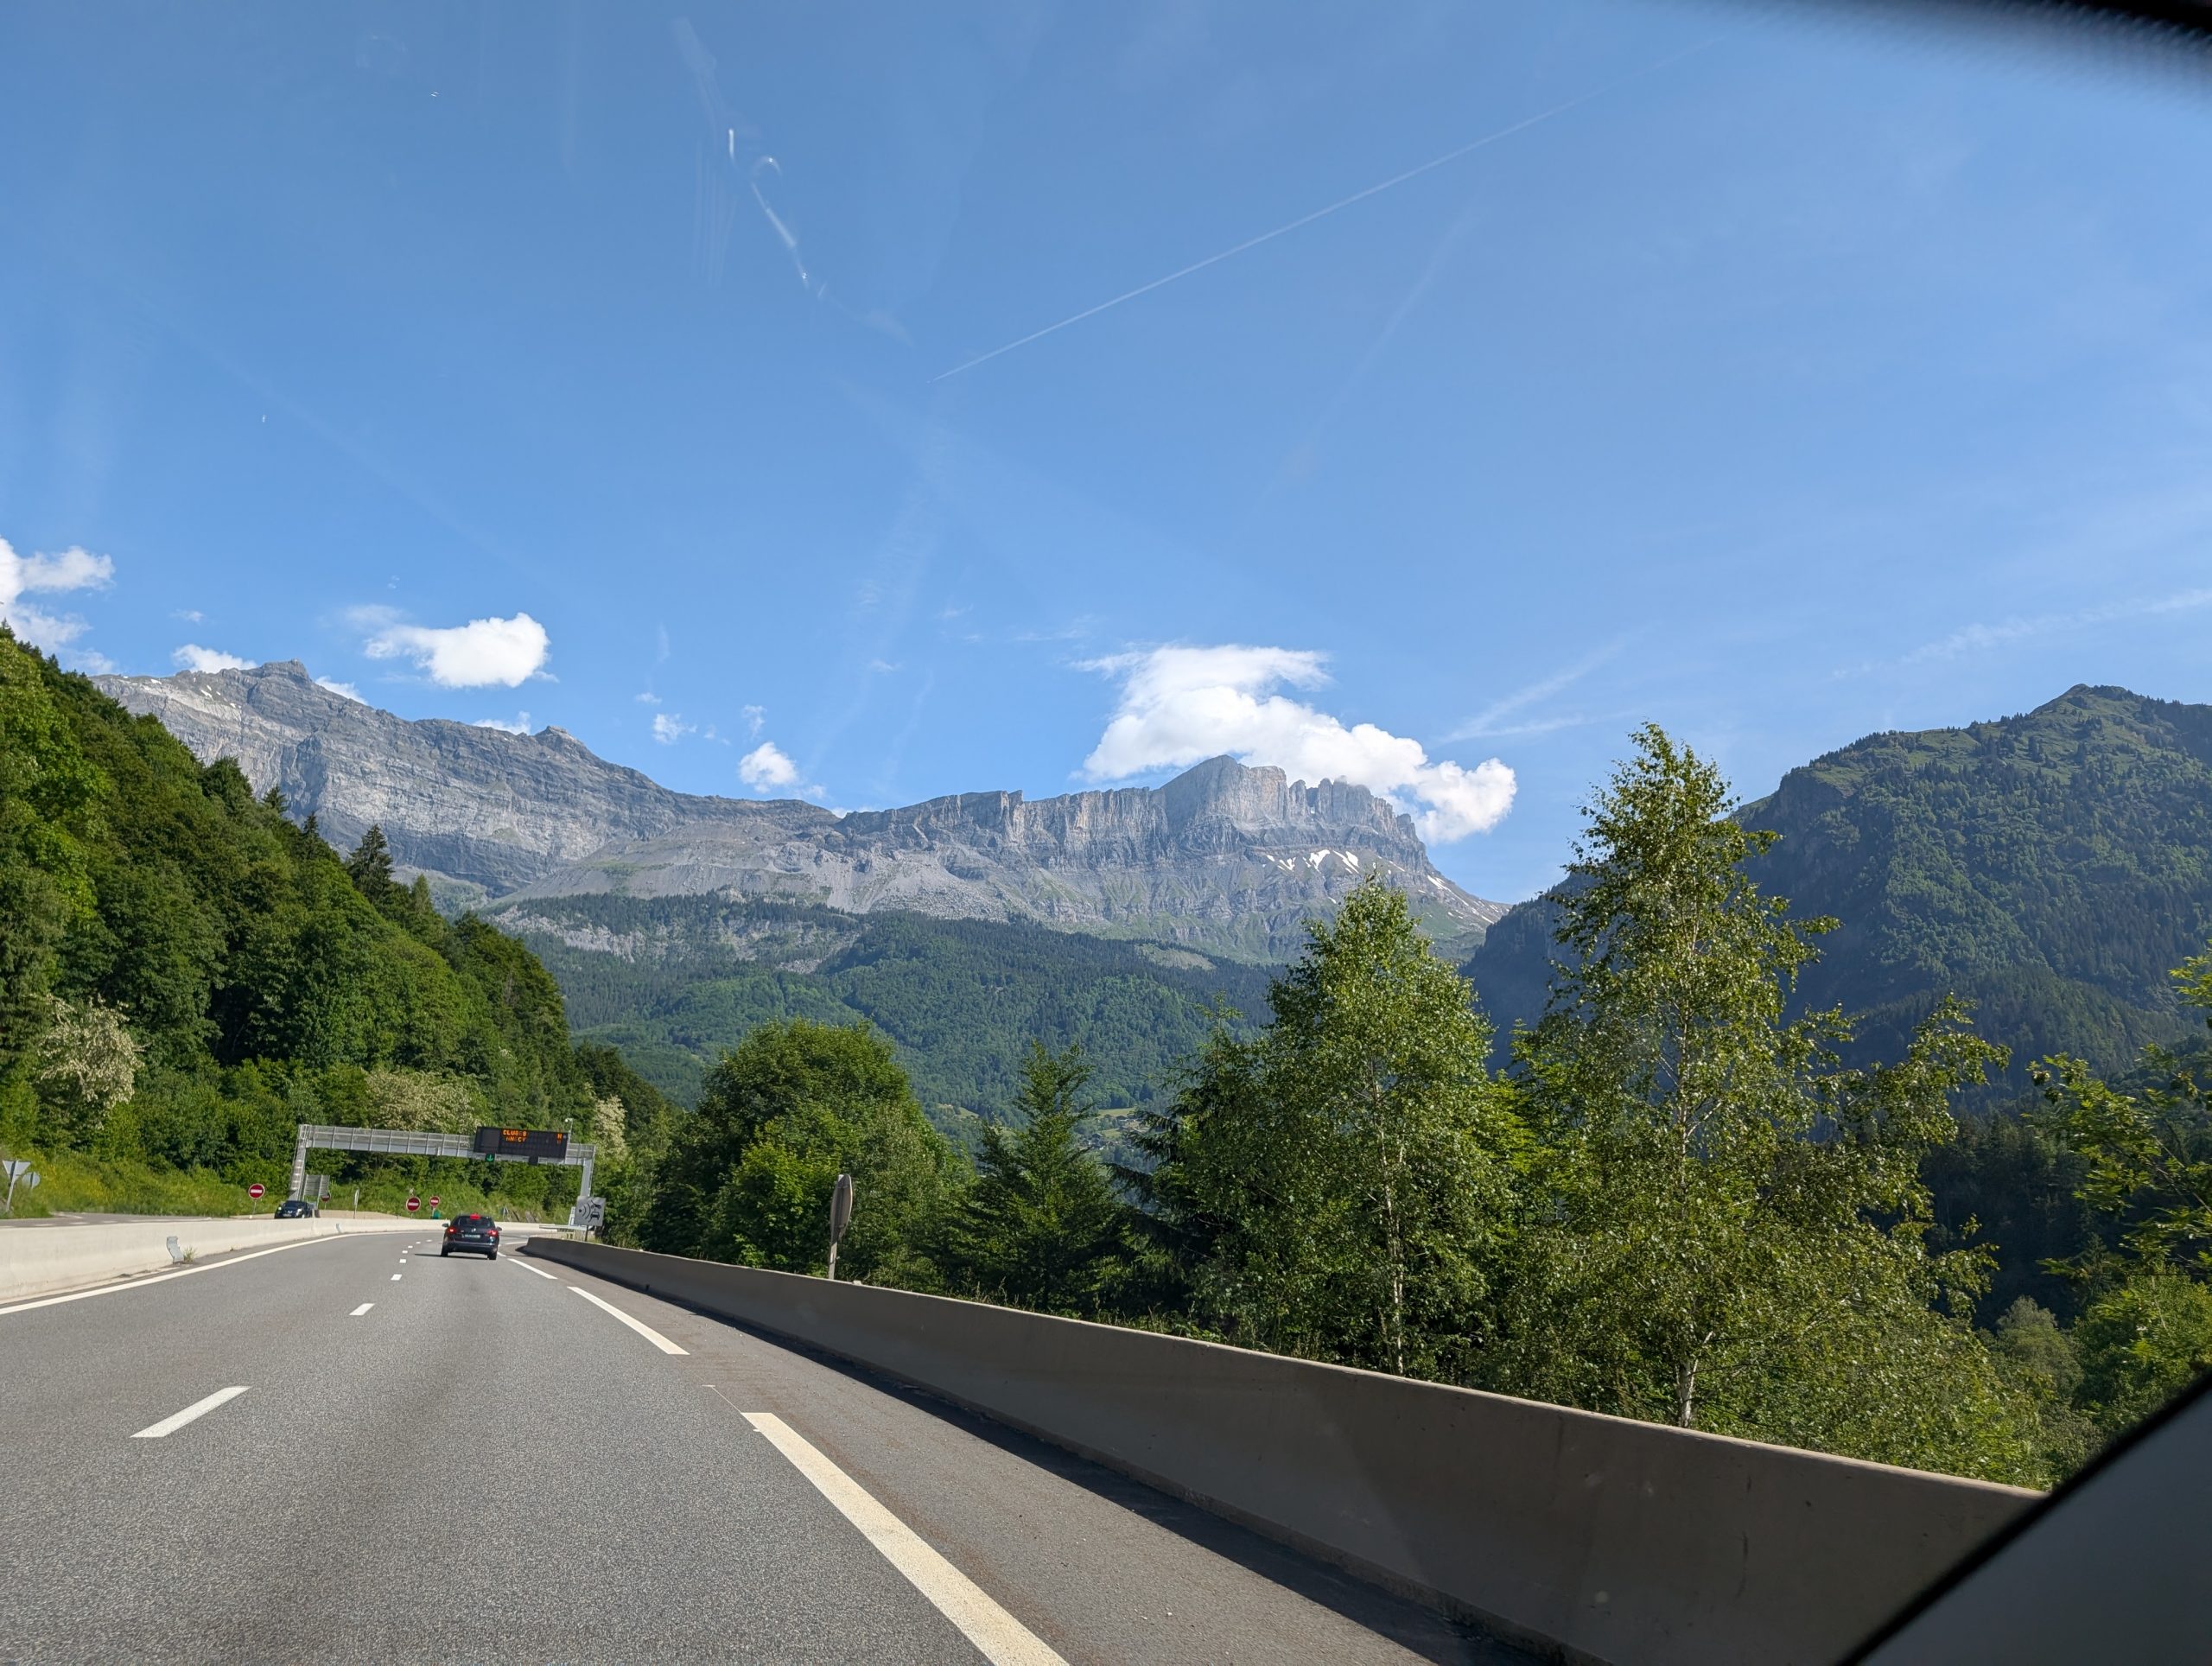
Thursday, May 29, 2025 – Basel, Switzerland to Auberge du Manoir – Chamonix, France
Well, this was the day to bid farewell to our new friends and fellow Viking travelers. And a night where neither of us slept very well. But regardless we had to disembark our boat, the Gersemi, at 9:00 am, after having left our luggage in the hallway at 8:00 am to be taken off the boat by people stronger than us. (Thank you, Viking.) When we got off the boat, there was a taxi waiting for us to take us to Basel airport. (Again, thank you Viking!) The taxi driver dropped us off at the car rental area and proceeded to wheel our luggage trolleys (that’s what they call rolling suitcases here) right to the Avis check-in desk. Then after a few signatures here and there, and more money spent, we walked only a few yards to our car. A Skoda Scala (Andy named it “road scala”.) (Later re-named “Rhoda Scala”.)
Then it was on our way to Chamonix, France.
Everything went smoothly until we hit a huge back up where we had to turn to go through Bern. Complete stop. Nothing moving. So, we decided to take a different route, and boy am I glad we did. Because the traffic coming from the other direction also headed for Bern was backed up for miles.
So instead, we drove around Luzern (Lucerne), then on to Interlaken, then drove up a side road which took us through the town of Zwisimmen, which is home to the famous Gstaad Ski Resort. From there we descended to the town of Aigle which is on the Rhone River upstream from Lake Geneva.
A few pictures of our drive today.
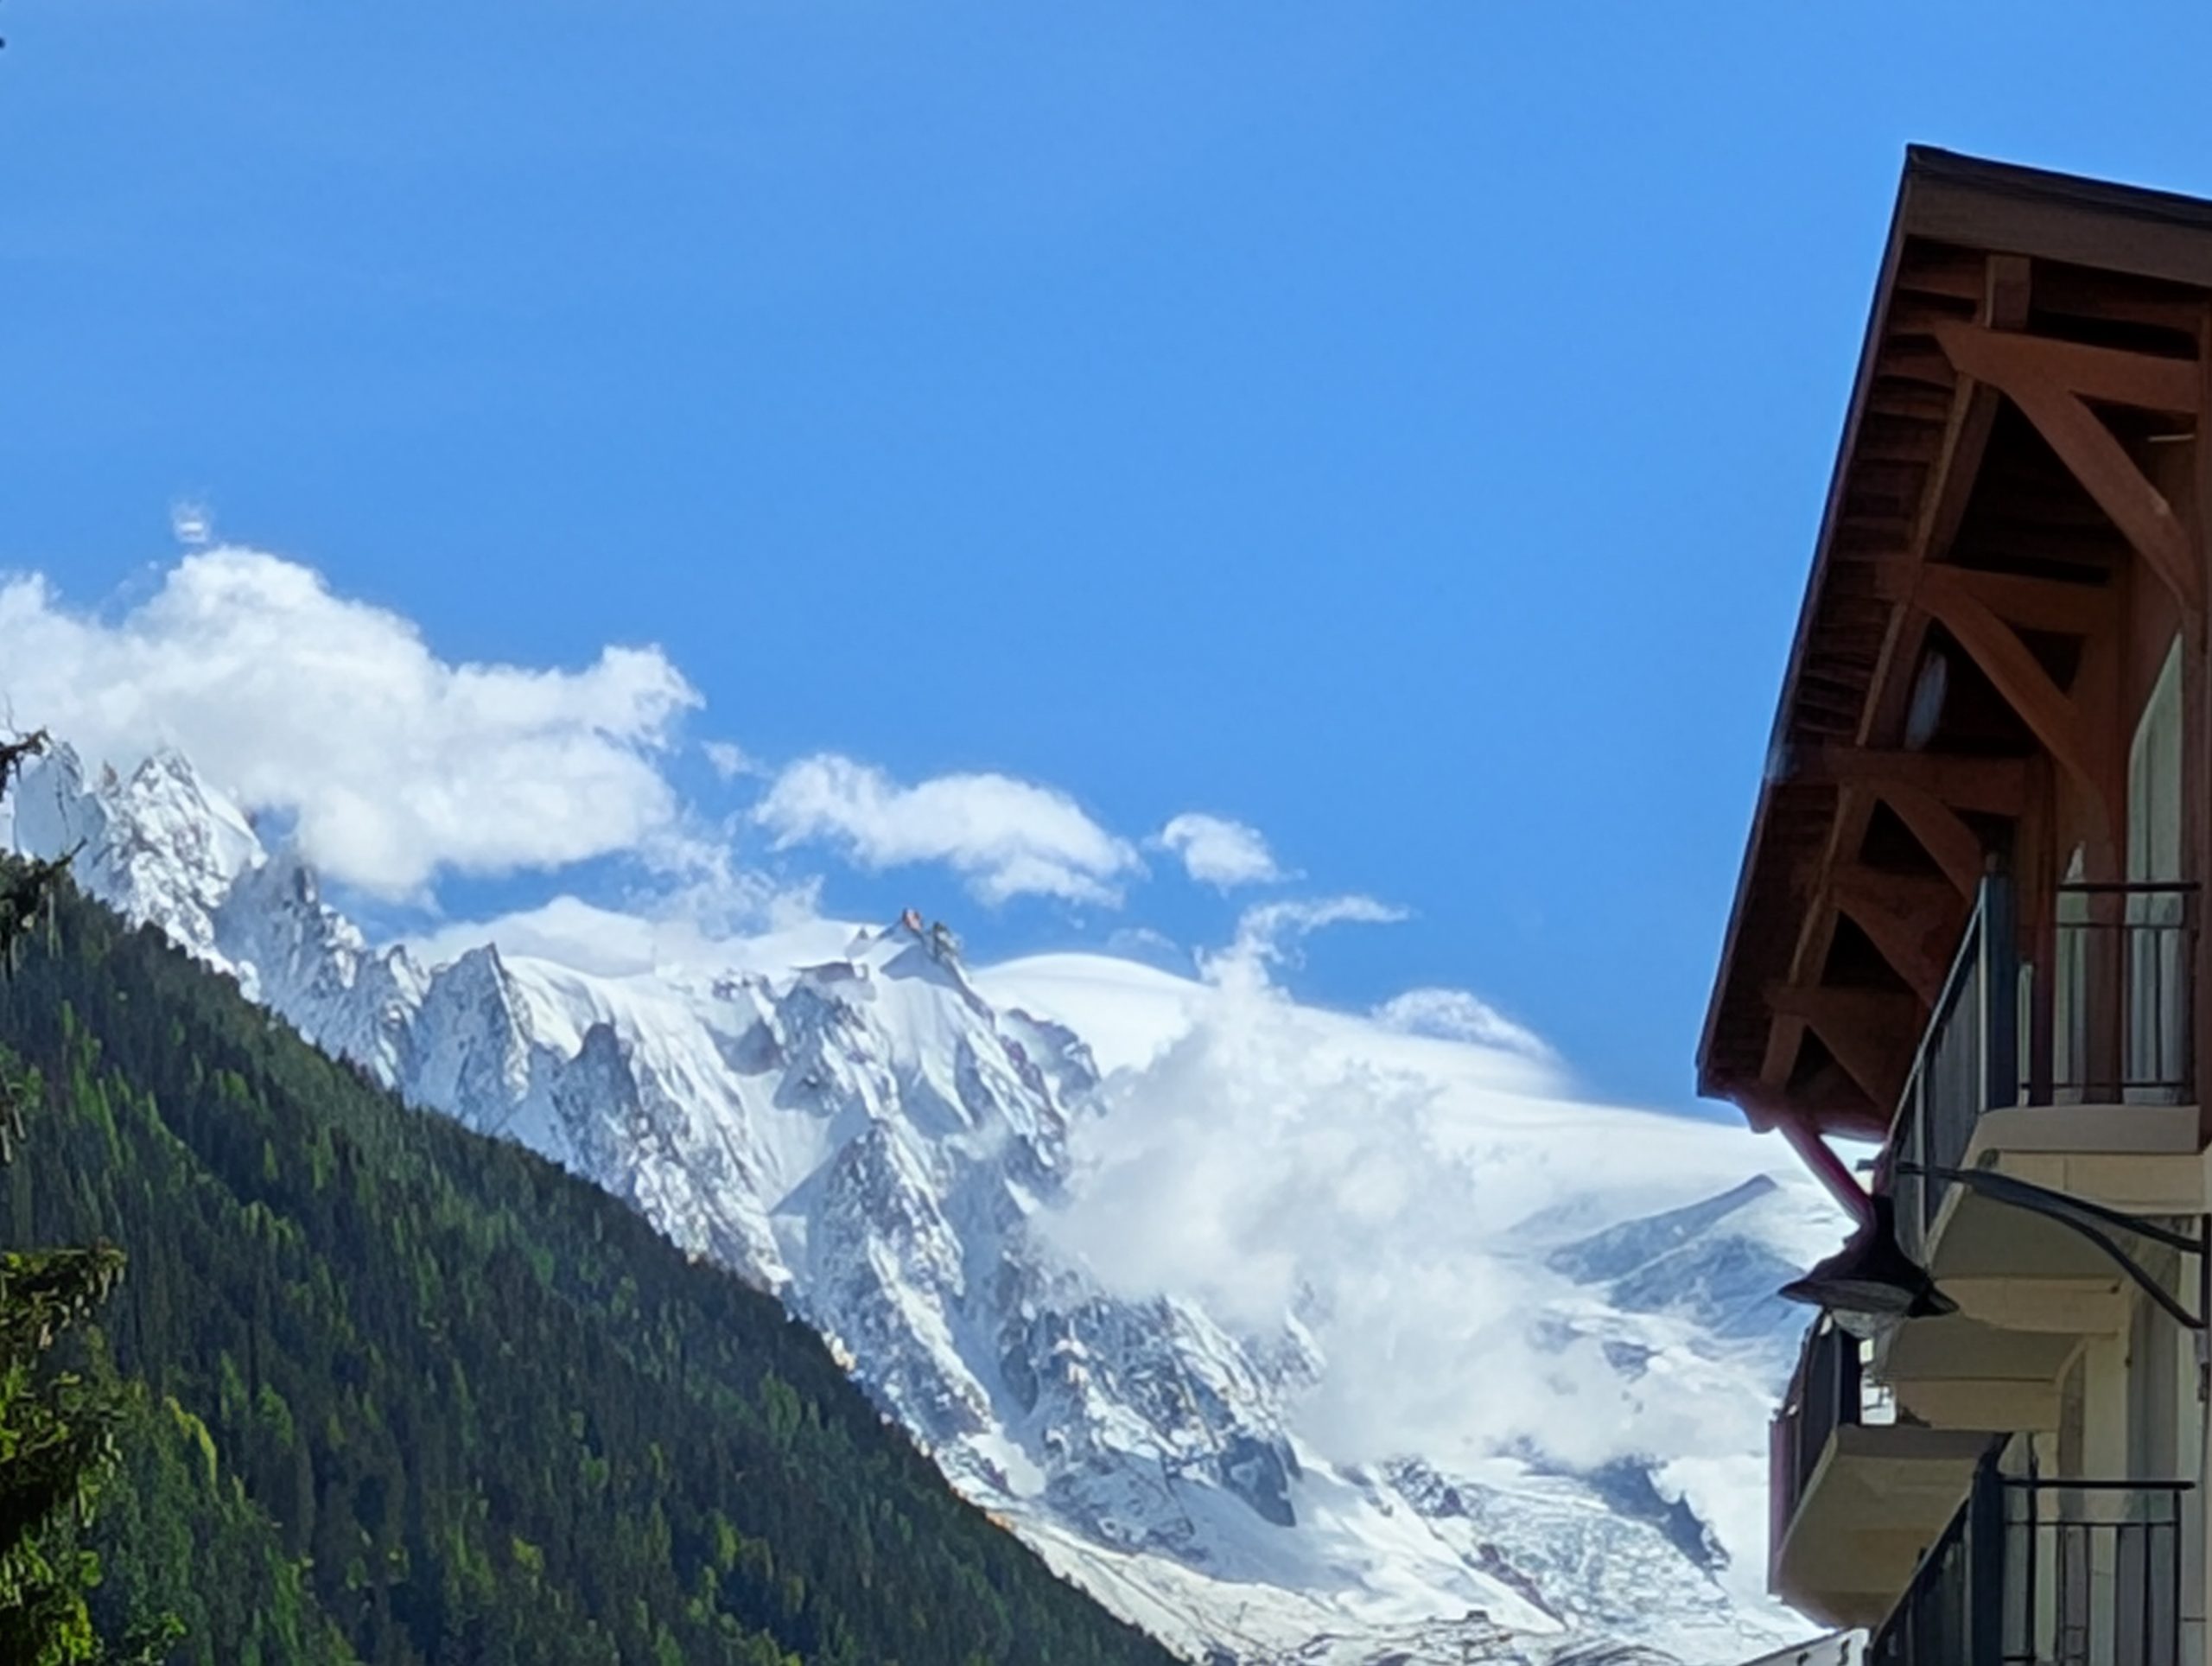
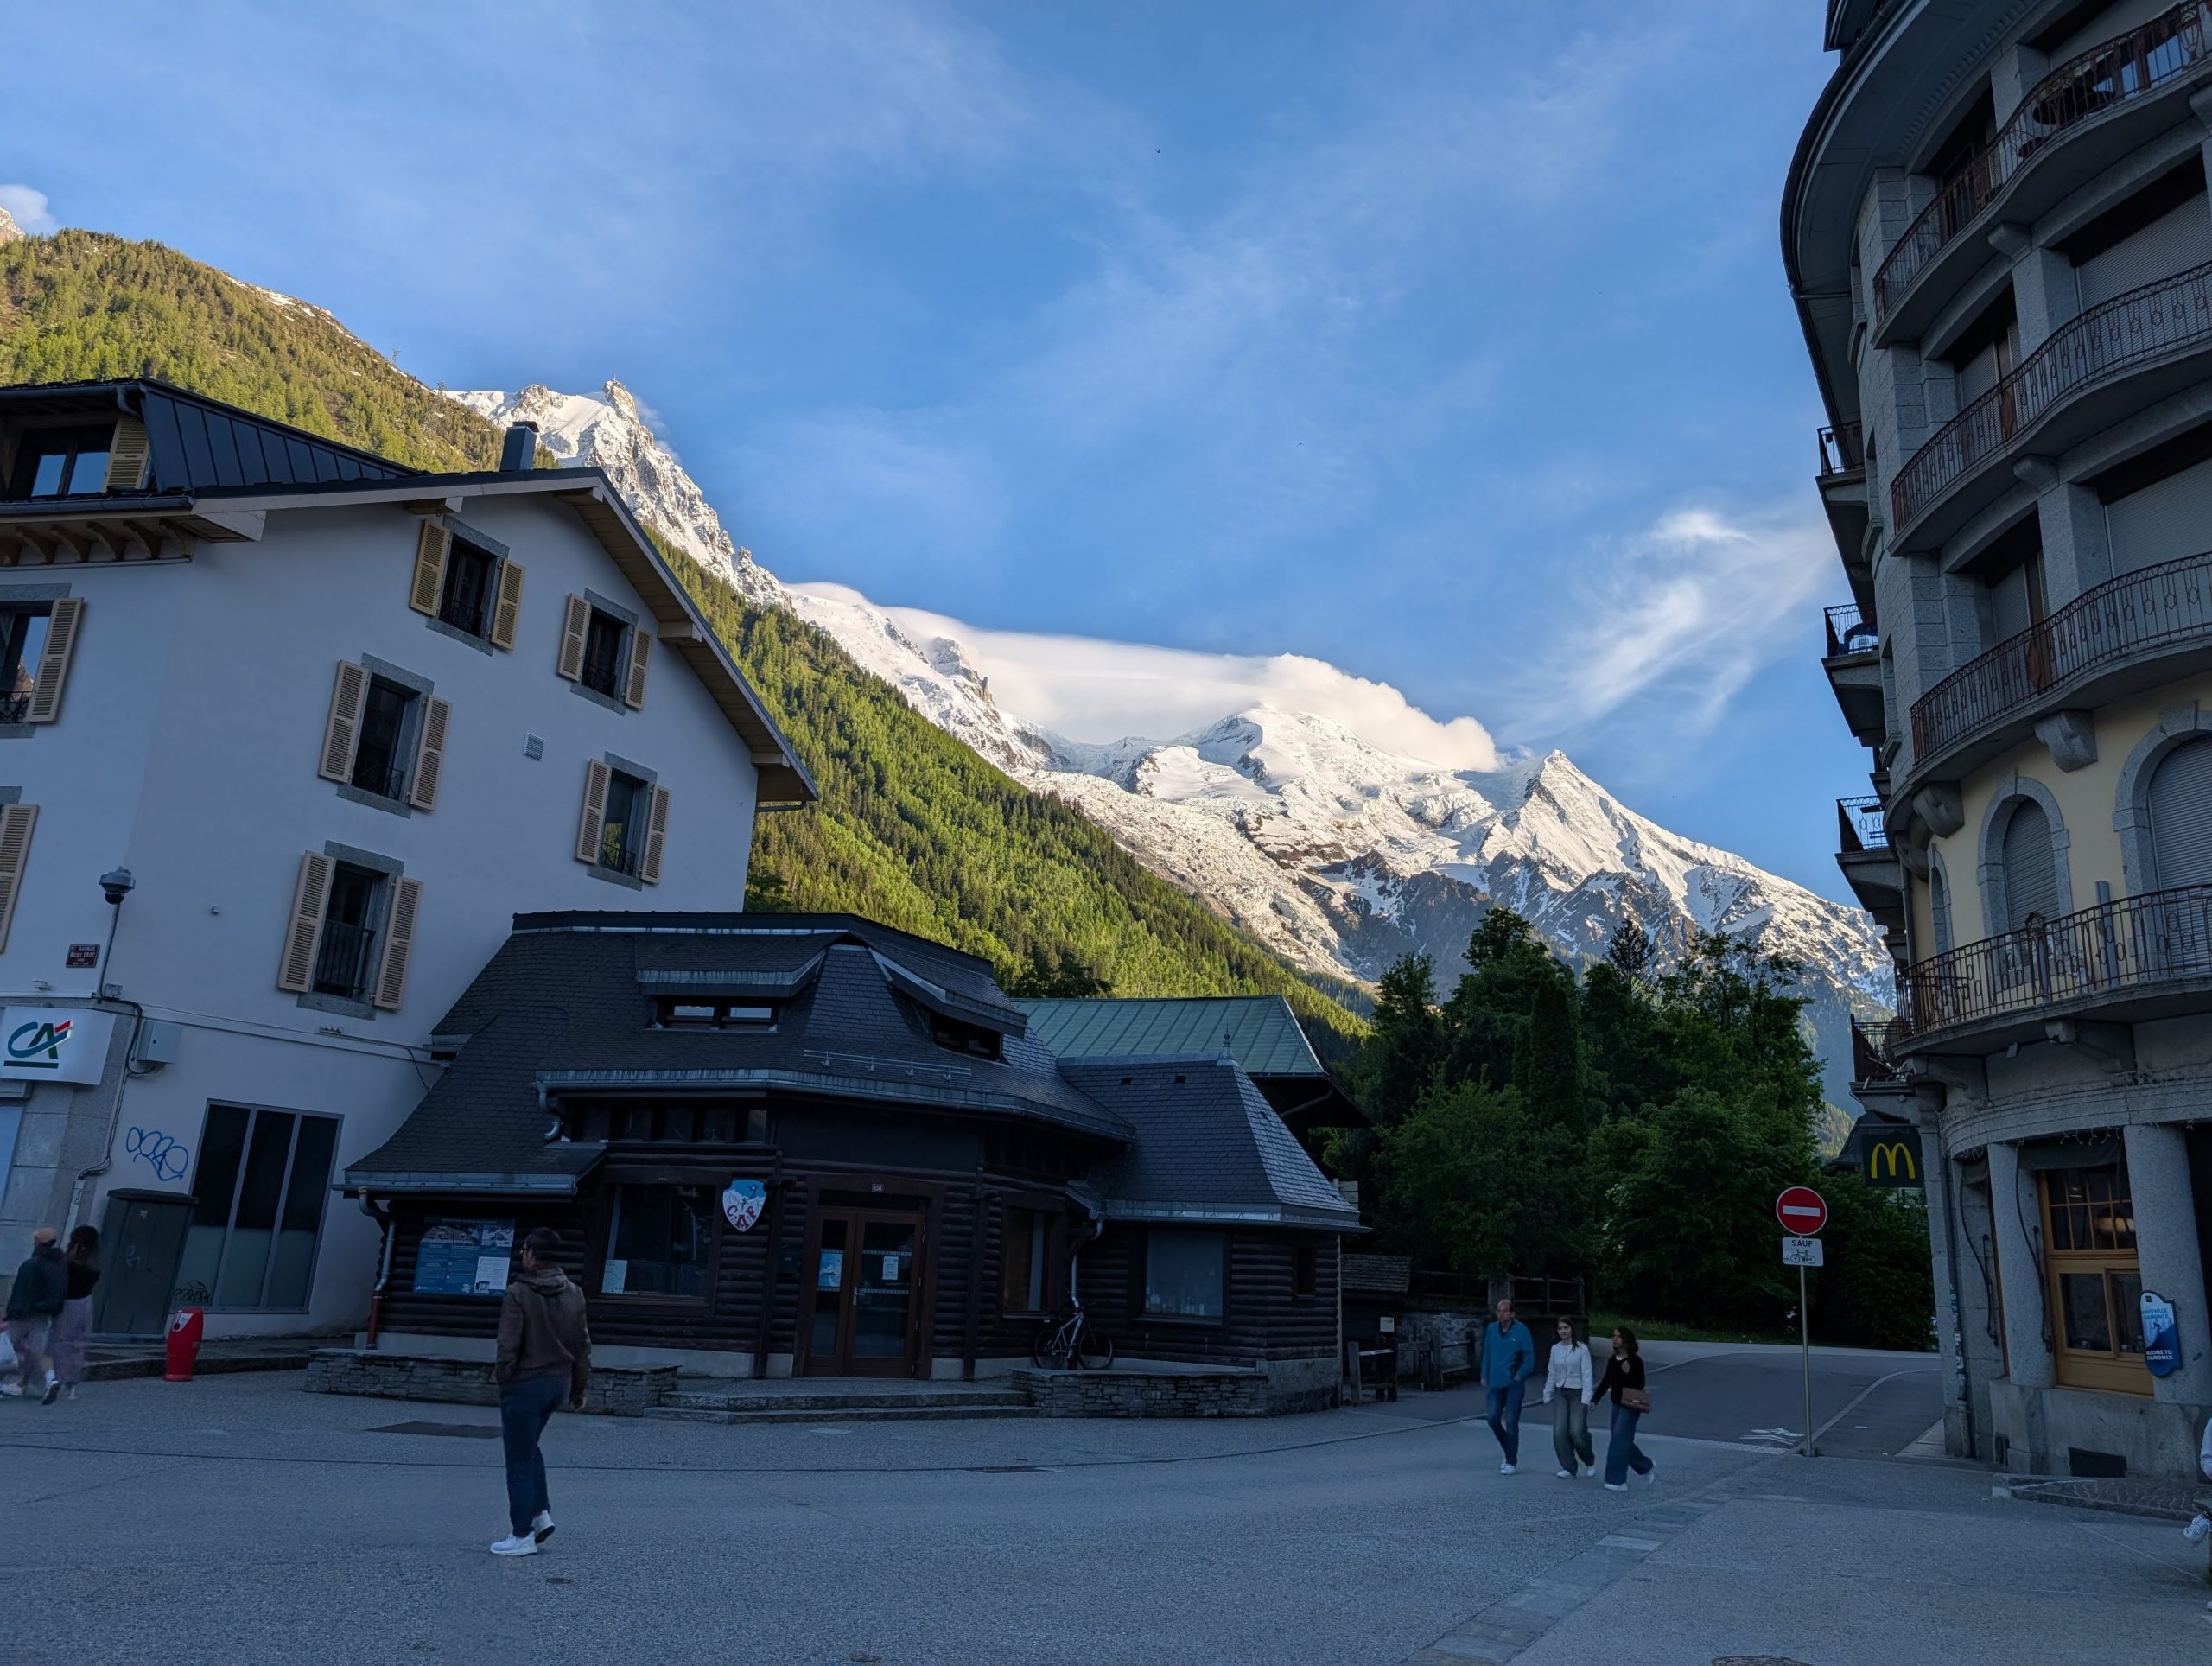
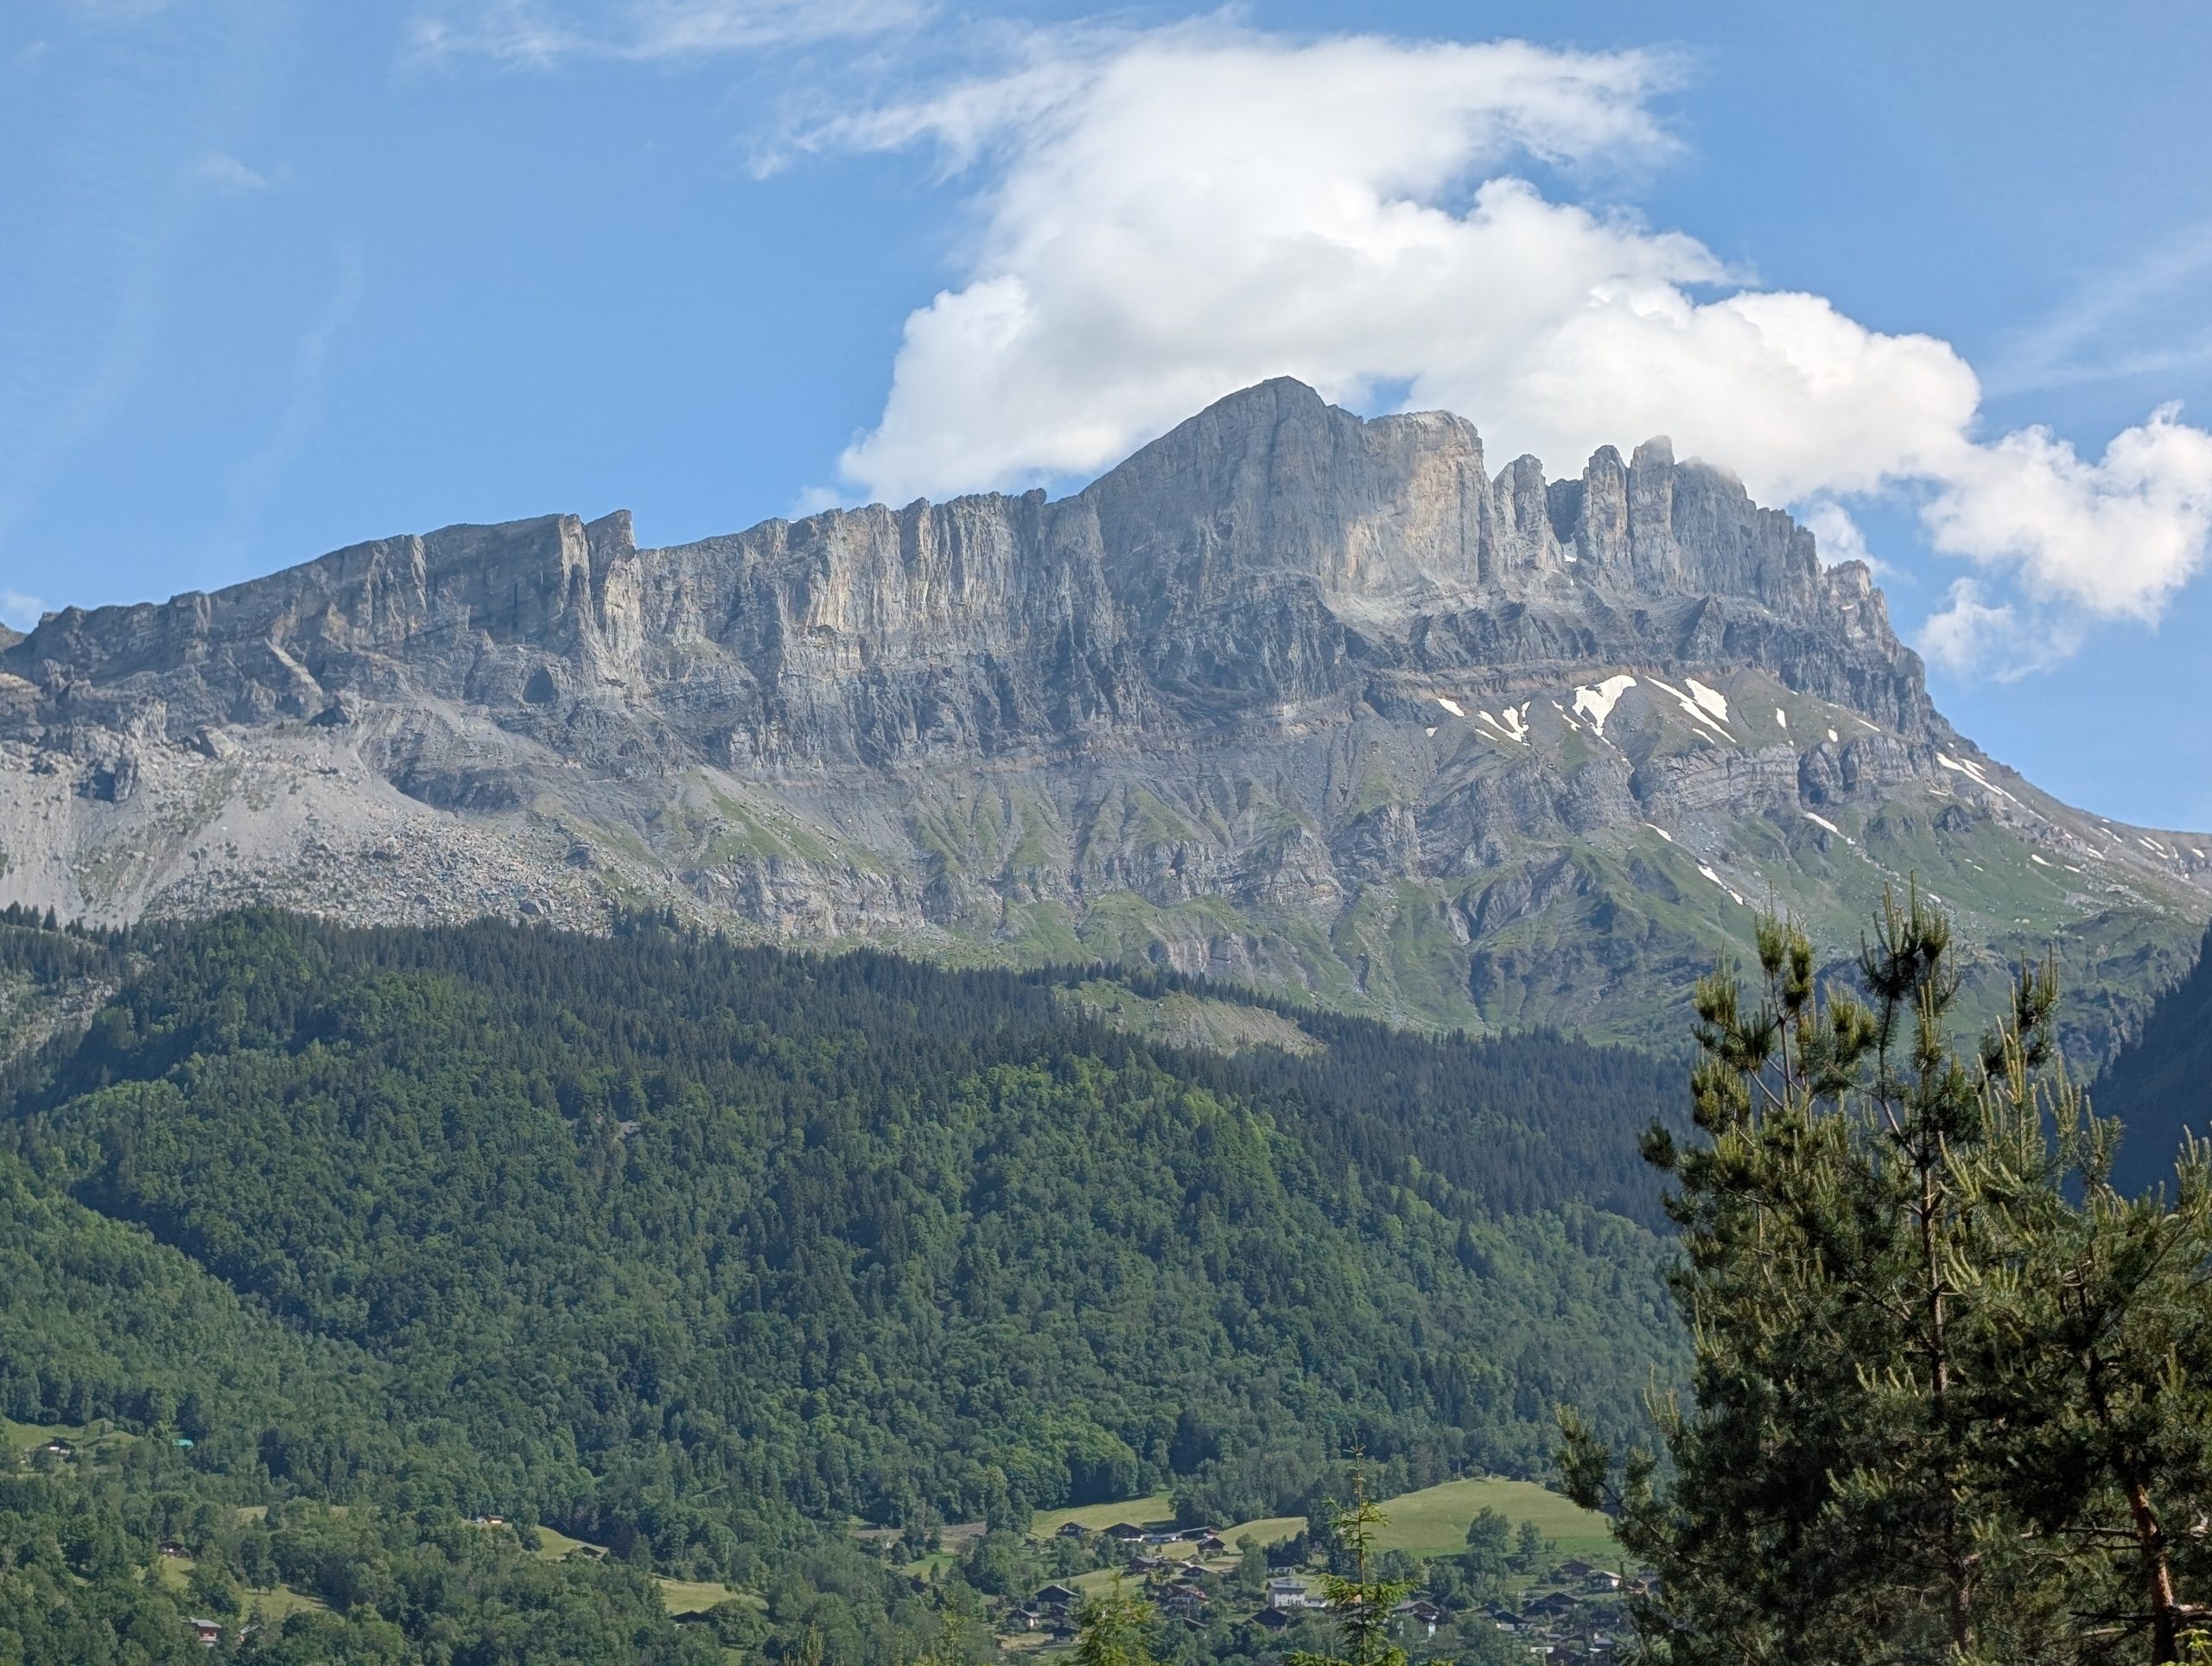
Back on the autobahn we went South to Martigny. We then proceeded West over a high pass on a secondary road into France. And from there we went steeply down towards our hotel in Chamonix, Switzerland gasping at views of Mt. Blanc all along the way.
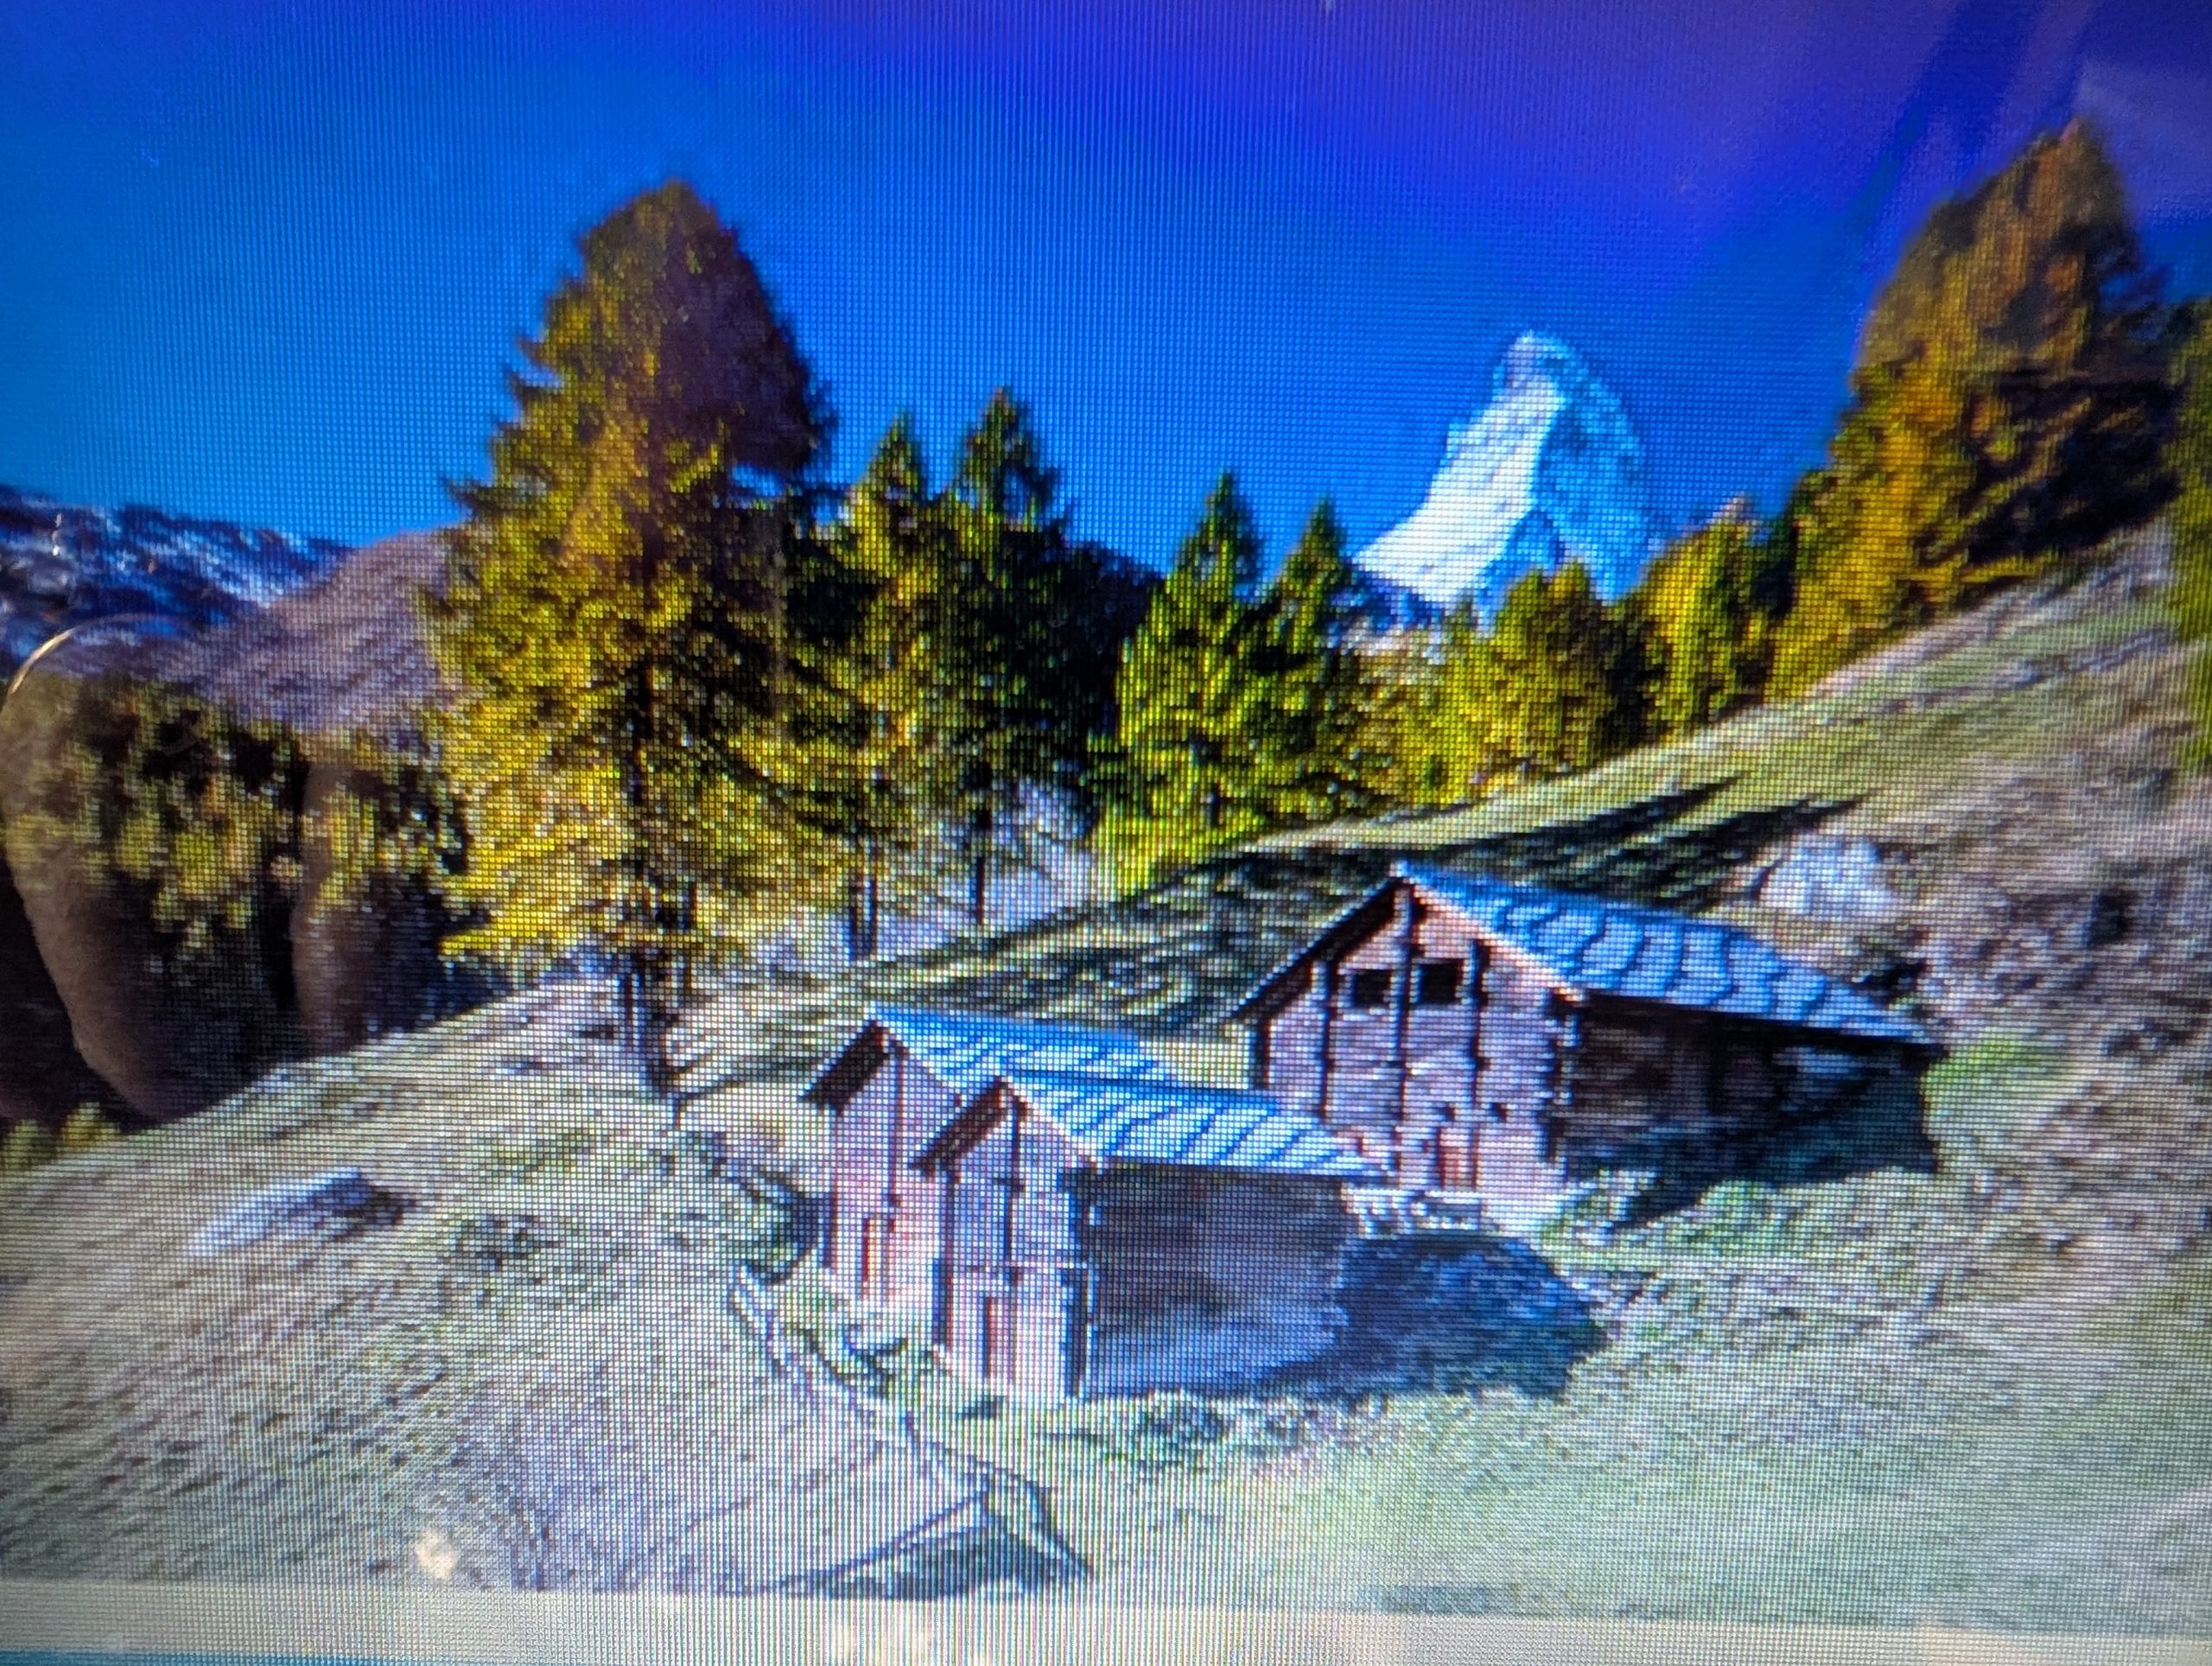
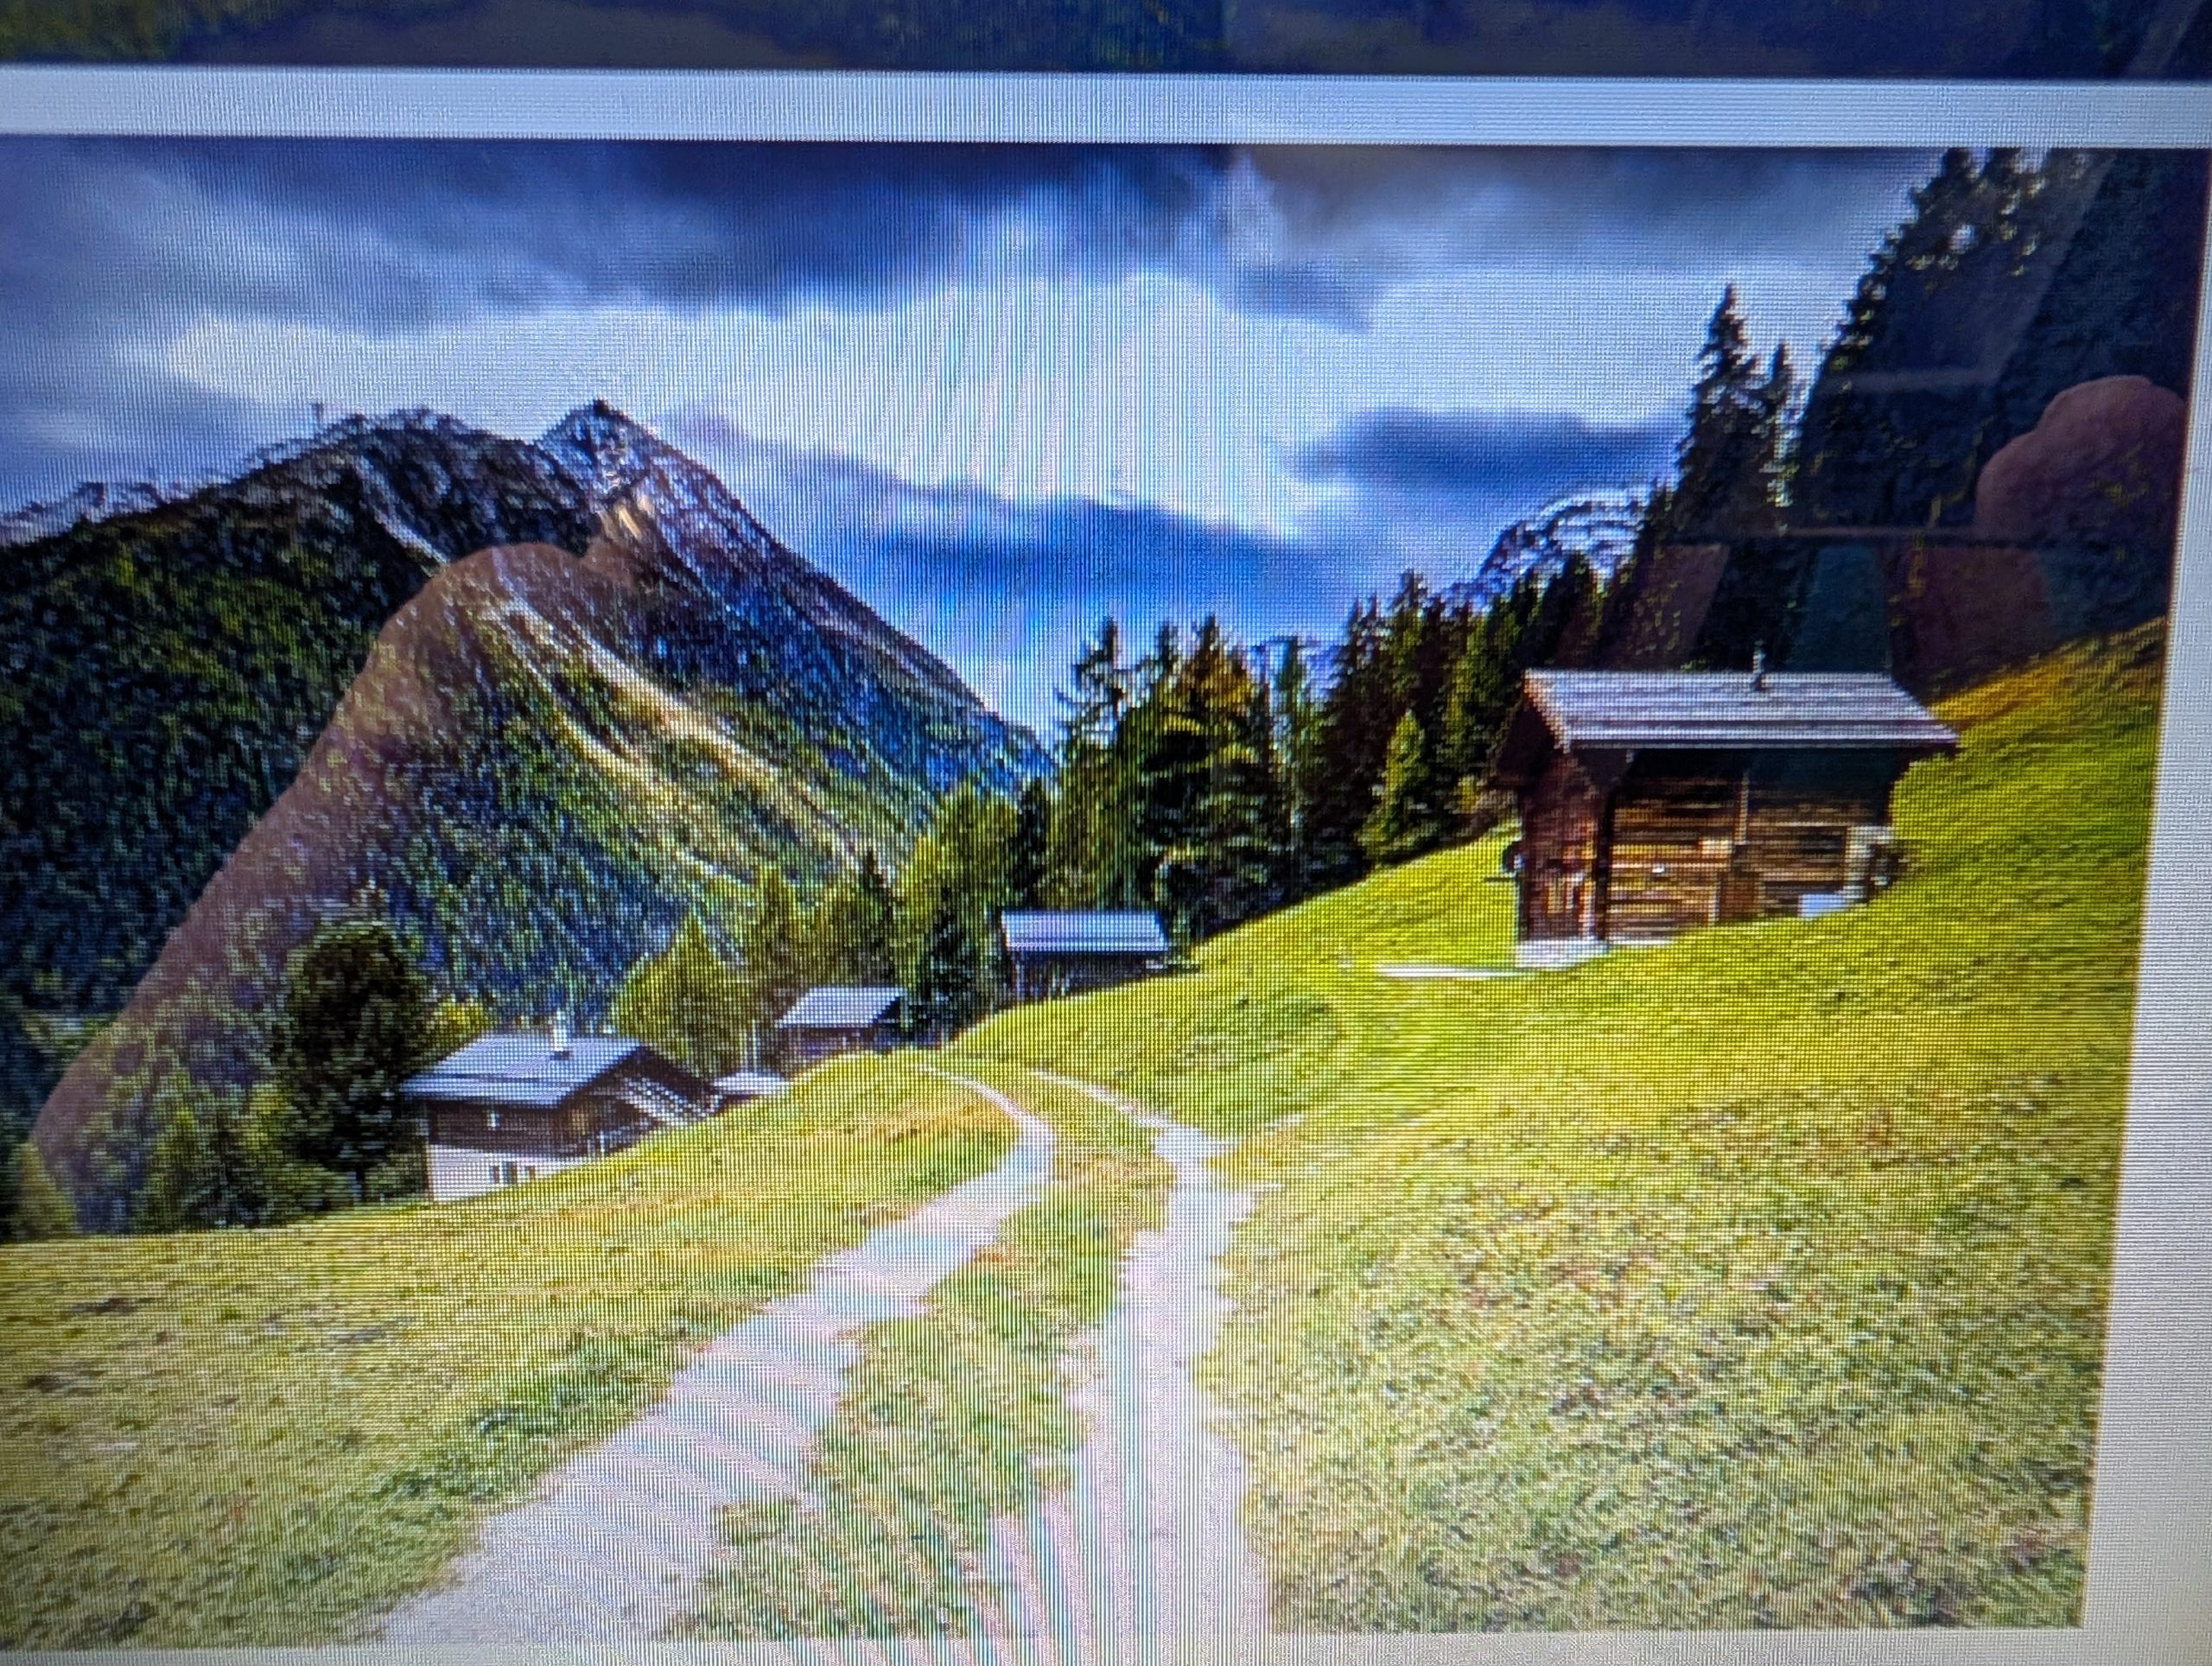
One of the more picturesque sites along the way was the abundance of little, dark wood huts located all over the hills. I later learned that long before the Swiss Alps became known as a skiing and hiking destination, ingeniously designed stilted barns sustained entire communities.
Blackened by the sun, stilted pitched-roof barns seemingly floated above the flower-strewn meadows, framed by the Matterhorn, Switzerland’s famed pyramidical peak. I also learned that the barns’ facades were festooned with weather-worn scythes, pitchforks, and even a toboggan-like contraption used to transport hay.
These centuries-old stadels (grain-storage barns) are an intrinsic part of the landscape and still dot this landlocked country’s high alpine valleys. Many are located in Zermatt, a resort town located in southern Switzerland’s Valais region, and the barns have borne witness to the monied ski and hiking destination’s humble beginnings as a farming community. Beyond their rural romanticism, these monuments to the past served a very practical purpose: to feed self-sustaining mountain communities.
The hotel Auberge du Manoir.
From our hotel.
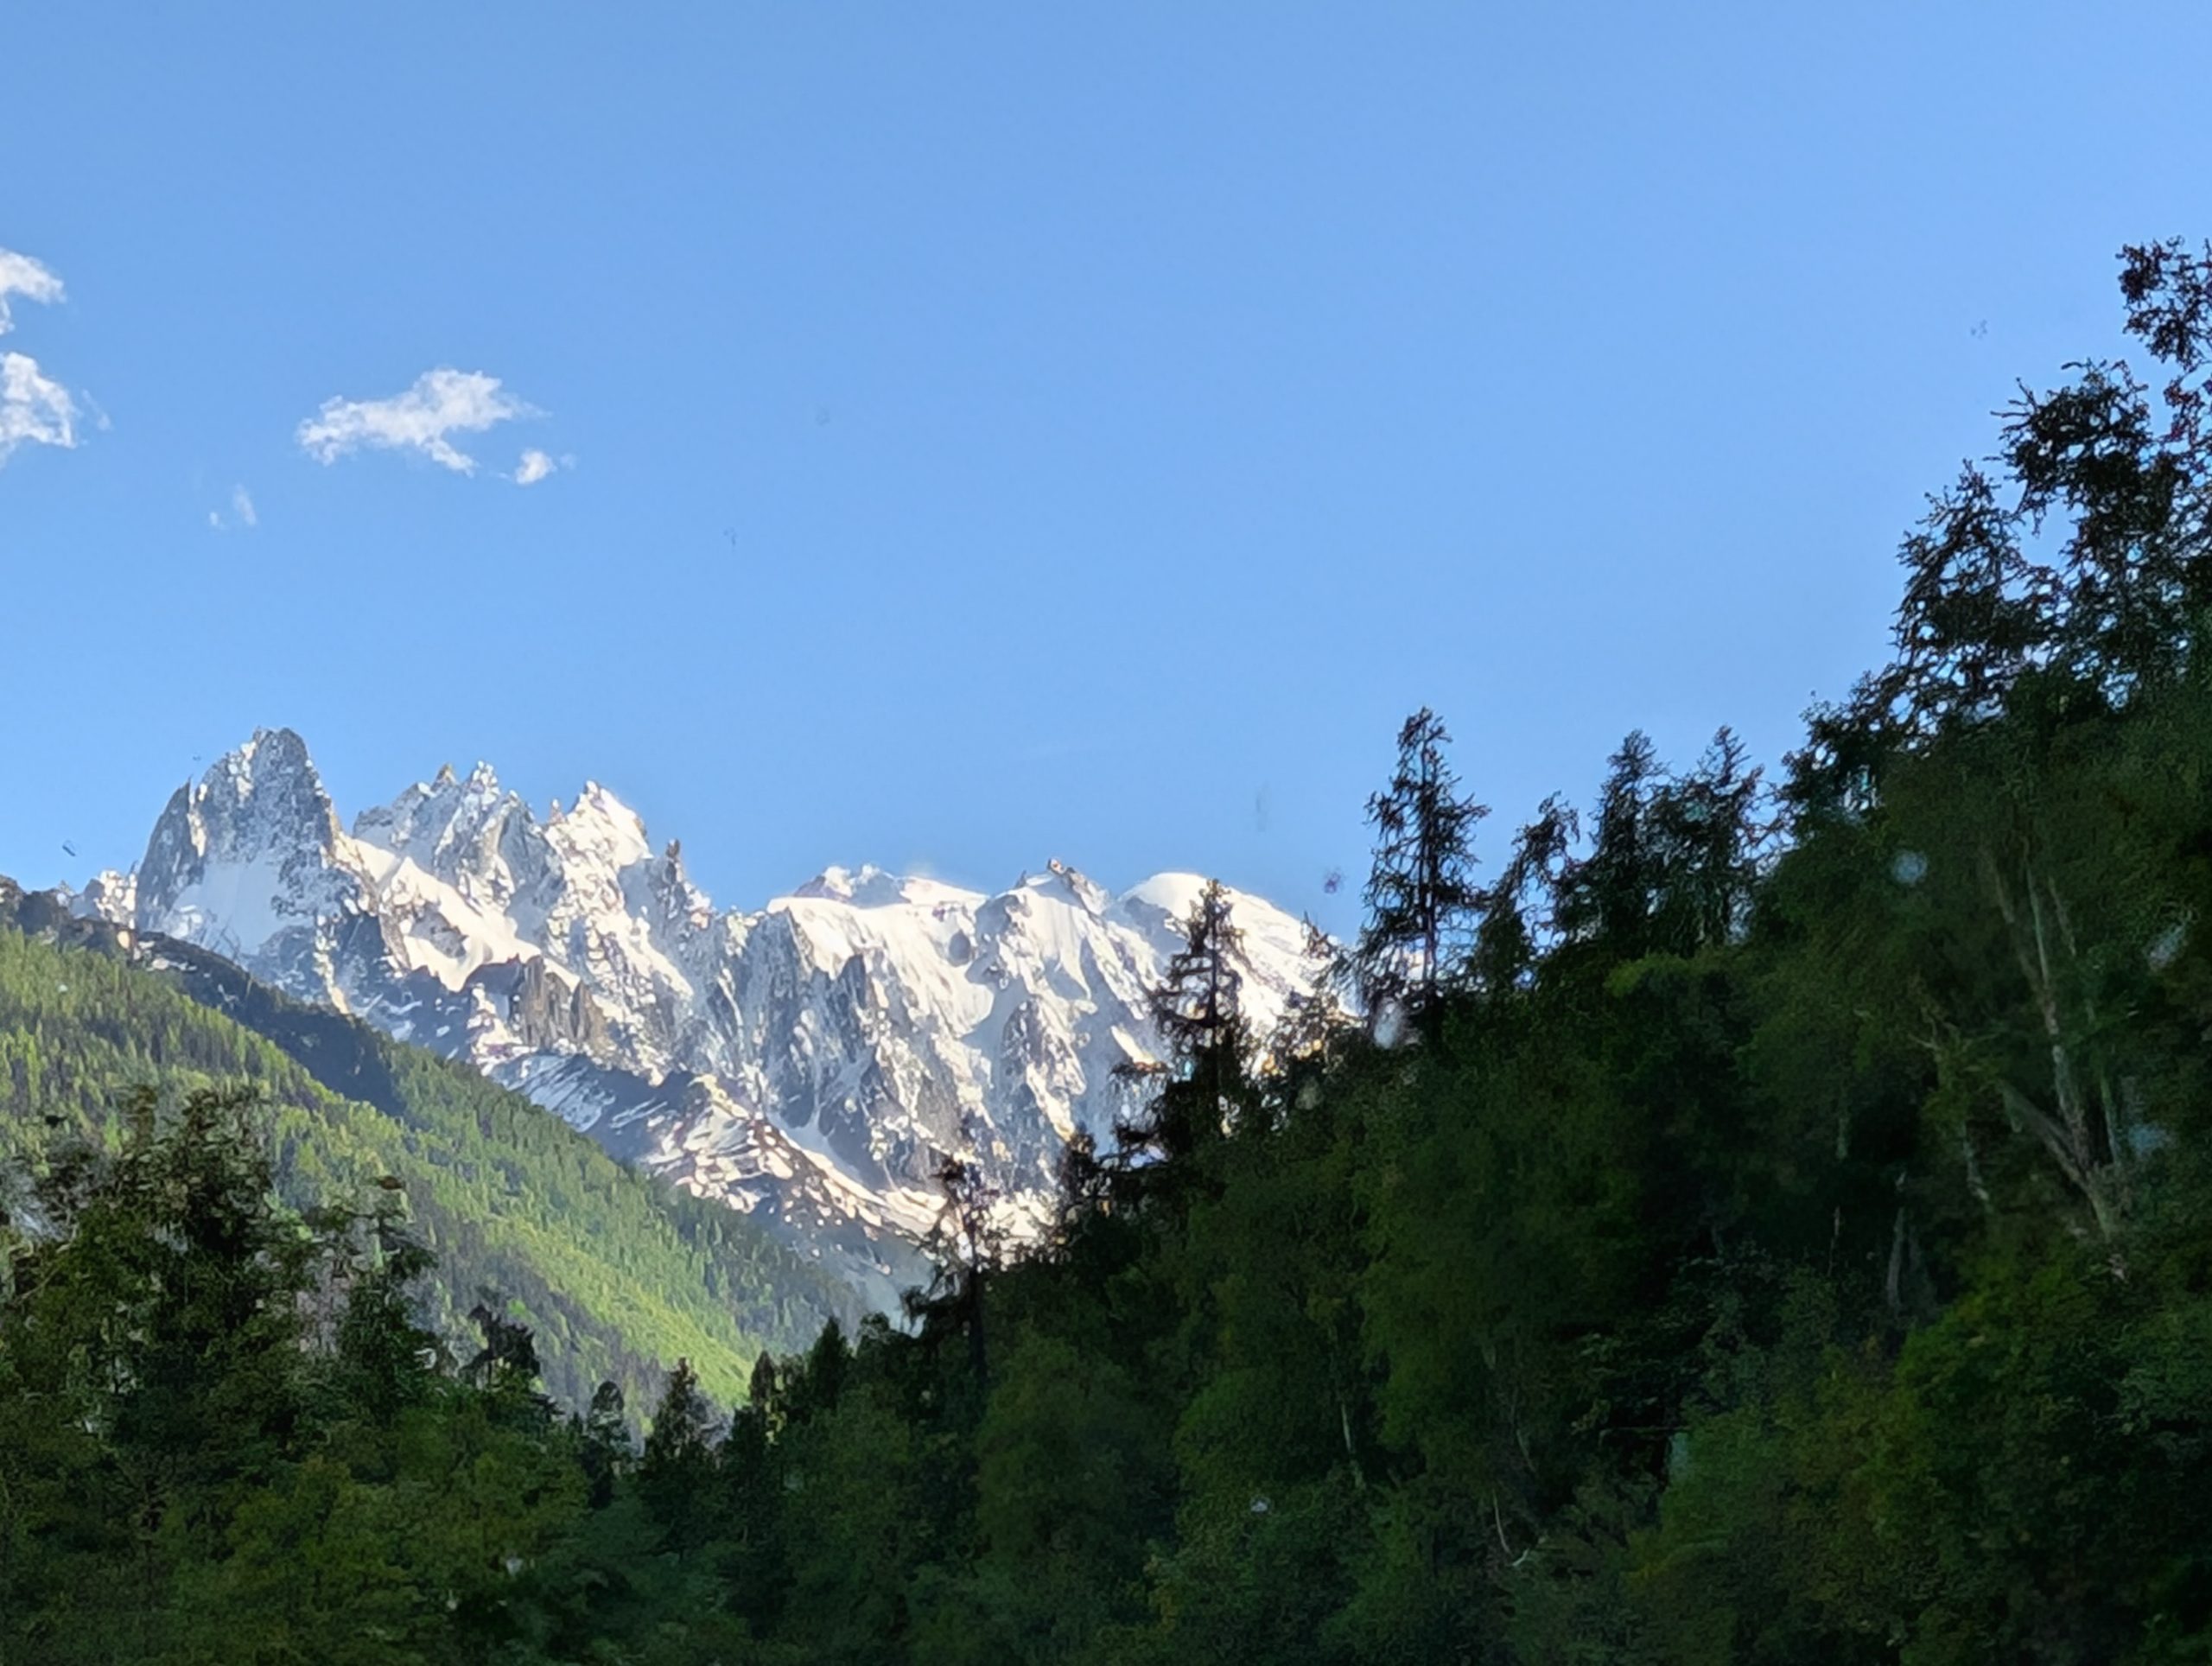
Another view of Mr. Blanc from near our hotel.
After checking in to our hotel, we promptly went in search of dinner.
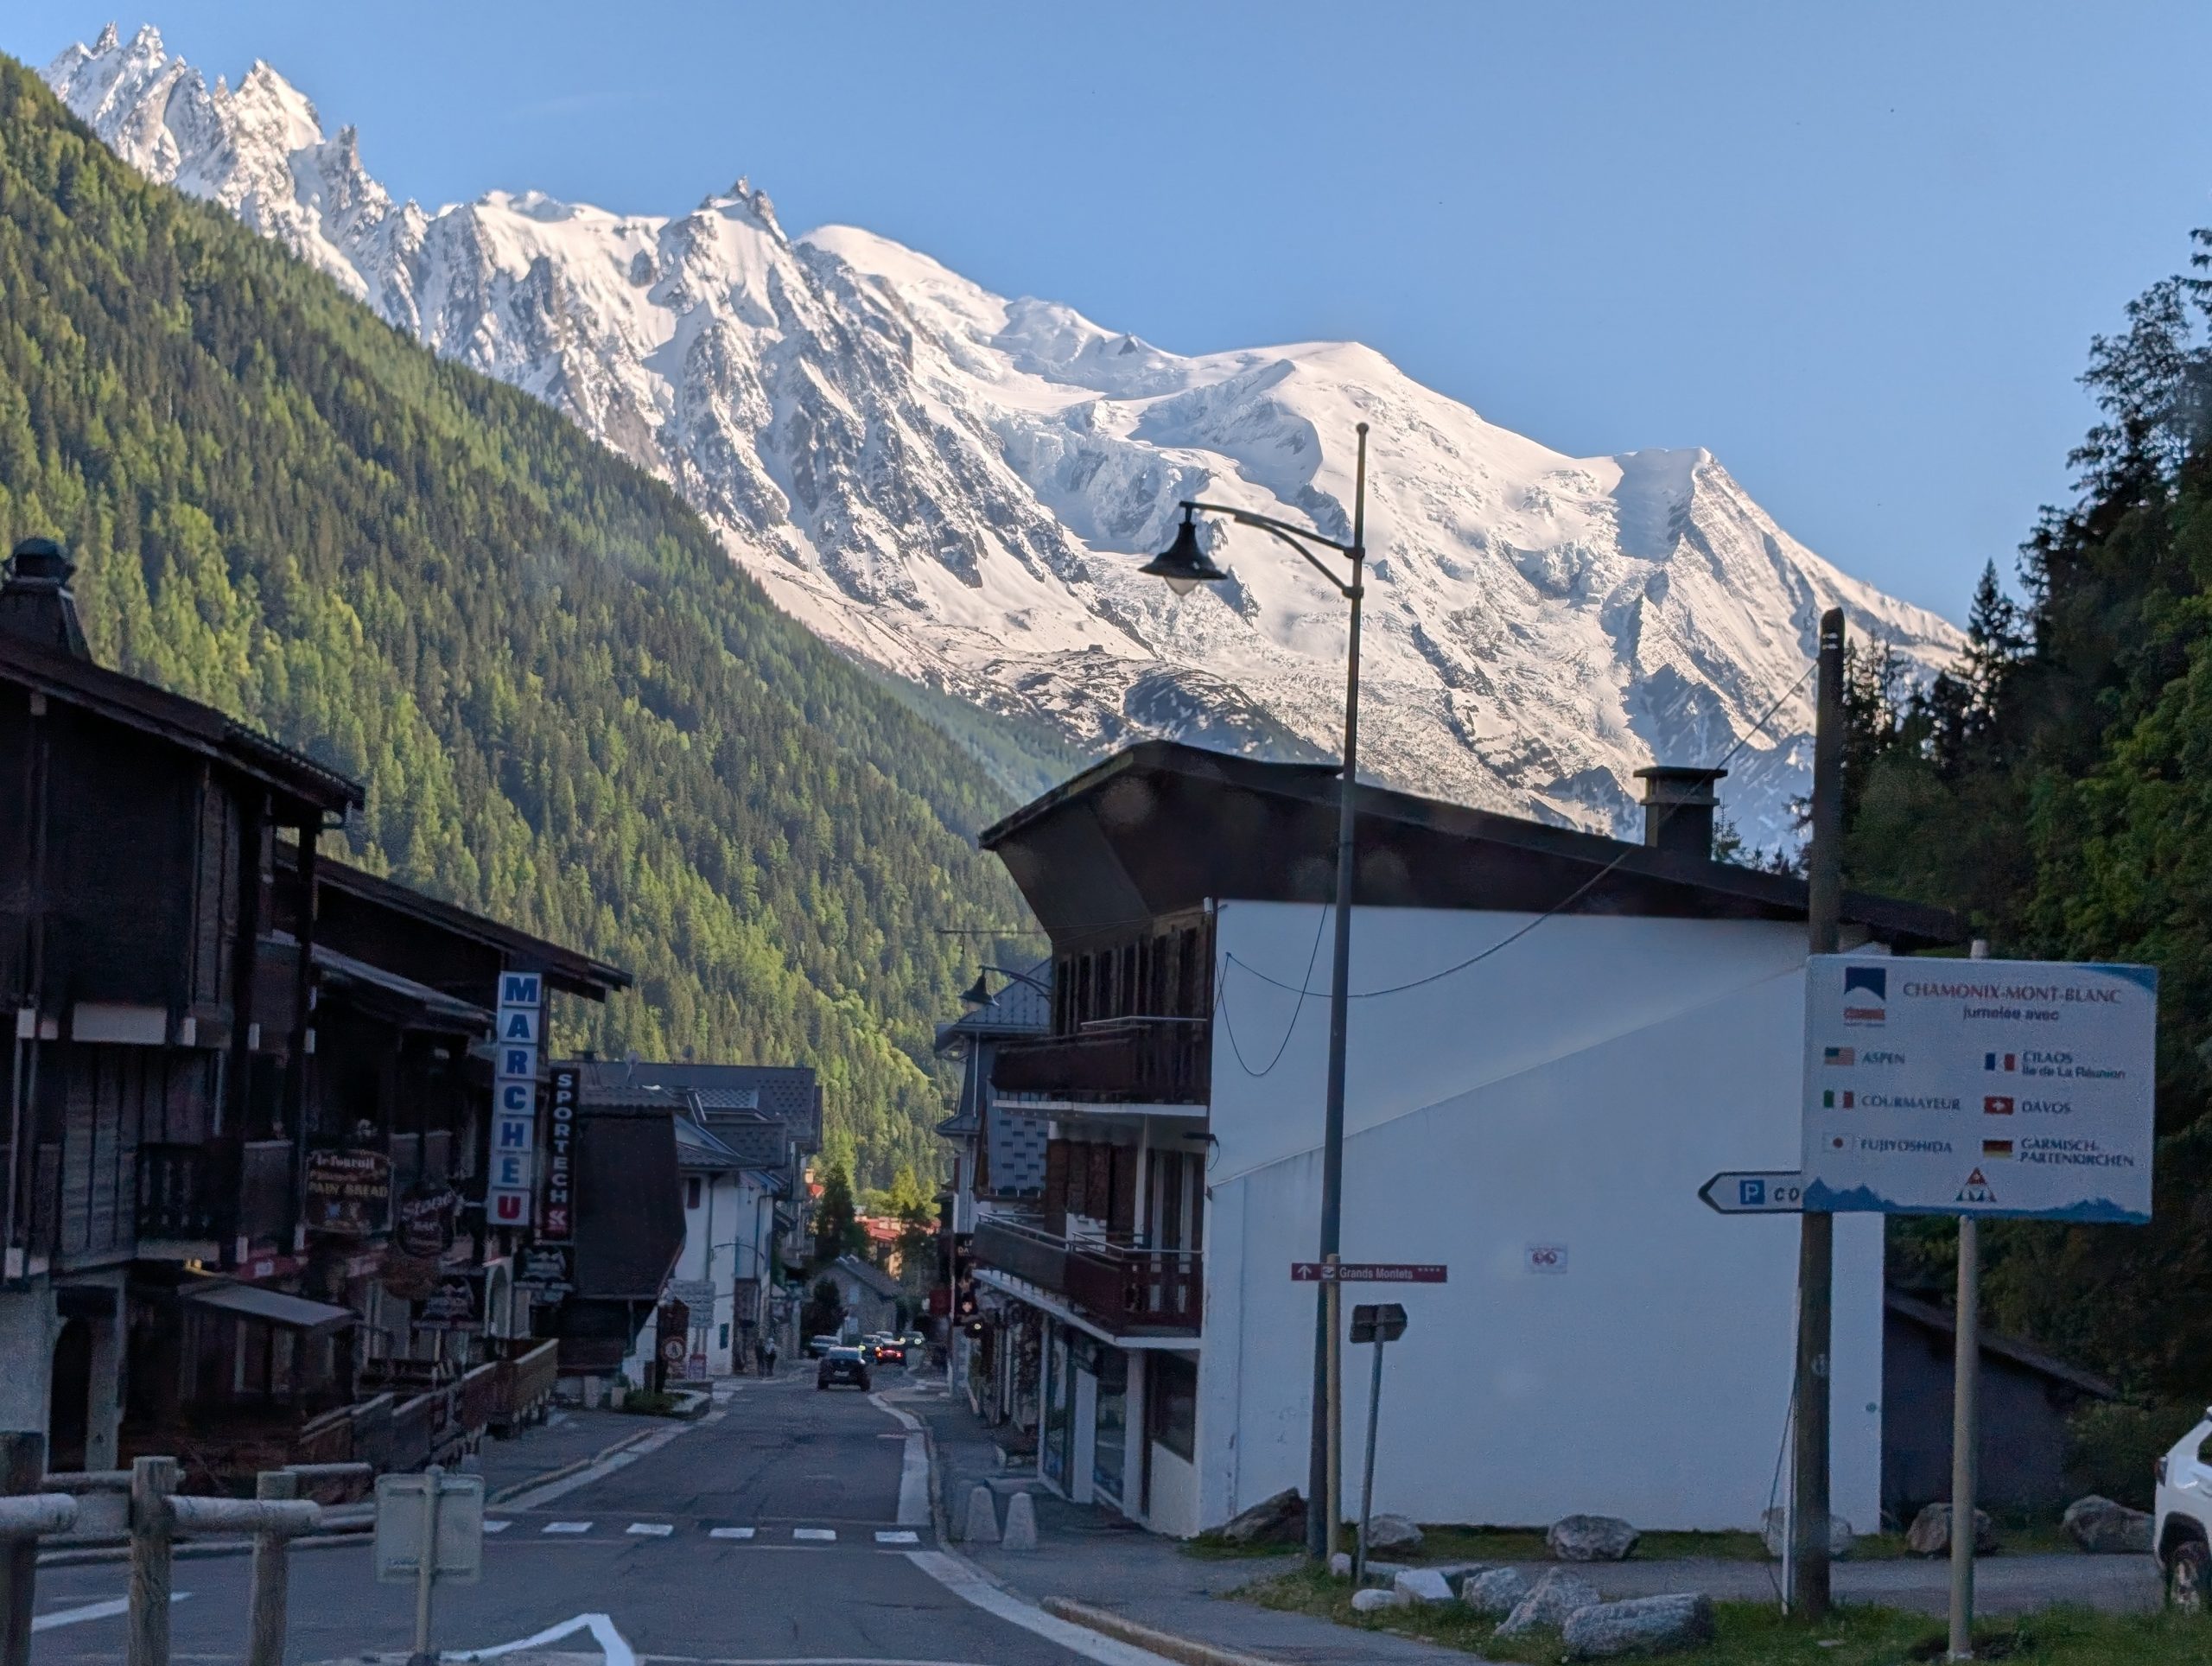
On our walk to dinner.
When we returned at about 8:30 pm, I went straight to bed. I was totally wasted. Andy steadfastly stayed awake until 9:30.
Friday, May 30, 2025 – Chamonix, France
Well, it isn’t every day you get to see the Matterhorn and Mt. Blanc both on the same day. But that is exactly what we were lucky enough to experience today.
After a nice breakfast, we jumped in our trusty Skoda and headed up valley back toward Martigny. After going around Martigny we drove up the Rhone valley hoping to see glimpses of the Matterhorn.
Driving in the Rhone Valley.
Finally, we stopped to ask Google where we could get the best view of this magnificent peak. Google told us we needed to go to Zermatt by way of a short 3-mile train ride. Which of course, appealed to us since Zermatt is a “no car” town. So, we parked in this huge 2100 space underground parking garage. And please note, the parking spaces were basically large enough for a motorcycle, but everyone was parking their cars in them anyway. (Thank you, God, for little cars!) Then off to buy our tickets for the train ride. This could not have been easier. (I mean really, if we can figure it out, anyone with even half a brain could figure it out!) Anyway, after about a 10-minute wait, we hopped aboard the train and set off on our arduous journey. Uphill all the way and through tunnels galore.
Now before I go any further writing about today’s adventure, I want to talk a bit about tunnels. We have never driven through so many tunnels before on any of our previous world-wide adventures. There are roughly 1300 tunnels and galleries with a total length more than 2000 km to be found in Switzerland alone. And new tunnels are continuing to be built. BTW, a gallery is one of several tunnels driven sequentially and in parallel.
Now of course, we didn’t drive all the tunnels and galleries Switzerland had to offer. But just enough to be genuinely impressed. And of course, the French and Italian Alps are replete with tunnels and galleries too. But back to today’s excursion.
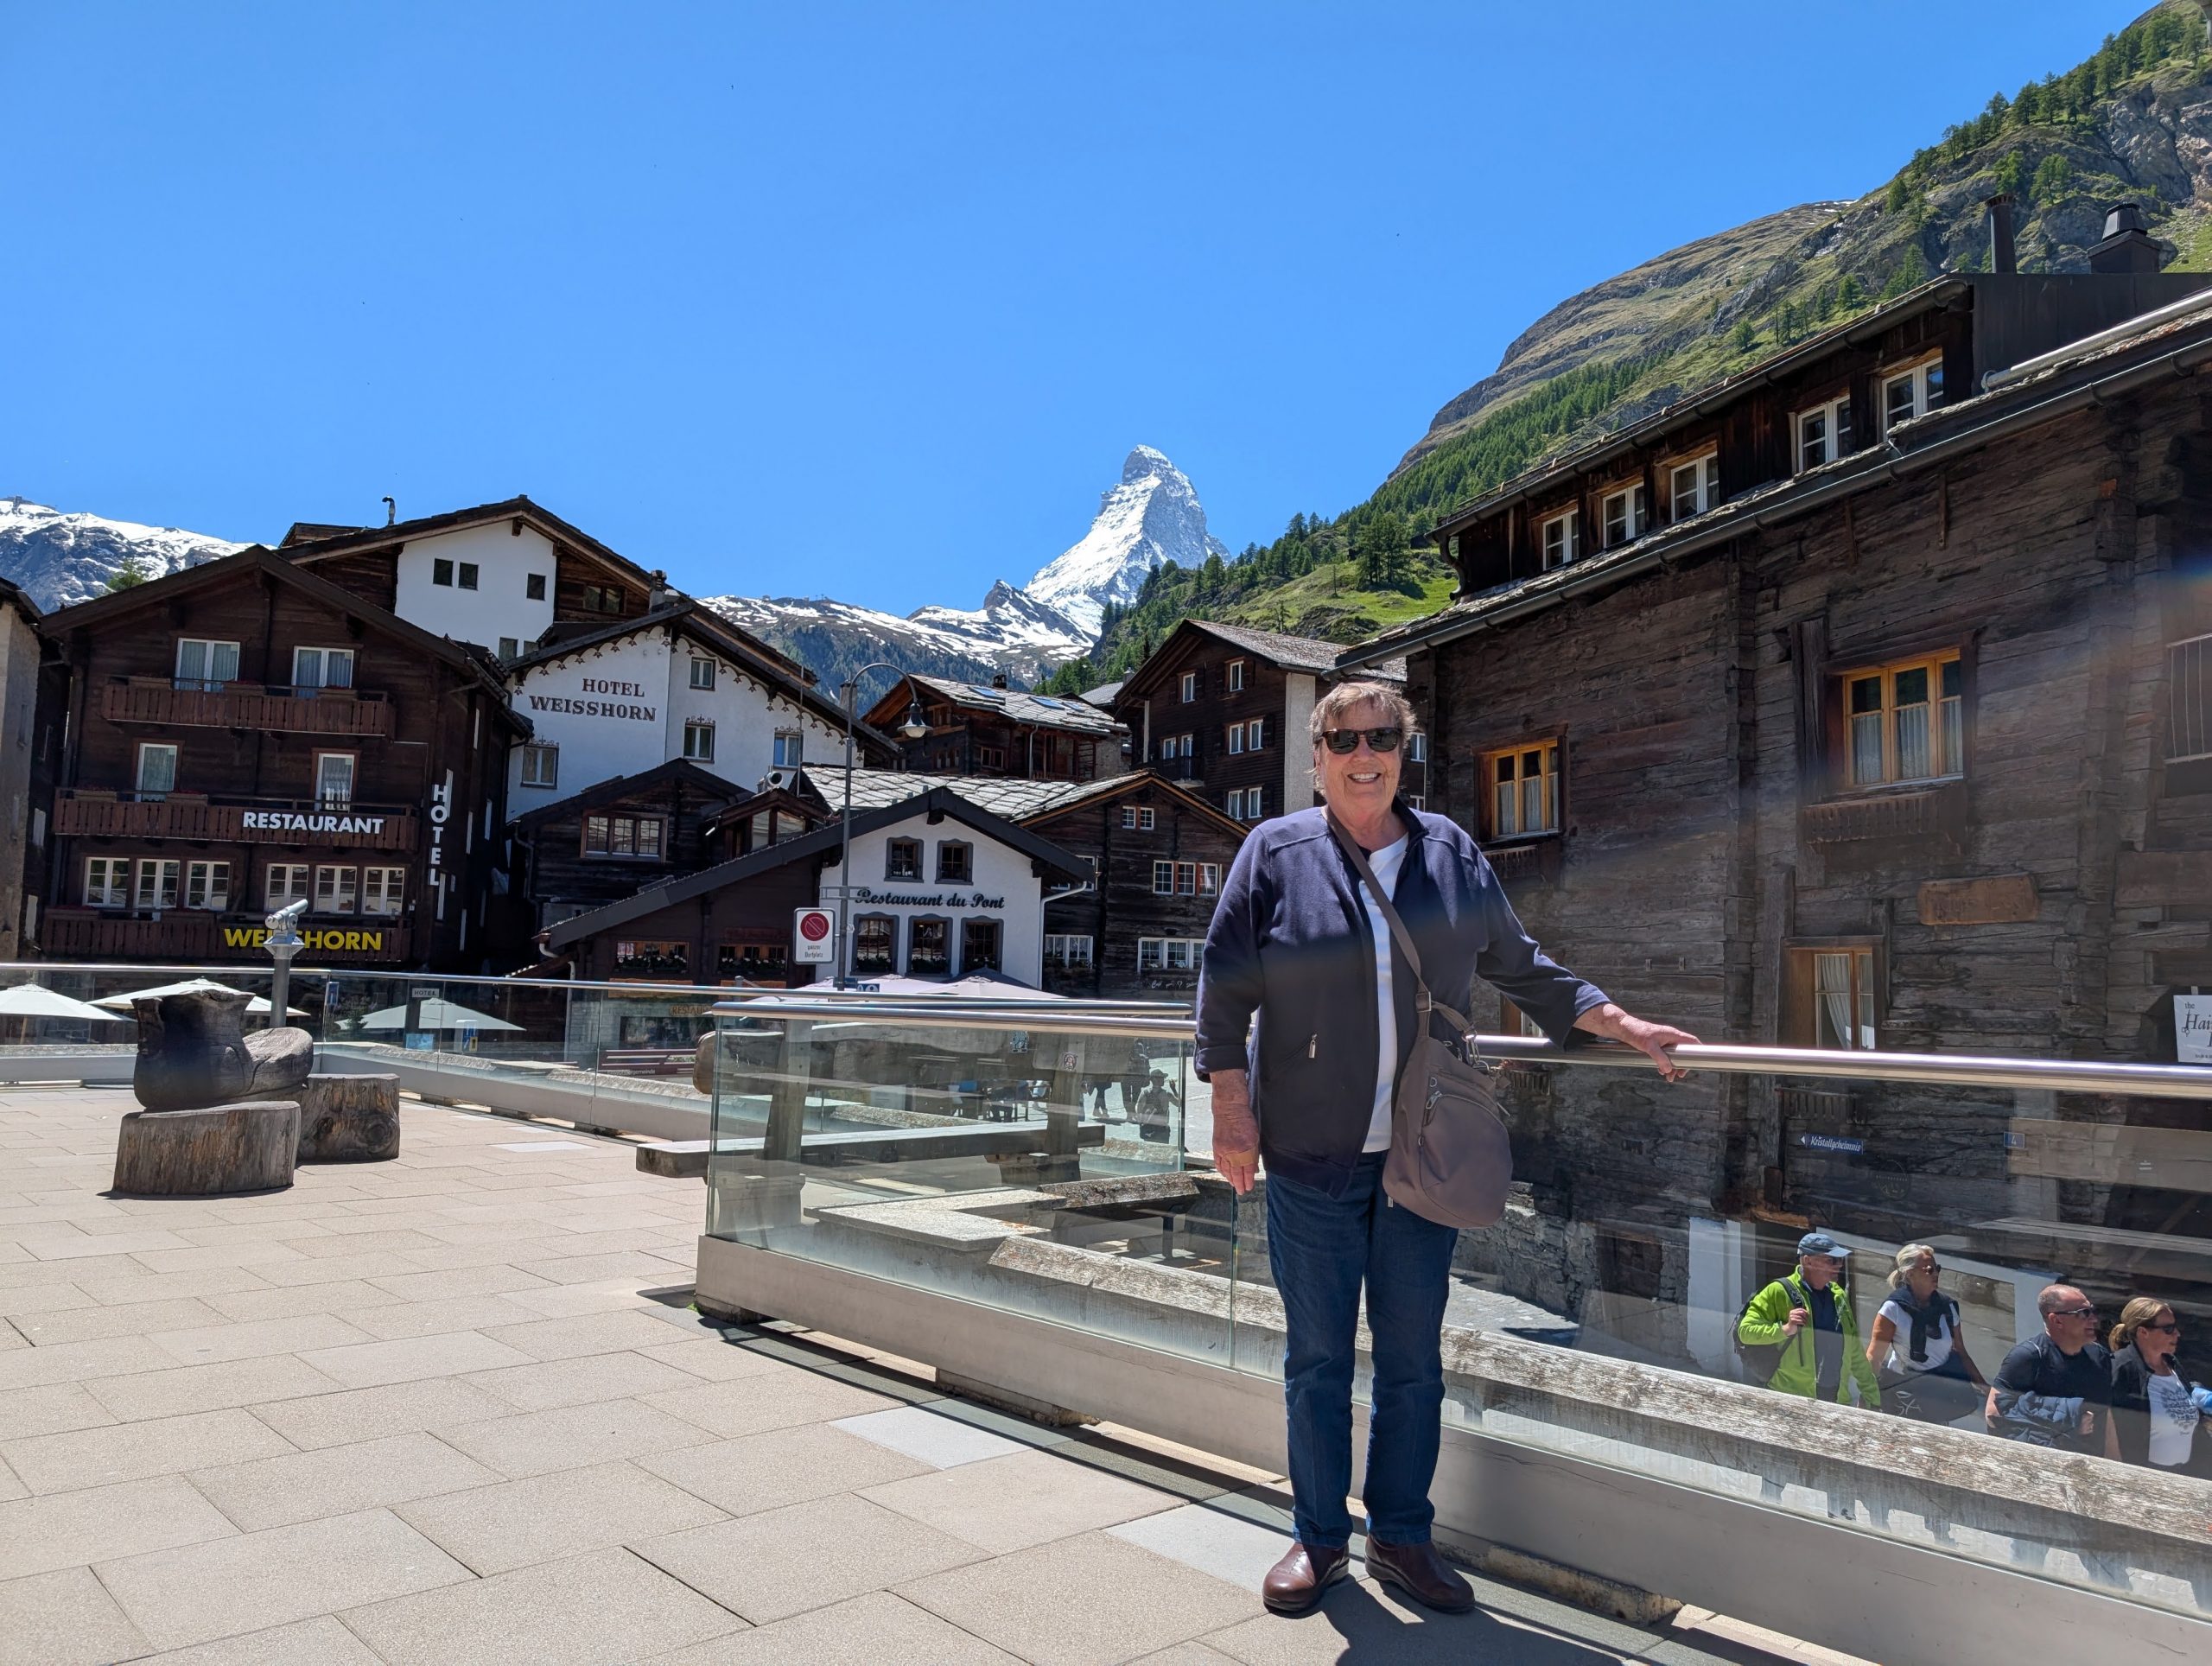
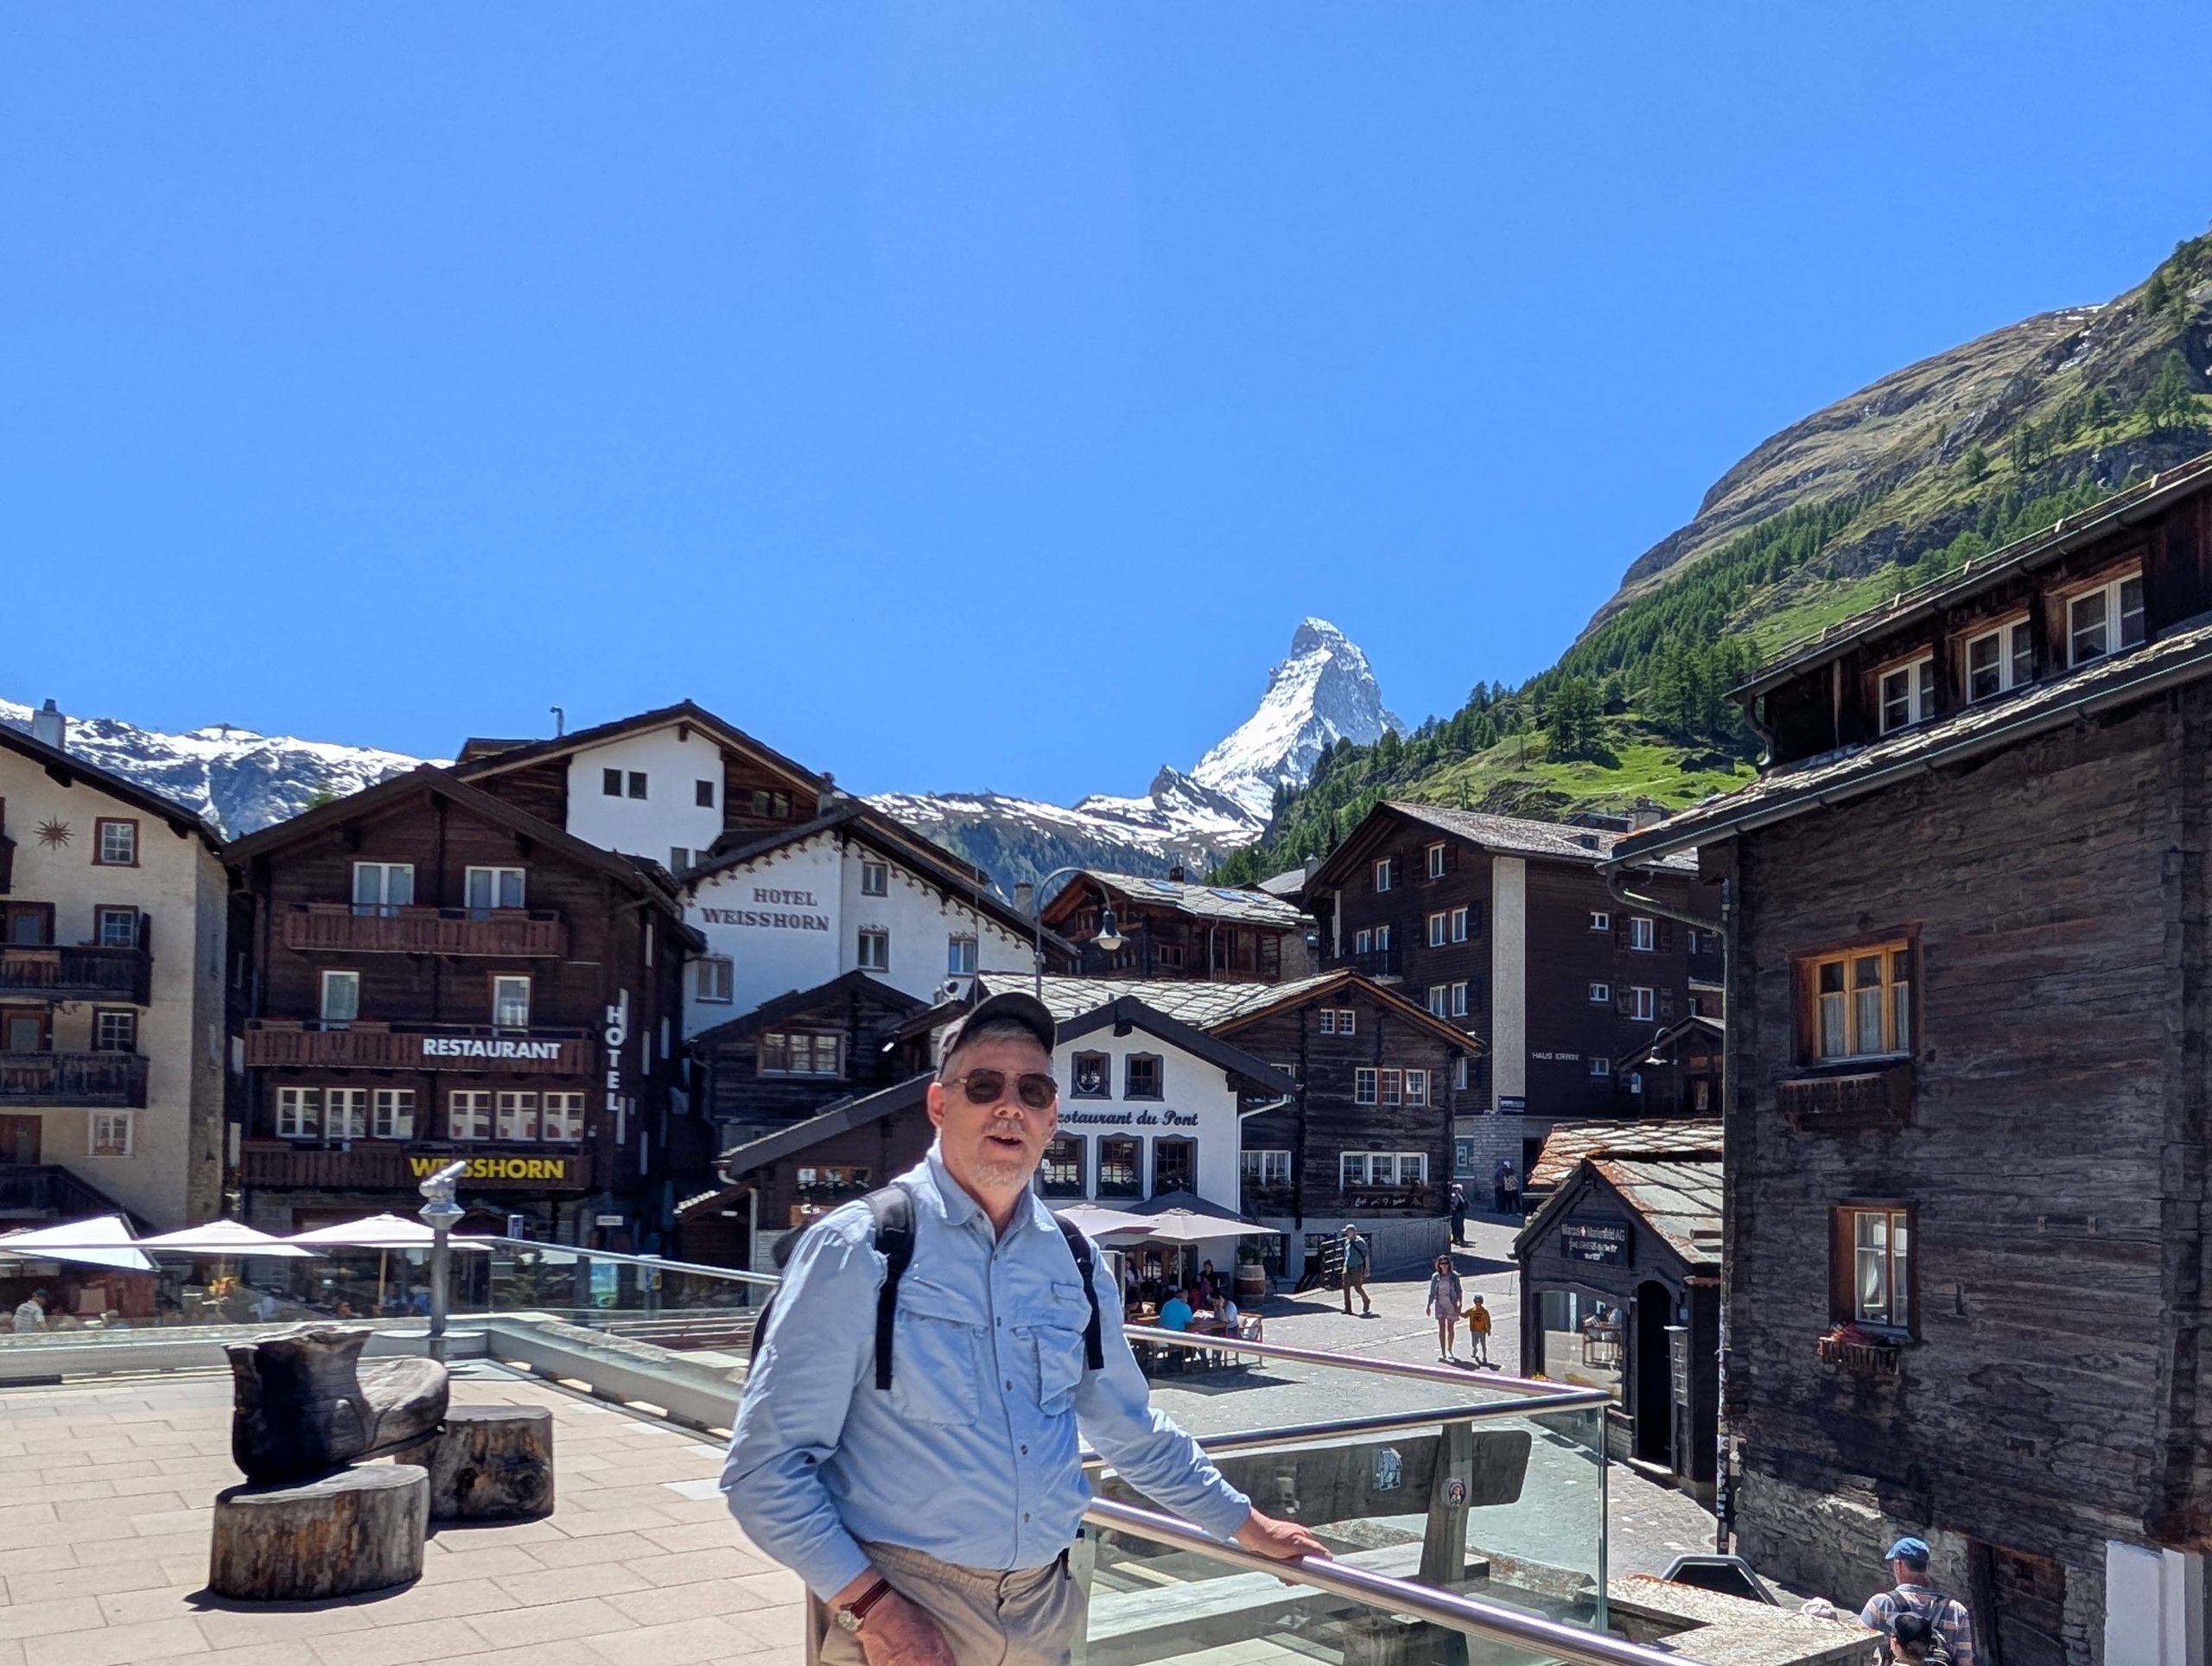
After we got off the train in Zermatt, we decided to try and find a view of the Matterhorn. I had assumed we would just get off the train and there it would be. Hardly. Zermatt is a booming tourist, ski resort, and mountaineering destination. But before we tried to find a viewing place, we needed sustenance, because by now it was 2:00 pm.
After a shared focaccia and a beer for me and some wine for Andy, we started walking toward the mountain through hordes of people. I was about to give up when just around the corner we came to a place that looked promising. And what a view we found. And just a perfect day. No clouds, which is quite unusual. Apparently, this amazing natural wonder likes to hide from the viewing public and is often shrouded in clouds. But not today. The God of beautiful mountains obviously understood that we had come a long way and took pity on us.
The booming town of Zermatt, Switzerland.
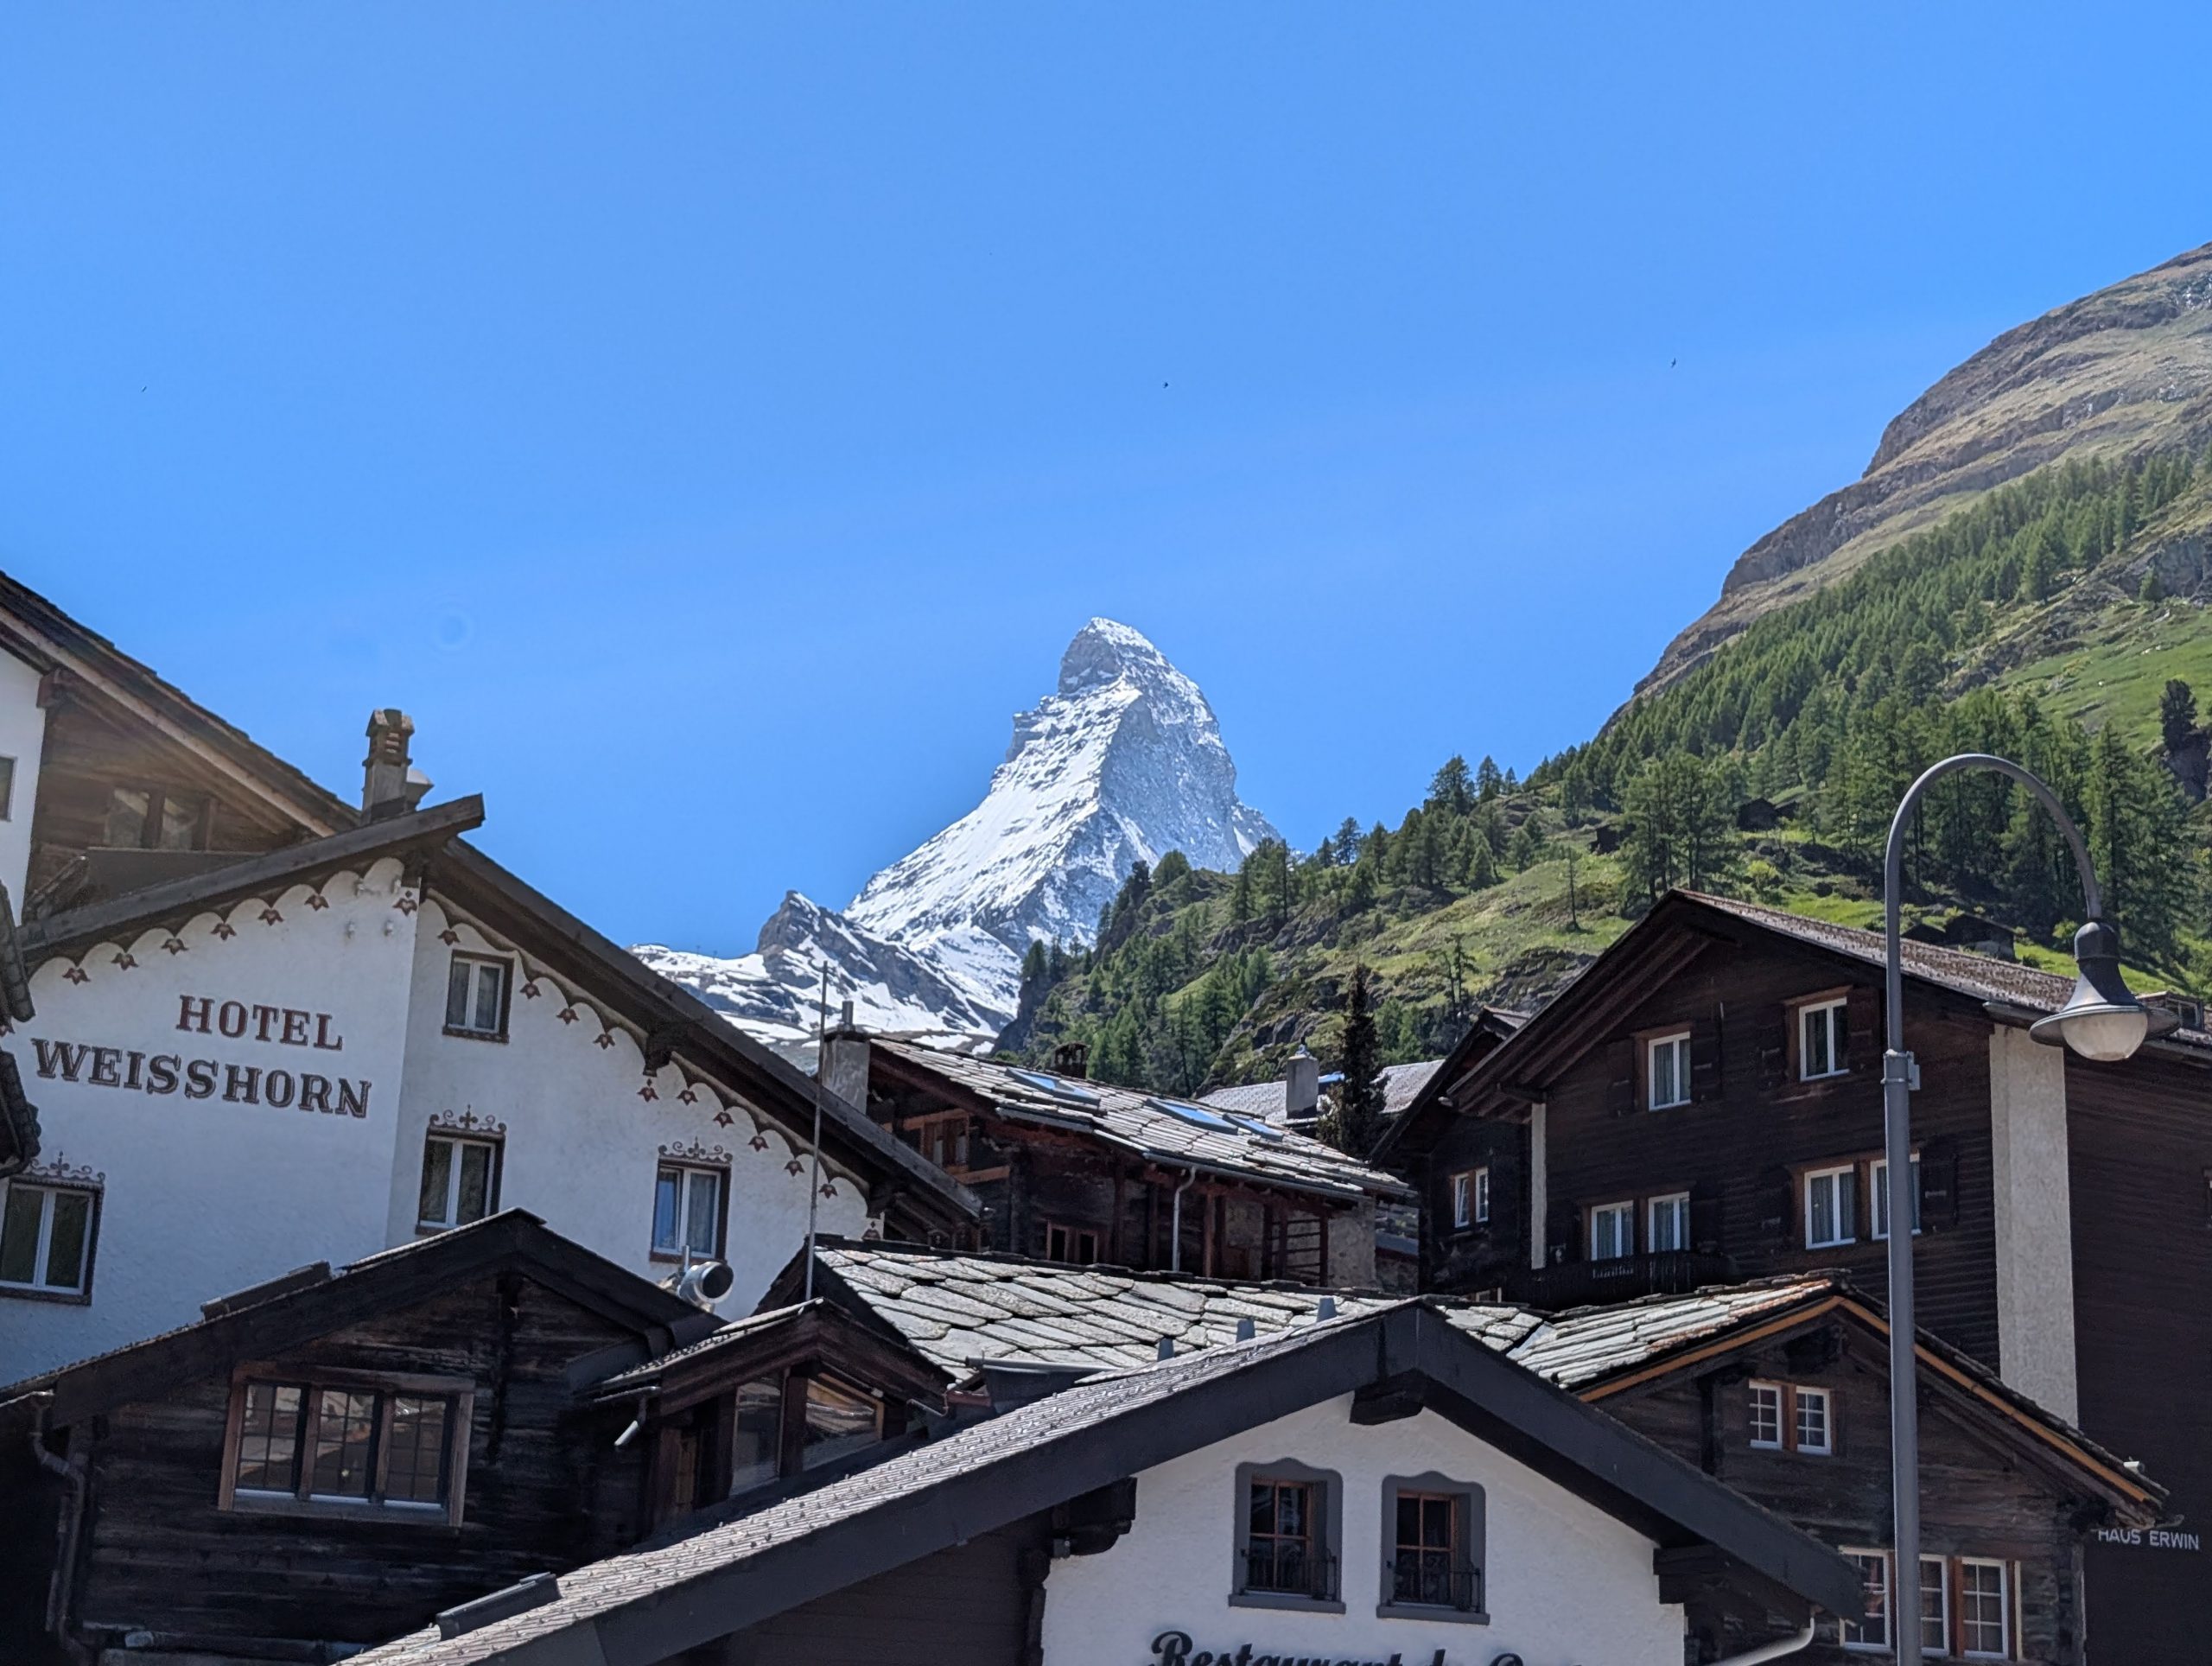
We found the Matterhorn!
A little closer view.
Wonderful view of the Matterhorn from the graveyard attached to the Parish Church of St, Mauritius.
So, after grinning ear to ear at each other, we decided to walk back to the train. But first gelato to help us stay cool on our way back down to the train. Because yes, it was quite warm.
So, back on the train and back in our car for the reverse trip. Nice sights along the way.
And then once again, coming into Chamonix, Mt. Blanc was out in all its glory to welcome us back safely.
Another thing to know. There are more bicycles on the roads than cars. Not really, but it seems like it. And these are narrow, windy roads. My fear was that we would come around a bend and run into a bicyclist because there is absolutely no shoulder and many with cement block walls. Crazy. And many riders without helmets. Even crazier!
But we made it back safely and without injury to ourselves or any others.
Picture from our walk to dinner.
Another view of Mt. Blanc from close to our hotel.
Once back, it was off to enjoy a fabulous caprese salad and four cheese pizza. Then a leisurely stroll back to our hotel. What a wonderful day in the Alps.
Saturday, May 31, 2025 – Chamonix, France
Today we decided to go through the Mont-Blanc tunnel into Italy and see if we could find the valley that we had loved so much on our first trip to Italy in 2000. And of course, neither of us could remember the name of the valley.
But first, some information about Mont-Blanc tunnel. The Mont Blanc Tunnel is a little over 7 miles long and costs E54.80 one way. YIKES! Connecting France and Italy, this very pricey tunnel has been dubbed “the most expensive” toll tunnel in Europe. Ya think! Holly Molly! This unique driving experience links Chamonix, France with Courmayeur, Italy.
The road through this amazing tunnel is one of the major trans-Alpine transport routes, transporting as much as one-third of Italy’s freight to Northern Europe. So, were there lots of trucks? You bet your sweet bippy. I’d hazard a guess it was a one-to-one ratio. One truck to one car. And no bicycles. So, now we are on the other end of the tunnel, and now in Italy we headed North up a side valley.
Just a lovely road along the way.
And then road construction which looked a bit dicey. Oh well, grin and bear it!
Oh, how I wish we could park our trailer here. Of course, no such things as hookups. Not even electricity or water. Much less septic. As I was taking a picture, a lady walked past me in her bathrobe. Towel wrapped around her hair. She had obviously just taken a shower and was headed back to her trailer. Oh, the joys of roughing it!
But, oh the vistas.
Takes your breath away……..
After much uphill and winding road, we eventually reached the small commune of Bionaz where we stopped for lunch. Since we were basically at the end of the road, we turned around and decided to take the Grand St. Bernard tunnel leading to Martigny and back to Chamonix. It may sound like a quick little adventure, but we left at 11:00 am and didn’t get back to Chamonix until after 6:00 pm. You simply can’t go quickly from place to place when you are in the Alps. All the roads except for the main tunnels are slow, steep, two lanes, and very, very windy. And you are always being passed by motorcycles and slowing down for bicyclists. But this entire area is overwhelmingly picturesque. It’s like every way you look; a picture should be taken. Impossible of course, but hundreds of postcards could have been made from just our drive today.
When we got back to our room, we decided to head out immediately for dinner. We found a nice little café and shared a warm sandwich. It was basically a thick piece of toasted country bread about 9-inches long and 4 inches wide, topped with cream cheese, thinly sliced ham, rounds of warm fresh Chevre cheese, and kalamata olives. This lovely sandwich was served with a small green salad with olive oil and balsamic vinegar and topped with different types of raisins. Amazingly delicious. And a perfect size for the two of us to share.
Then back to our room for me to write and hopefully stay awake long enough to plan tomorrow’s adventure.
All and all, another great day in the Alps. And today was amazing in the fact that we were in three different countries. France, Italy, and Switzerland. Bring it on is all I have to say!
Sunday, June 1, 2025 – Chamonix, France
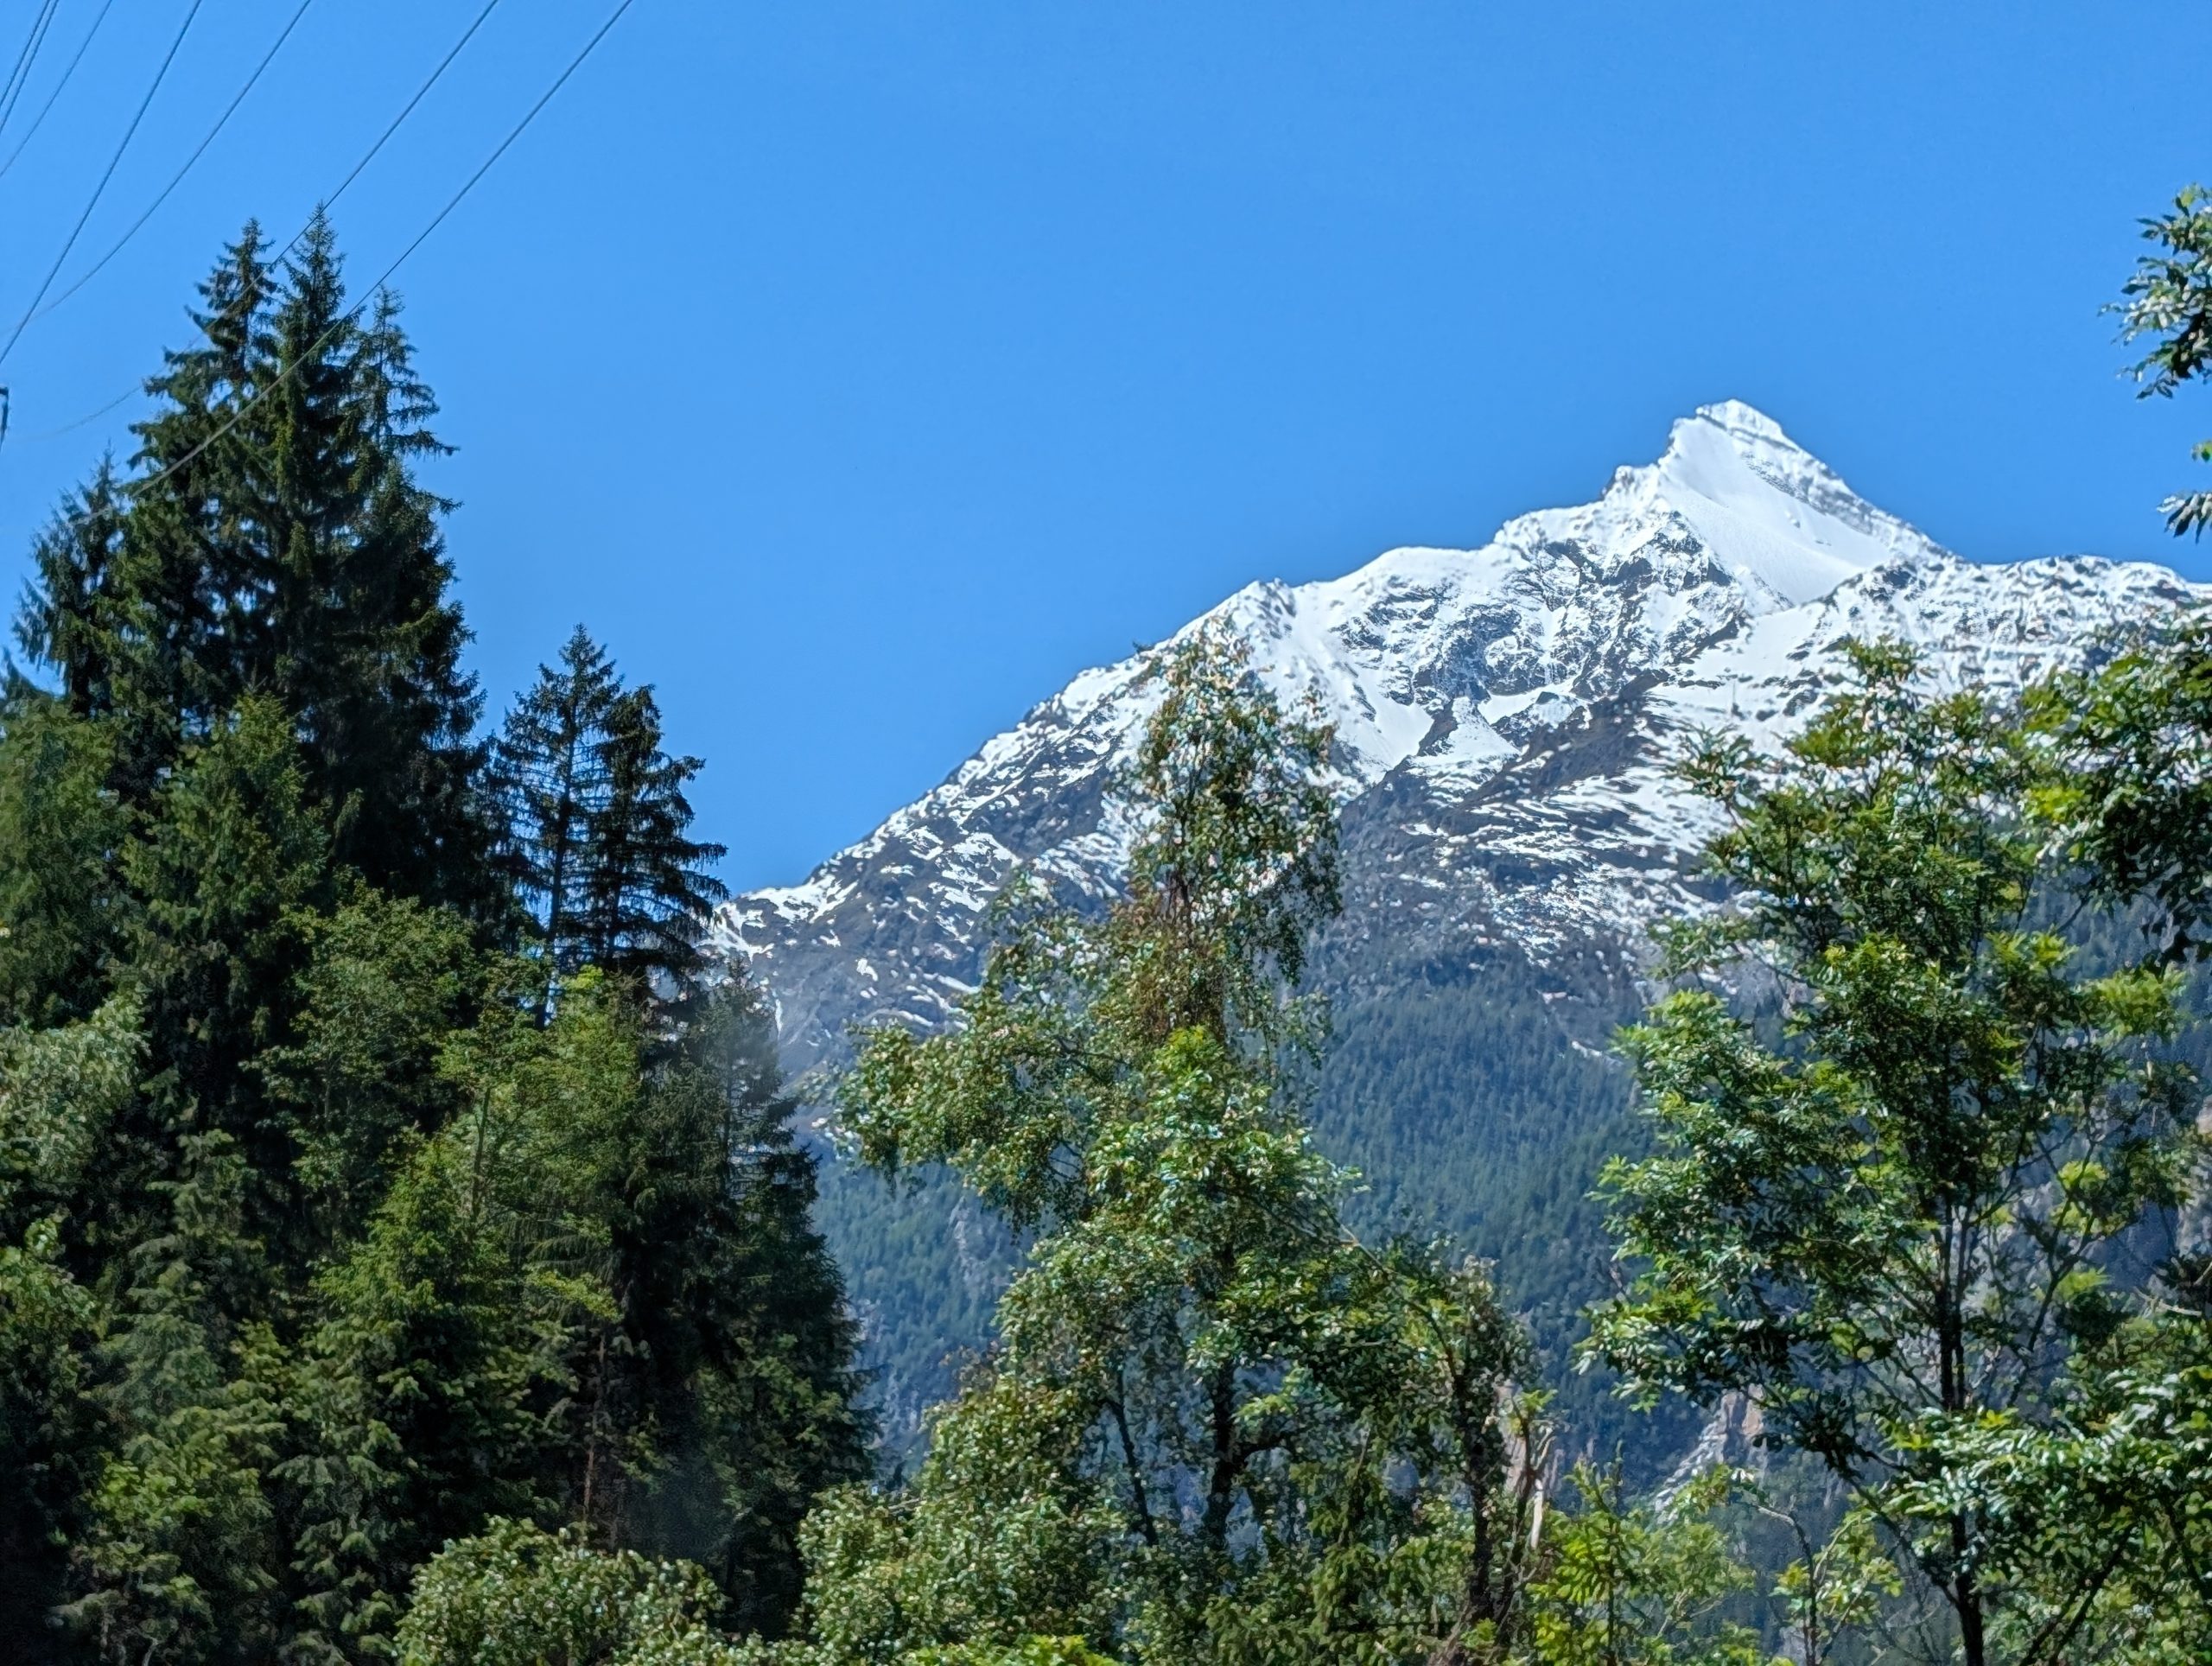
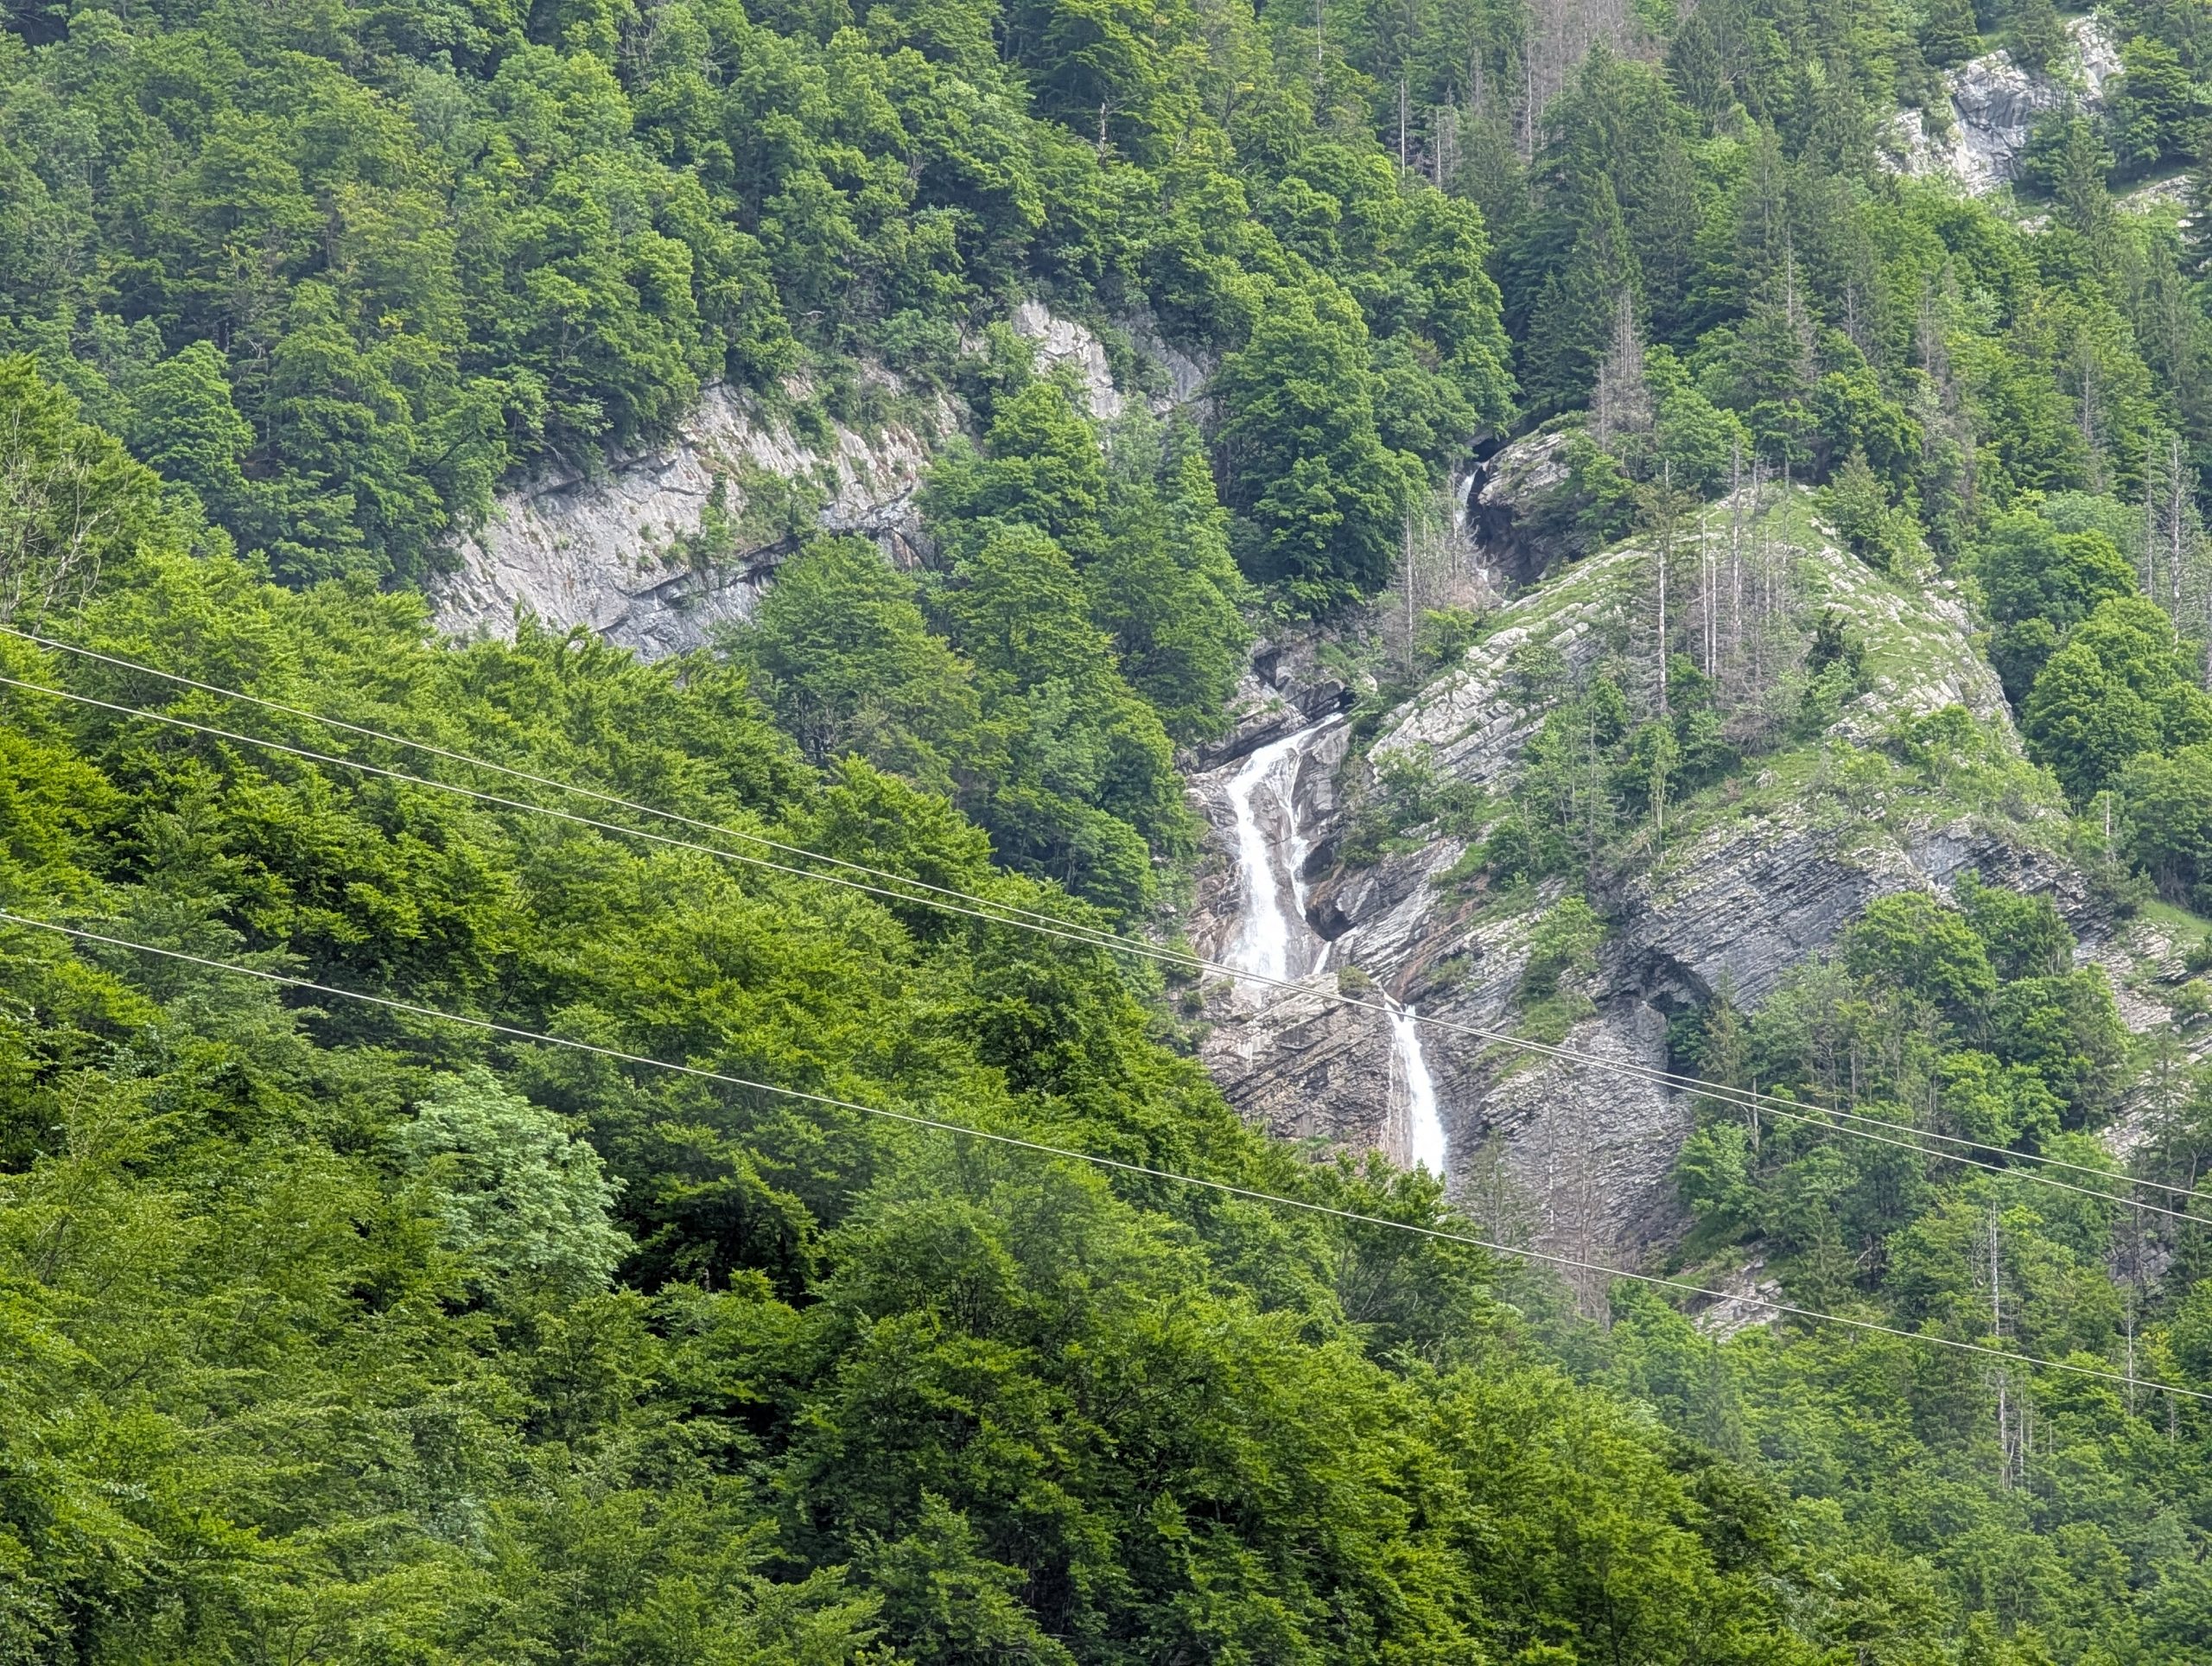
After another fine breakfast we were in our car by 10:00 am. Today we were heading west out of Chamonix towards Geneva, Switzerland. We wanted to get off at Cluses but couldn’t get off there so continued to Bonneville. From there we backtracked and then drove up into the hills to the north to the town of Taninges. We then turned east and proceeded to Sixt-Fer-a-Cheval. And all along the way, steep sided mountains and many waterfalls.
Andy stopping to check out waterfalls.
Waterfalls every way you looked.
Lunch by a river.
Yeah pizza! And beer of course!
And while dining, happy rafters coming ashore.
Then back in the car and on to Cirque du Sixt-Fer- à -Cheval.
We then drove to the end of the road which brought us to the Cirque du Sixt-Fer- à -Cheval. (A cirque is a half-open steep-sided hollow at the head of a valley or on a mountainside, formed by glacial erosion.)
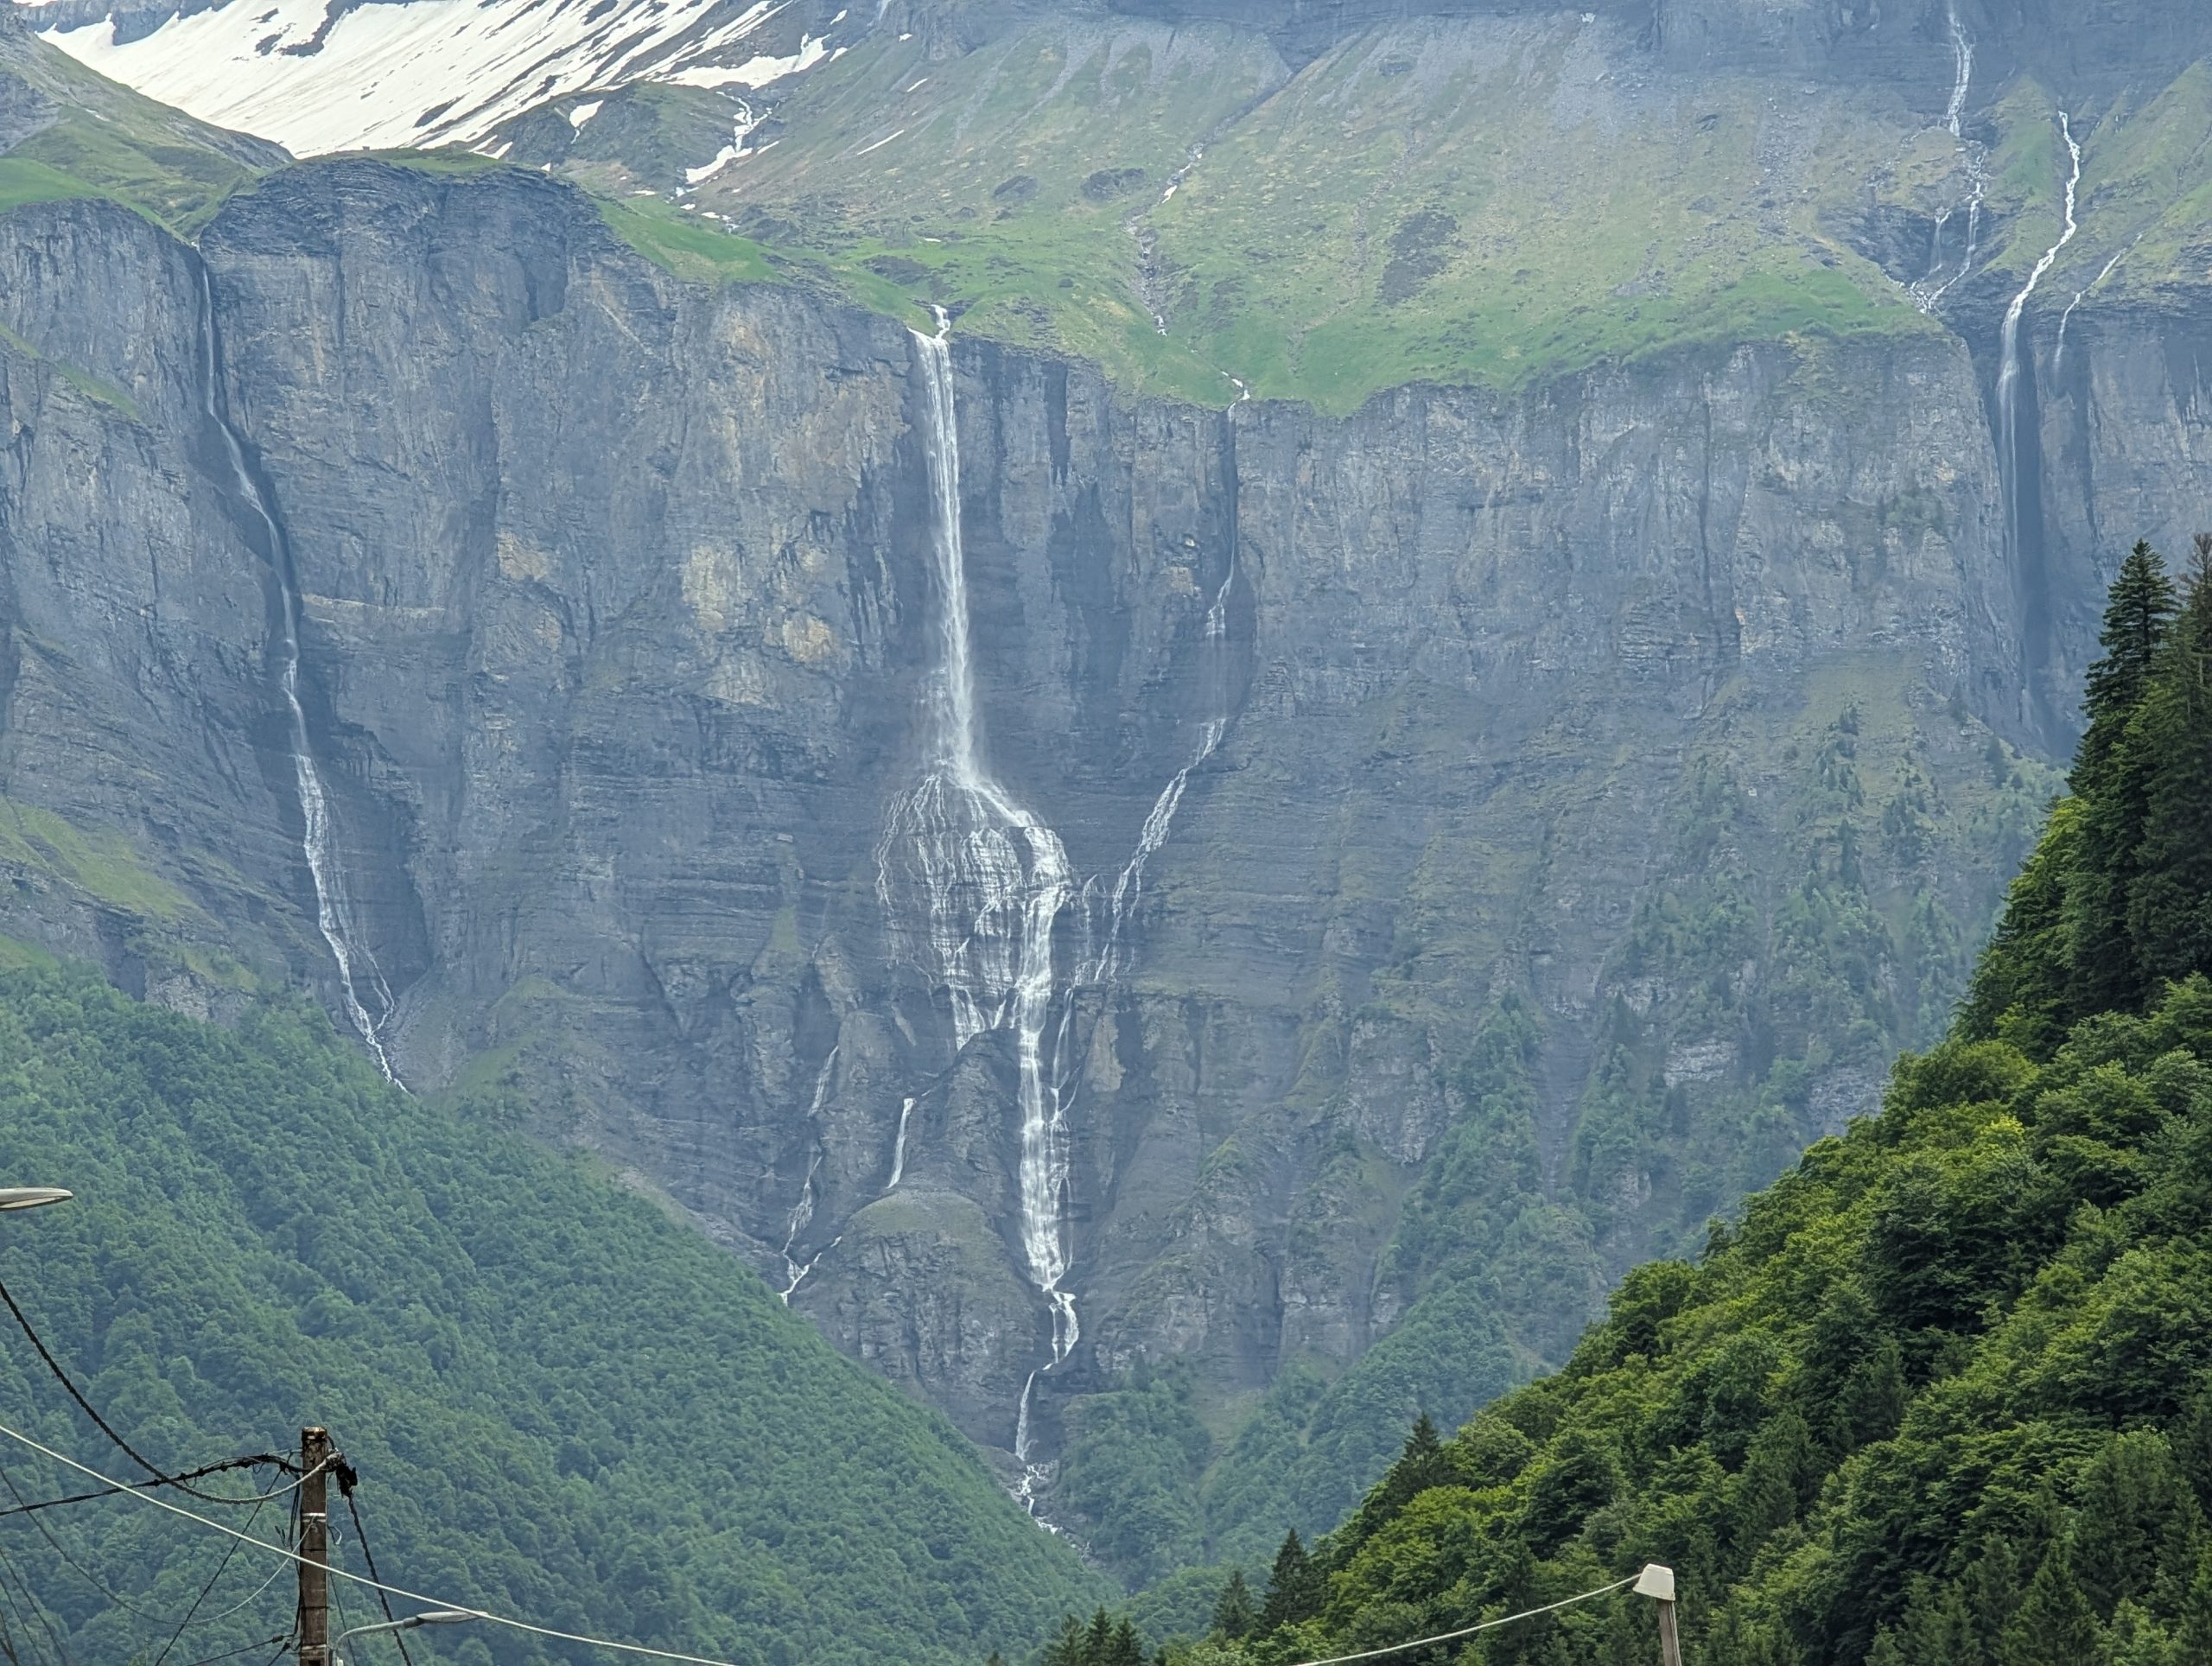
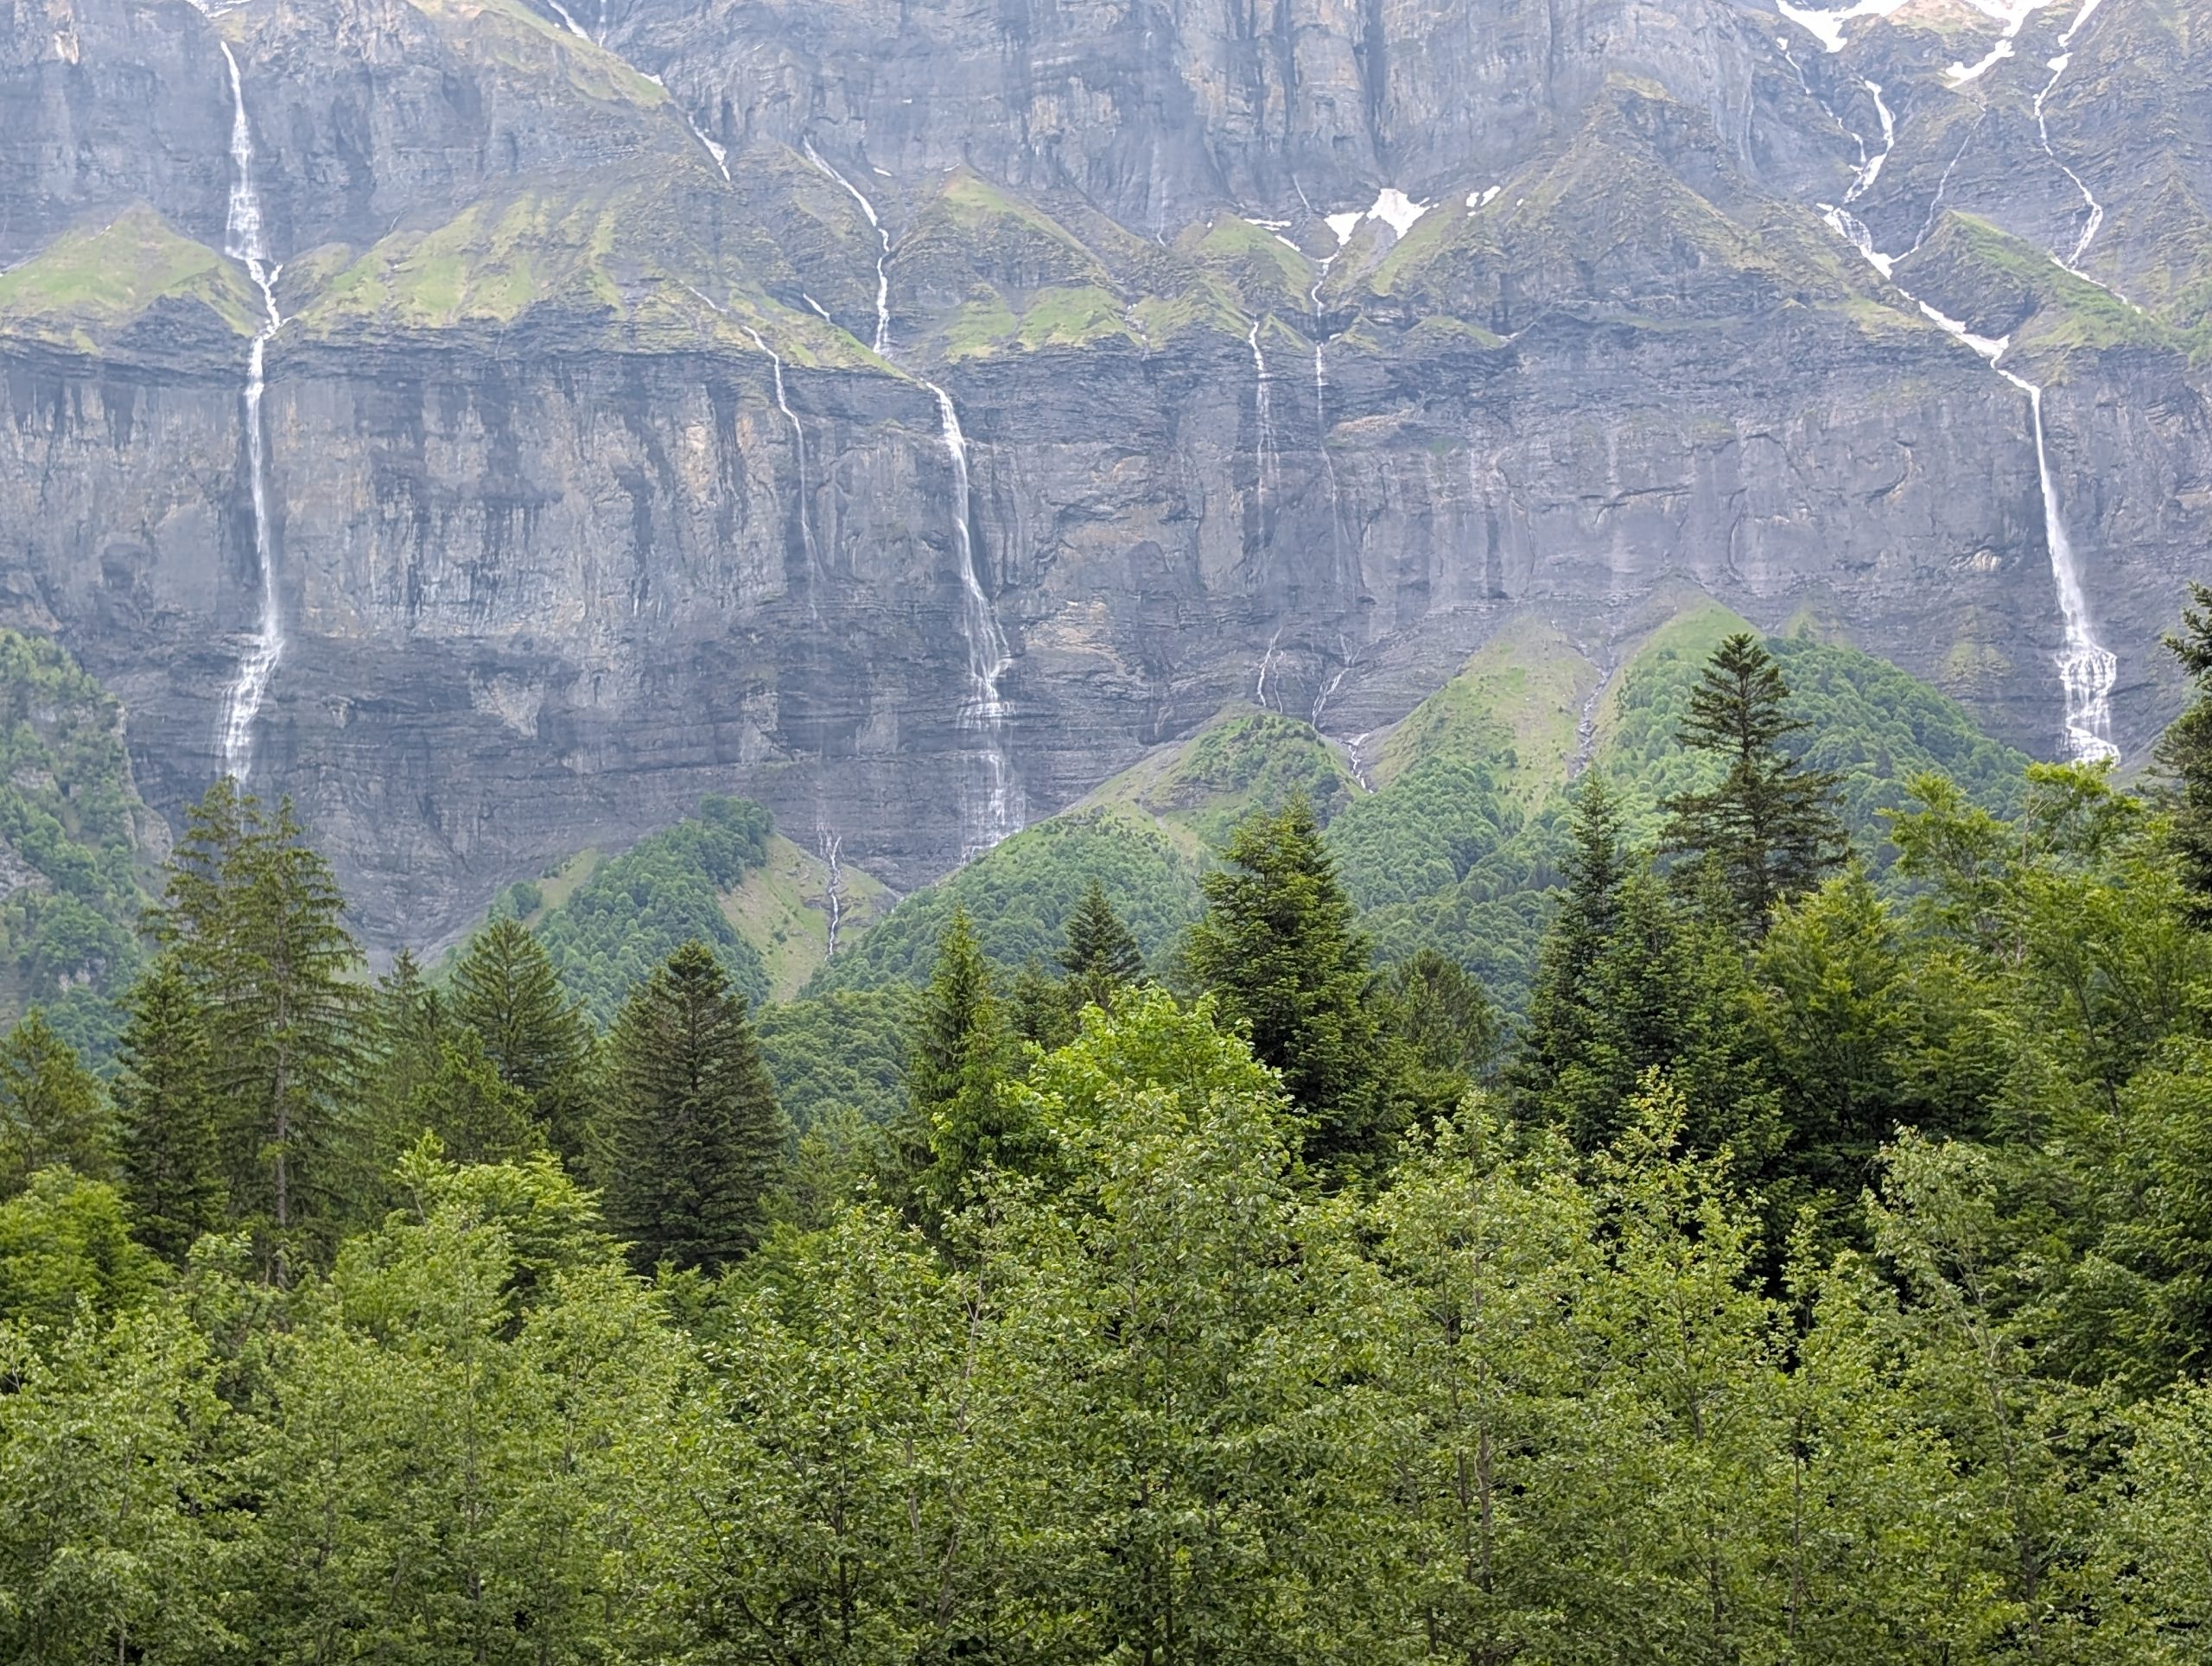
The Cirque du Fer-à-Cheval gets its name from the shape of its cliffs which resemble a horseshoe (fer à cheval in French). Due to the impressive height of these cliffs (6,500 feet), there are a multitude of waterfalls, the number of which varies depending on the season. In June, there are more than thirty waterfalls gushing down the cliffs. This entire area is easily accessible by car.
Very similar to the Cirque de Gavarnie in the Pyrenees, it is the most visited and most famous site of Sixt-Fer-à-Cheval. This huge amphitheater of limestone closes the eastern part of the Giffre Valley, stretching over about 3 miles, with steep cliffs up to 6,500 feet. It is the largest Alpine mountain cirque.
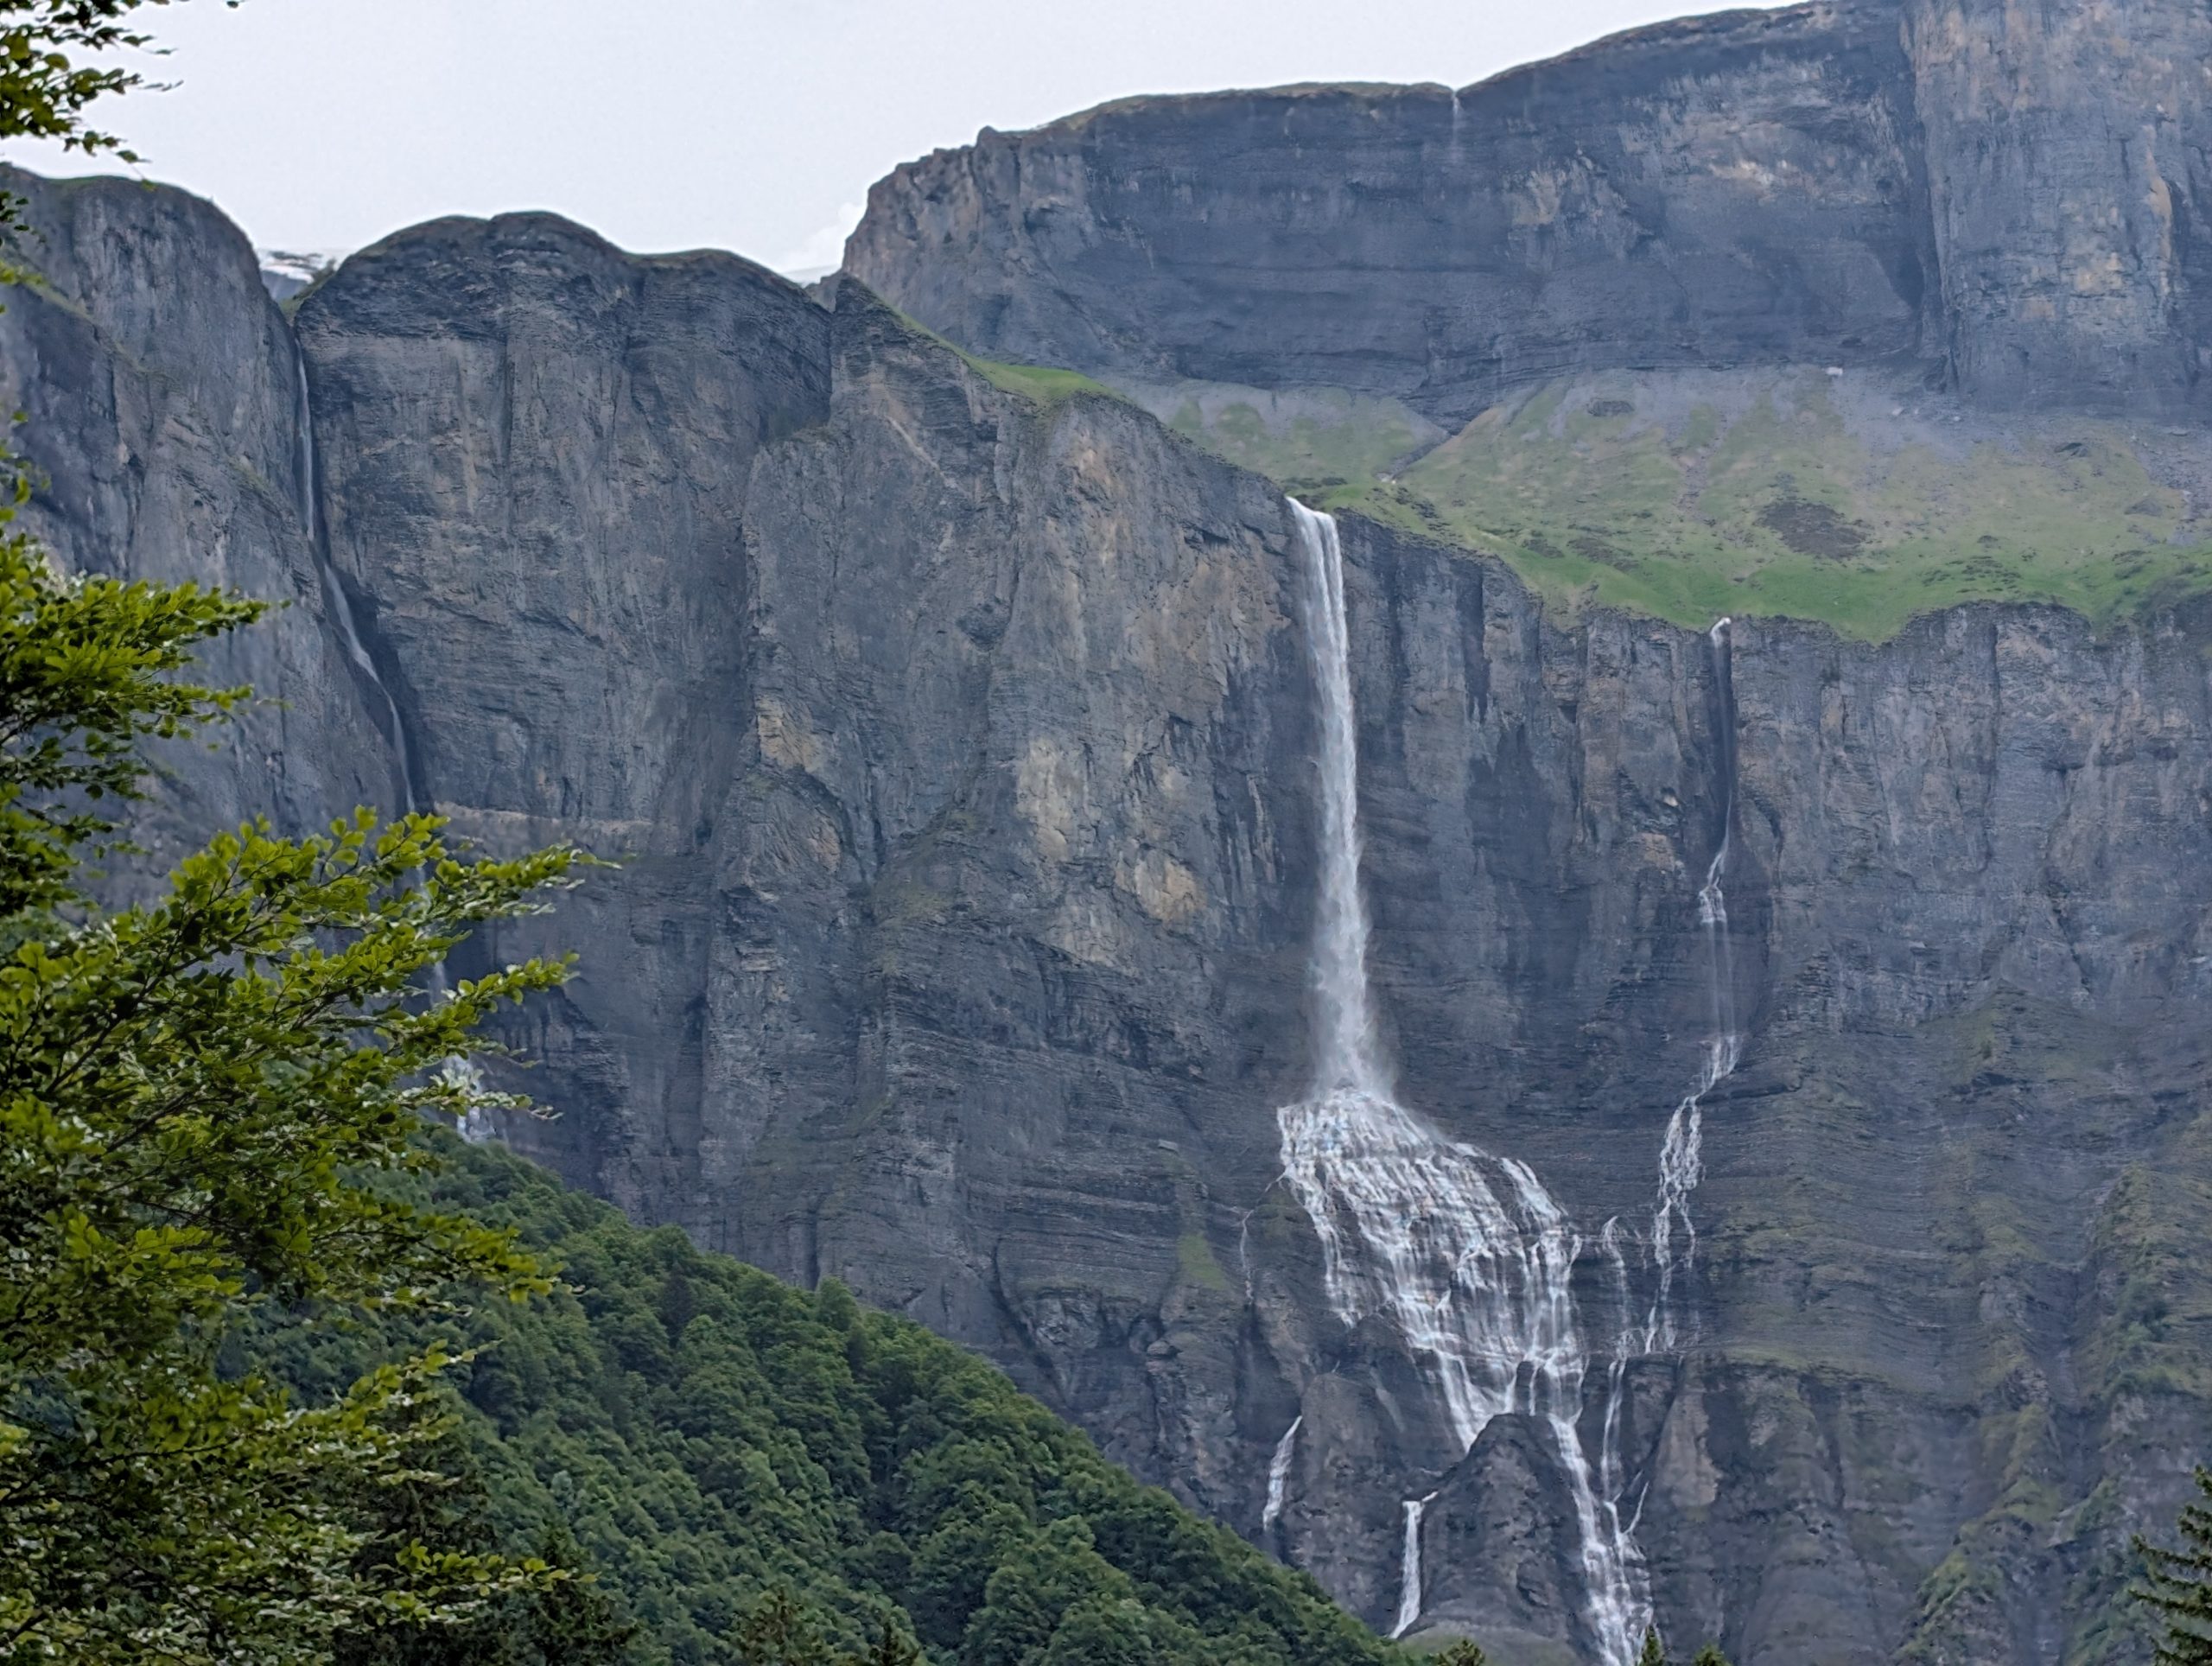
This was one of the most amazing places we had ever seen. If you continue past the cirque (which of course we did) up a narrow road, you can actually drive over a bridge that crosses right over the middle of this long and beautiful waterfall.
View of Cascade de Rouget from below.
Cascade de Rouget from where our car is parked.
Up close and personal with this magnificent waterfall.
The bridge over this waterfall is located about halfway up the falls. And on a truly hot day, I’m sure the mist would be thoroughly appreciated.
Downstream of the falls.
Then we turned around. (We had no choice. We were at the end of the road.)
On the way back to Chamonix, we took a side excursion hoping to get a glimpse of Lac Leman, the lake the city of Geneva, Switzerland is on. But after about 15 miles, we decided it was getting late in the afternoon and turned around. We will have to see this famous lake some other time. But what an amazing day. Beautiful vistas everywhere you looked. Then back to our room to do a bit of reading before heading out to dinner.
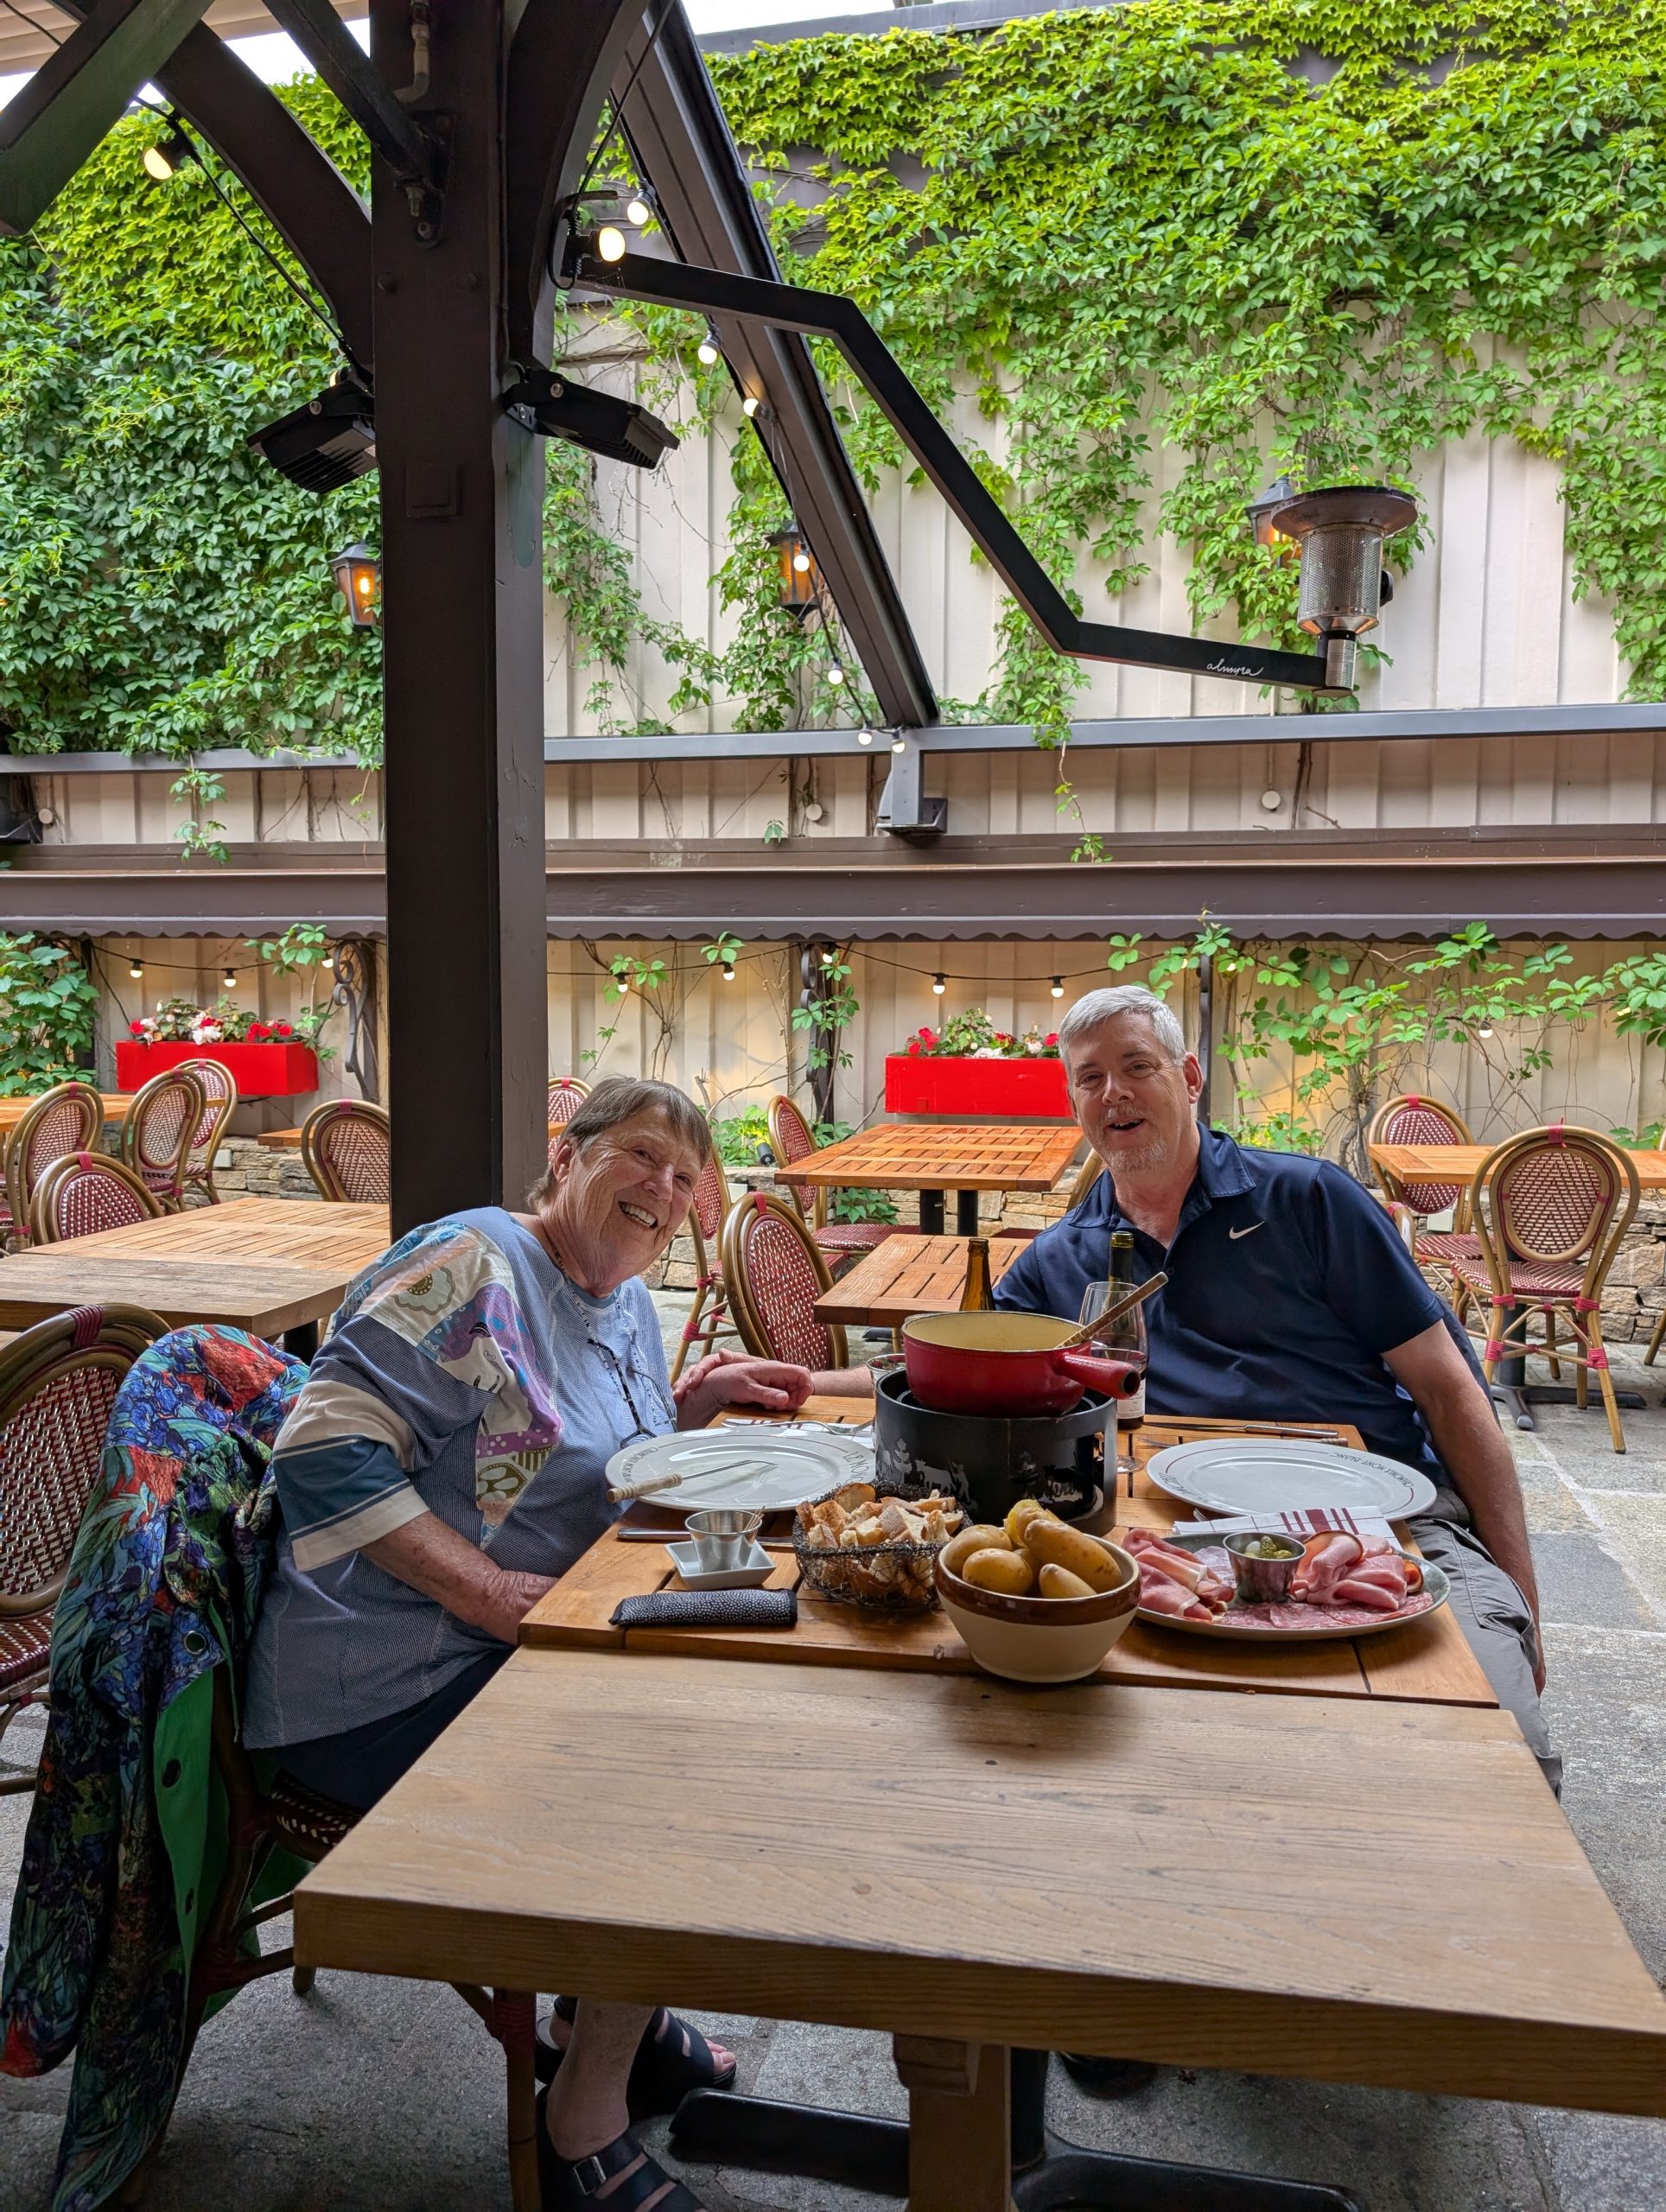
Tonight, we decided to have fondue. And in all the restaurants we came across, the minimum was “fondue for 2”. And the choice of fondue we ordered (there were 5 options), came with a large basket of torn bread, a small bowl of olives, 6 large (count them 6) boiled potatoes (baked potato size), a charcuterie plate that could have easily served 6, and a small bowl of cornichons.
Notice the bowl of potatoes. Really?!
We ate until we couldn’t eat even one more bite. And still there was enough meat left for a huge sandwich and potatoes that would happily feed 6 hungry adults. Ridiculous amount of food.
We had learned after ordering our first meal in Chamonix that we would have to order just one entrée to share from now on. We decided that we could always order more, but ordering less, after the fact, is simply not acceptable behavior. And that had been working fine for us. But with this order, we had no choice. And I really wanted to taste real French fondue. And yes, it was very good. But it truly was a ridiculous amount of food.
But what a wonderful day we had shared. And more adventures to come. Life is goooooood!
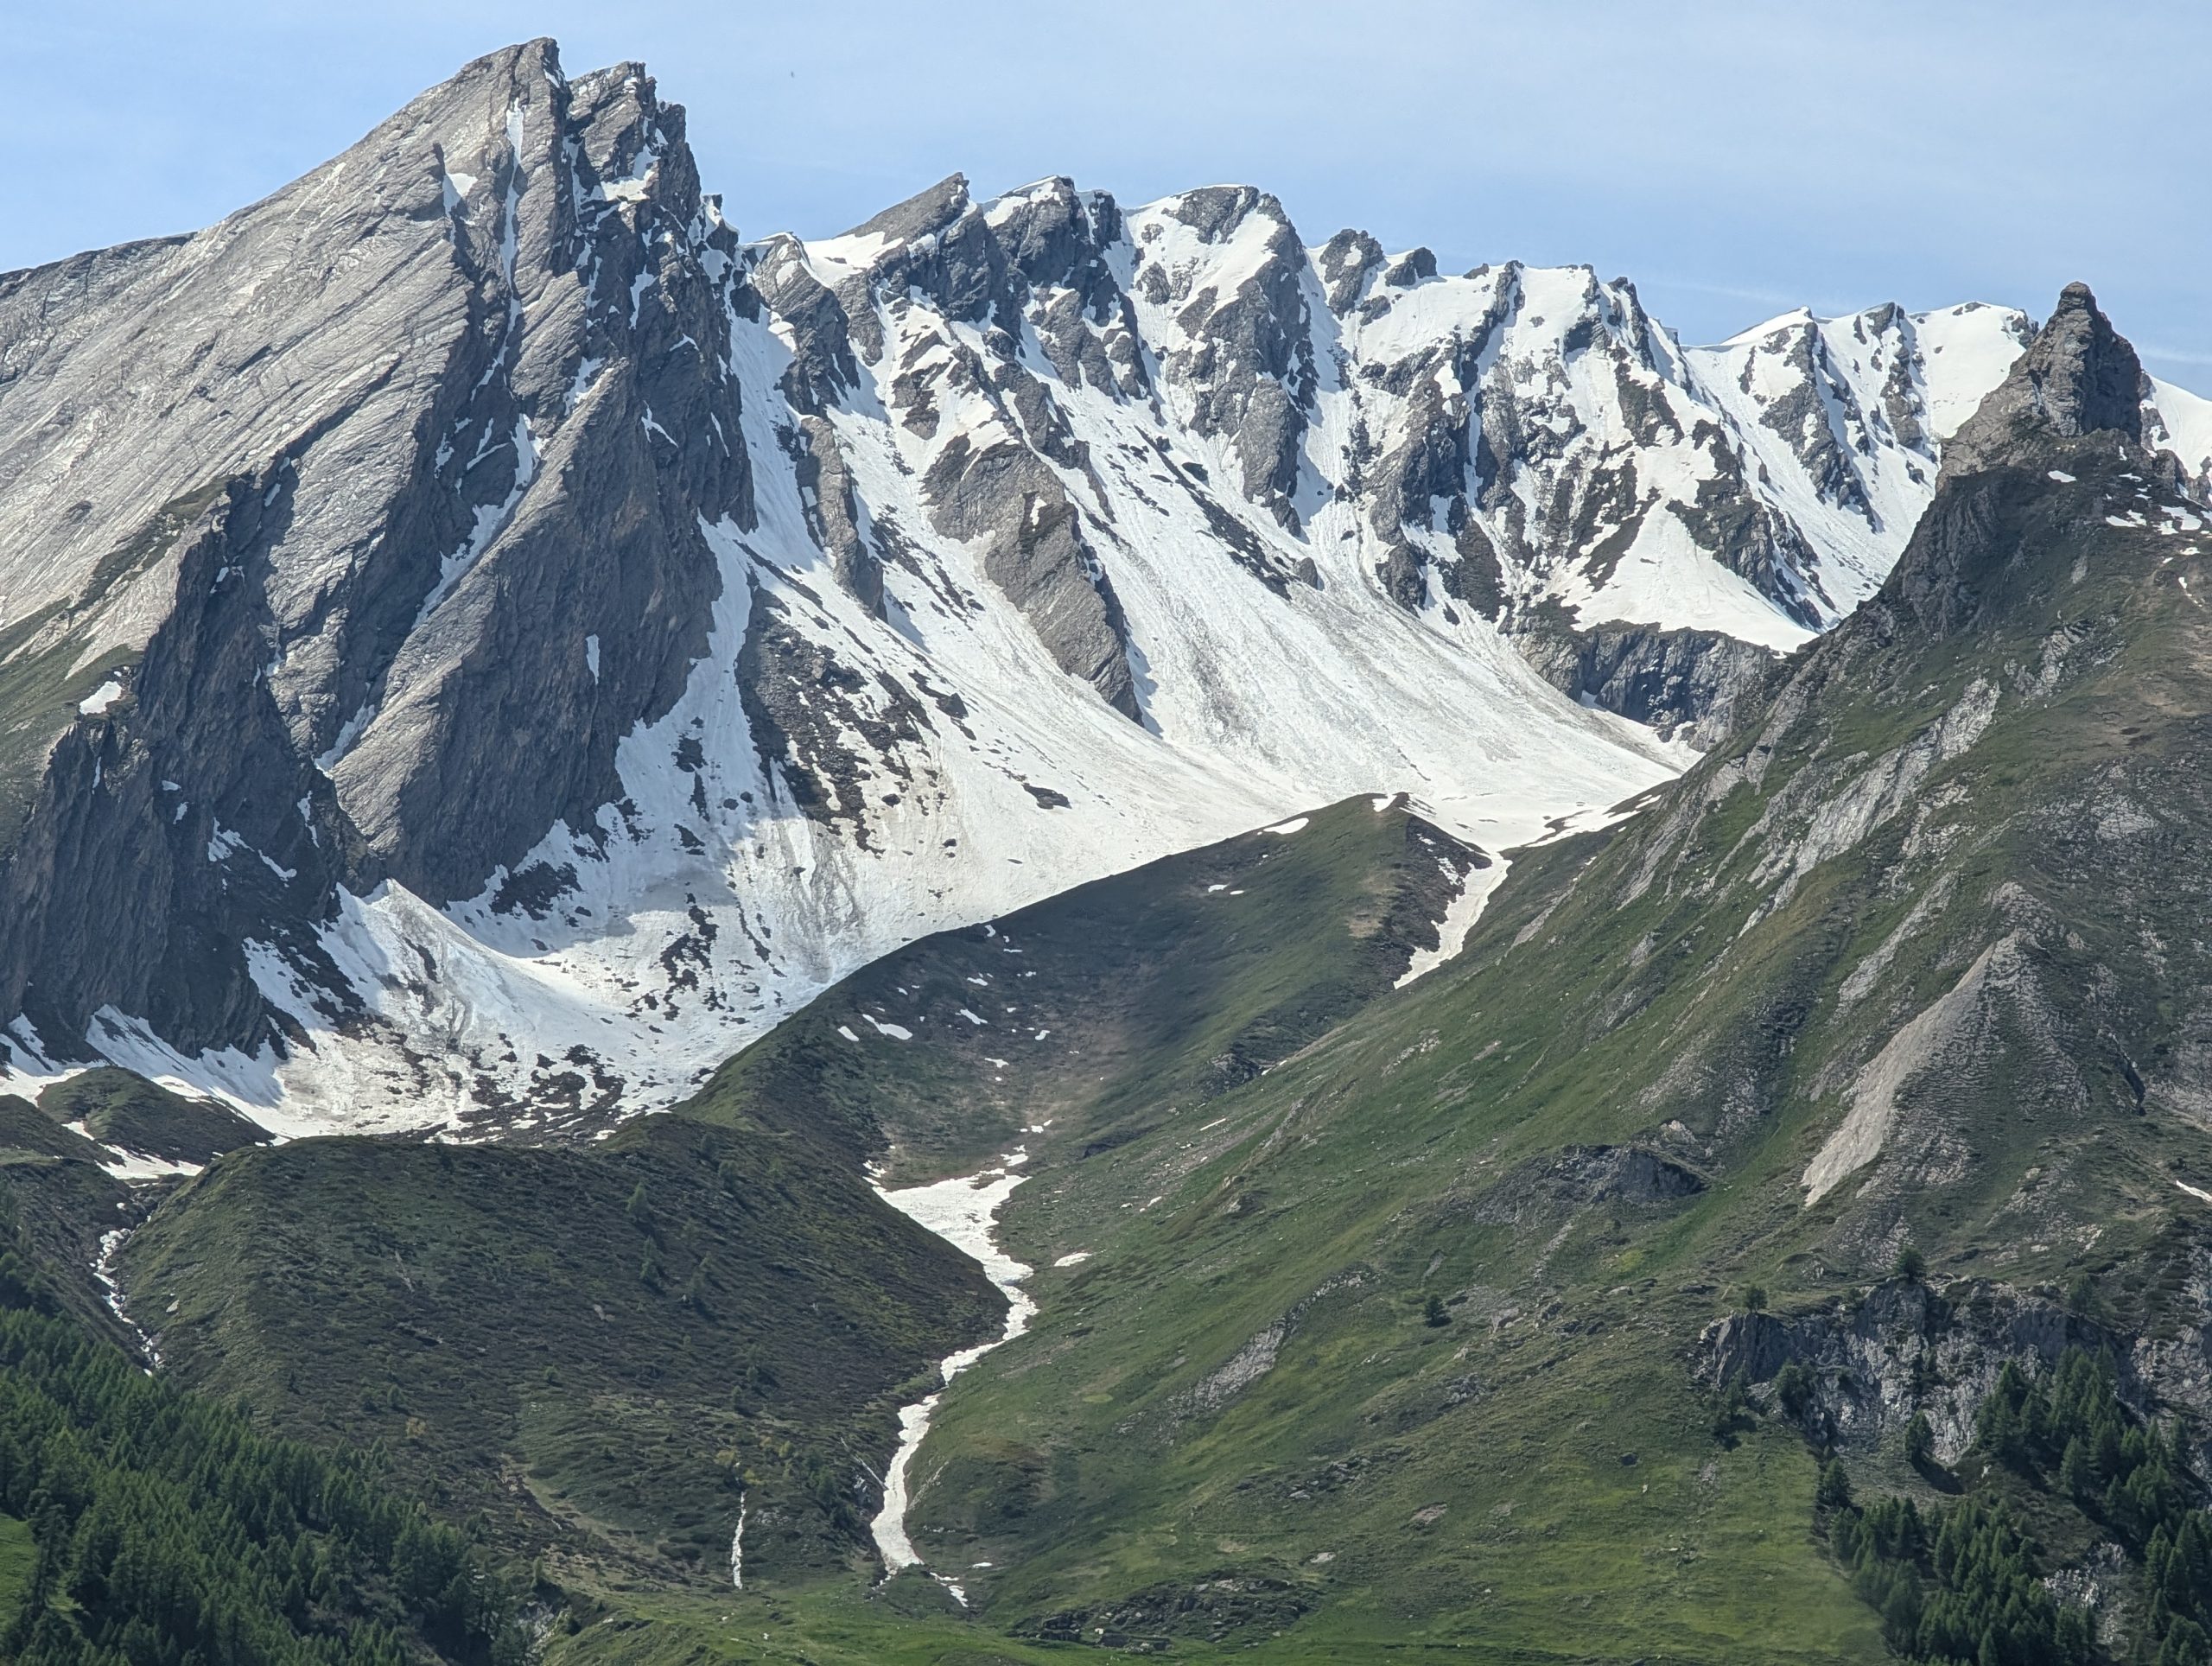
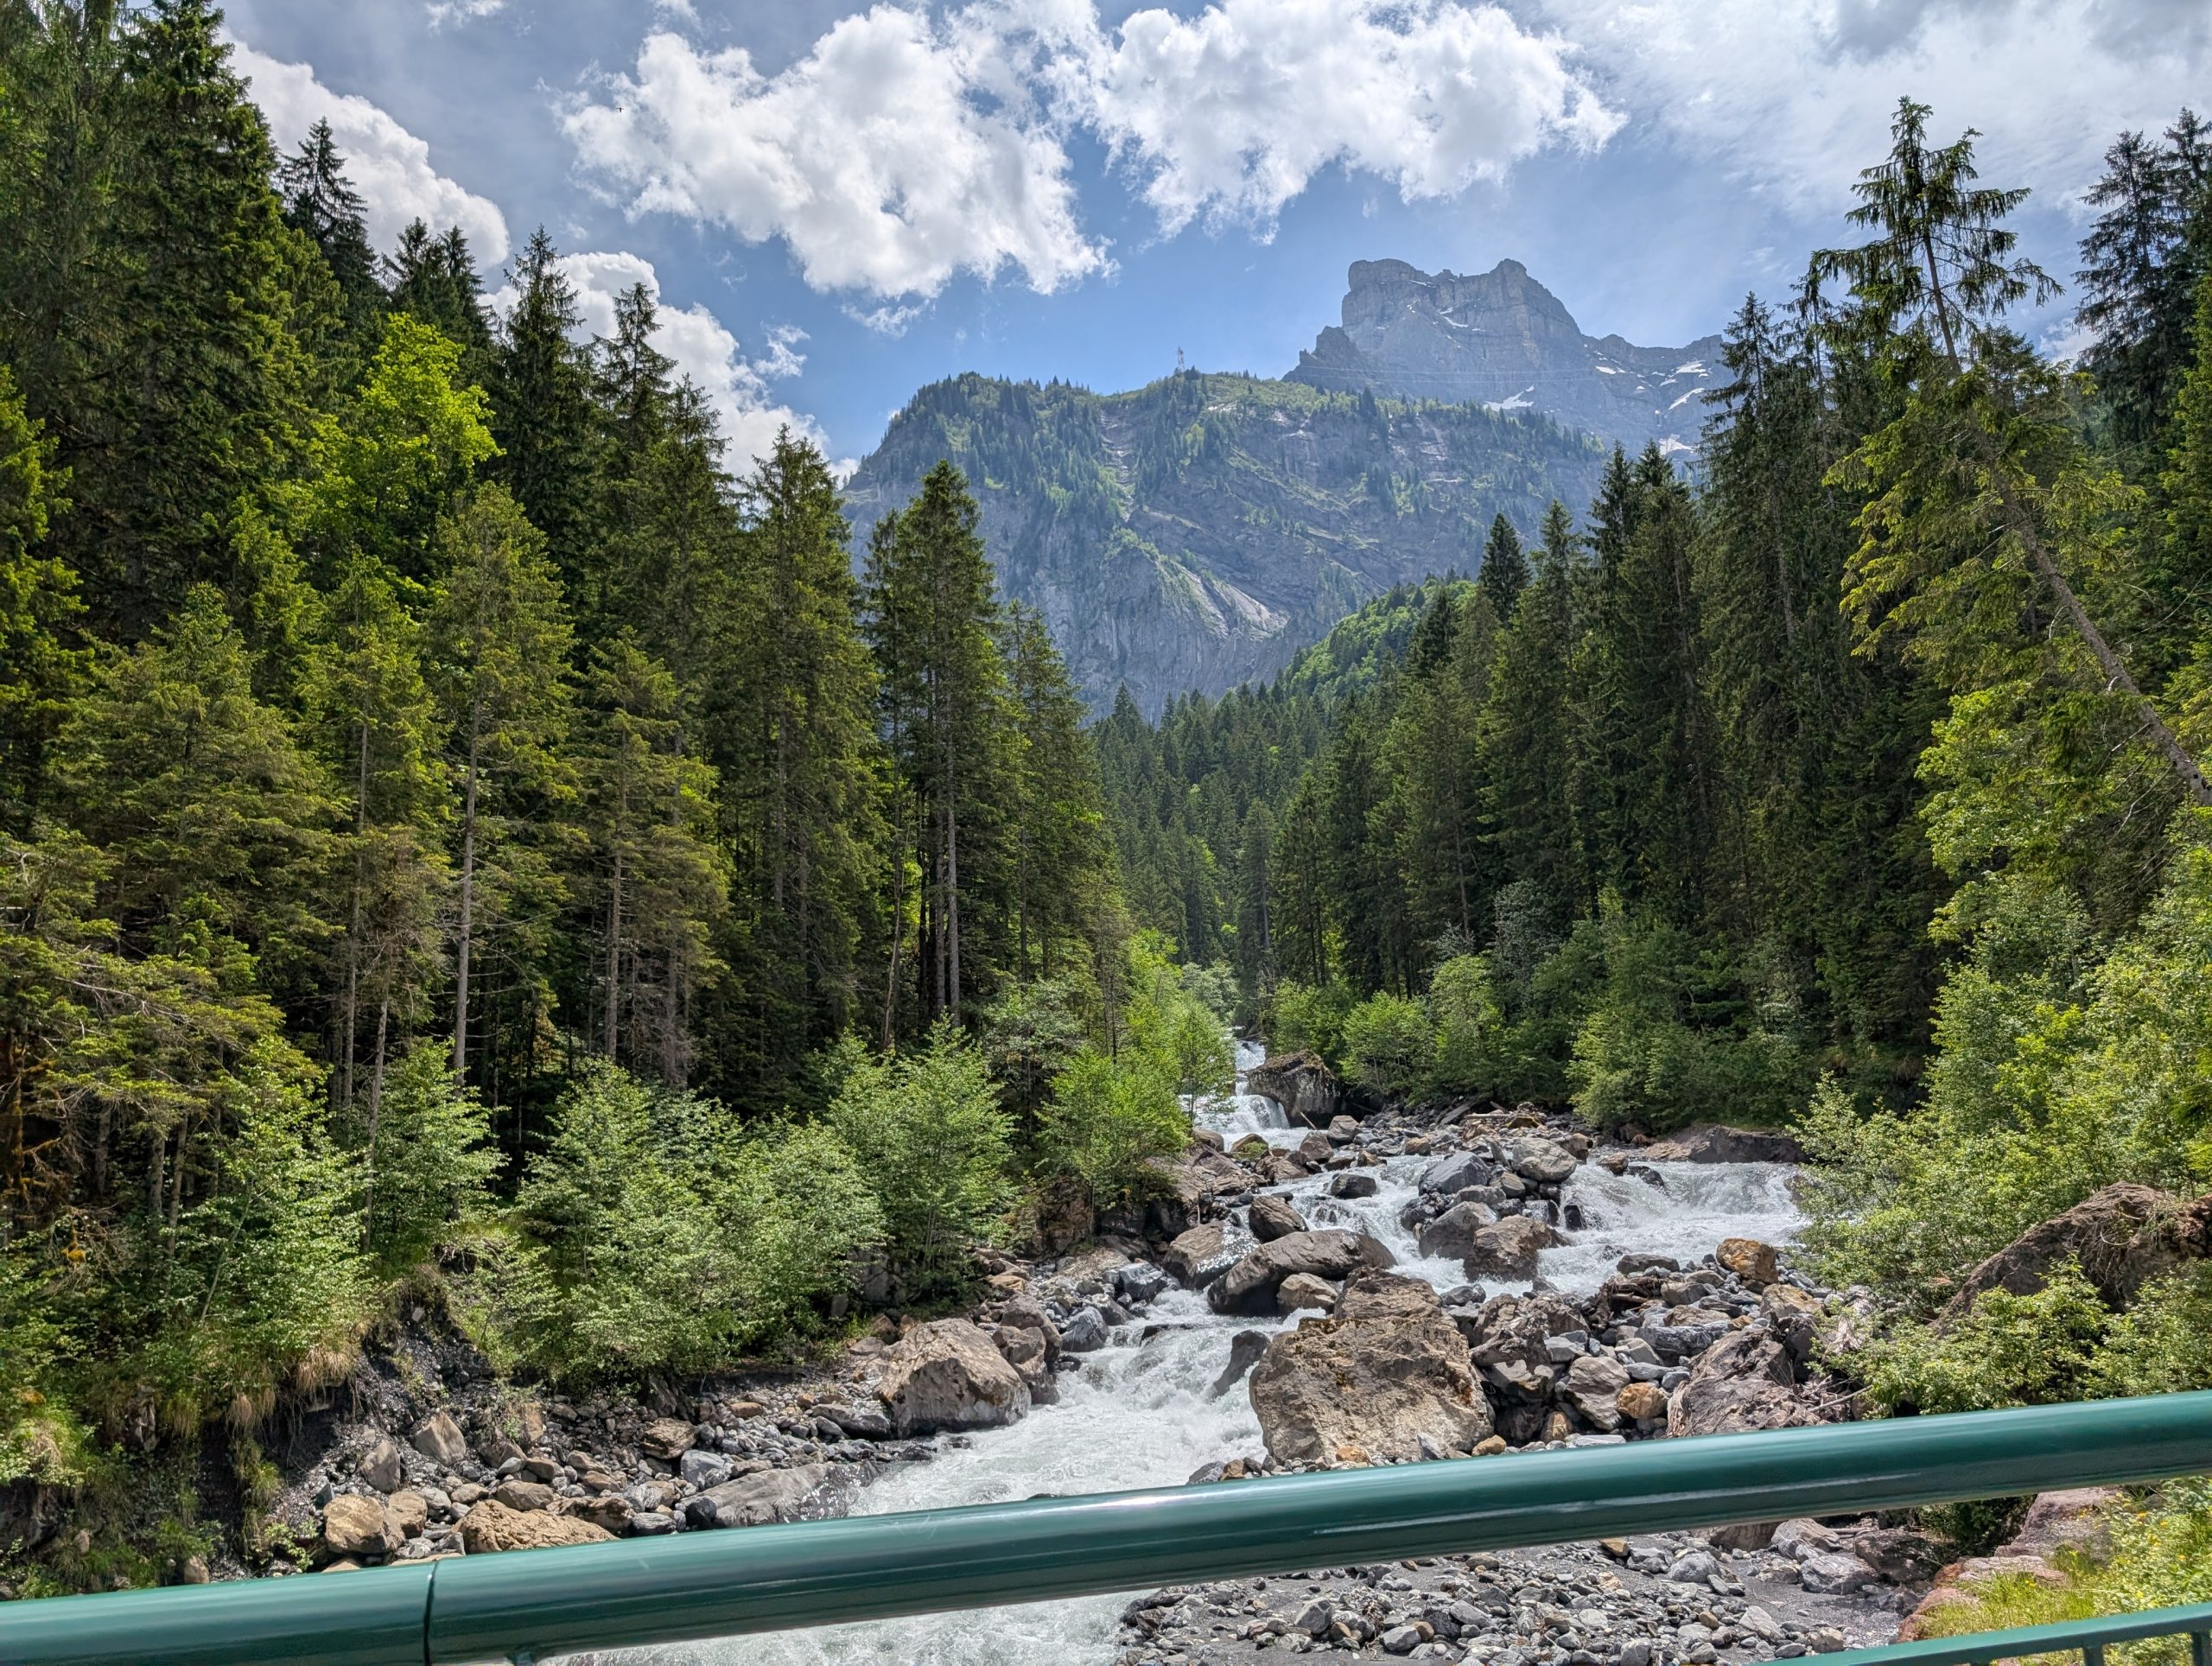
Monday, June 2, 2025 – Chamonix, France
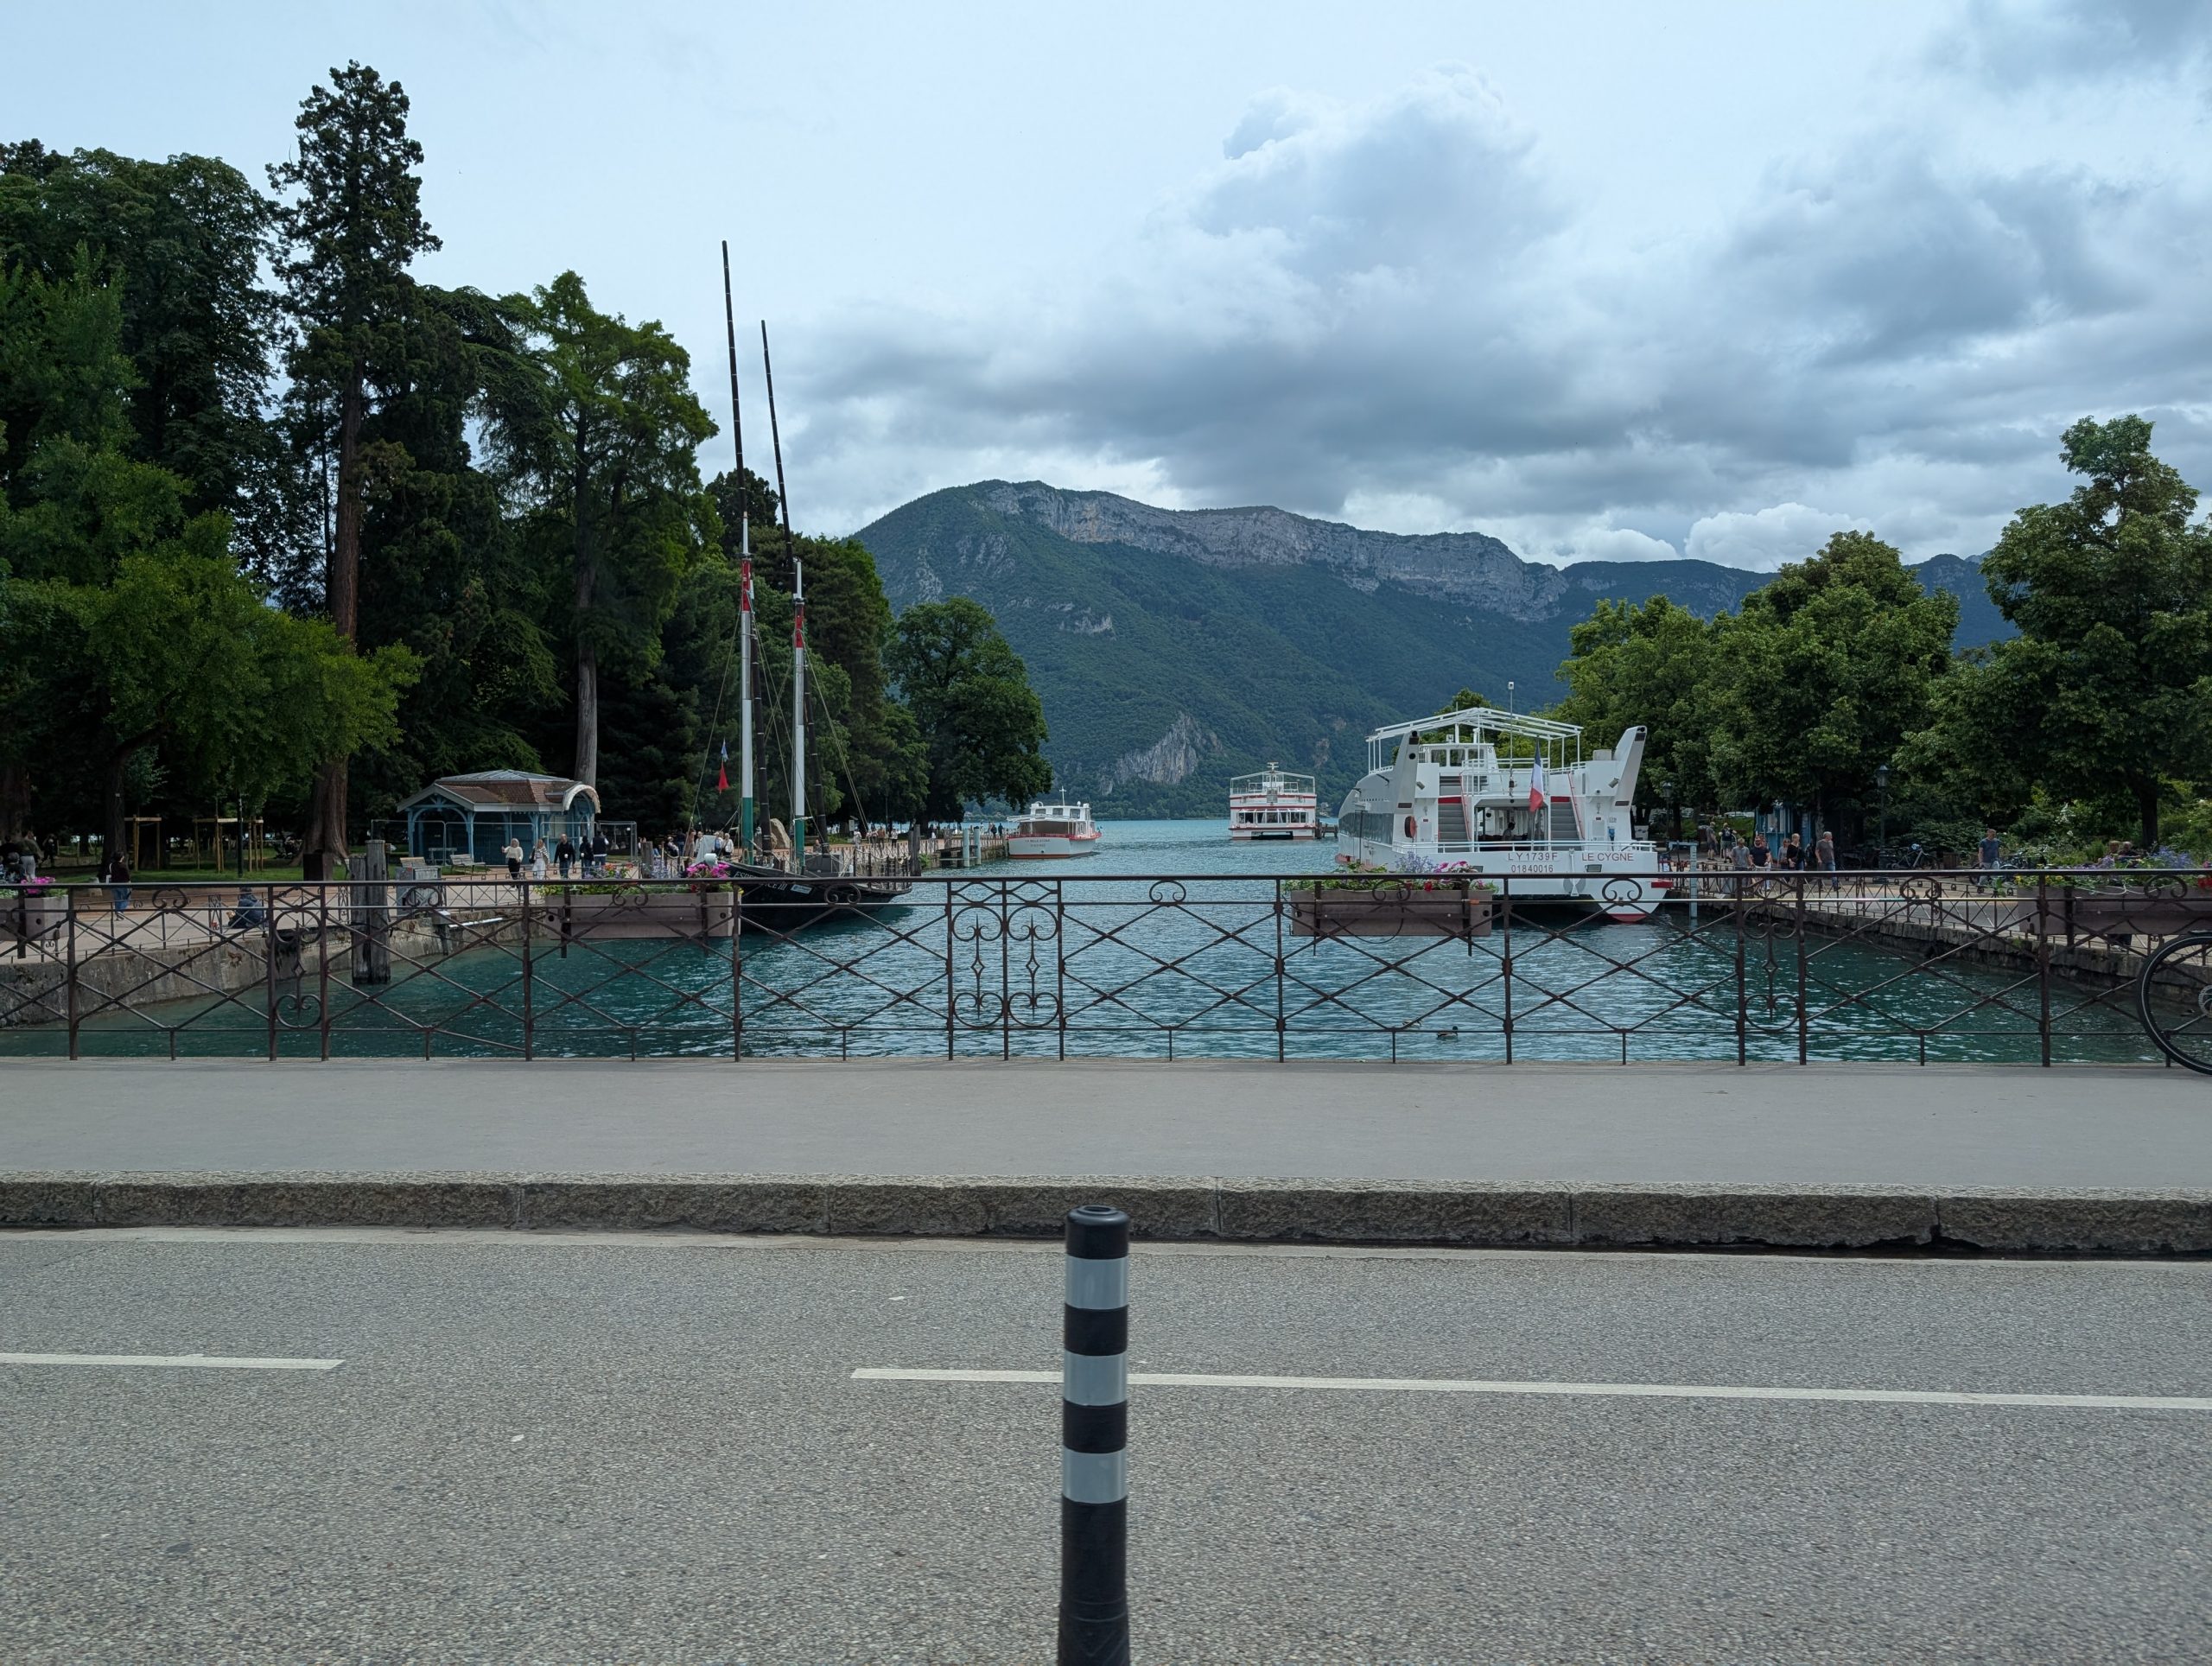
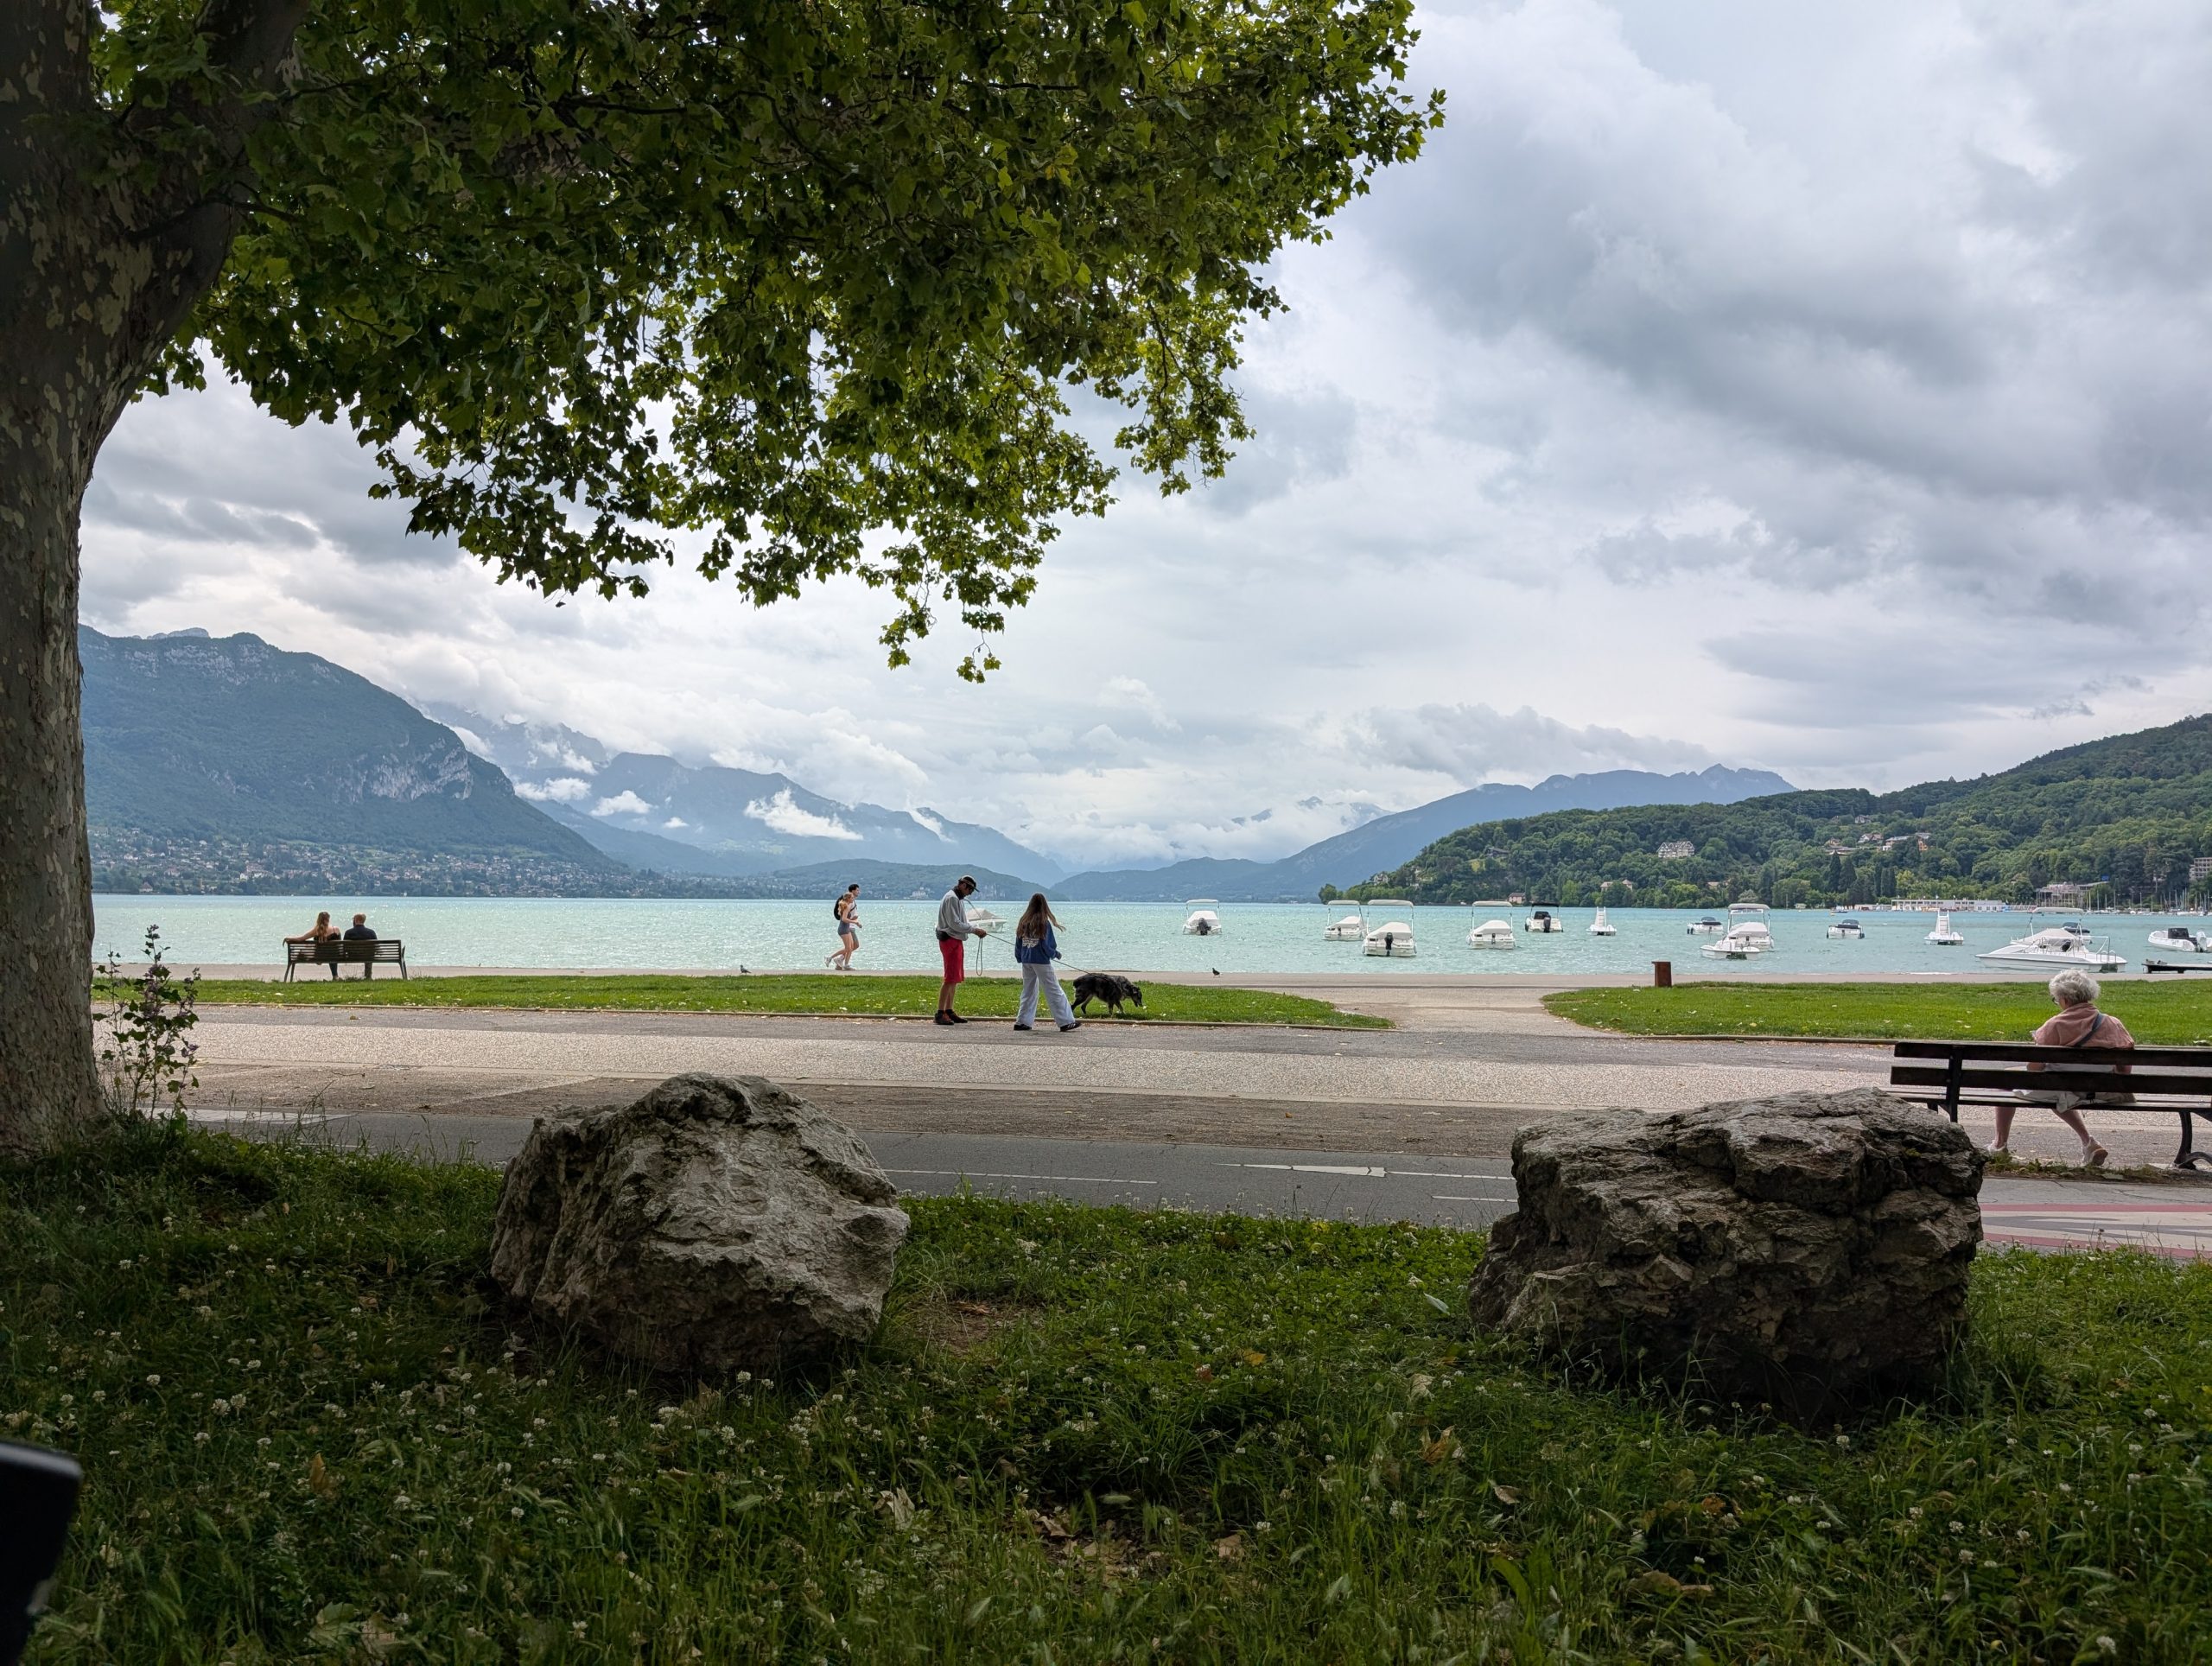
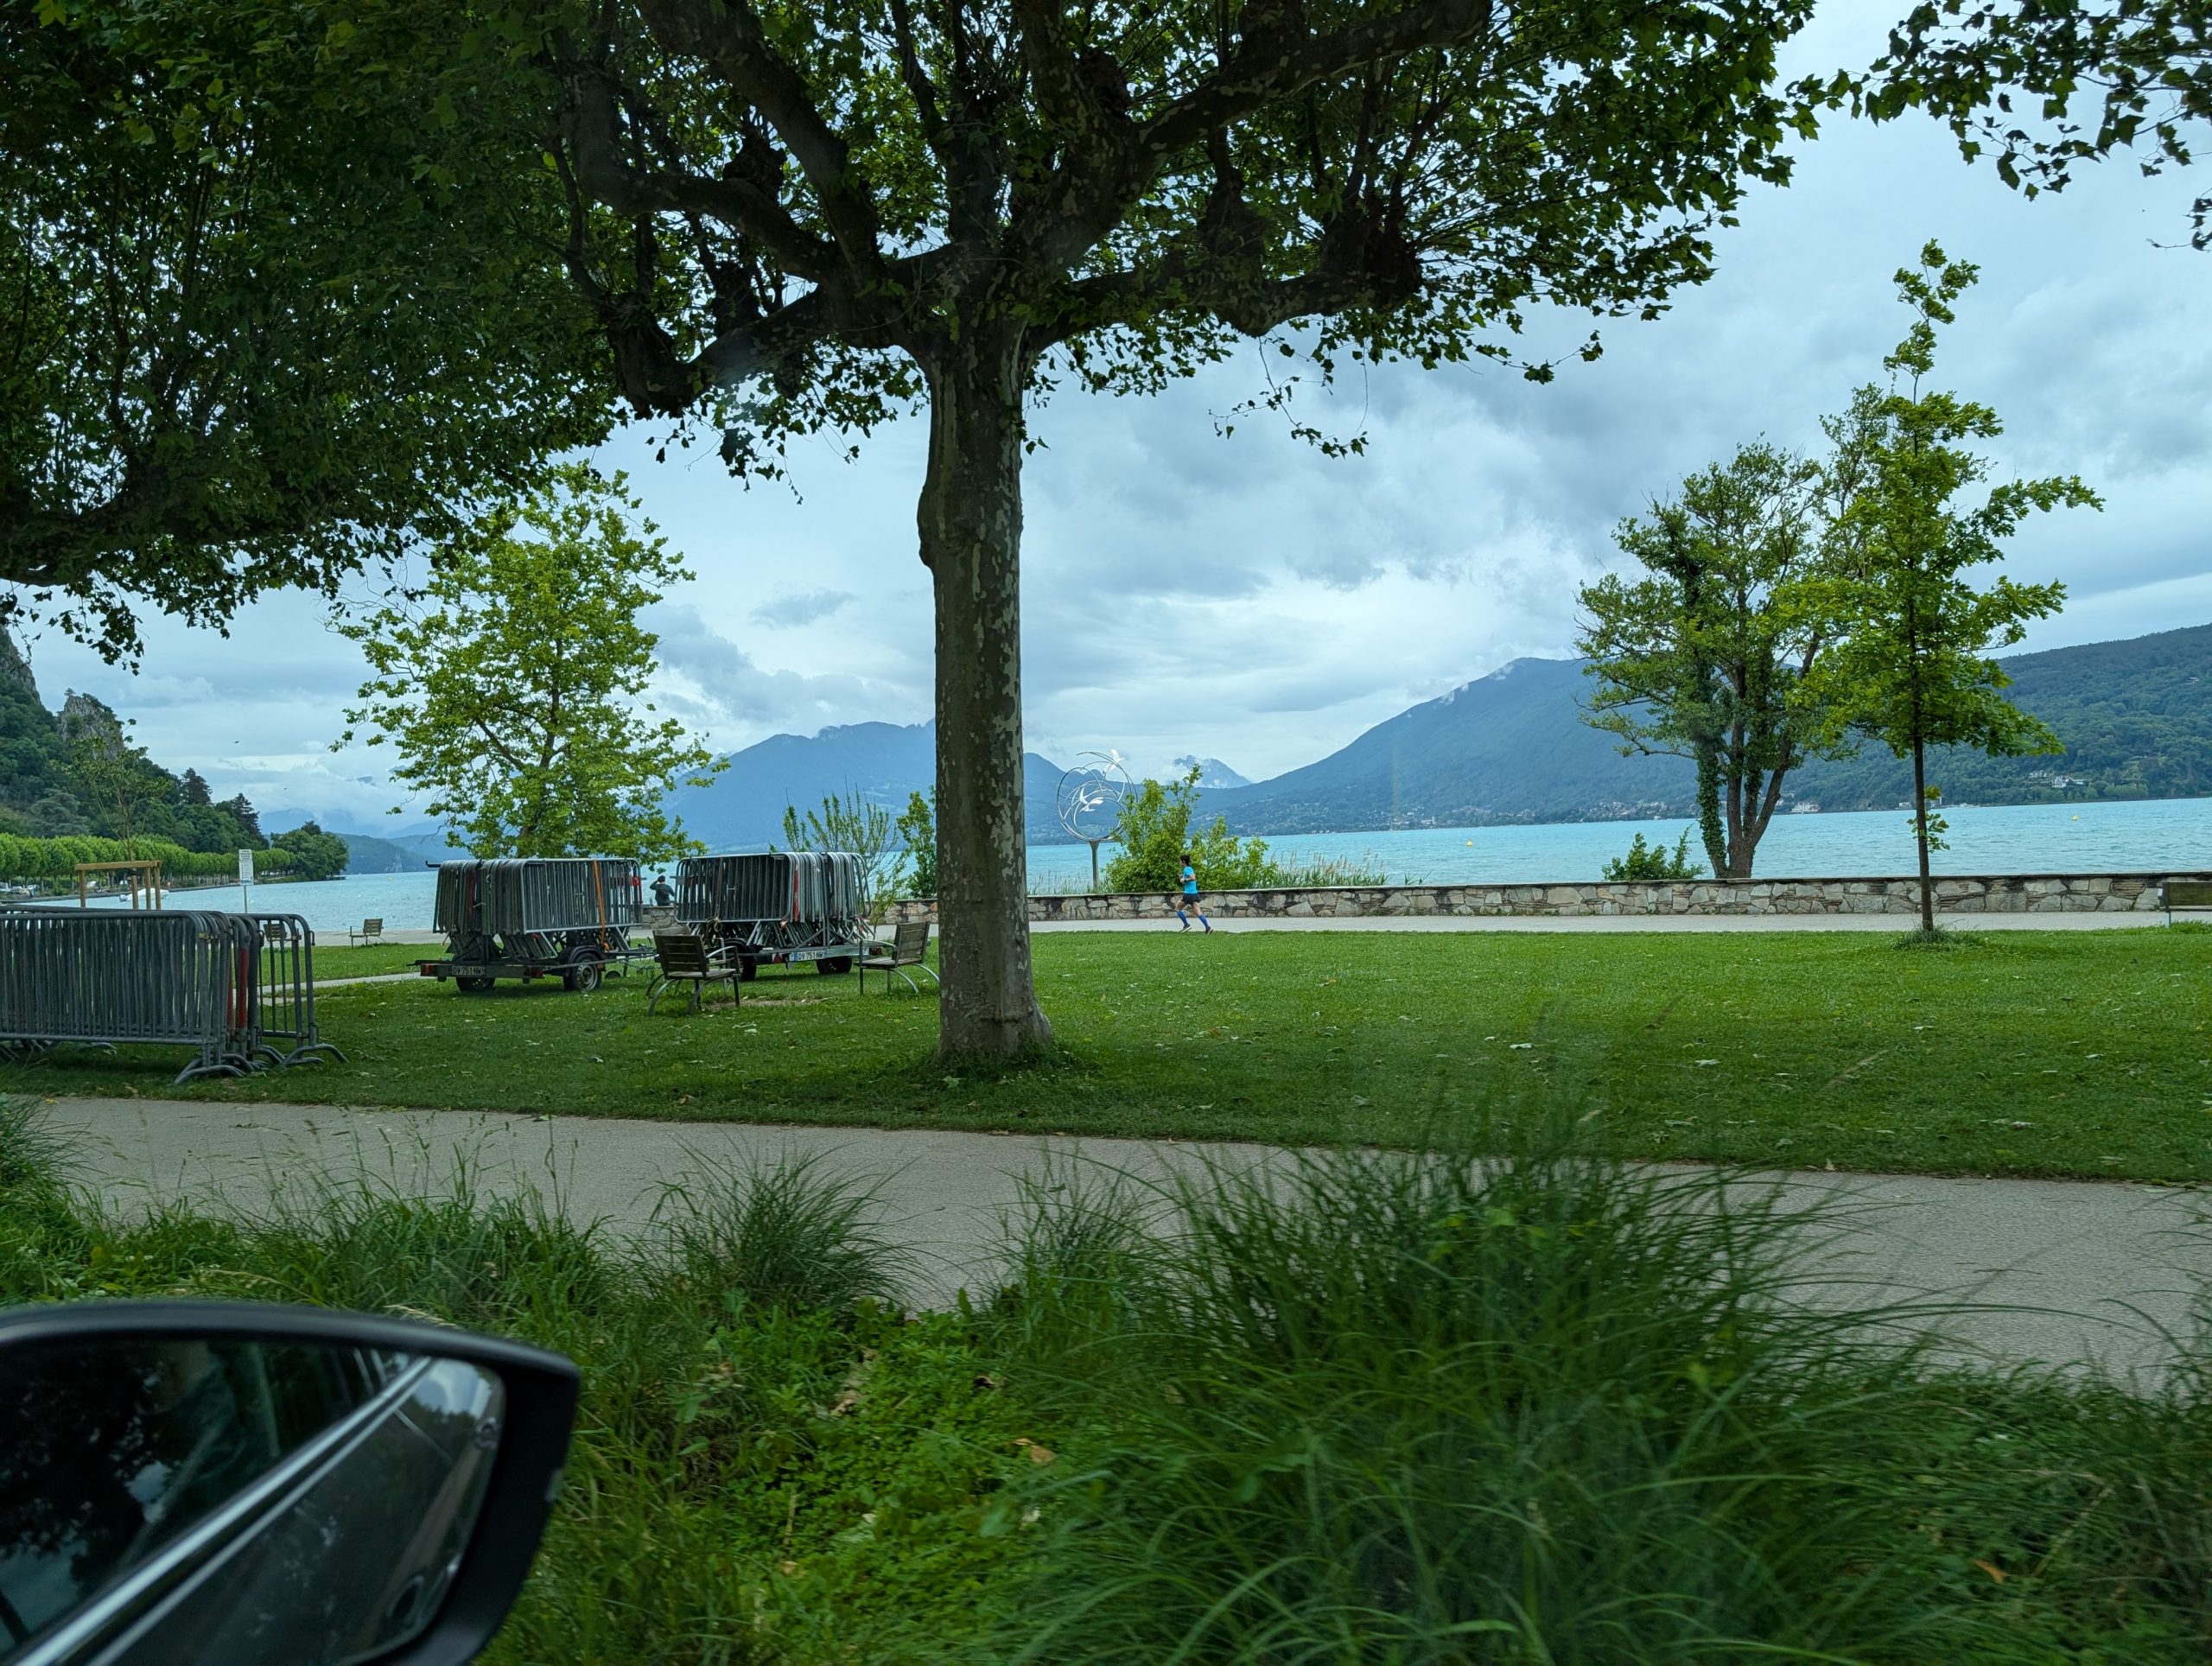
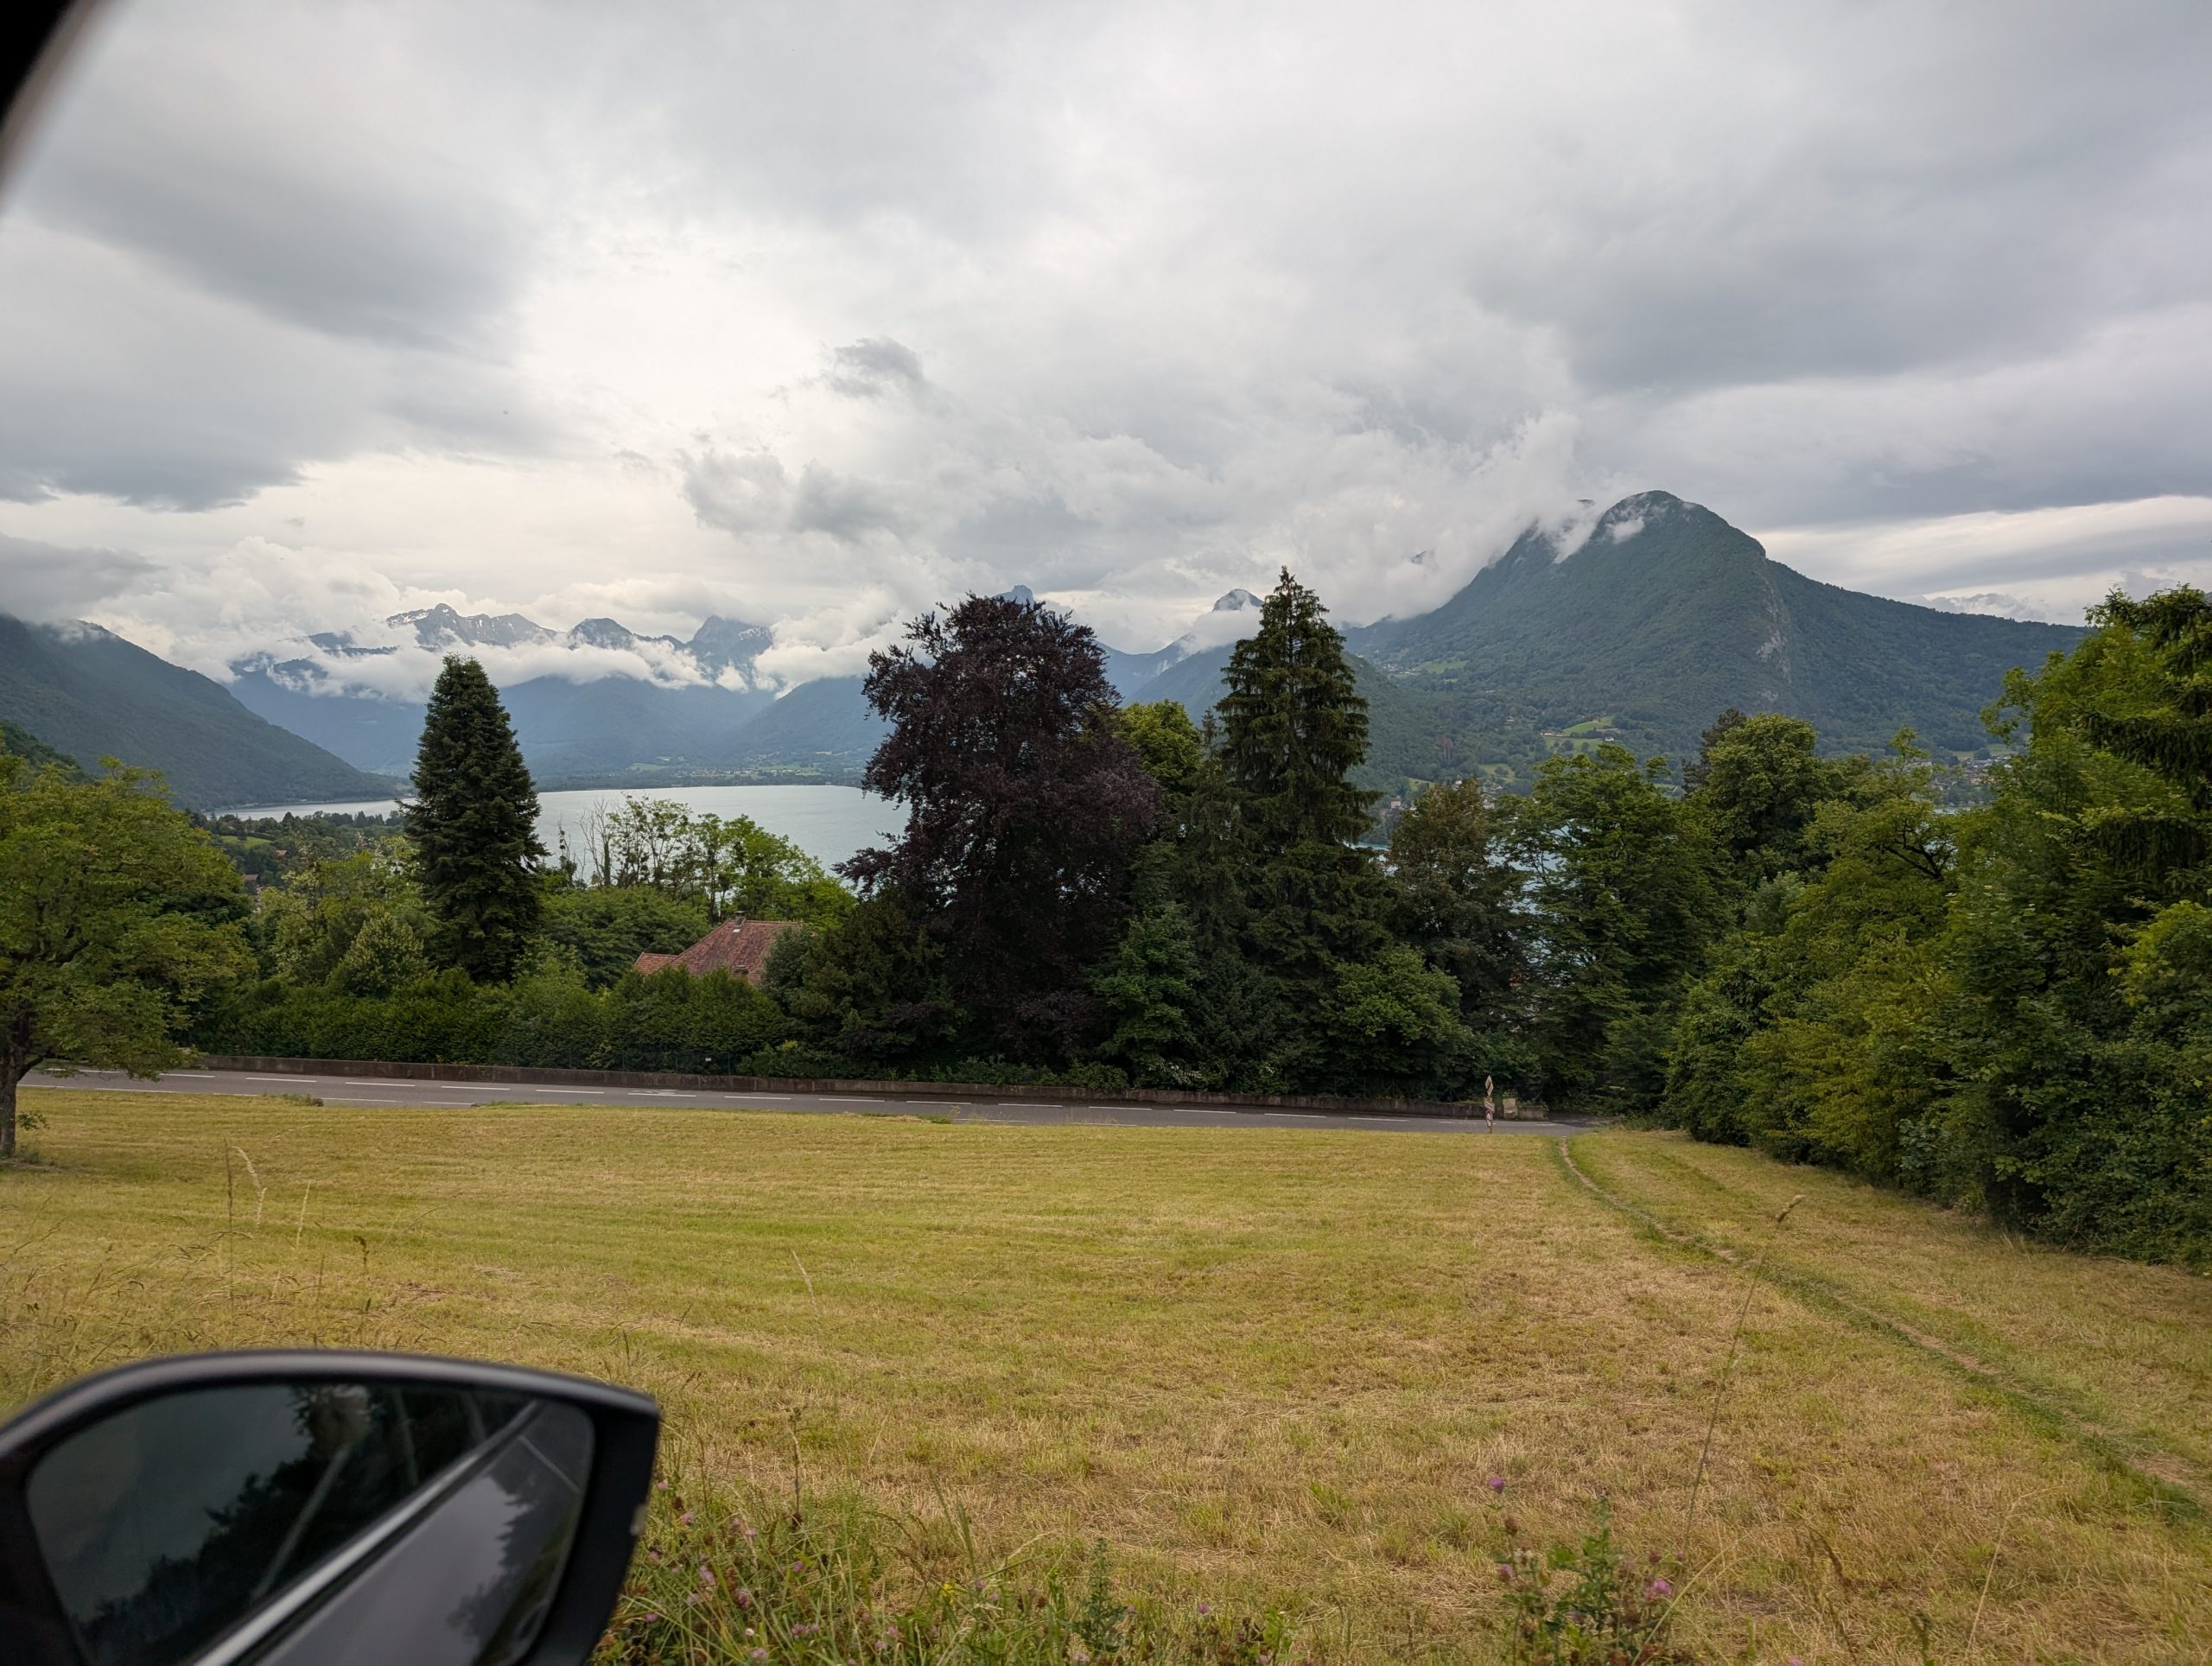
Today’s driving adventure started once again at 10:00 am. From Chamonix we headed southwest to exquisite Annecy, which is purported to be France’s most beautiful lakefront town. Of this I have no doubt.
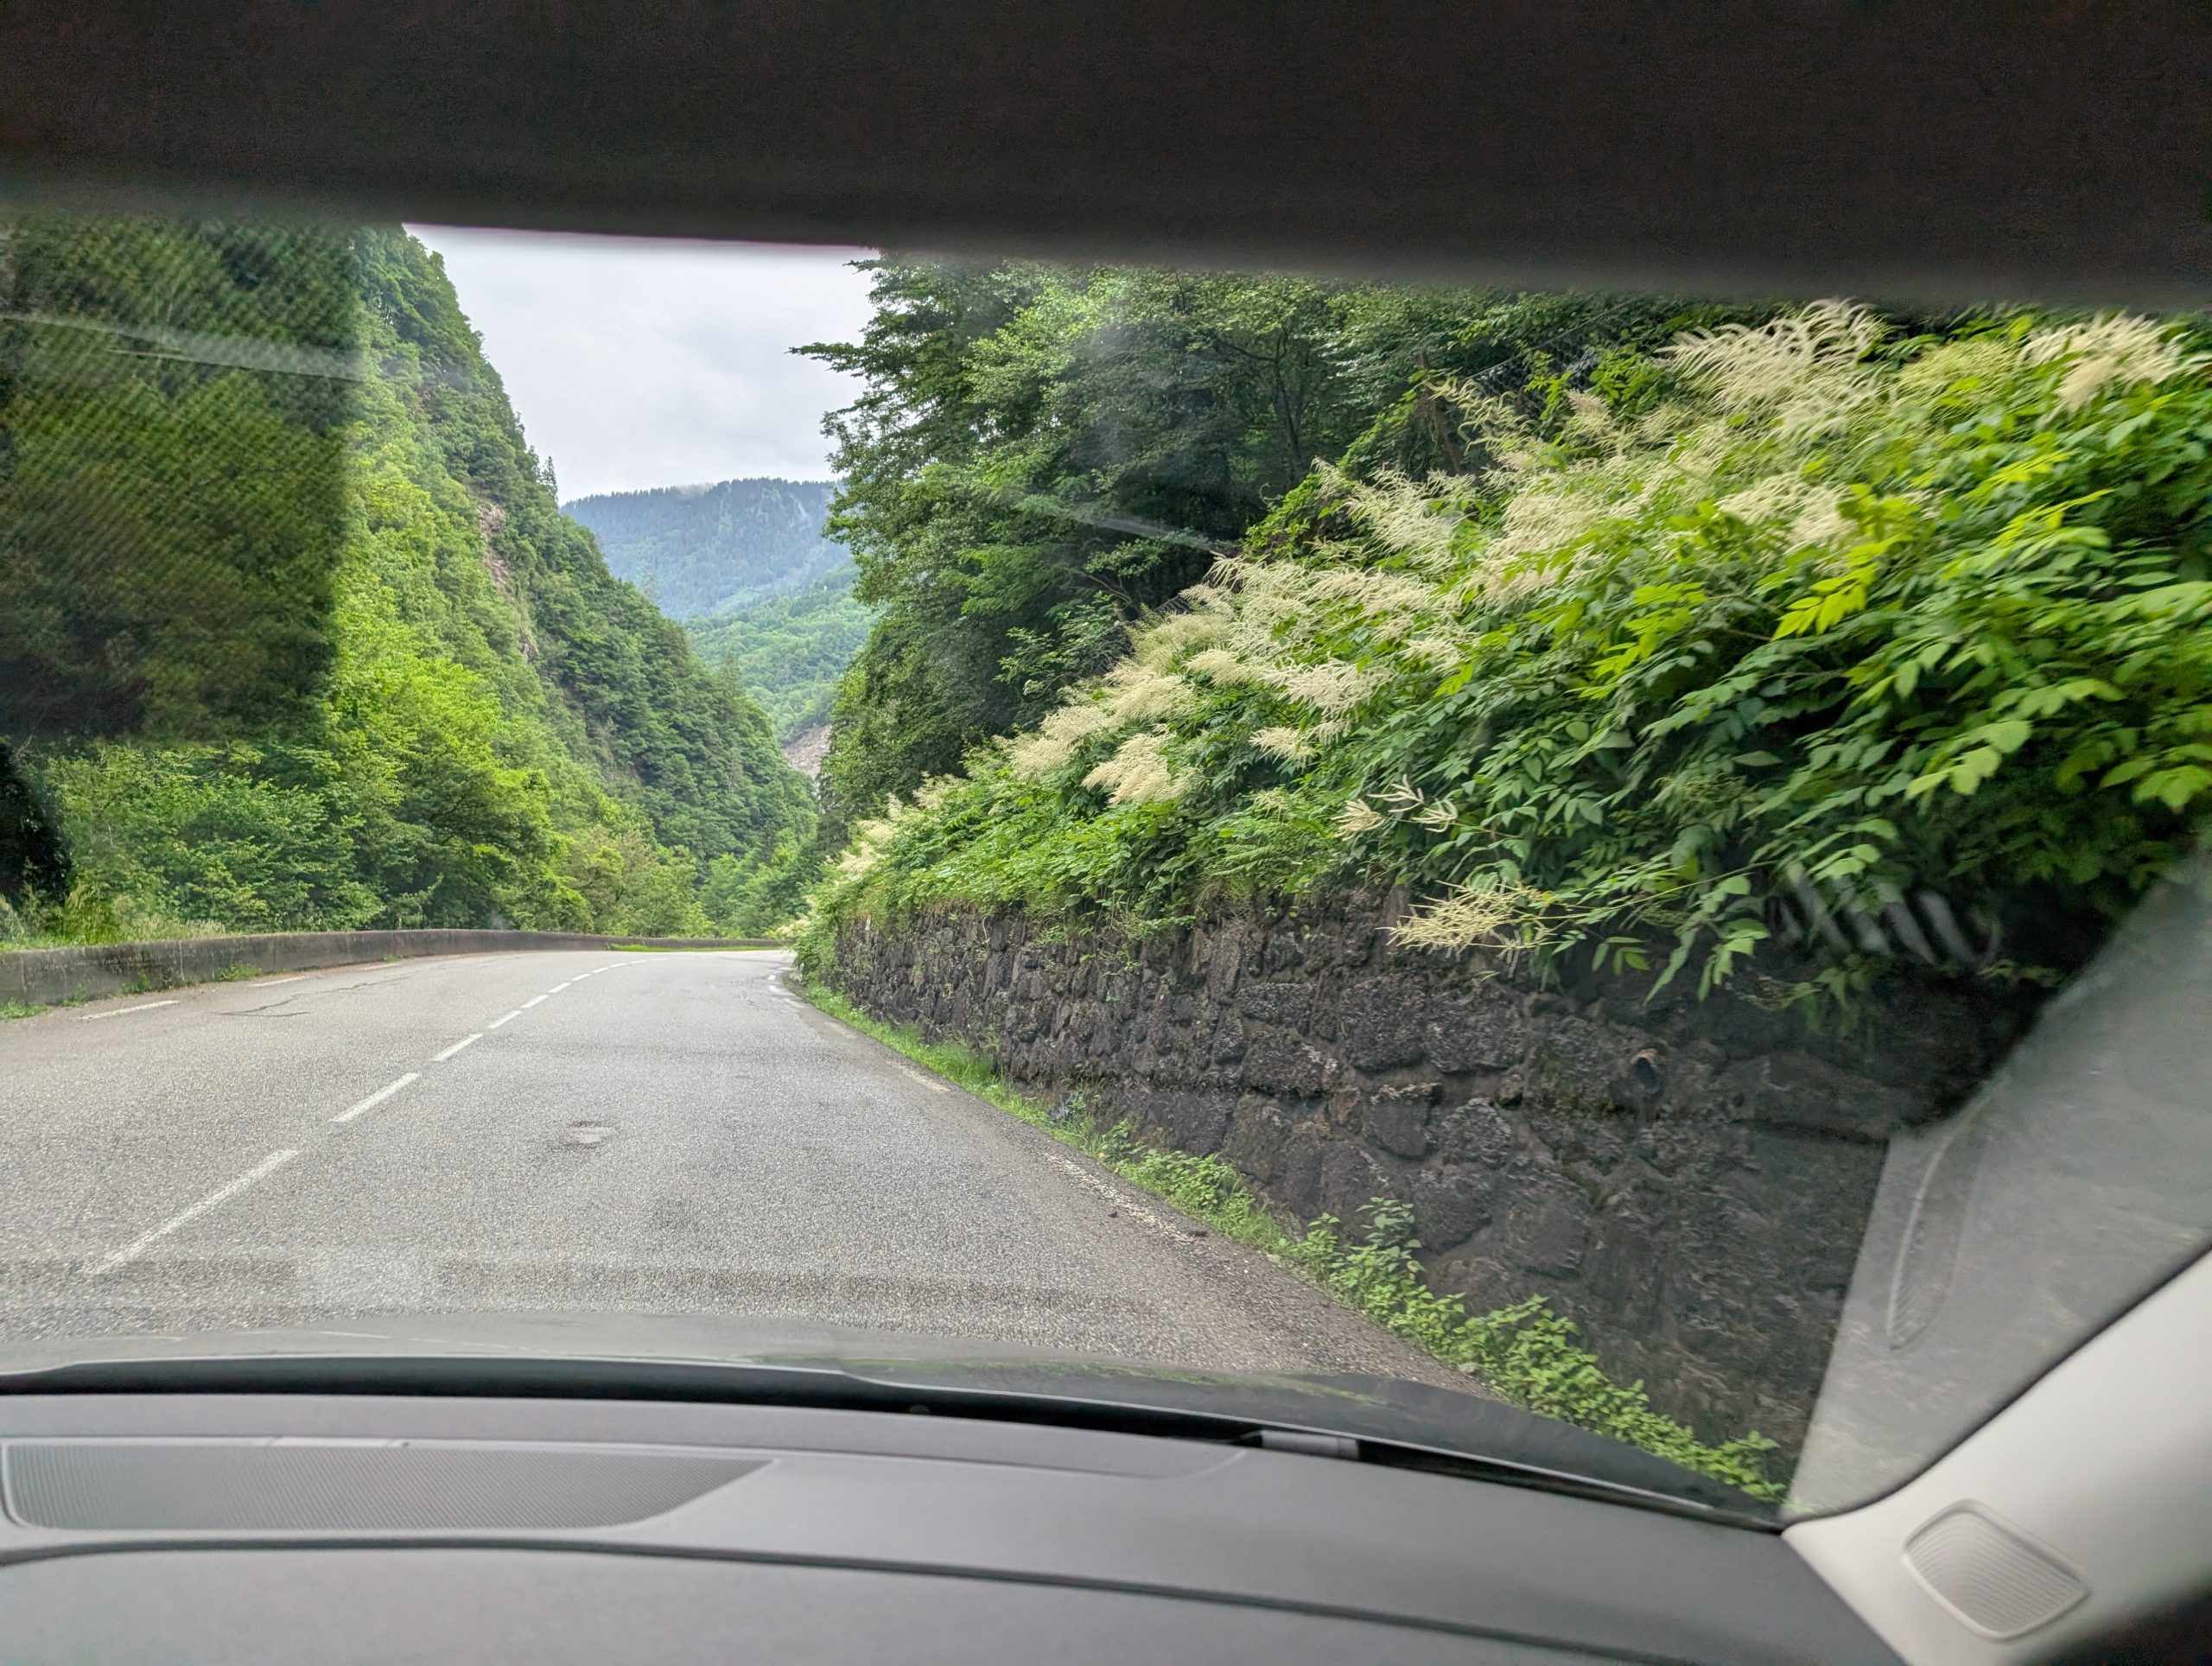
The drive took us through an incredible region with exceptional landscapes, fairytale towns, and natural wonders galore. Absolutely perfect for nature lovers like Andy and me. And along the way when driving through narrow gorges, we were in the company of Goat’s Beard, a flowering herbaceous perennial.
This part of the French Alps is a popular destination during the ski season, and it appeared that every little village had its own lift and ski runs. But we were lucky enough to visit it in the Spring, when the mountain flowers were in full bloom and there was no snow on the ground. Frankly I would have been scared stiff if there had been snow. Because like everywhere else in the Alps, the roads are narrow, twisty, and only designed for horse drawn wagons, not little cars with more horsepower than needed to get the job done. Absolutely no one can go very fast on most of the roads. Too many twists and turns. And drivers are different here. Yes, they drive fast on Autoroutes (motorways) with a default limit of 130 km/h. But drivers aren’t rude here. They have manners. They don’t have to prove they are macho by cutting people off or in any way showing that they are in some way superior. And even though there is sometimes graffiti, there is no trash along the road. People take care to make things nice.
When we got back to our hotel, we had time before dinner to do some reading. When it was time to go for dinner, the heavens opened, and we were tempted to get in our car and go look for a restaurant. But it isn’t the same in towns that have been around for centuries. Parking is a problem. And many parking lots cost money. And almost always, they are full anyway. So, even if you can get a parking space, you still must walk some distance.
So, we put on our raincoats and headed out to see what we could find. And if it seems like it might have taken a long time to get to the restaurants, it only took no more than 10 minutes to walk to any of the restaurants we visited. Since we had already been to 4 different restaurants, (Josephine Restaurant, L’ Atelier, Casa Valerio, and Le Monchu), why not make it 5? We settled on the Rose Du Pont. Very beautiful building and as we had learned the hard way, we split a delicious green salad and fish and chips (frites). Perfect amount for us.
Then back to our room to read some more and for me to write up today’s adventure.
Tomorrow, we leave this beautiful alpine town, and head into the interior of France.
Tuesday, May 20, 2025 – Camano Island to Vancouver, BC to Amsterdam
Got off to a great start. We wanted to leave home by 10:00 am and actually backed down the driveway at 10:04 am. Hurray us!
Then an easy drive to Peace Arch crossing with not even a 5-minute wait. And then a less than 1 minute questioning by the Canadian crossing guard including where are you headed, when do you plan to return, and do you have any guns etc. along for the ride. After that brutal inquisition, we were on our way to YVR (the Vancouver BC International airport). But before we could go through all the security, check in, and interminably long wait to board our flight, we first had to a) find the airport, and b) drop off our car. Piece of cake! There were signs everywhere. (Thank you, Canada and Jetset YVR Parking.)
Then onto the plane we proceeded. Business Class, which BTW I adamantly recommend, especially if you are a senior citizen. For this trip, we were, for the first time, flying the friendly skies with KLM. The seats were wonderfully comfortable, but their idea of gourmet fare and mine are worlds apart. Suffice it to say, I ate hardly any of the dinner and breakfast provided. But sleep, that I did. All tucked away in my own little cocoon. With Mr. C. right next to me.
After landing and collecting our luggage, it was time to find a taxi. Easy. And there was no waiting time. Then it was off to our BNB.
Wednesday, May 21, 2025 – bnbheerhugowaard
Now, when I was reserving a place to lay our heads the first night in the Netherlands, I decided against staying in Amsterdam proper. Hotels in Amsterdam are very pricy. Well, I should have realized that a taxi ride of 57 km from Amsterdam airport to bnbheerhugowaard, would cost quite a bit of money too. But I never imagined that it would cost us 200 Euros, plus tip! Way to go Patti. And then, how in the hell were we going to get from our bnb in the Netherlands hinterland to Amsterdam and then to the Viking River Cruise terminal? Because as we were informed by our host when we arrived, there are no taxis in this small town that go as far as Amsterdam. Well then, now what should we do? So, Andy went on his phone and found a local taxi company where we could book online for a quick 6 kl car ride that would take us to the town’s (and I use the term “town” loosely) train station. But mind you, at this point we are sleep deprived, hungry, and I am totally anxious and ready to turn around and JUST GO HOME! So, instead of making a taxi reservation for 10:00 am on the 22nd, he made it for the 23rd. And after securing a taxi, Andy went online and bought us 2 first class train tickets to Amsterdam.
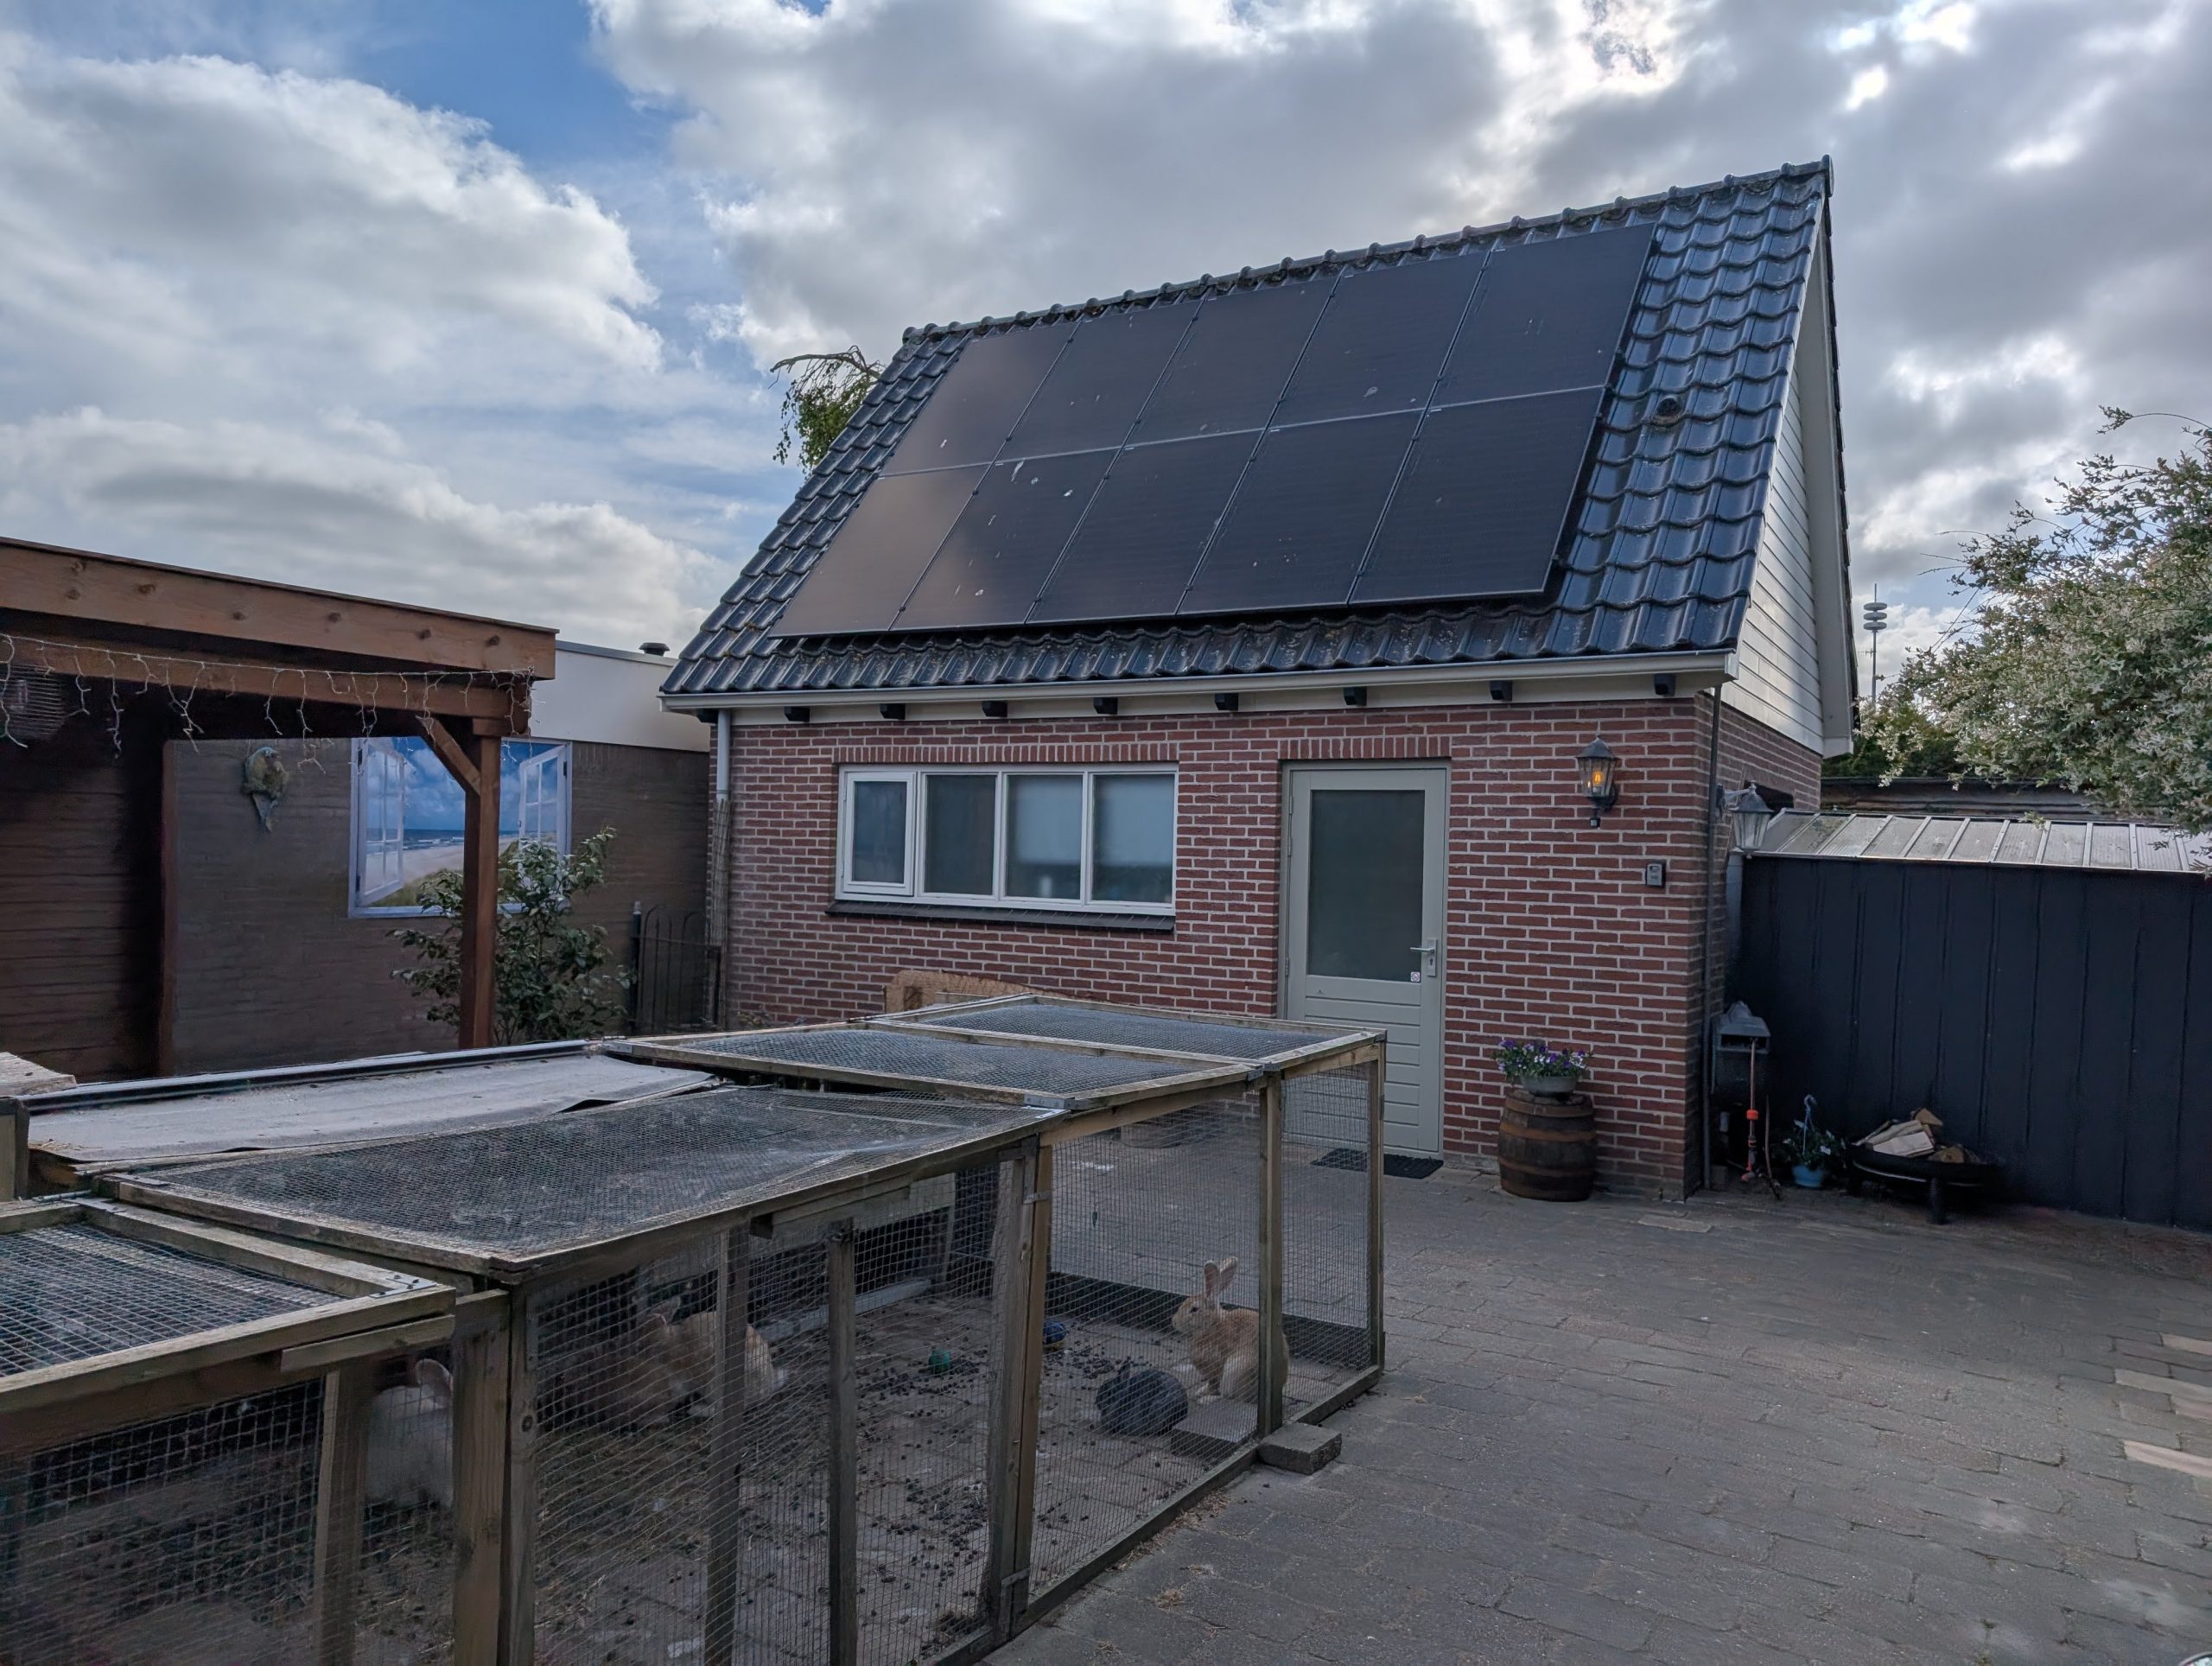
Our own little room at the bnb. Notice the pen in the foreground with chickens. There were also rabbits.
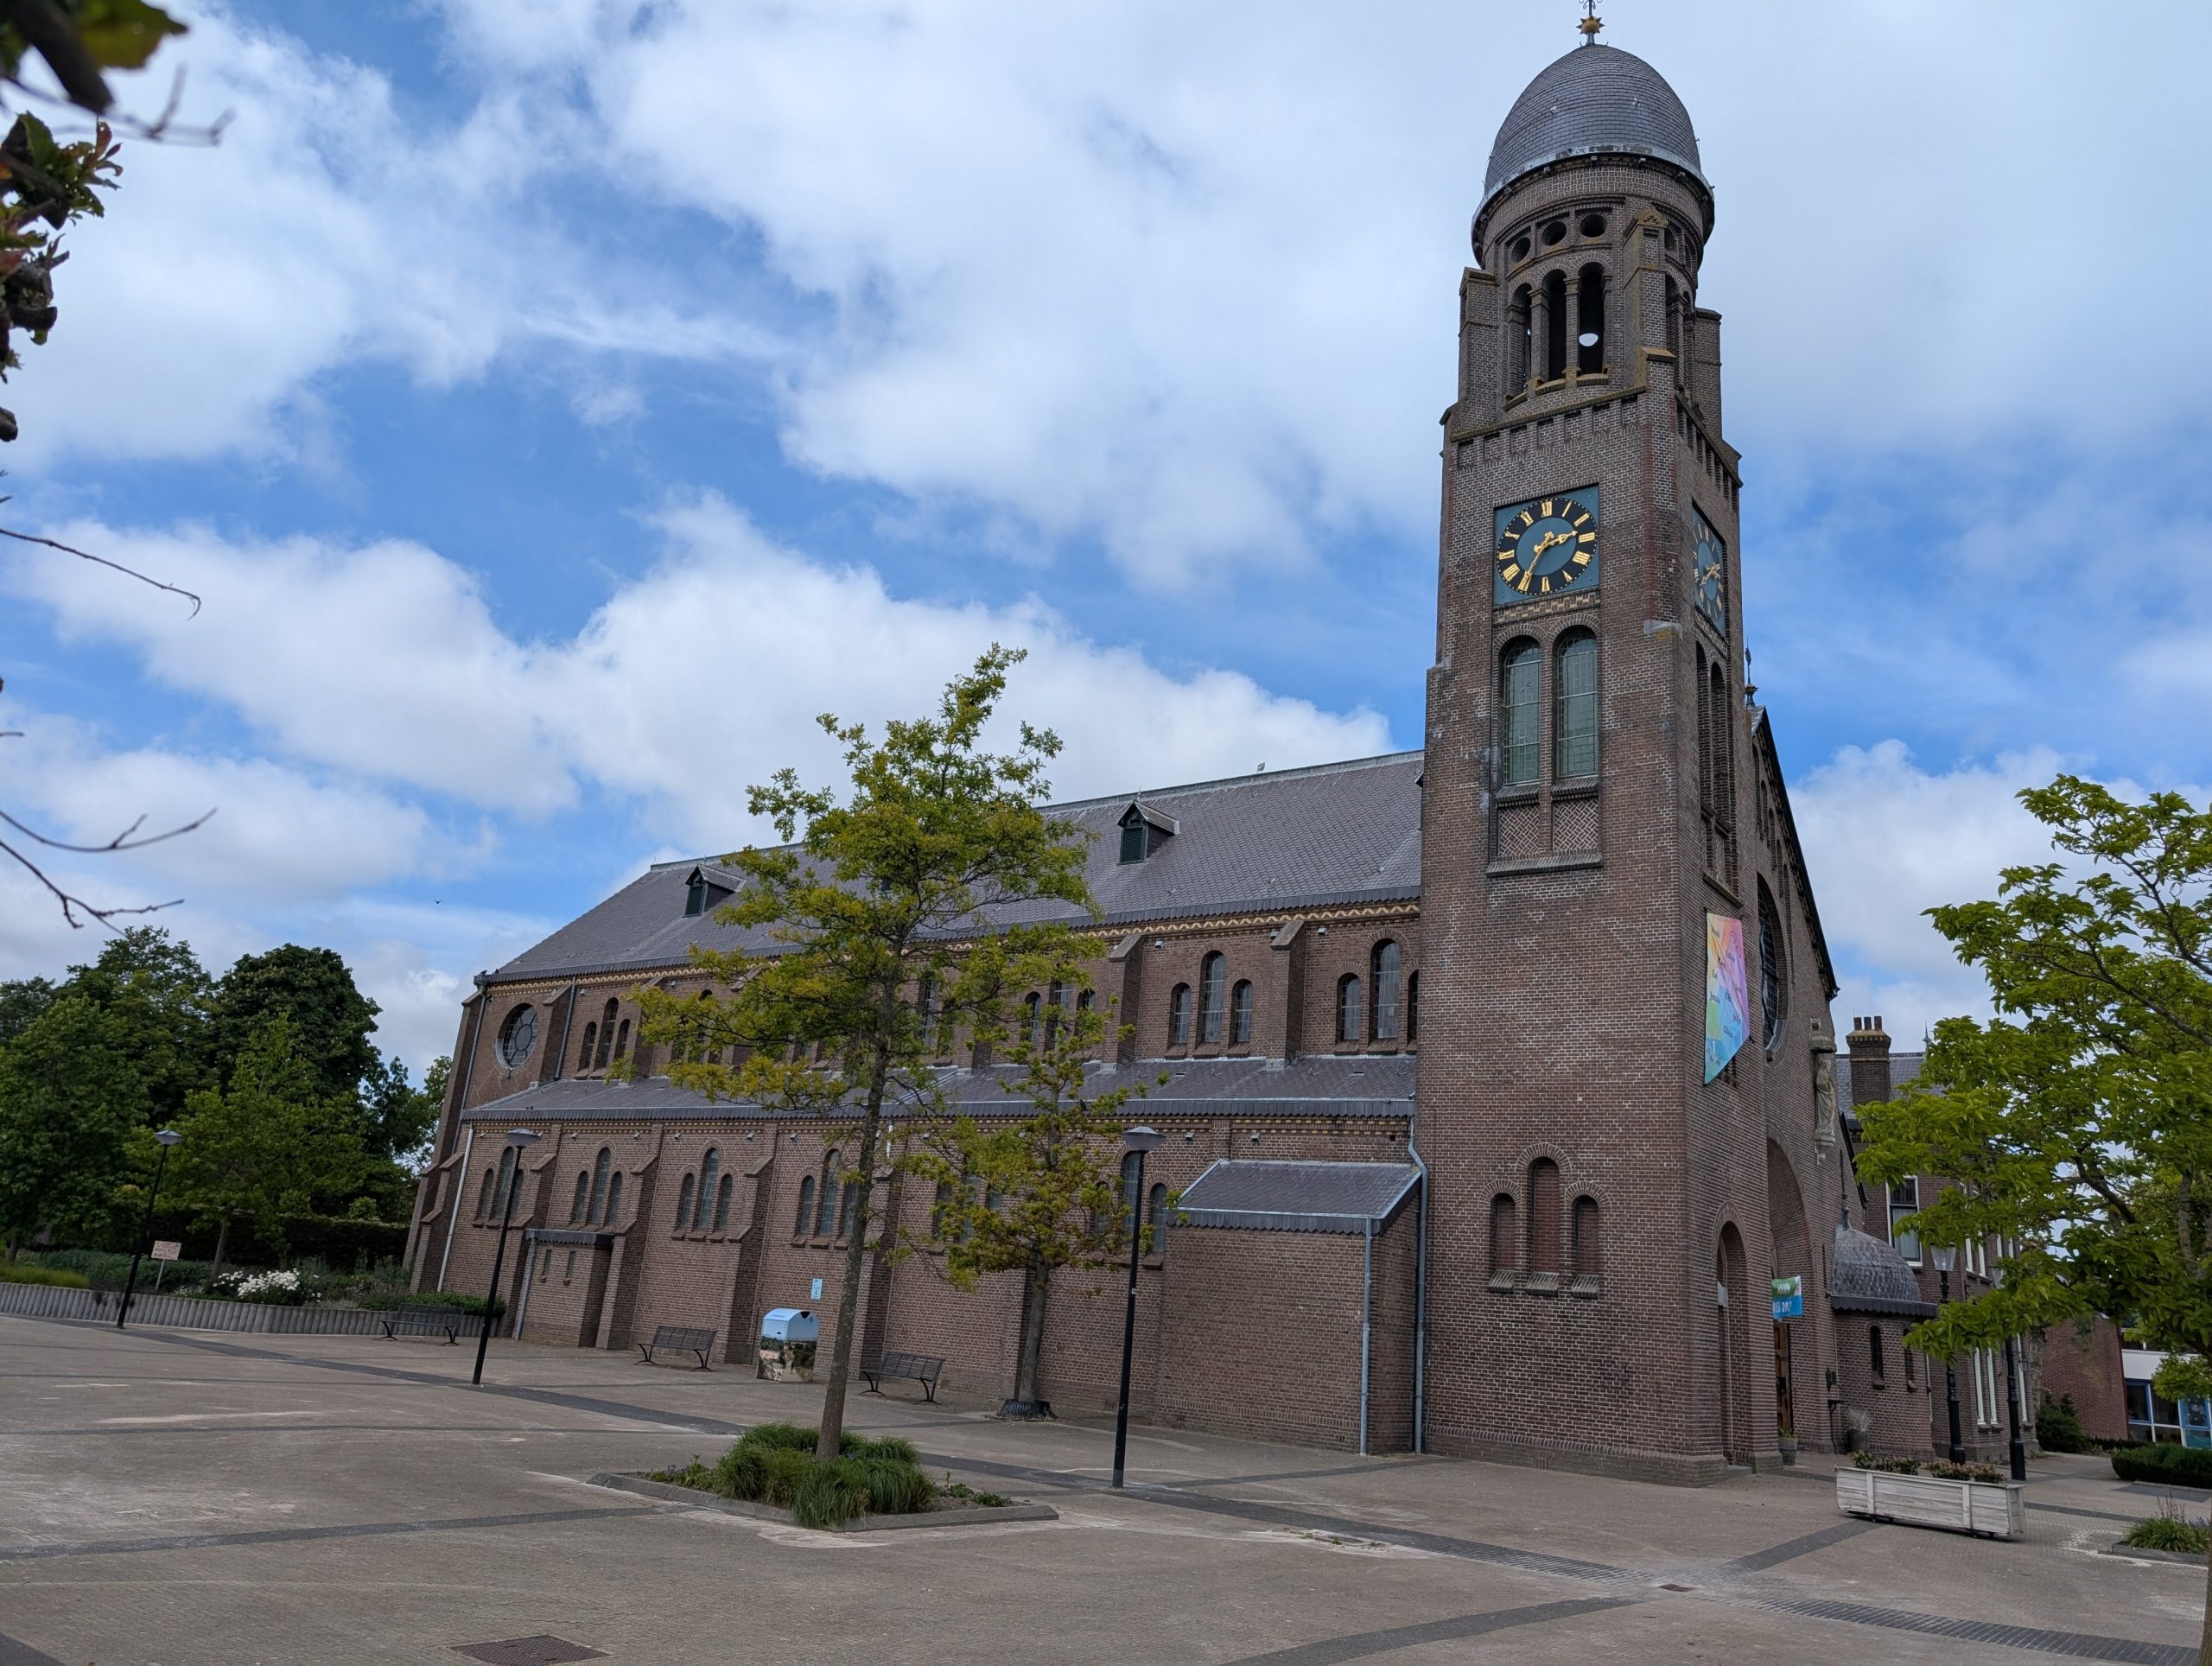
Pretty little church near the bnb in Heerugowaard, Netherlands
Thursday, May 22, 2025 – Amsterdam and all aboard Viking’s Gersemi river boat in Amsterdam.
After partaking of a lovely breakfast provided by our host, we find ourselves checked out and waiting at 10:00 am for our taxi. At about 10 after, Andy looked at the reservation again and realized his mistake. Now, what in the bloody hell are we going to do? Just about then our host must have seen us still waiting and we explained that we had made an error, had called the taxi company, confessed our mistake, and they said they would try and get a cab to us in half an hour. “Try” being the operative word. Our host took pity on us, and after unloading a whole bunch of stuff from his car, took us to the train station. So, here we are waiting for the next train, not really knowing what to do. I must at this point tell one and all that when an old lady with a smile on her face, and a confession of being completely confused asks for assistance, it is gladly given. Because this lovely young man, who was also waiting for the next train, who BTW spoke beautiful English, helped us figure out which train to take.
But then, now that we have the train reservation on our phone, what in blue blazes do we do next. There is no scanner or any railroad personnel to assist us at the station. God must have taken pity on us, because now we are at least traveling in the right direction. That destination being Amsterdam. A nice ride and we got to see a lot of lovely homes, fields of cows and sheep, water canals everywhere, and more bicycles than I have ever seen in any place before.
So, we got off the train, and again, not a soul to tell us where to go. And I’m telling you true, I wanted to shout at just about anyone who would listen, just exactly where I wanted them to go! No signs, and of course I led us astray. At about the time I was afraid I might break into tears; Andy calmly directed us to the exit. And of course, we had to prove that we had actually paid for our ride. But perhaps at this point the Gods of foreign travel decided to once again take pity on us, because the gate opened immediately as soon as Andy showed the bar code, or whatever that squiggly square thing is called, and we were no longer train station captives. Then, where do we find a taxi. Again, no signs. But Andy spotted a taxi, and we toddled off to claim it at a good clip for a couple of weary senior citizens. And the taxi driver gladly opened the car doors for us.
And then our next adventure began. We gave the nice taxi driver as much information as we had, but unfortunately, he dropped us off at the wrong dock. But as luck would have it, a nice lady who was helping people board a huge floating hotel, sent us off in the right direction. And after about a 20-minute brisk walk, we finally arrived at our destination.
Now I must confess, I haven’t walked that long or that fast in many years. It’s amazing what the fear of not knowing where you are and how you are going to get to where you need to be, to put your body into – full steam ahead mode! But we were welcomed aboard our Viking ship, shown to our room, and were advised that lunch was being served.
And the really ridiculous part of this whole unnecessary taxi ride was the fact that the train station was closer to where our boat was moored than where the taxi driver dropped us off! But that is just one of the aspects of traveling. Not having a clue what you are doing. Will I ever forget this mix-up, of course not!
After a nice repast, we went back to our room, took everything out of our freshly delivered suitcases, and stowed everything in drawers and closets. I was amazed at how much storage there actually was in our tiny room.
We chose not to pay for a fancy room because we didn’t plan to stay in our room when there were so many lovely areas on the boat just begging to be used.
After a light lunch, it was time for me to start my travel report.
Andy decided to go for a short introduction to Amsterdam guided walk at 3:30 pm (5 people) into the heart of Amsterdam.
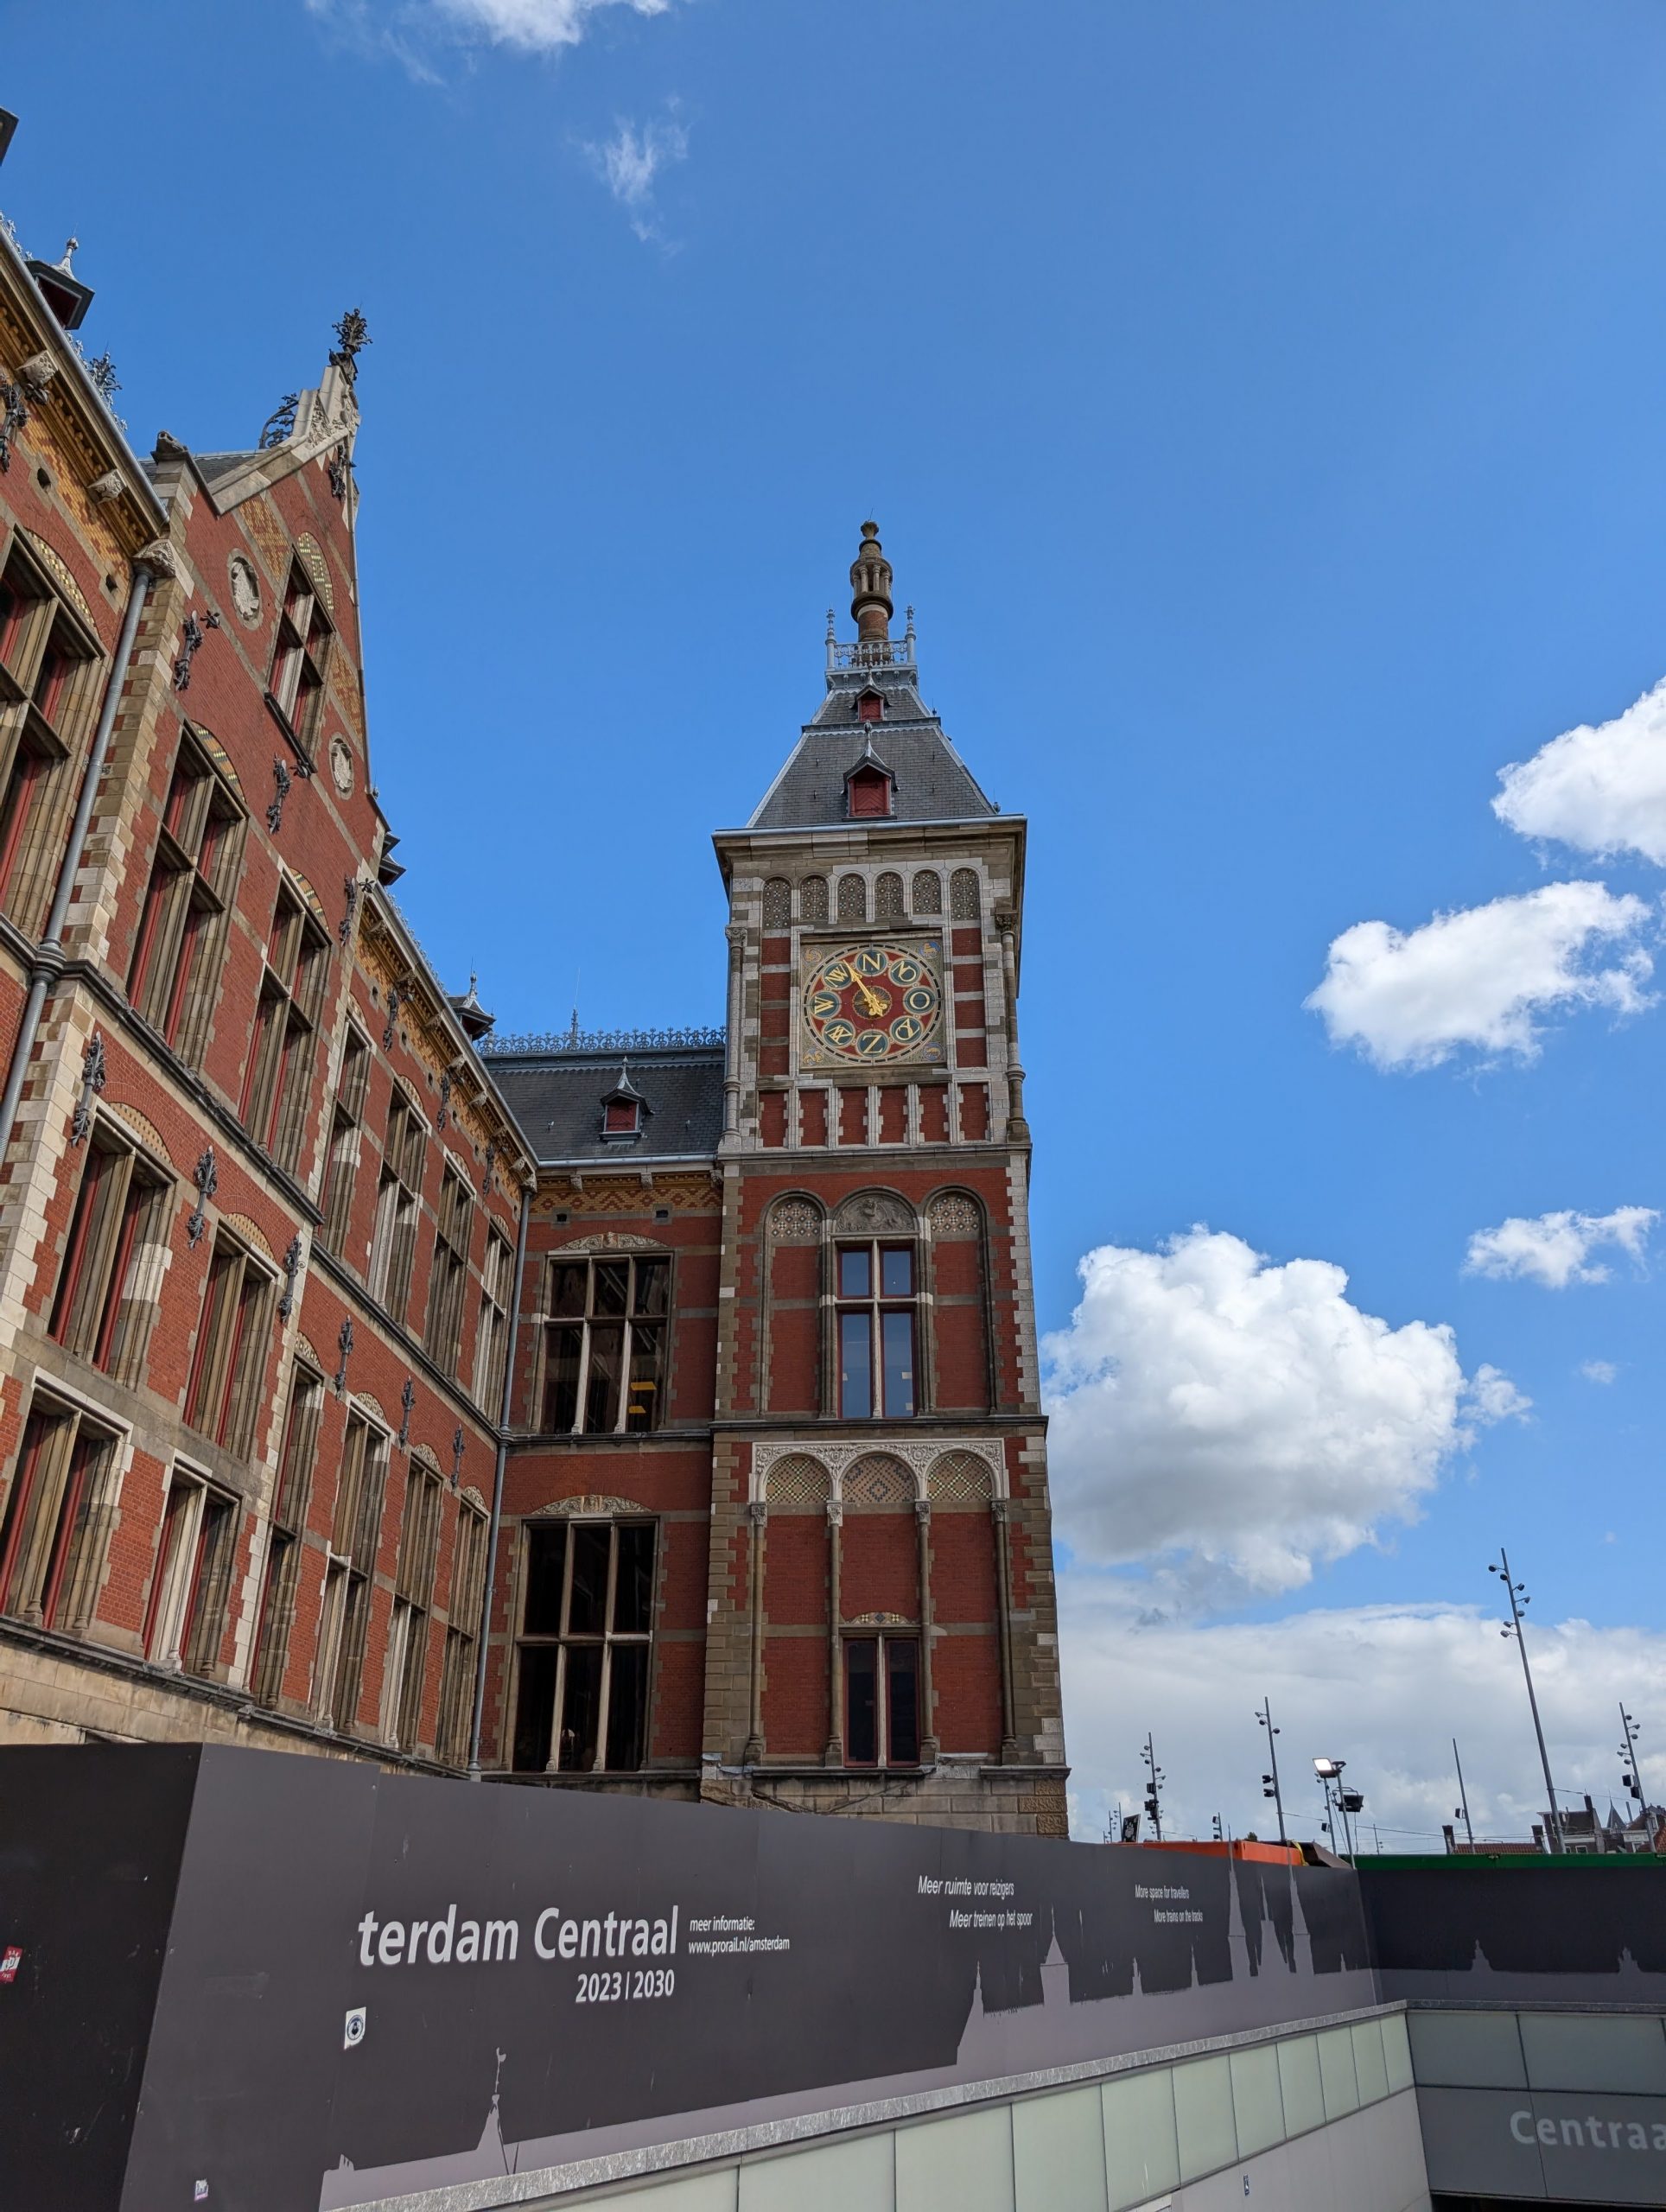
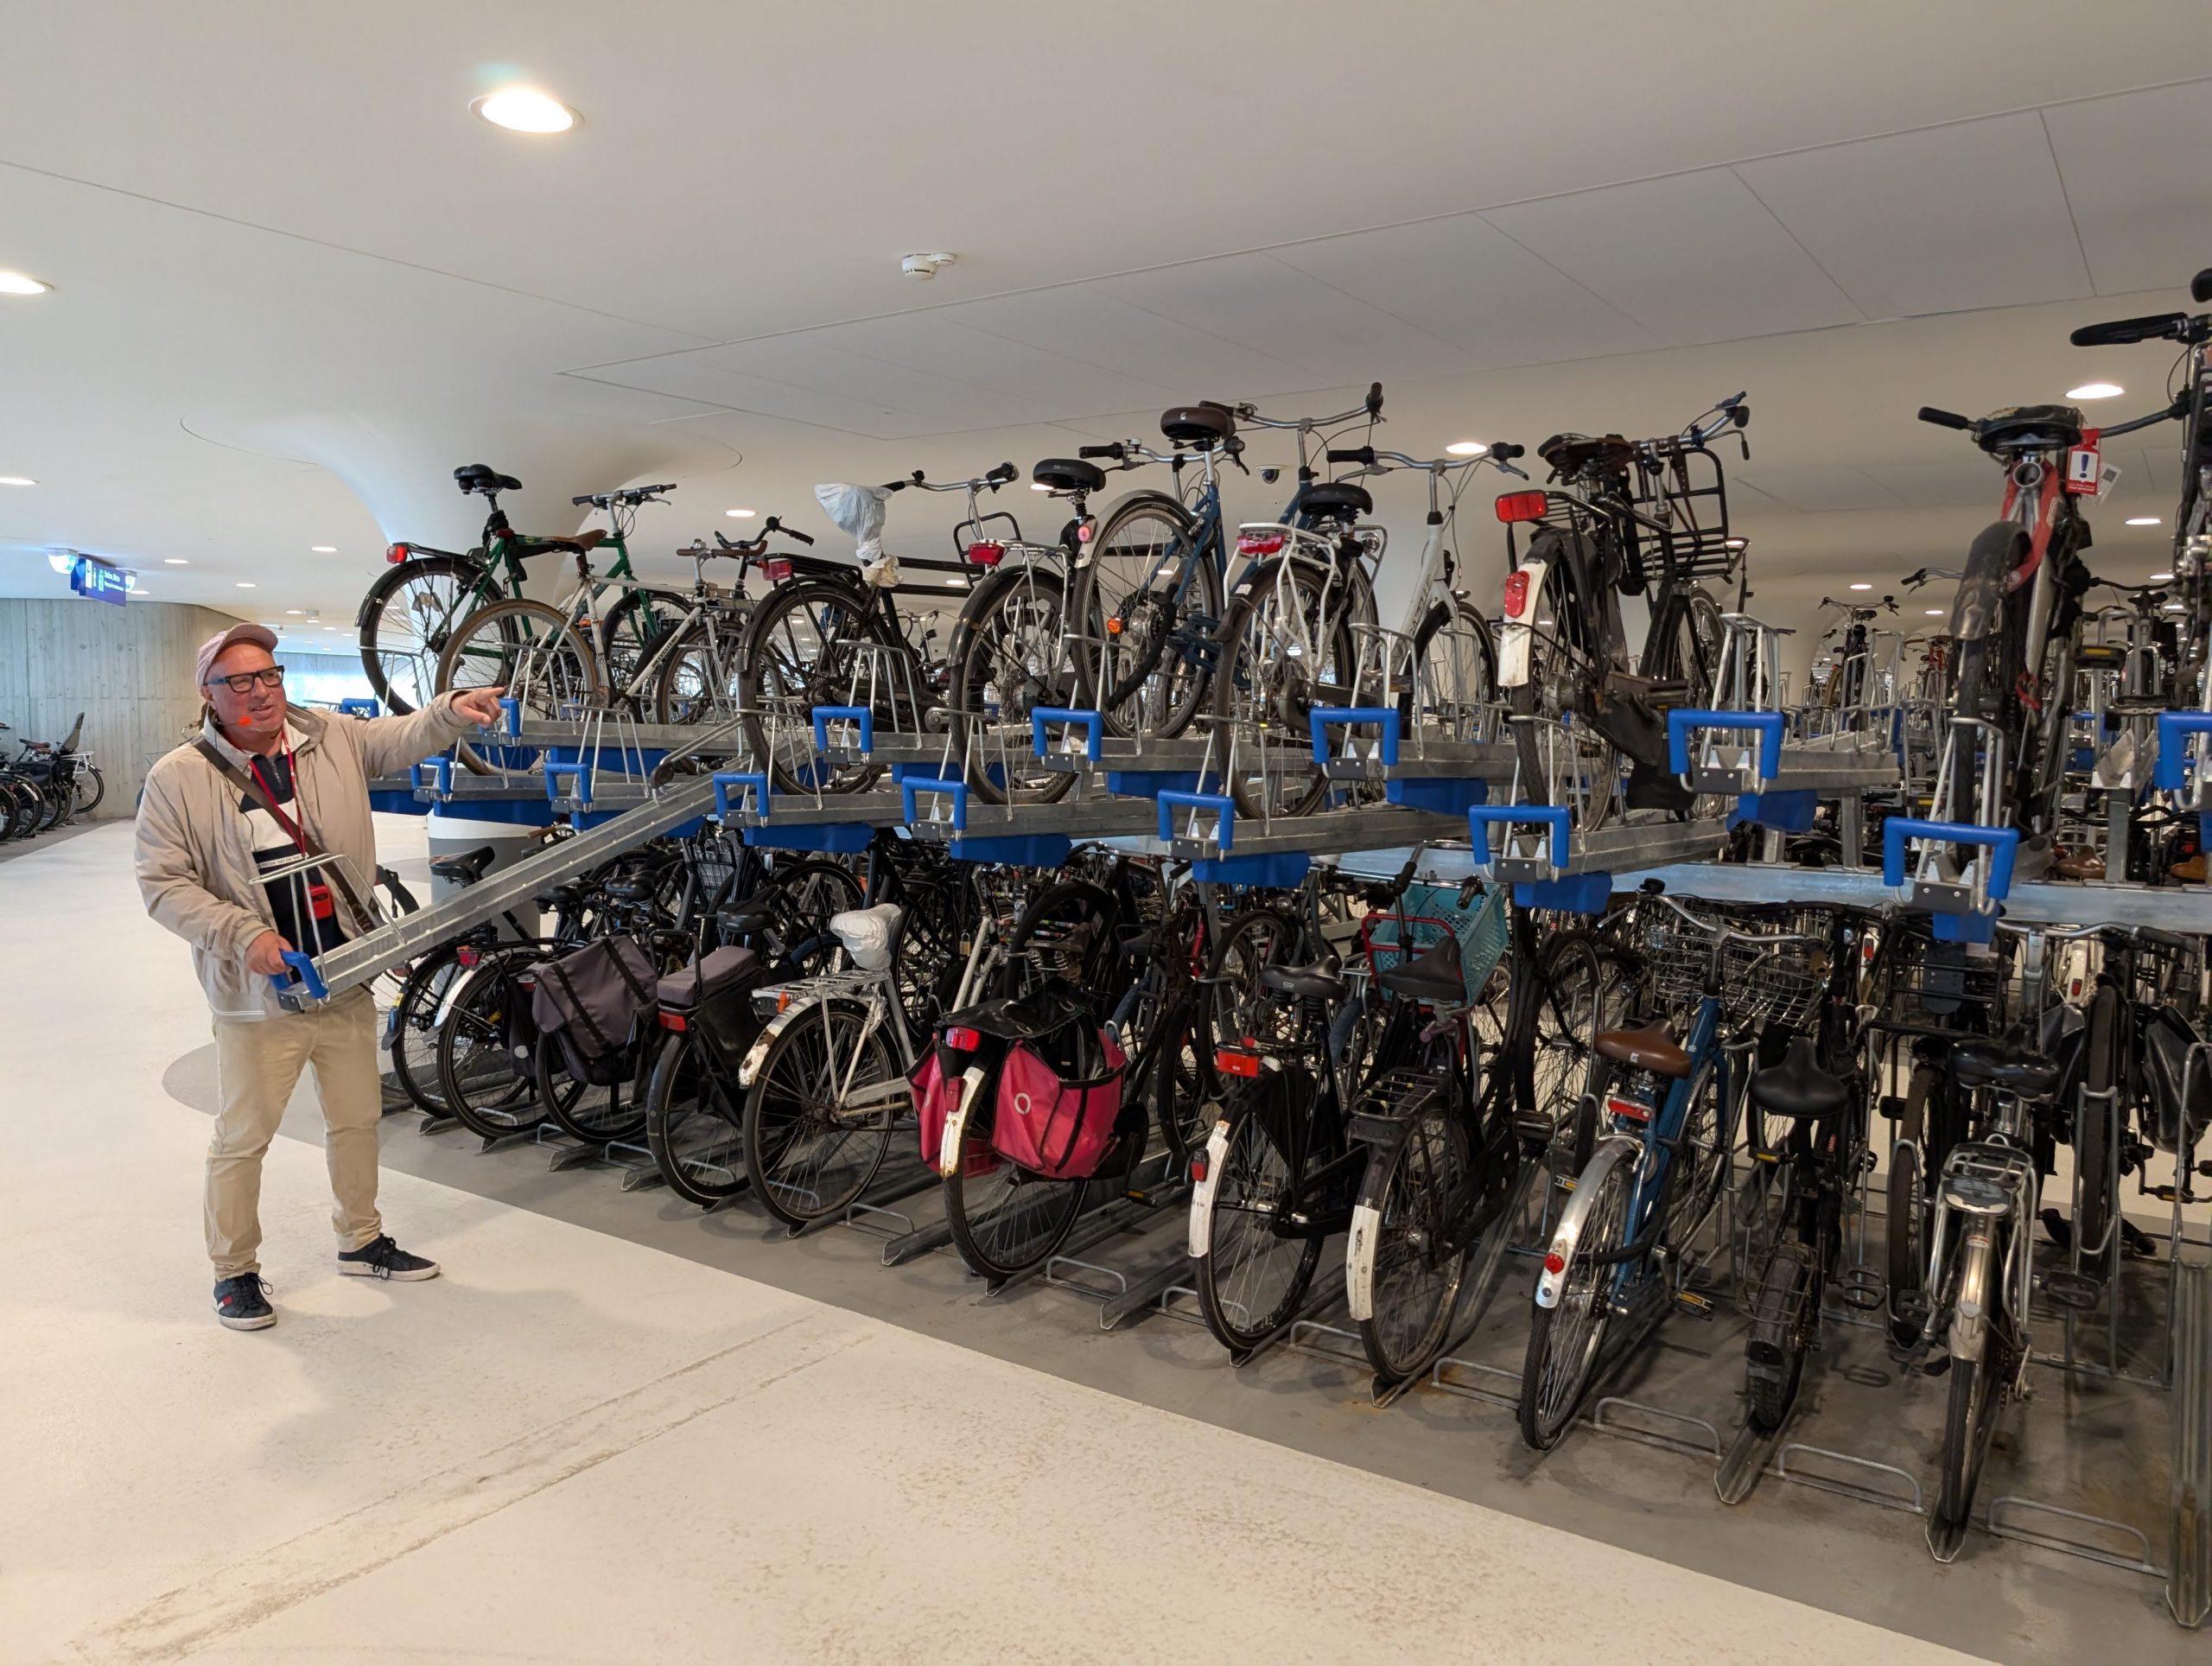
Amsterdam’s train station
Amsterdam Centraal Station has two new underwater bicycle parking facilities with a combined capacity of approximately 11,000 bicycles.
I decided to stay in our room, start my trip report, and if luck was on my side, take a bit of a nap before toddling up to the lounge for drinks at 5:00 pm.
Interesting fact about Amsterdam. Amsterdam consists of 90 islands. Basically, a patchwork of islands connected by 1,500 bridges.
Met a lovely couple from Nashville who were retired music educators. We thoroughly enjoyed talking with them. Then at 6:00 pm we were given a welcome briefing and safety instructions. 7:00 pm was dinner. Again, we met a nice couple from Salem, Oregon. And after our initial banter, we realized we were of like minds when it came to the situation, we Americans are currently facing. So, we talked about our leaders. Of course we did! Then after dinner we decided to check out the trio that would be providing entertainment in the lounge. After 30 seconds, we gave it a pass, headed back to our room, and were in bed by 9:30 pm hoping to sync our bodies with the local time zone.
I have no pictures from this day. I took plenty, but they somehow disappeared from my cell phone camera. We looked everywhere for them, but they are simply gone. Grrrrr
Friday, May 23, 2025 – Viking’s Gersemi river boat – Kinderdijk, Netherlands
Both woke up early. Andy decided to go top-side and find a cup of coffee. I read for a bit then got ready to join him for breakfast at 7:00 am.
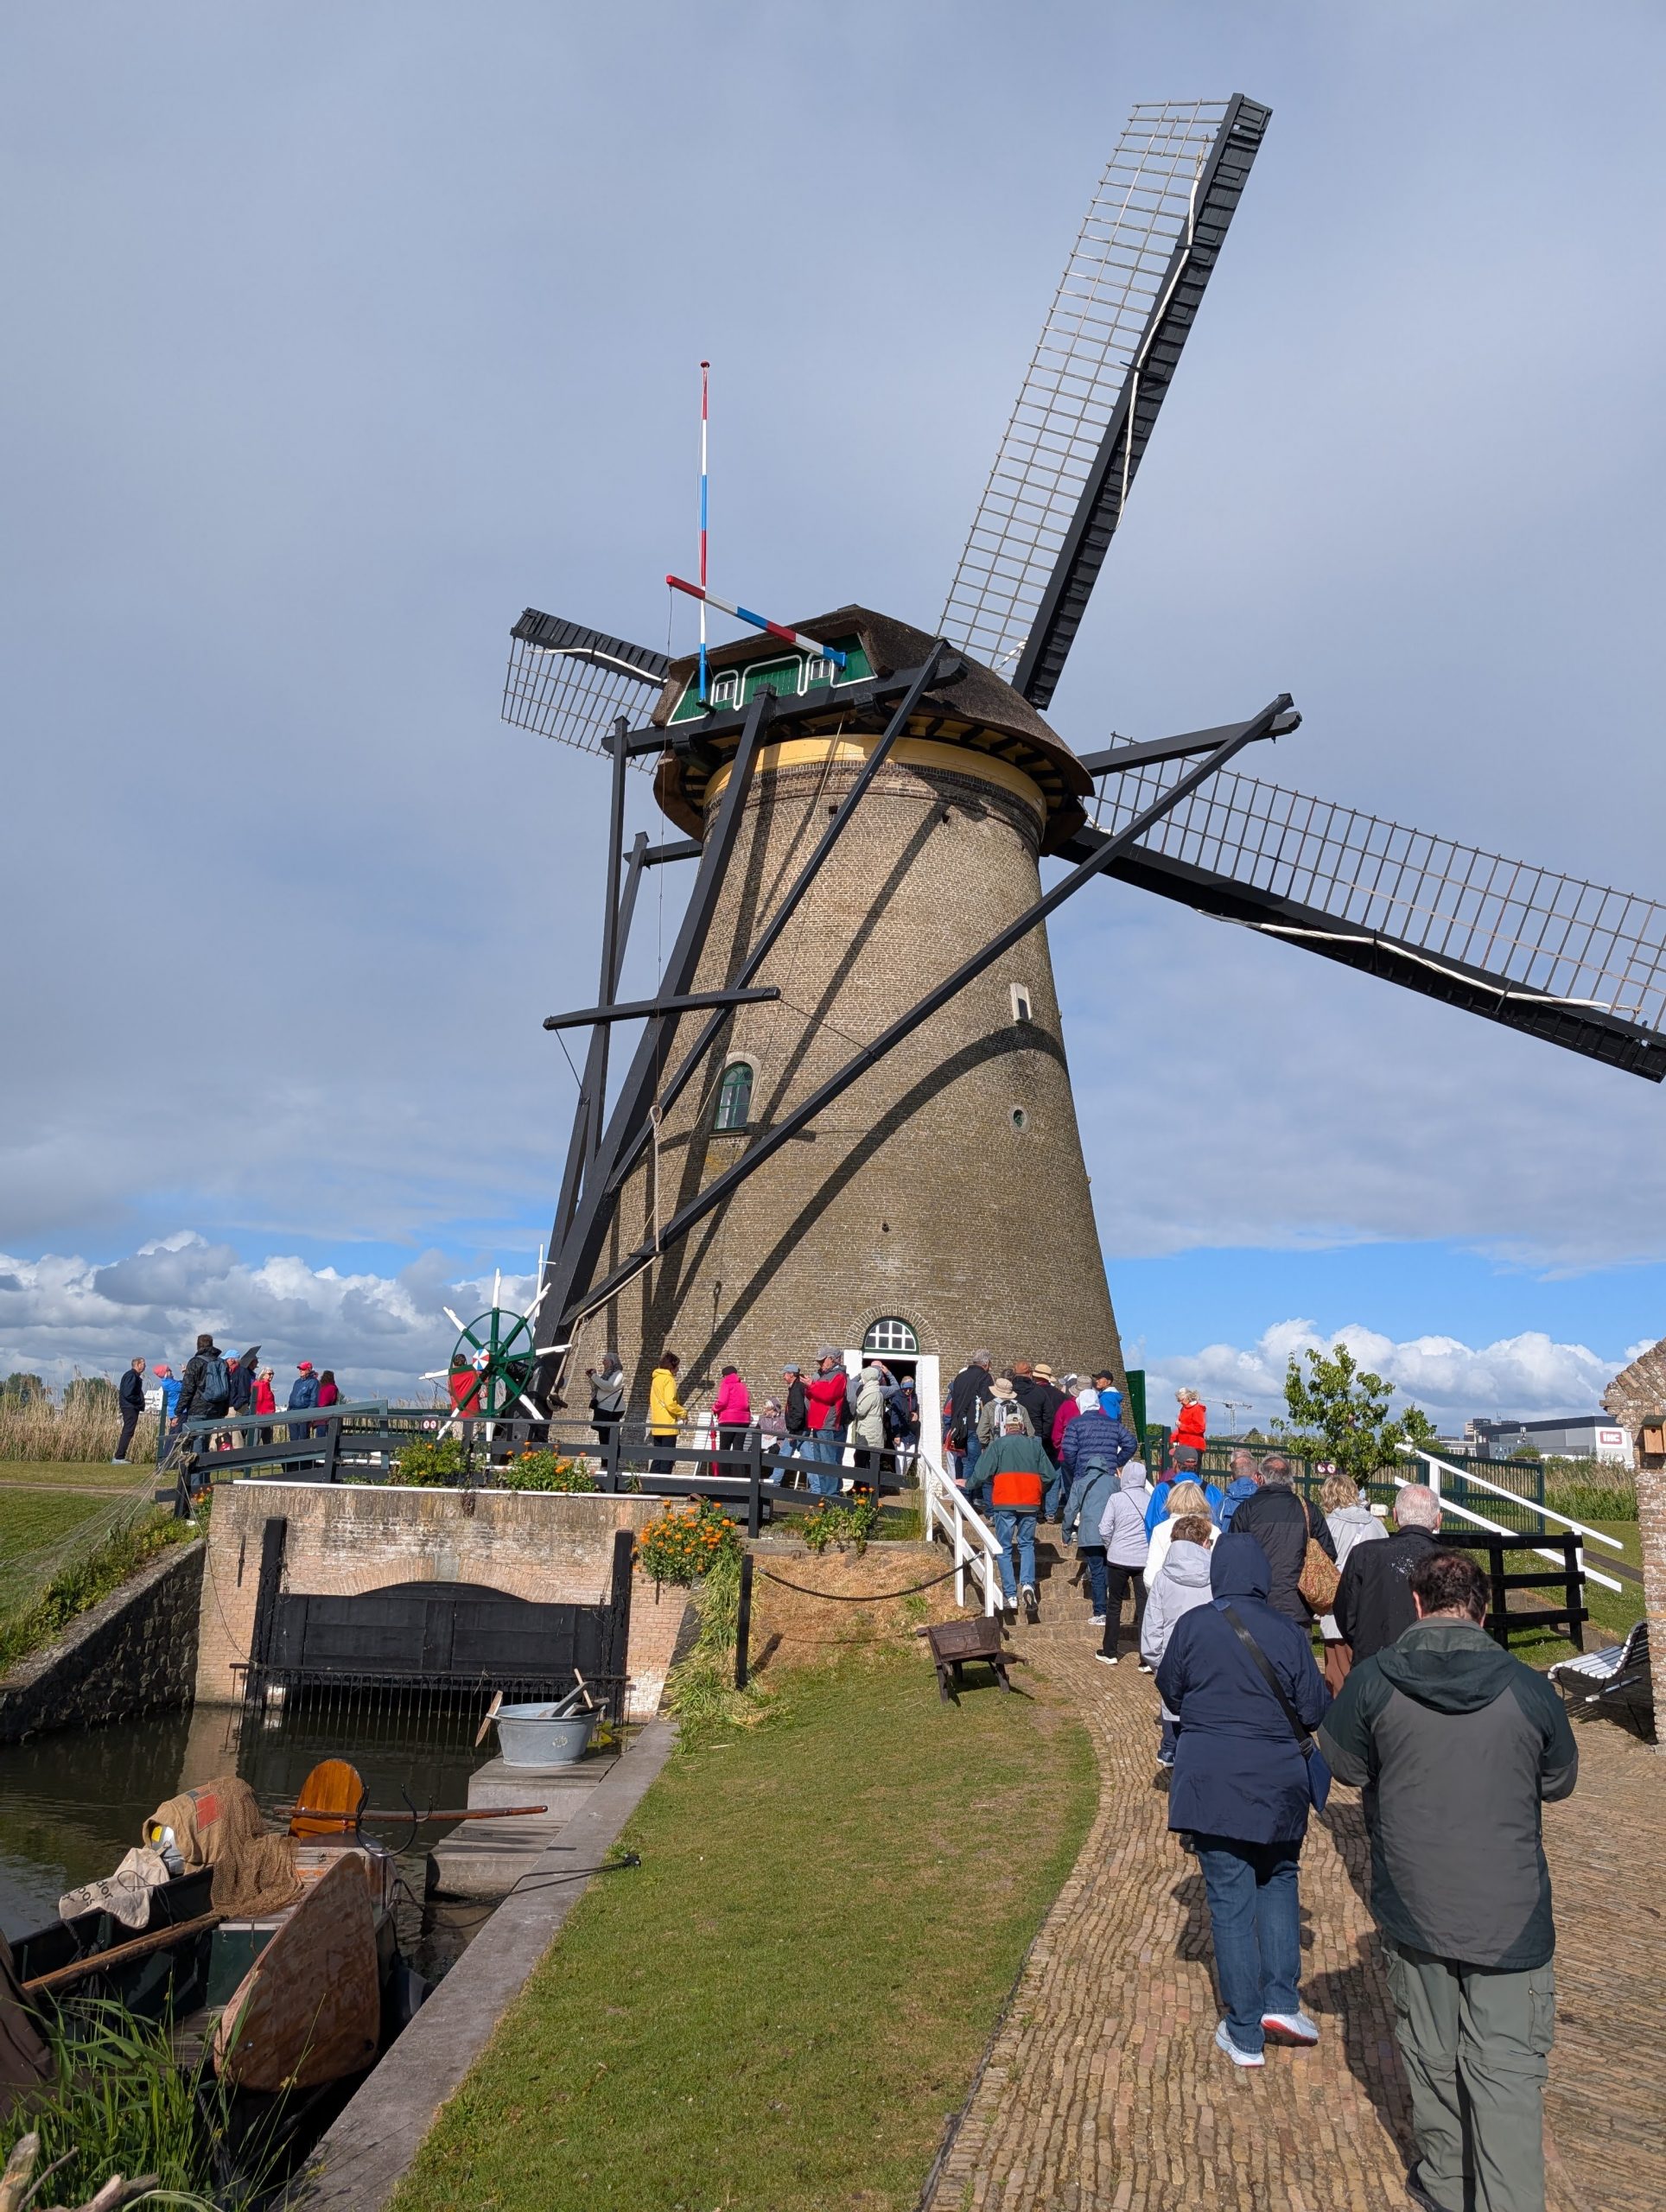
After breakfast, we joined our group at 8:20 am for a shore excursion to the Kinderdijk Windmills.
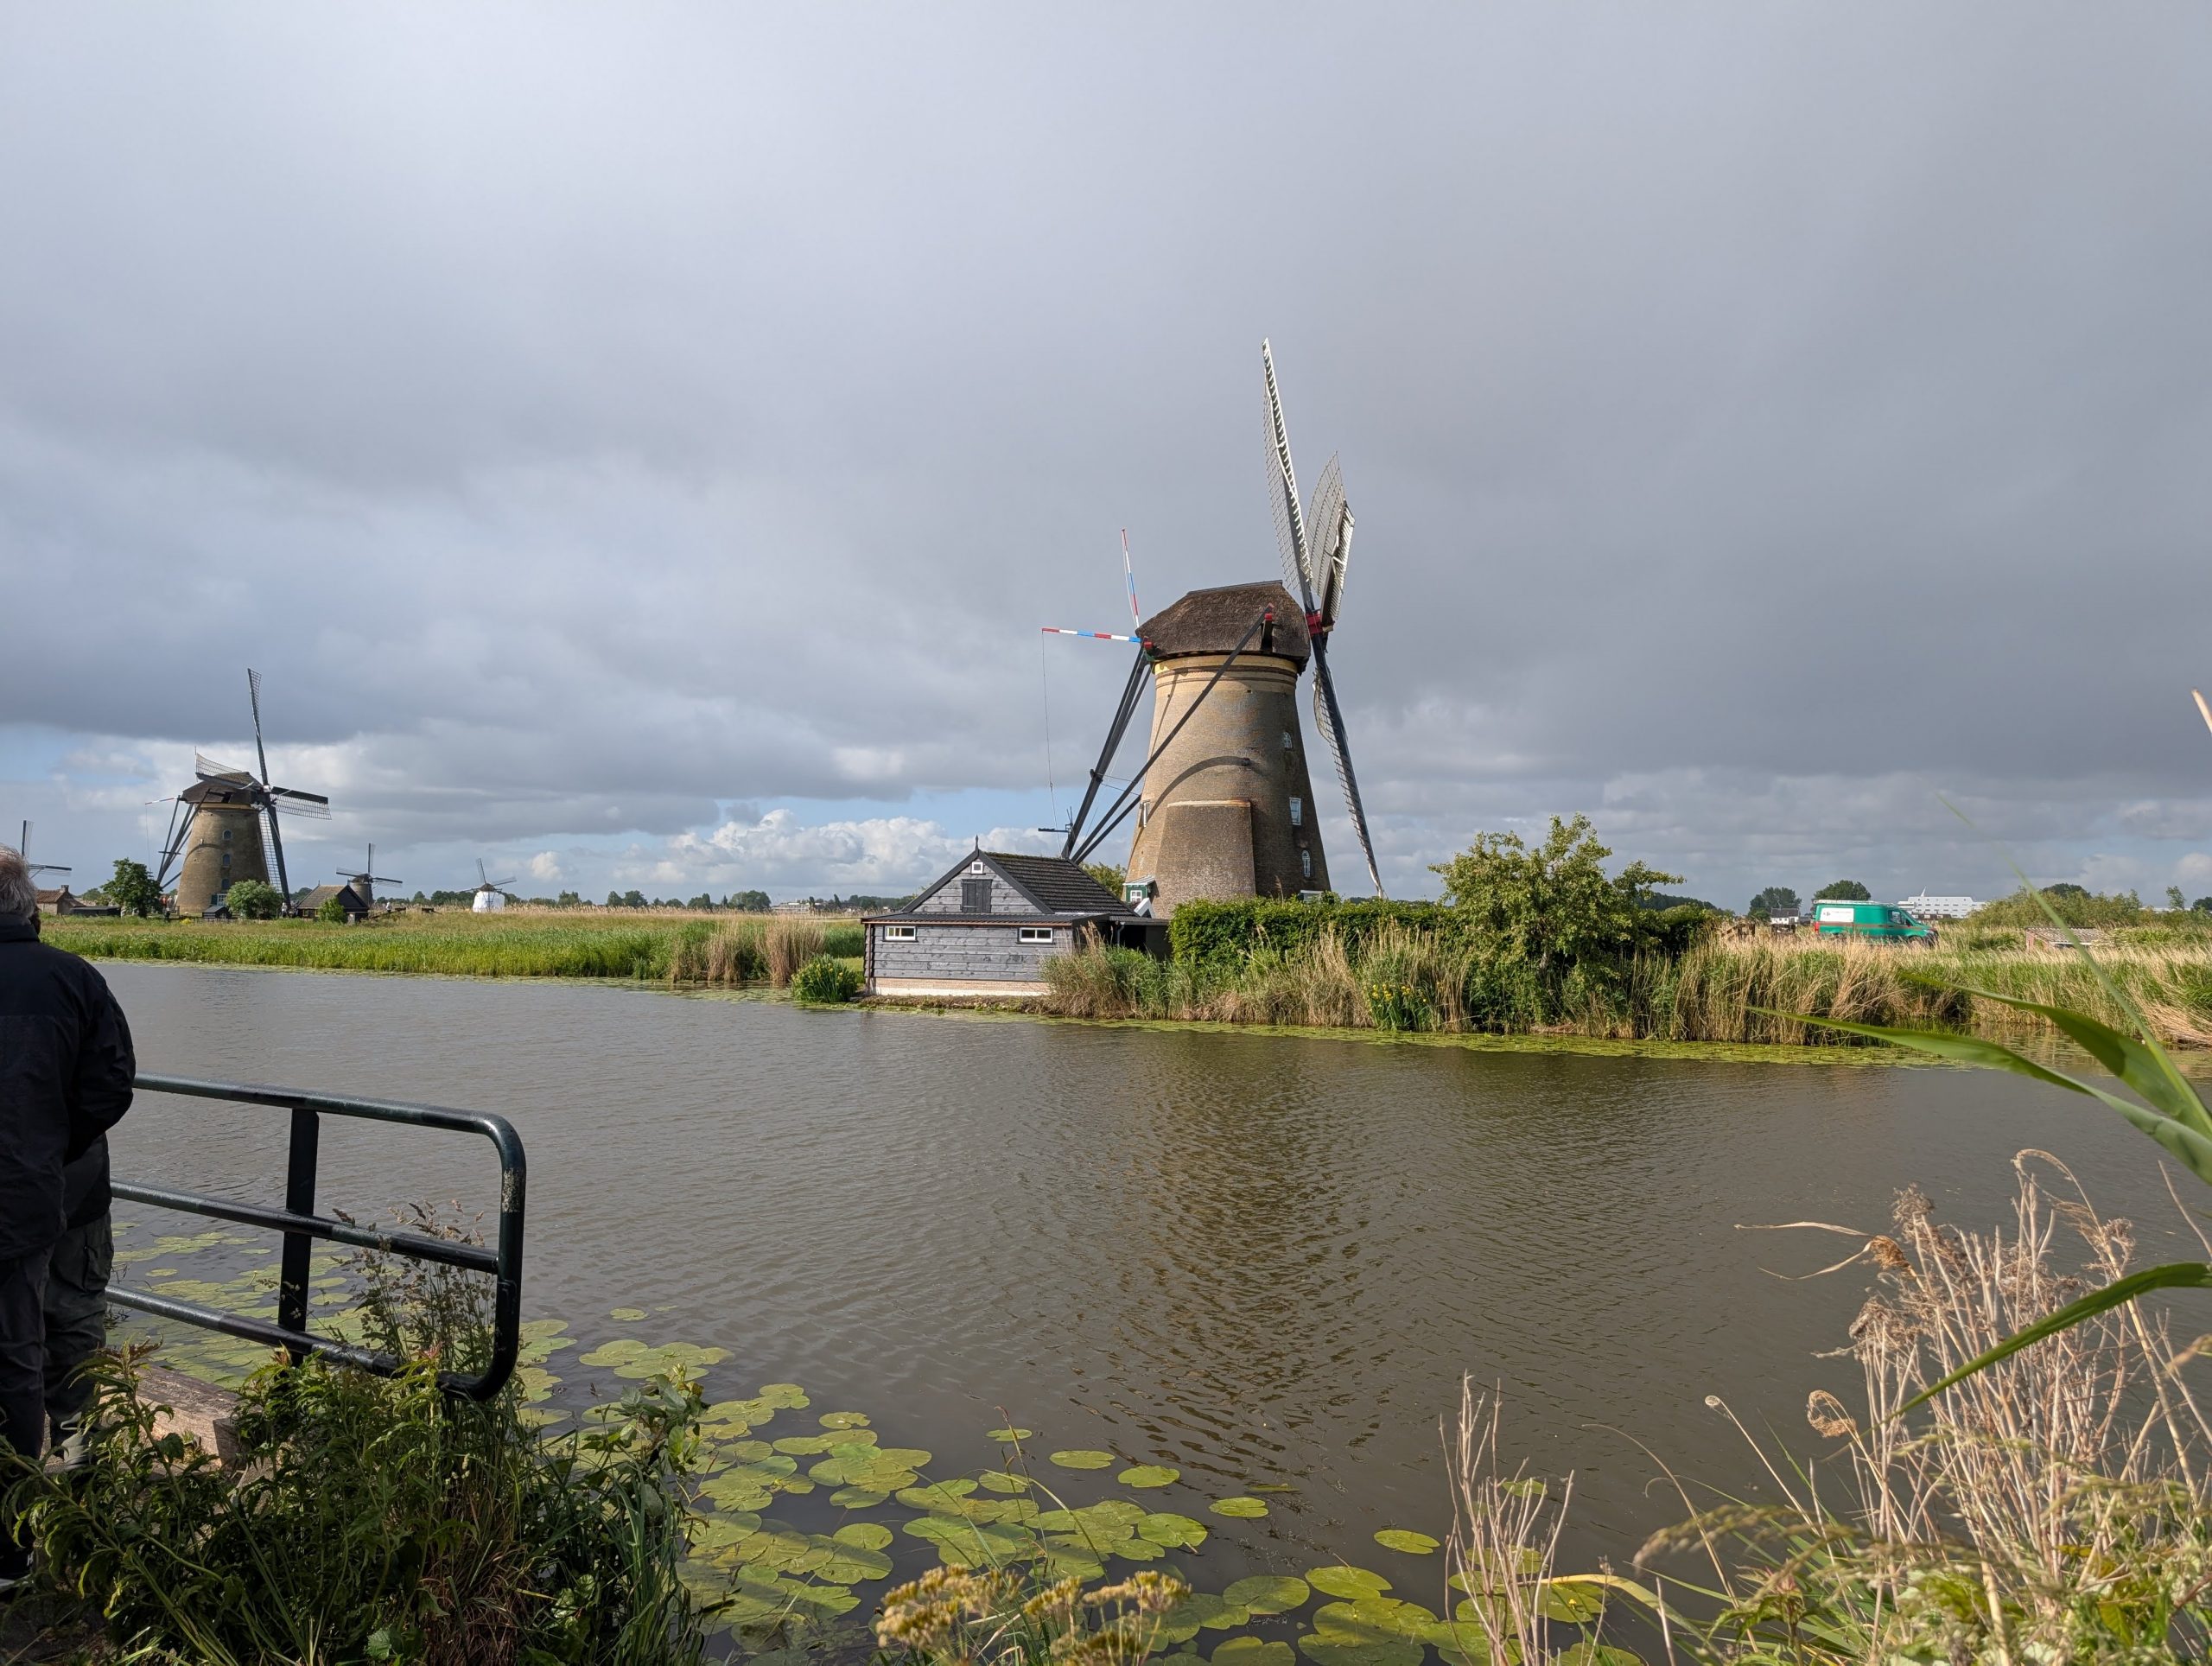
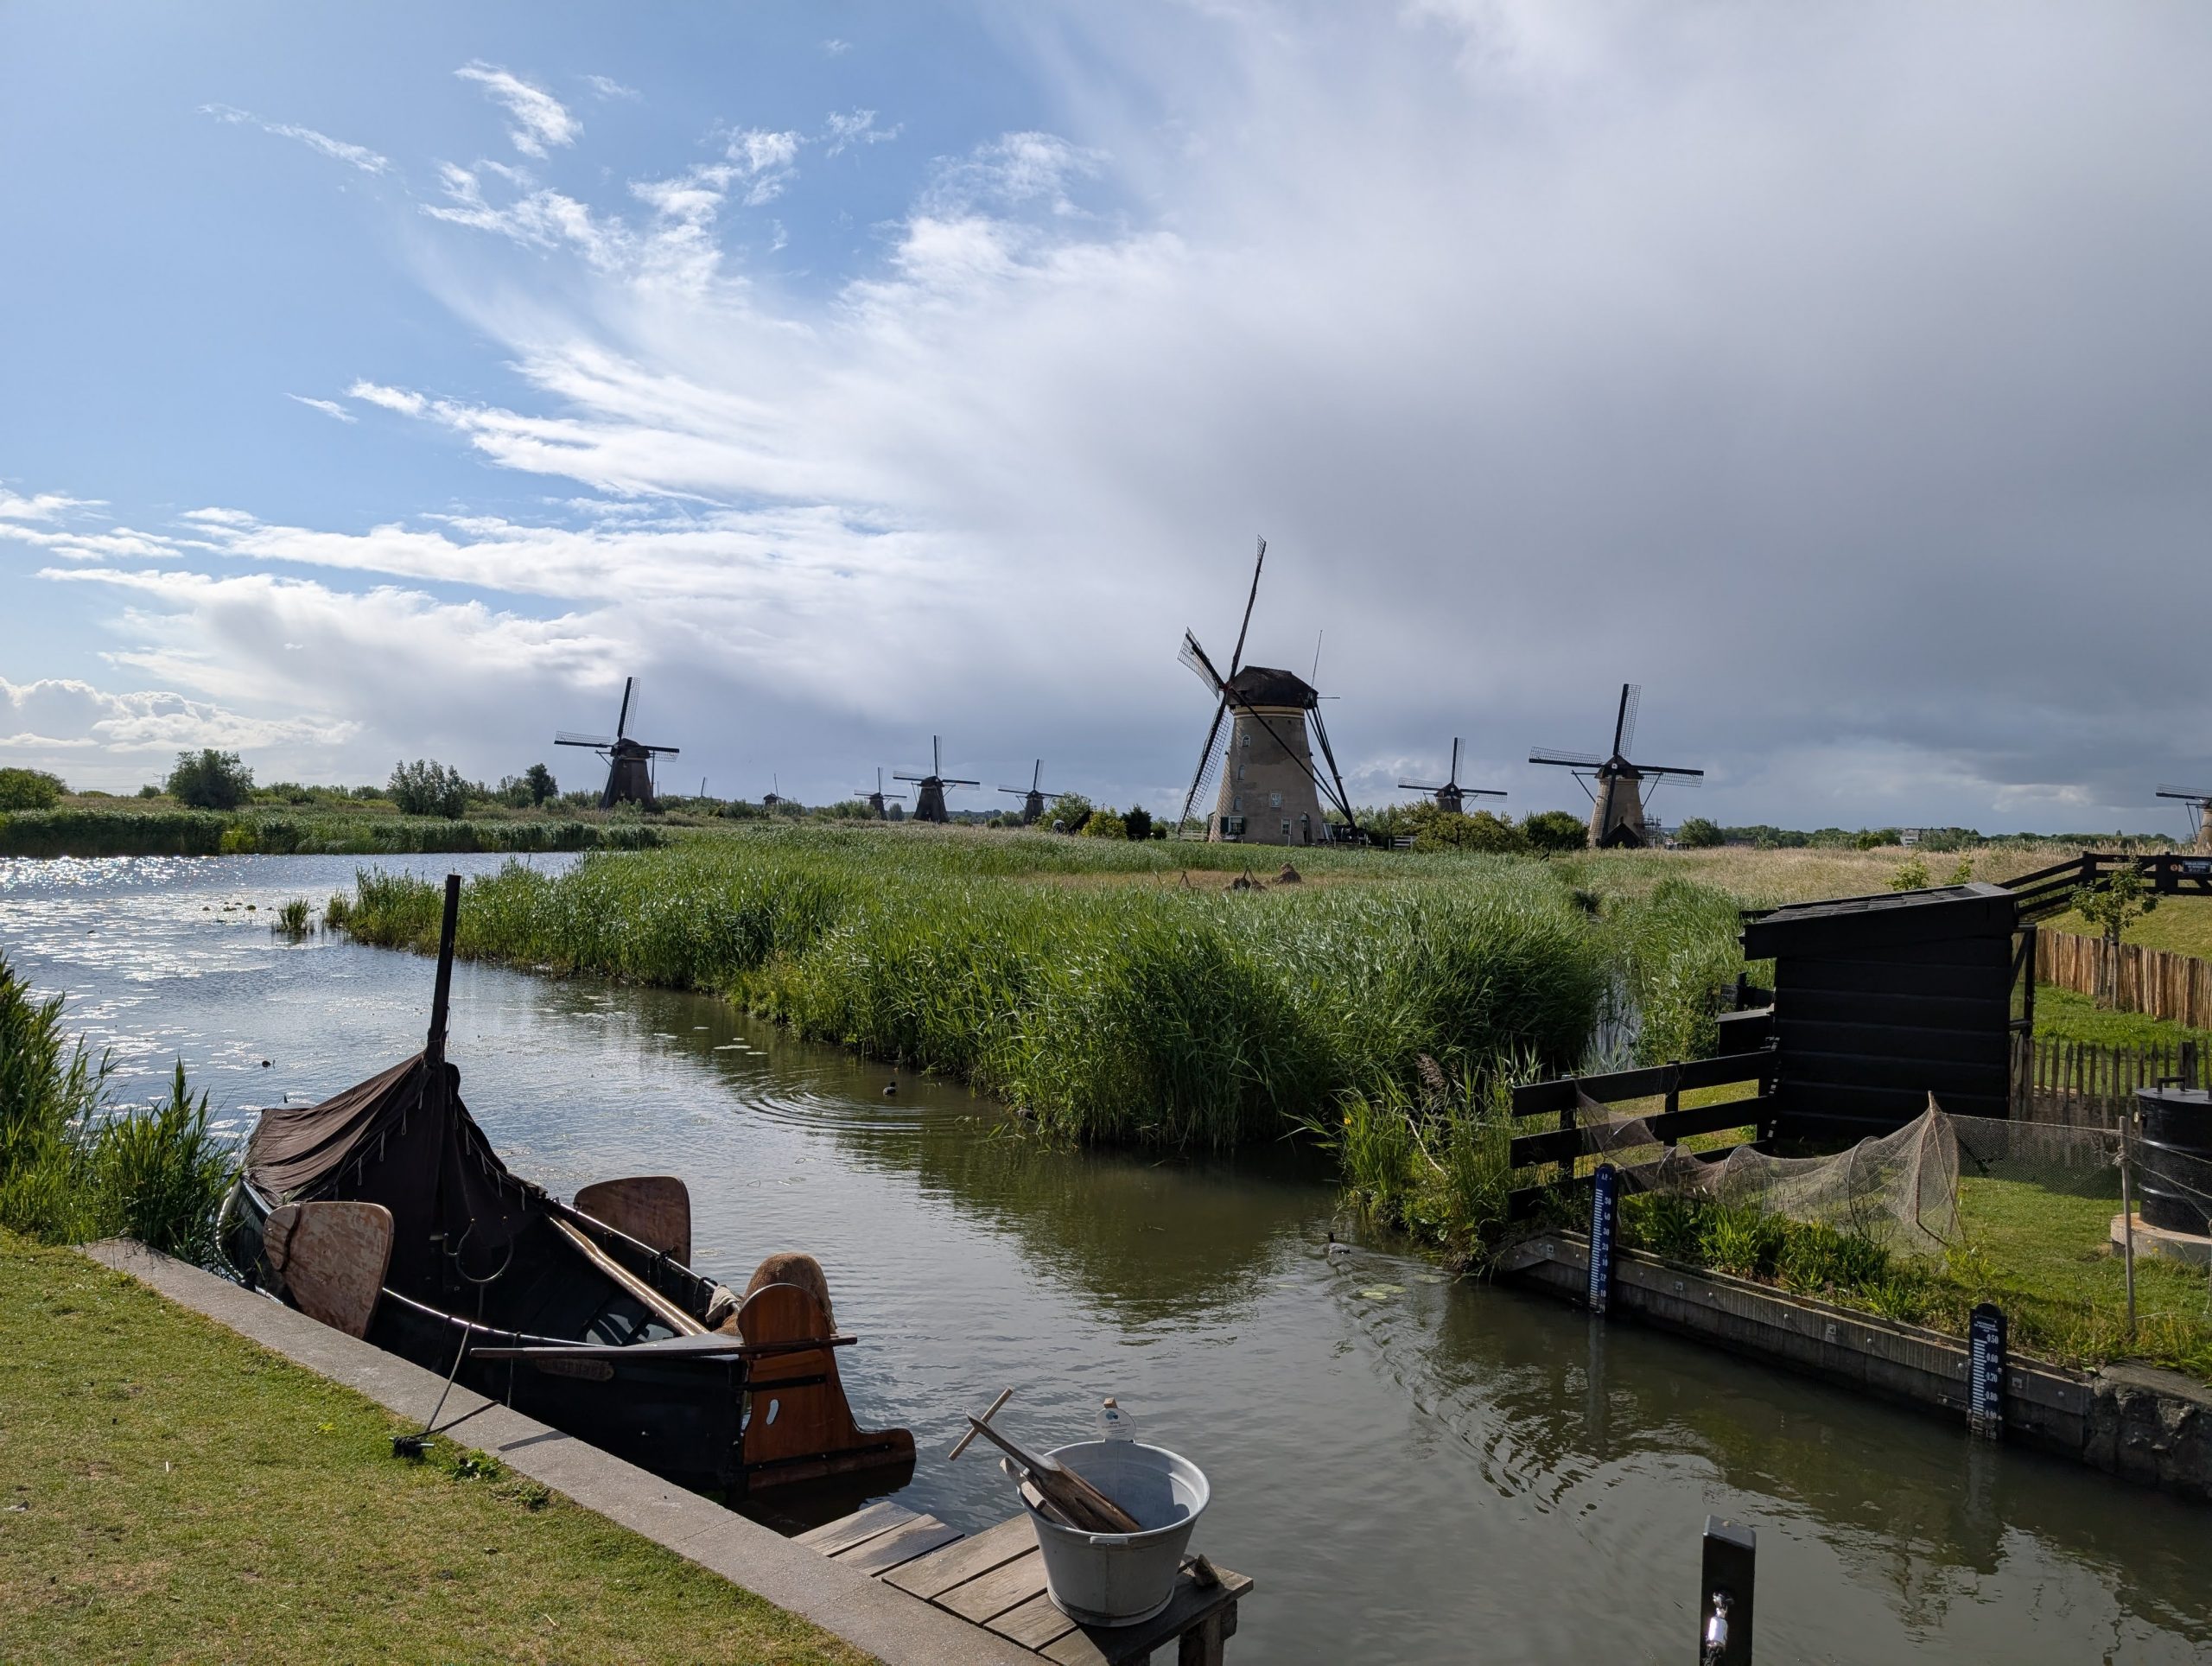
Kinderdijk is a village community in the Alblasserwaard province. This corner of South Holland, part of the scenic Waal and Merwede regions, has long been shaped by Rhine Delta waters. Kinderdijk is most known for its 19 remarkably preserved 18th-century windmills. The charming hamlet is located amid low-lying polders, tracts of land reclaimed from the sea by the power of the windmills and enclosed by embankments or dikes. This legendary place calls to mind the 1865 novel Hans Brinker, in which a heroic boy plugs his finger into a ruptured dike.
In this beautiful, water-rich area near Dordrecht we walked to one of the windmills that was built around 1740. These 19 remaining magnificent windmills serve as part of a larger water management system to prevent flooding in this area. This is very important because 60% of the Netherlands is under sea level. And rain, no rain, etc. requires a very complicated system of keeping the water level consistent.
Simply put, these few historic windmills symbolize Dutch water management and in 1997 they were declared a UNESCO World Heritage Site. Why? The Kinderdijk windmills were built to keep the low-lying land of the Alblasserwaard dry. Once you visit this area, you simply must admire the tenacity of the Dutch and their many waterways, dikes, mills, and locks that have been using water to their advantage for over 1000 years.
Of course, during our walk, the heavens opened, and we survived a short but very impressive deluge. And in typical NW Washington manner, 5 minutes later the sun came out and along with a bit of help from the wind, we were dry again in 15 minutes. Of course, I did feel a bit of pressure during the walk, because we had been warned at the start of our tour that we had to be back at the boat by 10:30 am. If not, we would be left behind. Needless to say, we made it back in time, but now safely on board and back in our room, I immediately lay down for a bit of a nap. One hour later, it was time for lunch and afterwords, a nautical talk including a slide show on the workings of our boat.
Of course, the talk was a bit over our heads, so upon conclusion, we both decided a nap would be the perfect way to spend the next hour. So, lights out, curtains drawn, and logs sawed until 4:30 pm to once again return to the lounge for a talk on upcoming optional excursions. Then drinks in the lounge until dinner was served at 7:00 pm.
After dinner we decided we had socialized enough today and proceeded back to our room for me to write up today’s report and Andy to bury his nose in his kindle.
Saturday, May 24, 2025 – Viking’s Gersemi river boat – Cologne, Germany
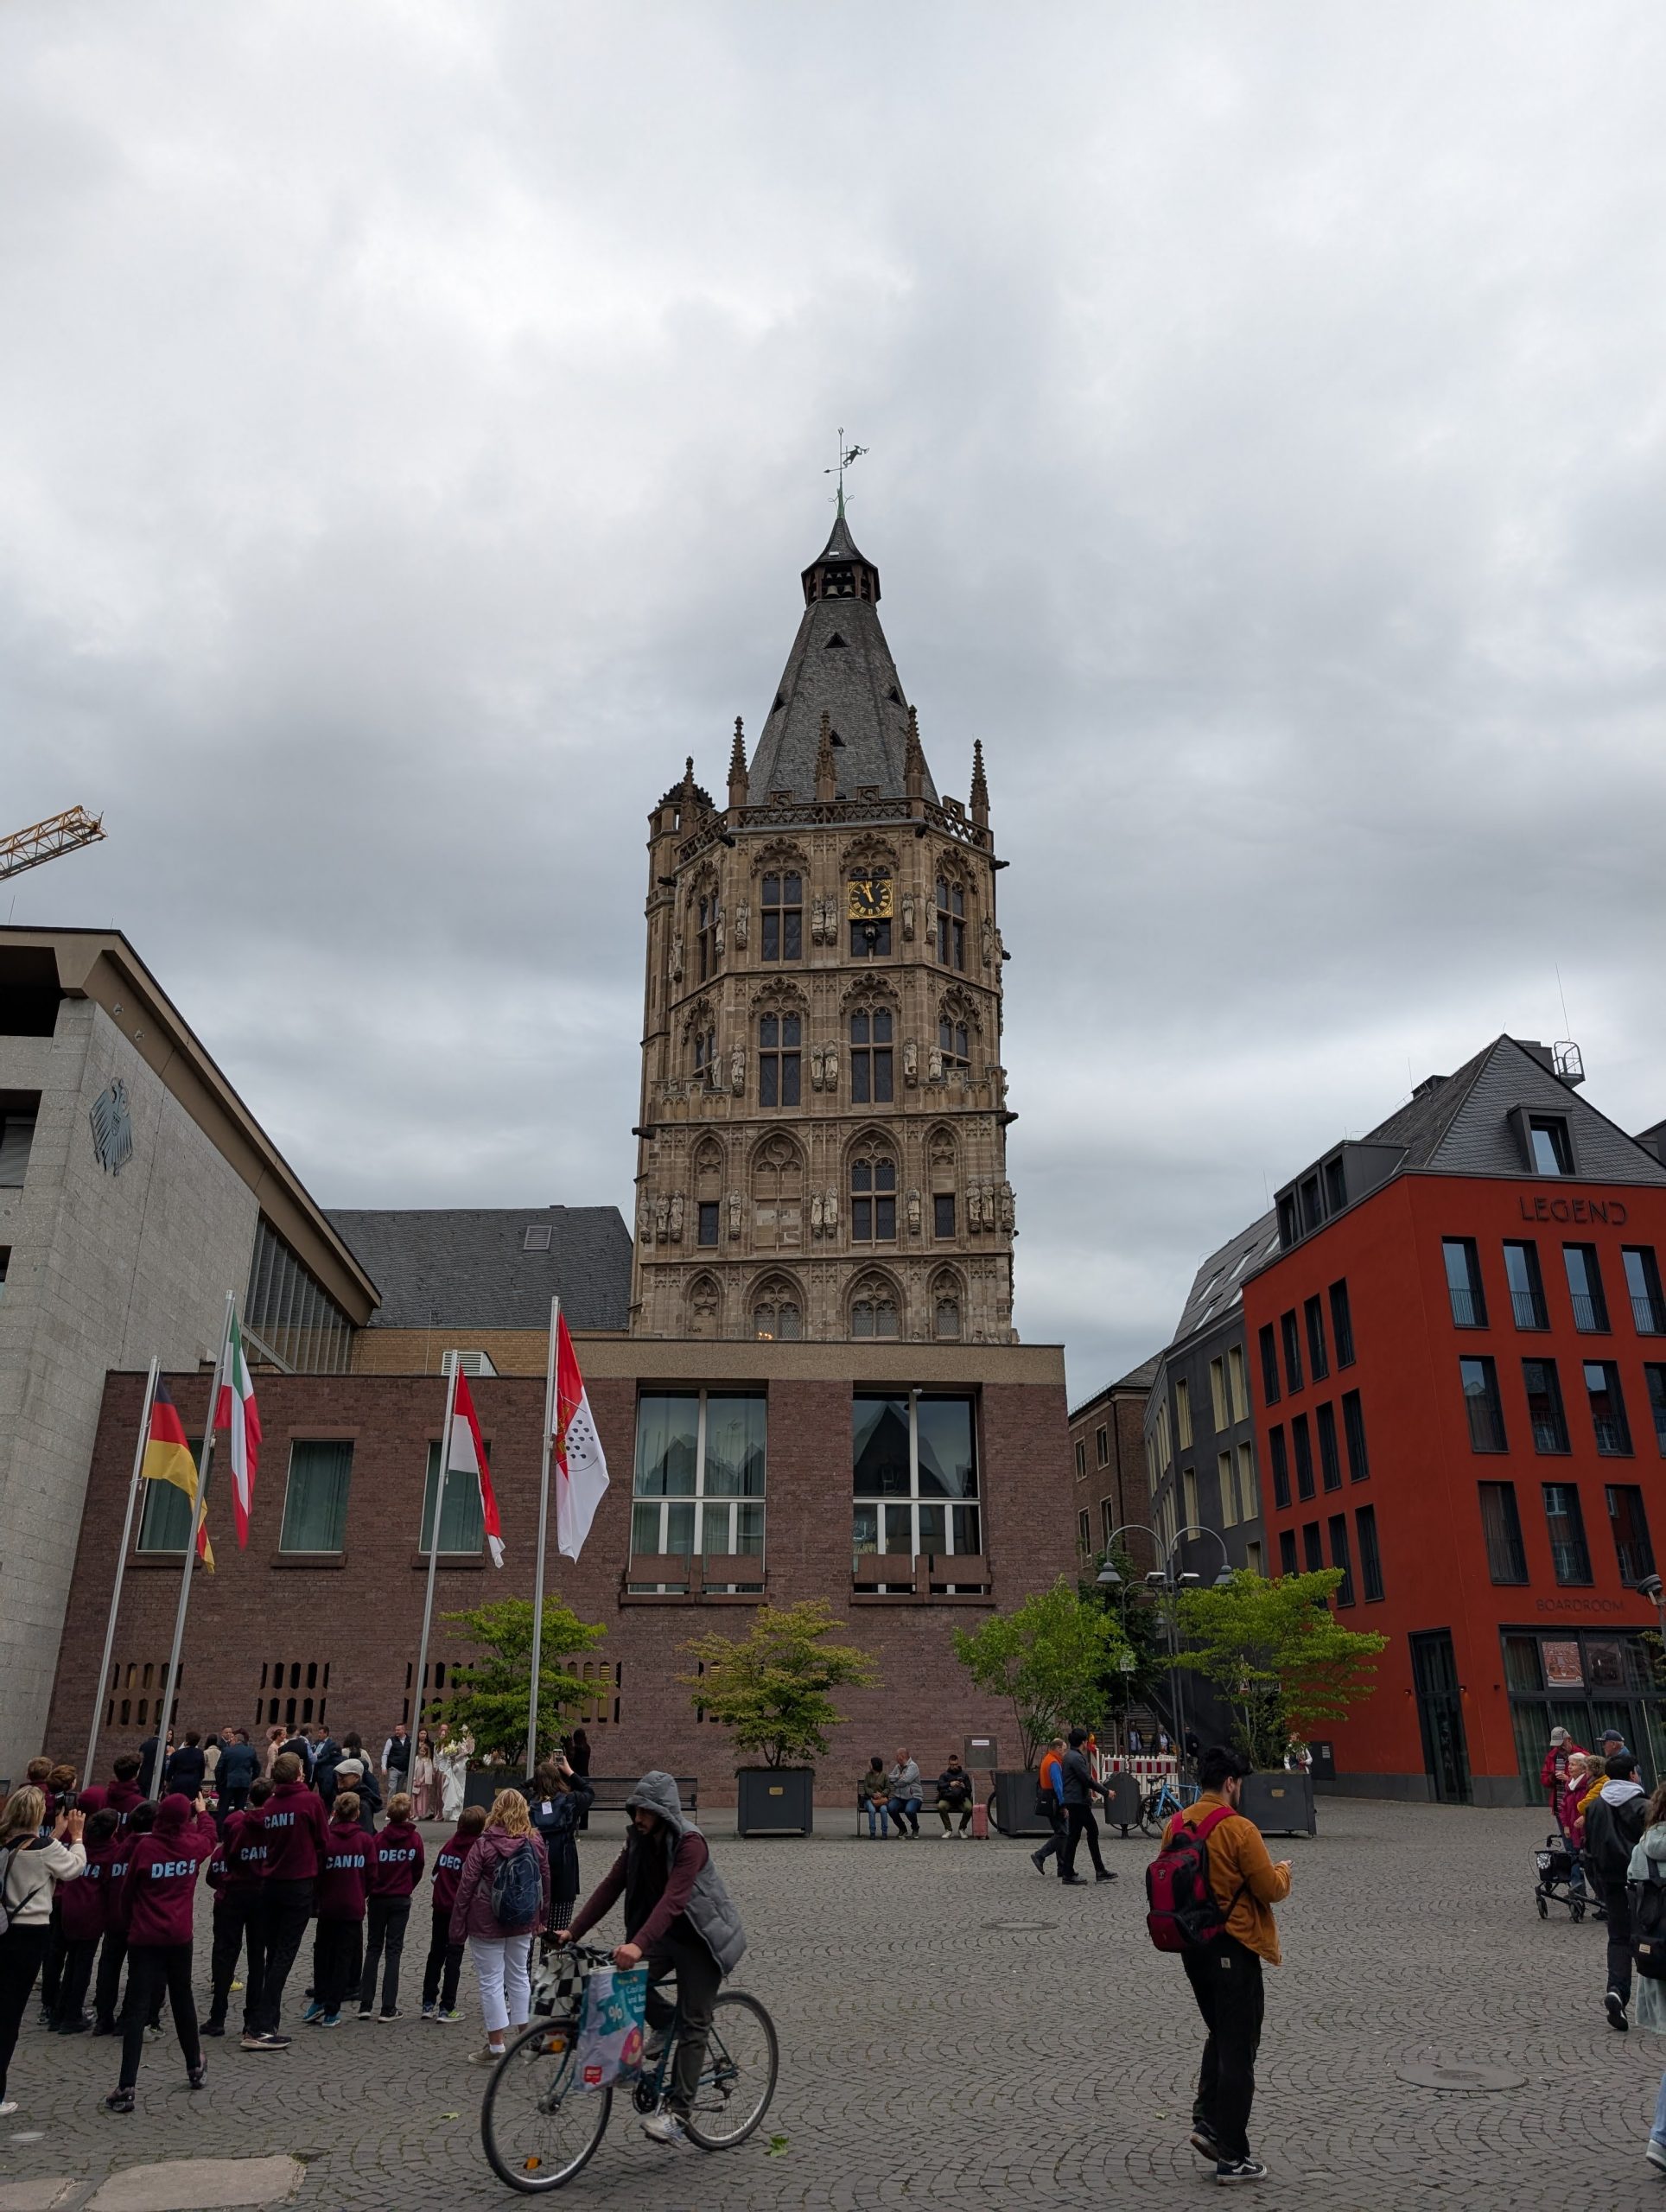
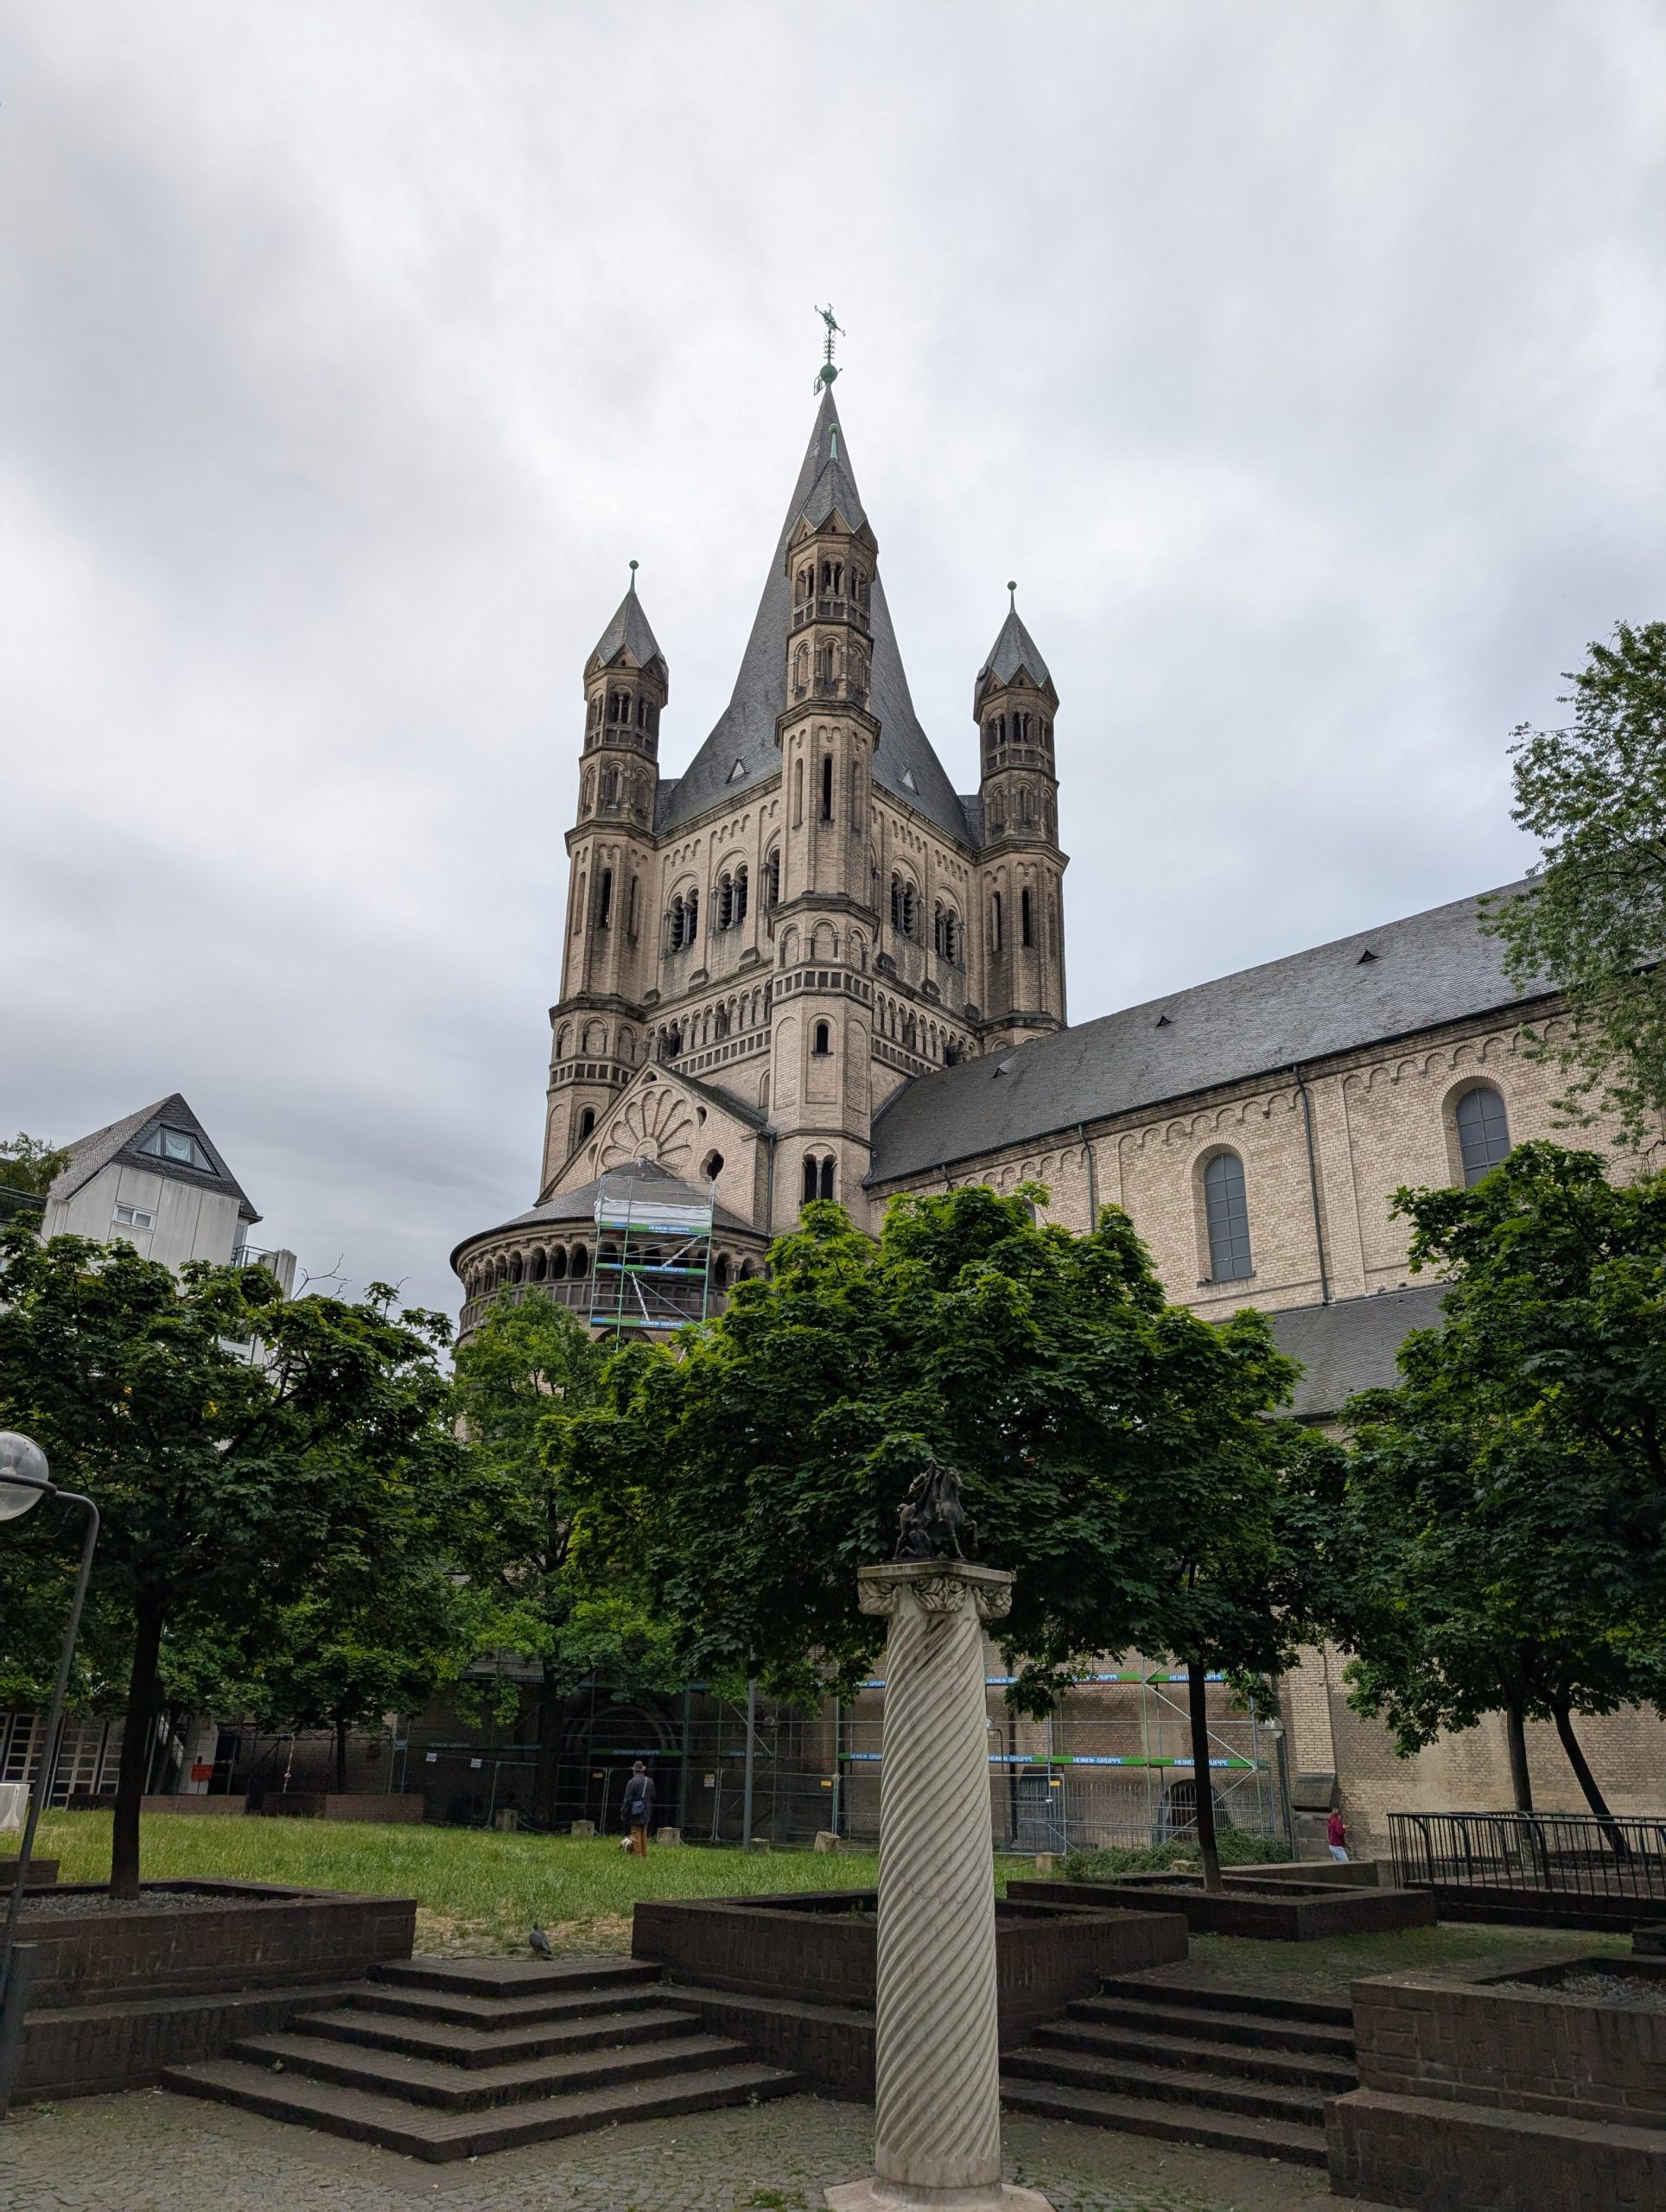
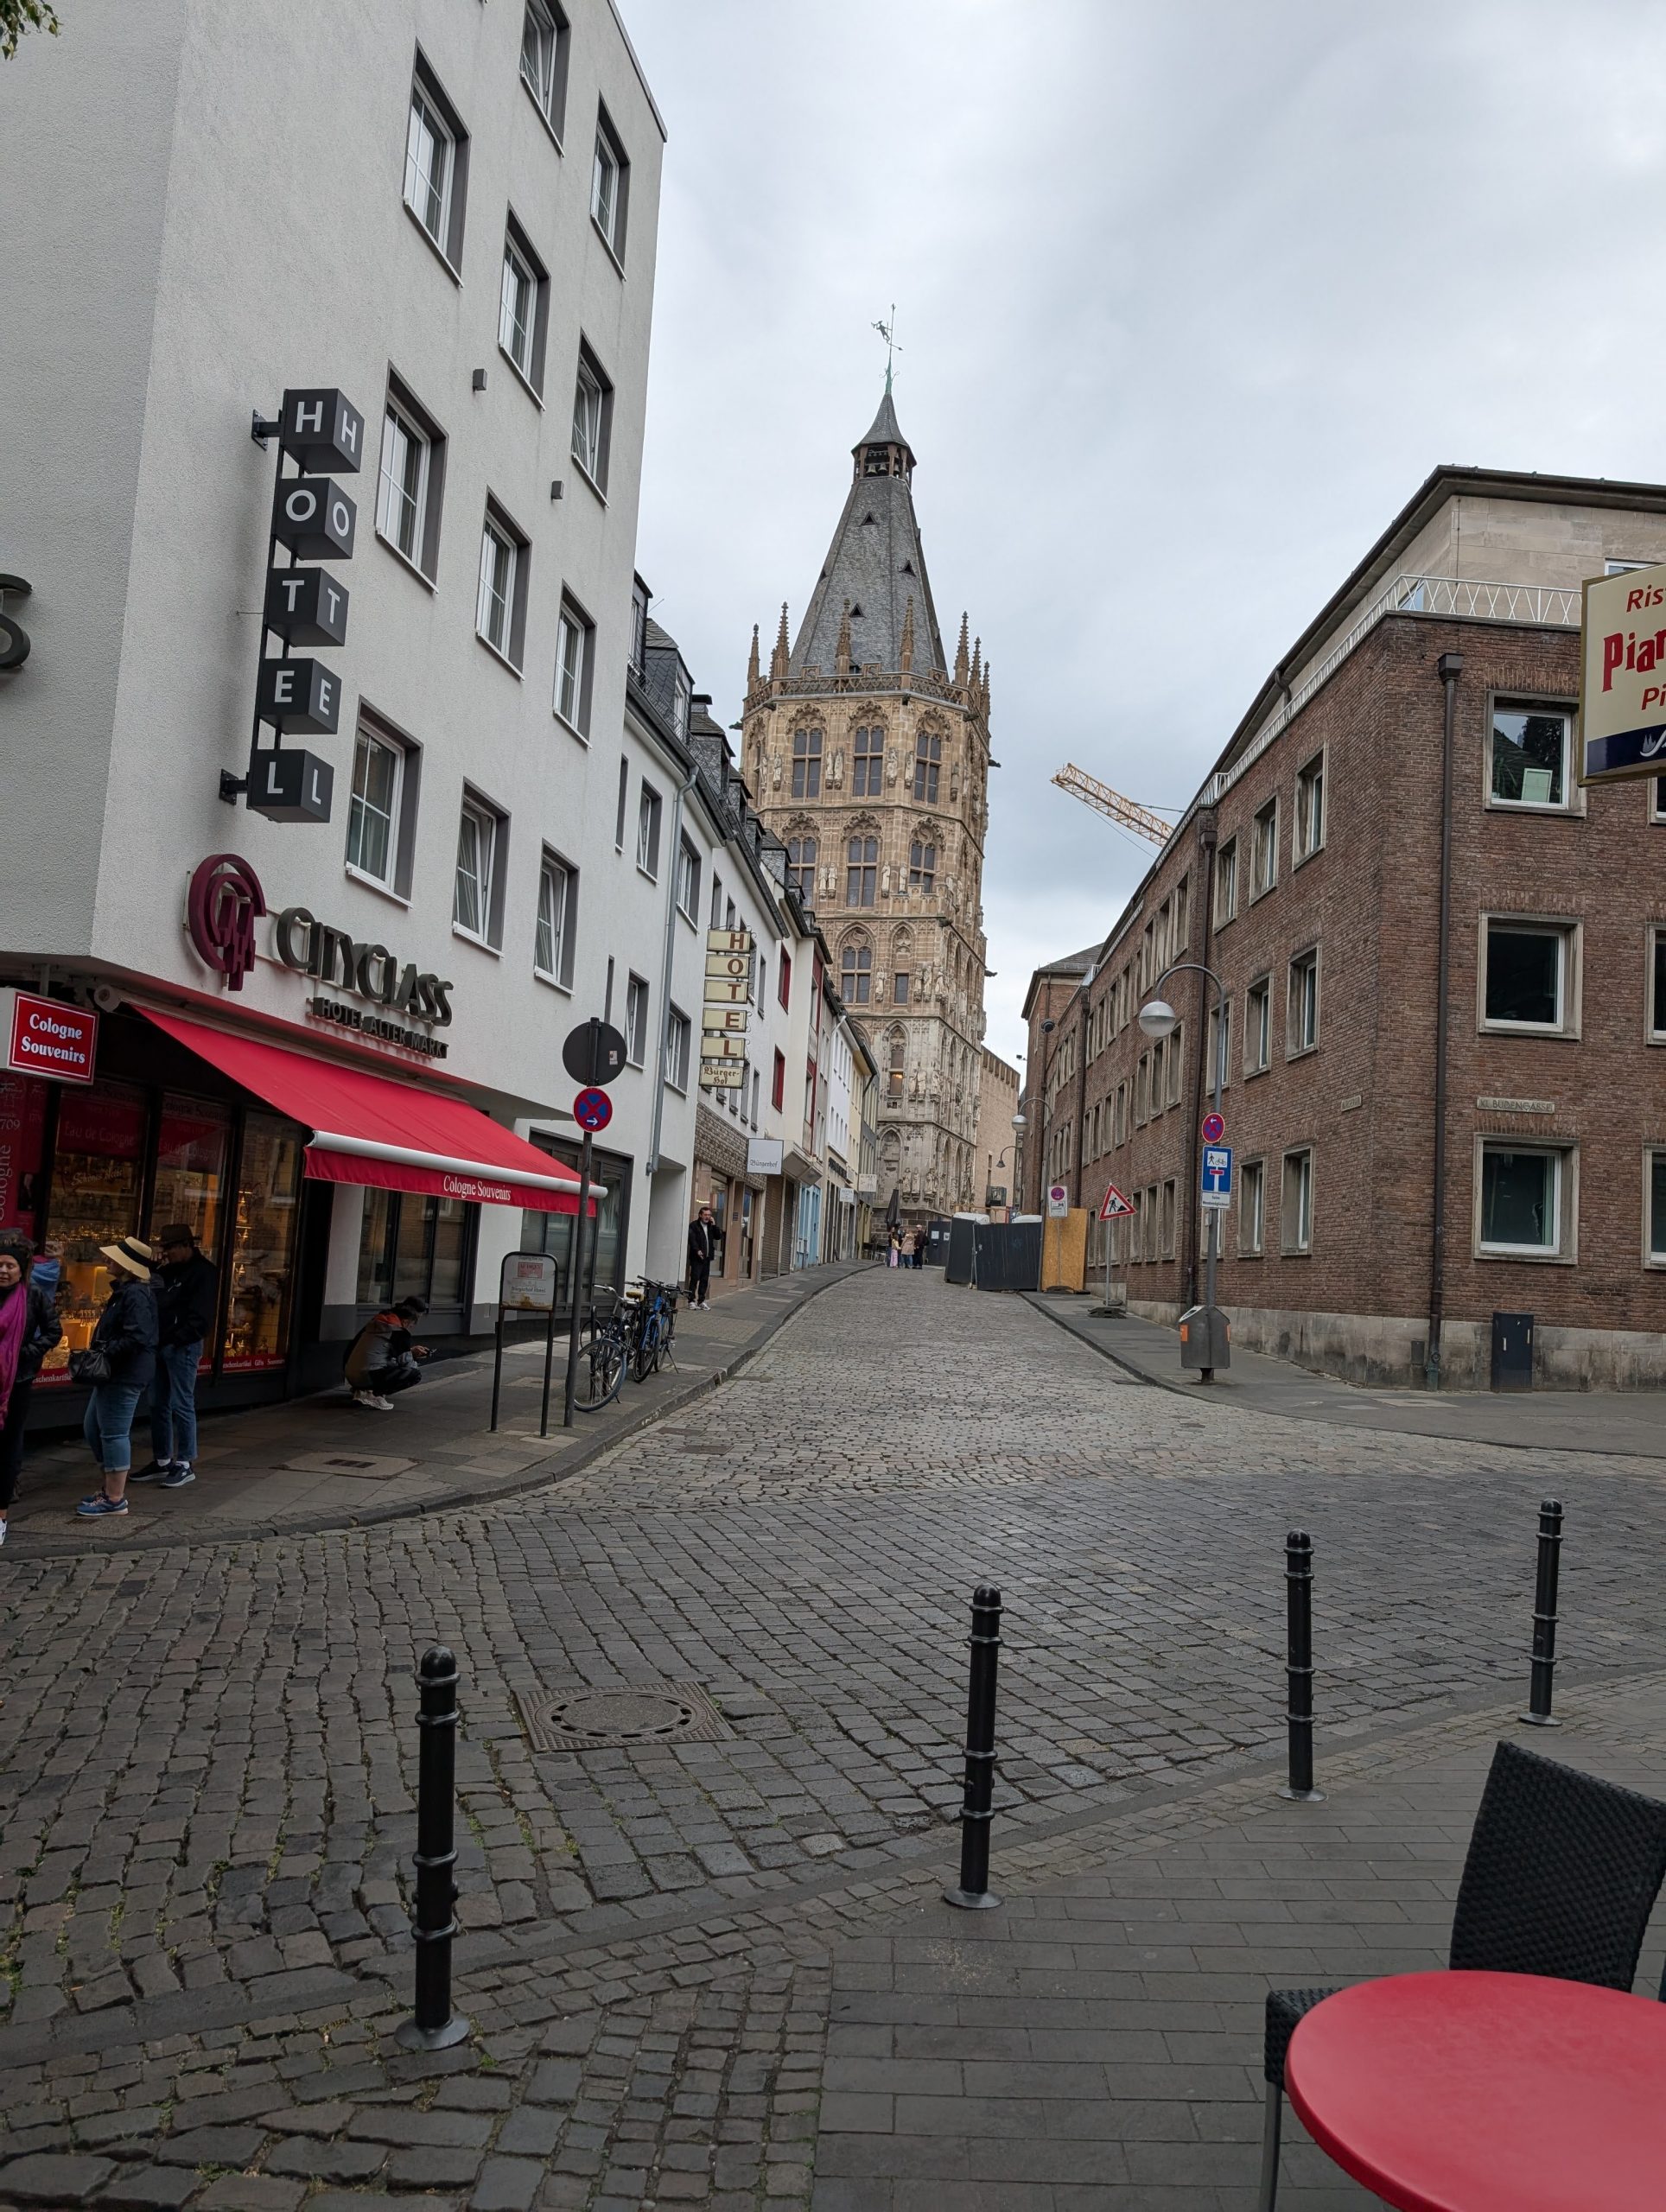
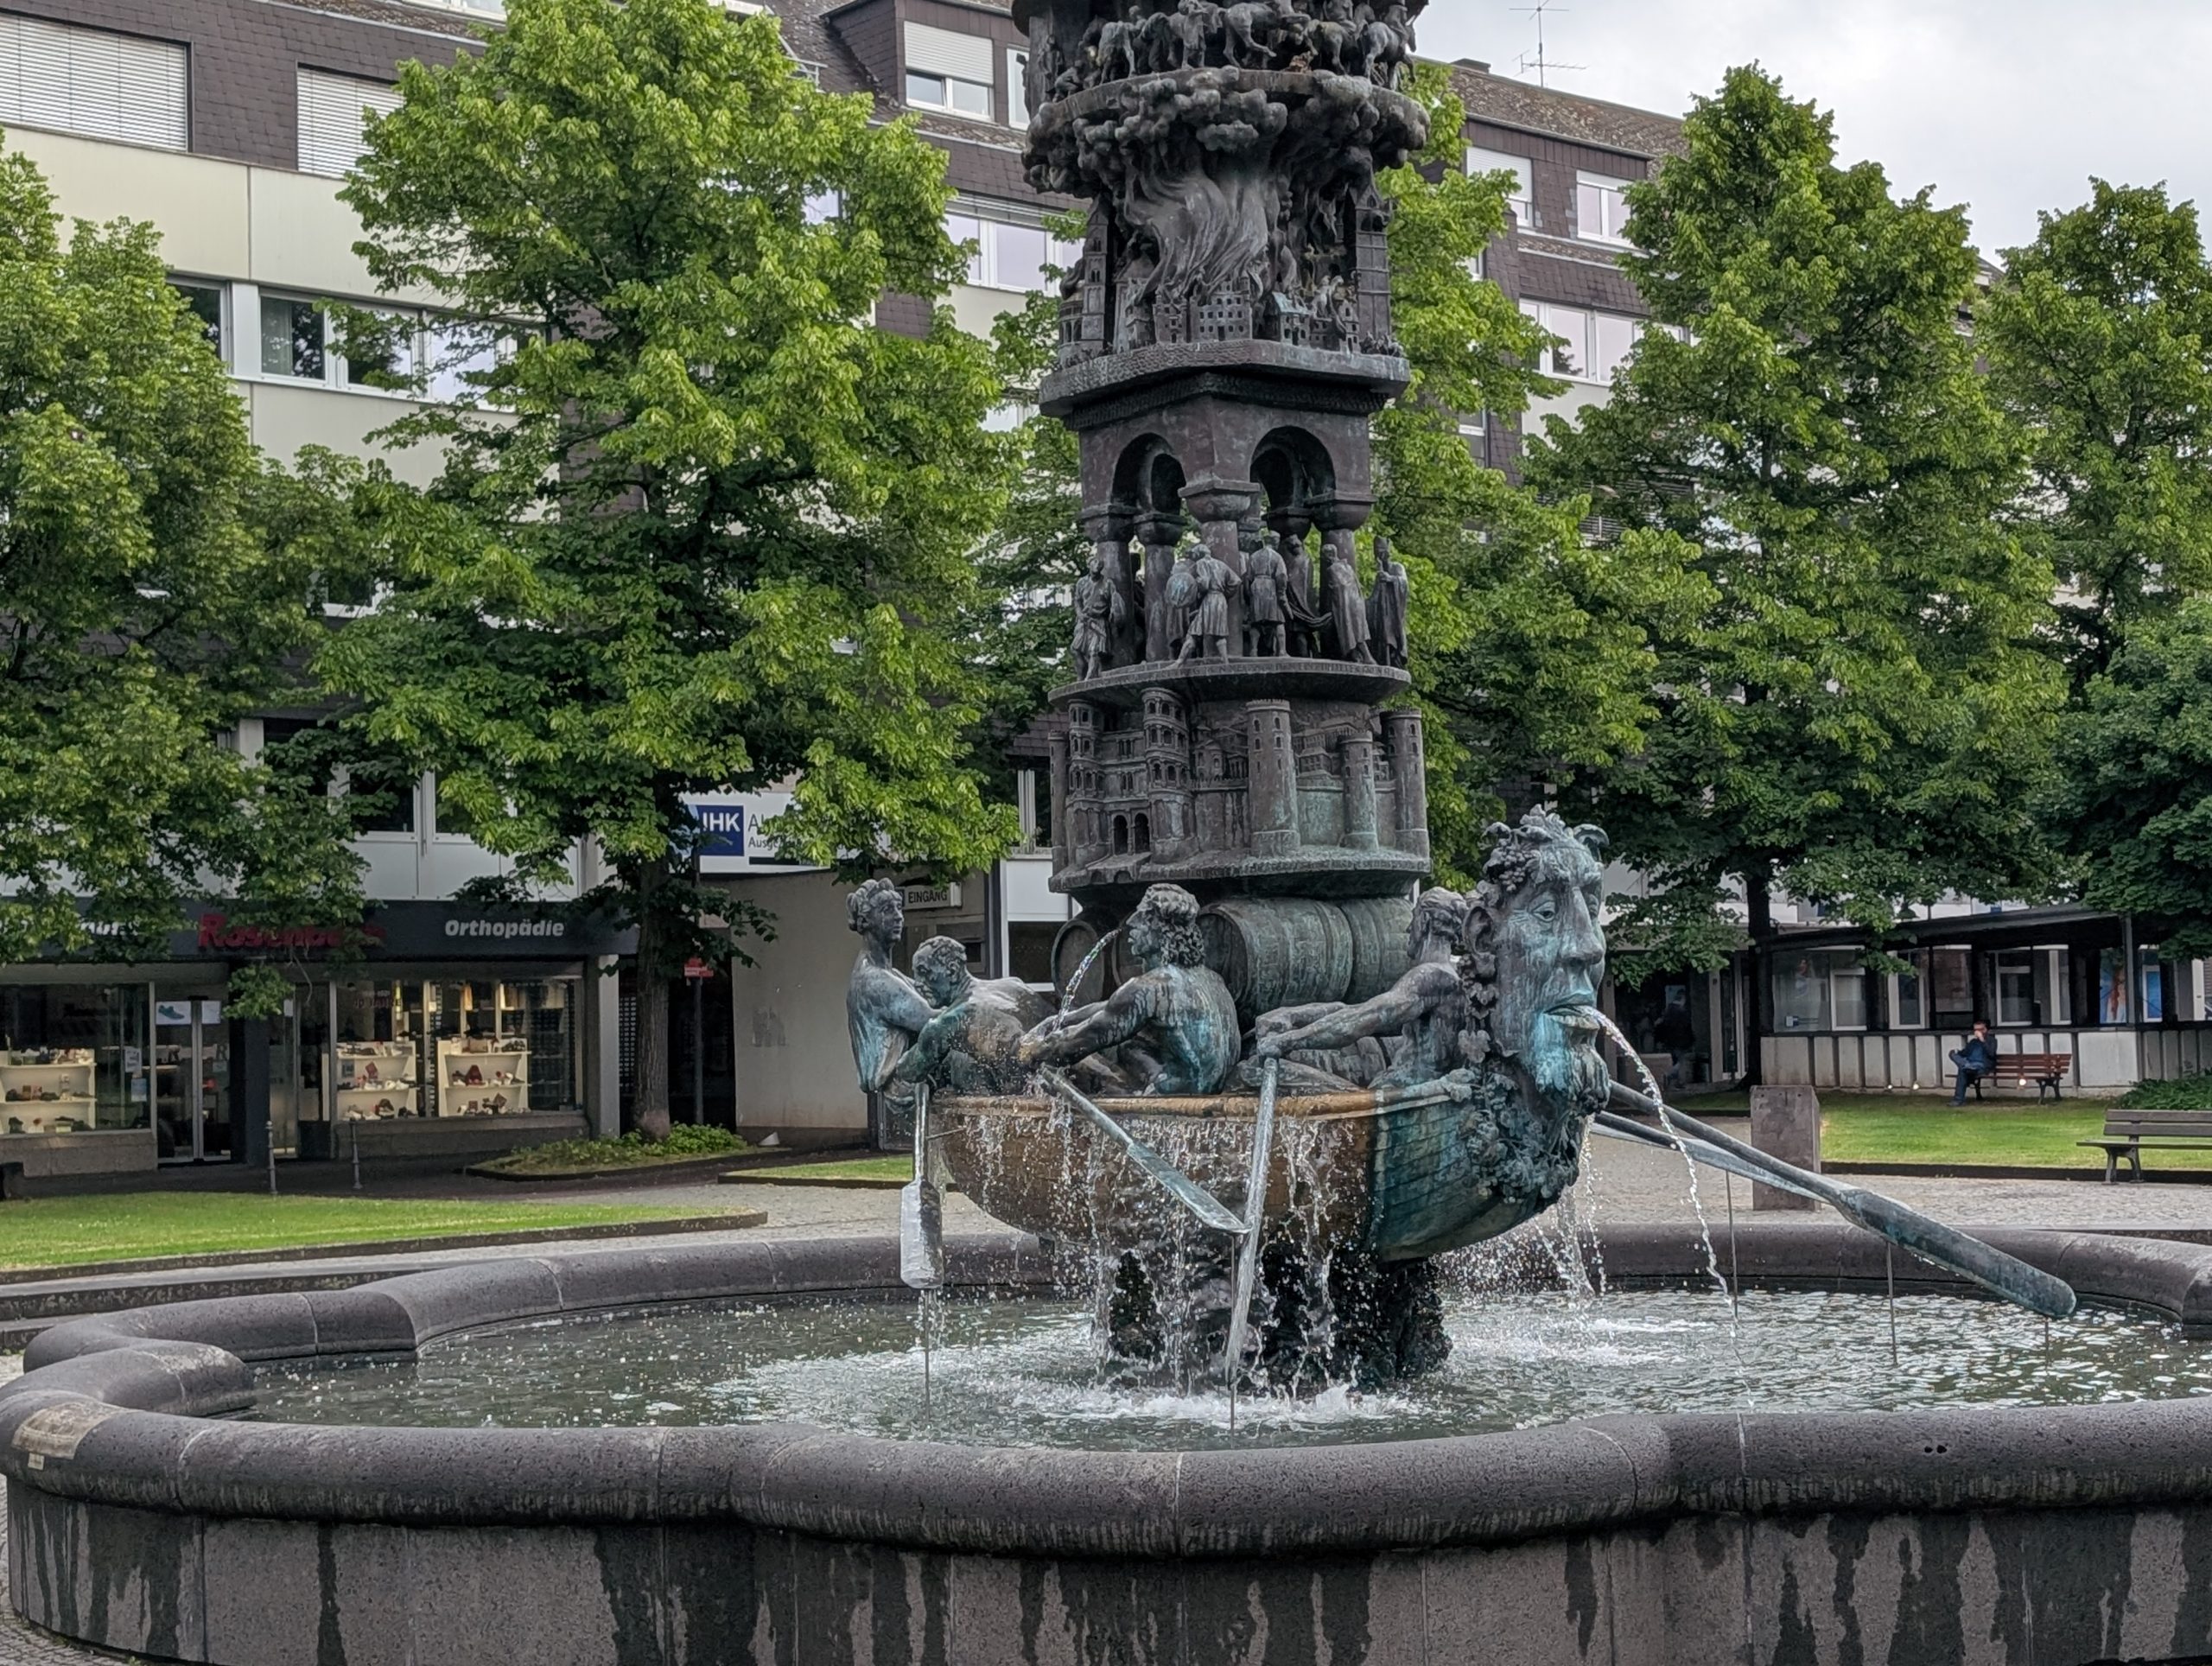
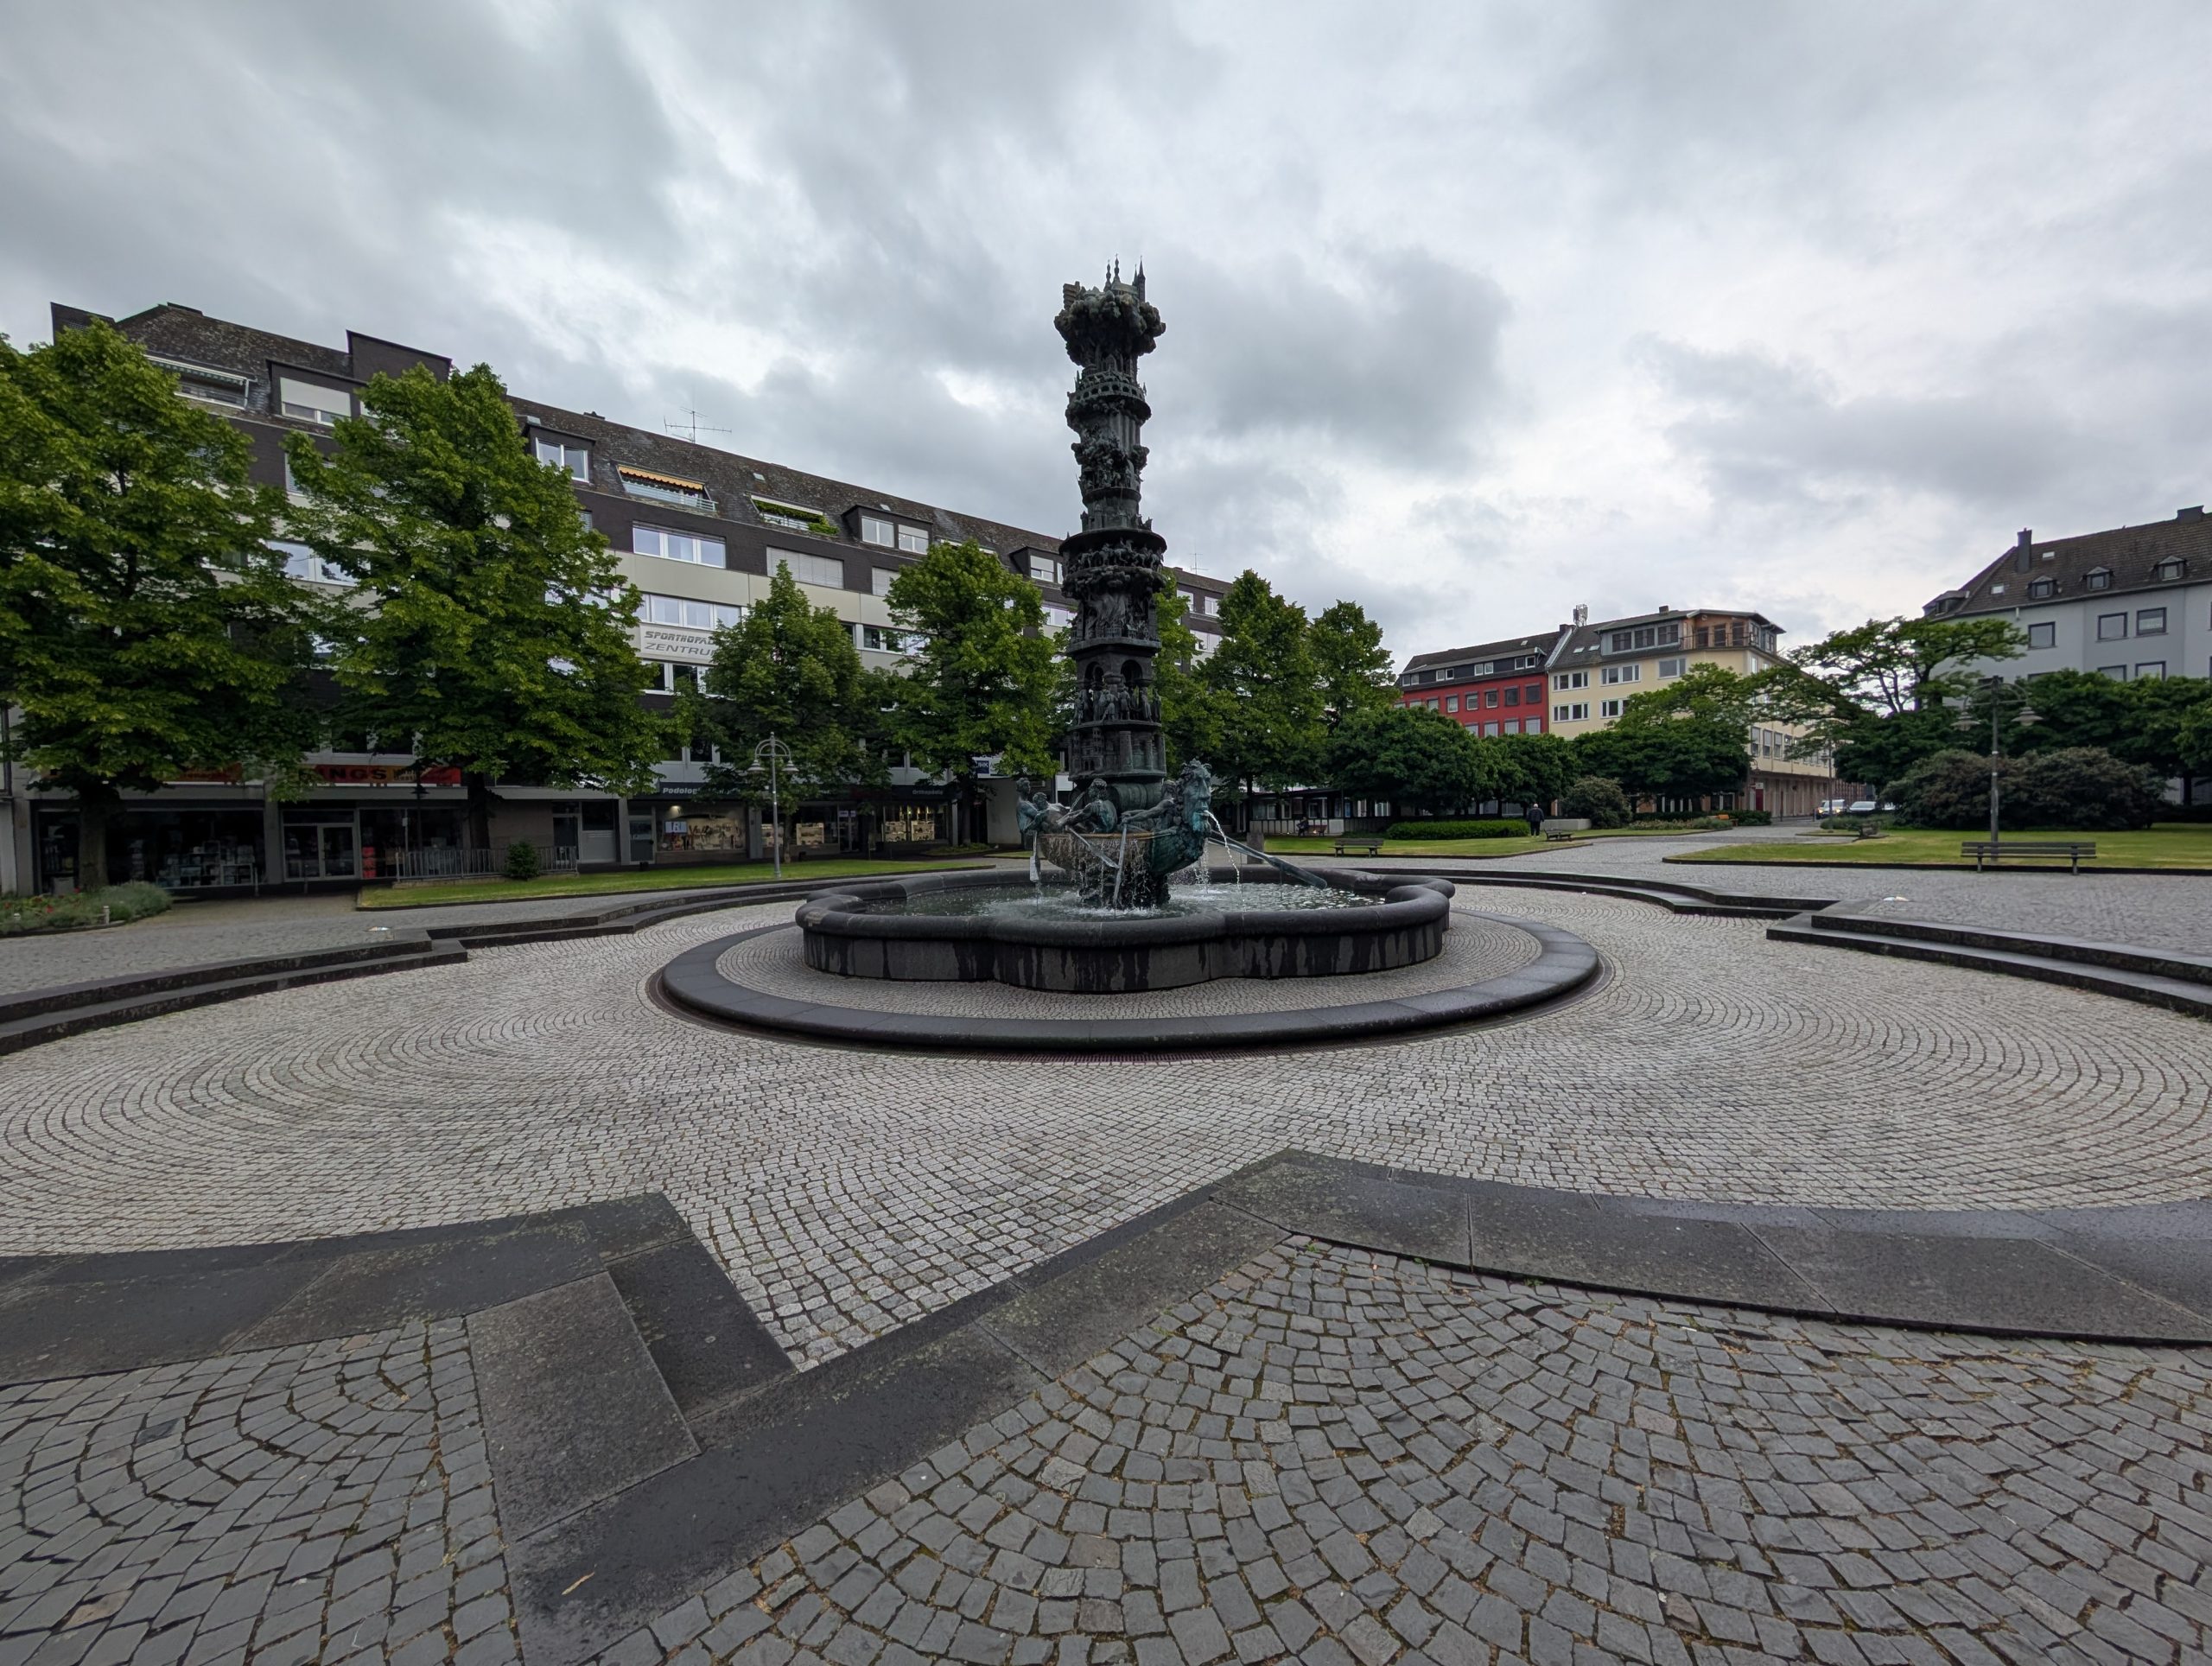
Well, today was a strenuous day for us. After breakfast we joined the “leisurely” group for the Cologne Walking Tour which took us, with the help of short bus ride, into the market district of bustling Cologne.
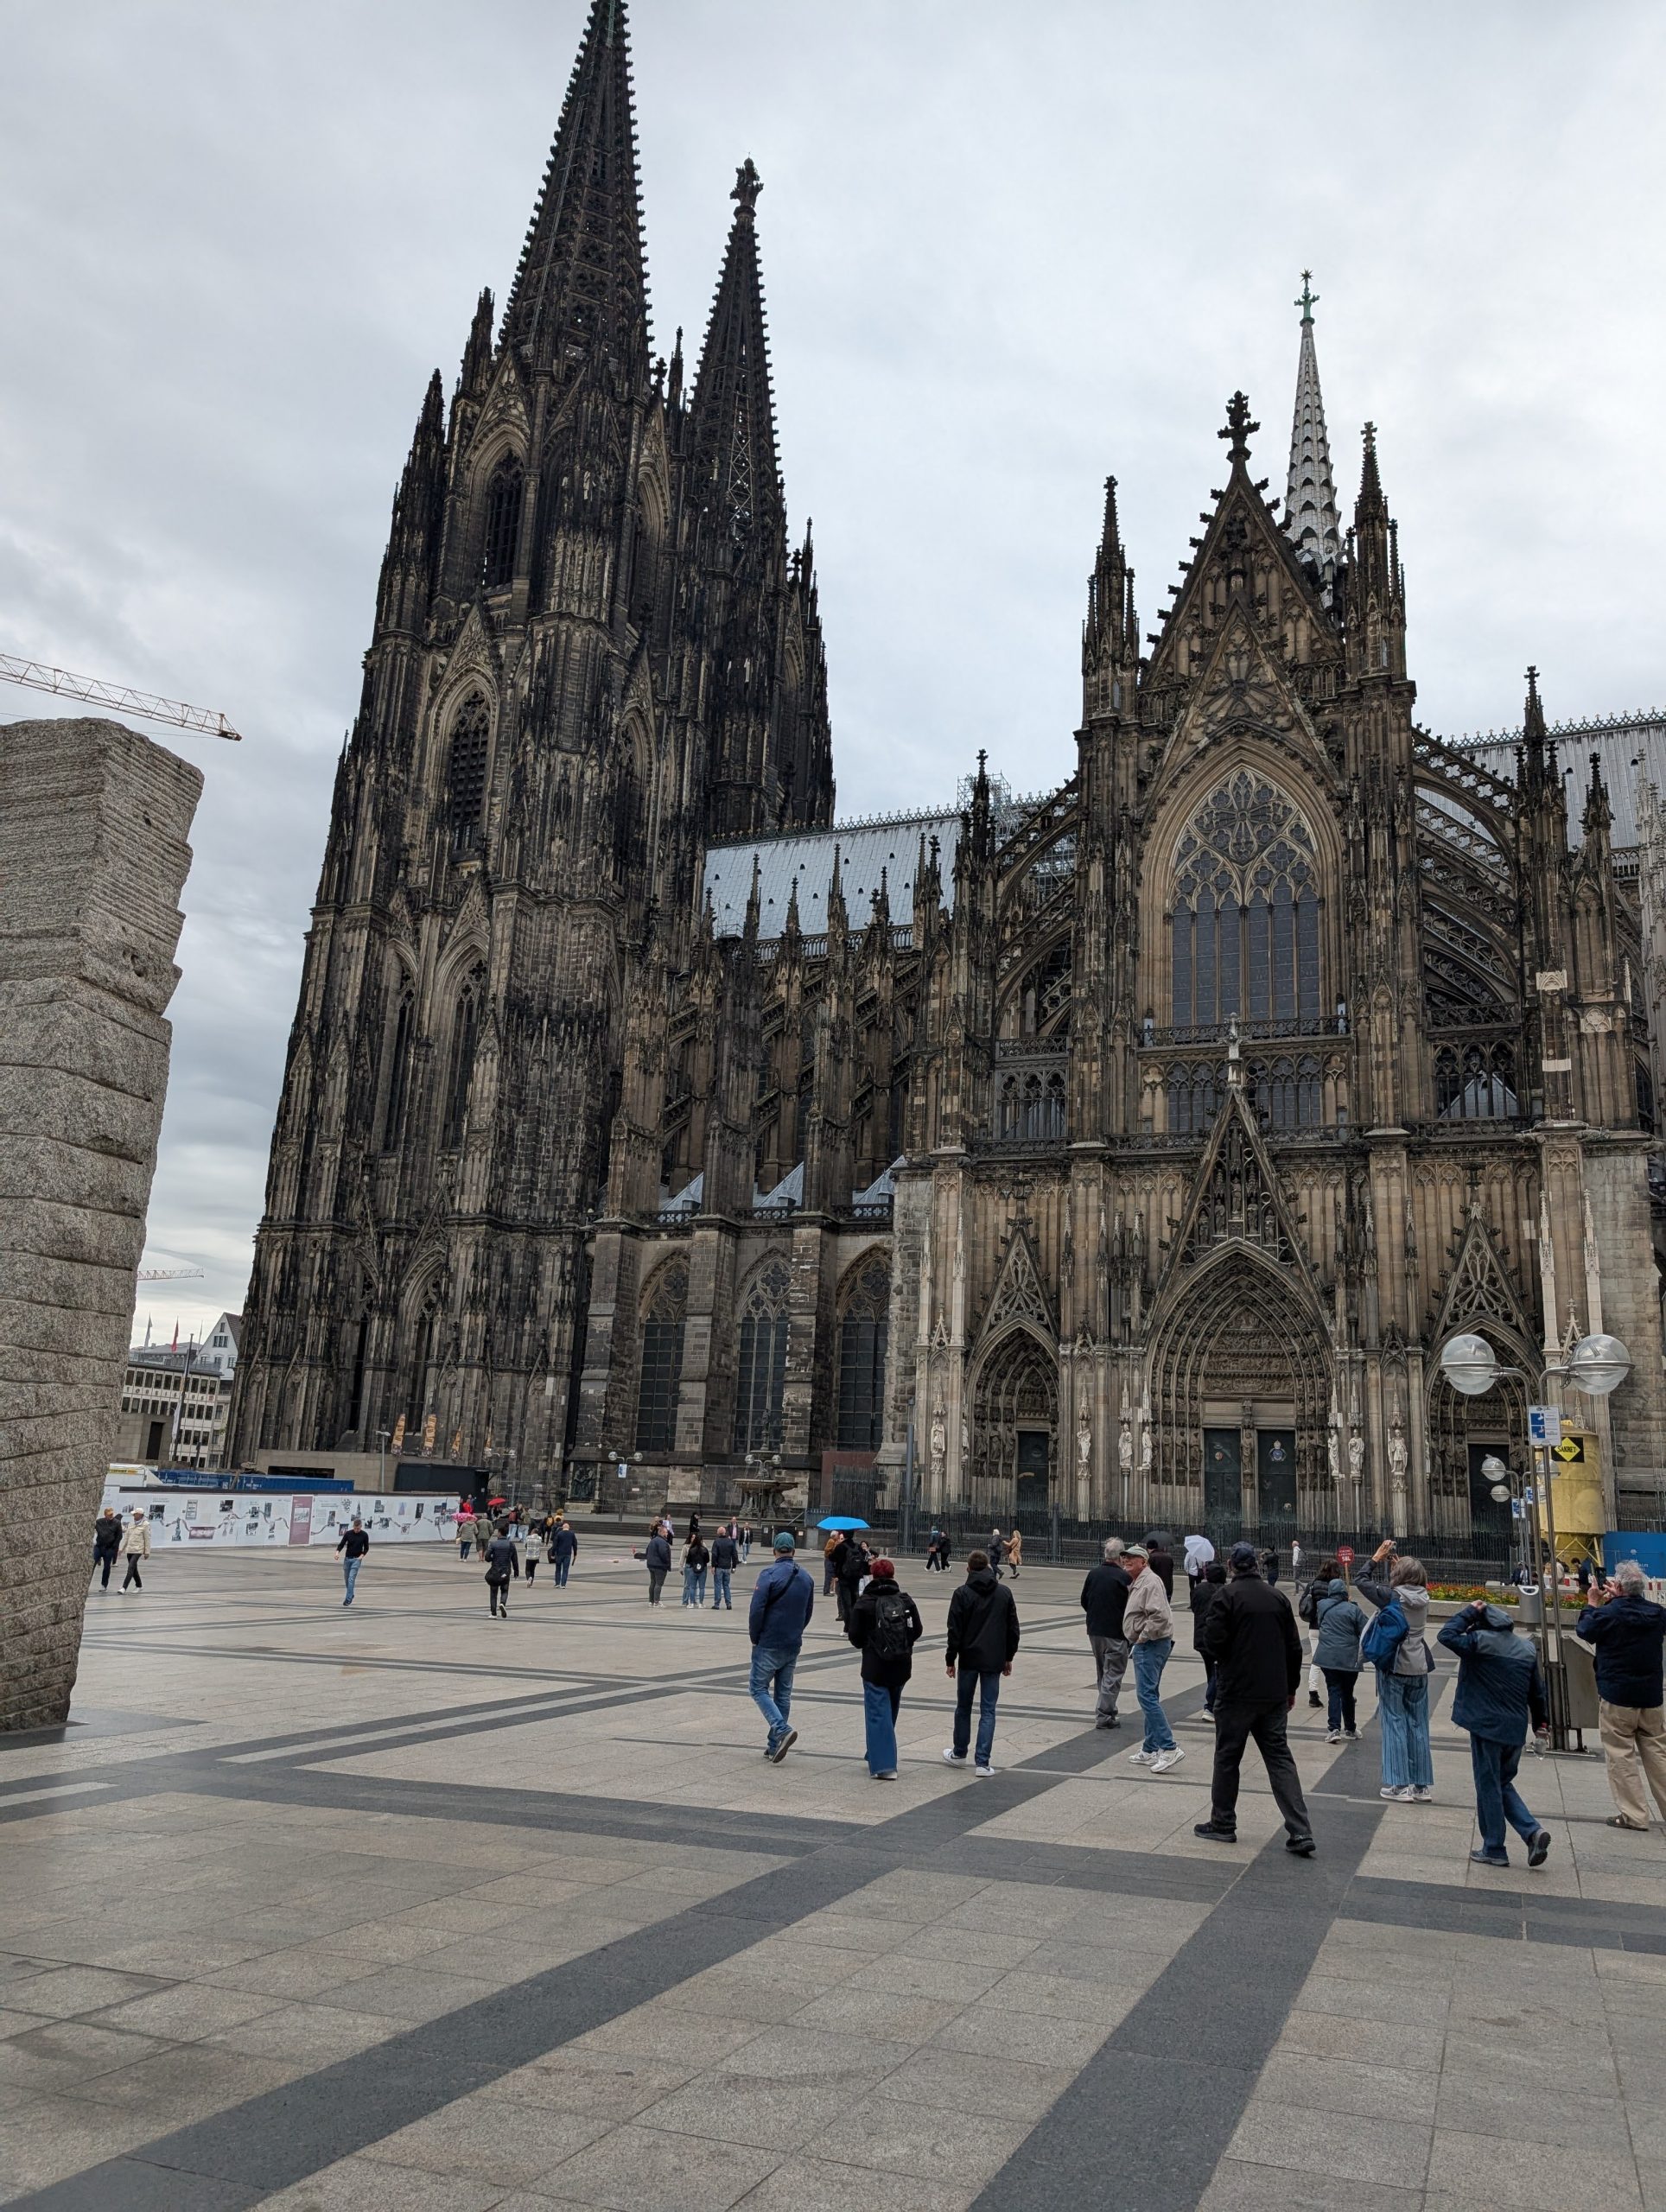
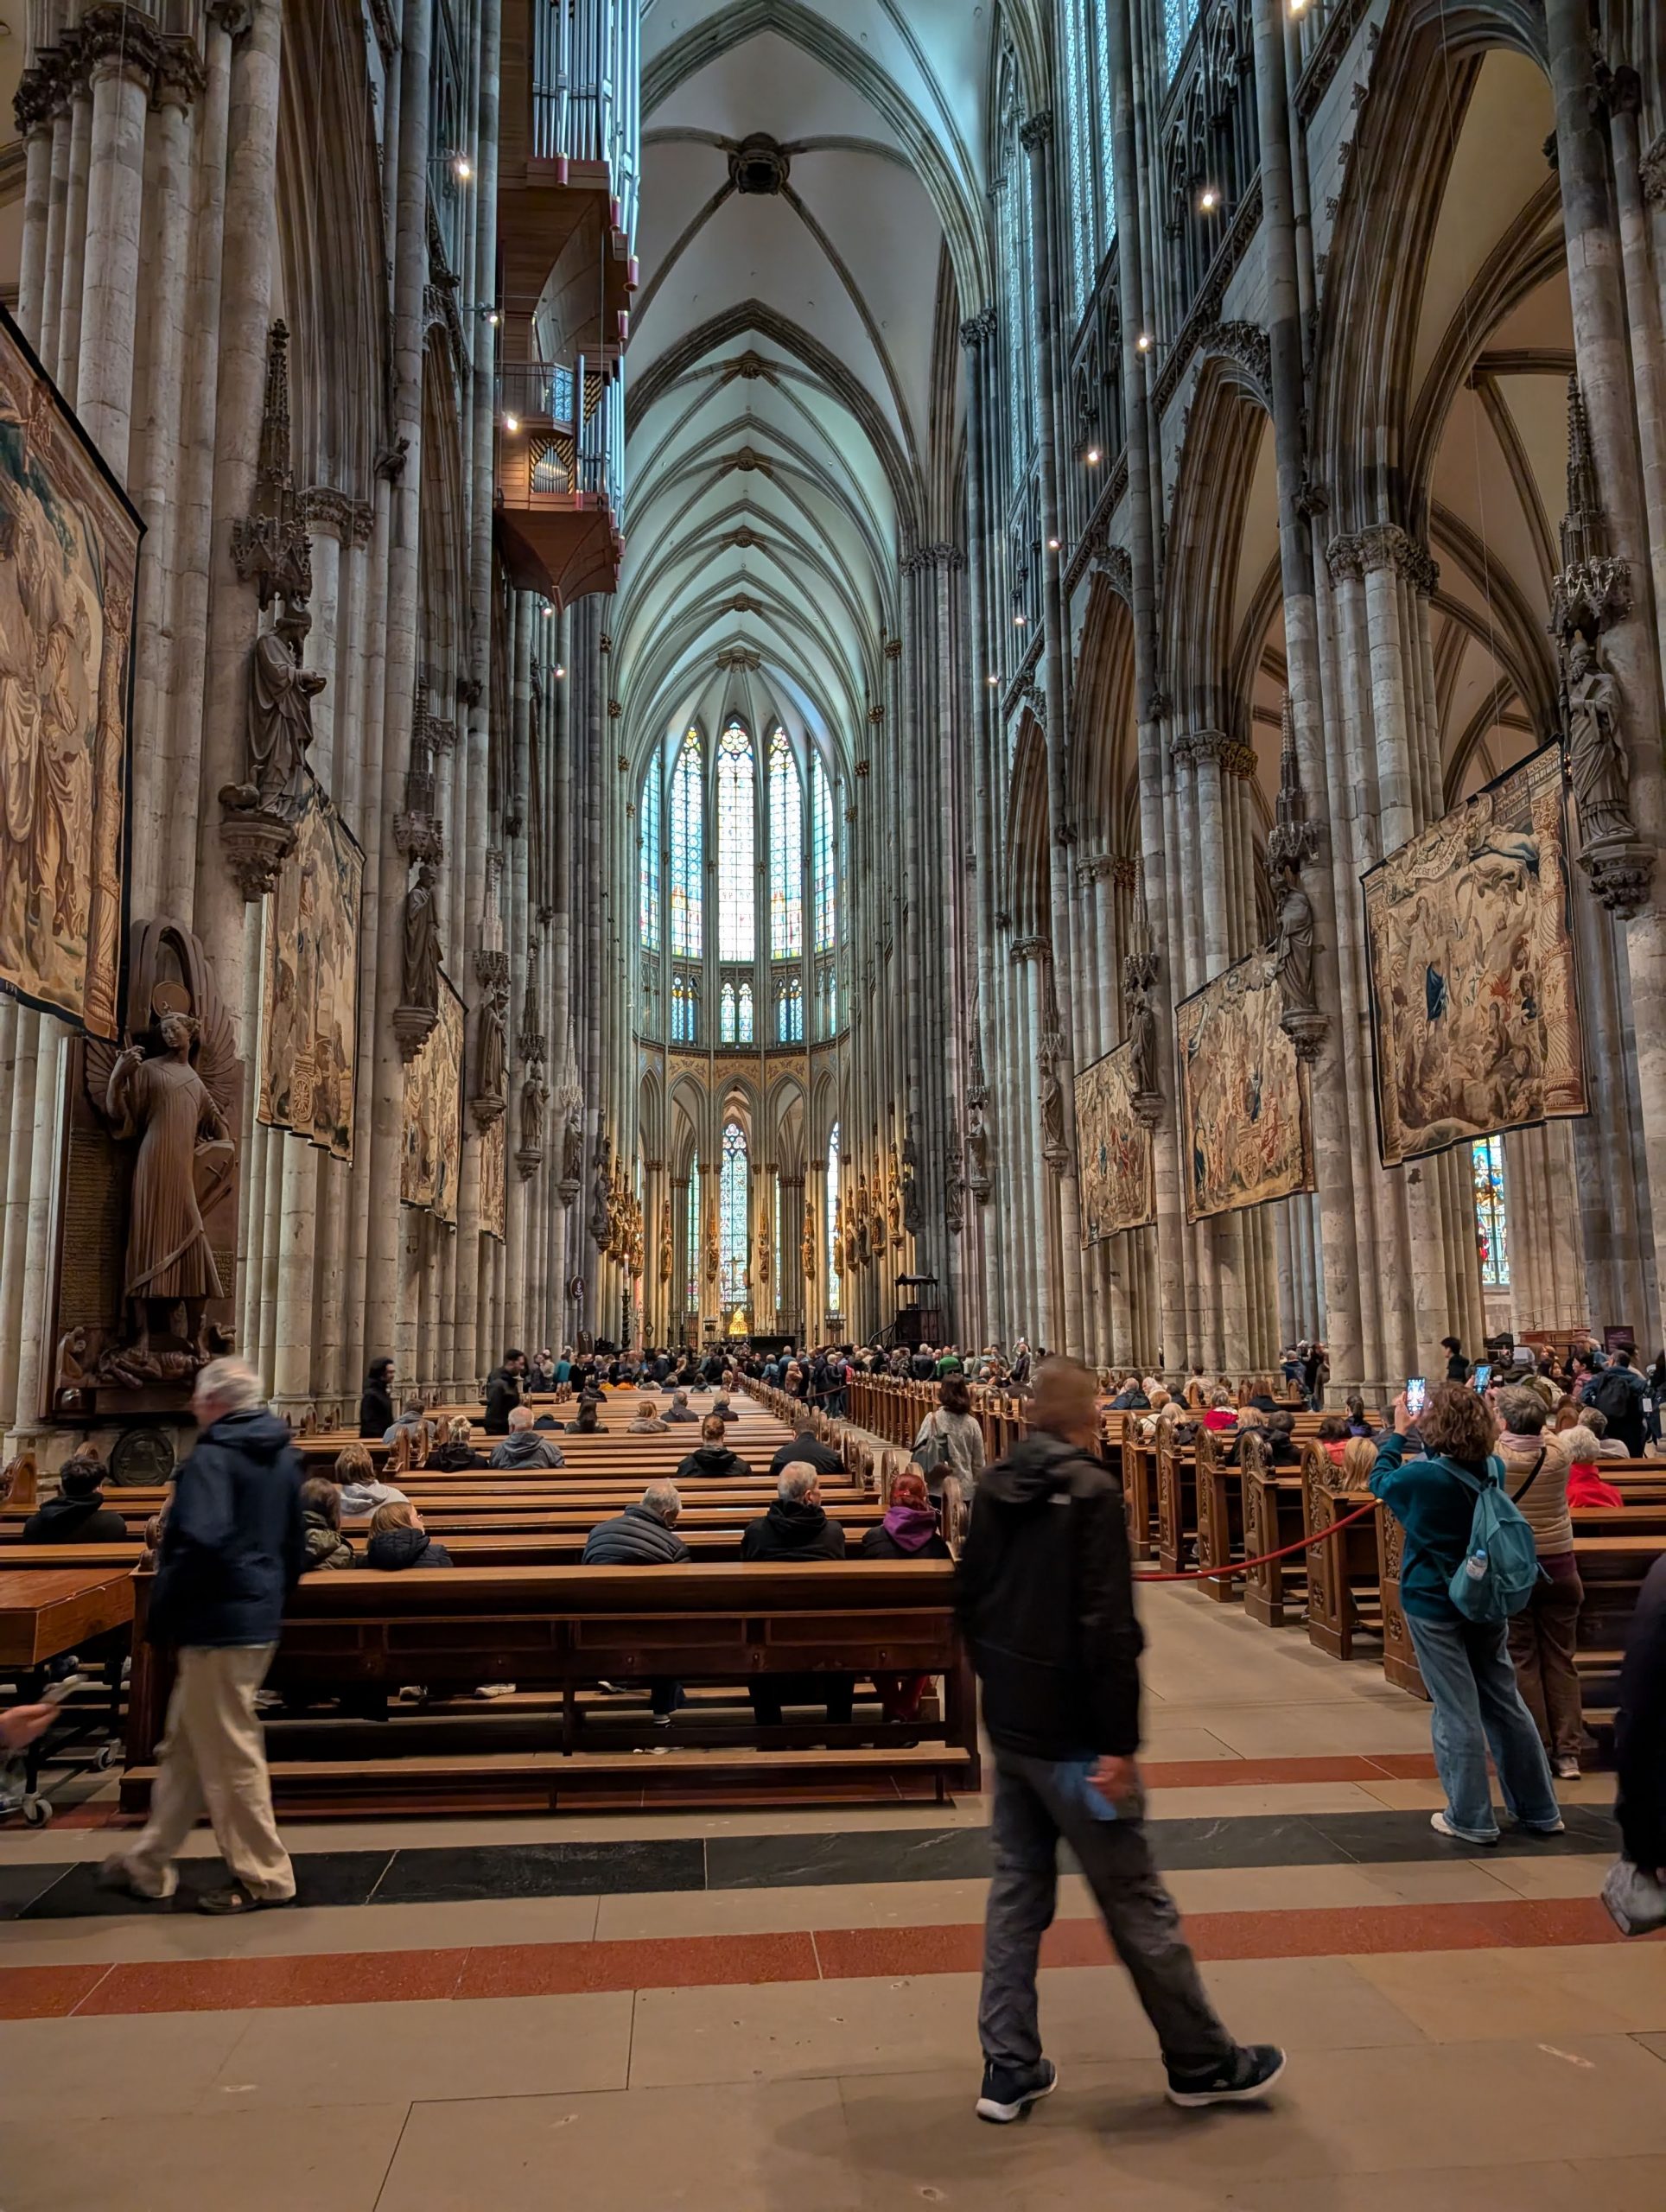
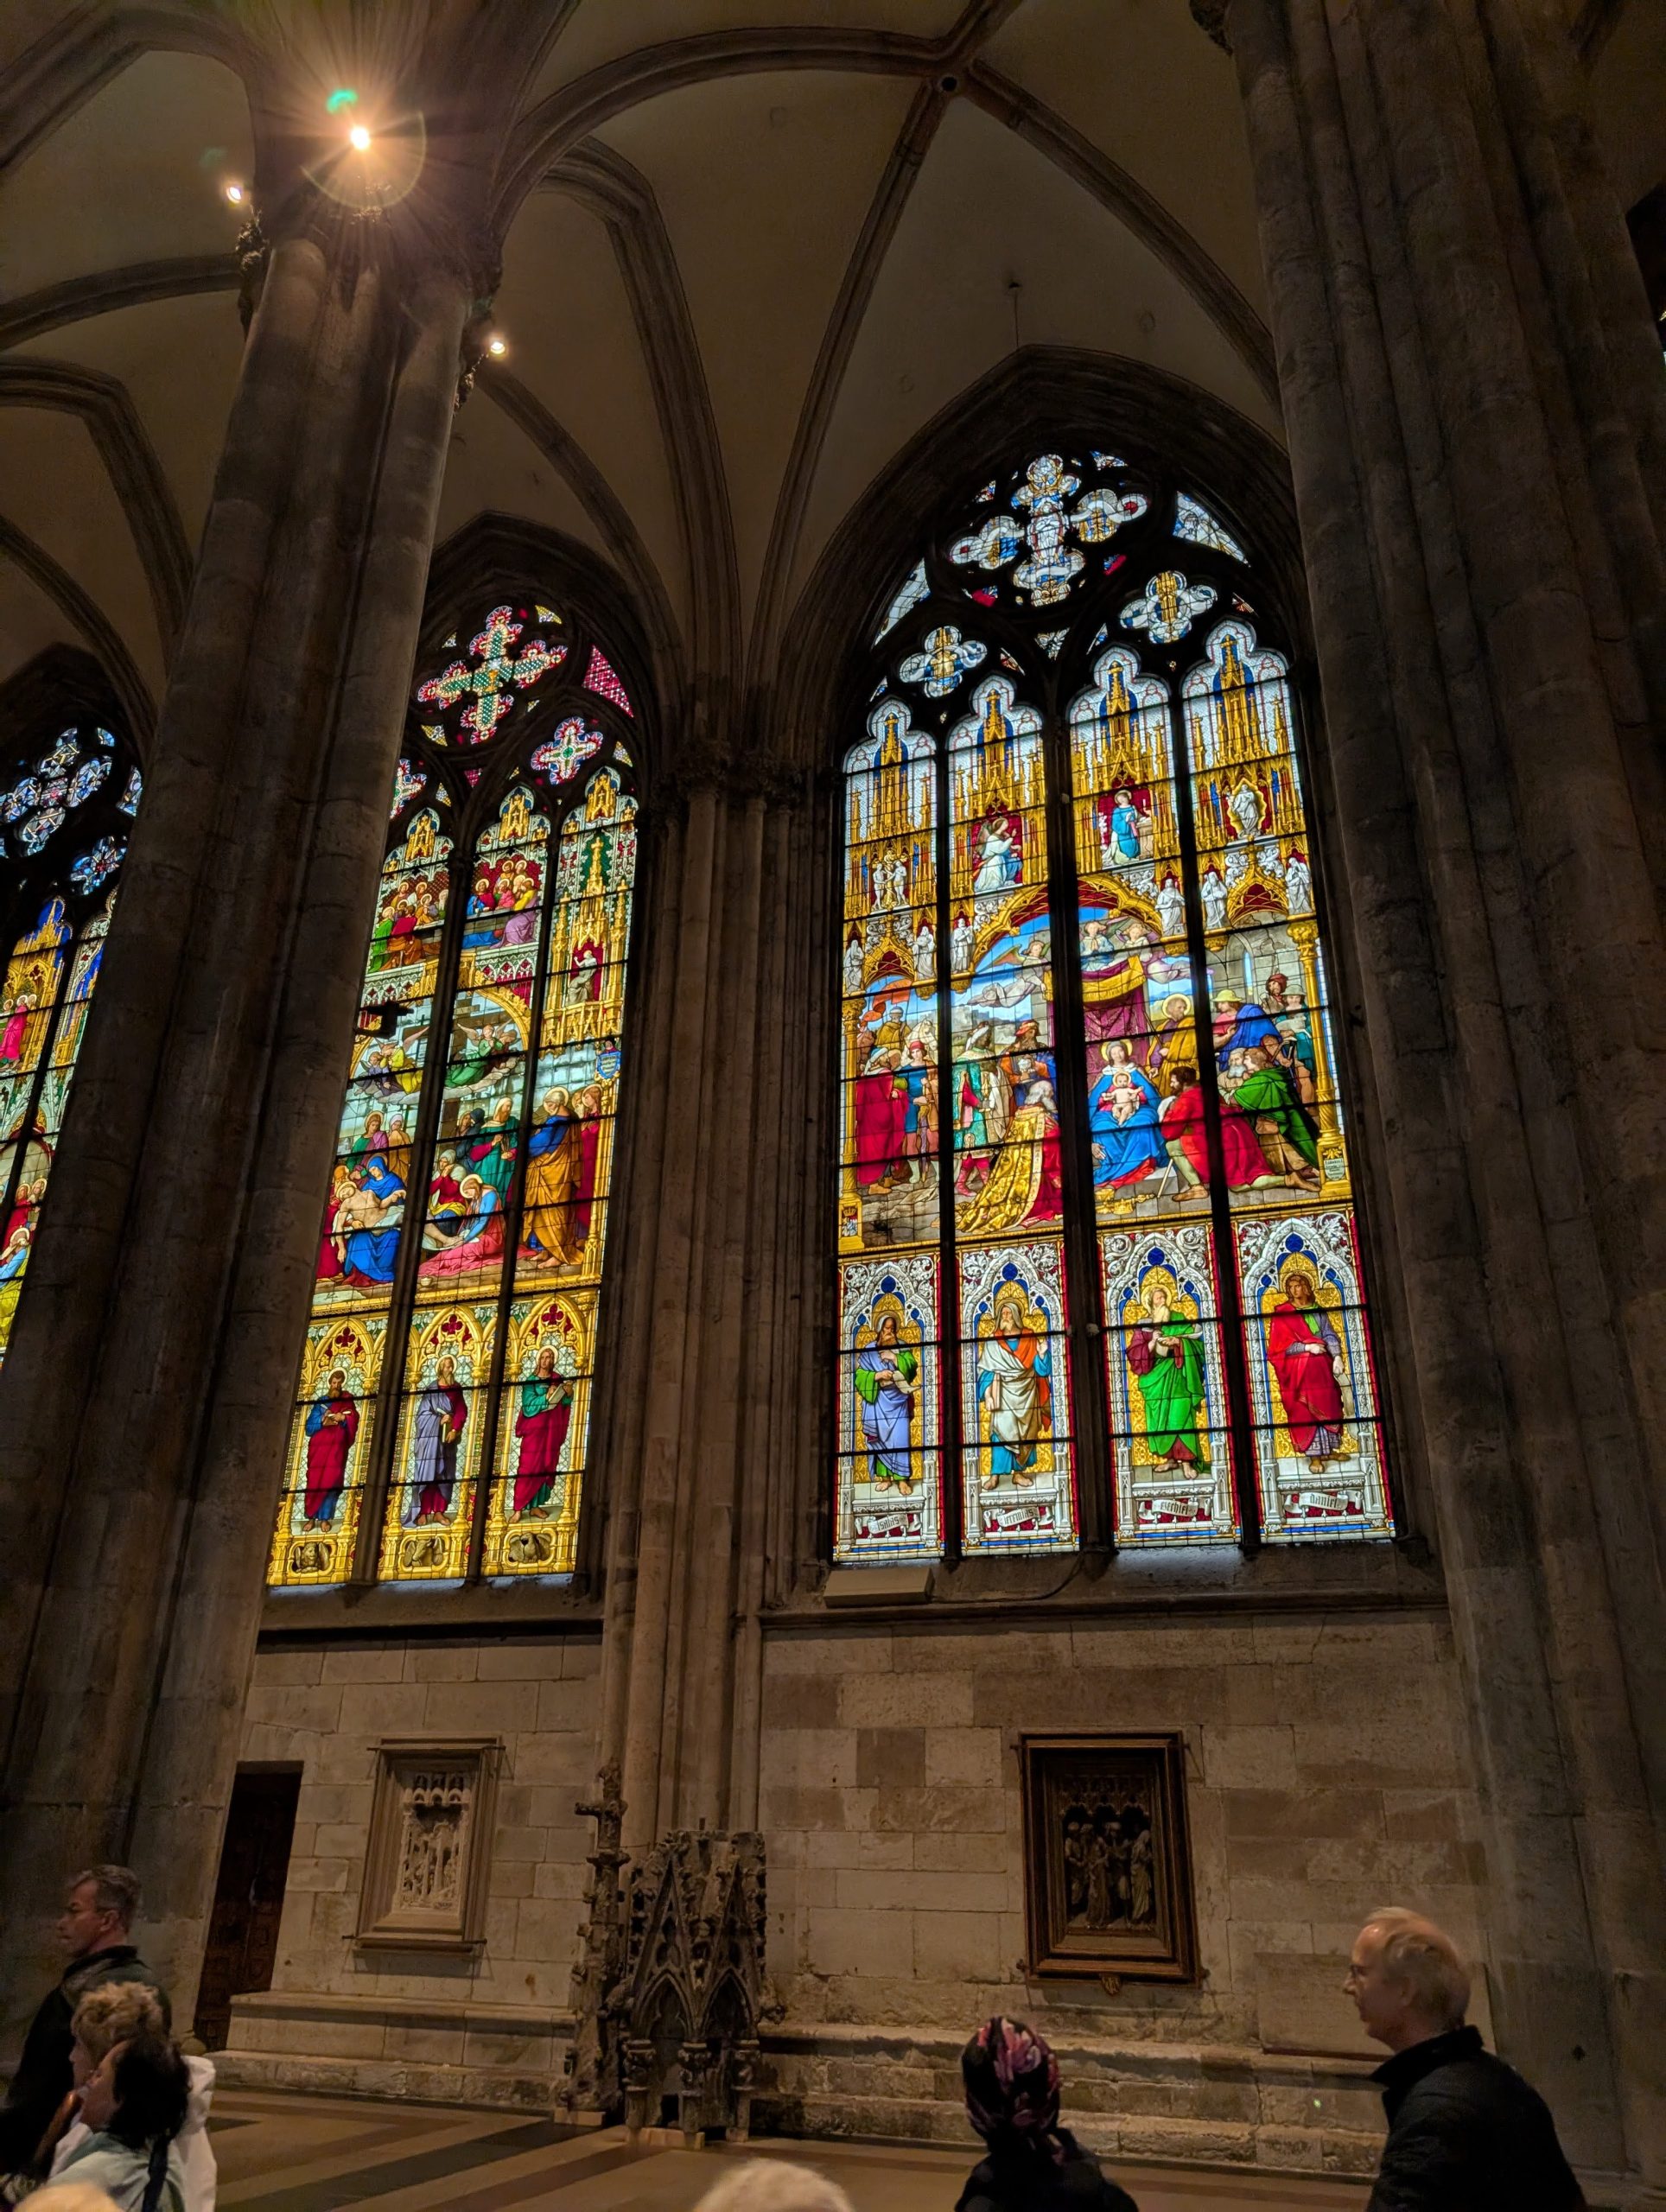
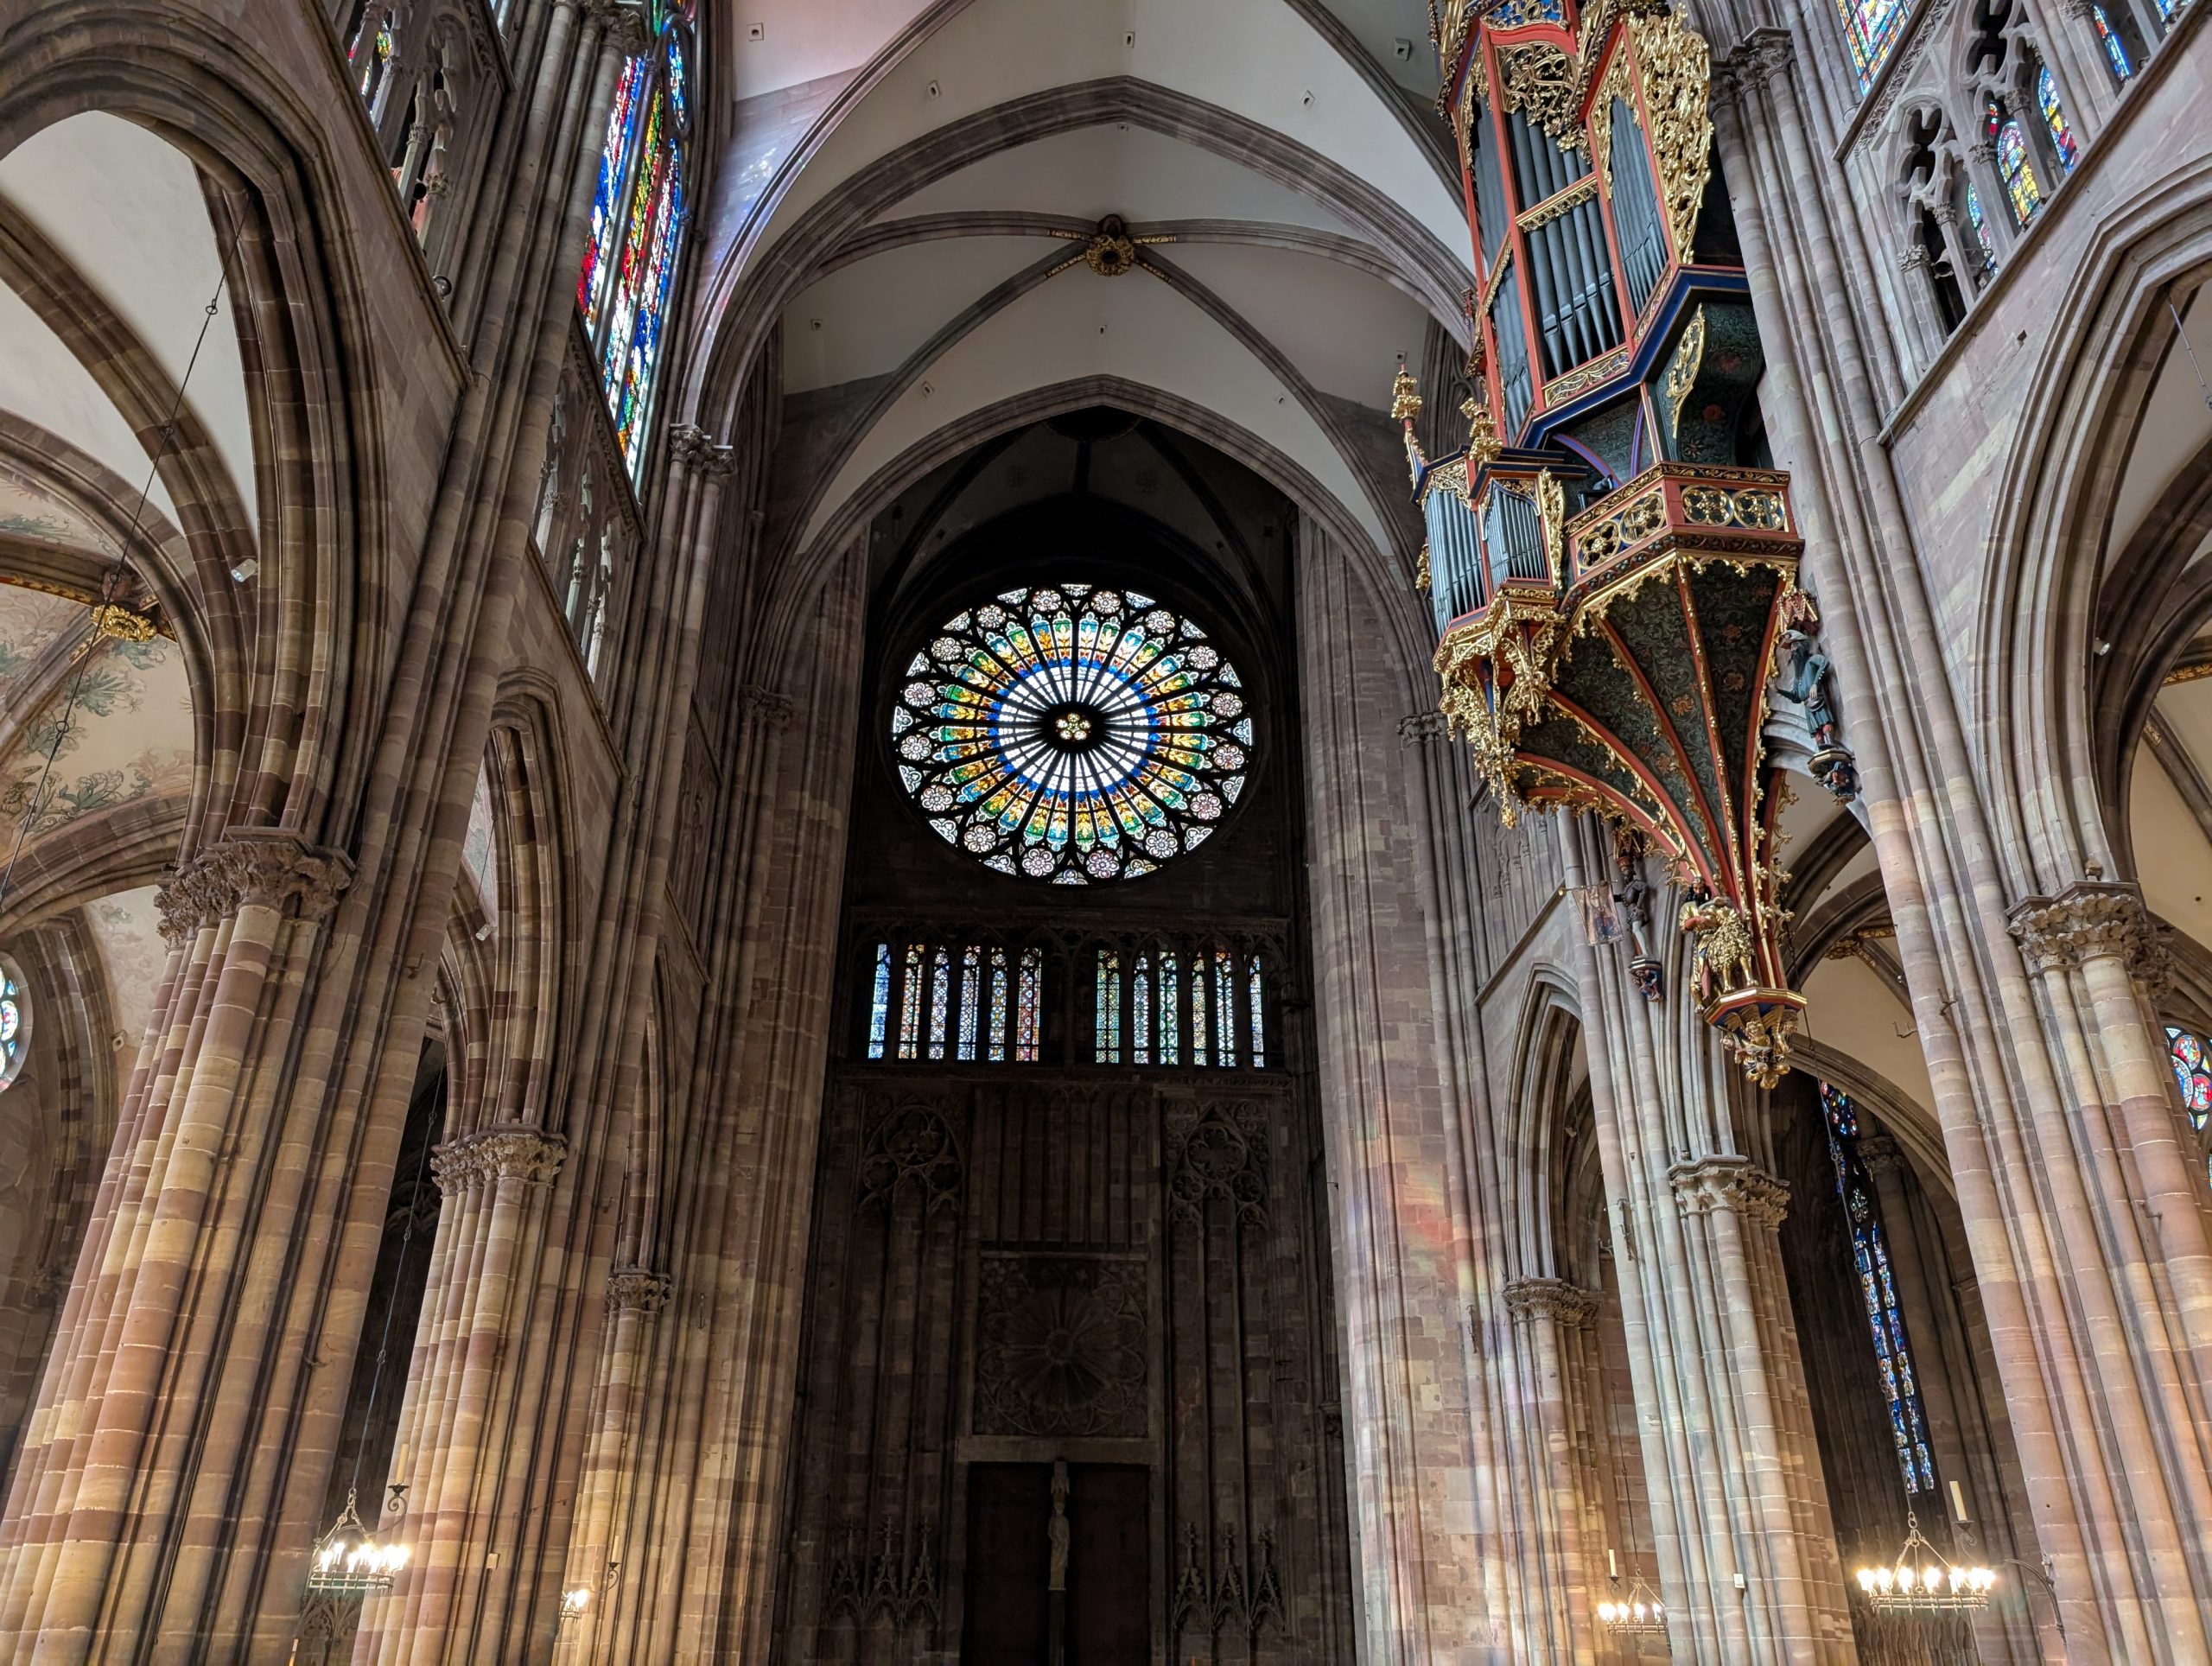
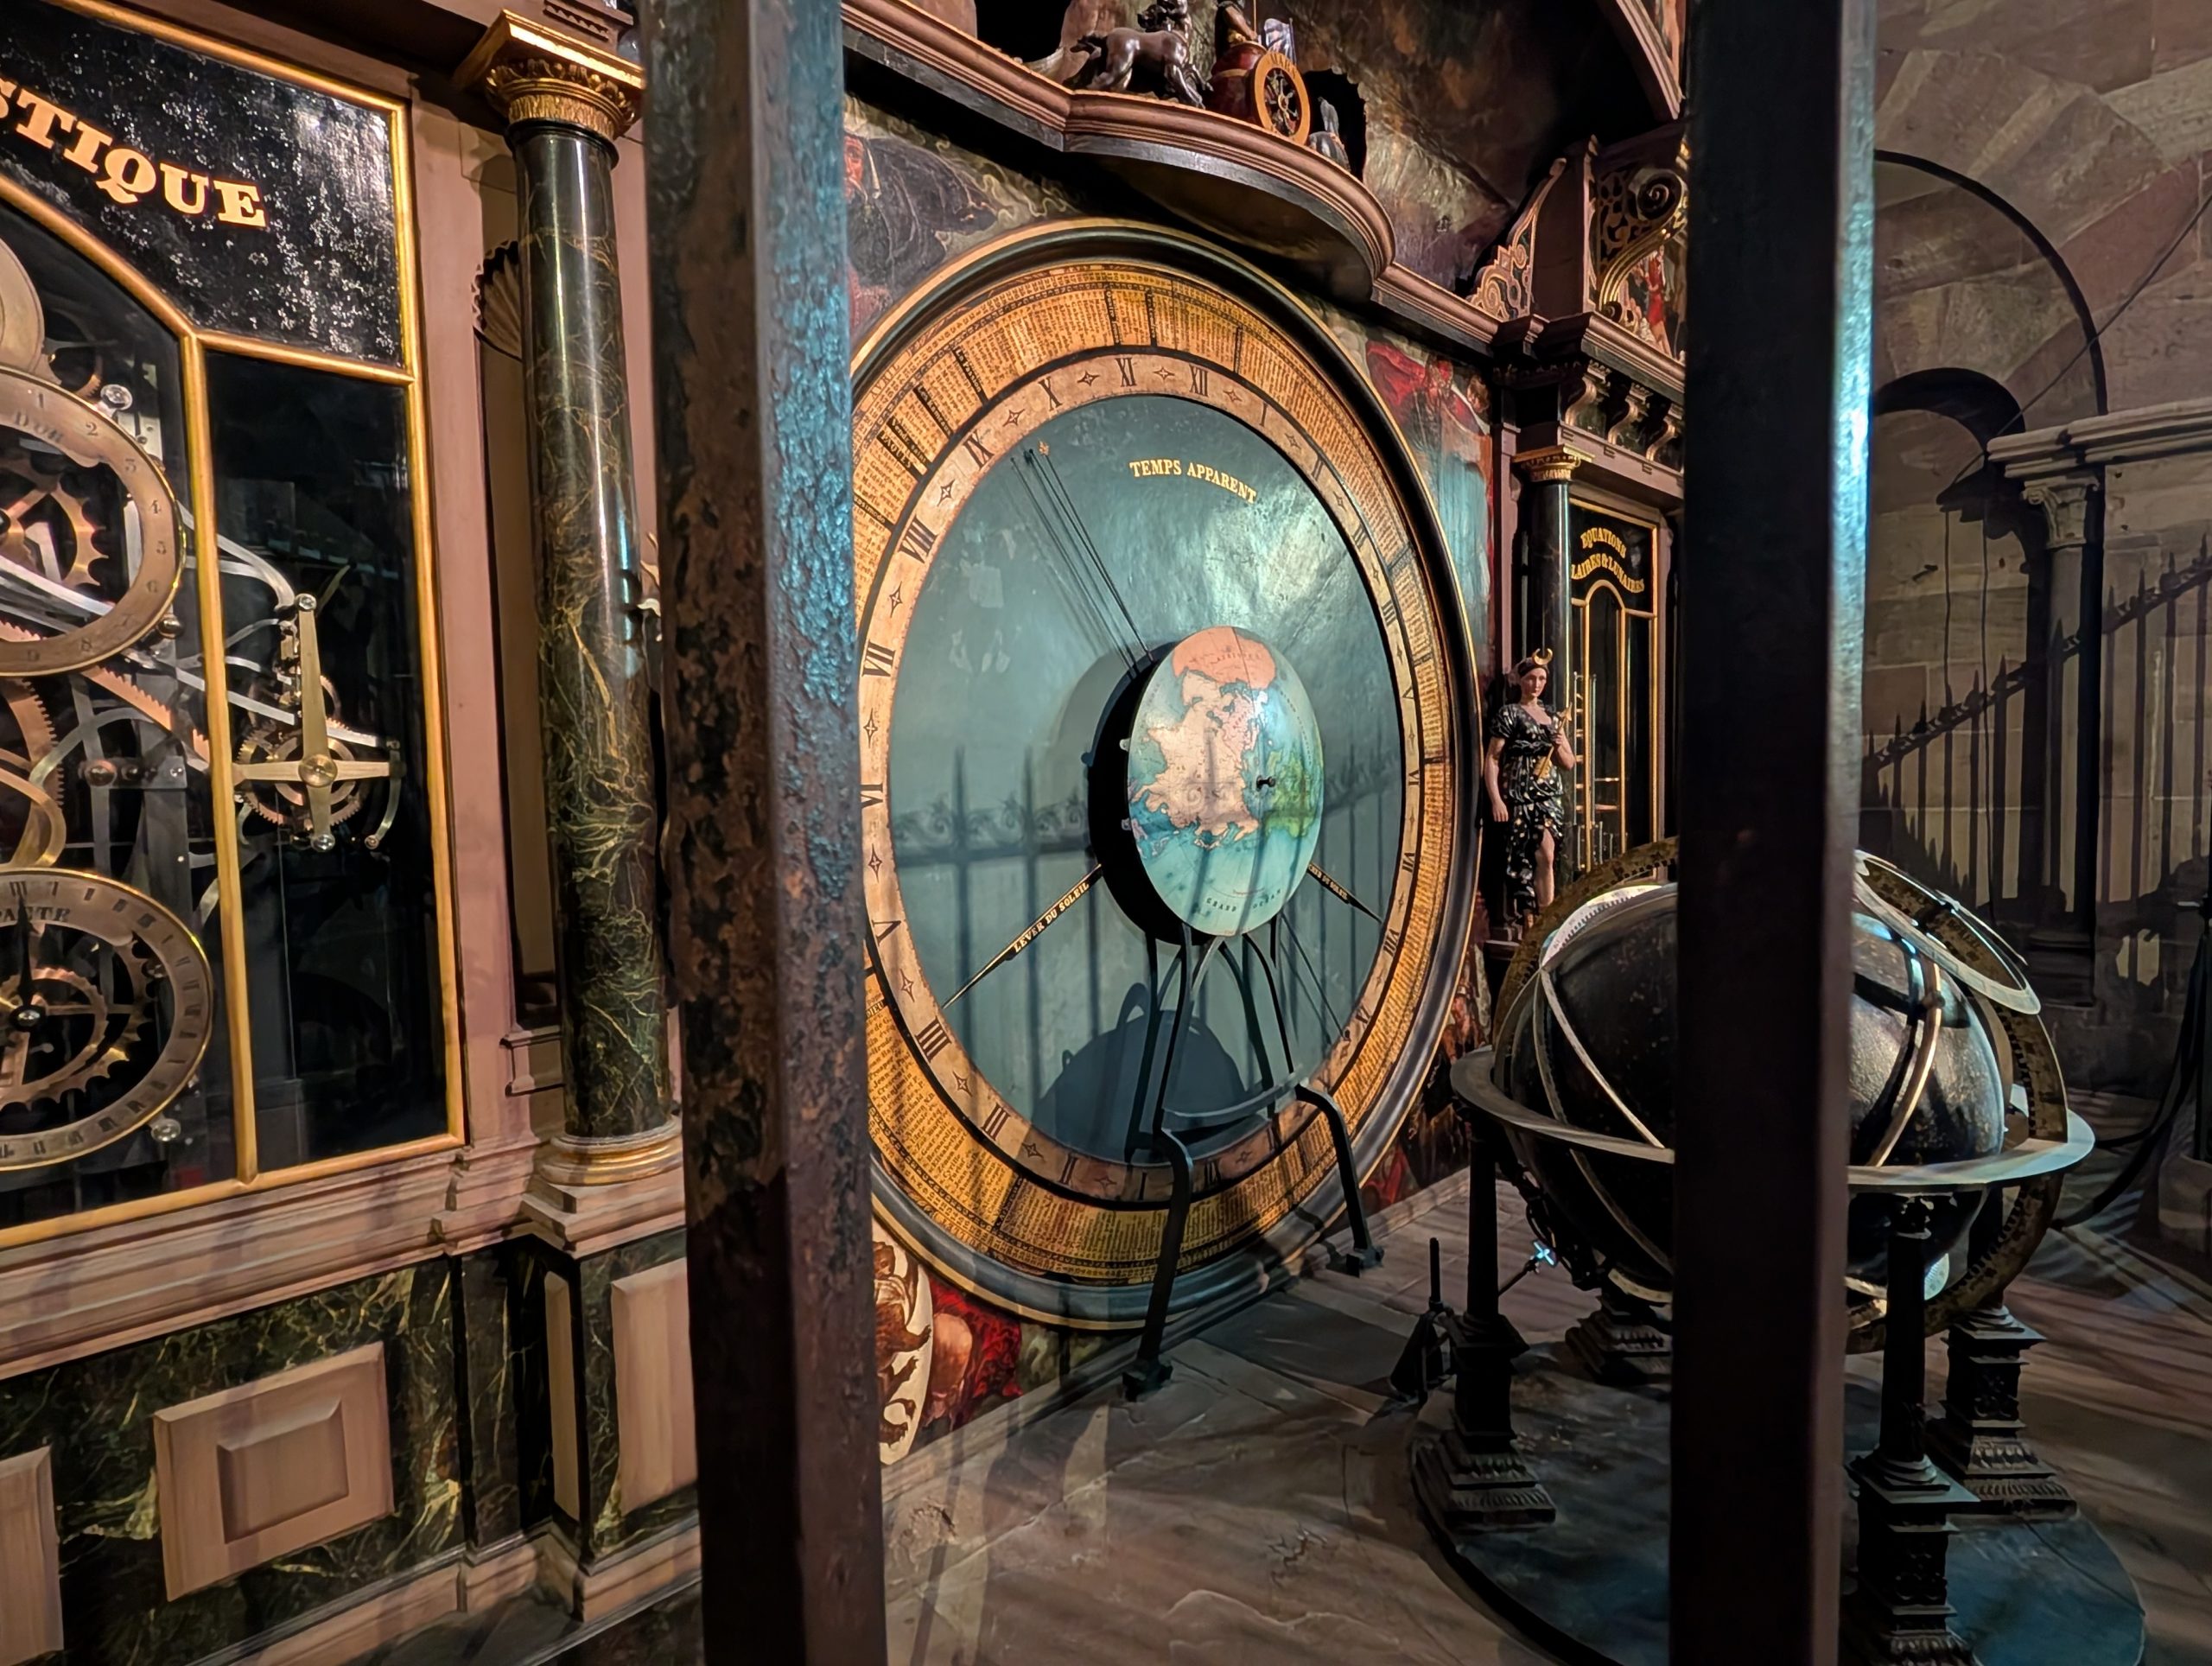
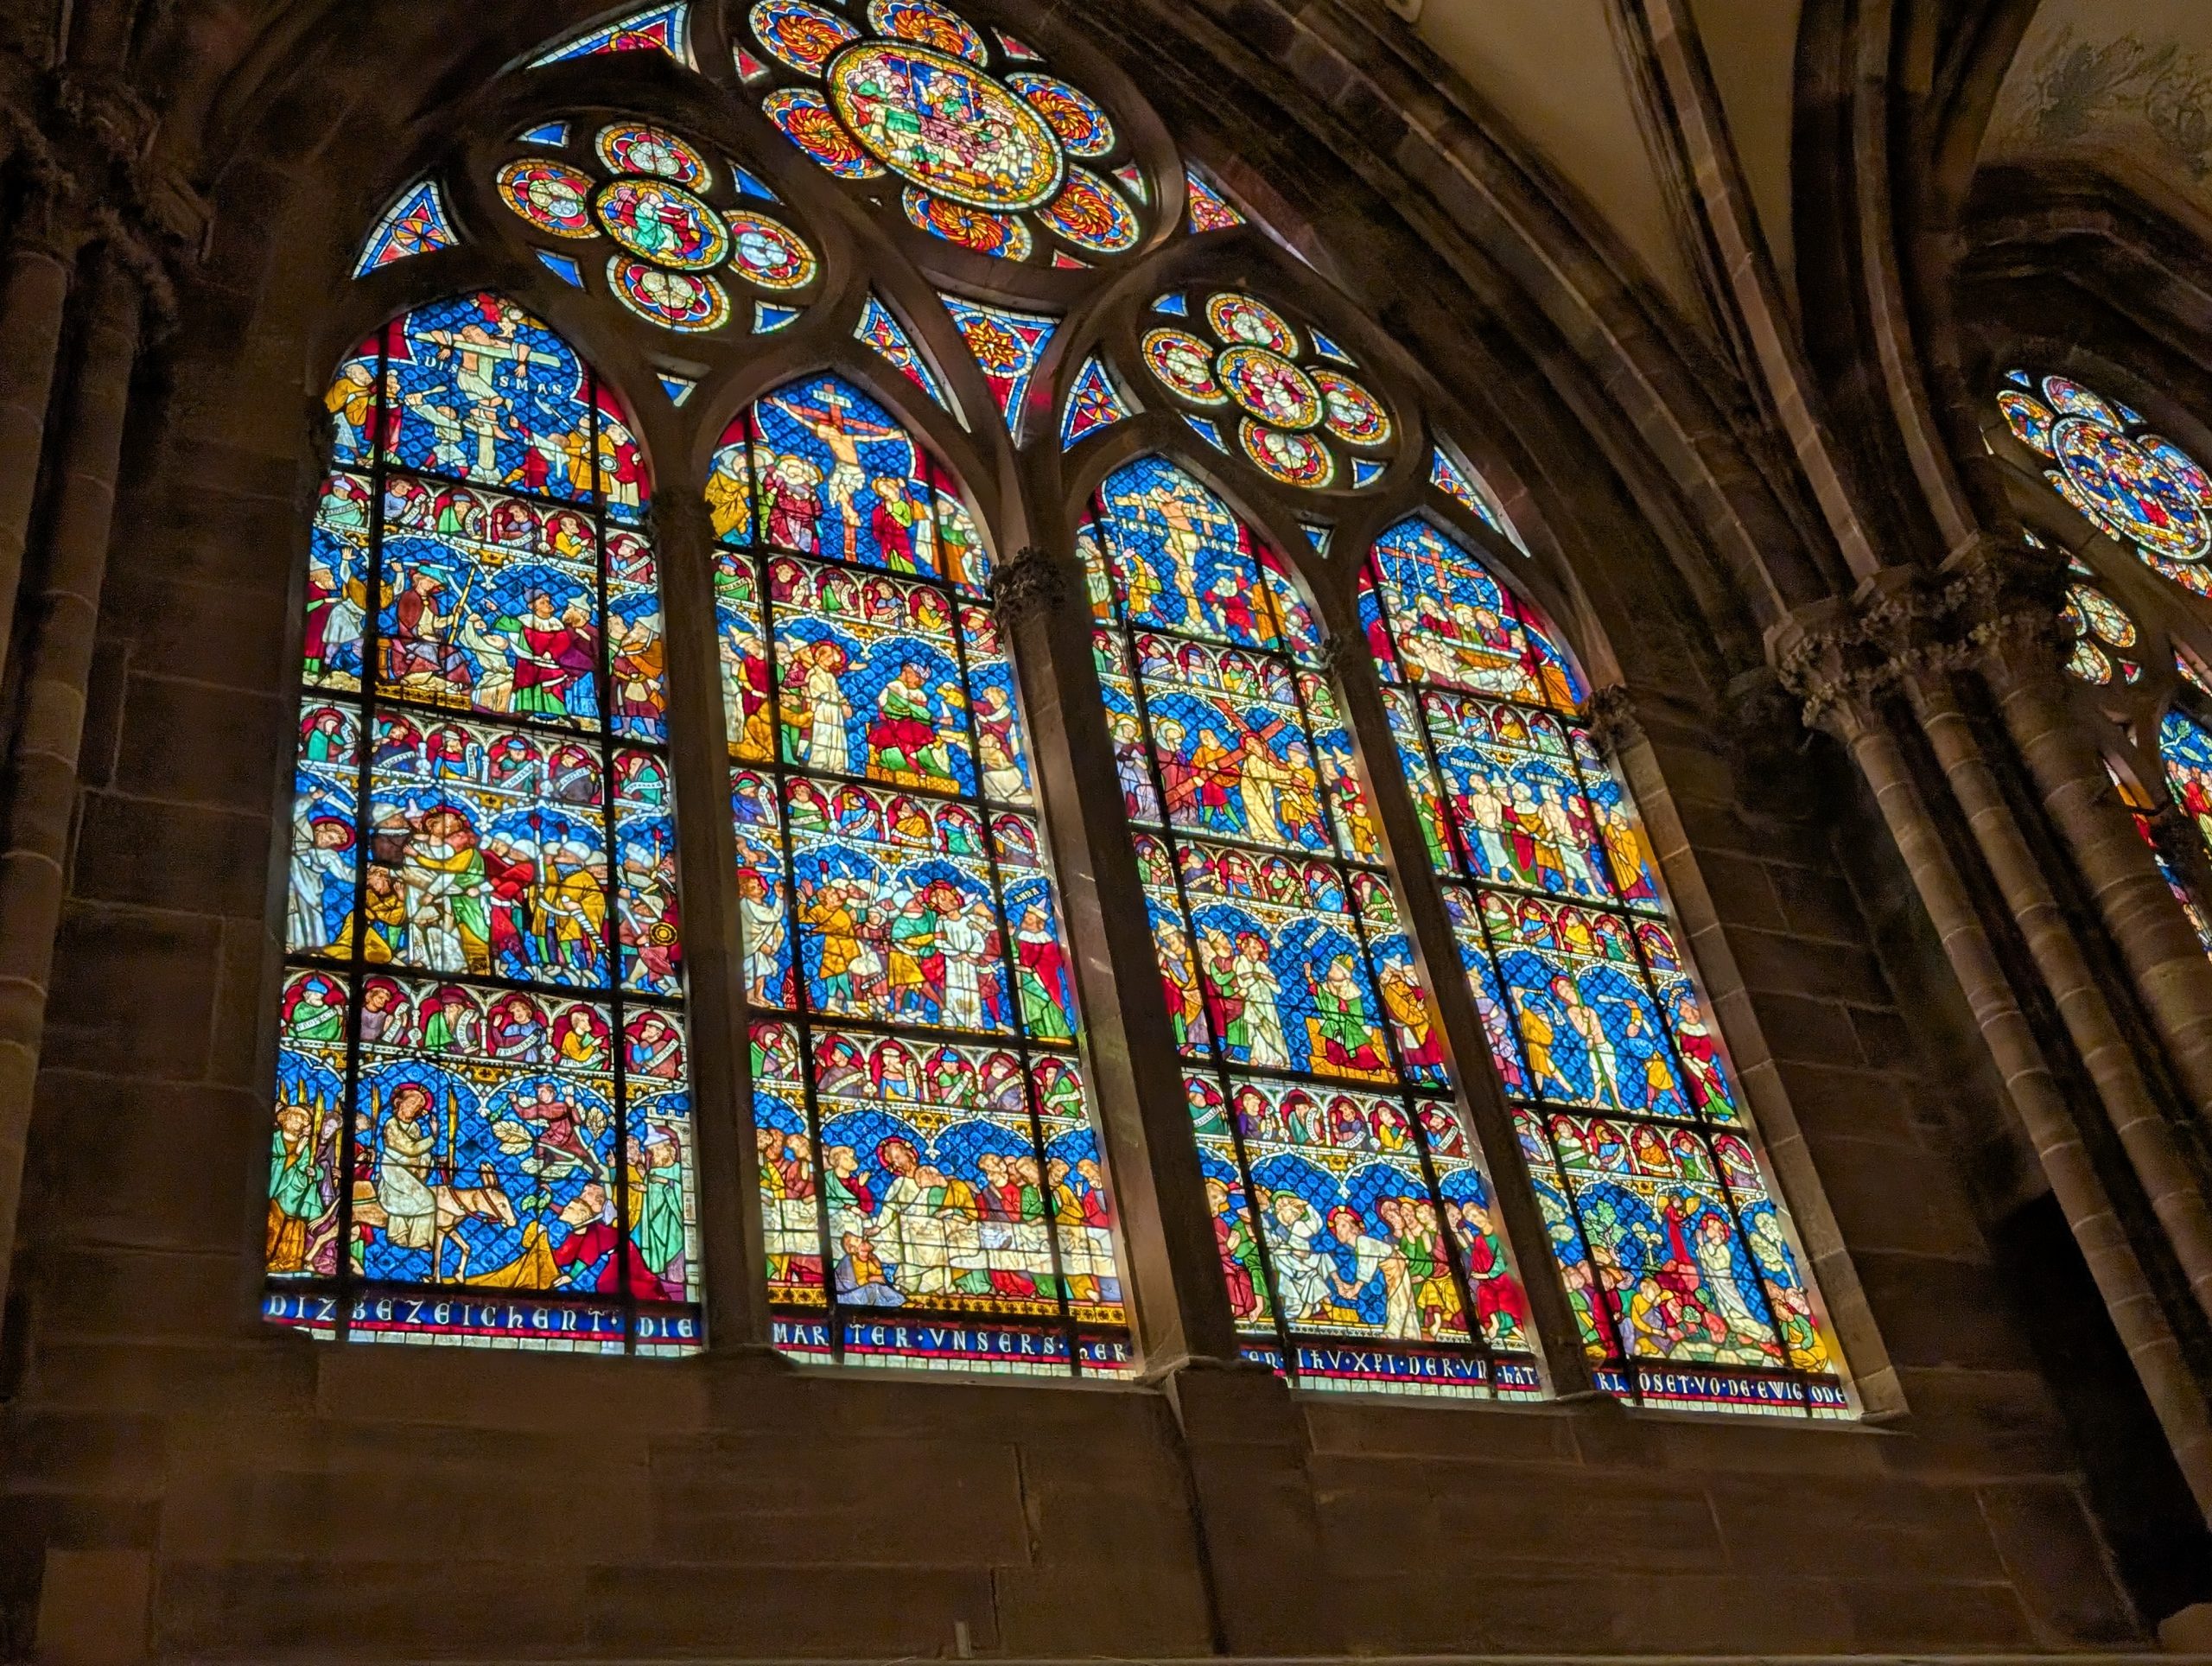
After passing some other old structures, we finally arrived at Cologne Cathedral.
This Gothic cathedral dominates the skyline of Cologne and is one of Germany’s most famous landmarks. It is also one of the most beautiful examples of Gothic and Neo-Gothic architecture in the world.
The building of the Cologne Cathedral commenced in 1248. But it took over 600 years to complete. And even after all the years, the cathedral still dominates the skyline of the city.
Currently the cathedral is the seat of the Archbishop of Cologne, and it has been a UNESCO World Heritage Site since 1996. Upon its completion on the 14th of August 1880, the Cologne Cathedral held the title of the World’s tallest building until 1884.
The Cologne Cathedral dominates the city of Cologne even today and can be viewed from anywhere in the city. The cathedral’s famous twin towers stand out boldly as the symbol of Cologne’s proud history. On the outside the cathedral is dark and rather menacing; inside it is just awe-inspiring. At the end of the gigantic nave is the reason for the cathedral being built; the shrine of the Three Magi, the Three Wise Men whose relics were brought to the city in 1164.
Then it was back to the boat for lunch.
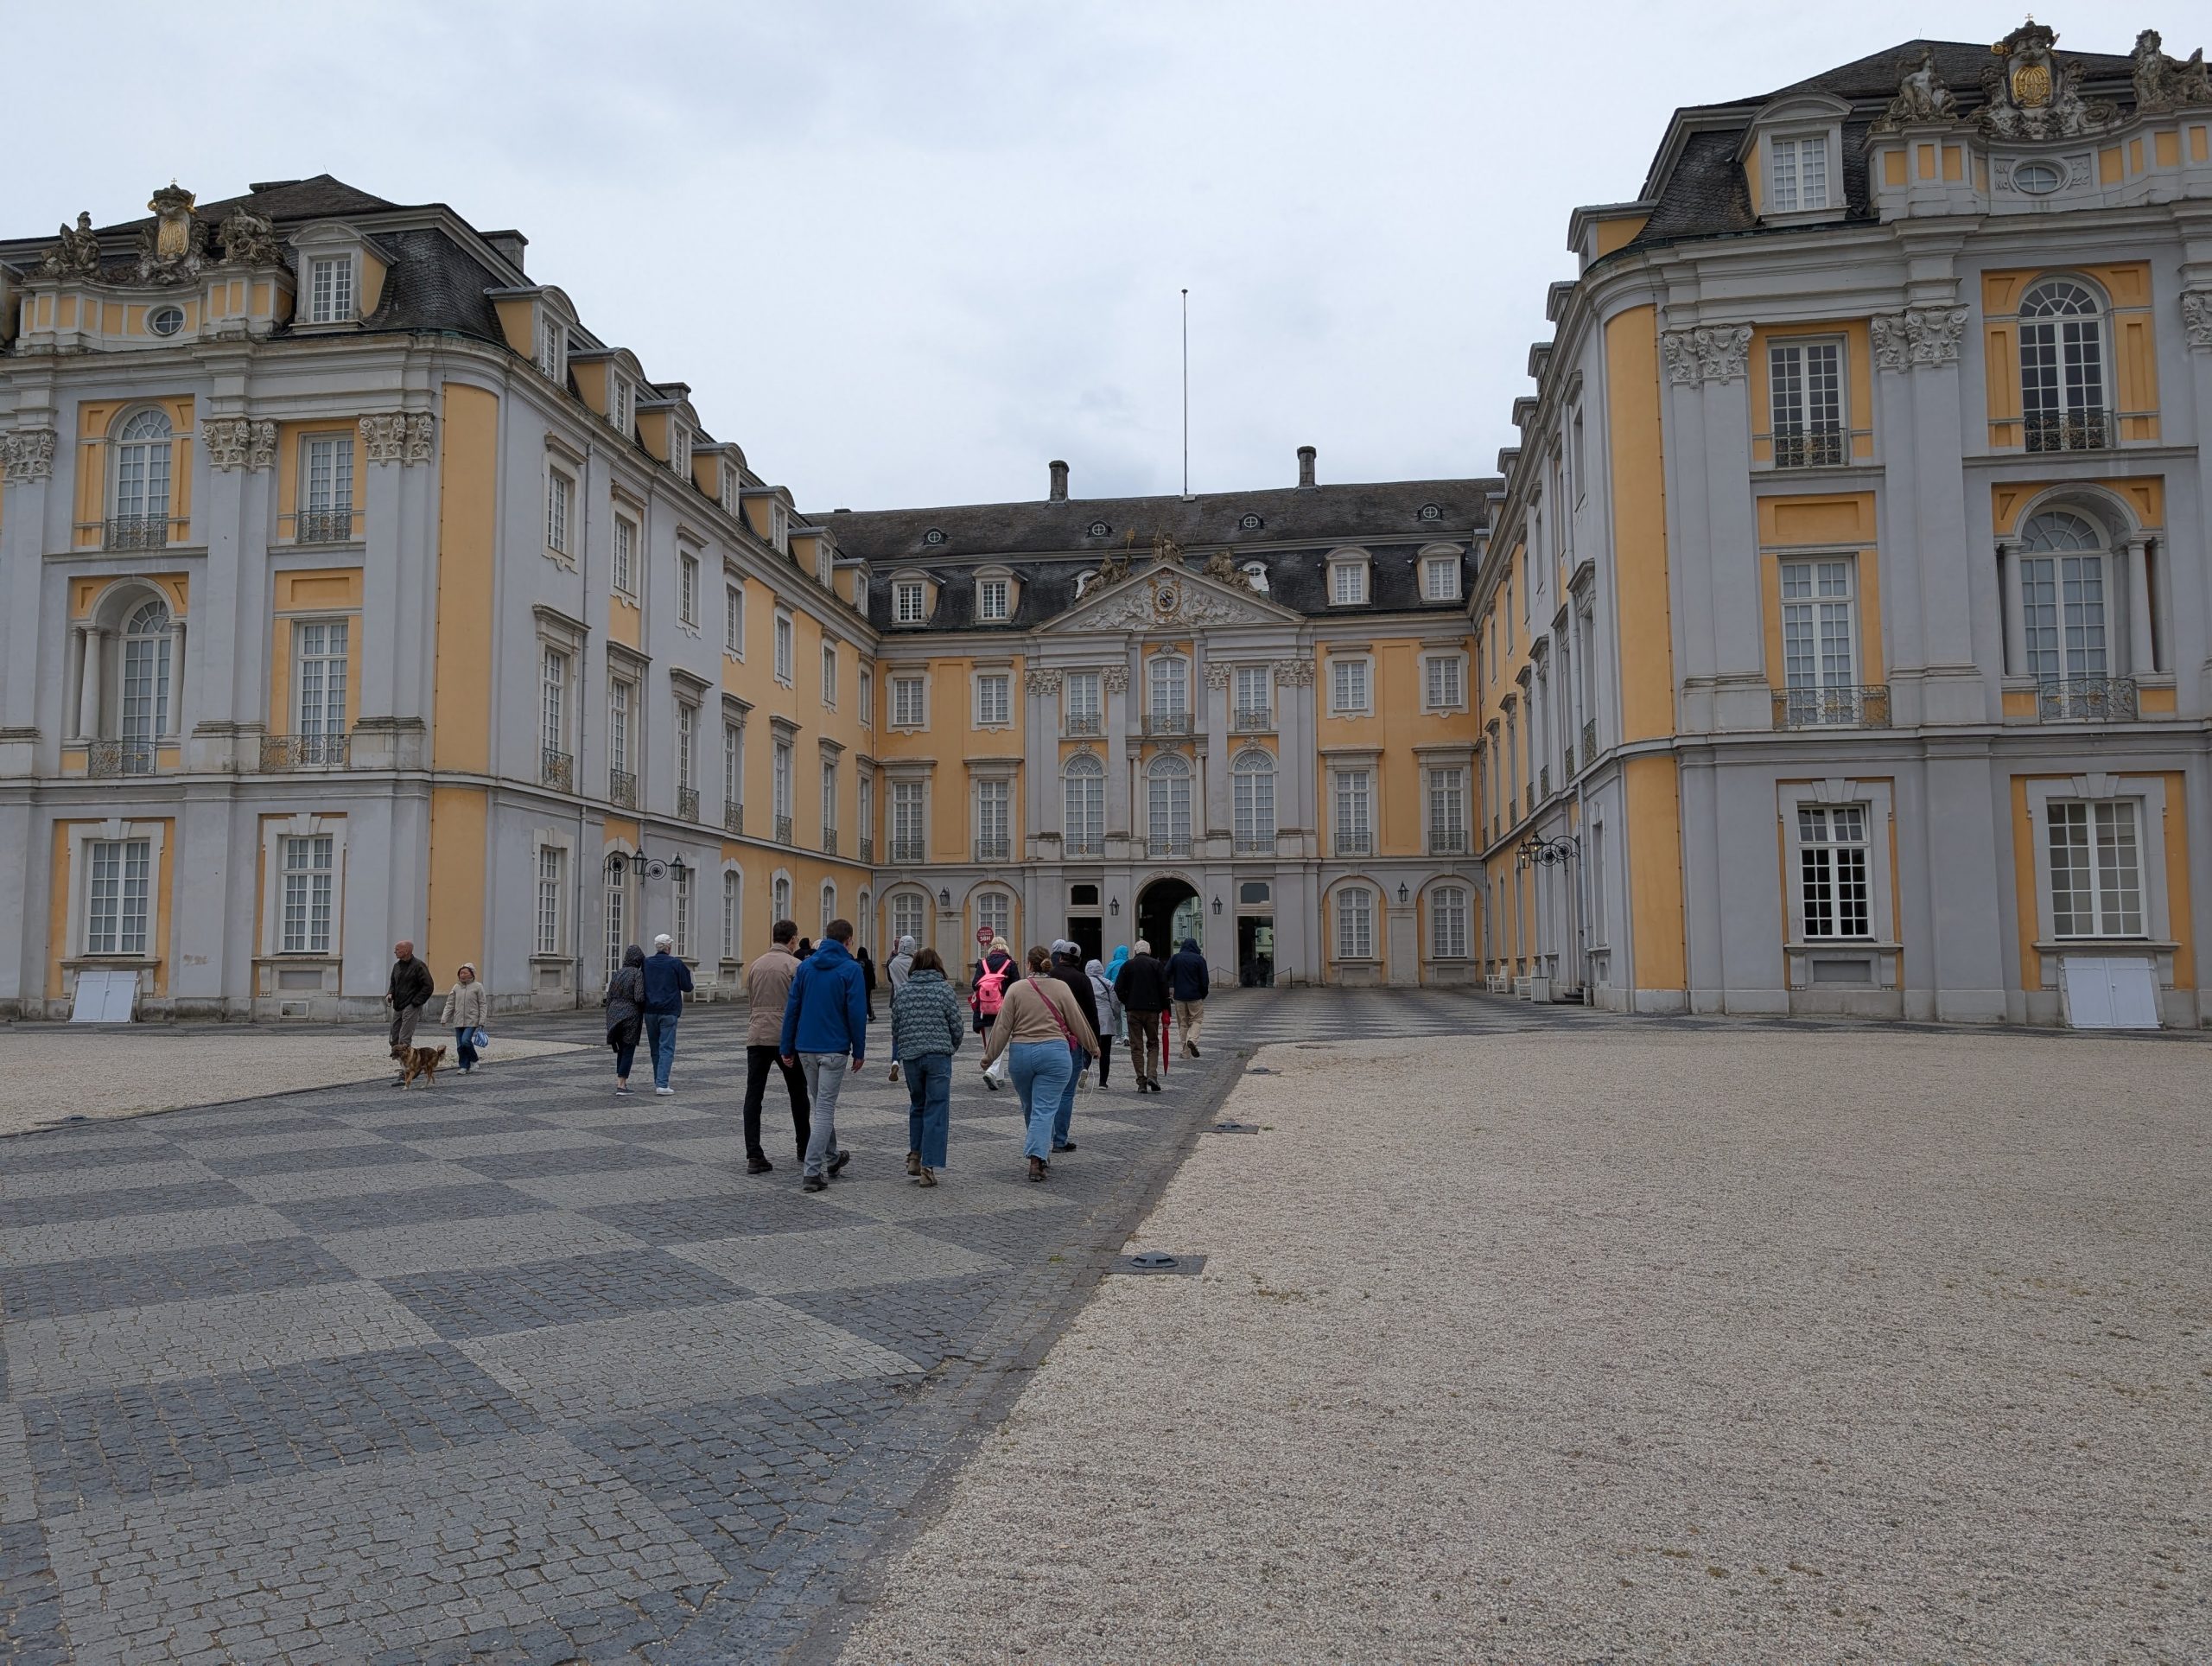
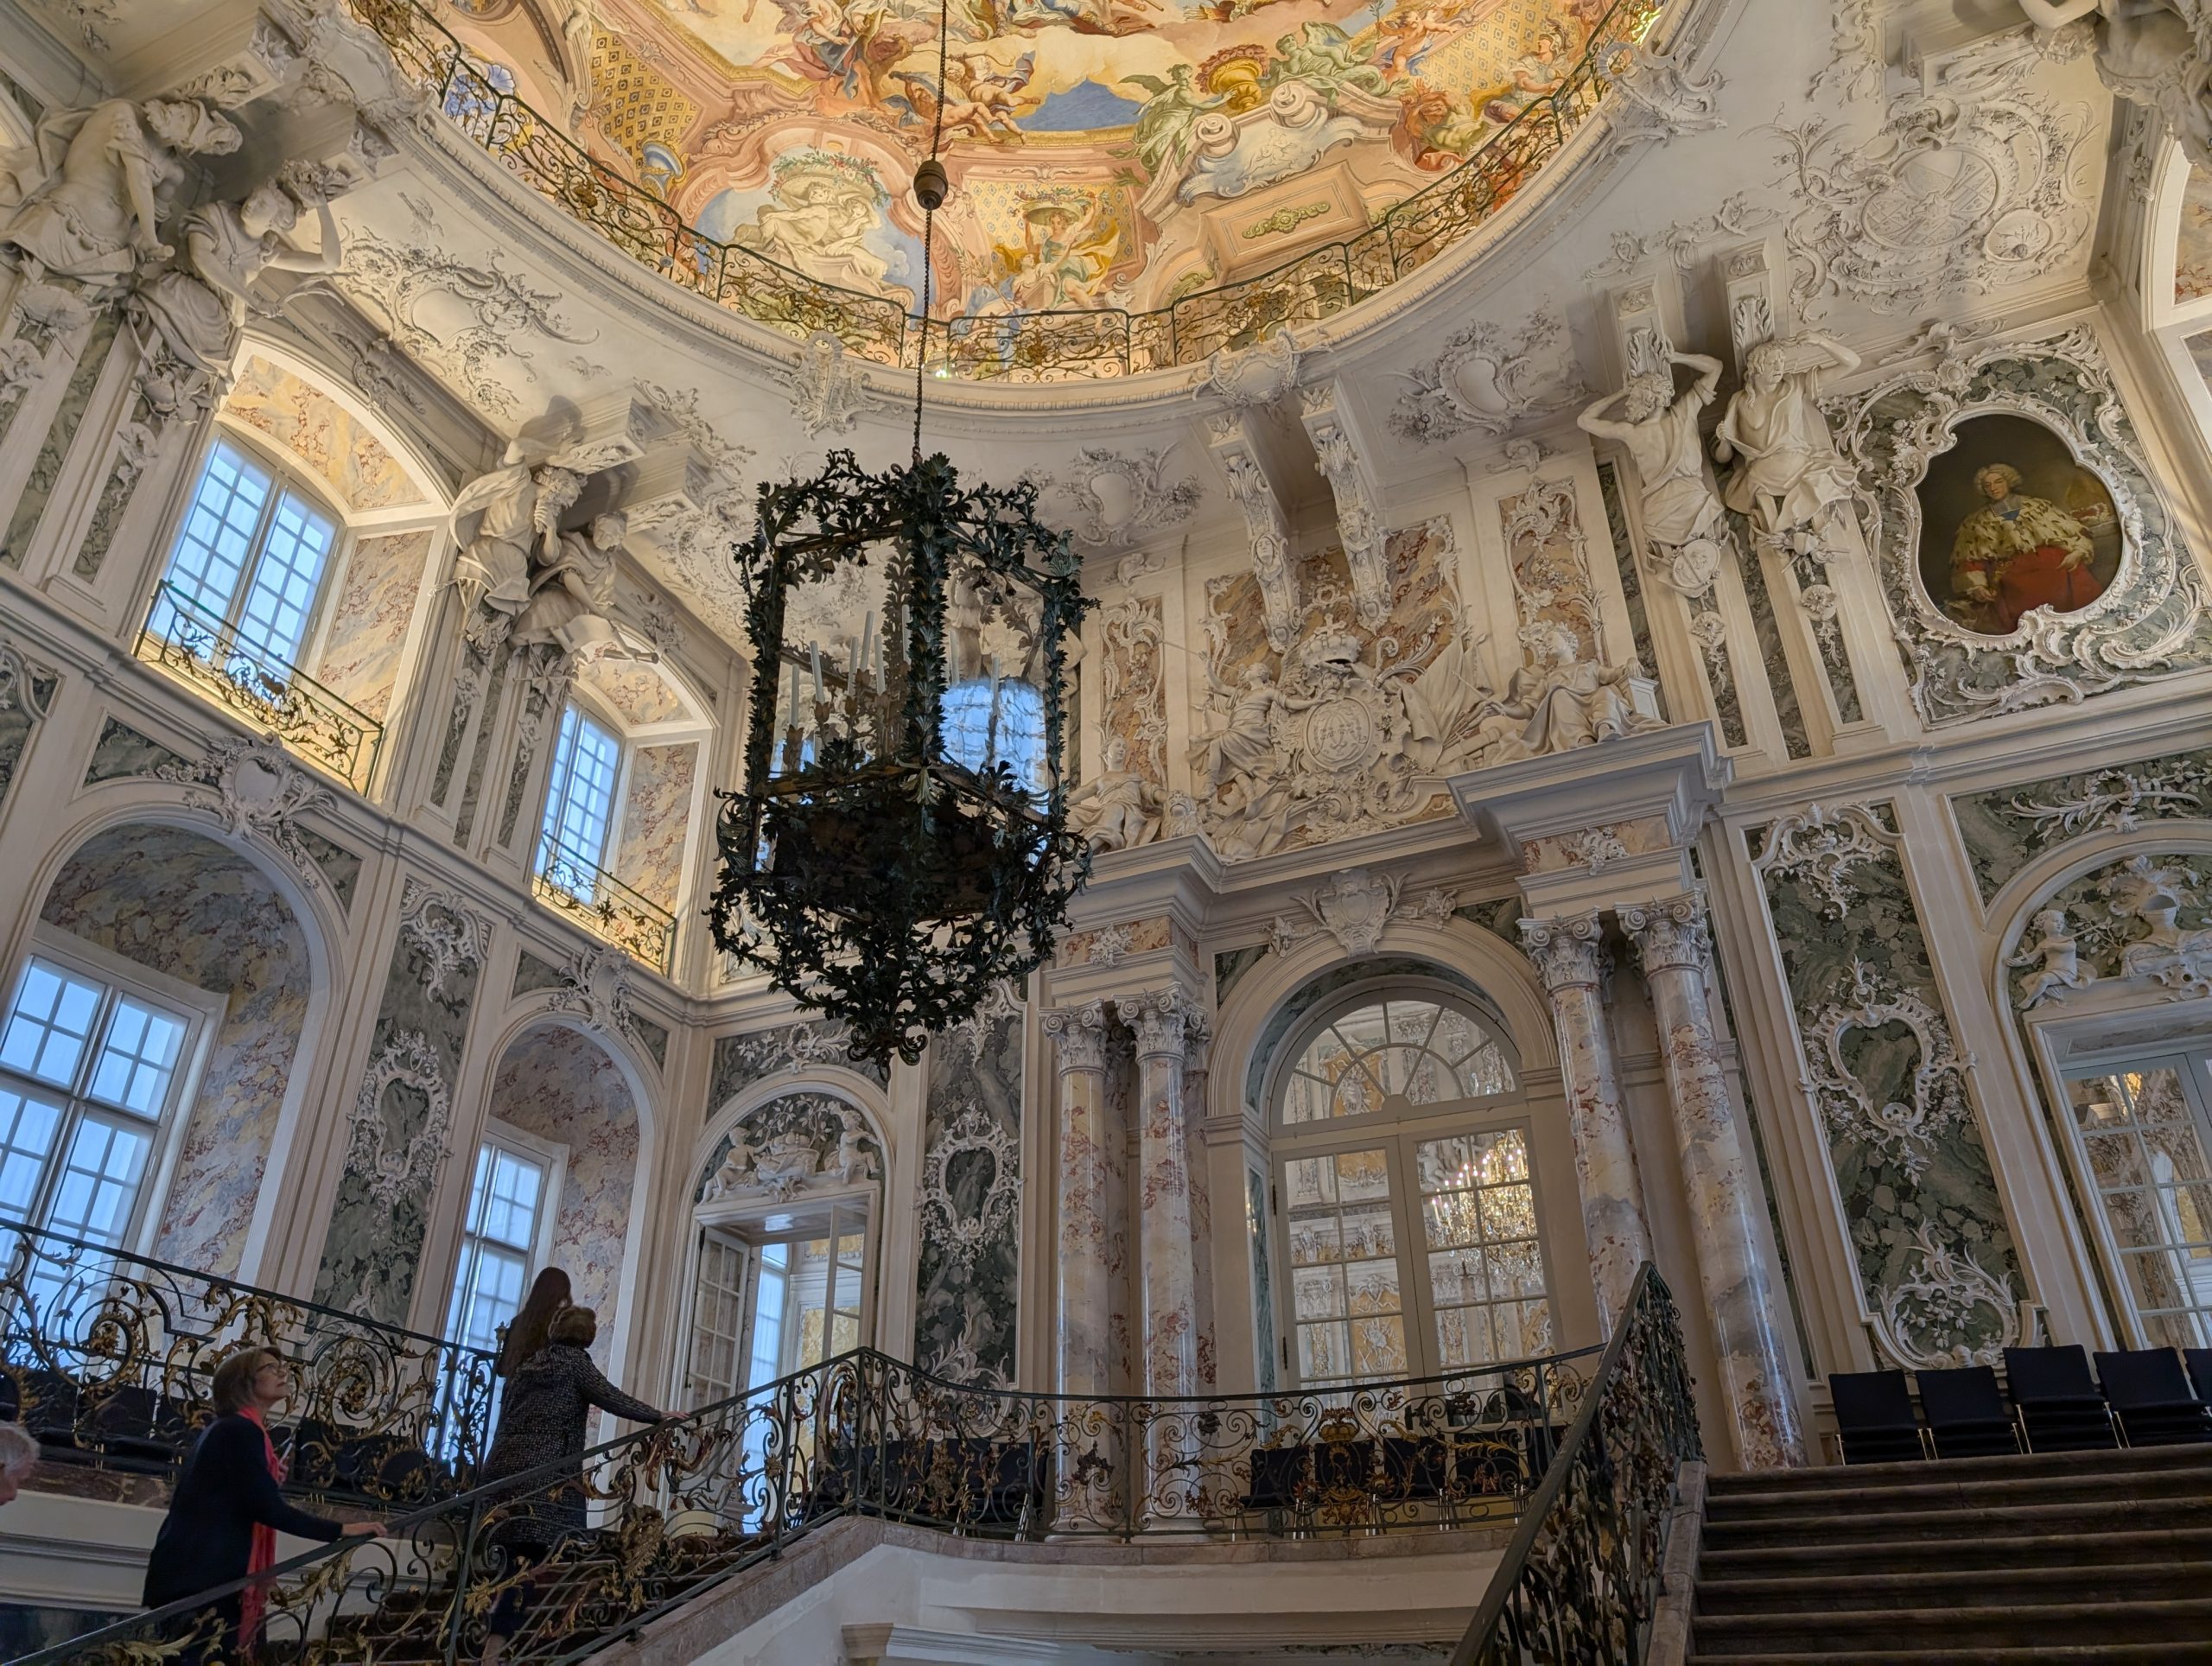
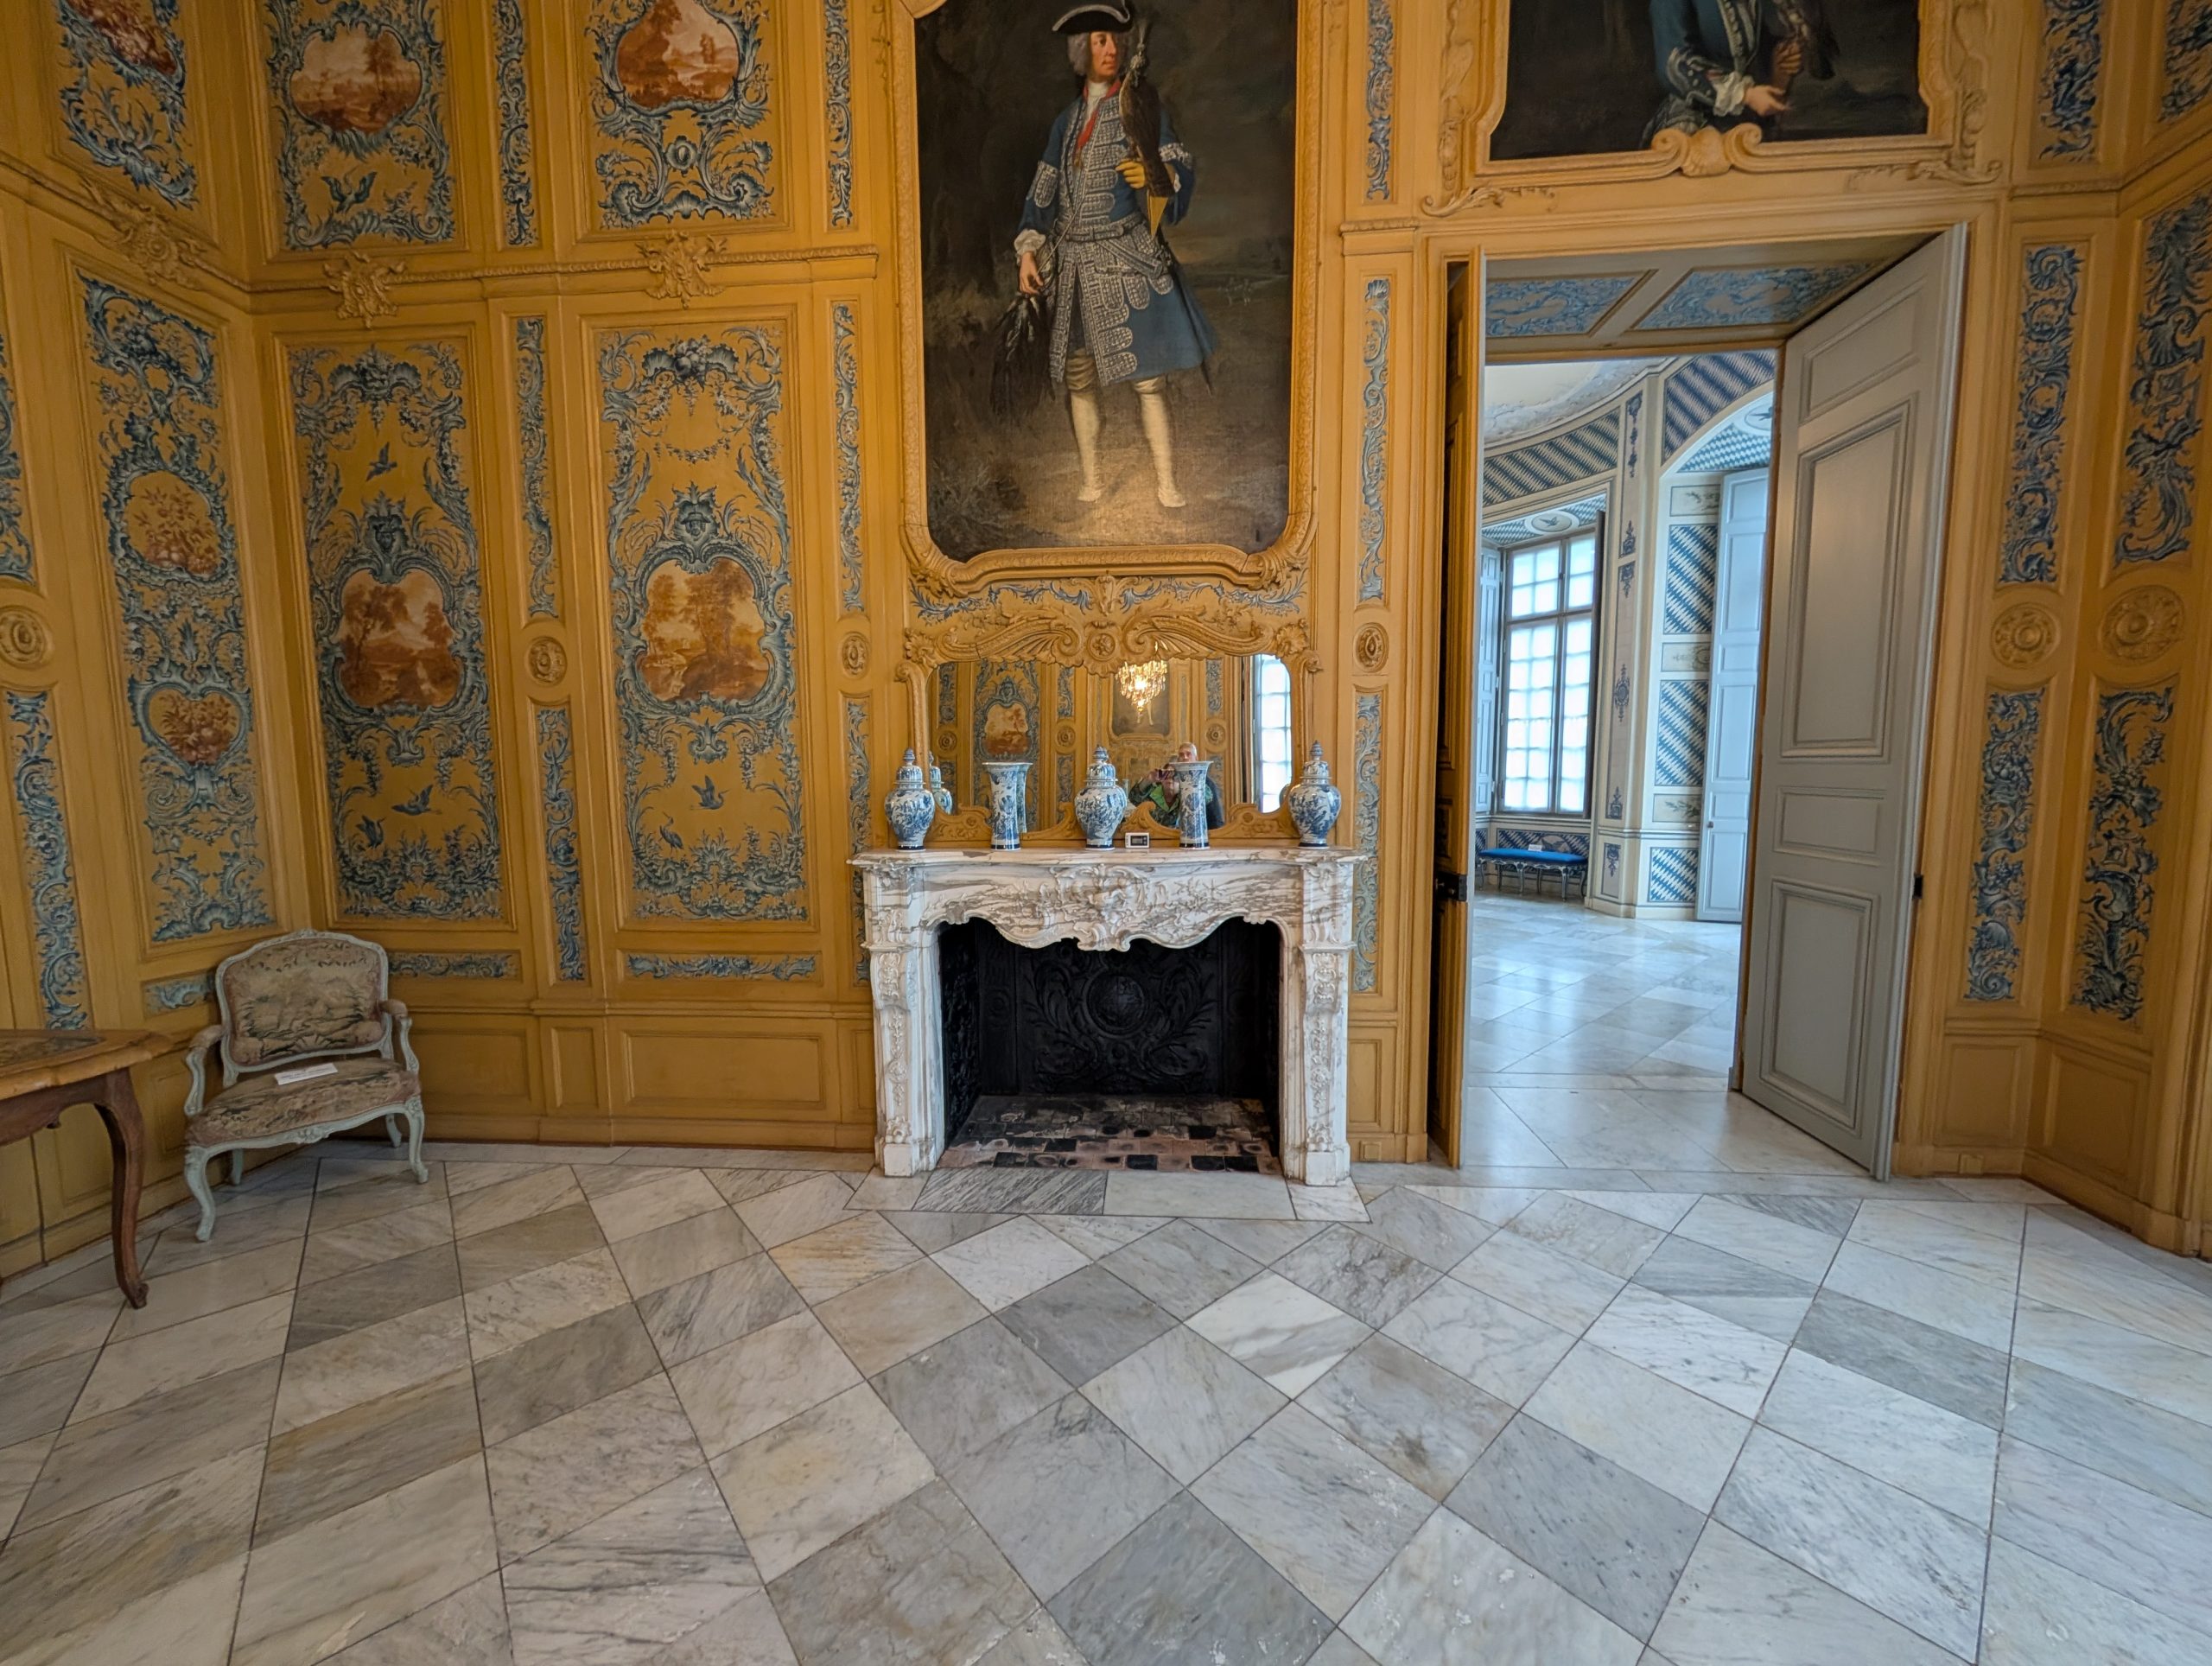
After lunch we boarded another bus for yet another excursion. This time we visited the Brühl UNESCO Palaces.
The Augustusburg Castle was built on the foundations of a medieval castle in 1725. Shortly thereafter, in 1729, a hunting lodge was designed to the southeast for the owner to practice falconry.
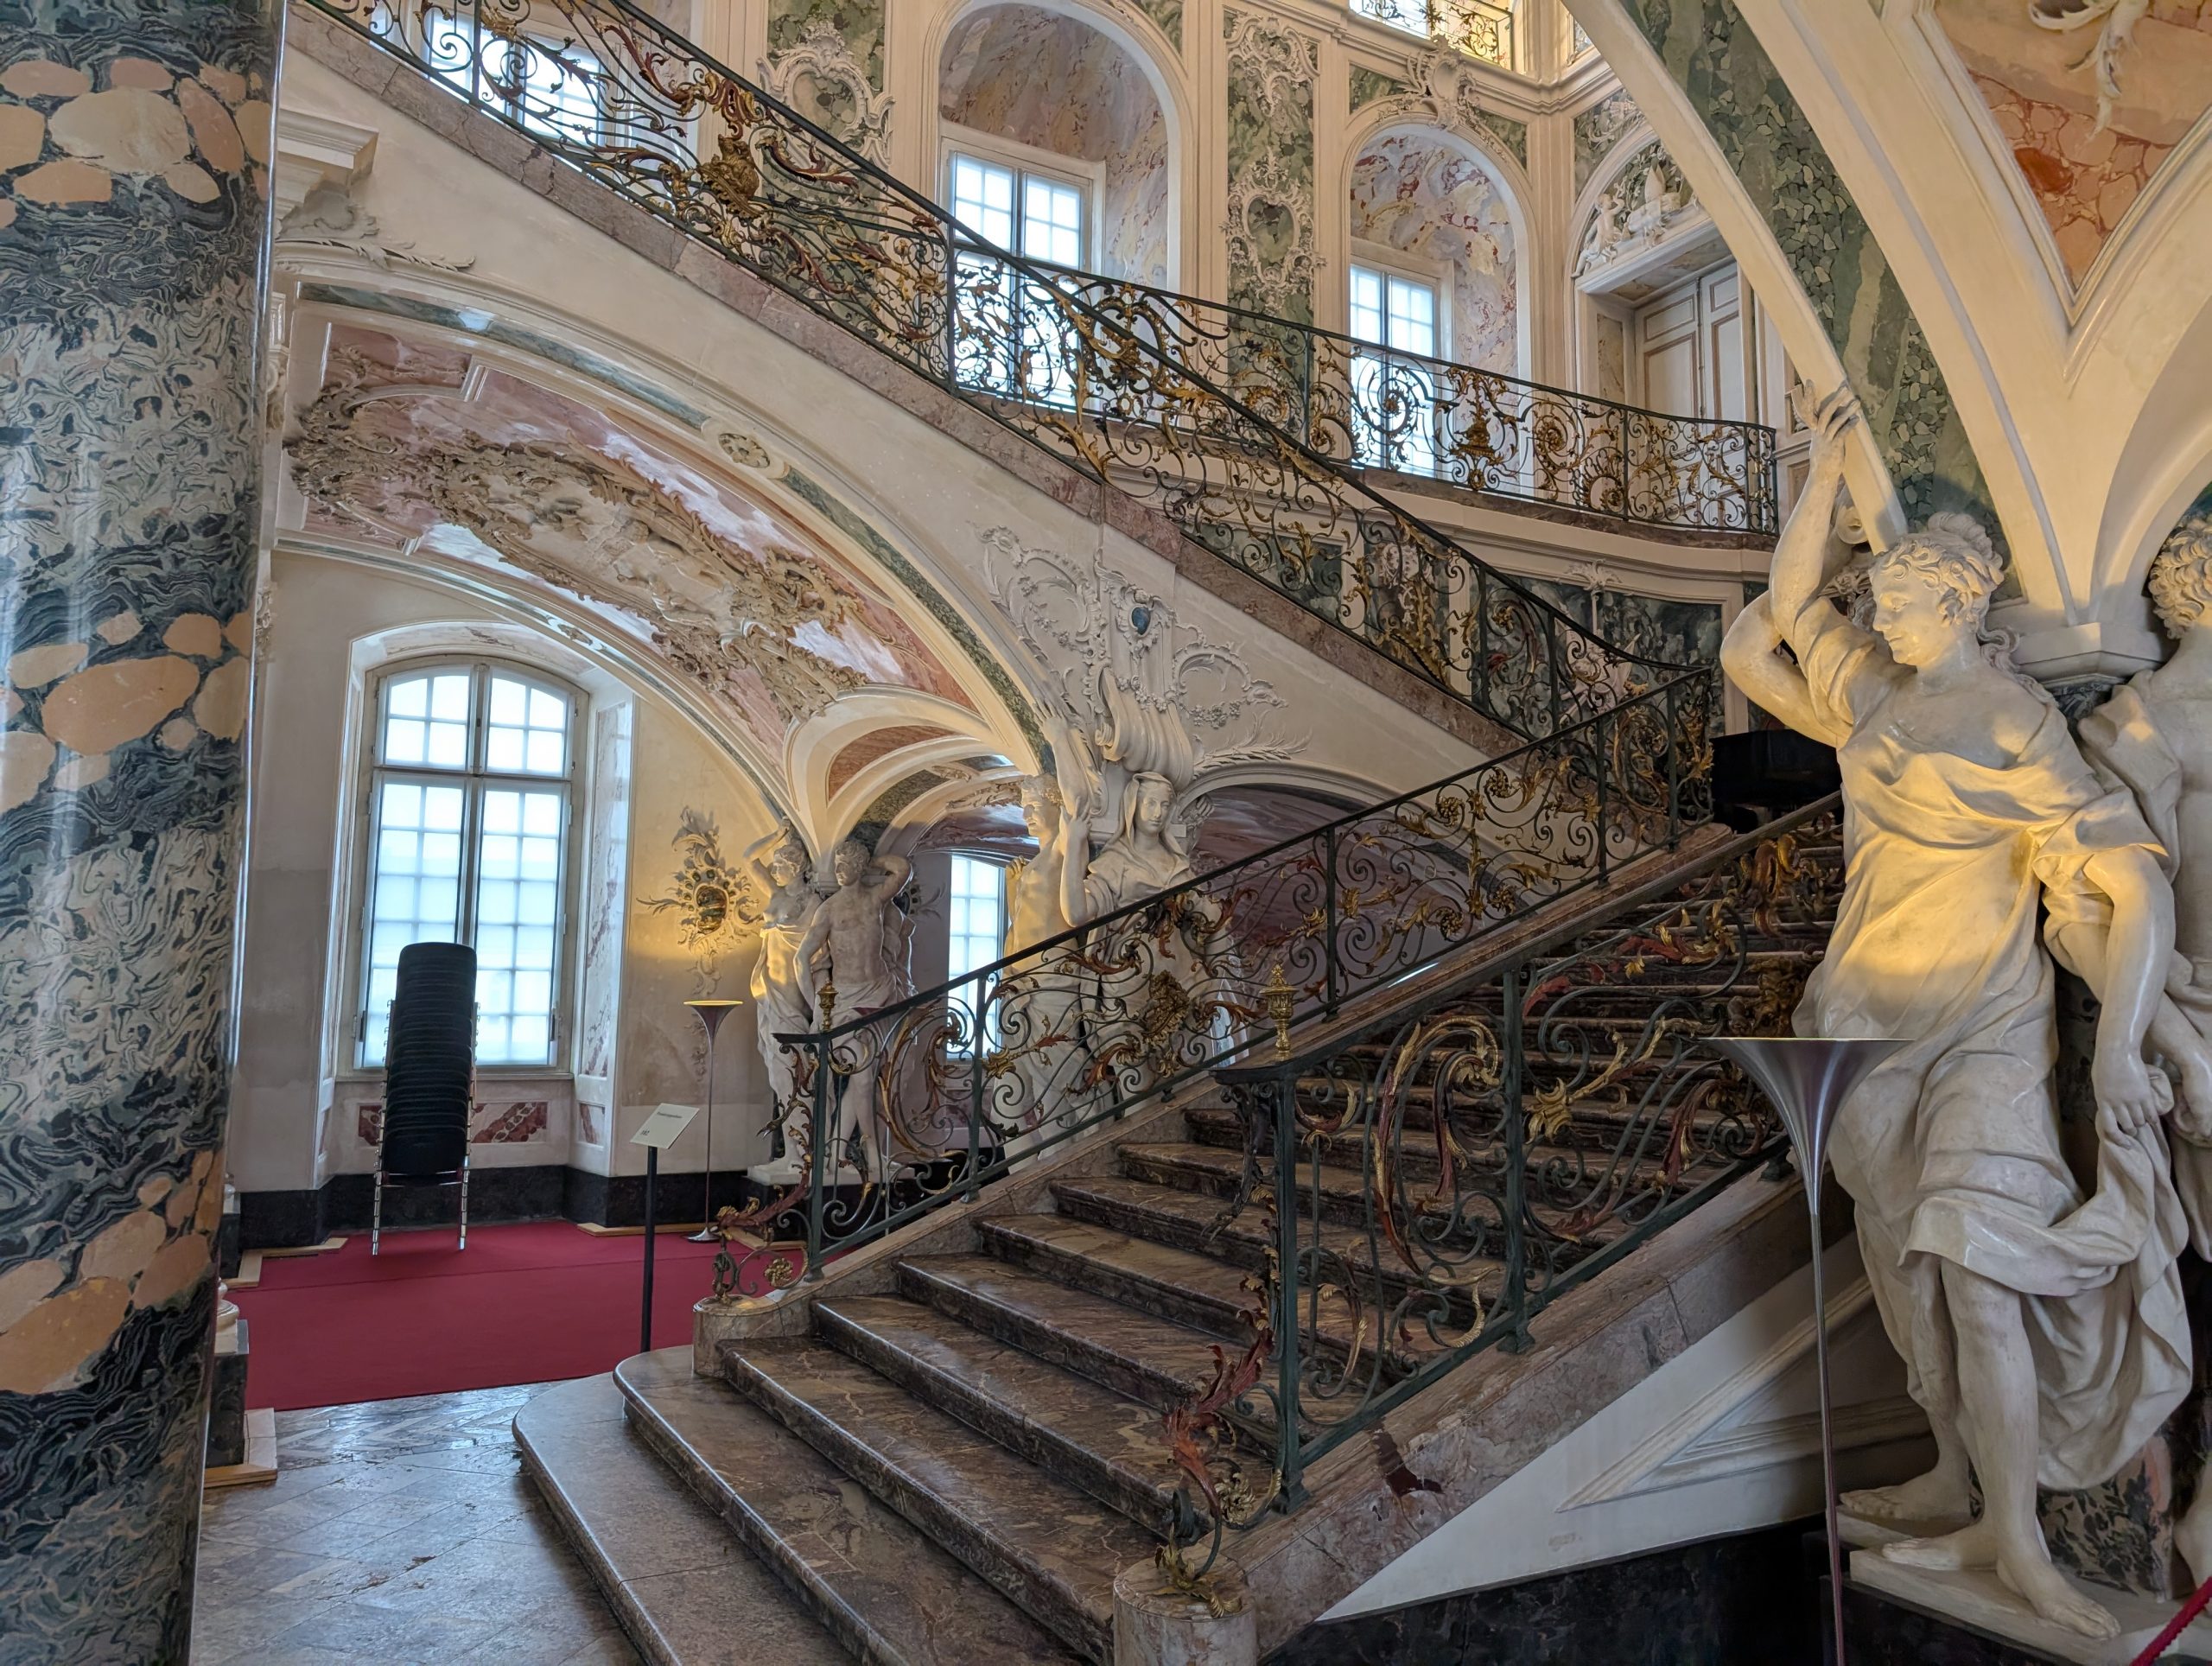
The main block of Augustusburg Palace is a U-shaped building with three main stories and two levels of attics. The three wings are made of brick with roughcast plaster. Two orangeries (a room or dedicated building, historically where orange and other fruit trees are protected during the winter, as a large form of greenhouse or conservatory) adjoin the main building on the north and south sides. The magnificent main staircase is made of ornate marble, jasper and stucco. The main garden directly south of the Augustusburg Palace is a complex, embroidery-like parterre (a level space in a garden occupied by an ornamental arrangement of flower beds) with four fountains and a mirror pool, flanked by alleys lined with lime trees. A path runs diagonally south from this garden to the Falkenlust lodge.
The Falkenlust lodge was built in the style of a country home. The main building has two floors, flanked by two single-story buildings that housed the prince-elector’s falcons. On the ground floor is an oval salon.
After this excursion to this beautiful palace, it was back to the boat for cocktails, dinner, and a short but wonderful classical concert by a flautist and pianist. By the time we were back to our room, I was thoroughly and completely exhausted. But all and all a wonderful, adventure-filled day.
Sunday, May 25, 2025 – Viking’s Gersemi river boat – Koblenz, Germany and Braubach, Germany
We had an early start today. Breakfast at 7:00 am, then 8:30 – 12 noon, a walking tour of historic Koblenz, including the market square and The Liebfrauenkirche. Built on the highest point of the city, the Liebfrauenkirche was the main parish church of Koblenz from the late Middle Ages until the French Revolution. Its beginnings date back to the 5th century, when the Franks built a place of worship in a previous Roman building. Using the foundations, it was rebuilt and extended several times. The onion domes, built in the 17th century, destroyed in 1944 and restored in 1955, characterize the silhouette of the Koblenz old town.
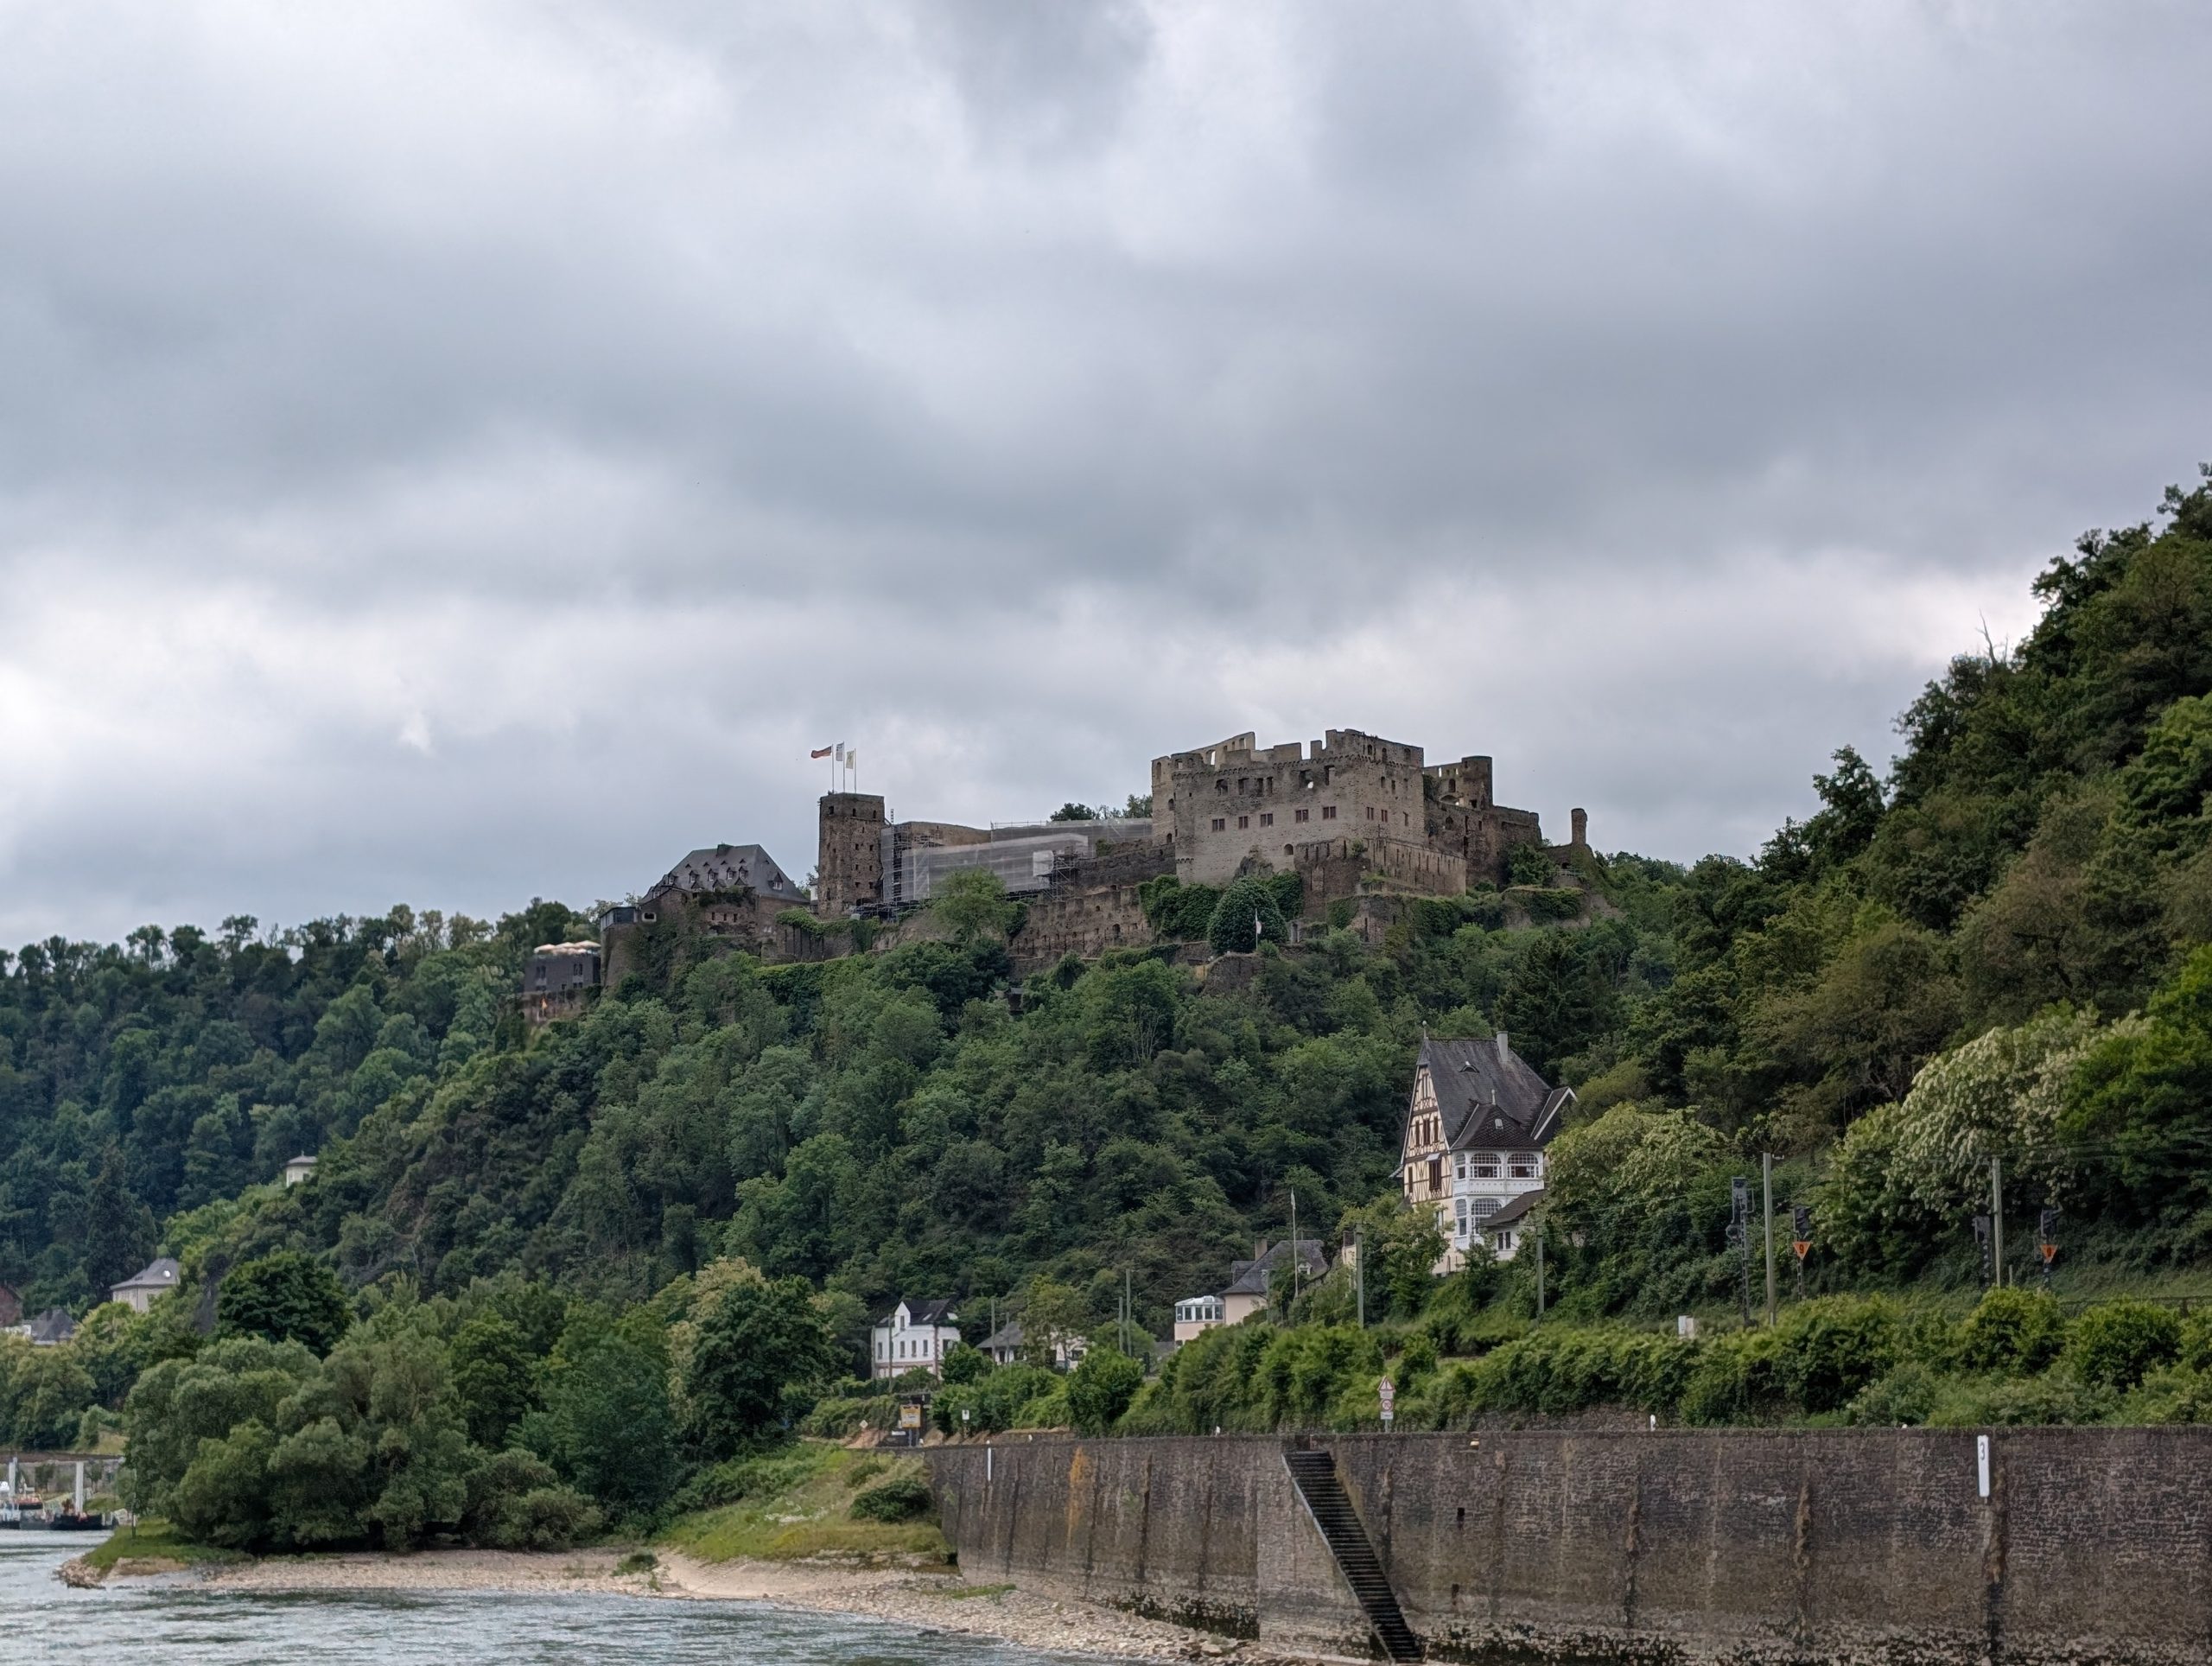
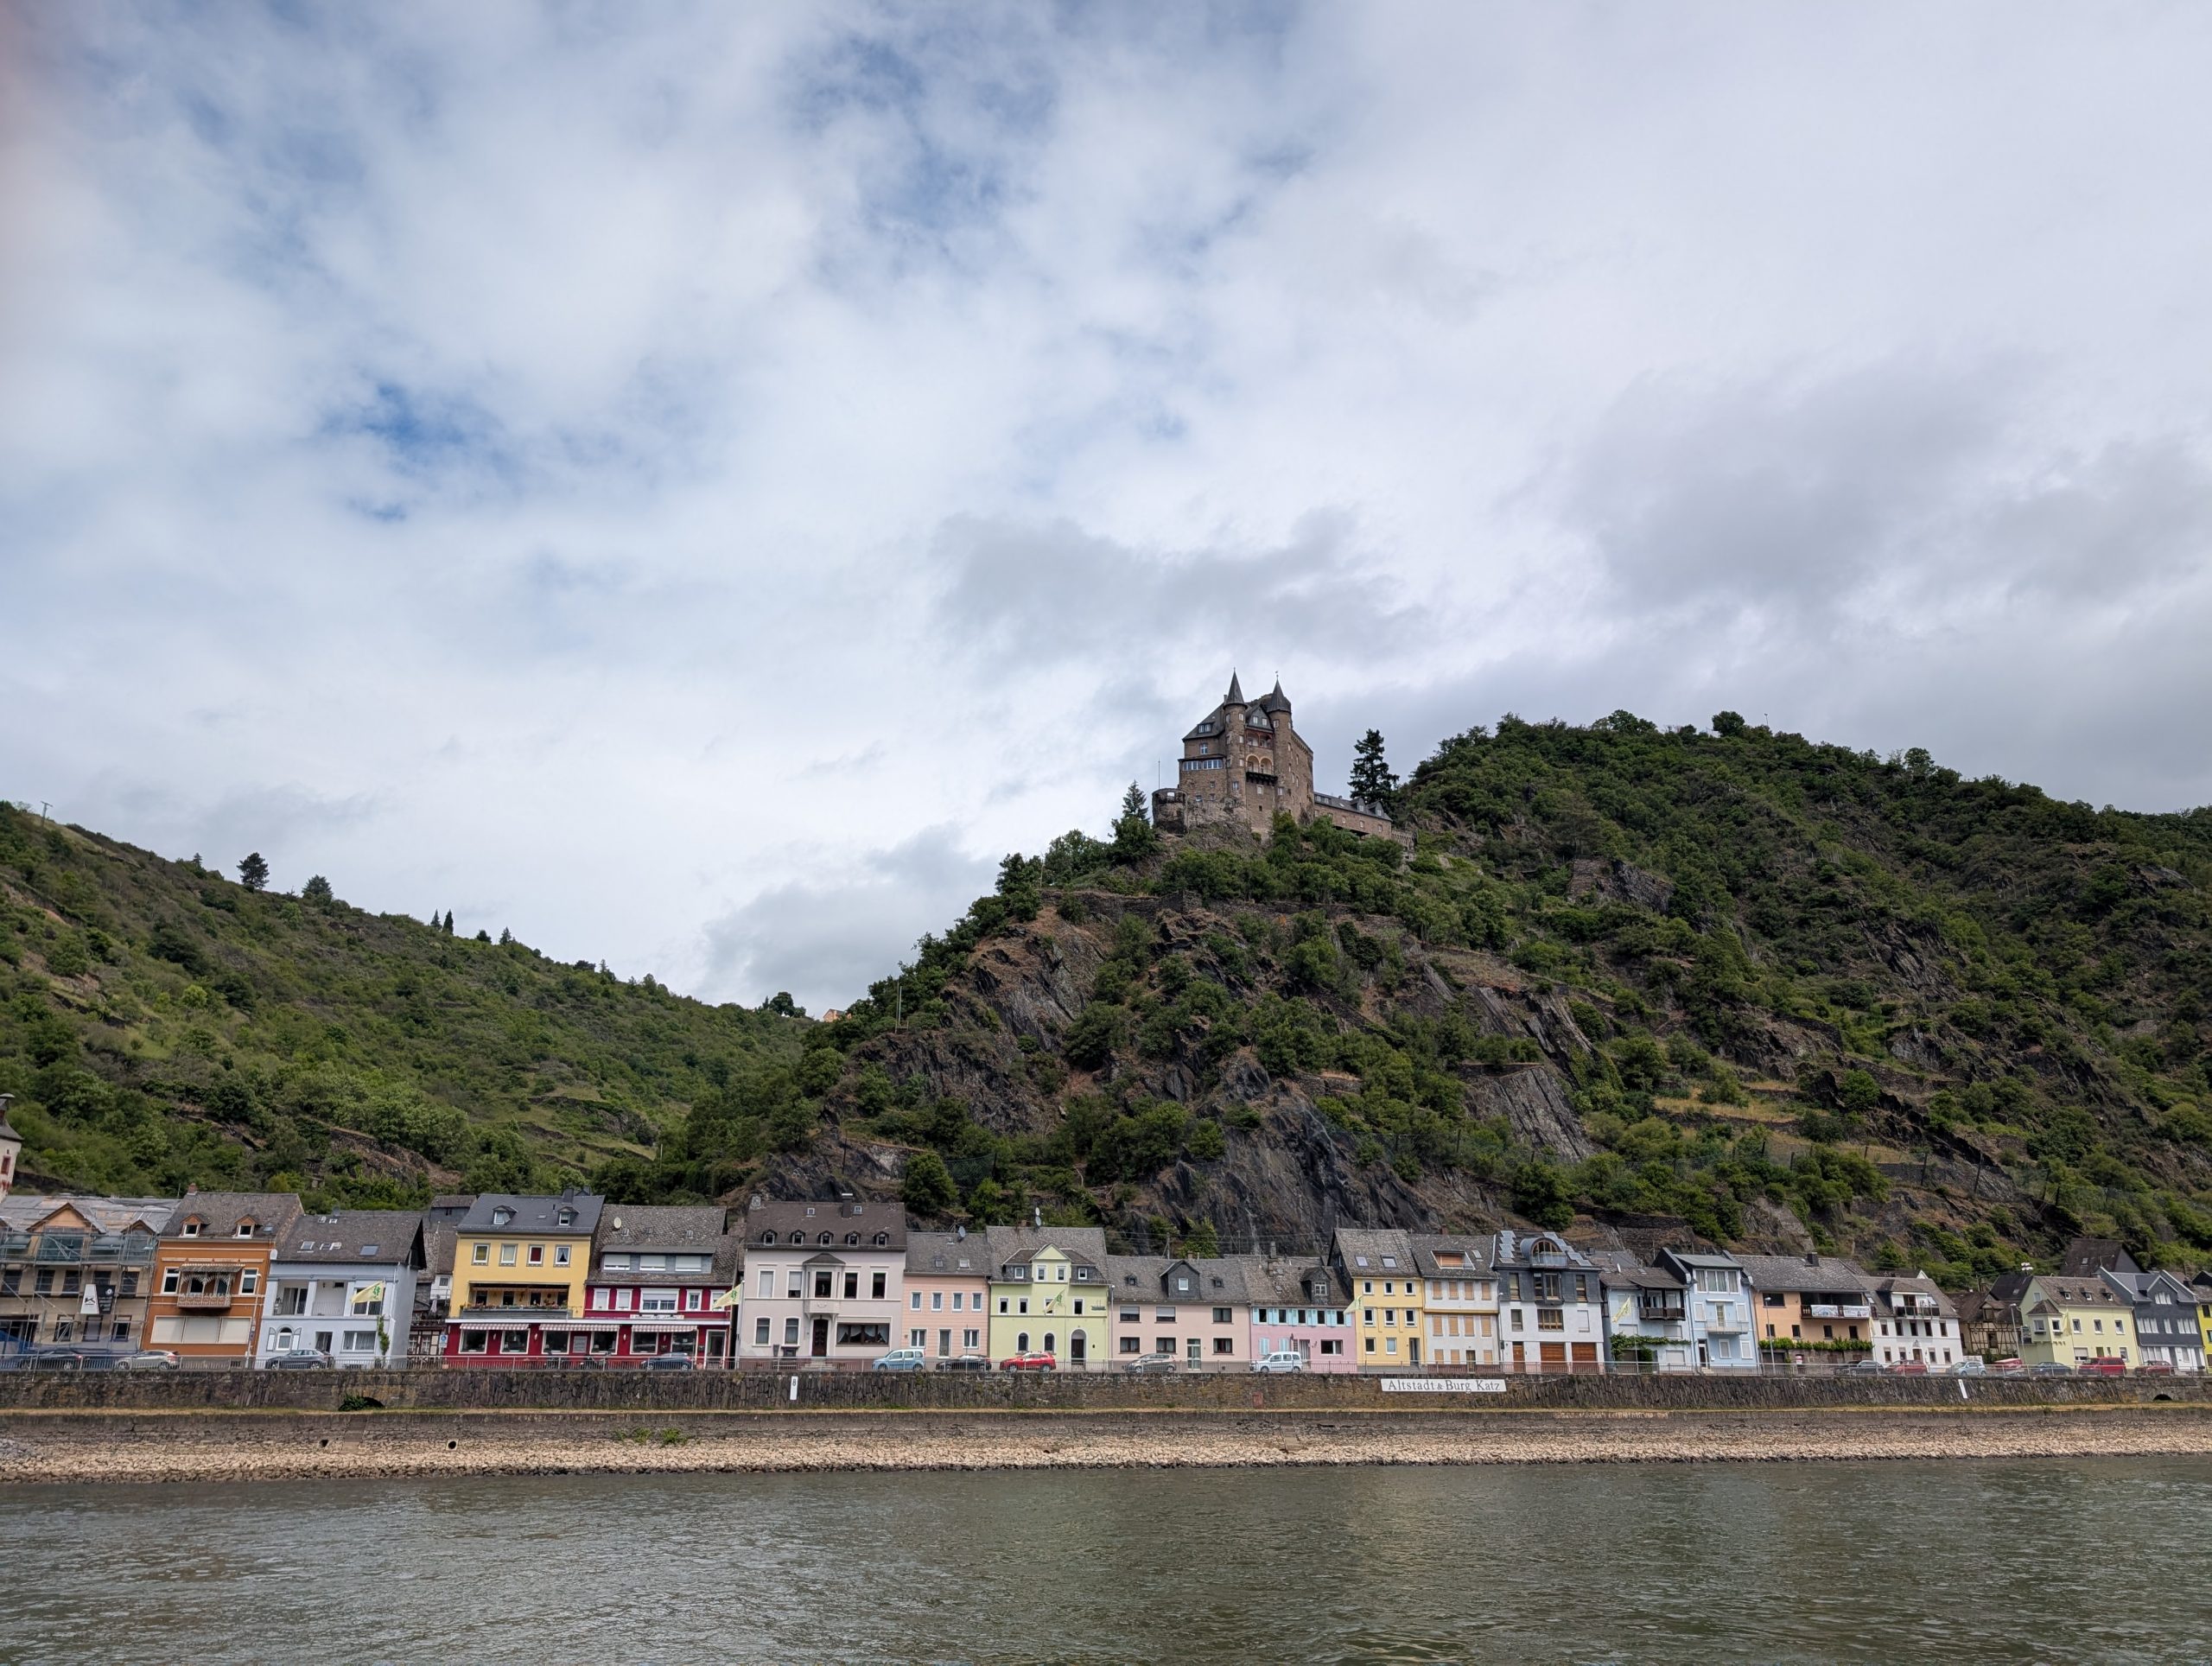
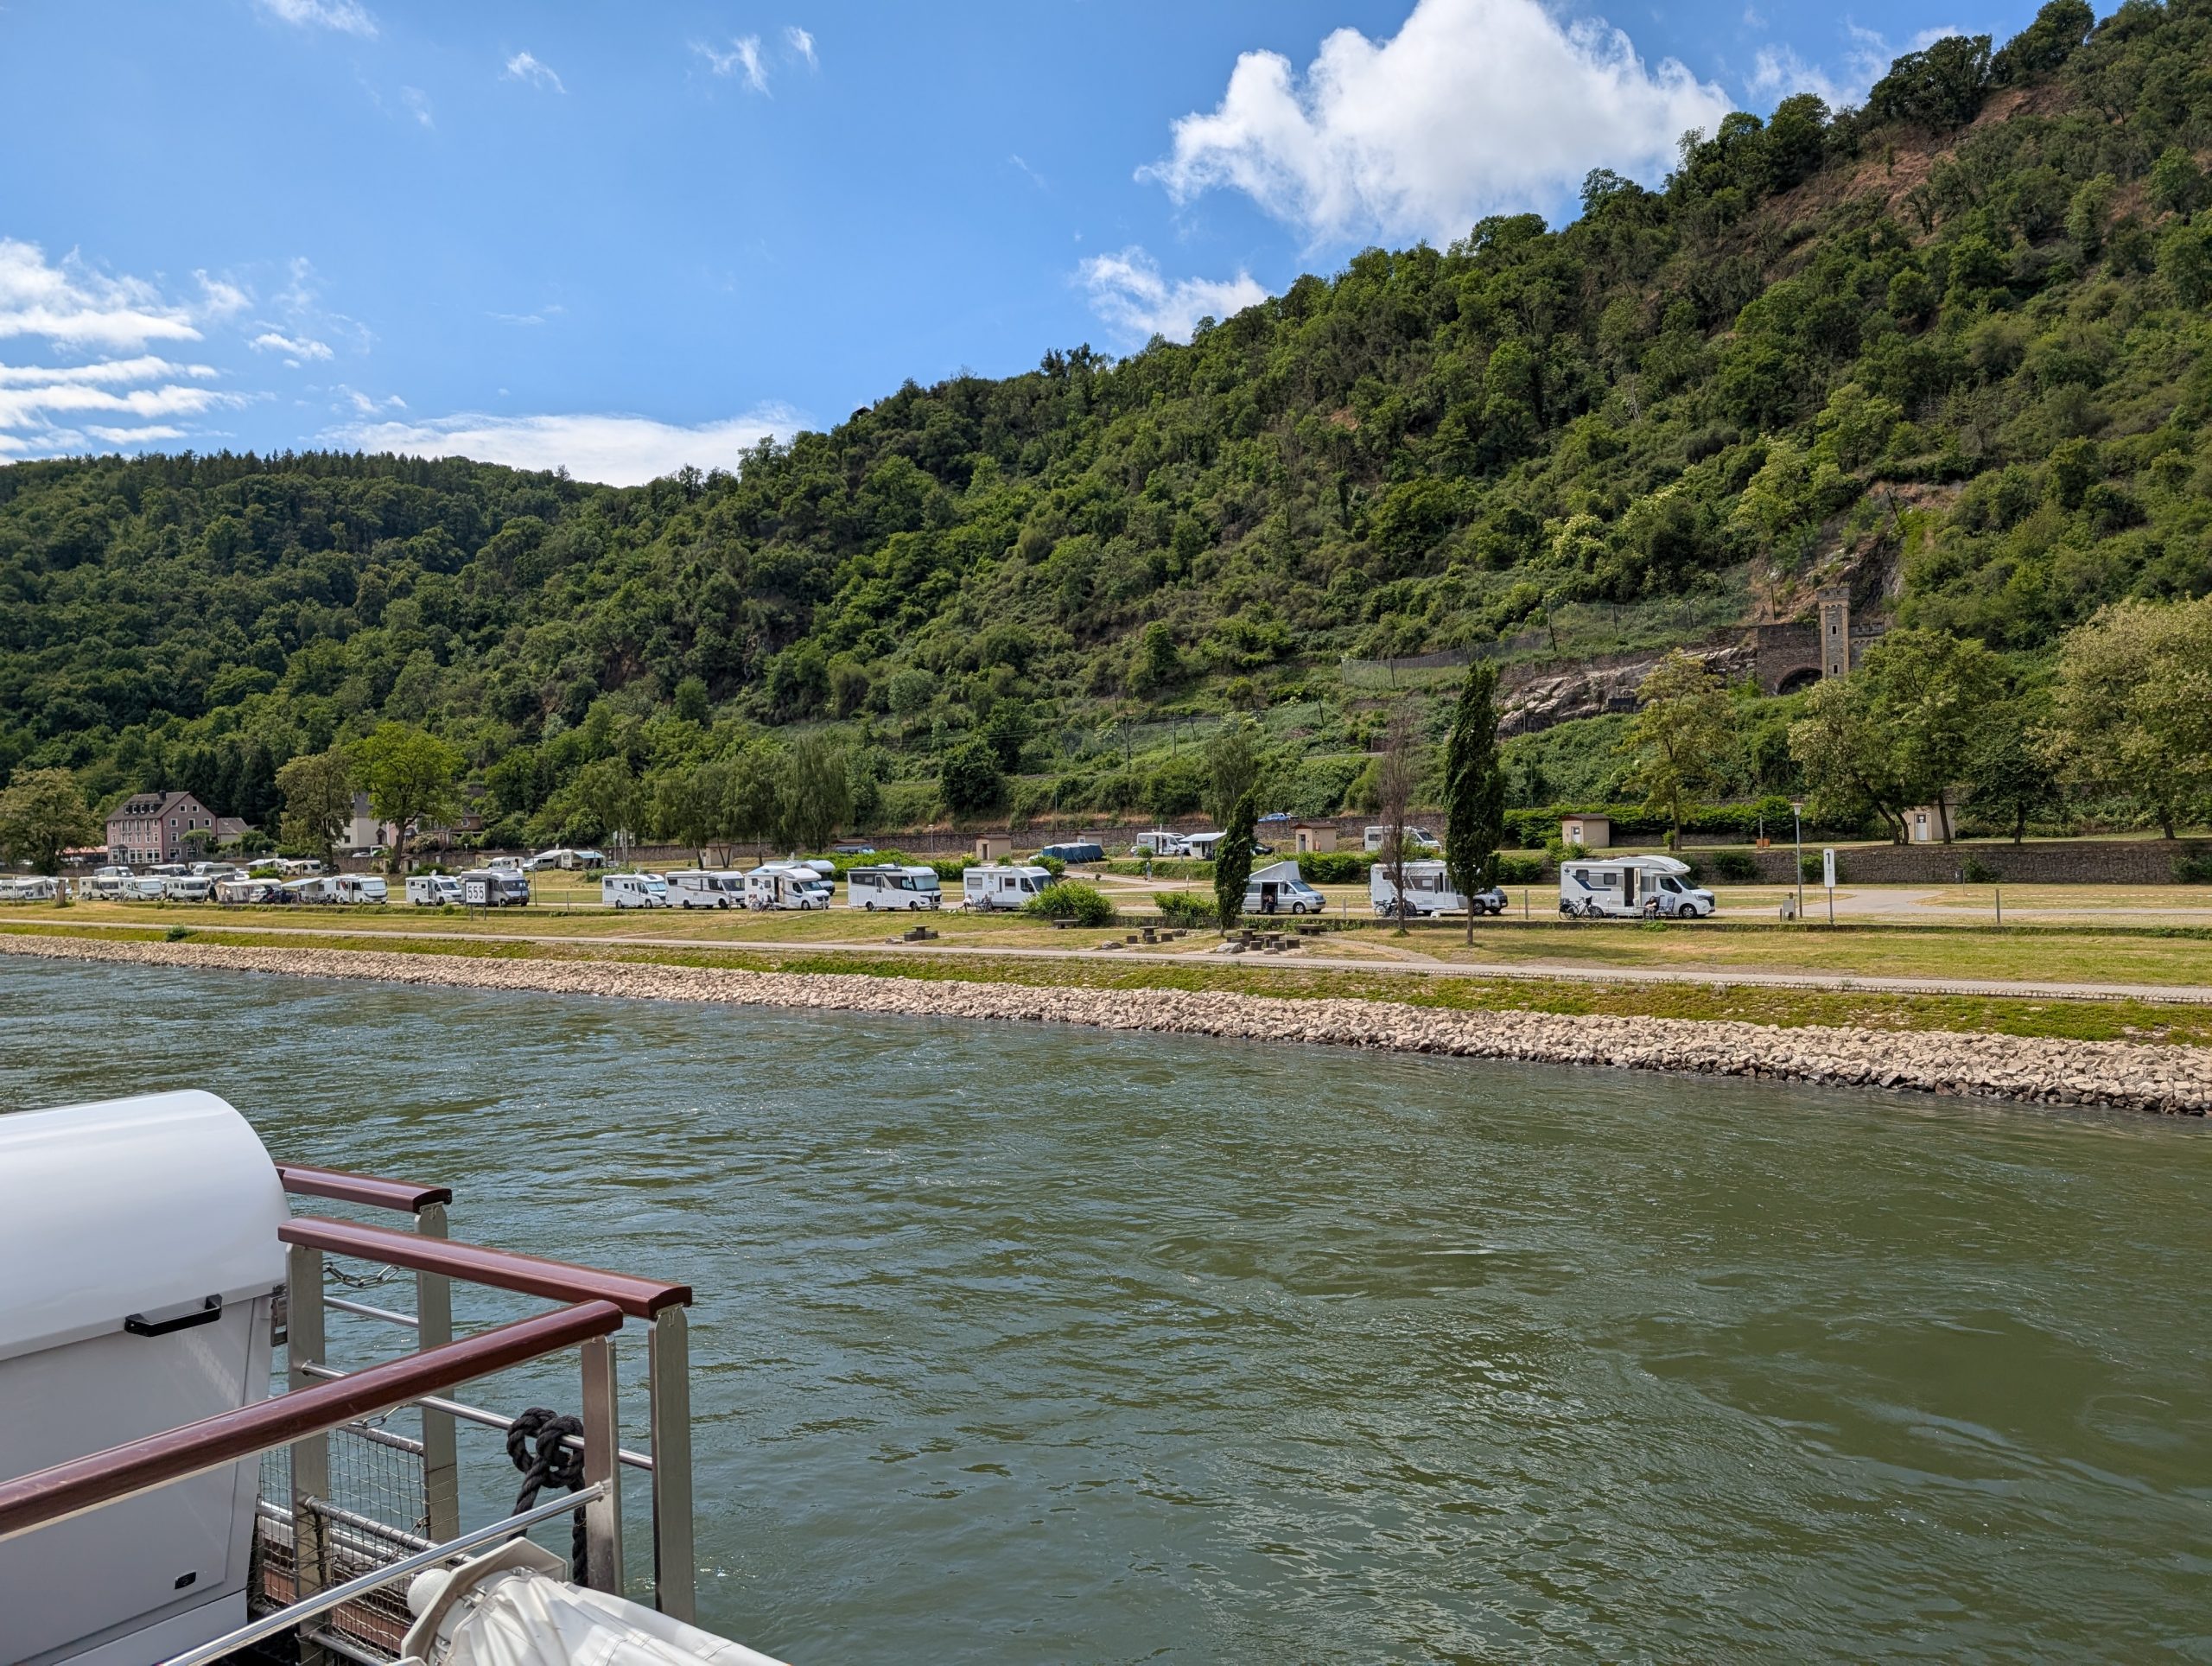
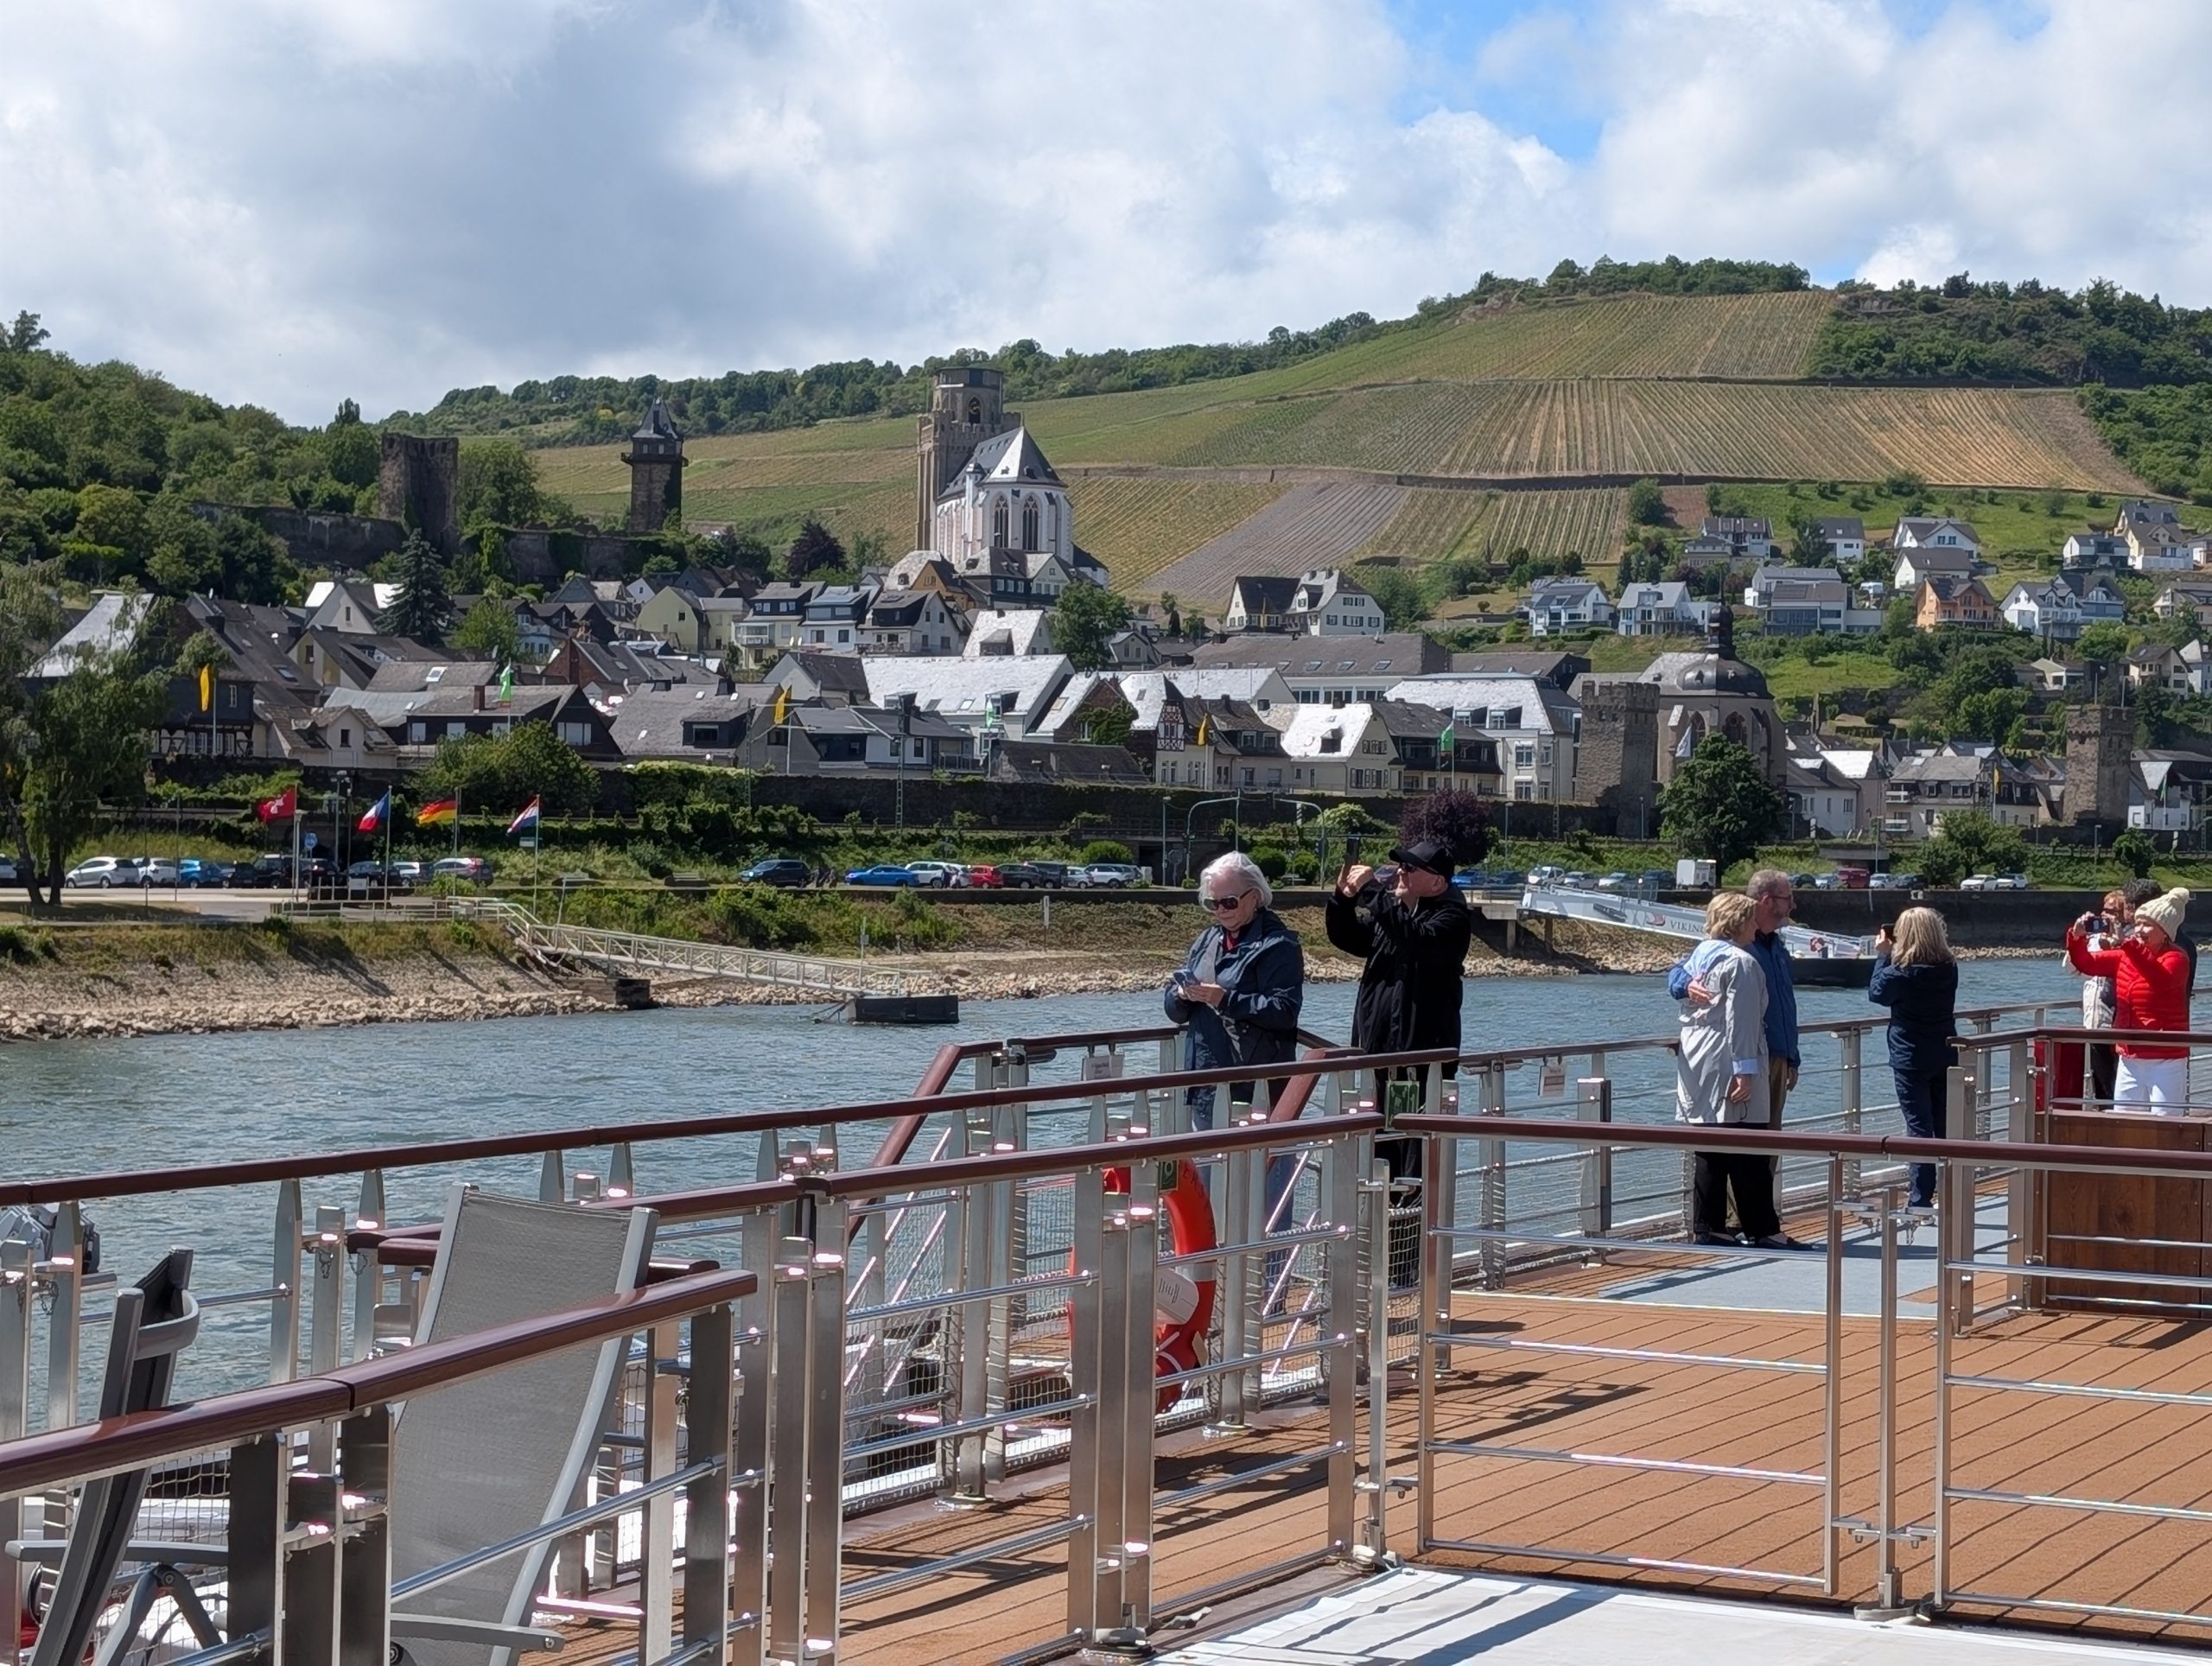
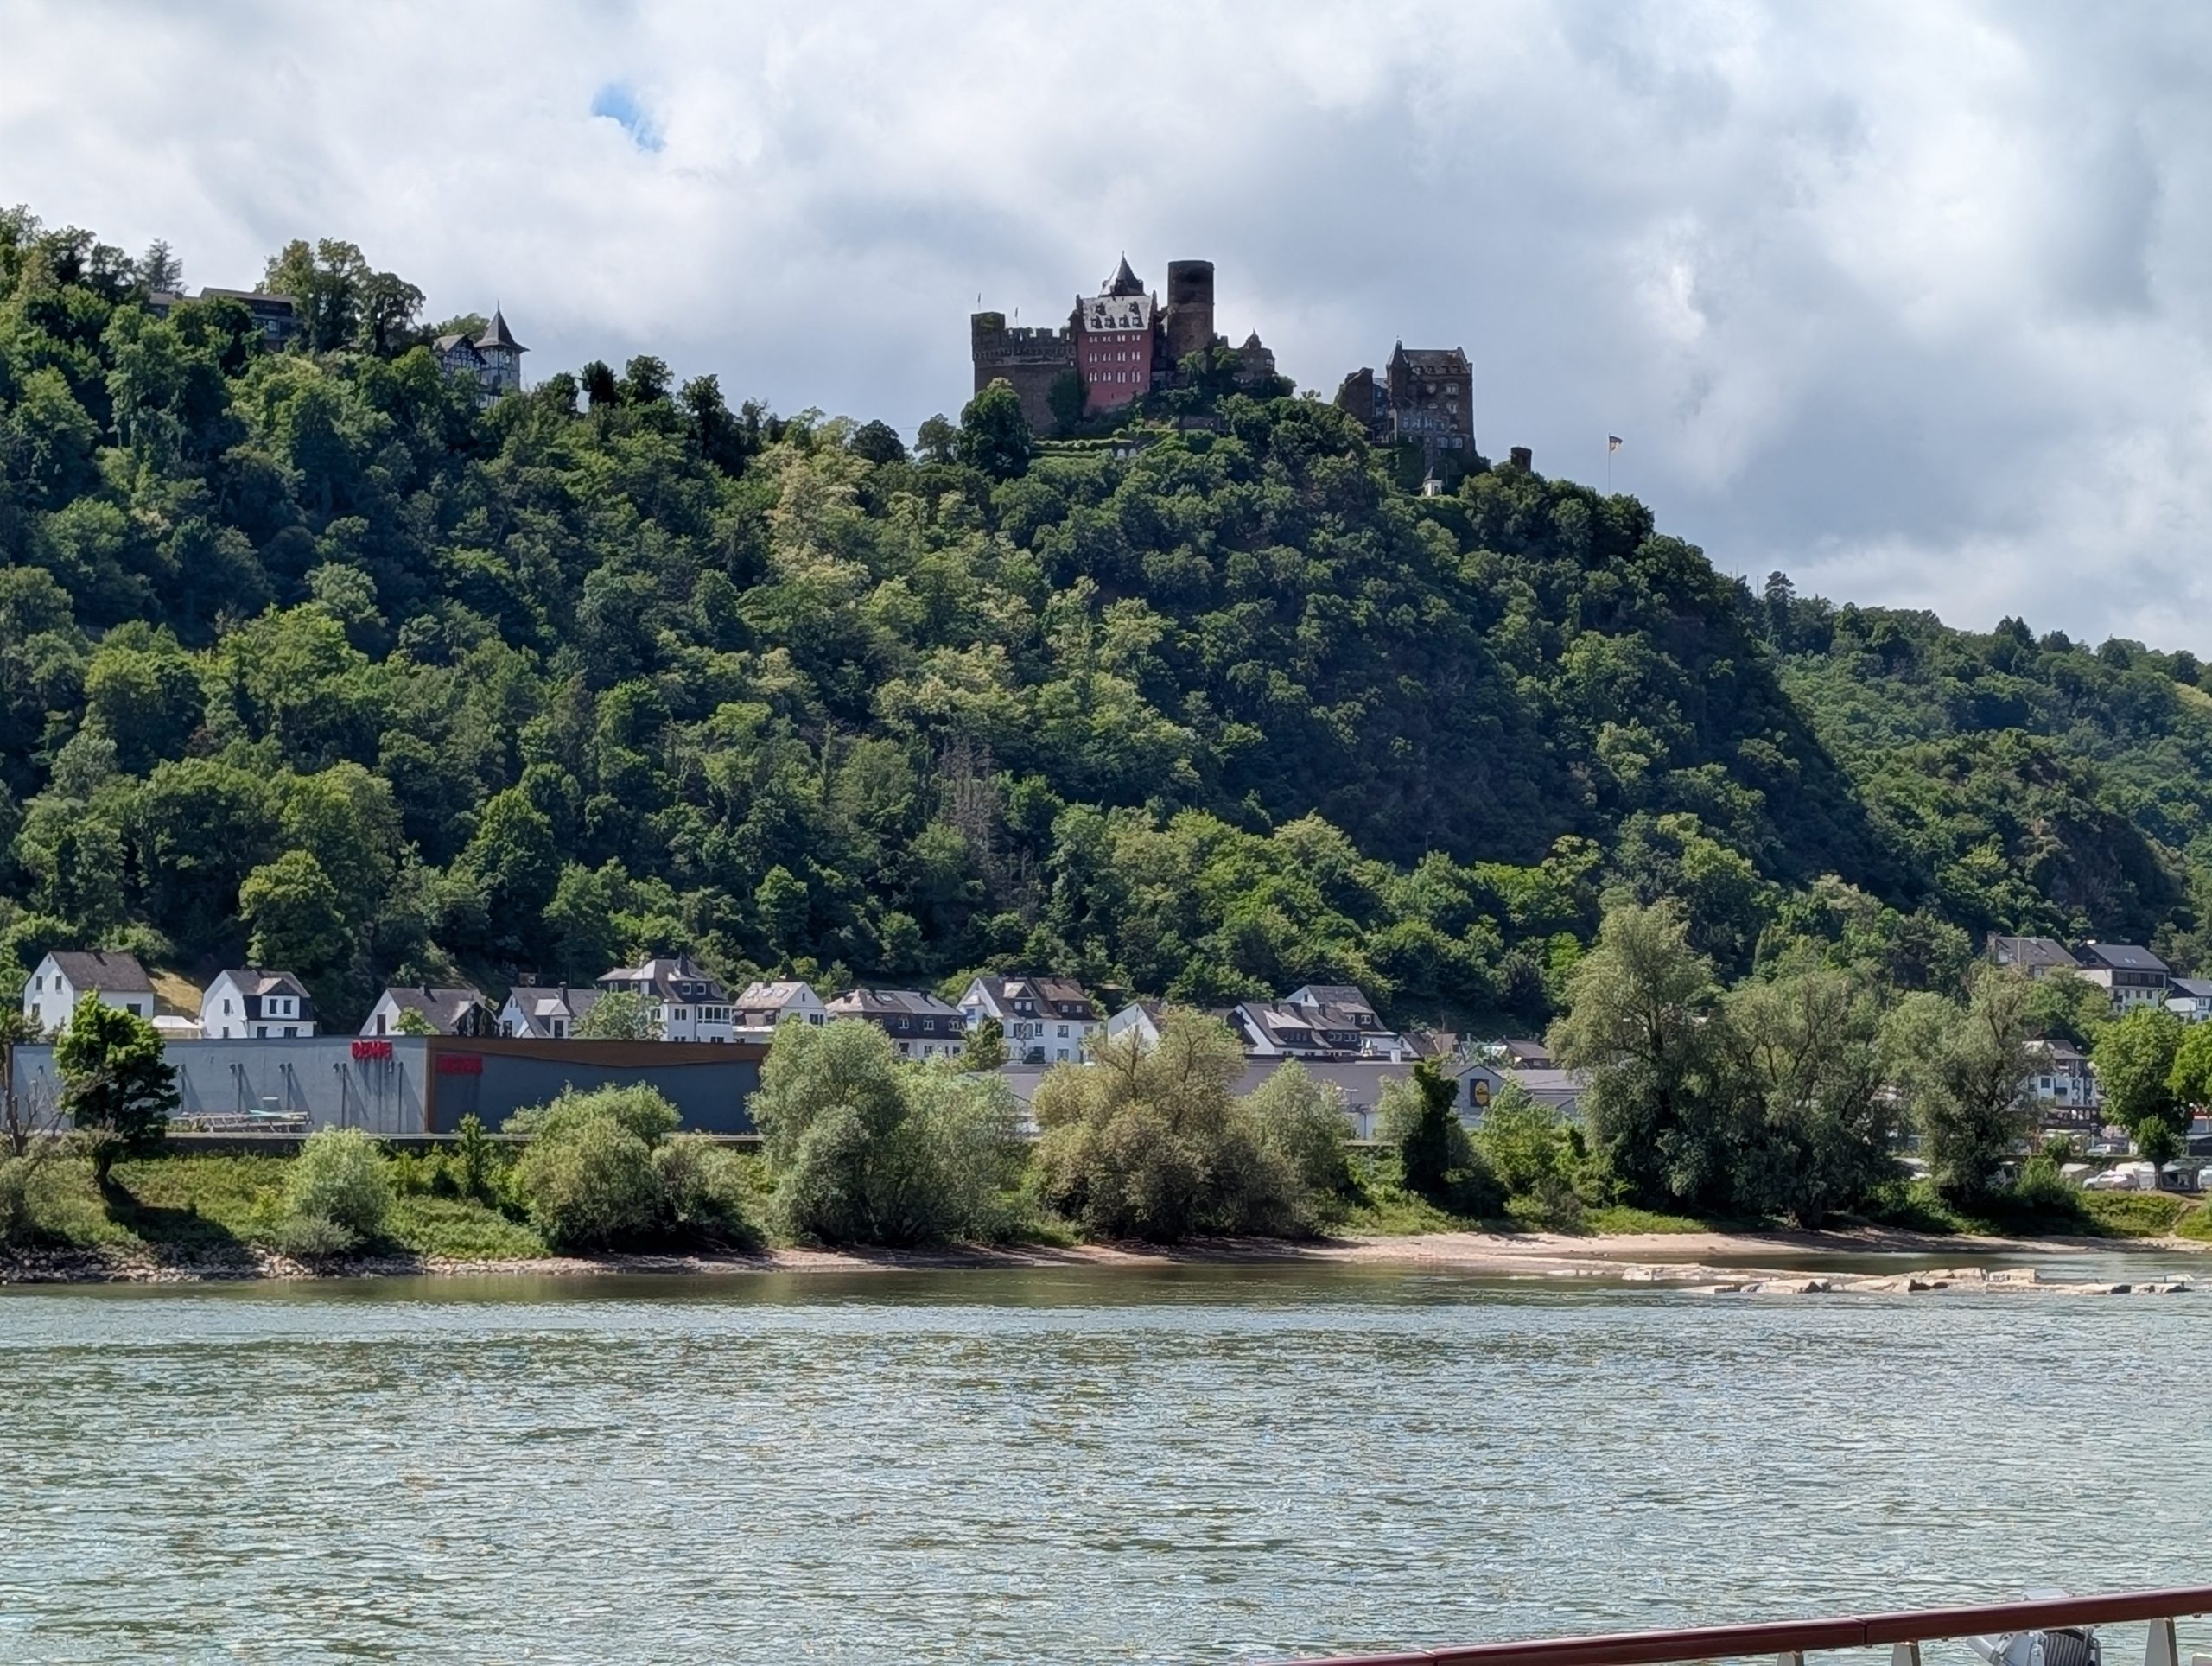
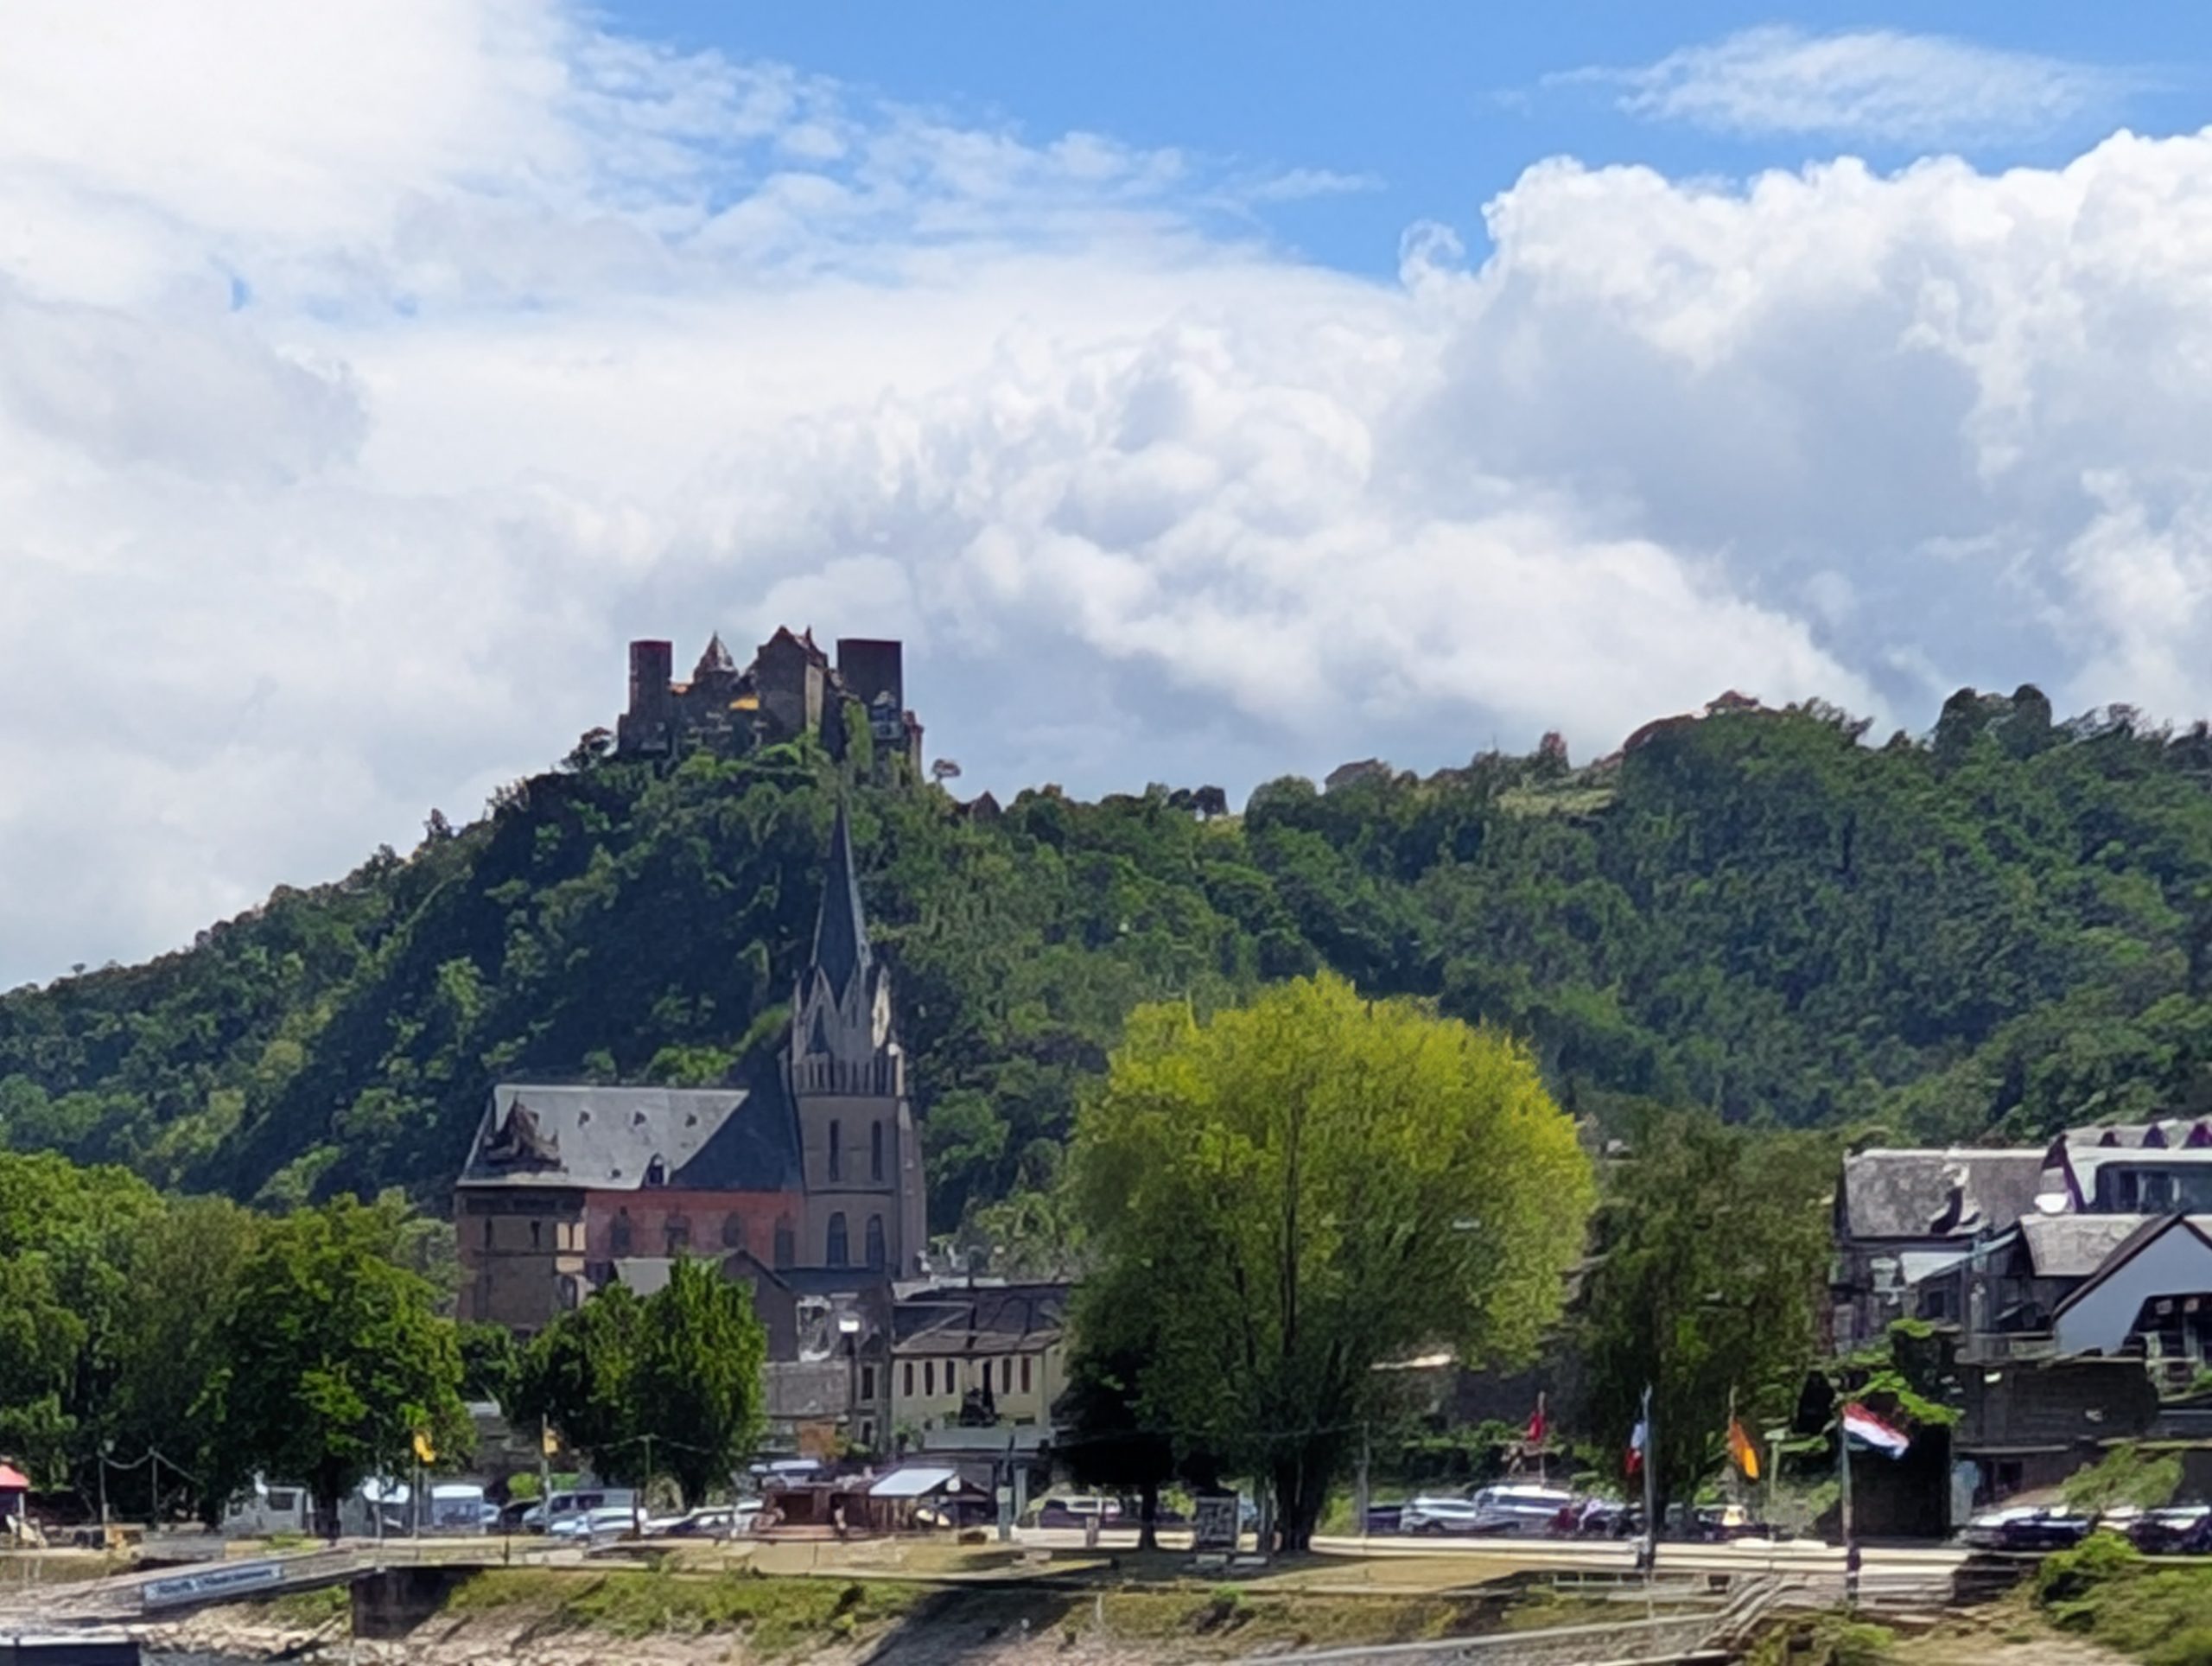
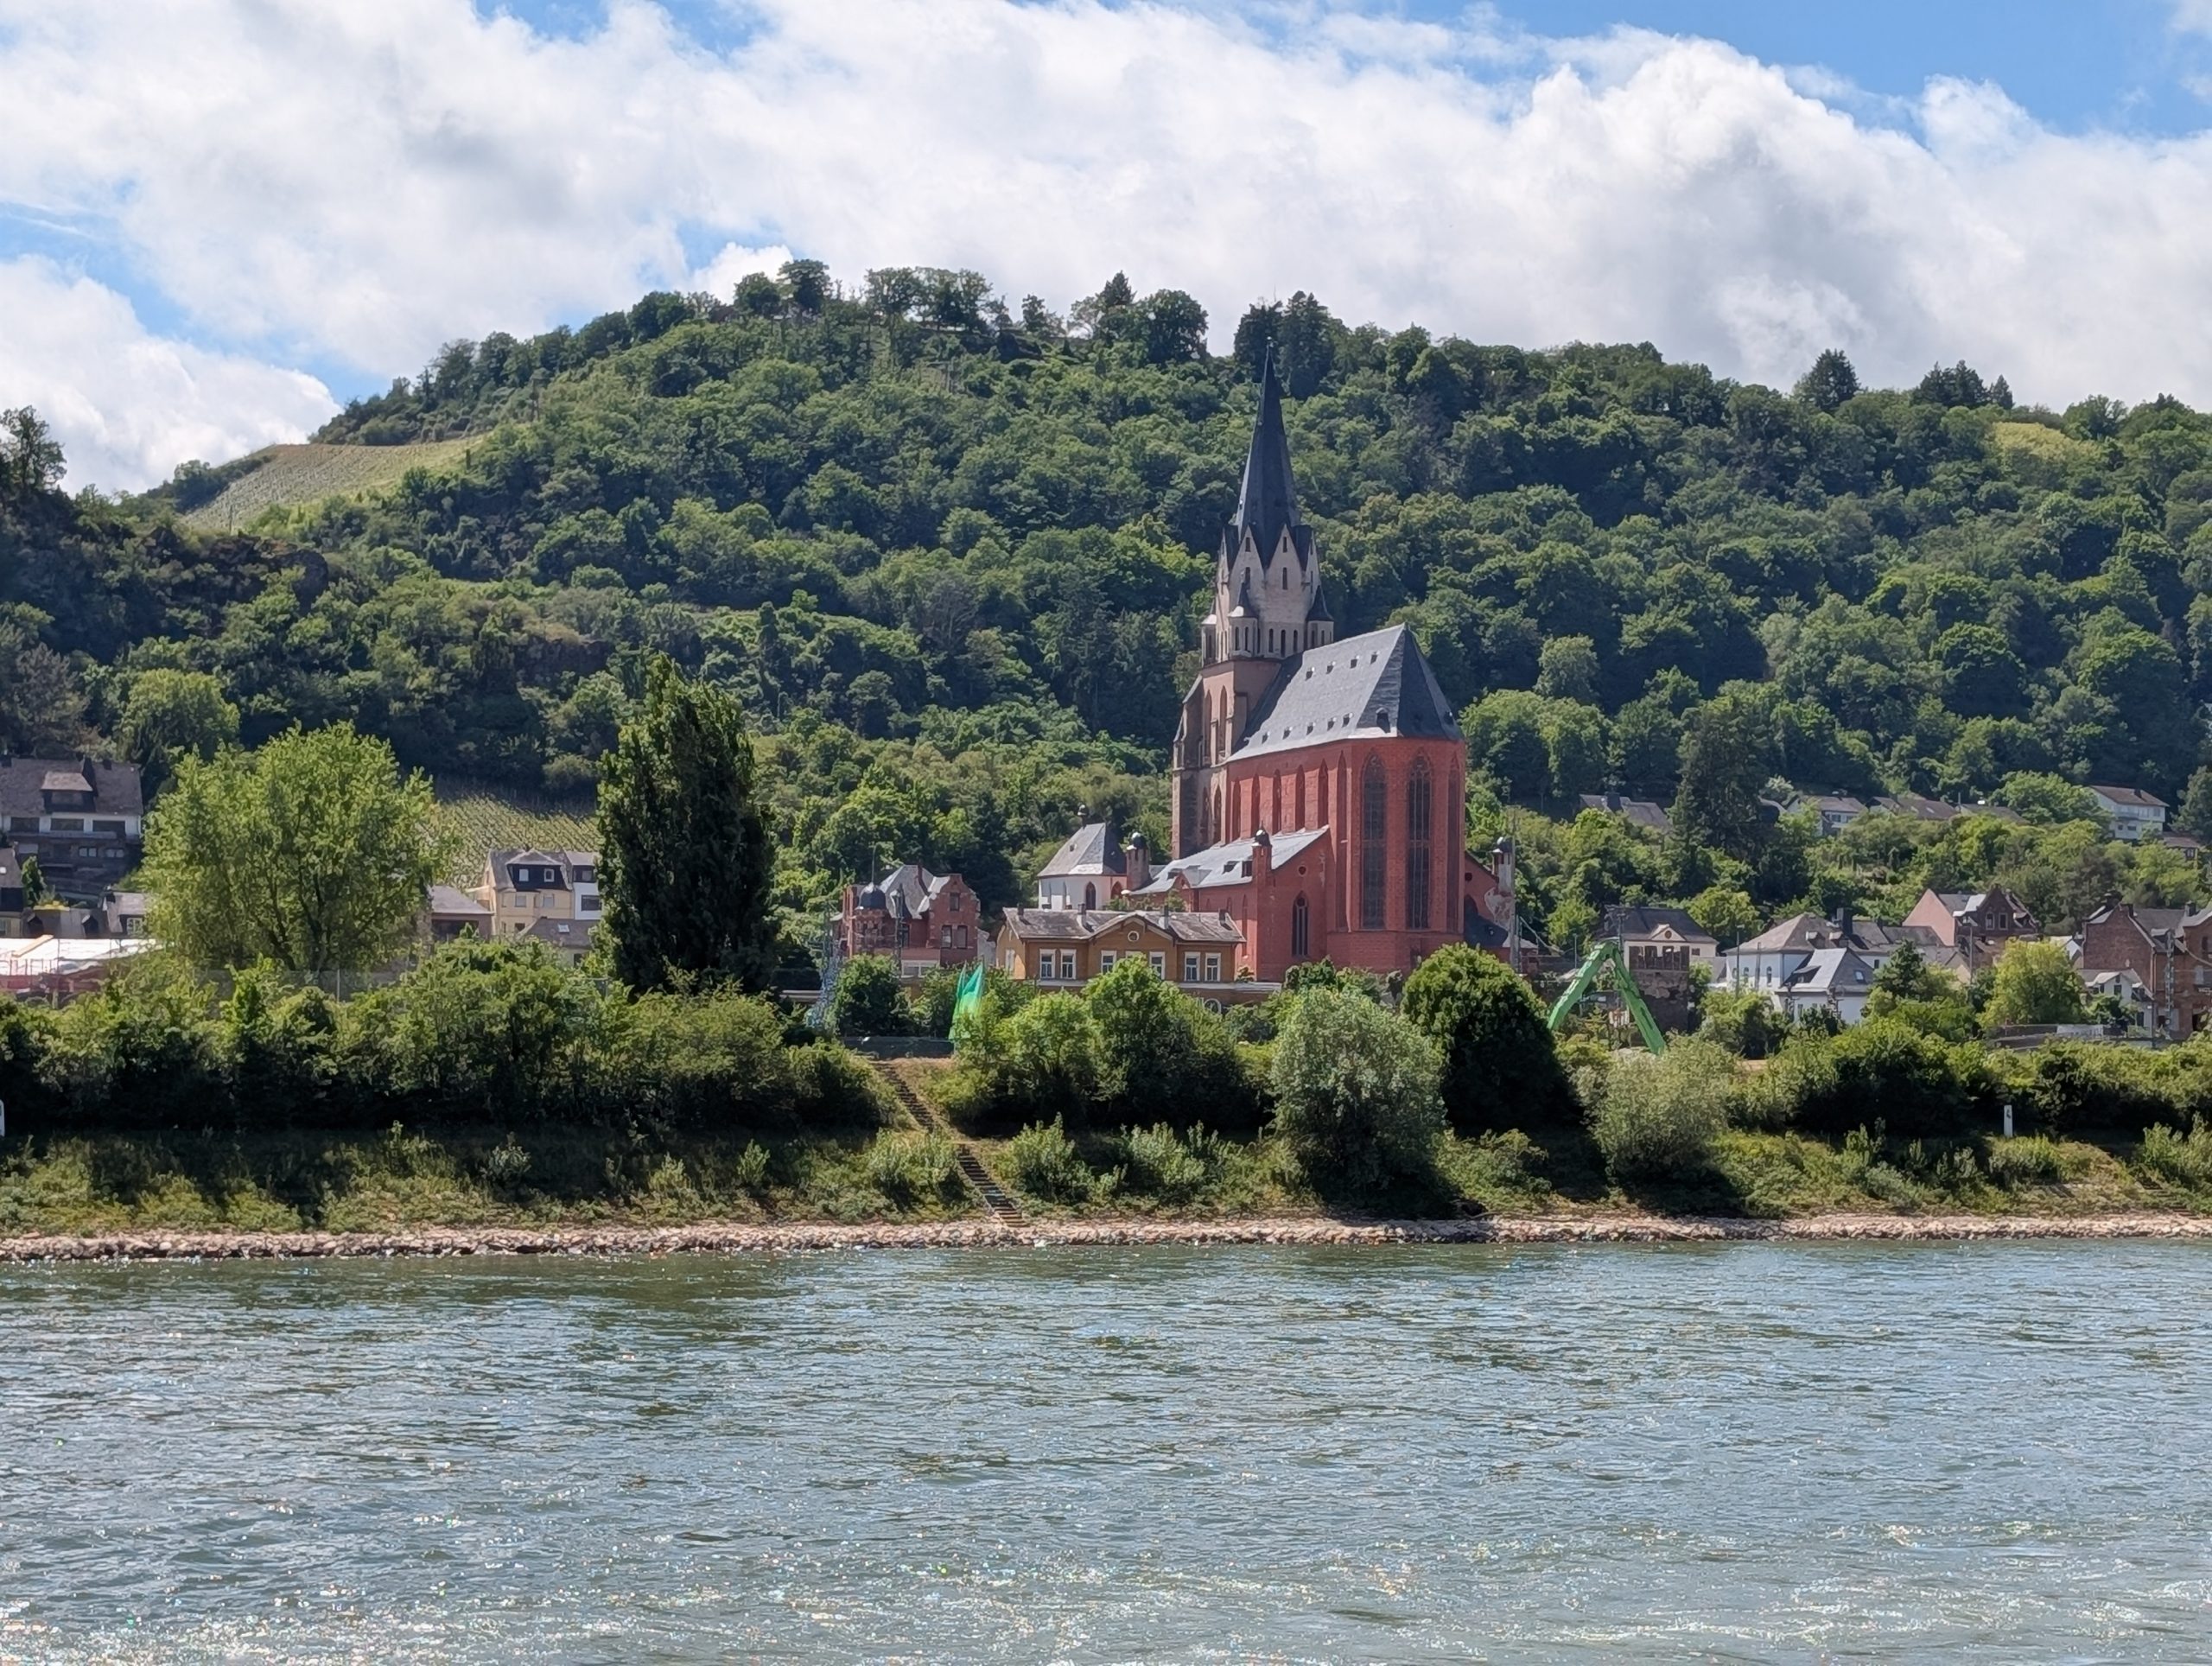
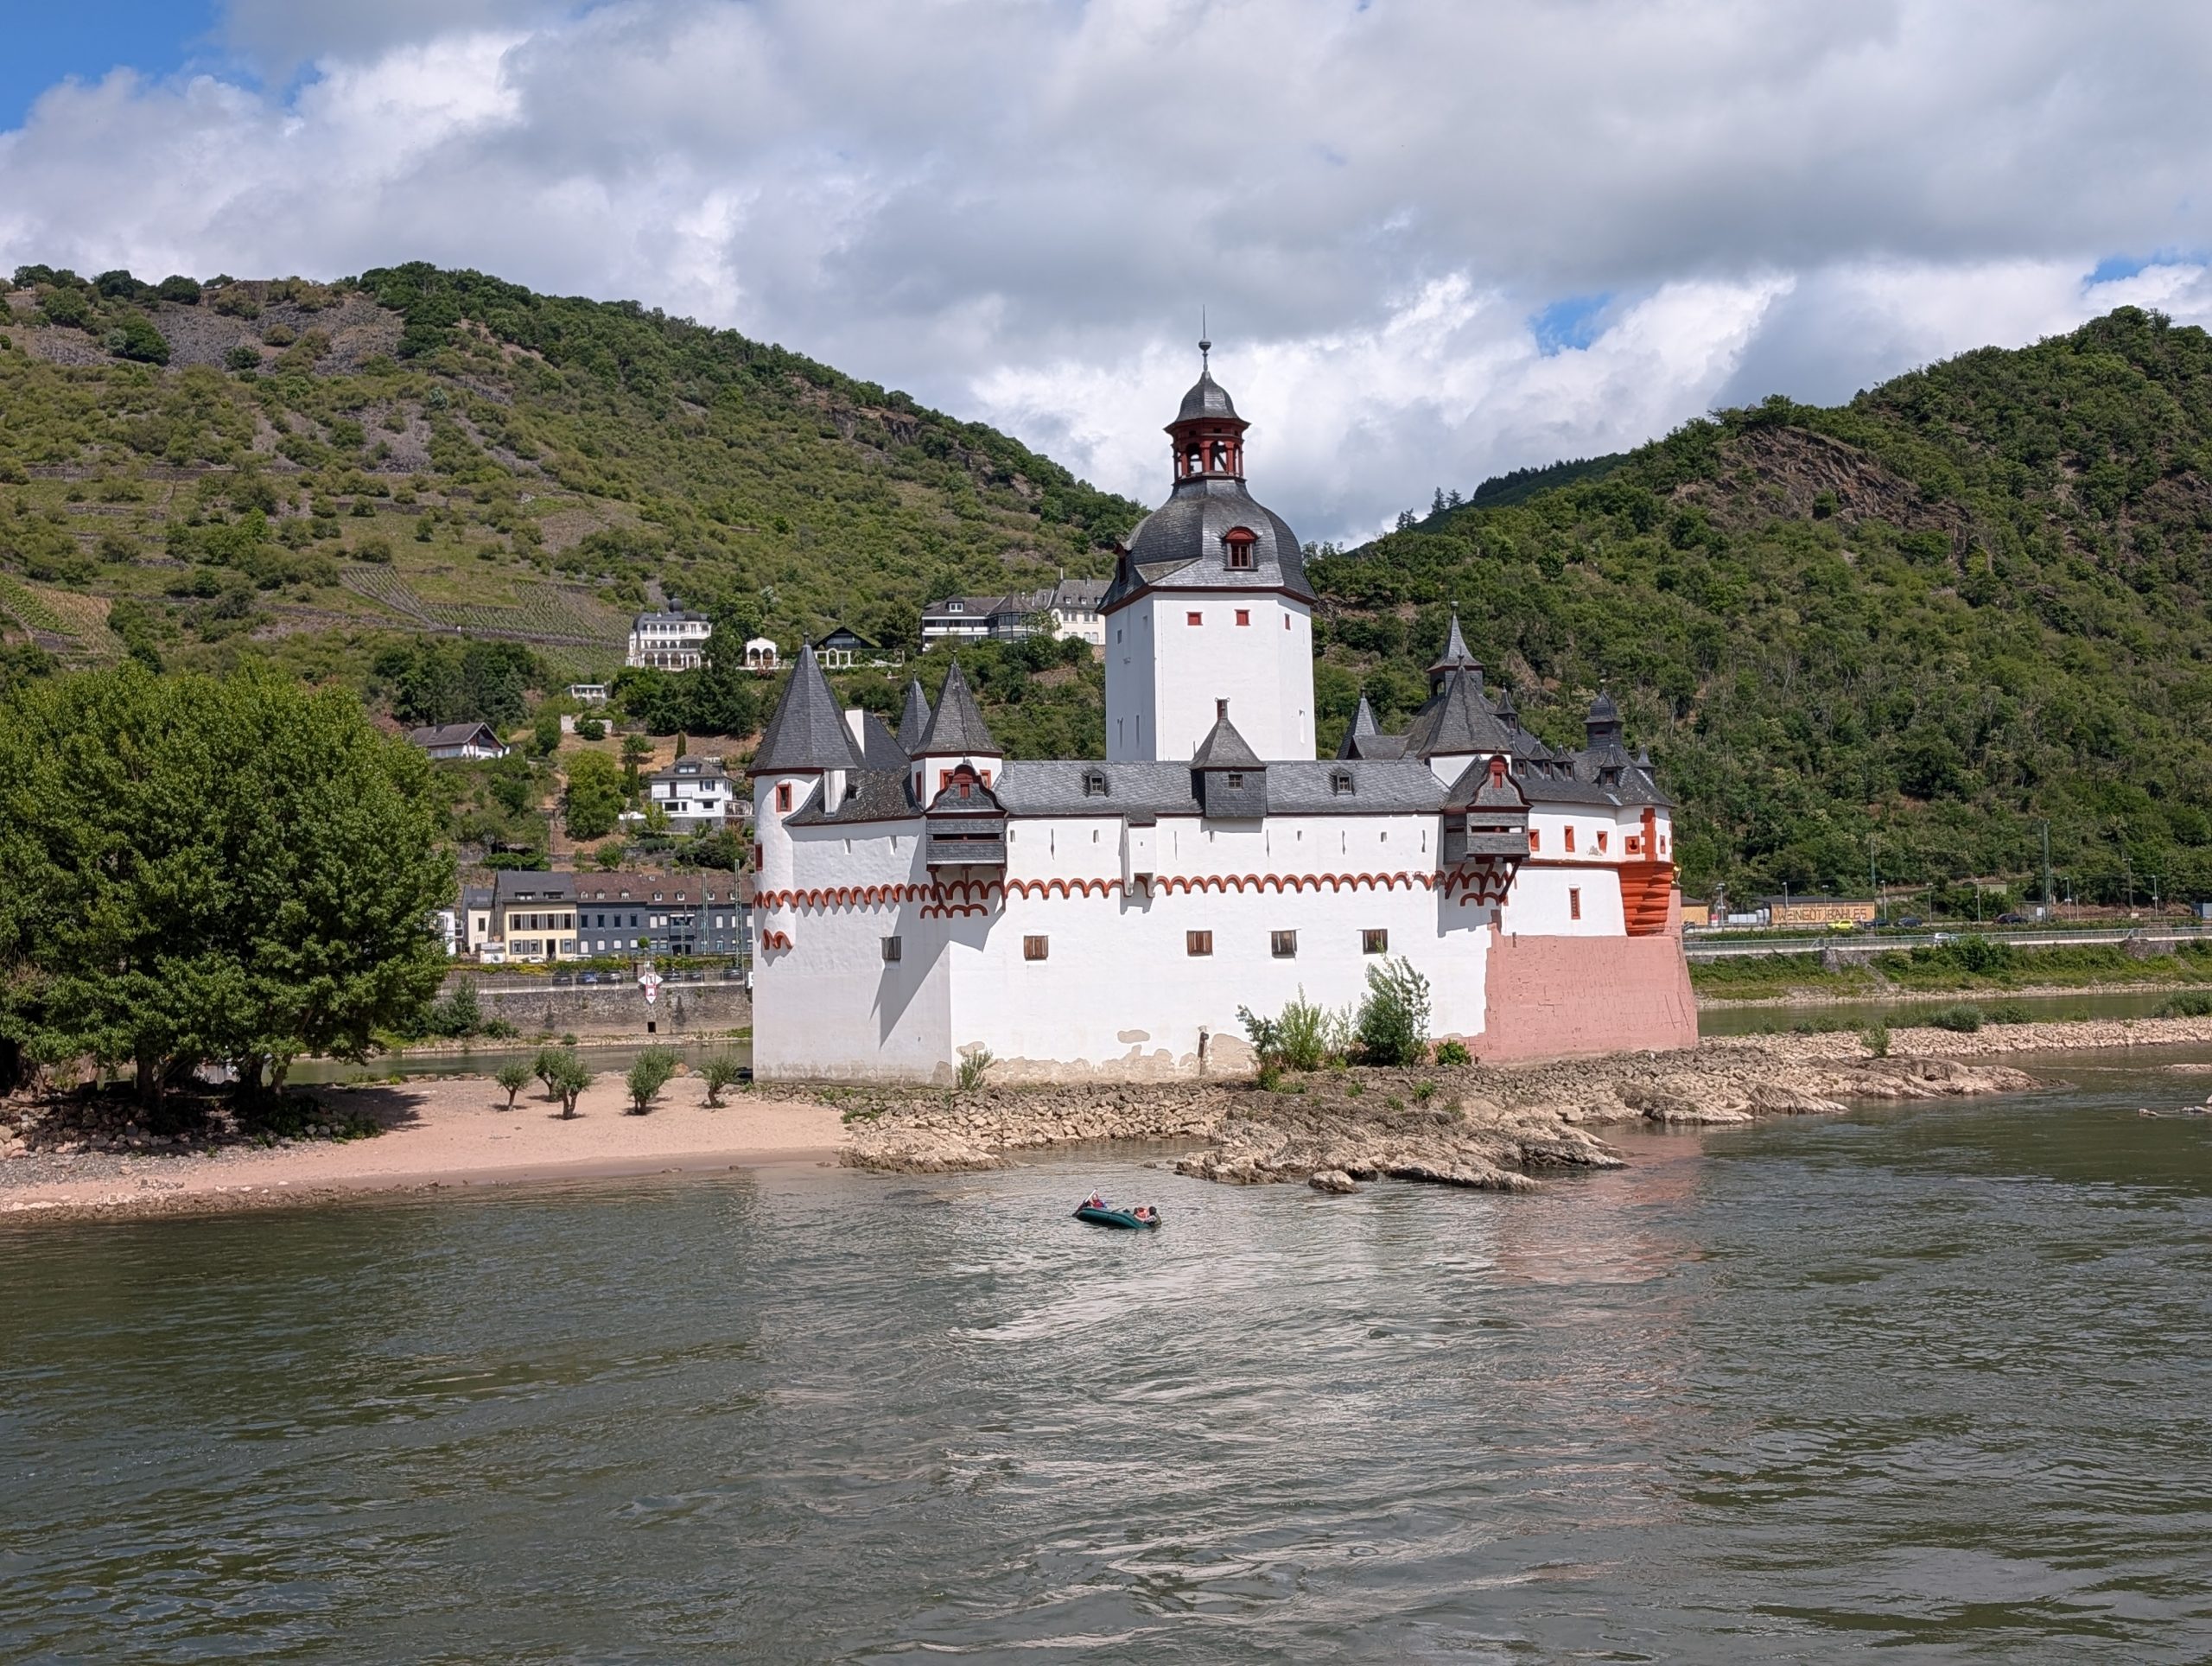
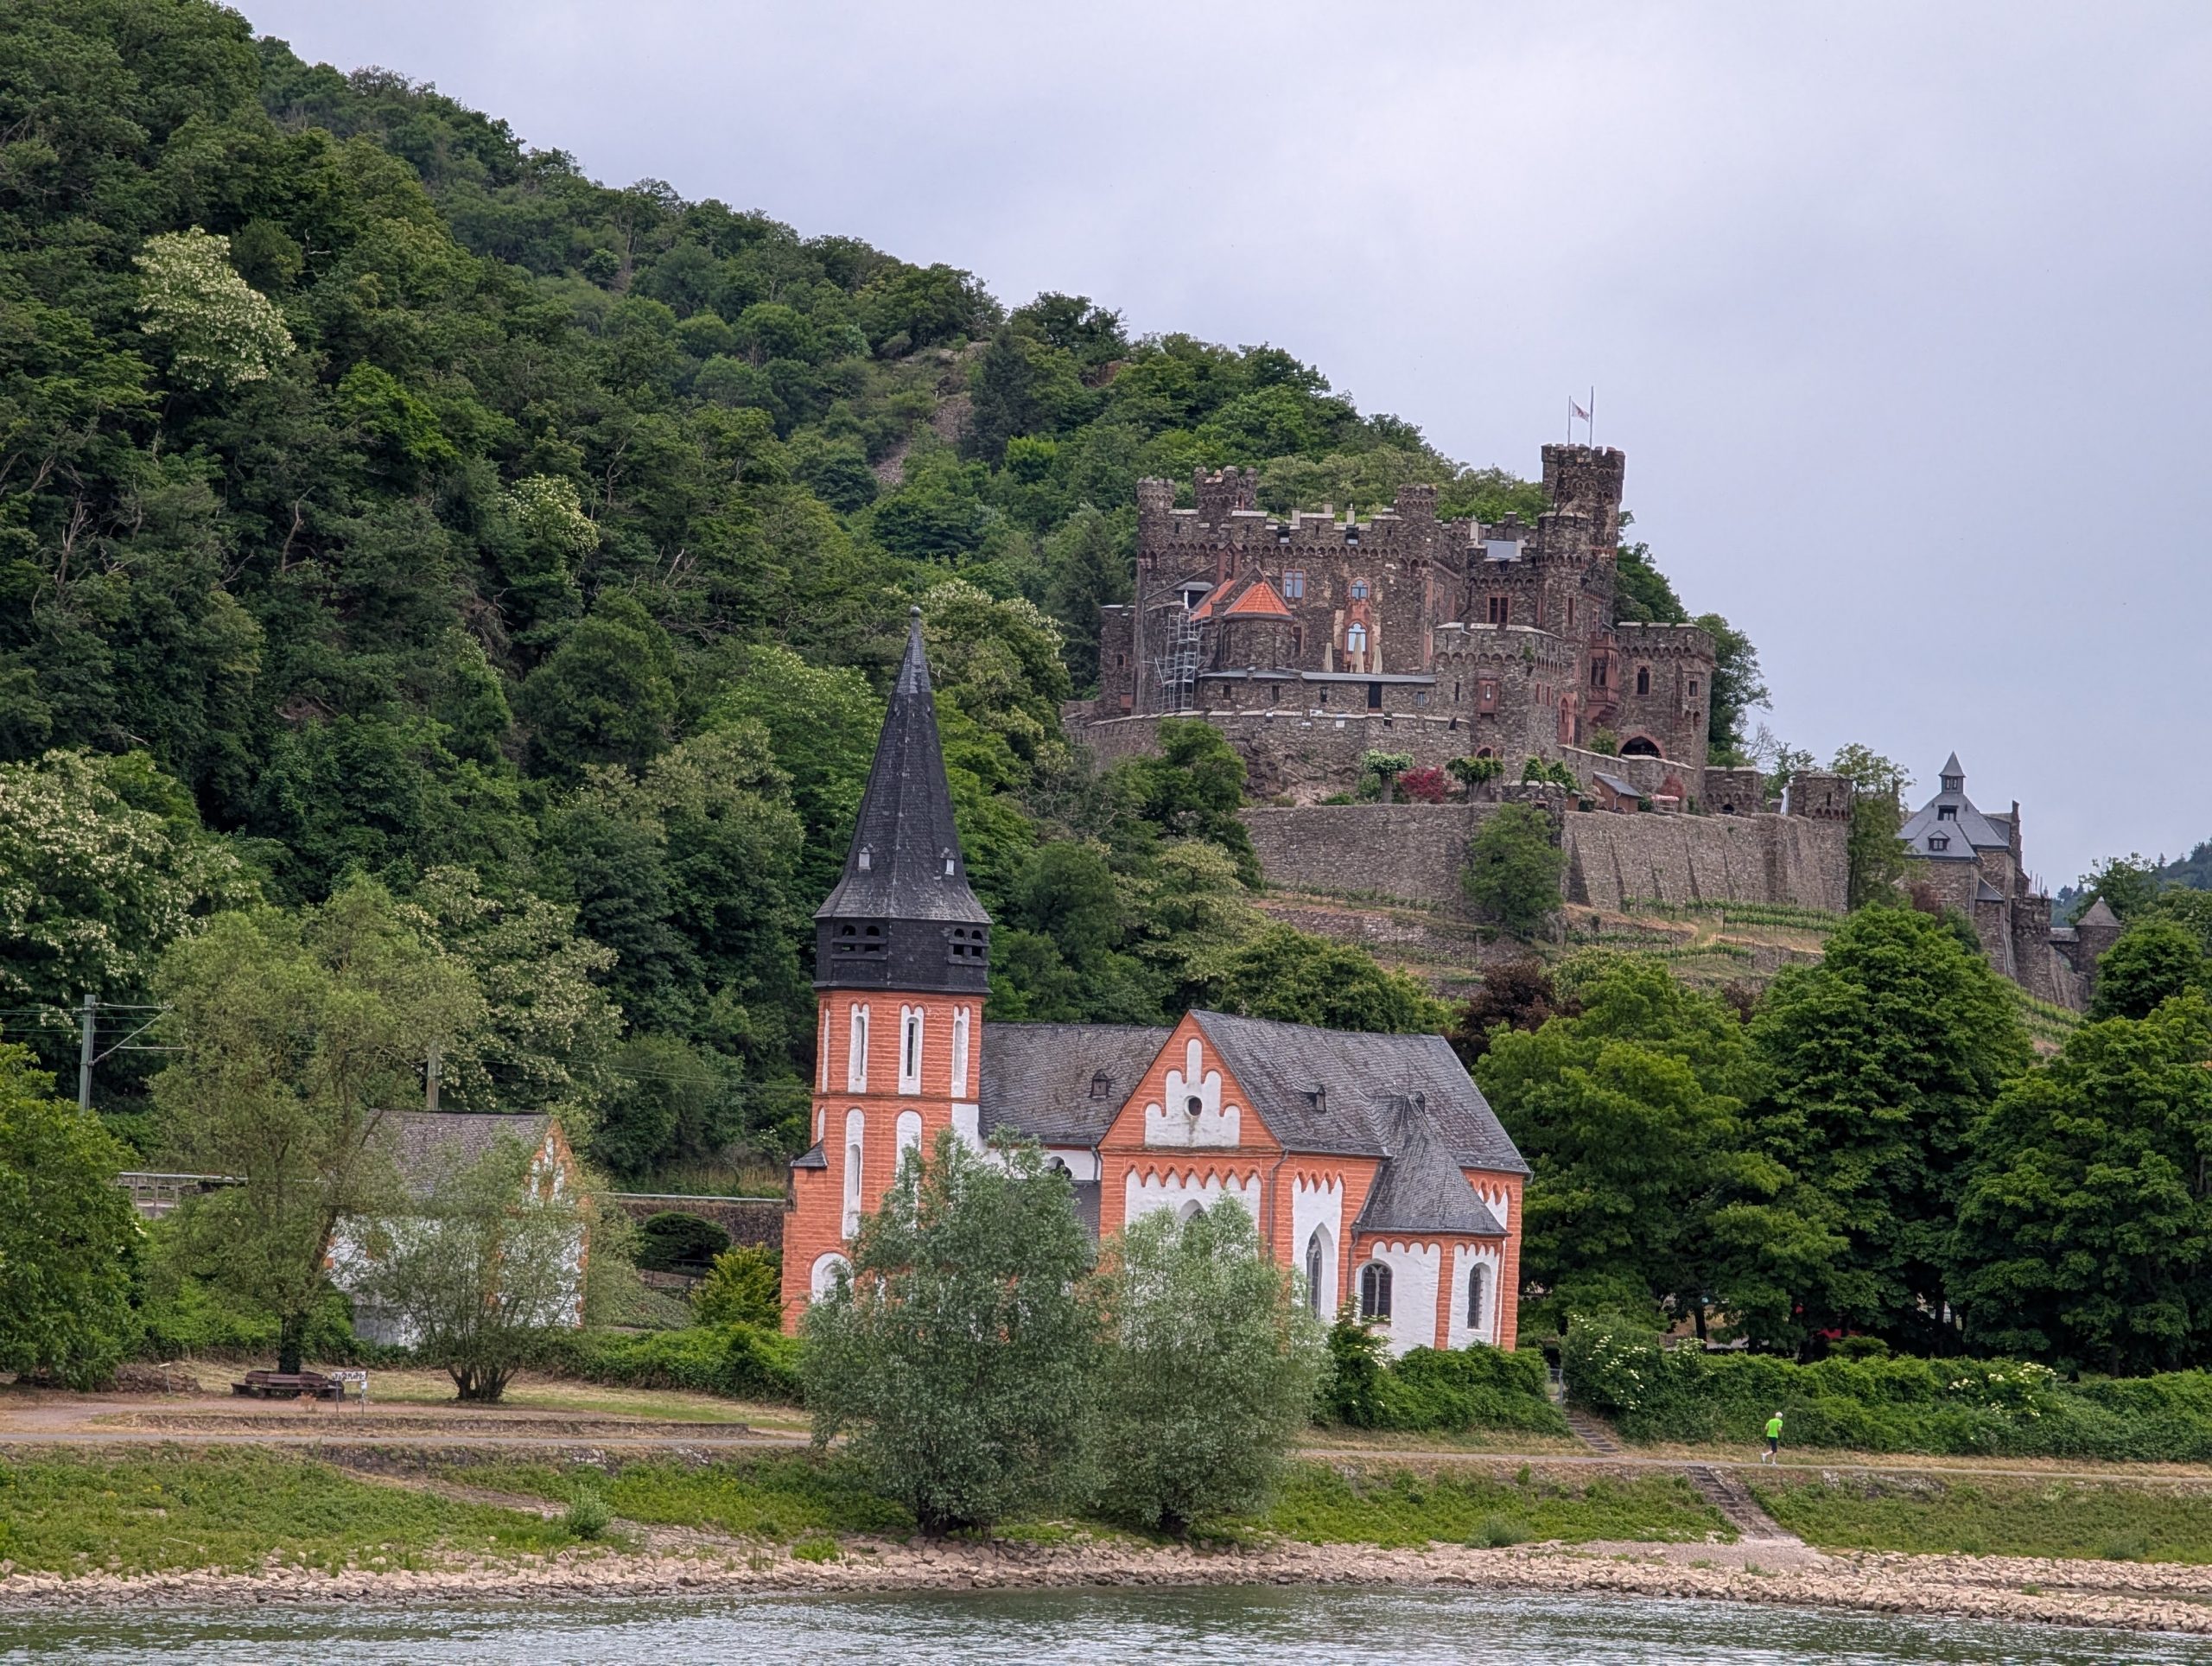
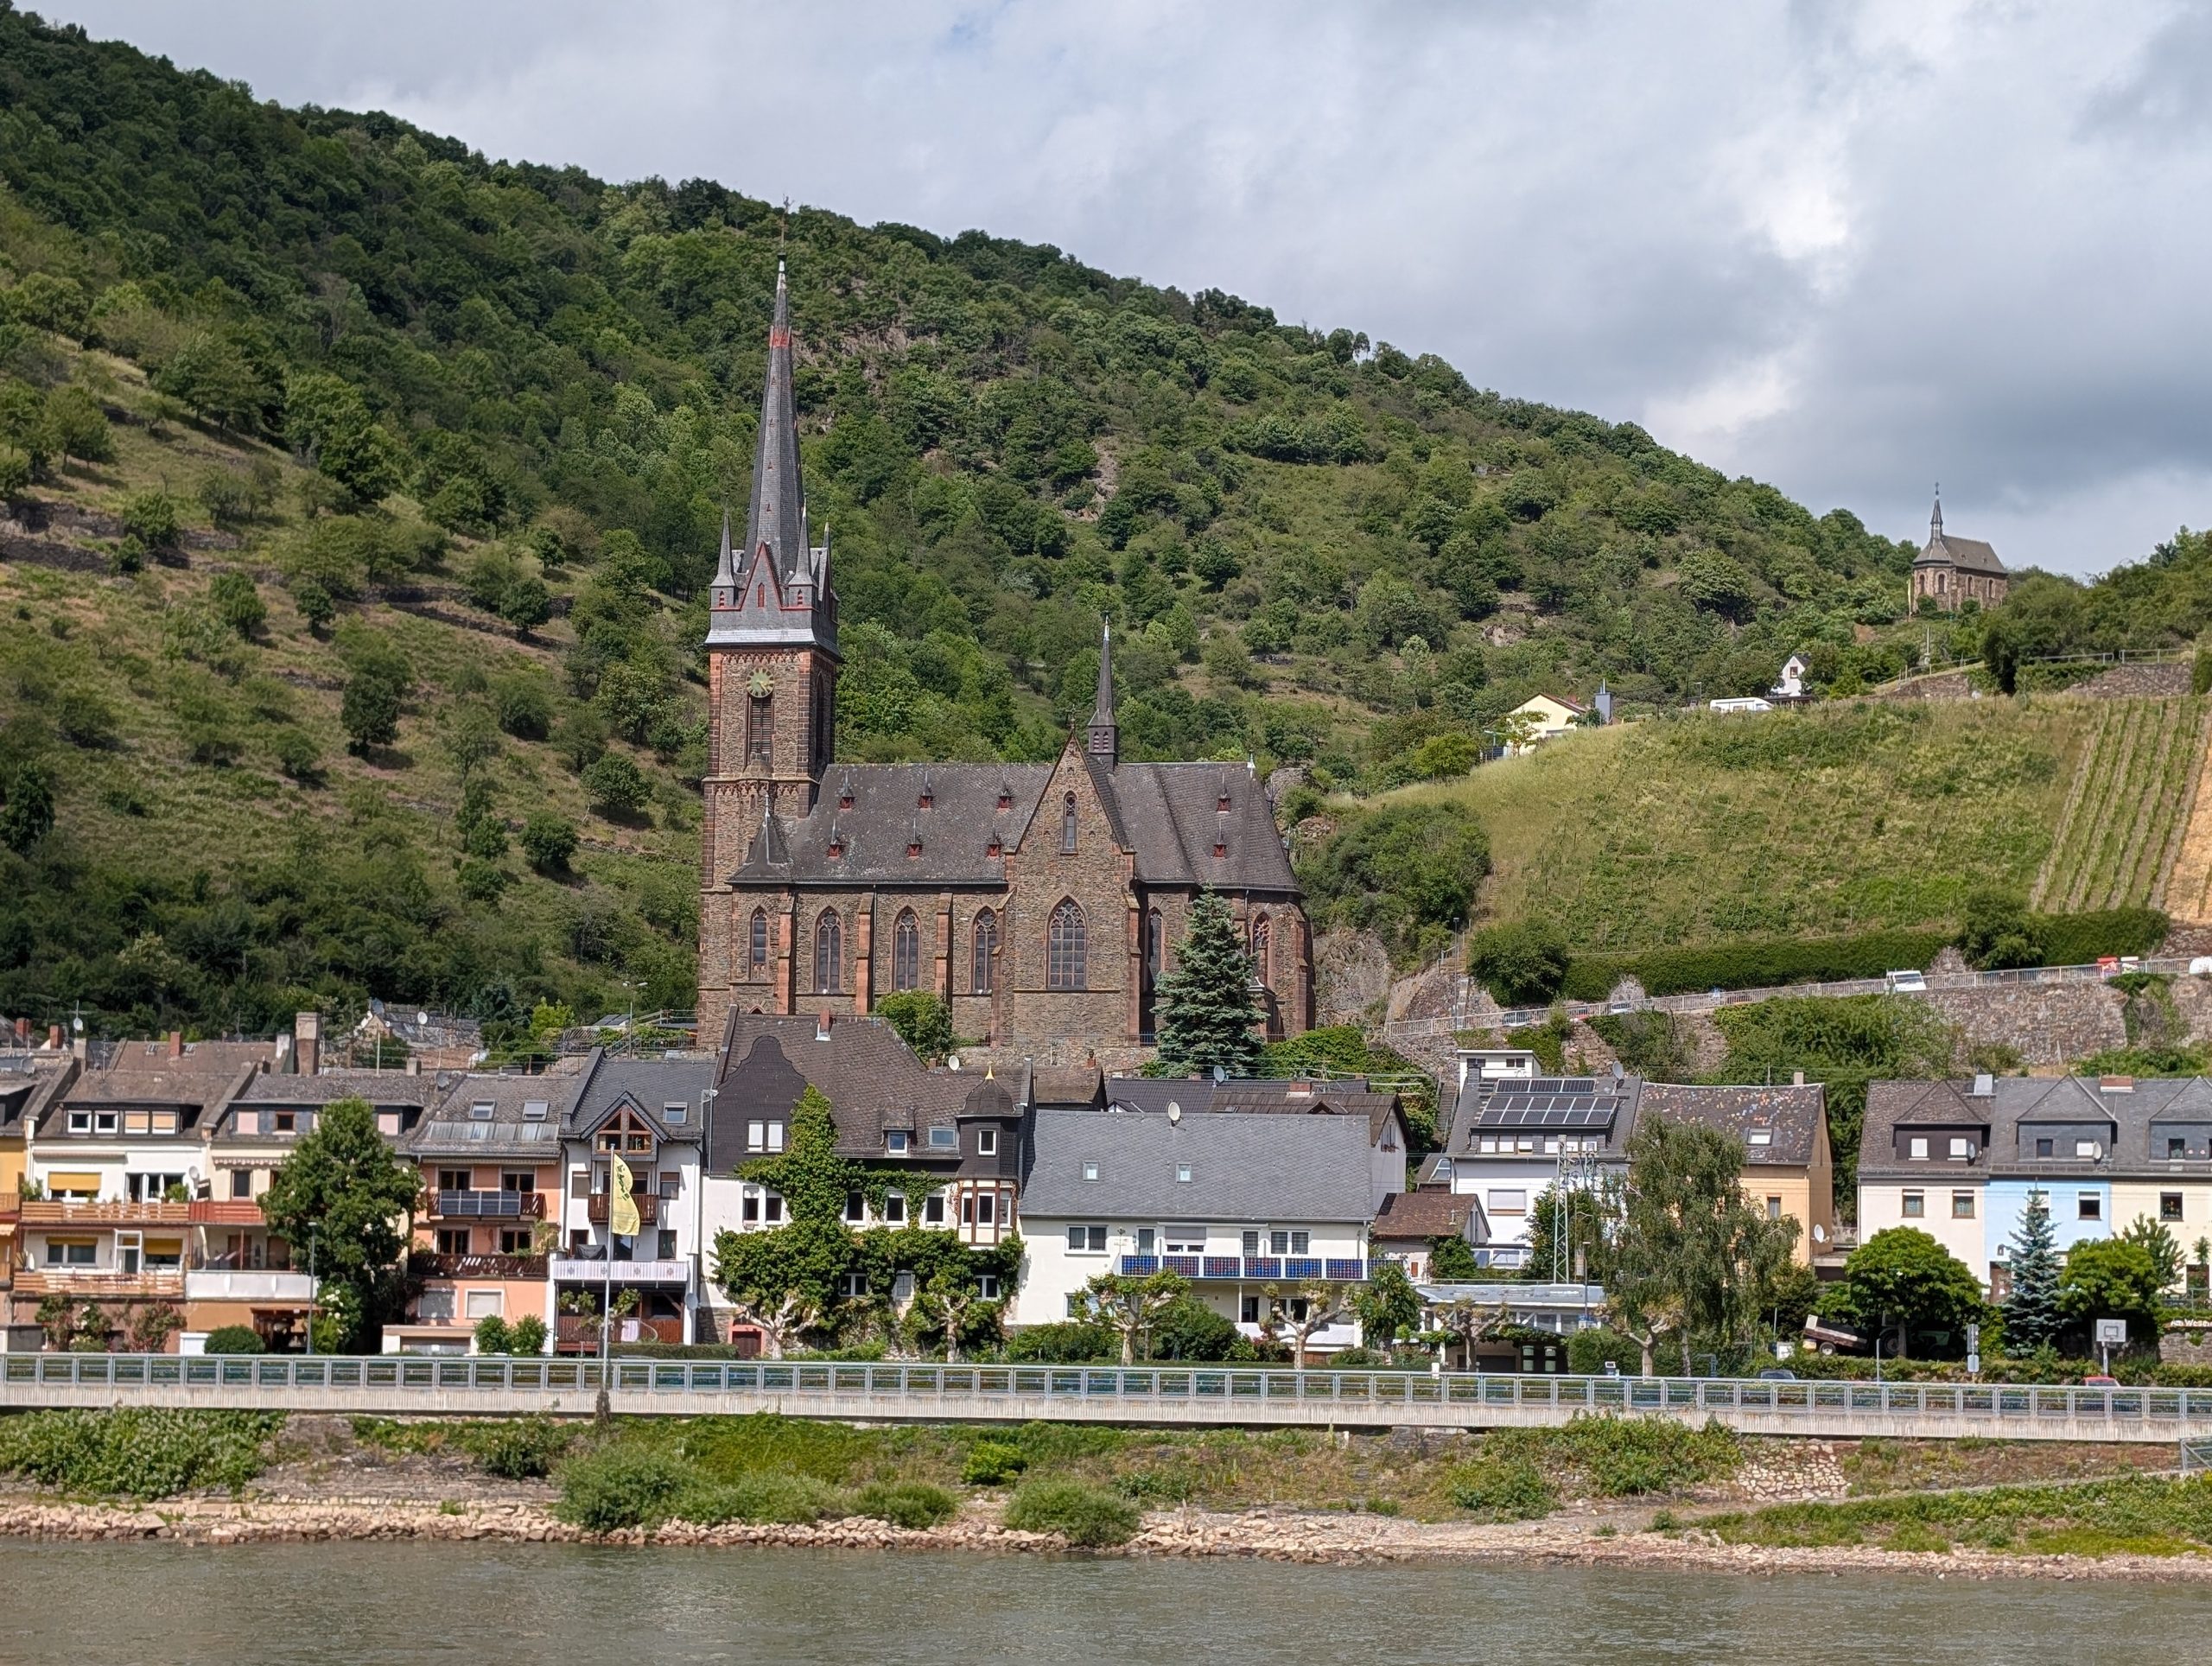
Then back for lunch at noon and from 1:00 pm to about 4:30 pm we sat on the sun deck as the boat made its slow progress through the Middle Rhine. This area is the most beautiful section of the Rhine Valley. It lies between Koblenz and Bingen. Here, the river cuts through the mountains, (we consider them hills rather than mountains) creating a winding valley of pretty villages with Gothic-style houses and fairytale castles. As for the weather, we had patchy clouds, sun breaks, wind, calm, and everything in between. Fortunately, no rain. But it was, huddle in your raincoat, take it off, put it on again, etc. etc. the entire time we were on the sun deck.
Happy campers along the shore.
Andy taking in the sights.
At 4:30 pm it was time to go down to the lounge, for a briefing on tomorrow’s excursions and events.
After that it was a nice drink, and then for me, back to our room to catch up on my trip report, while Andy wandered around the boat until it was time to collect me for dinner.
Not a bad way to spend the day. Ya think?!
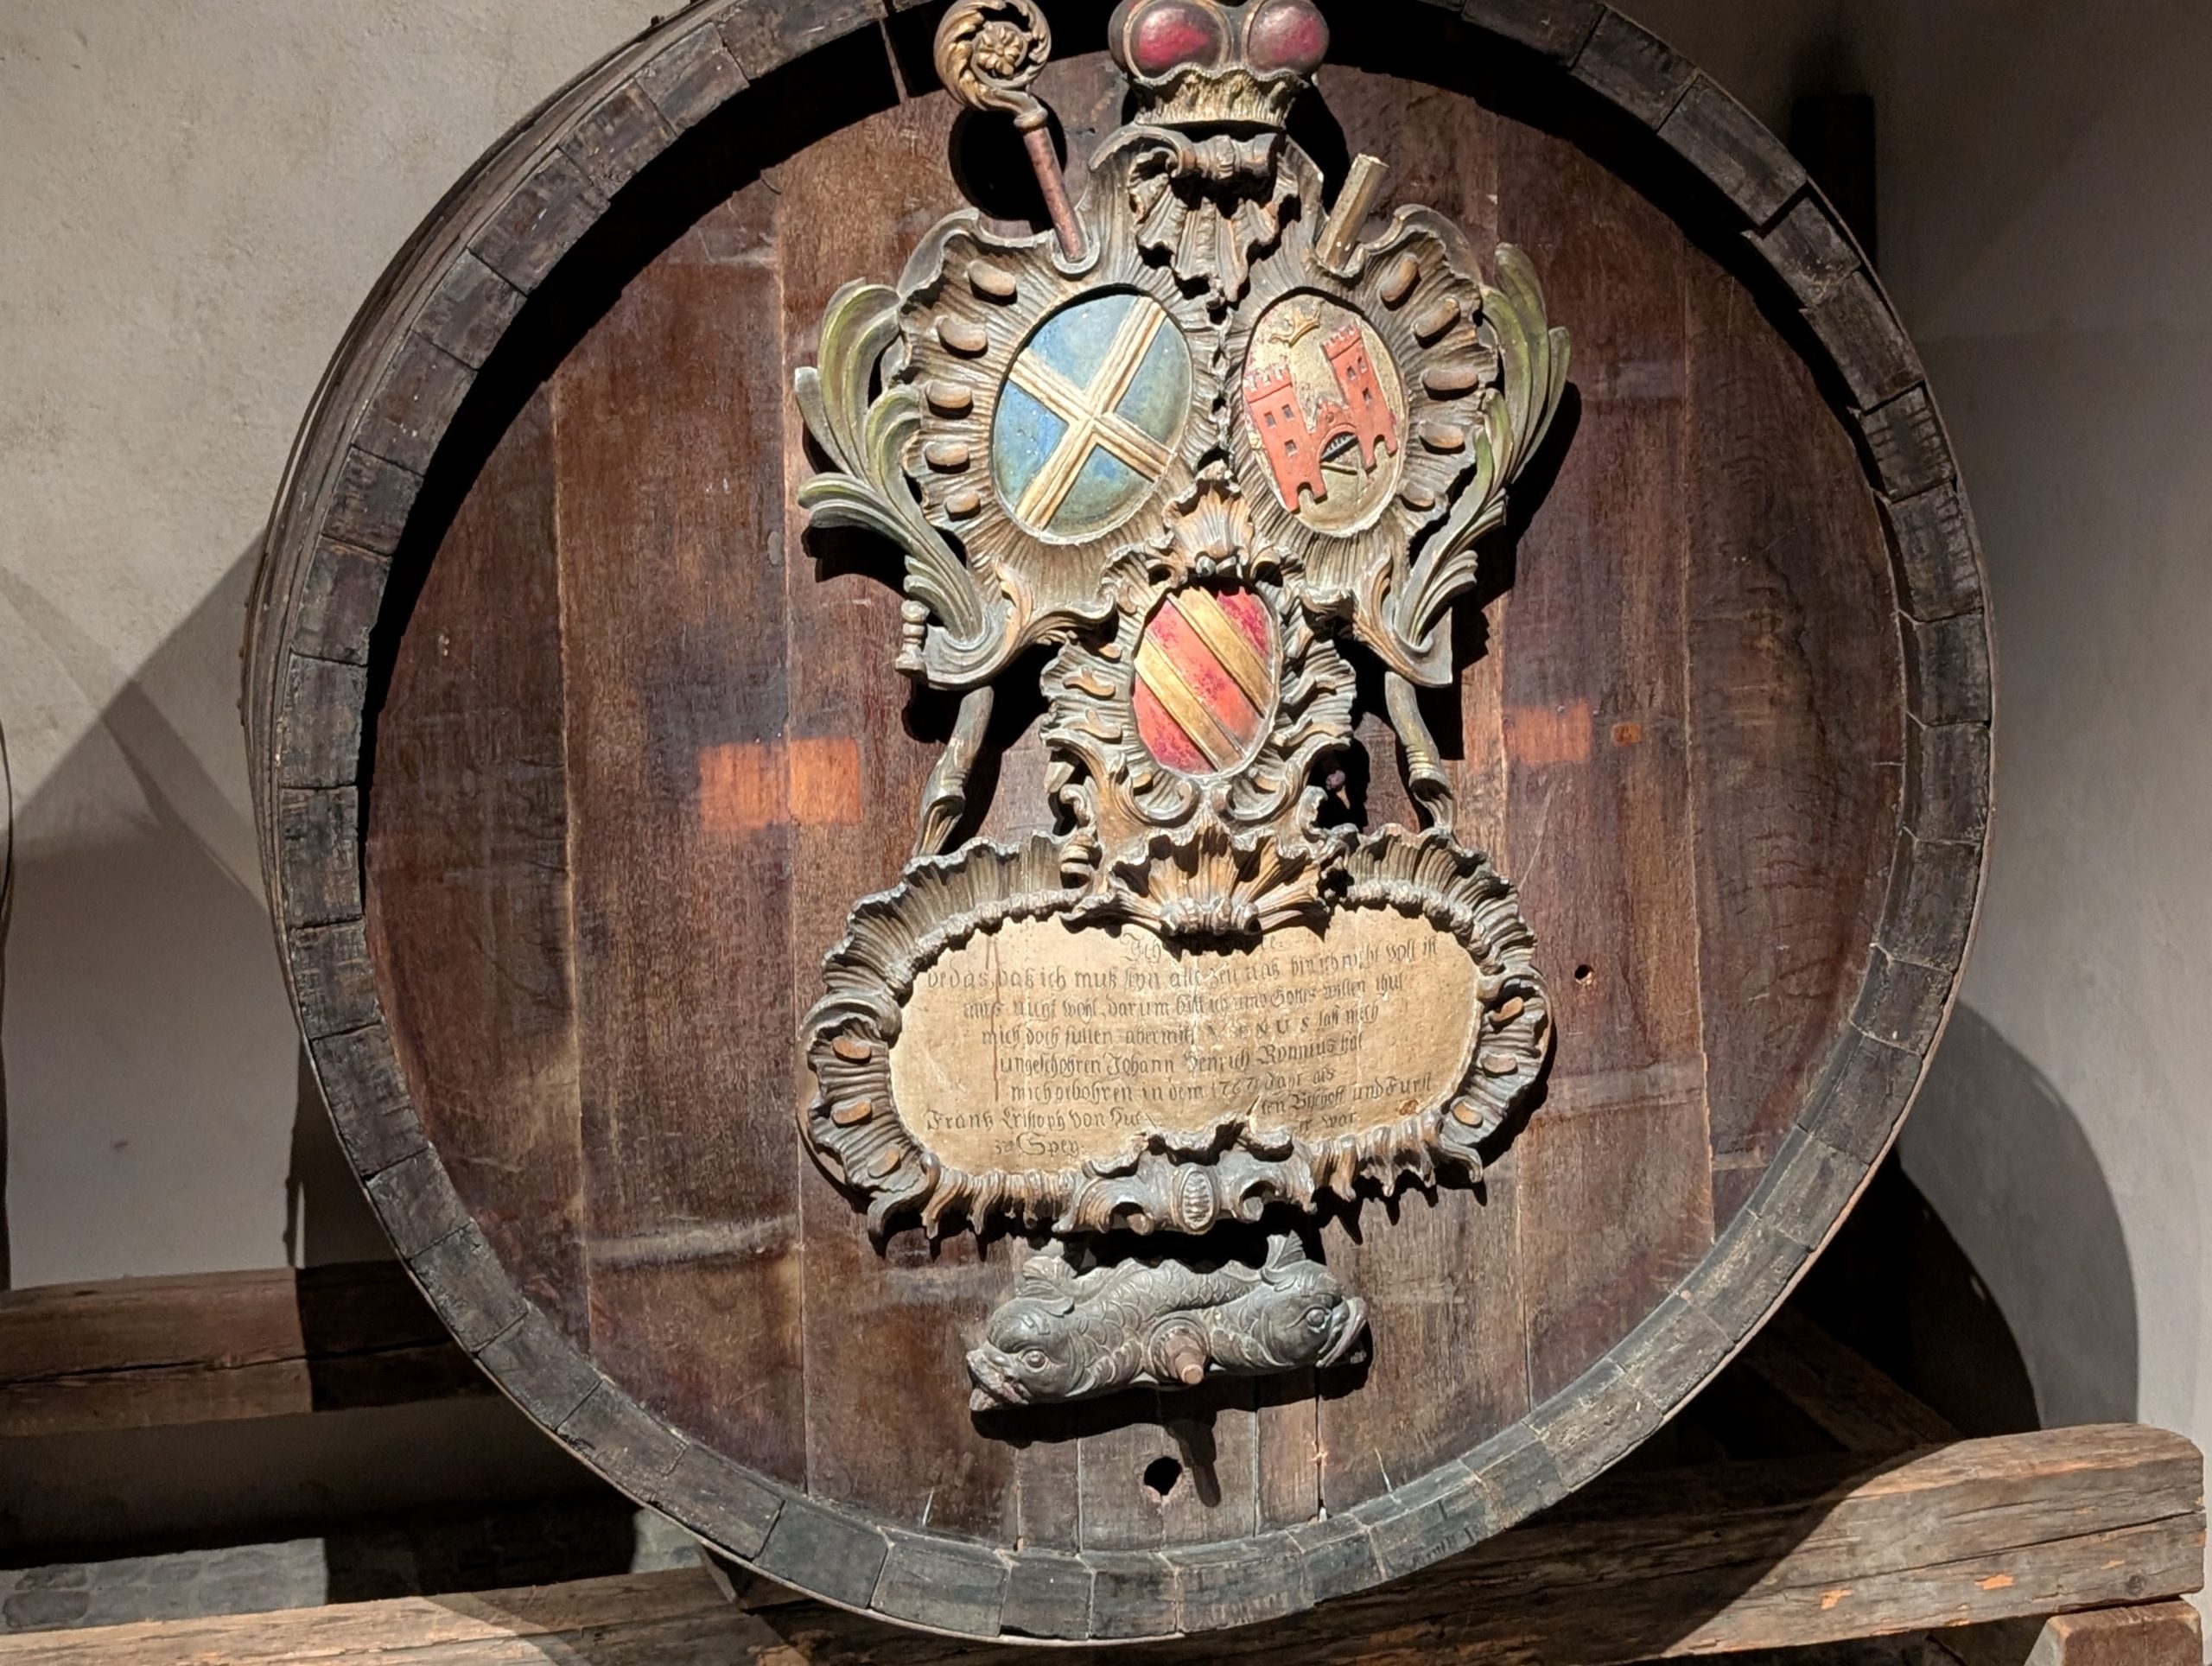
Monday, May 26, 2025 – Viking’s Gersemi river boat – Speyer, Germany
Today was just what the doctor ordered. A morning with nothing planned, besides breakfast, of course. So, I slept in until 8:20 am. And boy was that nice. Then, to the dining room for breakfast. And then, because it was such a beautiful day, a quiet few hours up on the sun deck reading, chatting with fellow adventurers, and generally taking it easy.
After lunch, it was time to get ready for our shore excursion: Speyer Walking Tour. Like our other tours, we had a local guide who kept us well informed as we visited the area.
Speyer Cathedral*, a basilica* with four towers and two domes, was founded by Conrad II in 1030 and remodeled at the end of the 11th century. It is one of the most important Romanesque monuments from the time of the Holy Roman Empire. The cathedral was the burial place of the German emperors for almost 300 years.
Speyer Cathedral is historically, artistically, and architecturally one of the most significant examples of Romanesque architecture in Europe. It is, by virtue of its proportions, the largest, and, by virtue of the history to which it is linked, the most important.
In its size and the richness of its sculptures, some created by Italian sculptors, it stands out among all contemporary and later Romanesque churches in Germany, and it had a profound influence on the pattern of their ground plans and vaulting. Today – after the destruction of the Abbey of Cluny – Speyer Cathedral is the largest Romanesque church in the world.
*A basilica is a church that has special importance for worship or history, while a cathedral is the seat of a bishop. Speyer Cathedral just happens to be both. It is also a UNESCO World Heritage Site.
After walking around the town and visiting the cathedral, it was back to our boat by 5:00 pm. And into the lounge for a drink and an announcement about tomorrow’s exciting excursions and events.
I think it is time I told you about our experience on this cruise. The staff is friendly and very helpful. The rooms and public areas, like the lounge and restaurant, are beautifully appointed, comfortable, and the food is fabulous. And the information provided about every aspect of our boat tour, including the next day’s events, is provided every day so you can’t miss out on anything.
We spoke with many of the guests and have heard not even one complaint. In fact, all the folks we have visited with, especially the ones who have been on large boat cruises, tell us that they much prefer the intimacy of a smaller group. Even if there aren’t casinos, movie theaters, swimming pools, etc. etc., they much prefer everything this type of cruise offers. The Viking people know how to do it right. We are having a wonderful time.
Well, it may be only 10:00 pm, but I’m calling it a day. Tomorrow’s excursion starts at 8:05 am tomorrow. That means breakfast at 6:45 am.
Tuesday, May 27, 2025 – Viking’s Gersemi river boat – Kehl, Germany
Even though our cruise ship was now docked in Kehl, Germany, our adventures today were in Strasbourg, France (just across the river) and a bus ride into wine country for Alsatian wine tasting.
But first, panoramic Strasbourg by land and water. Our group left for our land and water tour at 8:05 am as dictated. Then it was a short, but up many stairs, walk to our bus, get on the bus, drive into Strasbourg, get off the bus, get on our tour boat, and ride along the canals for an hour and 15 minutes. (We went through 2 small locks on our water tour. One up, one down. Great fun!)
Then, off the boat and a nice walk and interesting facts about the area given by our guide as we proceeded to Notre Dame Cathedral of Strasbourg France.
Interesting fact. There isn’t just the Cathédrale Notre-Dame de Paris. (The one that was partially burned recently. And the only Notre Dame I had ever read about.) But in fact, in France alone, there are more than a hundred churches dedicated to “Our Lady” (“Notre Dame”) scattered around the country. And we were lucky enough to visit this incredible cathedral. To put it mildly, it was freaking huge!
And truly, nothing can prepare you for your first glimpse of Strasbourg’s Cathédrale Notre-Dame, completed in all its Gothic grandeur in 1439. The lace-fine facade lifts the gaze little by little to flying buttresses, leering gargoyles, and a 466-foot spire. The interior is exquisitely lit by 12th to 14th century stained-glass windows, including the western portal’s jewel-like rose window. The Gothic-meets-Renaissance astronomical clock strikes solar noon at 12.30 pm with a parade of figures portraying the different stages of life and Jesus with his apostles.
After going through the cathedral, we headed off on our own to visit the statue of my great, great, great, etc. etc. grandfather Jean-Baptiste Kléber. Born in 1753 and died in 1800. Gramps was a French army officer and architect who served in the War of the Bavarian Succession and French Revolutionary Wars. After serving for one year in the French Royal Army, he joined the Imperial Army of the Holy Roman Emperor seven years later. However, his humble birth hindered his opportunities. Eventually, General Kléber joined the French Revolutionary Army in 1792 and quickly rose through the ranks.
After saying goodbye to my famous ancestor, we decided a bit of a sit down was in order. Although I am managing to walk a great deal better than expected, there comes a time each day when my body tells me enough is enough! So, upon finding an establishment that served both coffee drinks and gelato, we availed ourselves of a table and chairs to wait the 20 minutes or so until our fellow travelers re-grouped, and together we toddled our way back to our bus.
After enjoying the most delicious lemon gelato I have ever tasted, we joined our tour group and arrived back at our boat just in time for lunch. A first for me. Even with Andy’s help, I could not finish my 2 scoops of gelato. It still boggles my mind to even think that this could happen!
At 2:00 pm after enjoying yet another delicious lunch, we joined yet another tour. This time it was up to the bus again (huffing and puffing all the way) to once again manage the steep stairs up onto our tour bus. After about an hour of driving out into the countryside, which BTW at least half of which I missed because I fell asleep, we arrived at the Achillees winery.
Each of the barrels had their own special picture. I have no idea if the pictures meant anything, but they were all fun.
Andy examining the vines.
After seeing the workings of the winery, we sat down and did a bit of sampling what this fine winery had to offer. I only took one tiny sip of each wine, but truthfully, I wasn’t very impressed. And wonder of wonders, Andy didn’t purchase even a single bottle. (Amazing restraint on his part.)
Then it was back on the bus for another hour’s ride back to our boat. At least for the return trip I was able to stay awake. Then hurry to our room, shed a few layers of clothing, and hurry up to the lounge for a drink, and a port talk including disembarkation details.
Then down to the restaurant for our special “taste of Germany” dinner.
After dinner it was time to go up to the sun deck to assist our captain as he brought our boat through a lock safely. And I must say, we did a terrific job.
This was a very large lock. The barge carrying containers was only inches away from our boat. These boat captains really know what they are doing.
The boat captain and his assistant were steering our boat from a side control station rather than the regular, middle of the boat station. It was amazing to watch.
You can see how close the boats were together. Fantastic piloting.
Of course, the fact that I was offering my expertise didn’t hurt. Right!
Then it was back to our room for me to write up today’s trip report and to obey my pillow which had been calling my name all day!
Another great day on our “Viking” adventure.
Oh, I must add. So far, the only thing I have heard about that I want to purchase before we leave this area is a Kitchen Witch.
A Kitchen Witch (KW) is a traditional home décor with the functions of an amulet, that has deep roots in European traditions. It usually is a hanging poppet with a broom, witch’s hat or headkerchief, and often also other attributes like spoons, forks, bowls, herb sachets and so on. Kitchen Witches are usually homemade and are considered poppets rather than dolls.
To get technical, a doll is a plaything and a poppet is a small figure resembling a human that is used in witchcraft. But before you panic and think that all poppets are bad, remember that these are good witches. Specifically tasked with overseeing your home and kitchen.
There is some debate over where the Kitchen Witch originated, some claiming Scandinavia and other Germany, but consensus points to older Northern European customs, as it seems to have been more widespread earlier.
The poppet is supposed to depict a “good” witch who inspires productivity and safety in a kitchen, but also counteracts any ill-will directed to the home. It is considered good luck to give a Kitchen Witch to a friend or family member.
And I can attest to that. Many years ago, my sister-in-law Evelyn gave me a Kitchen Witch. I loved my KW. But with the years, it became dusty and so it left our premises, I’m pretty sure, of its own volition. Apparently, we were doing just fine, and perhaps there was another home that needed more assistance than we required. (My story and I’m sticking to it!)
Anyway, I want a new one. So, I am on the lookout.
After another fine dinner, it was back to our room to read until our eyes could no longer focus on words.
Wednesday, May 28, 2025 – Viking’s Gersemi river boat – Breisach, Germany
You would think that on vacation you wouldn’t want to miss out on anything. Wrong. At least wrong, when you are 33 days from turning 81 and your knees are shot! So, this morning, after breakfast, Andy visited the charming town of Breisach while I took the opportunity to write up yesterday’s adventures and do a bit of reading.
Notice how the bricks are positioned. Very clever.
While I was writing I considered what the average age of this cruise ship’s guests might be. I know the youngest guests are 22 and 20. But like us, most of our fellow travelers are retired. So, if I were to hazard a guess, I would say 65-70. Some, of course, are older, some younger. And I would also say, except for a couple of curmudgeonly elderly gentlemen we had tried to engage in conversation, who were obviously on this trip only because their wives insisted, everyone had a burning thirst for travel. And as you might expect, most of our fellow travelers were from the US. And except for one of the curmudgeons, who expressed the beginnings of a positive opinion about our present administration, all the others, if the subject came up, also were truly appalled at what is happening in our country. (And as you can probably imagine, when Mr. Curmudgeon began to speak, we suddenly were finished with our dinners. Funny how that works!)
But all in all, I would have to give our fellow adventurers a 10. Maybe even a 15.
Well, I must stop my narrative now, because it is getting close to lunch time. Not that I’m hungry. In fact, quite the contrary. But we have a 4 hour tour this afternoon into the Black Forest region of Germany. And of course, I don’t want to begin any adventure on an empty stomach. So, once again, I must put in a good word for Viking cruises. There is no way in hell you could go hungry on this boat. There is food everywhere. No matter what time of night or day, there is something to nibble on. And lovely and comfortable places to just hunker down and read.
And just so you know, I will not be purchasing a cuckoo clock while visiting the Black Forest. I made that mistake when I visited the region while on a tour with my church choir in 1988. When I got home, my new cuckoo clock drove me “cuckoo” and I took it down after only a few weeks. Somehow, it too, like my old Kitchen Witch, disappeared without a trace.
But just for fun, a bit of history about these amazingly noisy ways of telling time.
The story of clock making in the Black Forest begins around 1630. People there had always crafted and carved using the local wood that was one of the few natural resources in the area, especially during the long winters when the land was covered with snow and they could hardly leave their houses.
It must have happened around 1630 that a peddler who sold glass from the Black Forest to foreign countries, returned with a clock, perhaps from the land of Böhmen (today’s Czech Republic). Somebody in the Black Forest must have been fascinated by this technical wonder that kept time much better than hourglasses or sundials that were used in the area at that time. So, this person built his own clock and started the tradition of clock making.
Those first clocks were rather primitive. They used toothed wheels made of wood and simple stones as weights. Instead of a pendulum, they used a piece of wood called a “Waag” that moved forward and back above the clock dial, to make the clock keep time.
Most of the people who made clocks at that time were not the rich farmers, but the so-called “Häuslers”. In the Black Forest area, usually the oldest son of a farmer inherited the farm; his siblings only got a small piece of land. Those “Häuslers” had to work for other farmers to survive during the winter-months, and clock making was a welcome way for them to earn a little money. In 1690, the whole industry of clock making was developed in the Black Forest.
Clockmaking became more and more important for the rather poor Black Forest area. It is known for example that in 1808 in Triberg, and the surrounding villages, 790 of 9013 inhabitants were involved in clock-making. In 1850 the Herzog (Duke) of Baden founded a school for clock-making in Furtwangen, where students learned math and drawing as well as making cases and movements for the clocks.
At 1:45 pm, we climbed aboard a bus to take us into the Black Forest to the quaint little village of Hofgut Sternen.
The glassblower doing his thing.
From our ship it took about an hour and twenty minutes to arrive at Hofgut Sternen. On our way we drove through parts of the Black Forest, and that was most enjoyable. The drive is incredibly beautiful, but the roads are very narrow and very twisty. When we arrived at Hofgut Sternen we were given the opportunity to watch a glass blower in action. And of course, a lovely shop displaying beautiful hand-blown glass objects for sale. Also, a cuckoo clock demonstration providing us with a bit of information about how cuckoo clocks are put together. And then of course, you could choose your favorite clock and have it shipped home. There was also a Black Forest Cake demonstration, but I skipped that. While I was shopping, (bought a beautiful glass bird) Andy took a guided hike to a beautiful little chapel.
To be perfectly honest, my favorite part of this excursion was seeing the Black Forest.
Then back on the bus to arrive back aboard our cruise boat at 6:15 pm. There was quite a bit of traffic, so the ship’s departure time was held up. But as soon as the last person was onboard, we were on our way.
Then down to our cabin to clean up a bit, and up to the lounge for a well-earned drink. Then 7:00 pm dinner. By 8:30 pm we were back in our room packing our bags because our bags must be outside our door at 8:00 am. So, waiting until the next morning would never work for us.
While our bags were being taken off the boat, we waited in the lounge. Our taxi was scheduled by the cruise line to take us to the car rental place at the airport at 9:00 am. So, I will close for today and try to get a good night’s sleep.
This cruise was worth every penny. Even though it was sometimes physically strenuous, we survived. There was plenty of time to relax and just enjoy being on holiday. And the sights we experienced and the things we learned will stay with us for a very long time. We are well and truly blessed.
But now, on to the next part of our European adventure. Tomorrow we are off on our own, in our own rental car, having to find our hotels, meals, gas stations, etc. etc. all by ourselves. Hopefully we are still up to the task. We shall soon find out if we can continue to consider ourselves inveterate travelers. Time will tell,
I’ve said it before, but I’m going to say it again. Pork tenderloin is one of the best ways to get more bang for your buck. Compared with beef tenderloin, there is a huge price difference. Pork tenderloin is cheaper per pound than beef due to several factors related to production costs and animal husbandry. Pigs are raised faster, require less space, and convert feed to muscle more efficiently than cattle, leading to lower production costs. Additionally, the amount of usable meat is higher for pigs than for cattle, further contributing to lower per-pound costs.
And bottom line – pork tenderloin is the filet mignon of pork. The average price per pound is about $6. The average cost of beef tenderloin is around $26 per pound, and the price can vary dramatically depending on the quality, where you buy it (grocery store vs. butcher shop), and whether you purchase a whole tenderloin or individual steaks.
And pork tenderloin is just as versatile as beef tenderloin. And they are both more tender and succulent when they are not over cooked. There should be some pink in both a well-cooked slice of pork tenderloin as well as in a perfectly prepared piece of beef tenderloin.
As you can see from the picture above, I left the pork tenderloin in the oven too long. Kevin of keviniscooking.com directions stated to transfer skillet of pork to the oven and cook for 12 minutes, or until internal temperature is 145°F. I read it to mean, start checking after 12 minutes. Stupid me! I should have checked after 7-8 minutes, so that’s what I wrote in the instructions below.
But boy of boy was the pork tasty and the sauce fantastic. Very different than other sauces I have made in the past. So, I am thrilled to share Kevin’s recipe with you. You simply must give this recipe a try. Just DON’T BAKE THE TENDERLOIN TOO LONG!
Well, that’s it for today. Just made brownies for our upcoming JazzVox home concert. They are presently cooling so that I can cover them with both plastic wrap and aluminum foil so that they stay fresh (at room temperature) until I frost them Sunday morning with Raspberry Cream Cheese Frosting. And yes, brownies keep better for up to 5 days, when wrapped tightly and left at room temperature. (Your second cooking tip of the day.)
And as always, from our home to yours, peace and love.
And just for grins and giggles, check out the bonus pictures at the bottom of this post.
1 pork tenderloin, silver skin removed and dried with a paper towel or 2
2 garlic cloves, finely minced
1 T. fresh rosemary
2 tsp. lemon zest
1 T. extra virgin olive oil, divided
½ tsp. kosher salt
freshly ground black pepper
¼ c. chicken broth
¼ c. balsamic vinegar
1 T. unsalted butter
1 T. drained capers
Pre-heat the oven to 450-degrees.
In a small bowl, combine the garlic, rosemary, lemon zest, half of the olive oil, salt, and pepper. Rub the mixture all over the tenderloin.
In a large skillet (preferably cast iron) with an oven proof handle, heat the remaining olive oil over medium heat. Add the tenderloin and fry until the meat is seared on all sides, about 8 minutes.
Transfer skillet of pork to the pre-heated oven and cook for 12 minutes, (start checking at 7-8 minutes) or until the internal temperature reaches 145-degrees.
Remove pork from pan, transfer to a cutting board and lightly tent with foil to keep it warm.
Set the skillet over medium heat and stir in the stock and vinegar, scraping up any cooked bits from bottom of pan. Bring mixture to a boil and cook until reduced by half. Turn the heat off and whisk in the butter until it melts. Stir in the capers and spoon over pork which has been cut into 1-inch slices.
I walked in our bedroom, and there he was. Miles. This picture should be captioned, “even though it’s May and the sun is shining, I’m still cold”. This is our boy who already has a reputation for sleeping in the craziest places. The following picture proves my point.
In deference to the title of this recipe, I’m going to make this portion of the preface simple too. Make this old-fashioned salad next time you need a salad that can be whipped together in no time at all. And I know, the following paragraphs have absolutely nothing to do with salad, but we are living through strange times, and as your friend, I want to share with you other aspects of my life.
So, first, sorry I haven’t written any book reviews for a while, but I have been re-reading Jacqueline Winspear’s series featuring Maisie Dobbs and enjoying them as much a second time, as I did the first time. I am on book 15 in the series entitled “To Die but Once”.
It’s war time in Europe, 1940, and many underage young men in England, as in other European countries being threatened by Nazi Germany, are being accepted into service to defend their country as they might. And in talking about the war and what it means to all involved, Maisie remembers what someone in her past had quoted regarding not only war but greed. “Where there’s muck, there’s brass. A simple line, an aphorism that seemed to suggest the selling of manure. But it had a meaning that went so much deeper, alluding to the fact that where you find filth – where you find dirt, where you find the detritus of life – you’ll also discover someone making a profit. Much money can be made from the dirtiest jobs. Muck and money go together.”
And it made me reflect on what is currently happening to our country at the hands of just a few rich individuals in Washington DC. That the elimination of certain government-run services such as the postal service and social security, and privatizing them, would surely put yet more money in the hands of the rich. And in doing so, it would undoubtedly lower the standard of living for so many of our citizens.
There is also another term or saying defining greed and the love of money that is being all to aptly demonstrated by our current administration. “Filthy lucre.”
“Filthy lucre” refers to money, especially when it’s perceived as being obtained dishonestly or through immoral means. It carries a negative connotation, implying that the money is not earned fairly or is associated with questionable activities. The phrase “filthy lucre” in scripture, primarily found in the King James Version of the Bible, refers to dishonest or corrupt gain, often associated with false teaching or greed. It appears in 1 Timothy 3:3 and 3:8, and Titus 1:11. The term is used to warn against the dangers of prioritizing financial gain over genuine service and integrity.
So, if you are one of those people who really doesn’t understand that what our current administration is only concerned about is acquiring more wealth and power, please step outside your comfort zone, and read what truly learned men and women are saying about the reality of our perilous situation.
But for those of you who get it and are often anxious about what’s happening, please know you are not alone. We are all in this together. We must stay strong. We must stay positive. And we must not give up.
Peace and love to all.
½ c. plain Greek yogurt
2 sm. garlic cloves, minced
½ tsp. dried dill weed
½ tsp. kosher salt, or more to taste
freshly ground black pepper
1 tsp. white vinegar (the old-fashioned kind)
¼ c. finely chopped onion
1 English cucumber
Combine yogurt, garlic, dill, salt, pepper, and vinegar in a small salad bowl. Add the onion and cucumber which has been partially peeled, cut in half lengthwise, seeded, then sliced into ¼-inch thick half-moons. Taste and adjust seasoning and serve cold.
OK, I do not have much experience with GF baking. Wheat flour, I got you covered. But the use of GF “flour”, I am but a novice. So, bear with me and I will tell you how this recipe came about.
While offering to bring cookies for a “celebration of life” for our dear friend Ken Wilson, I decided 6 kinds of cookies would be perfect. And one of the choices should be gluten free. So, my first GF attempt was a no-bake chocolate cookie. Good grief! I followed the recipe, which BTW had received mixed reviews on the site (should have been my first clue), was a disaster! Threw the whole mess away. OK, start again. So, how about a GF brownie. Everyone loves brownies. And the recipe I found that looked like it would be perfect, was on the meaningfuleats.com site. And except for the fact that I doubled the recipe (originally for a 9×9-inch pan) and I baked it in a 9×13-inch pan, everything went well until it came time to take the pan out of the oven. The original recipe for the 9×9-inch pan calls for baking the brownies for 30-35 minutes until set and a toothpick inserted into the center of the brownies comes out clean. Well, after 49 minutes in my 9×13-inch pan (which the author stated would be fine for a double batch), there was still a bit of batter that clung to the toothpick. So, I decided to pull the pan out because I feared the bottom and sides would be burned to a crisp if kept in the oven any longer. At that point, I decided that when the whole bloody pan cooled, I would throw yet another GF attempt away. Then off to bed I went at about 10:30 pm and finally drifted off probably around midnight.
Jump forward to 4:45 am the next morning. (The morning of the event.) I couldn’t get back to sleep after a night call worrying about where I could buy GF cookies the next morning or should I try again, right there and then, with another recipe. So, I gave up trying to get back to sleep, threw on my bathrobe, and proceeded out to the kitchen. But before going any further, just for grins and giggles, why not cut into the brownies. And to my delight, the brownies cut into beautiful small squares, moist, but fully set. And of course, I had to taste one. OMG – delicious, and the texture was perfect. Disaster avoided. And if lucky, when I crawled back in bed, I just might be able to get in a few more winks. Which I did!
So, if you too want to serve a GF cookie that everyone will love, this is the recipe for you. I was astounded. Every person who tasted one of the brownies came back for more. And even more amazing, no one seemed to be in the least bit concerned that these brownies were GF. They just assumed they would be good. Which made me realize that those of you who are offering GF recipes, like Erin, are really doing a huge favor for everyone. Because even if many of us don’t have a problem with gluten, we still occasionally want to accommodate those who do. So, thank you so much for all your time and effort.
Well, that’s it for today. Mr. C. is spending his afternoons this week, conducting the rhythm sectionals at the 2025 Northwest Big Band Camp across the bay from us at Warm Beach Camp and Conference Center. He has truly enjoyed helping with this camp in previous years. So, he is thrilled to be doing it again this year.
I, on the other hand, am finalizing the menu for our next JazzVox home concert. Always a challenge, but one I love.
May you too have things in your life that bring you joy.
Peace and love to all.
20 T. (2½ sticks) unsalted butter, cut into small pieces
3 c. semi-sweet chocolate chips, divided (I use mini chocolate chips)
1 c. brown sugar
1½ c. granulated sugar
4 lg. eggs + 2 egg yolks
2 tsp. vanilla extract
1 tsp. espresso powder
1¼ tsp. fine sea salt
2/3 c. unsweetened cocoa powder (I use Ghirardelli)
1½ c. gluten-free flour (I used Cup4Cup)
First and foremost, get all your ingredients together (mise en place)* before you start preparing the brownie batter. Which means, place the butter and 1 cup of chocolate chips in a large microwaveable bowl. Measure the brown and granulated sugar and place them together in another bowl. Crack the eggs (4 whole eggs, 2 egg yolks) in another bowl. Have your vanilla and measuring spoon ready. Whisk the espresso powder, salt, cocoa powder, and GF flour together in yet another bowl. Measure out the remaining 2 cups of chocolate chips and set aside. And last but not least, grease a 9×13-inch or 10×16-inch baking dish (metal if possible) with cooking spray and set aside. Now you are ready to start the fun part of preparing the brownie batter.
Microwave the butter and 1 cup of chocolate chips slowly until the chocolate and butter are completely melted and well-combined.
Add the granulated sugar and brown sugar mixture to the butter mixture and whisk vigorously for 1 minute.
Stir in the eggs one at a time, whisking 20 seconds after each addition. Then quickly whisk in the vanilla extract.
Using a rubber spatula, mix in the flour mixture until fully combined. Stir in the chocolate chips.
Pour the batter into the prepared baking pan. Smooth or shake the batter into an even layer.
Bake in a pre-heated 350-degree oven for 30-45 minutes or until set and a toothpick inserted into the center of the brownies comes out clean or with just a bit of moist brownie dough stuck to the toothpick. And, of course, the brownies will be done quicker in a 9×13-inch pan than in a 10×16-inch pan. Thus, the wide spread of cooking time. So, check periodically after 25-30 minutes.
Remove from oven and cool completely before cutting.
*Mise en place, a French term meaning “putting in place” or “getting things ready”. It involves prepping and organizing all your ingredients (measuring, chopping, etc.) before the cooking or baking process begins.