Category Archives: APPETIZER RECIPES

SAVORY CREAM CHEESE AND MINCED OLIVES BALL

There are just certain foods that bring back pleasant memories. And this is one of those special foods.

Somewhere along the line years and years ago, I was introduced to this mixture of softened cream cheese and olives used as a filling for sandwiches. Where and when that was is (I’m sure) firmly nestled in the archive’s region of my brain and therefore only able to be accessed at certain times. And my brain’s archive visitor hours appear to be getting shorter and further apart as I continue to pile on the years. So, unfortunately, today does not seem to be one of the times when my brain archive access is available! (Much to my displeasure!)

Anyway, suffice it to say I have been making this spread for decades. And why I am only getting around to sharing this treasure with you now is anyone’s guess. Although, hosting a 1950’s themed birthday party for our dear friend Mark was the impetus for digging up recipes from that era. And cream cheese balls seemed to have been all the rage at the time. And frankly, they still should be all the rage, because they are fabulous. At least this one is!

Now, I hope you understand that I didn’t actually attend cocktail parties in the 50’s. Even I’m not THAT old! (Mark didn’t attend in the 50’s either. He just happened to be born in the 50’s.) But I did start making several of the appetizers that were popular in the 50’s when I was hosting cocktail parties in the 60’s and 70’s. So, it was fairly easy to come up with a menu for the party. So, my next post will be entitled – 1950’s COCKTAIL PARTY RECIPES. (In case you too get a wild hair to throw a 1950’s theme party. This could save you a bunch of time.) But, back to this recipe.

Not only is this spread delicious; it is also very easy to prepare. Simple, everyday ingredients, and a creamy texture that is irresistible.

Well, that’s it for today. It’s sunny and bright outside and Mt. Baker and several other of the peaks along the Cascade Crest are showing off their new snow. It’s just a glorious day to be alive.

Peace and love to all.

Mt. Baker
Various peaks across from our home

And sorry about no picture of the spread. I have a picture on my camera, but for some reason I can’t transfer it to my computer. User error, I’m sure. But if and when I can make the transfer work, I will edit this post to include the work of art. (Don’t hold your breath!)

1 (8-oz.) pkg. cream cheese, room temp.

1 T. sour cream

½ tsp. Worcestershire sauce

1/8 tsp. granulated garlic

scant 1/8 tsp. granulated onion

freshly ground black pepper (not too much)

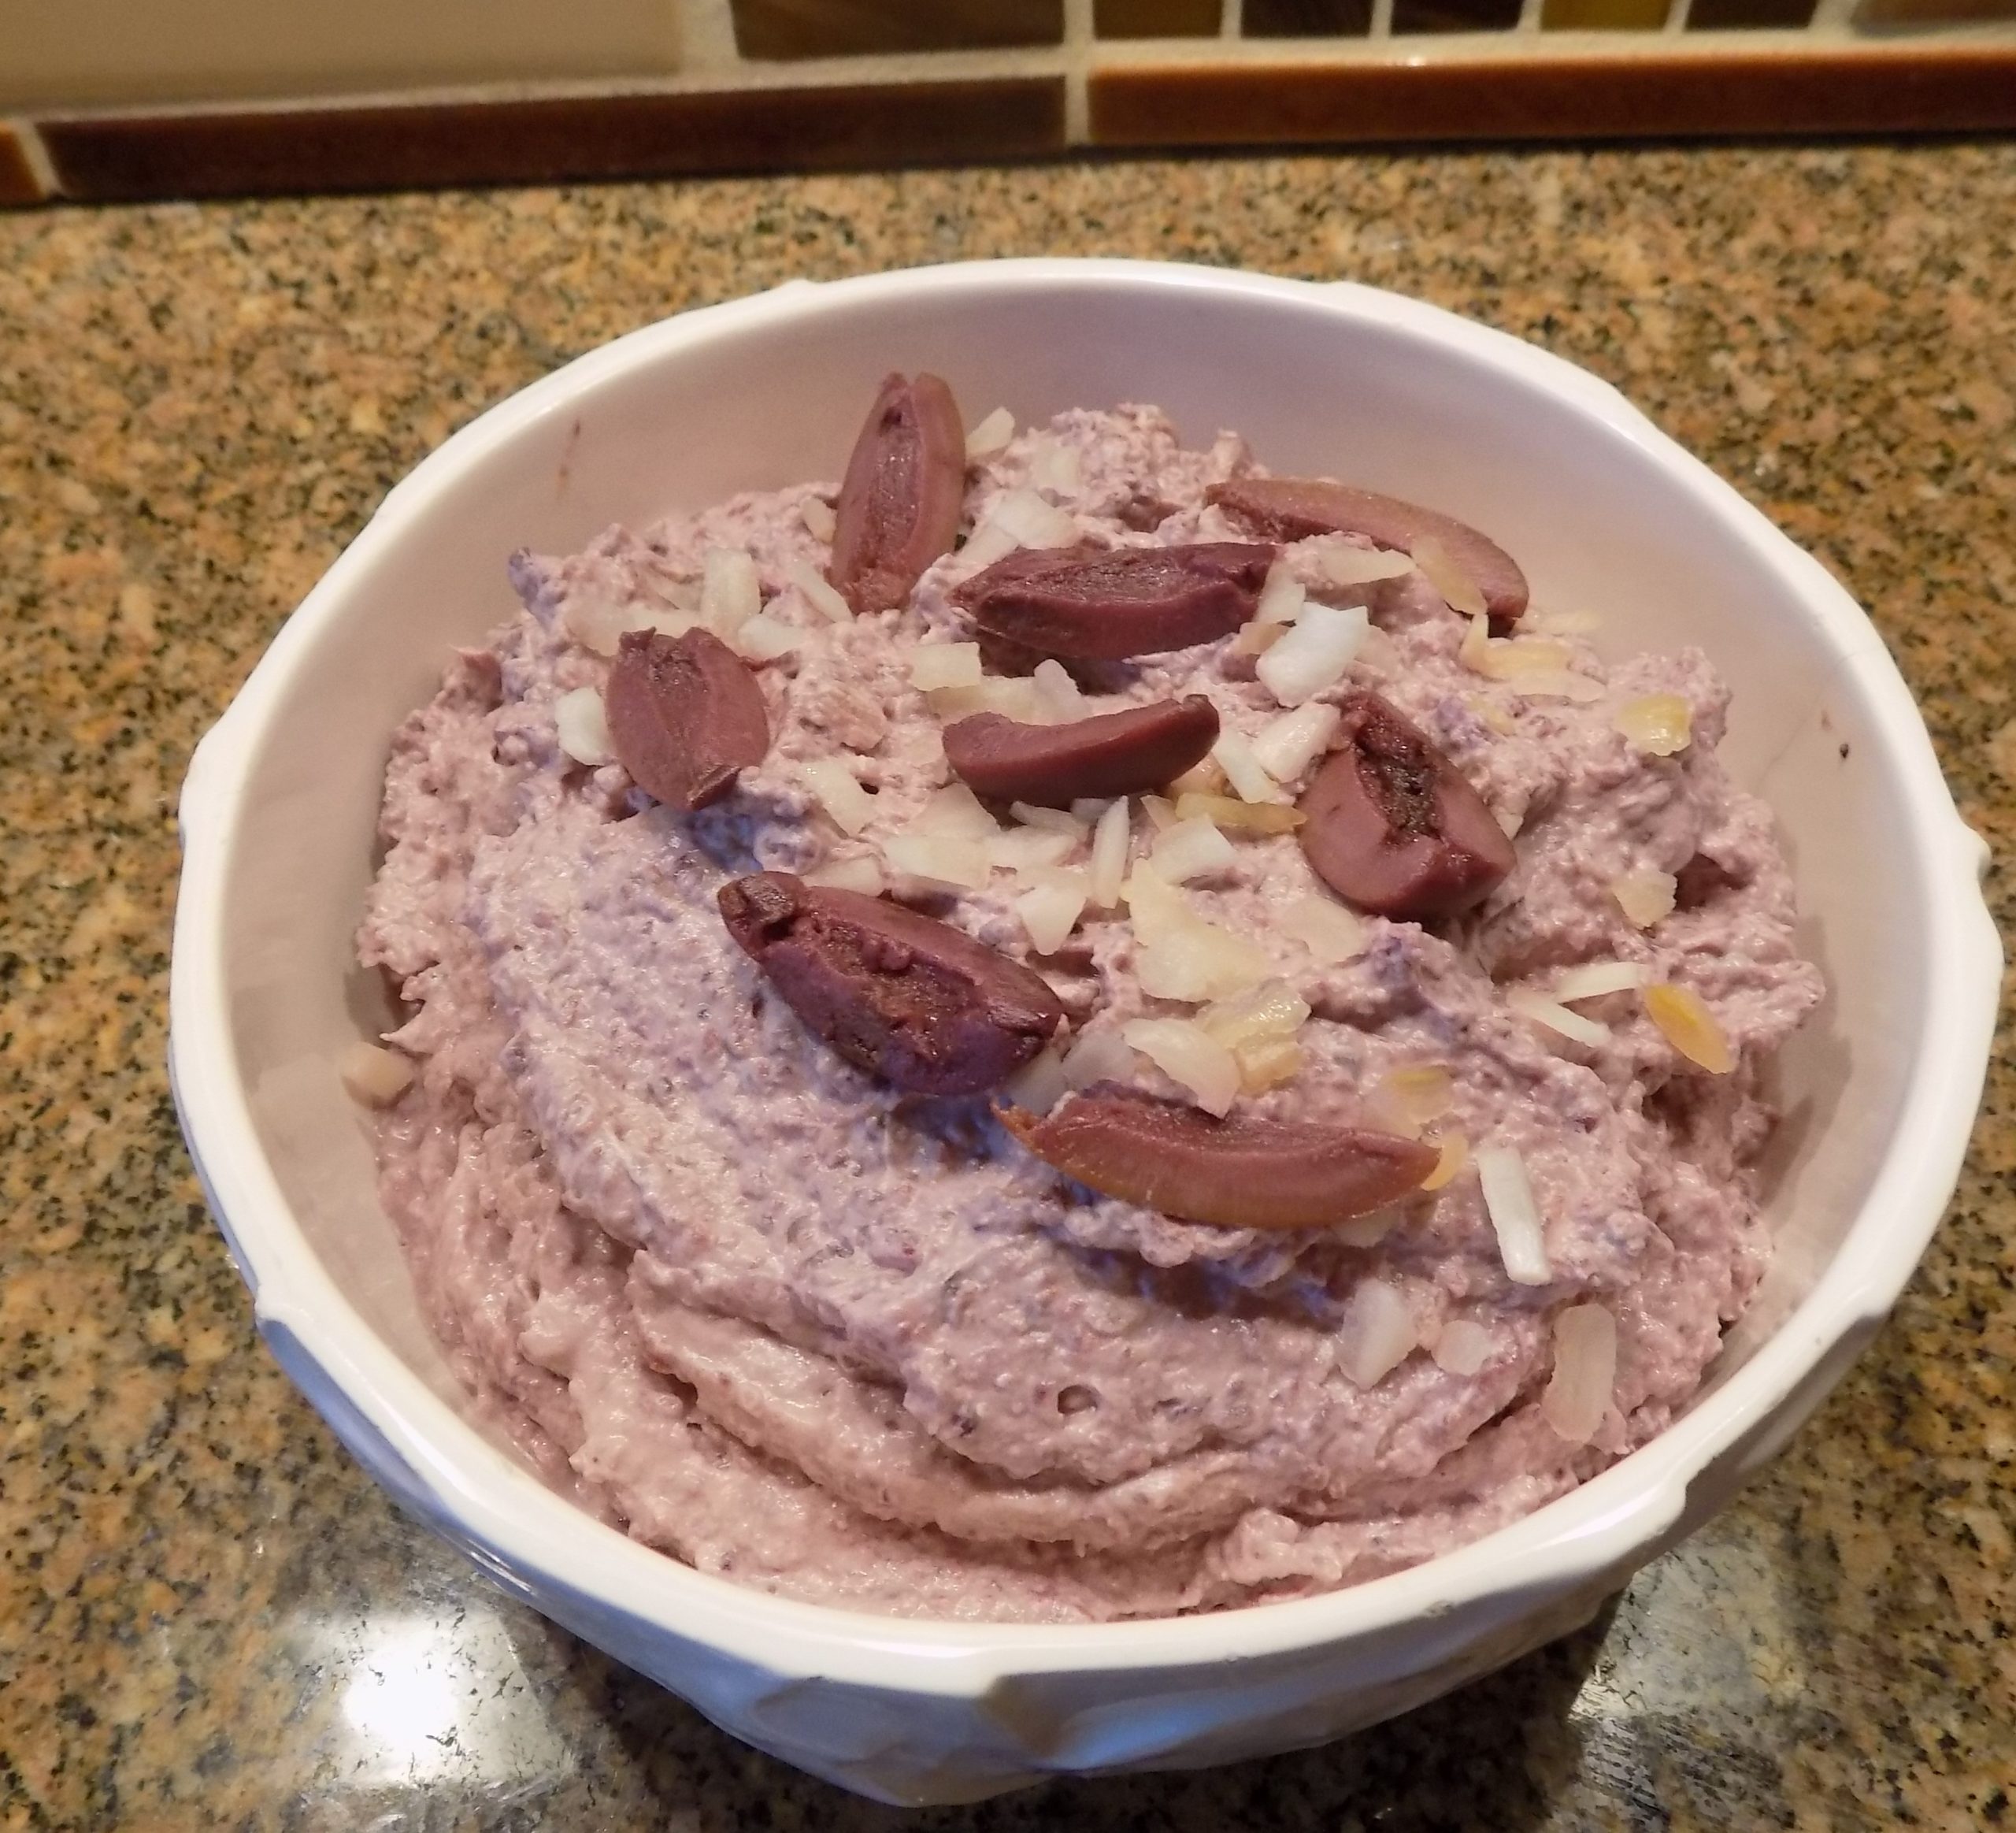
1 (4.25 oz.) can chopped black olives

¼ c. minced pimento stuffed green olives, plus a few slices for garnish

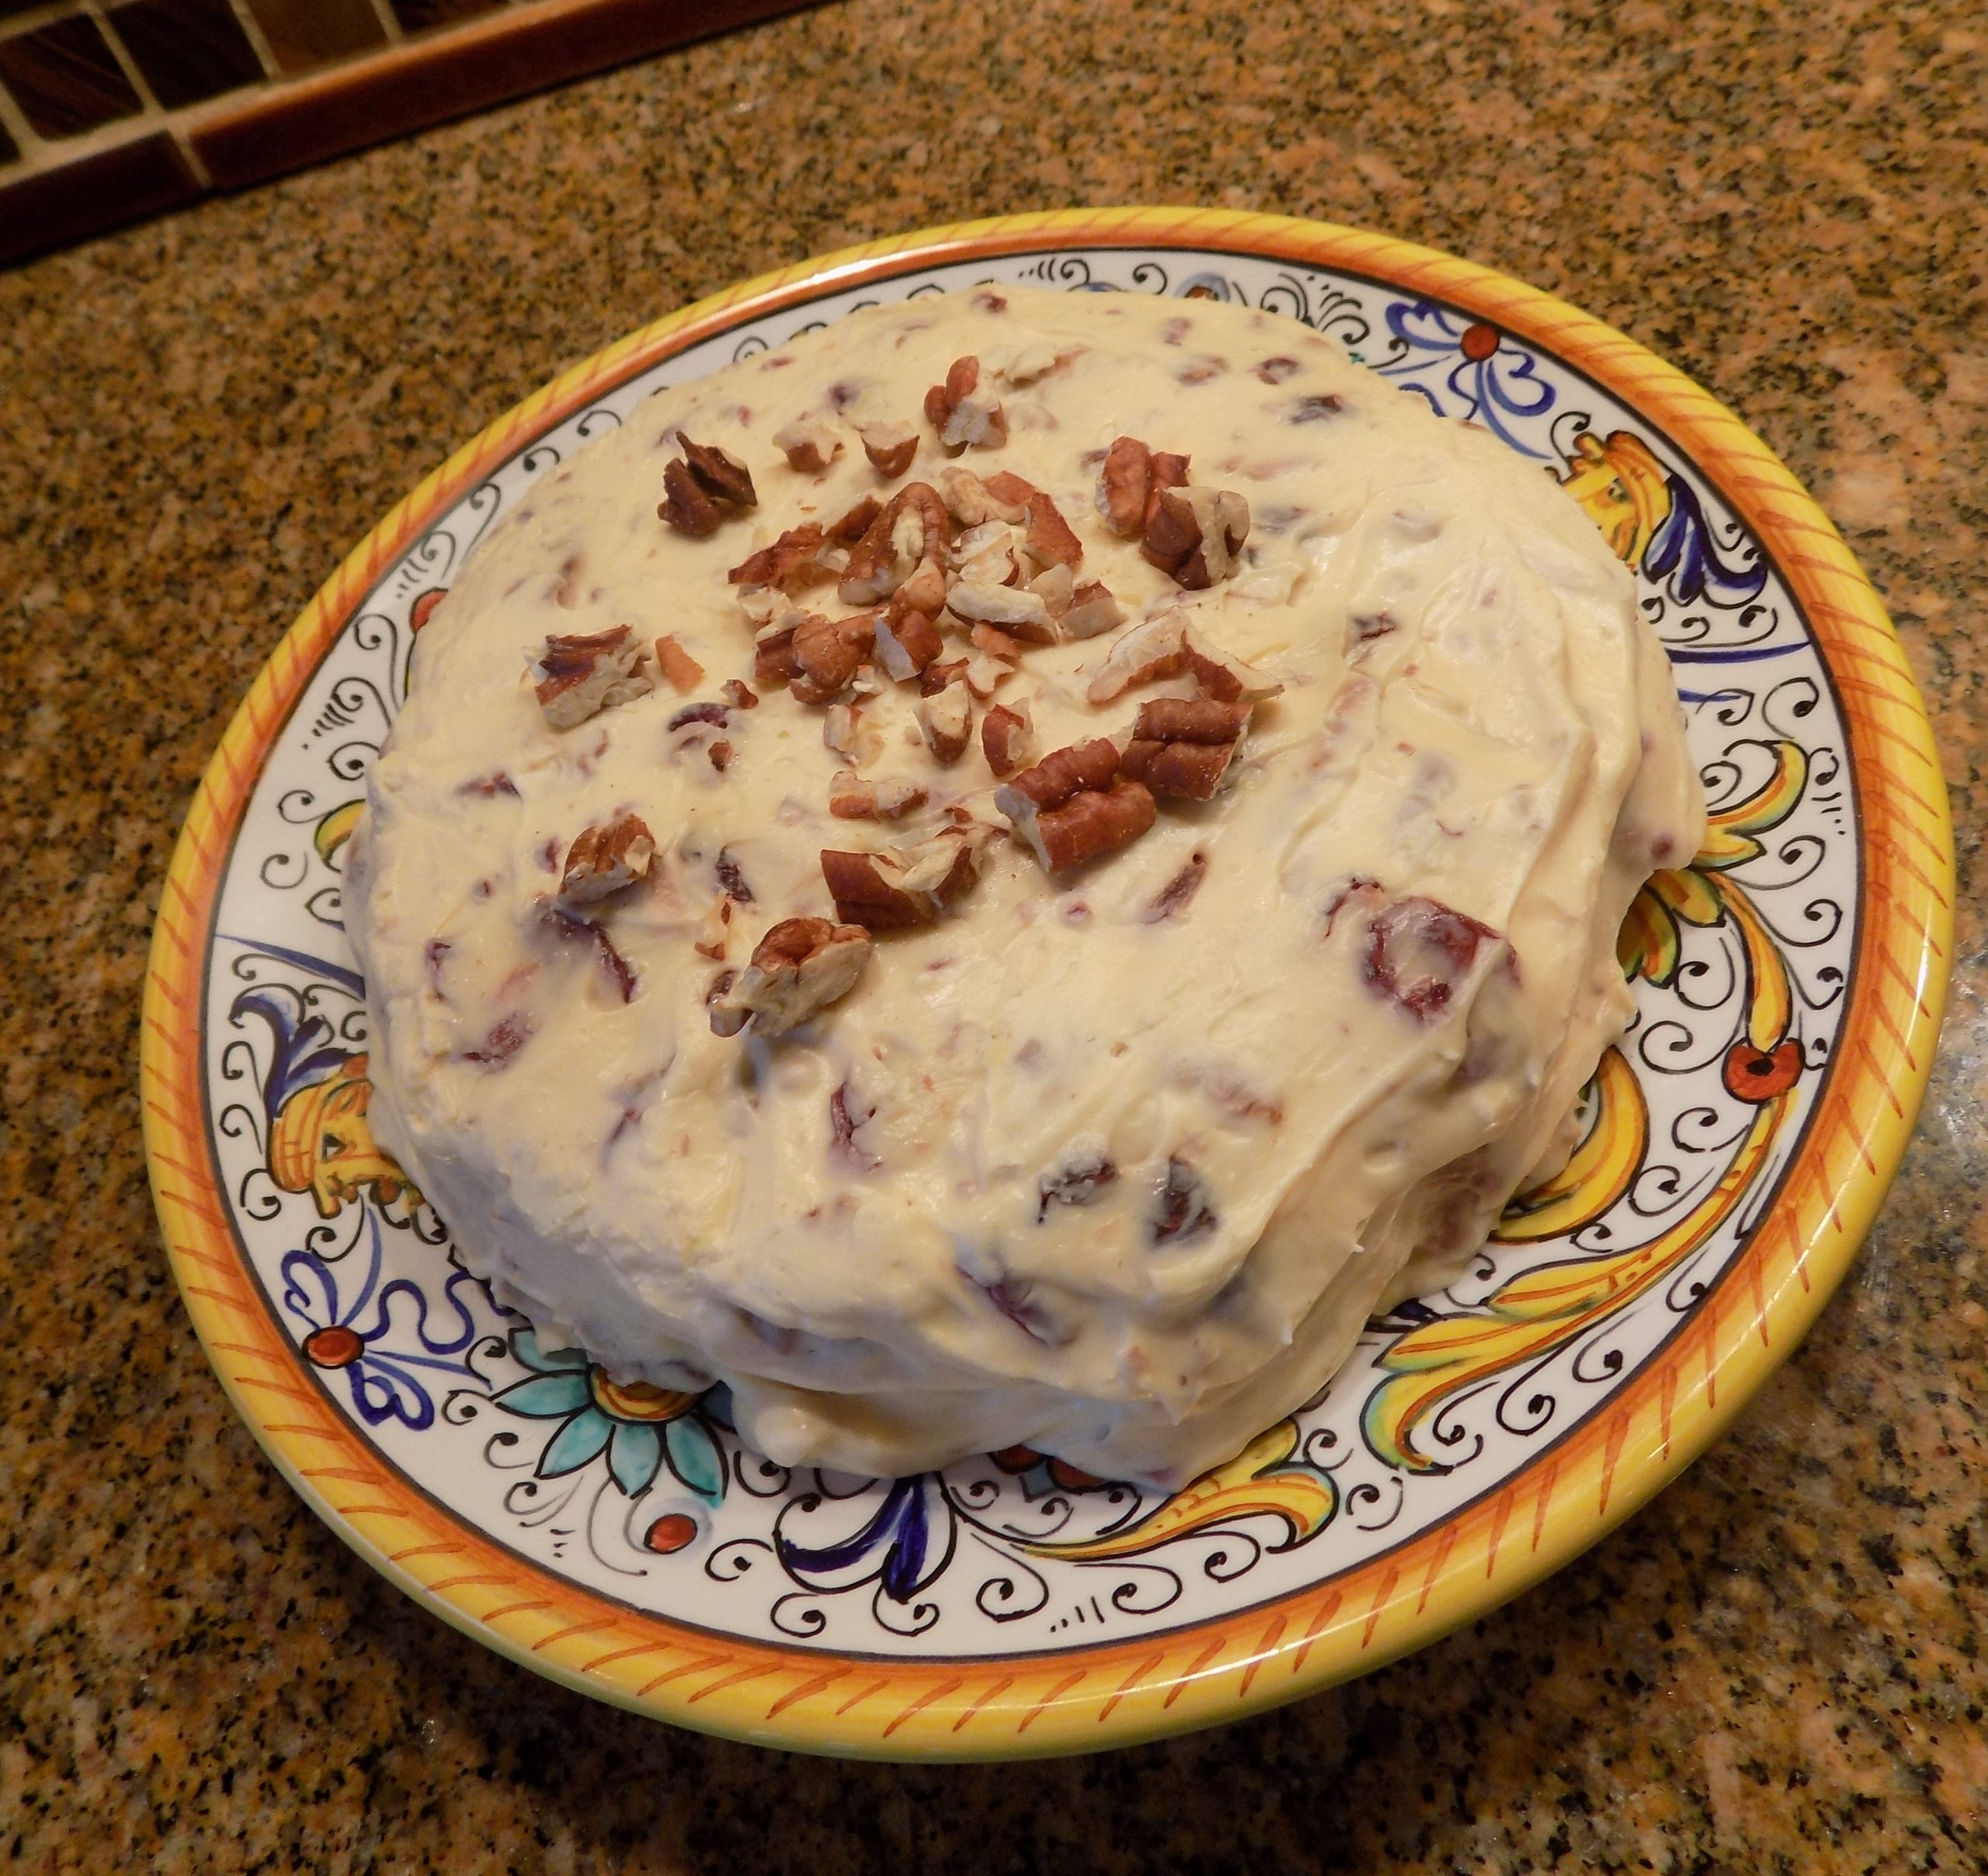
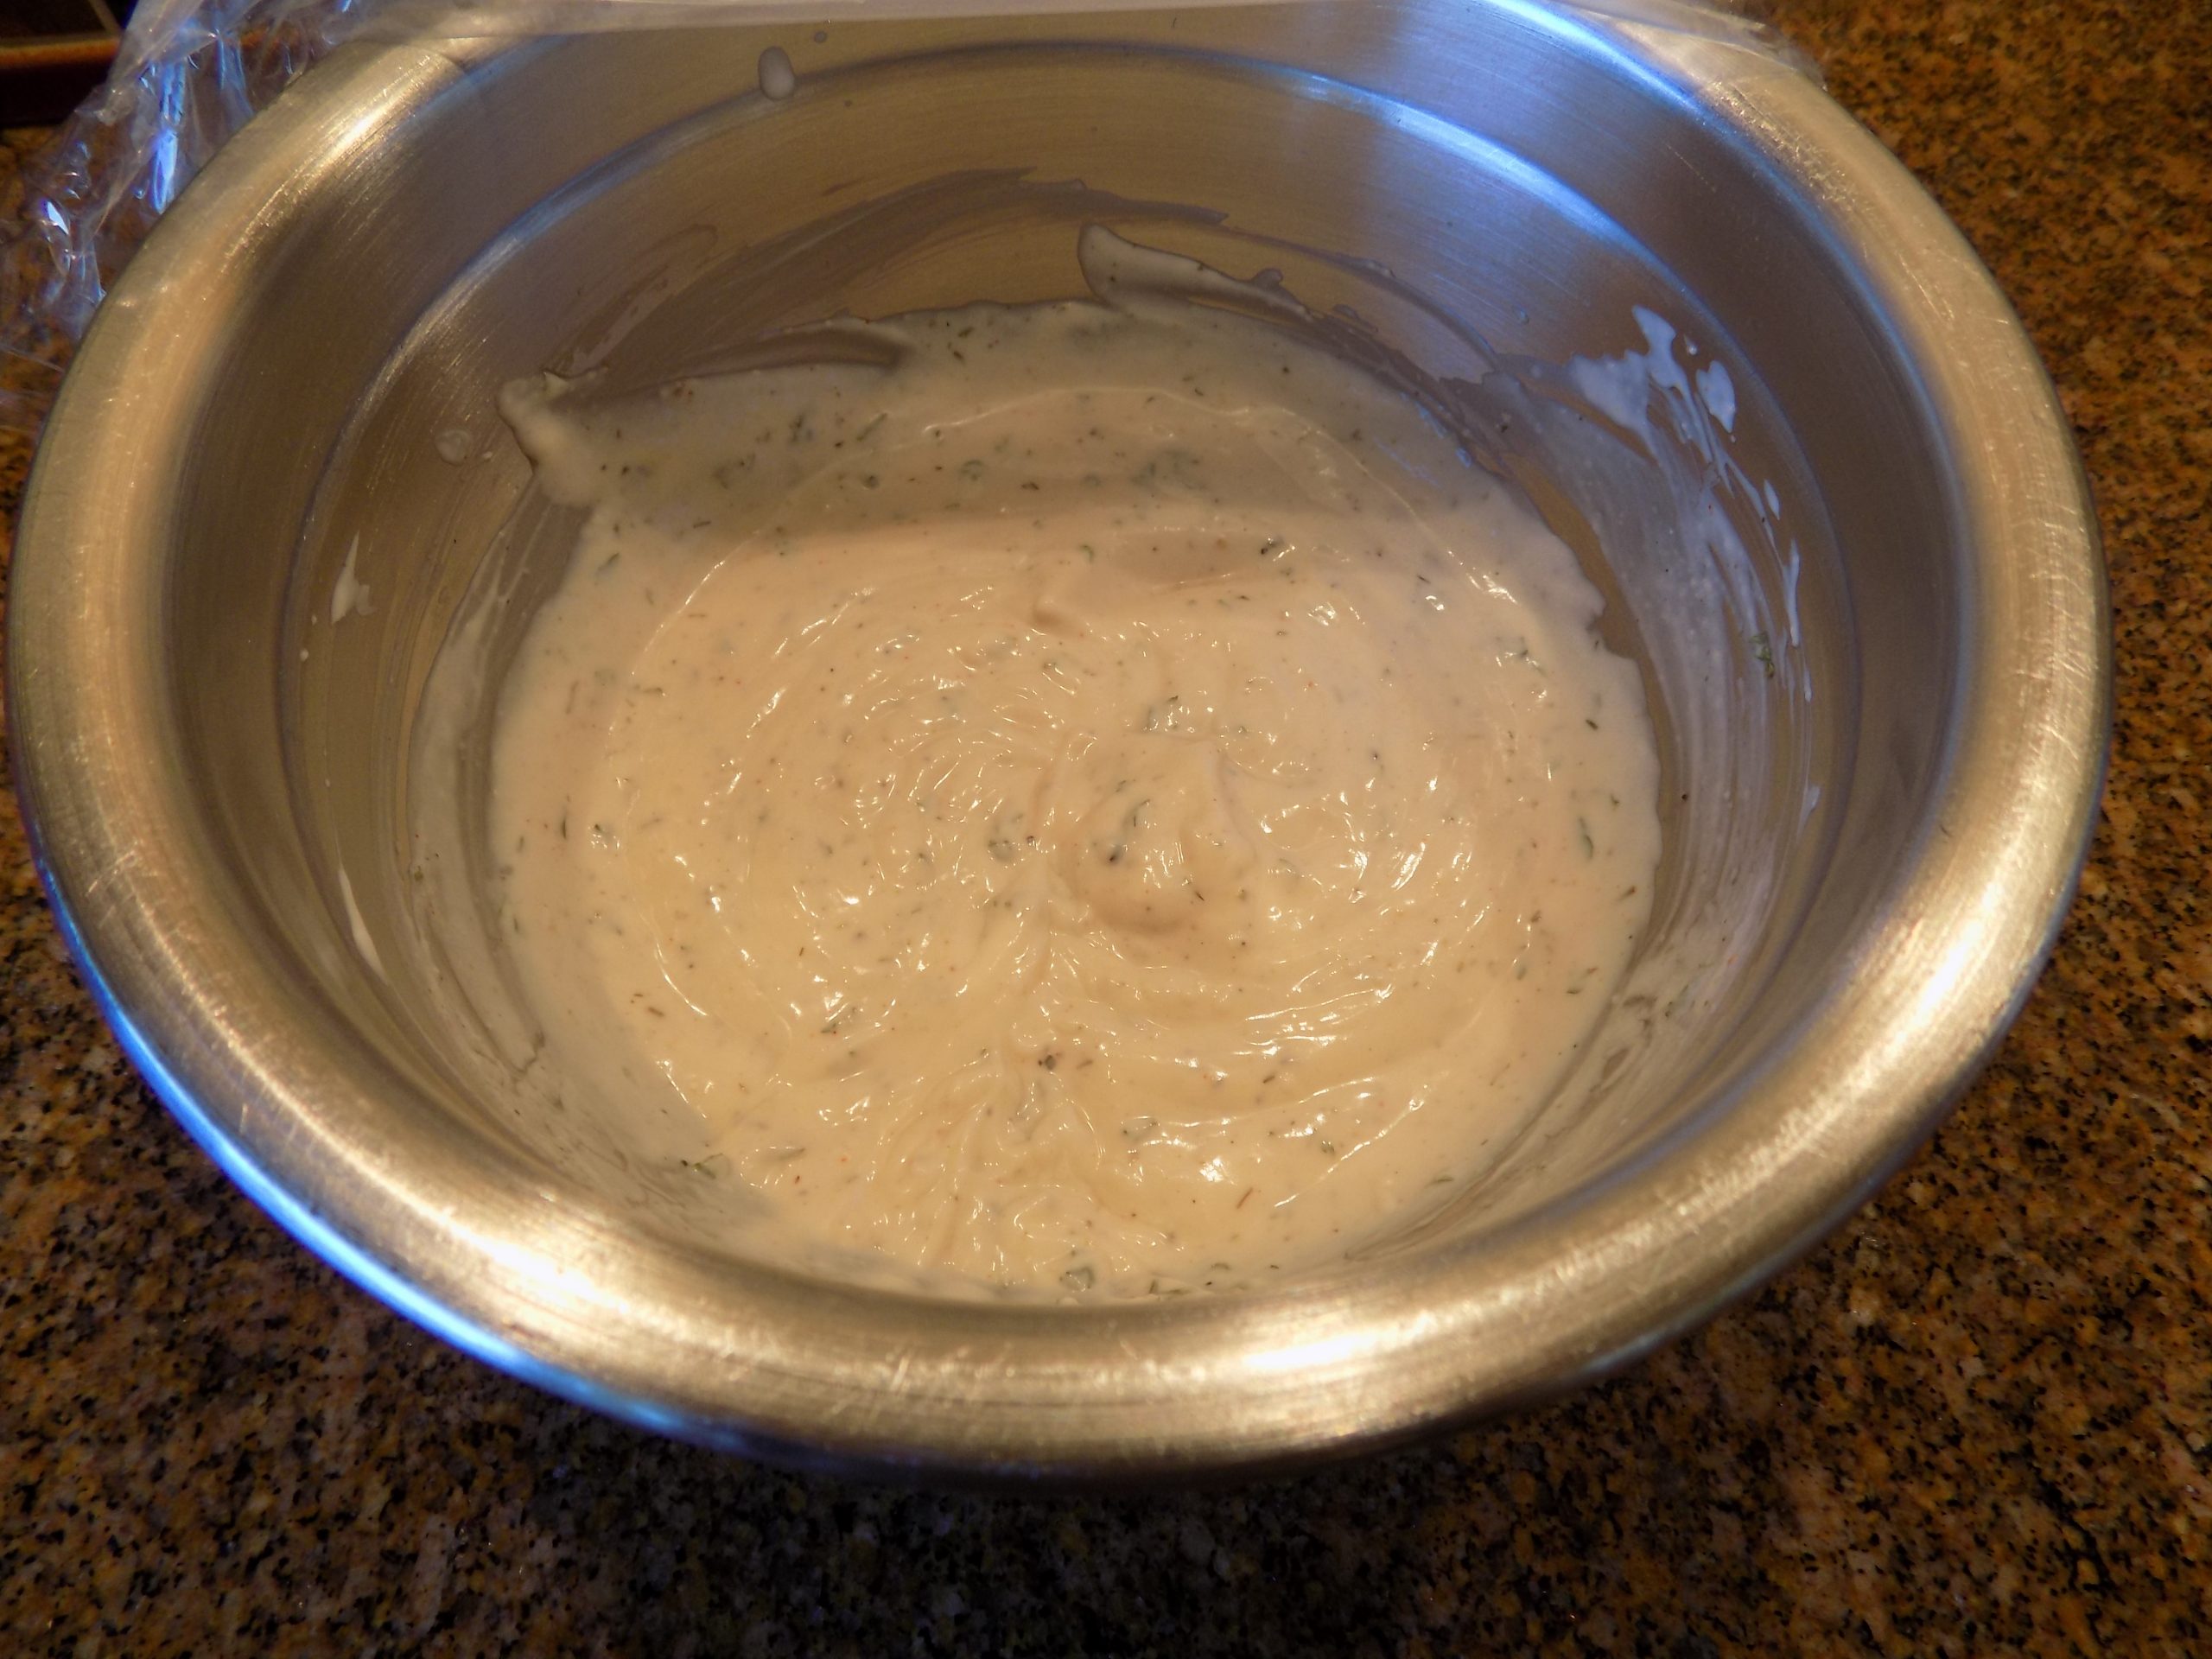
Using a fork, combine the cream cheese and sour cream in a mixing bowl until no lumps remain. Then stir in the W sauce, granulated garlic, granulated onion, black pepper, chopped black olives, and minced green olives. Form mixture into a mound on a pretty plate. Decorate with a few slices of stuffed green olives. Cover loosely, and refrigerate for at least 3 hours, or until firm, but better overnight.

Bring to room temperature before serving with crackers or stuffing into celery. Or spread liberally on toasted bagels. Now that’s a tasty treat!  


SWEET AND SPICY GLAZED PECANS

This picture was taken after the pecans had cooled but before I broke them apart. Frankly, I could have eaten every one of these babies all by myself. Right then and there!

This is another recipe from one of my favorite recipe sites – onceuponachef.com. Over the years I have learned to trust Jenn’s cooking skills. I often make a slight change to her recipes, but that’s usually because I don’t have all the listed ingredients, or I want to make a substitution, or I’m lazier than Ms. Segal. True confession time.

But this recipe I followed just about to the T. I did change ½ teaspoon cayenne pepper to a scant ½ teaspoon cayenne pepper because, well, I am a bit of a coward when it comes to hot spices. But if you are a hot spice fan, then by all means, go for the full ½ teaspoon cayenne or even a bit more.

I must admit, that if this had not been a Jenn Segal recipe, I would never have given it a second glance. But like I said above, I have learned to trust this chef. And I am so glad I gave this recipe a try. Because these glazed sweet and spicy pecans are the best I have ever tasted. And the easiest to prepare. And I know they are going to be perfect on the green salad with roasted beets, goat cheese, and dressed with my Creamy Balsamic Salad Dressing (on this site already) that I plan to serve while we are on vacation.

And just because I am feeling terribly beneficent today, I’m going to include my new and ultra-simple way to roast beets. And I must say, these are the best roasted beets I have ever produced. And they simply could not be easier to prepared because they don’t even need to be peeled. (How cool is that!) (See recipe below.)

Anyway, I need to get on with my day. So, I am going to stop at this point and direct myself to the nearest grocery store. In a few days we will be leaving our home and our kitties in the capable hands of our dear friend Peggy and taking off with our trailer in tow for parts unknown. OK, we know where we’re going, but you will have to wait for my travel log to get all the fun and exciting details of our latest adventure.

May you too have exciting adventures in your near future.

Peace and love to all.  

½ c. powdered sugar

¾ tsp. kosher salt

scant ½ tsp. cayenne pepper

4 tsp. water

2 c. pecans halves

In a medium sized bowl, whisk the powdered sugar, kosher salt, cayenne pepper, and water together.  

Add the pecans and stir until the nuts are evenly coated.

Transfer the pecans to a parchment paper lined baking sheet and arrange in a single layer. Make sure the nuts are evenly spread out. (If they are clumped together, they won’t cook evenly). Scrape out any remaining glaze from the bowl and drizzle over the nuts.

Bake in a pre-heated 350-degree oven for 14-15 minutes, or until the pecans are caramelized and the caramel on the baking sheet is a rich brown color. (The nuts around the edges will darken first so watch closely so they don’t burn.)

Remove from oven and immediately slide the parchment paper off of the hot baking sheet. (This stops the nuts from continuing to bake.) Allow the pecans to cool completely. Once cool, remove the pecans from the parchment paper, breaking apart any clusters if necessary, and store in an airtight container for up to two weeks.

Note: If the nuts are sticky after cooling, that means the glaze coating is not fully cooked. Pop them back in the oven for a few minutes and let cool again.

OVEN ROASTED BEETS

beets (your choice of color)

extra-virgin olive oil

fine sea salt

Preheat your oven to 375-degrees and line a rimmed baking sheet with parchment paper. Scrub the beets really well under running water. (No need to peel the beets at any point).

Slice off the base and pointy end of each beet. Cut the beets in half. Then slice the halves into half rounds ⅓ to ½-inch thick. Place in a bowl and pour on a bit of olive oil. Using one of your hands, (best tools in your kitchen BTW), make sure every bit of every piece of beet is coated with the oil.

Place the beet pieces on the prepared baking sheet in a single layer. Sprinkle the top side of each piece with a bit of salt.  

Roast for 30 minutes on the first side. Then flip and bake the second side for about 15 minutes or until tender. When done, you should be able to easily cut into each piece with a paring knife.

Remove from oven and taste. Sprinkle on a bit more salt if needed. Either eat the roasted beets immediately, or store in your fridge for a couple of days or freeze for later use. (Cooked beets freeze beautifully BTW.)

Great as a side veggie or great addition to salads.     


DILLY BUTTERMILK DRESSING OR DIP  

I always make my own salad dressings and dips. Even when we are in our trailer. I used to buy dressing for our trailer trips, but they just weren’t as good as homemade, plus they contained all kinds of weird ingredients. And yes, OK, bottled dressings do last for months when refrigerated, and it is easier just to grab a bottle out of the fridge than to juice a lemon or mince a clove of garlic. But considering that you can build a dressing to go specifically with whatever salad you feel like serving and save money at the same time, I feel no consideration should be given at all to which way you should proceed. Homemade dressings taste better, are cheaper, contain less chemicals, and can be built to order. Enough said!

So, the other evening when I planned to serve us a big old chef salad for dinner, I decided to try this dressing recipe from the onceuponachef.com site. I love this site BTW because I think that Jenn is a wonderful cook, and I know I can count on her recipes to be fabulous. I often make a change or two here and there, but then, that’s just what I do. (I simply can’t help myself!)

Anyway, this dressing turned out to be perfect on the chef salad. And I loved the dill. At first, I was a bit hesitant to use as much dried dill weed as directed. But it was the perfect amount. I did use only 1 garlic clove instead of 2, but that’s just because I prefer a subtle garlic flavor. Which brings me to a point of interest when it comes to fresh garlic.

Garlic is a potent ingredient. So, a little bit goes a long way. Garlic cloves are made up of small cells, each of which is filled with a pungent, sulfur-based liquid. The finer you chop a garlic clove, the greater amount of juice you release. And the more juice, the hotter the flavor. So, roughly chopping a garlic clove produces a much milder garlic flavor than grating the same size garlic clove with a microplane. I do both. For most recipes I mince garlic. If I am in a hurry or want a stronger garlic presence, I use my microplane. But in any case, I do not use that stuff that comes in a jar. (For more information on garlic than you ever wanted to know, go to my recipe for Tahini Lemon Salad Dressing.)

Well, there’s not much more to say about this dressing except that it is very easy to prepare and can also be used as a wonderful dip for crudité (pieces of raw vegetables such as celery or carrot sticks served as an hors d’oeuvre). (Don’t you just love cultured words such as crudité and hors d’oeuvre for something as unsophisticated as cut up celery and carrots before dinner?)

So, if you will please excuse this bibliophile, I am off to peruse the latest tome by Barack Obama.

Peace and love to all.   

Oh, I almost forgot to tell you about my latest “ah ha” moment when it comes to green salads. We love romaine and other lettuce greens, but they don’t have as much crunch as we would like. So, just a couple slices of green or red cabbage cut into very thin strips does the trick. And for my husband, the none-lover of cruciferous vegetables, he doesn’t even notice the cabbage. Yea me!

½ c. sour cream

½ c. buttermilk

¼ c. mayonnaise

2 tsp. fresh lemon juice

1 garlic clove, finely minced

1 tsp. kosher salt

freshly ground black pepper

1½ tsp. dried dill weed

¼ c. finely chopped fresh chives

couple dashes hot sauce, optional (I use Frank’s RedHot)

Whisk all together and store in a covered container in your fridge.


CROSTINI

OK, this is going to be the easiest recipe I ever shared with you. But this may be one of the best recipes I ever shared with you. And why is that you might ask? Well, for several reasons. Not only is crostini easy to prepare and delicious, it’s crunchy. And who doesn’t love crunchy! Crostini (meaning “little crusts” in Italian; singular crostino (but who could ever eat just one) are simply that much needed crunch so often missing in a meal of soup or stew and bread. And we all know how wonderful soup and stew are when served with a nice soft roll or baguette slices. But with crostini, you have the lovely bread, but also the delightful crunch.

So, what types of bread make the best crostini? Glad you asked. Rustic peasant bread, ciabatta, and different types of baguettes all work great. If you are into baking your own bread, I would recommend Chewy Sourdough Baguettes, Thin Sourdough Baguettes, Overnight Sourdough Baguettes, Soft French Baguettes, or Classic Italian Baguettes. All found on this site.

And then guess what else is great about crostini? You can top the little darlings with any old thing you want. For example – Kalamata Olive Spread, Creamy Feta Cheese Dip, Mushroom Pâté, Herbed Cream Cheese with Black Pepper Spread, and of course bruschetta. (See recipe below.) Or provide a variety of different toppings for family and friends to smear on crostini all by themselves. (Sounds like a party to me.)

Speaking of parties, I’ve had the pleasure of listening to the Whistle Lake Jazz Quartet rehearse in our living room. Furniture scattered to the four winds. Beer glasses everywhere, and happy, wonderful guys truly enjoying themselves making beautiful music. I feel like I’m in heaven. Just sitting in our den, writing up this recipe, it feels like magic happening all around me. There is simply nothing better than live music. And when it’s in your own living room – well, nothing compares. For pictures of the quartet practicing, see the bottom of the post.

So, as always, bring a little magic into your life. Be it listening to beautiful music, looking at fabulous art, reading good books, playing with your children, making someone else’s life a little bit better, or whatever feeds your soul. If it makes you smile, then it’s worth the effort.

Peace and love to all.

baguette

extra-virgin olive oil

flaky or fine sea salt, to taste

Pre-heat your oven to 450-degrees. Line a rimmed baking sheet with parchment paper for easy clean-up. 

Slice the baguette on the diagonal into pieces no wider than ½-inch. Lightly brush both sides of each slice with olive oil.

Place the slices in a single layer on your prepared baking sheet and bake them on the middle rack for about 9 minutes, until they are crisp and nicely golden on top. Remove from oven and sprinkle lightly with salt. Serve immediately.

Bruschetta

crostini – just out of the oven

1 garlic clove

extra virgin olive oil

chopped fresh basil

chopped tomato

freshly ground black pepper

Scrape the warm crostini with a garlic clove. Drizzle on a bit of olive oil, then top with diced tomato, chopped fresh basil, kosher salt, and freshly ground black pepper. Serve to only those who deserve the best.

Mr. C. on piano

Mr. C. and Todd on drums
Tim on bass and Jamie on guitar
All together now, all together now……..


KALAMATA OLIVE SPREAD

OK, I’ll just say this once. I am an olive lover. And have been ever since as a 7- or 8-year-old, I ate most of a can of black olives and drank some of the juice while “helping” my mother prepare a relish tray for Thanksgiving dinner. Granted I didn’t feel real swell after drinking the olive brine, but it didn’t leave me hating olives either.

And oh, how I loved those relish trays. Cut up carrots and celery, black olives, and home-made dill pickle spears. I can still see myself gently setting my mother’s rectangular cut glass dish full of tasty treats on the table just before company arrived.

After black olives, the next kind of olive I fell in love with were those salty, briny pimento stuffed Spanish olives. (A must for use in a perfect Tanqueray martini.) And then I found kalamata olives. OMG. How did I ever exist before kalamata olives!?!?

But then during our last visit to Italy, we spent a few days at a small hotel in Rome. When I asked for a pre-dinner martini in the hotel’s very small bar, the owner/bartender had to ask me how to build a martini, to which of course I dutifully acquiesced. I gave him my recipe and asked for the requisite number of olives. Now please note, I don’t speak Italian and our dear bartender only spoke limited English. He appeared very puzzled when I asked for olives in my drink. When the drink arrived, it was huge. And as for the olives, he brought us a whole bowl of olives. But olives the likes of which we had never tasted. They were Castelvetrano olives. And oh my, they were the best tasting olives we had ever encountered. So, you might ask, Patti, which is now your favorite kind of olive. And my response would have to be – whichever is in front of me at the time.

But, enough about me and back to the real reason for this post – this delicious and easy to prepare spread recipe. I found it on the sweetcaramelsunday.com. site. And I can’t begin to praise this spread enough. And the ease of preparation makes it every busy cook’s dream come true. Just blitz all the ingredients together in your food processor, scoop into a pretty bowl, cover, and refrigerate for at least 24 hours. Serve with crackers and stand back.

So, if you too are an olive lover and like to prepare dishes ahead of time, this is the appetizer spread for you. And as for me, I couldn’t be more delighted that there is still some left in our refrigerator.  

As always, peace and love to all.

1½ c. pitted kalamata olives

1 pkg. (8 oz.) cream cheese, room temperature

1 T. olive brine

1 T. dehydrated onion

1 tsp. granulated garlic

freshly ground black pepper

Roughly chop the kalamata olives in your food processor. Add the cream cheese, olive brine, dehydrated onion, granulated garlic, and black pepper and whirl until well combined.

Scoop into a pretty bowl. Cover with plastic wrap and refrigerate at least 24 hours before serving. Remove from fridge at least an hour before serving with crackers.

DRIED CRANBERRY AND PECAN CREAM CHEESE SPREAD

Well, for those of you who have been to this site before, I have a huge confession to make. (Those of you who are new to this blog, ignore my following comments. I don’t want you to shy away from this site because I went crazy this Thanksgiving and prepared way too much food!)

Anyway, I always considered myself a good judge of how much food to prepare for the size of any given group I planned to feed. But this year, I over-achieved in every single dish I prepared. Every – single – one! (Well except for the turkey gravy. No matter how much gravy I prepare, there is never any left.)   

Anyway, I should have known better than to fix so darn much food. We can’t eat like we did when we were, say, 25. So, what made me think that 12 adults between 65 and 80, 3 adults in their 50s, and 2 guests in their late teenage years were likely to put away a full complement of appetizers, a first course soup,  a 20 pound turkey, plus an extra turkey breast and 6 drumsticks (for the dark meat), 10 pounds of mashed potatoes, enough dressing to feed a small cavalry, and a huge casserole dish containing corn pudding! Not to mention all the lovely appetizers, side dishes, salads, and desserts brought by our guests. OMG. If I was ever in doubt that my brain was aging right along with my body, this Thanksgiving proved that my brain was totally in step with the rest of this old gal’s declining body parts! So, lesson learned. Next year, half as much as I think I need, and everything should come out just about right! And speaking of something that is right, this spread I found on the food.com site is absolutely, right on! The flavor is amazing, the prep time so short as to be almost nonexistent, and best of all – the spread must be made ahead of time. And I can’t think of a better spread to serve at Thanksgiving or Christmas. Festive looking and incredibly delicious.  Just like the other spread I made – Kalamata Olive Spread – to be published in the near future. Both absolutely perfect for any appetizer spread. So, do make these 2 spreads in the near future. They are simply yum!

So now that Thanksgiving is over, it’s time to think about Christmas. And this year I’m even more excited about baking cookies and putting up our holiday decorations. After not being able to spend the holidays with our family and dearest friends last year, I can hardly wait to sit in front of our Christmas tree with a Speculaas (Dutch Ginger Cookie) in one hand and a warm cup of Glögg in the other. (And yes, both recipes are on this site.)

So, have fun in your kitchen. Consider baking extra cookies this year and gift them to a friend or neighbor who might profit from a little extra Christmas cheer. Or invite them over for a special dinner or present them with cinnamon rolls to make their Christmas morning special. It’s the little things that remind people how much we care about them.

And as always, peace and love to all.

1 pkg. (8-oz.) cream cheese, room temp.

¼ c. orange juice concentrate

½ c. chopped dried cranberries

½ c. chopped toasted pecans, plus more for garnish

Beat the cream cheese until soft. Slowly add in the concentrate until creamy and completely smooth. Add the chopped cranberries and pecans.

Mound the spread on a small plate. Cover with plastic wrap and refrigerate at least overnight. Remove from fridge an hour before you plan to serve. Just before serving, decorate with a few chopped pecans.

Serve with crackers.


BAKED SHRIMP WONTON CUPS WITH SWEET AND SOUR SAUCE

I have this tendency (a holdover from earlier years spent carefully watching my bank account balance), to see a leftover ingredient in my refrigerator and build a new dish around that ingredient. So, after making Baked Crab Rangoon with Sweet and Sour Sauce (recipe on site) a couple days before and having both leftover wonton wrappers and Sweet and Sour Sauce, I decided to try my hand at shrimp wonton cups. And boy am I glad I did!

I started with a recipe for wonton cups I found on the anerdcooks.com site. Then of course, I played with the recipe because I simply can’t help myself. But the result was terrific, so as in many cases, asking for forgiveness is so much easier than asking for permission. But Lauren, I do apologize for the changes I made to your perfectly fine recipe without your permission.

Anyway, the result was much better than expected. And even though there are still unused wonton wrappers in my refrigerator, I have reduced their number by 24. Of course, I have also used a half pound of large shrimp, 4 ounces of cream cheese, a bit of sour cream, and some grated mozzarella in the process. But I already had them in stock, so no visit to the grocery store was required to prepare this treat. (I still have left over Sweet and Sour Sauce too. But I have decided to let it go. There is a line over which even I refuse to cross!)

So, if you too love shrimp wonton cups with a truly delicious sauce, then I recommend these easy to prepare recipes. Perfect as an appetizer or accompaniment to other Chinese dishes.

As always, keep smiling. And keep your family and friends smiling too by preparing great food and serving it in beautiful serving dishes and on lovely dinnerware.

I don’t know about you, but food served on nice plates always seems more appealing. So, don’t save your good dishes for Thanksgiving or Christmas. Use them whenever you get the urge. Sure, a piece could get broken. It happens. But while the pieces are still around, they should be made to earn their keep, not tucked away for your inheritors to dispose of. Because realistically, your kids tastes and yours, when it comes to fine china that is, are probably quite different. So, enjoy them while you can. (That goes for the kids too!)

Peace and love to all.

2 tsp. unsalted butter

½ lb. lg. raw shrimp, shelled, deveined, and tails removed

freshly ground black pepper (just a bit)

24 square wonton wrappers

4 oz. (½ lg. pkg.) cream cheese, room temp.

2 T. sour cream

1 garlic clove, finely minced

½ tsp. Worcestershire sauce

2 green onions, finely chopped

½ c. grated mozzarella cheese  

Heat the butter in a small frying pan. Cut the large shrimp into very small pieces. Add the shrimp, lightly sprinkled with black pepper to the frying pan and cook just until done. Remove from heat and set aside. Preheat oven to 350-degrees.

Lightly spray mini-muffin pans with nonstick cooking spray. Carefully press wonton wrappers into wells of pan. Lightly spray the wonton wrappers in the pan. Bake 7-8 minutes or until edges start to turn golden brown. Remove pan from oven.

Meanwhile, stir the cream cheese, garlic, and Worcestershire sauce together in a mixing bowl until well blended. Stir in the cooked shrimp, green onions, and mozzarella cheese; mix well. Using a #100 (2 teaspoons) ice cream scoop, plop the shrimp mixture into each wonton cup.

Bake for about 10 minutes or until wontons are golden brown and the filling is starting to bubble. 

Serve hot, warm, or at room temperature. Great dunked in Sweet and Sour Sauce.

SWEET AND SOUR SAUCE

¼ c. lightly packed brown sugar

¼ tsp. kosher salt

2 T. ketchup

1 T. soy sauce

3 T. plain rice vinegar (not seasoned rice vinegar)

½ c. water

2 tsp. cornstarch dissolved in 2 tablespoons water

Combine the sugar, salt, ketchup, soy sauce, vinegar, and water in a small saucepan. Bring to a near boil over medium heat, stirring occasionally to dissolve the sugar. Give the cornstarch a stir and then add it to the pan. Continue cooking, stirring, for about 15 seconds, or until the sauce comes to full boil and thickens.

Remove from the heat. Serve warm or at room temperature. Can be made ahead.


BAKED CRAB RANGOON WITH SWEET AND SOUR SAUCE

The last time I ordered crab Rangoon in a restaurant I was terribly disappointed. (And yes Rangoon should be capitalized because it is from the city Yangon, also called Rangoon, the former capital of Burma, which is now Myanmar.) Anyway, the crab used in the making of the Rangoon at this otherwise fine Chinese cuisine dining establishment, was very sparingly used, to say the least. In fact, if there was any crab in the mix, I would be very surprised. If anything, there might have been a bit of surimi (fake crab) in the filling. And that not only scares me; it makes me madder than a wet hen! I hate fake crab! And everything about it! For interesting facts about imitation crab, skip to the bottom of this post. But back to this recipe.

The other day when I got a hankering for Chinese food, I decided to pull out my old recipe and build me some crab Rangoon with what I consider to contain the requisite amount of crab. And since I abhor deep fat frying anything, even something as delightful as crab Rangoon, my old standby recipe for baking the Rangoon seemed perfect for the occasion.

And there was much rejoicing at table that evening. Not only was the Rangoon terrific; the sauce was over the top delicious. And nary a spattering of hot fat to be seen on either me or the immediate vicinity around the stove!

So, the next time you are looking for just the perfect appetizer, please give this baked Rangoon recipe a try. And don’t even think about serving the Rangoon without the Sweet and Sour Sauce. Not only is this sauce perfect with Rangoon, it’s equally great with the next recipe I am going to post – Shrimp Wonton Cups with Sweet and Sour Sauce. Plus, this sauce is terrific with my recipes for Char Siu (Chinese BBQ Pork), Easy Chinese Dumplings/Potstickers, baked eggrolls (still working on the recipe), or as a glaze for grilled chicken or seafood. Plus both the recipe for the Rangoon and the sauce are very easy to prepare.

So, as always, have fun in your kitchen. We all must eat to stay alive. And eating can be such a pleasure. As cooks we can make this happen.

And believe me, I know there are times when even the thought of cooking one more meal is overwhelming. But cooking is a lot like exercising. Once you get started, the effort initiates a biological cascade of events that results in the release of endorphins — those chemicals that make you happy! So, stay happy. Keep cooking!

Peace and love to all.

8 oz. cream cheese, room temp.

1 clove garlic, very finely minced

1 green onion, finely diced

¼ tsp. Worcestershire sauce

1/8 tsp. sugar

pinch white pepper

8 oz. crabmeat (canned real crab is fine for this recipe)

¼ tsp. kosher salt, if needed

square wonton wrappers

Mix the cream cheese, garlic, green onion, Worcestershire sauce, sugar, and pepper together. Taste the crab meat. If it isn’t terribly salty, add the ¼ teaspoon salt to the cream cheese mixture. Then gently stir in the crab.

Grease 12-16 muffin cups with cooking spray. Gently place 1 won ton wrapper in each cup. Fill evenly with crabmeat mixture.

Bake in a pre-heated 350-degree oven for 15 to 18 minutes or until edges of wonton wrappers are golden brown and the filling is heated through.

Serve warm with Sweet and Sour Sauce.

SWEET AND SOUR SAUCE

¼ c. lightly packed brown sugar

¼ tsp. kosher salt

2 T. ketchup

1 T. soy sauce

3 T. plain rice vinegar (not seasoned rice vinegar)

½ c. water

2 tsp. cornstarch dissolved in 2 tablespoons water

Combine the sugar, salt, ketchup, soy sauce, vinegar, and water in a small saucepan. Bring to a near boil over medium heat, stirring occasionally to dissolve the sugar. Give the cornstarch a stir and then add it to the pan. Continue cooking, stirring, for about 15 seconds, or until the sauce comes to full boil and thickens.

Remove from the heat. Serve warm or at room temperature. Can be made ahead.

Imitation Crab (From webmd.com)

“Imitation crab is made with surimi, a paste made out of finely shredded or pulverized fish. After the fish is minced, it is heated and pressed into shapes that resemble meat from a crab leg. The resulting imitation crab looks similar to the original crab in its coloring and texture.

Binding agents, like egg white, starch, vegetable oil, or sugar, are added to the surimi paste to make the meat stick together. Occasionally, monosodium glutamate (MSG) is added to the surimi. Orange or red coloring is the key ingredient added to make the mixture resemble shellfish meat. For the preservation of the product, the makers vacuum seal and pasteurize the imitation crab meat.  

Real crab has significantly higher nutrient levels than imitation crab. For example, imitation crab derives most of its calories from added carbs. The calories in an Alaskan king crab are derived from proteins, not from carbs. If you’re on a keto or low-carb diet and are trying to cut your carb intake, real crab would be the better choice.

Real crab provides a higher amount of vitamins and minerals. It’s a good source of vitamin B12, selenium, and zinc. When making surimi, these nutrients are lost during washing and processing when the fish meat is exposed to heat. Real crab also has a higher amount of omega-3 fatty acids than its mock substitute. Some packages of imitation crab may have added omega-3, but this isn’t always the case.

Imitation crab contains several processed ingredients. The largest component of the imitation crab product is surimi. It contributes 35% to 50% of the product’s weight. The other 50% to 65% that makes up imitation crab contains:

– Starches like wheat, potato, or tapioca starch make the surimi firm and freezable. 

– Salt (sodium chloride) adds flavor and helps turn the minced meat into a sturdy gel. Sometimes, potassium chloride is used.

– Vegetable oil enhances texture, shelf life, and white coloring.

– Sugar and sorbitol add some sweetness and help imitation crab to freeze and thaw with ease.

– Egg whites or soy are often added for a boost of protein and to improve texture, color, and glossiness.

– Water takes up the biggest percentage of all the extra ingredients. It helps create the right texture.” 


BUTTERMILK SALAD DRESSING OR DIP

OK, this has to be the easiest salad dressing/dip I have ever made. Absolutely no chopping of anything involved. But after working up this recipe for the other evening’s salad, I must admit I was a bit disappointed. It tasted OK, but it had that kind of raw taste. I wasn’t too surprised because of all the dried veggie action. And having a bit of experience in the kitchen, I should have remembered that it might take a day or two for the dried veggies to re-hydrate and mellow. But I was in a hurry and wanted to get dinner on the table. (You know how that goes.) So, we ate our salad, and I put the rest in the fridge. Jump forward 3 days.

While grating and chopping veggies for coleslaw, I remembered that I had envisioned this dressing as also a dip for crudité. And really, sacrificing my fingertips just to not waste the nub ends of celery stalks and carrots just didn’t seem like the reasonable thing to do. So, both the practical and smart answer was to nibble on whatever part of the veggie that I deemed prudent not to grate. So, I retrieved the dressing/dip from the fridge and took my first bite. OMG – all this wonderful blend of ingredients needed was just a bit of time together. And I tell you true, this is the best buttermilk dressing/dip I have ever tasted. But I can’t state this too fervently – THIS DRESSING MUST BE MADE AHEAD OF TIME. TWO DAYS AHEAD OF TIME, AT LEAST! (And no cheating.)

But it is so worth the wait. Perfect on salads. Perfect as a dip. PERFECT period! And just so darn easy to prepare, that I’m almost embarrassed to post it for all to see. But I must. Because it is just that darn good. And I like to share.

As always, have fun making food. And Happy 4th of July. And while we are celebrating with family and friends, let’s all remember why we still celebrate this day in history. Because on July 4, 1776, the Second Continental Congress adopted the Declaration of Independence, declaring at the beginning of the second paragraph: “We hold these truths to be self-evident, that all men are created equal, that they are endowed by their Creator with certain unalienable rights, that among these are Life, Liberty and the Pursuit of Happiness.”  

Peace and love to all.

¾ c. buttermilk (full-fat Bulgarian buttermilk is best)

½ c. mayonnaise

1 tsp. dried parsley

½ tsp. granulated onion*

½ tsp. granulated garlic*

½ tsp. celery salt

scant ¼ tsp. seasoned salt

pinch dried dill weed

freshly ground black pepper

Whisk or shake together in a lidded container. Use as a salad dressing or dip for crudité.

*You will notice that I almost always use granulated onion and garlic rather than onion and garlic powder. It’s just a preference because the difference in these forms is merely texture, powder having a flour-like consistency and granulated being coarser, like fine cornmeal. Most reputable manufacturers sell 100% pure versions of both, but occasionally you will find additives to improve flow or prevent caking, especially in the powdered variety.

But the main thing to know is that anyone who uses granulated or powdered onion or garlic is not less of a cook than those who always use the fresh variety. To my way of thinking, there is certainly a place for the fresh variety, and I use fresh garlic and onion a great deal in my cooking. But there are also times when a more delicate flavor is preferable. And I get to make that judgement. Not because I’m lazy (well sometimes because I’m lazy), but mainly because it’s my kitchen and my choice! And I always love having a choice.      

HONEY ROASTED NUTS

This recipe from noted NW culinary figure Greg Atkinson appeared in the December 13th Pacific NW section of the Seattle Times. Now of course, most of you who are refined, sophisticated, and savvy denizens of greater Seattle probably also subscribe to the Times. And have undoubtedly already made a batch of these nuts. But if you don’t subscribe to the Times, or don’t live in the area, or haven’t had the time or inclination to build a batch, then boy oh boy, do I have a treat for you.

These nuts are absolutely perfect. They aren’t too sweet. They aren’t too salty. They are, as Goldilocks would put it, “just right”! And extremely easy to throw together. And I’m telling you true; even a beginning cook should be able to make these nuts with no trouble at all. And what a lovely gift for someone or just as a special treat for your family. So, a big thank you to chef Atkinson for this marvelous recipe.

As always, continue to stay safe, continue to have patience with your family members, and continue to take super good care of yourself. It’s very easy to get so wrapped up in everyone else’s needs, that we forget about our own. I know how it goes, because once upon a time I was “mommy” to 4 kids. Some of those years are still a blur in my memory banks. I’m hoping that when I get really old, as opposed to just old like I am now, some of those memories will re-surface crystal clear. Because I loved being a mom, even with all the hassles, hard work, inconvenience, and exhaustion not mentioned in the original job description.

I guess what I’m trying to say, is treasure the time you have with your family. Your kids will be grown and gone sooner than you can say, for the millionth time, “I said clean up your room, and I mean now, not tomorrow!”

Peace, joy, and love to all. And a very, very Merry Christmas.

8 c. whole pecans, walnuts, macadamia nuts, or almonds (I use 2 cups of each)

¼ c. granulated sugar

1 T. kosher salt  

1 T. brown sugar, packed

1 T. water

2 T. honey

2 T. canola oil

Preheat the oven to 375-degrees. Spread the nuts out on a rimmed baking pan. Toast in the oven until a light golden brown and they begin to smell toasted, about 8 minutes.

Meanwhile, stir the sugar and salt together in a large bowl; set aside.

When the nuts are toasted, remove them from the oven and make the glaze.

In a large frying pan over high heat, combine the brown sugar, water, honey, and oil. Stir until the mixture is boiling. Reduce heat and immediately stir in the warm, toasted nuts and cook, stirring just until the glaze is stuck to the nuts and the pan is almost dry, about 2 minutes.

Remove from heat and toss the hot, glazed nuts in the sugar and salt mixture. Gently stir the nuts until every single one is coated. Return them to the baking sheet and spread them out in a single layer. Pop them back in the oven for one minute to set the glaze and the sugar coating.

Remove from oven and allow the nuts to cool completely on the pan before you move them around. (Tossing or packaging them before they are completely cool could cause the coating to come off.) When the nuts are completely cooled, store in an airtight container.