RICOTTA CHEESE GNOCCHI IN A GORGONZOLA CREAM SAUCE

OLYMPUS DIGITAL CAMERA

I believe most of you already know that I absolutely adore pasta and sauces. And why not? They are part of the five main food groups along with coffee, chocolate, and bacon. So of course I love them. They also happen to be the main reason I am filled to the brim of slimness. But that’s another story better held for another day.

Because today, I want the spotlight to be shining directly on this dish, which includes both a fabulous pasta which can be served with a variety of sauces and an incredible cream sauce which can be paired with a multitude of various pasta shapes. (See – it’s really not just all about me all the time!)

The gnocchi recipe is from Chef Geoffrey Zakarian. The sauce, well it’s a combination of recipes I have been preparing for years. But this time, the sauce was unbelievably delicious. And the gnocchi? Well let’s just say that if Mr. Zakarian walked in my home today, I would be down on my knees kissing his feet! OK, maybe I exaggerate about kissing his feet. But I would probably become so effusive with my complements that he would prefer if I just kissed his feet than to listen to any more of my verbal barrage. (I’m sure some of you feel the same way about my written ramblings.) But I digress…..

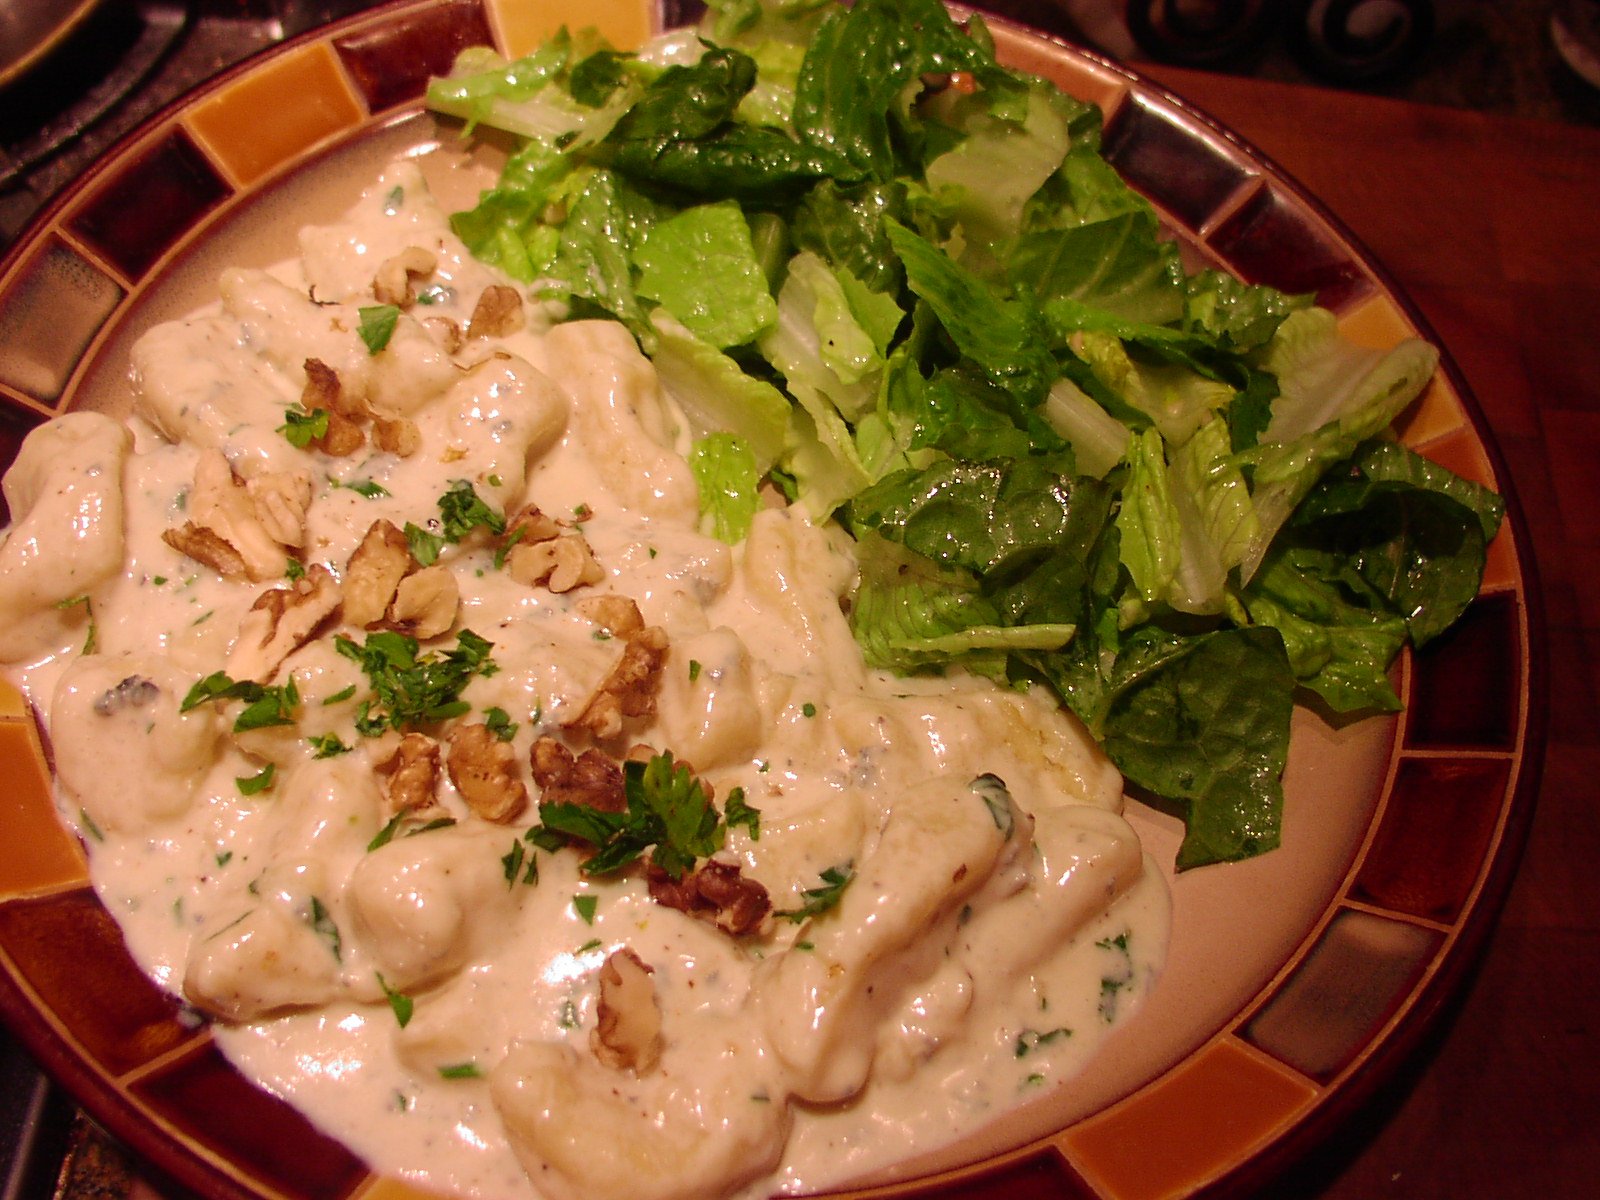
But truly, this is the sort of dish you would expect to be served in an excellent Italian restaurant. The gnocchi are like little soft pillows of flavor. The sauce is creamy and so tasty. And when garnished with toasted walnuts, it even has that crunch we all so dearly love.

So next time you want to treat your family and friends, fix this recipe and watch everyone at your table roll their eyes or gently sigh in response to the amazing flavors and textures in this pasta dish. And believe me, if I can make this gnocchi, you can too. All it takes is a little leap of faith in yourself. And of course it doesn’t hurt that it’s about the easiest and fastest pasta to make. No pasta machine required. Just a bit of extra flour, a pair of hands that don’t mind getting a little covered in flour, and a sharp knife or pastry scraper. And preparing the sauce? Very simple. Just have all your ingredients ready when you begin your sauce. You don’t want to be chopping parsley or toasting walnuts at the last minute. Have fun with this recipe and happy eating.

Gnocchi:

  • 1 (15-oz,) container whole milk ricotta cheese
  • ½ c. finely grated Parmesan cheese
  • 1½ T. extra virgin olive oil
  • 2 lg. eggs
  • 1 tsp. kosher salt
  • 1¼ c. unbleached all-purpose flour, plus more for dusting
  • semolina flour, for dusting 

Combine the ricotta cheese, Parmesan, olive oil, eggs, and salt in a large mixing bowl. Add the all-purpose flour in 3 parts, stirring after each addition. Dust a work surface (I use a pastry cloth) with plenty of flour. Scoop the dough out of the mixing bowl, and with floured hands, knead about 4 times before gently rolling into a ball. Cut into 4 quarters using a floured pastry scraper or a sharp knife.Roll the first wedge of dough into a dowel shape about 5/8-inch in diameter. Cut the “dowel” into 5/8-inch pieces. Place the gnocchi on a semolina or regular flour dusted baking sheet. Repeat with the rest of the dough. Set aside.OLYMPUS DIGITAL CAMERA
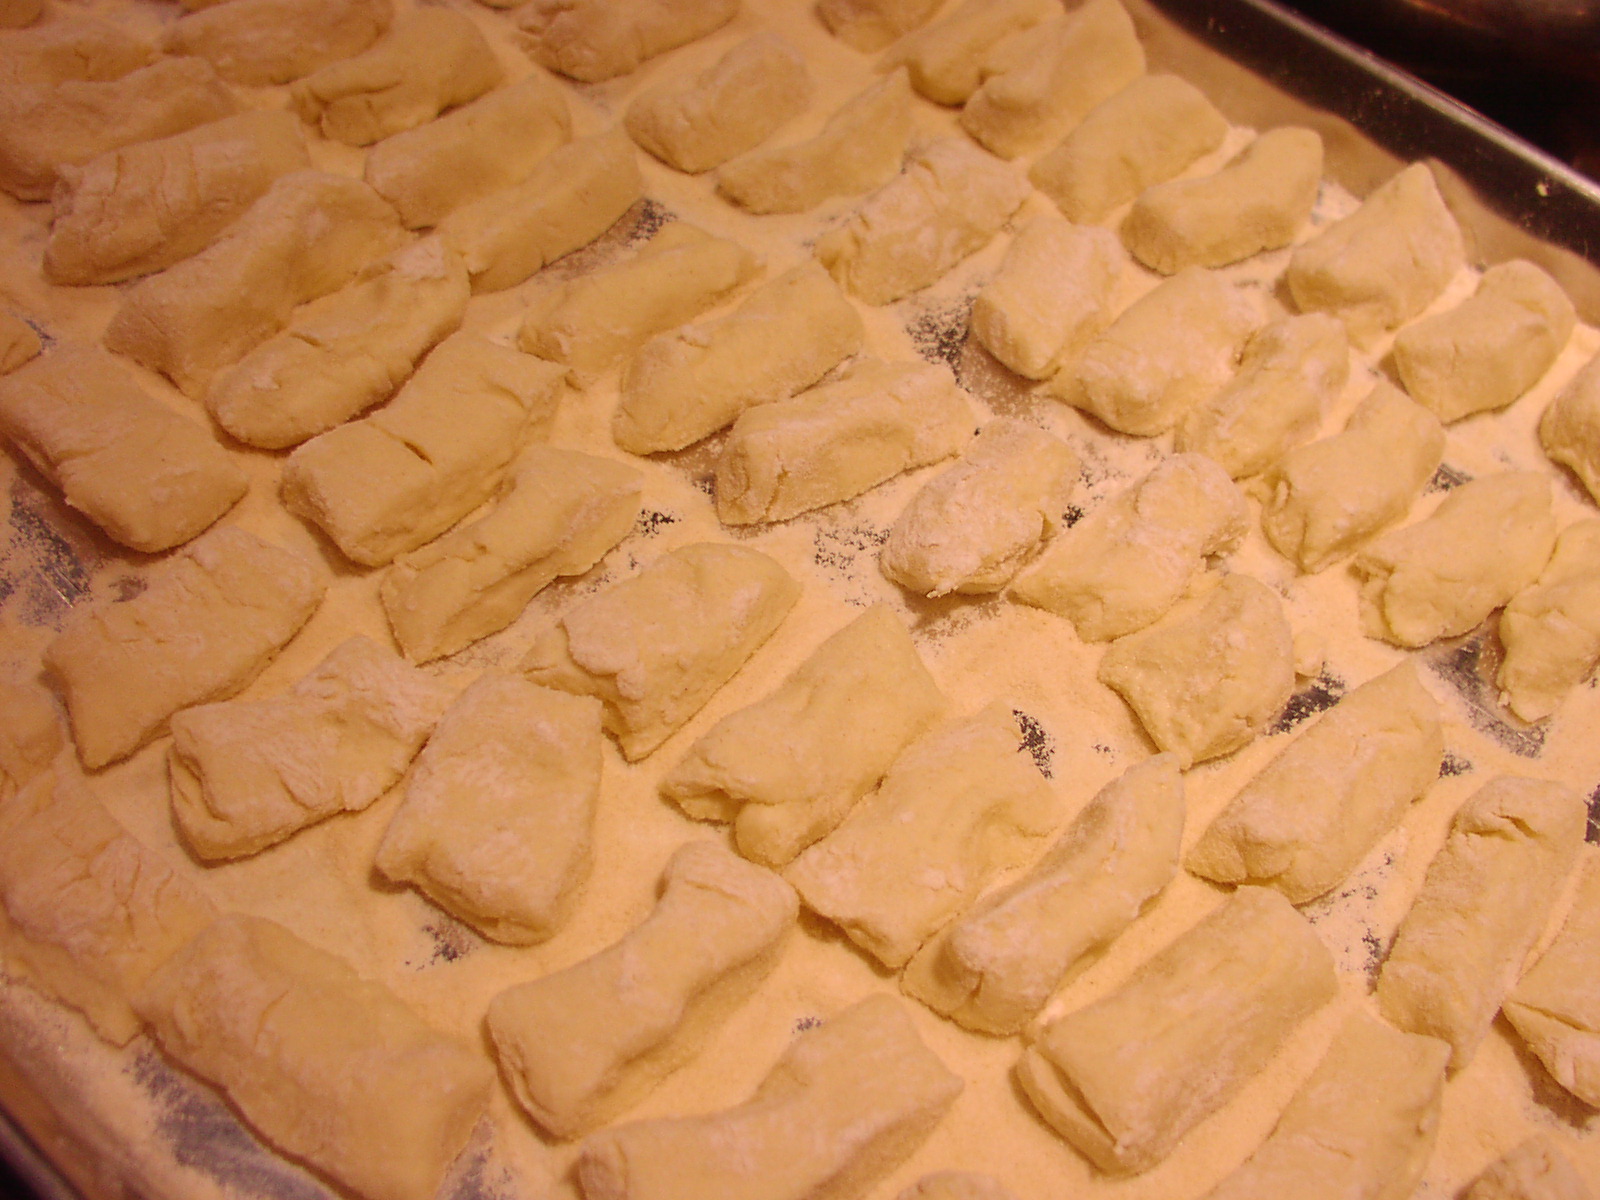
When your sauce is ready, cook the gnocchi in boiling salted water for about 2 minutes. (The gnocchi will float to the top of the water when it’s done.) Transfer the cooked gnocchi directly into the pan with the sauce using a flat headed strainer or a slotted spoon. (Be sure not to crowd your pan. When I cook the gnocchi I divide the tiny little pillows of dough in half. And since the gnocchi only take a couple of minutes to cook, and your pot of water is still hot, there is no problem with the first set just languishing in the lovely sauce while the second set cooks. (Save a small amount of the pasta water in case your sauce is too thick.)Note: Uncooked gnocchi can be frozen for up to 2 weeks.

Gorgonzola Cream Sauce:

  • 1½ c. heavy whipping cream
  • 1/8 tsp. kosher salt
  • freshly ground black pepper
  • smidgen* cayenne pepper
  • 5-6 oz. crumbled Gorgonzola cheese – not the creamy or dolce (sweet) kind
  • ¼ c. finely grated Parmesan cheese
  • 3 T. chopped Italian parsley, divided
  • ½ c. chopped toasted walnuts, opt.

Pour the cream, salt, pepper, and cayenne into a heavy pan, bring to a simmer, and cook until it reduces by almost a half, about 8 minutes, stirring occasionally. Mix in Gorgonzola cheese, stirring gently until almost melted.  Stir in most of the parsley and the Parmesan cheese. Carefully toss in the cooked gnocchi. If the sauce is too thick, thin it with a little of the pasta cooking water.

OLYMPUS DIGITAL CAMERA

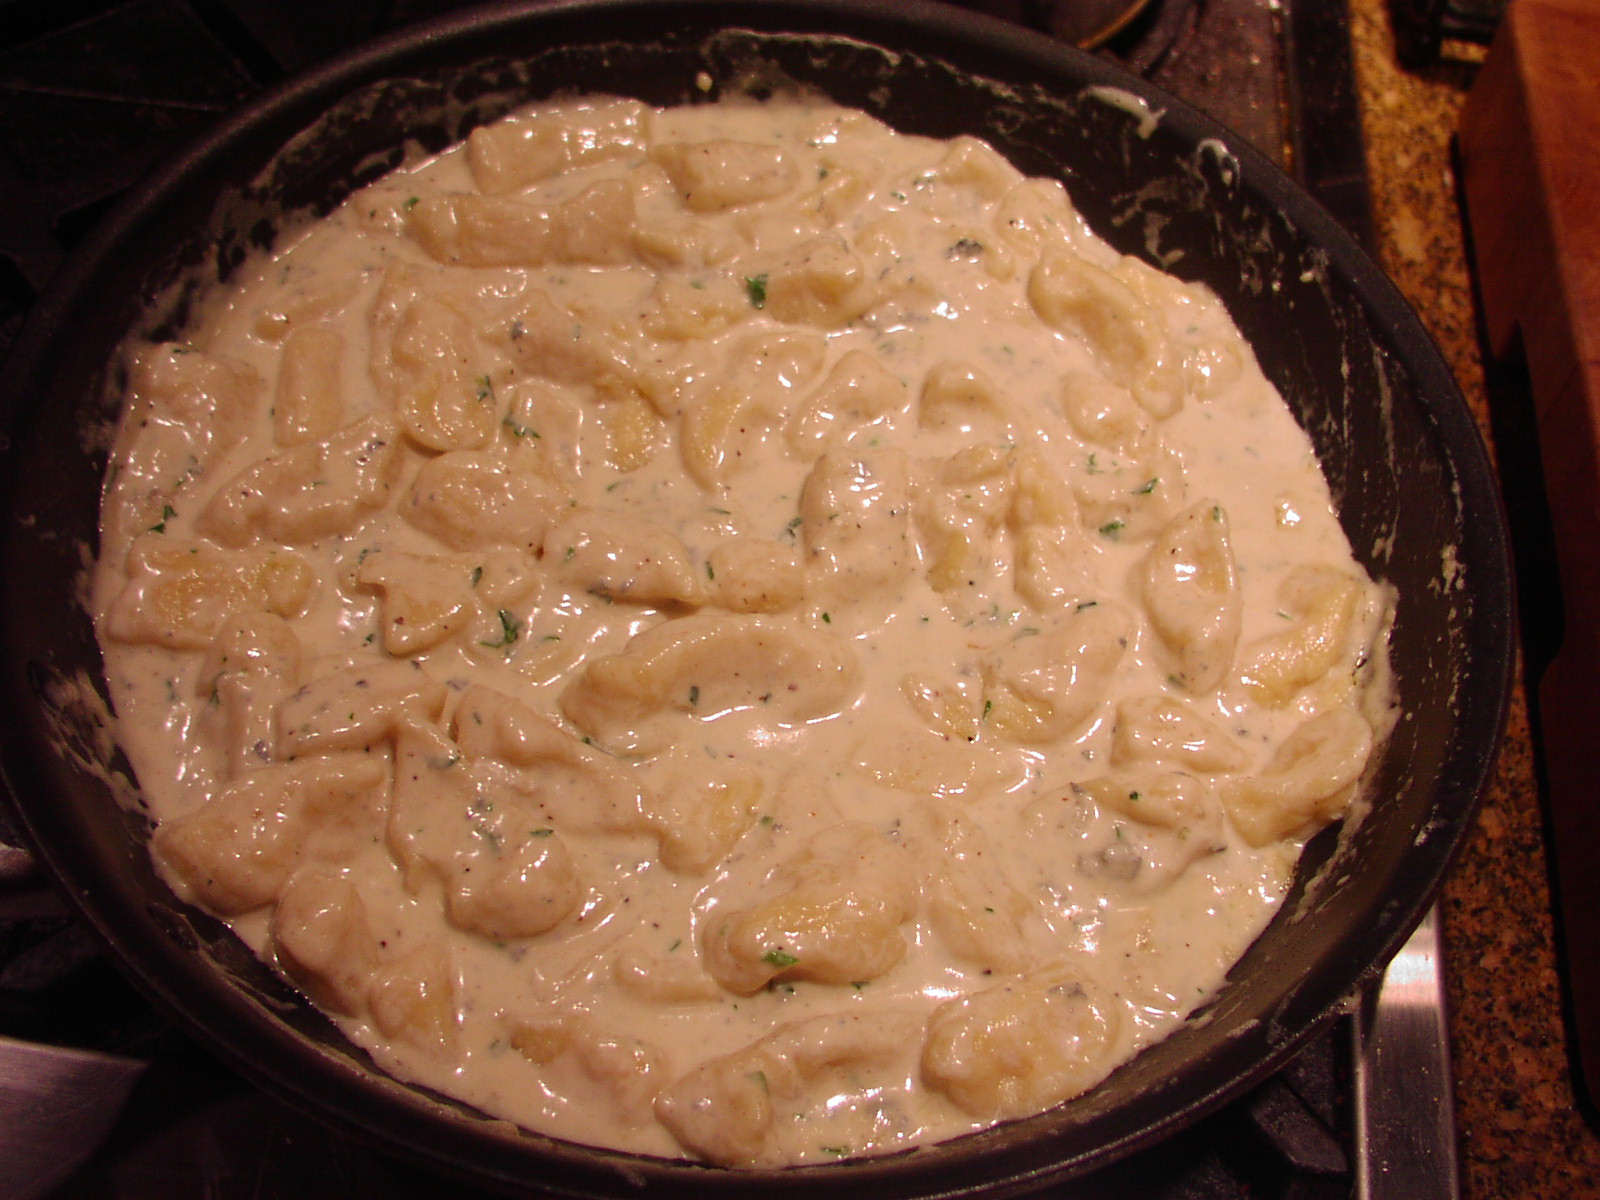
Transfer to a serving bowl and sprinkle with walnuts and the remaining parsley. Serve immediately.

*For accuracy in measuring a smidgen, pinch, or a dash of something, get yourself a set of measuring spoons. They are ever so helpful. Plus being cute as can be. What I did one year was buy several sets and tied them into the bows of Christmas packages for my girls and other family members. And of course, kept a set for myself.  


GLAZED ITALIAN LEMON COOKIES

OLYMPUS DIGITAL CAMERA

I love lemon, and I don’t care if it’s in a savory or a sweet. And none of this lemon juice that comes in a bottle or darling little plastic lemon looking thingy either! In my house, if lemon juice doesn’t come in its own little tree grown package, it’s just not happening at all! Plus, a lot of times, in addition to the juice of a lemon, the zest is also a required ingredient. And if you have ever tried to zest one of those little plastic lemon looking containers – well I know all of you are a lot smarter than that! My point is – use the real thing. Of course, if you simply must have your daily dose of Sodium Benzoate, Sodium Metabisulfite, and Sodium Sulfite (Preservatives), by all means use bottled ReaLemon. But if you want your lemon straight up with only a touch of additives such as sunshine and warm breezes, get thee to your produce section for the real thing! (And yes, sometimes I stoop to sarcasm to make a point. I’m not proud of this character flaw, but I just can’t seem to help myself!)

So with the flavor of lemon in mind, I decided a lemon cookie was exactly what was needed as one of the desserts for an upcoming JazzVox pre-concert meal. Usually when I serve a dessert that contains an ingredient that some of my guests may be allergic to, I also prepare a second goodie. So last weekend when I planned to serve Italian Dream Cake (on this site BTW), which contains nuts, I decided to also serve these lemon cookies. Of course I knew I already loved these cookies. But instead of rolling them in powdered sugar, which is how I introduced the recipe in my first cookbook (circa 1998), I decided a glaze would make a nice change. (Plus I had gone on the internet to research Italian lemon cookies, and a glaze topping seemed to be all the rage.) So my original recipe (Lemon Tea Cookies) became Glazed Italian Lemon Cookies. And yes, there are hundreds of Italian lemon cookie recipes out there. Many of which are very similar to these cookies. But when you already know that you have a winner, why try something new? I believe the old adage “if it ain’t broke, don’t fix it!” applies to all things culinary as well as government spending. Thank you Bert Lance for bringing this saying into common usage.

I hope you enjoy the recipe.

  • 1 c. unsalted butter, room temperature
  • 1½ c. powdered sugar, divided
  • 1 tsp. vanilla
  • 5 tsp. lemon zest, divided
  • ¼ tsp. salt
  • 2¼ c. unbleached all-purpose flour
  • 7 tsp. lemon juice

Cream butter, ½ cup of the powdered sugar, vanilla, 3 teaspoons of the lemon zest, and salt together.  Add the flour and mix only till combined. Roll into 1-inch balls or use a small ice cream scoop and drop onto ungreased cookie sheet. Bake for about 15 minutes in a pre-heated 400 degree oven. Cookies should be a light golden brown around the bottom when they are done. Do not overbake. Remove from pan and cool on a wire rack. When cool, dip the tops of the cookies in glaze and place back on wire rack to harden. Store in an airtight container.

While the cookies are baking, whisk together the remaining 1 cup of powdered sugar, the lemon juice, and the remaining 2 teaspoons lemon zest. Stir in additional juice if necessary, or powdered sugar to thicken.  


BAKED SWEET POTATOES WITH GARLIC AND THYME

OLYMPUS DIGITAL CAMERA

I love sweet potatoes. And most of the time when I serve them for dinner, I simply bake one and split it with Mr. C. Now if I could just eat the sweet potato with no additives, I would be fine. But the thought of not “decorating” my half with lots of butter, salt, and pepper, is just totally unappealing. So, out comes the butter dish every time.

But last night I decided that instead of simply baking the sweet potato whole, I would try a different approach. So I went to the internet for inspiration. And I found a simple recipe on the Epicurious site. I changed the recipe a bit to better fit our tastes. The result was both easy and delicious. And the best part. Not a dab of butter was used. Just a small amount of olive oil, plus fresh garlic and thyme. Speaking of time. (Nice segue wouldn’t you say?) This recipe takes no longer to get on the table than if I had simply baked the potato. Of course there is a bit of prep time, but not 30 minute’s worth. (Baking a whole sweet potato – 60 minutes. Baking these potato rounds – 30 minutes.)

So if you want a new and healthy way to serve sweet potatoes, give this recipe a try. You will be surprised by how much the addition of thyme and garlic enhances the flavor of the sweet potato. Of course I’m pretty sure garlic and thyme would enhance the flavor of dog food too given the opportunity. (Not going to give this hypothesis a try, you realize.)

So next time you are at the grocery store, bring home a couple of sweet potatoes. Even if you end up just baking them, you are doing your body a great favor. They are naturally rich in vitamin C, thiamine, niacin, and potassium. Just what the doctor ordered!

  • 1 lg. sweet potatoes, peeled and cut into ½-inch thick rounds
  • 2-3 tsp. extra virgin olive oil
  • 2 garlic cloves, minced
  • 1 T. fresh thyme leaves
  • ¼ tsp. kosher salt, plus more for sprinkling
  • freshly ground black pepper

In a large mixing bowl, combine all the ingredients and toss until all pieces are coated with the oil. Arrange in a single layer on a rimmed baking sheet. Place in a 400 degree oven and roast until tender and slightly browned, about 30 minutes. Remove from oven and if desired, lightly sprinkle with kosher salt. Serve immediately. Serves 2-3 beautifully.

CHEDDAR AND CHIVE BUTTERMILK BISCUITS

OLYMPUS DIGITAL CAMERA

There is nothing as delicious as a biscuit right out of the oven. Smothered in room temperature butter, there really is nothing finer. And this adaptation of one of Ina Garten’s recipes makes some of the best biscuits I have ever tasted. The combination of cheddar cheese and fresh chives is just amazing. And these biscuits are really easy to make. And there’s no fancy rolling them out, cutting them with a biscuit cutter, smooshing the remaining dough back together, rolling it out, cutting out more biscuits, etc. etc. You just plop the dough on a floured surface, pat the dough out, and cut it into 8 rectangular pieces with a sharp knife. Then drop the biscuits on a parchment paper lined baking sheet and bake them until they are lightly browned. Absolutely fool proof. And the greatest part. They are perfect for breakfast, lunch, or dinner. A fun story about biscuits.

In a former life I had a father-in-law who loved to make breakfast. His wife was an excellent cook, and she prepared the other 2 meals each day, but breakfast was always my father-in-law’s responsibility. And when we visited, he and I had a running “battle” over who made the better biscuits. Because in his world, biscuits were always a part of breakfast. So when at their home, he would allow me to make the morning biscuits every other day. Well it became a running joke. Because regardless of who made the biscuits that morning, they were always the best biscuits any of us had ever tasted. Of course there was always a lot of kibitzing while the biscuits were being made, but that was half the fun. And of course, the end result was biscuits! Every morning! Yum!   

So if you too are a biscuit lover, please try this recipe. And thank you again Ina for “the bones” of yet another wonderful recipe. You are my hero!

  • 2 c. + 1 T.  unbleached all-purpose flour, plus more as needed
  • 1 T. baking powder
  • 1½ tsp. kosher salt
  • 12 T. (1½ sticks) cold unsalted butter, diced
  • ½ c. cold buttermilk
  • 2 lg. eggs, divided
  • ¼ c. chopped fresh chives
  • 1 c. grated extra-sharp cheddar
  • 1 T. milk or water

Place the 2 cups of flour, baking powder, and salt in the bowl of an electric mixer fitted with the paddle attachment. With the mixer on low, add the butter and mix until the butter is the size of peas.

Combine the buttermilk and one of the eggs in a small bowl and beat lightly with a fork. With the mixer still on low, quickly add the buttermilk mixture to the flour and mix only until moistened. In a small bowl, mix the chives with the remaining 1 tablespoon flour. Add the cheddar and loosely coat the cheese with the flour. With the mixer still on low, add the cheese/chive mixture to the dough. Mix only until roughly combined.

Dump out onto a well-floured board and knead lightly about 6 times. Roll the dough into a rectangle 10 by 5 inches. With a sharp, floured knife, cut the dough lengthwise in half and then across in quarters, making 8 rough rectangles. Transfer to a sheet pan lined with parchment paper. Whisk together the remaining egg and the milk. Brush the tops with the egg/milk mixture. (If you like, you can add a little grated cheddar also.) Bake in a pre-heated 425 degree oven for 20 to 25 minutes, or until the tops are browned and the biscuits are cooked through. Serve hot or warm.


HERB AND GARLIC FOCACCIA

OLYMPUS DIGITAL CAMERA

When I want to serve really good bread to guests, I usually make it myself. And I know, that sounds rather conceited on my part, but it really isn’t my conceit showing. It’s my thrifty side coming to the fore. Because as much as I adore the people who come to our home for JazzVox concerts (anywhere from 25-40 any given concert), I’m simply not ready to spend $10 just for bread! Especially when I can build the bread myself for a fraction of the cost! Plus, if truth be known, I really like to bake bread.

So for our last concert, I fixed this new focaccia recipe adapted from the Inspired Taste website. Now in all honesty, I never got to taste the bread. Neither did Mr. C. But from what I was told, it was wonderful! (It sure looked good and smelled like Italian heaven.) People were still asking for the bread long after it was gone. (That’s always a sure sign the bread is good!) And the best part, it had been darned easy to build. And for someone who had 7 people to fix breakfast for and 41 people to feed a full meal to at 2:00 in the afternoon, I didn’t have any extra time the morning of the concert to fuss with an involved bread recipe. (And yes I am well aware of the fact that I am crazy. You need not feel obligated to remind me of this rather obvious character flaw!) But in my defense, I really did have everything under control. And having a really easy bread recipe picked out, was absolutely necessary to the success of my master plan. And yes, for these events I have a strategy mapped out that would make a NASA project planner envious! Complete with spreadsheets, timetables, and check-off lists. (Got to at my age! Just sayin’!)

So, next time you want a simple and tasty bread, remember this recipe. It makes a lot of focaccia, but it freezes beautifully. I hope you get a chance to try this wonderful focaccia. I know I’m going to be making it in the near future. But this time, I’m not going to share it with anyone. Well – maybe Mr. C. Oh, alright. If you happen to be around, I’ll let you try it too. But only one piece and for sure, you aren’t going to be taking any home with you! Well, maybe just one piece…..

  • 1 c. extra virgin olive oil, plus a small amount for greasing the dough  
  • 2 T. chopped fresh thyme or 2 tsp. dried thyme
  • 2 T. chopped fresh rosemary or 2 tsp. dried rosemary
  • pinch kosher salt
  • freshly ground black pepper
  • tiny pinch crushed red pepper flakes
  • 4 garlic cloves, minced
  • 2 c. warm water
  • scant 2 T. active dry yeast or 2 envelopes
  • ½ tsp. sugar
  • 5 c. unbleached all-purpose flour
  • 2 tsp. kosher salt
  • coarse ground sea salt or kosher salt

Combine the olive oil, thyme, rosemary, salt, pepper, and crushed red pepper flakes in a small saucepan. Place over low heat and cook, stirring occasionally for 3 minutes or until aromatic. Add the garlic and cook for 1 minute. Remove from heat and set aside to cool.  

In the bowl of your stand mixer, combine the warm water, yeast, and sugar. Stir a few times then let sit for 5 minutes. Add 2 cups of the flour and a ½ cup of the cooled olive oil mixture. Stir until all the flour has moistened. Let sit for another 5 minutes.

Add the remaining 3 cups of flour and the kosher salt. Once the dough comes together, knead the dough until smooth adding additional flour if necessary. Pour a small amount of olive oil over the dough, and turn until the whole ball of dough is lightly greased. Cover with plastic wrap or a clean tea-towel and let rise for 1 hour in a warm place.

Use 4 tablespoons of the remaining olive oil mixture to oil 2 – 9 x 13-inch rimmed baking sheets or 1 – 18 x 13-inch rimmed baking sheet.

Transfer dough to the baking sheet(s) then press it down into the pan(s). Use your fingers to dimple the dough, then drizzle the top with the remaining olive oil mixture. Add a very light sprinkling of coarse ground sea or kosher salt. Let the dough rise for 20 minutes until it puffs slightly. Bake in a pre-heated 450 degree oven for 15 to 20 minutes or until a light golden brown. Remove from the oven and transfer to a cooling rack. When cool, cut into desired size pieces. No butter or olive oil  dipping sauce required. (In my estimation.)


SHRIMP AND FRIED TOFU PAD THAI

OLYMPUS DIGITAL CAMERA

The other evening I had just an overwhelming hankering for Pad Thai. But having never made it before, I had to go to the internet for help. I only knew that whatever else the dish contained, mine had to have bite sized pieces of shrimp, crispy cubes of fried tofu, and of course rice noodles.

One of the first recipes I found was from Jennifer Steinhauer. I added, subtracted, and generally had my way with her recipe, but the basic ingredients she used became the backbone for the recipe you find below.

Jennifer’s recipe, as did almost all the other Pad Thai recipes, called for tamarind paste. Now I live on an island with just one humble grocery store. And granted, our store does its best with the limited space it has, but I didn’t even bother looking for tamarind paste. So I researched substitutions. Apparently equal parts of fresh lime juice and brown sugar is close enough for practical purposes. (And in my case, practical purposes includes not having to drive all over the region looking for tamarind paste!)

So there is no tamarind paste in my recipe. And as far as my taste buds can tell, the basic flavor of a good Pad Thai sauce has not been jeopardized by the absence of this quintessential Pad Thai ingredient. (Plus from everything I read about tamarind paste, it’s a pain in the patootie to work with! And frankly, I no longer have the time or patience for high maintenance ingredients!)

So if you too love Pad Thai and would like to serve it at home, give this recipe a try. It has lots of wonderful flavor without being too loaded with fat or salt. And it’s a one dish meal. And if there’s any phrase I’m beginning to like more and more, it’s “one dish meal”. Of course in my case, that one dish should be a big old salad, not a plate of noodles. But one simply must listen to one’s own hankering every so often. How else are we to keep our souls alive if we neglect our bodies wishes all the time? Perhaps I should research that subject on the internet. (I’ll let you know if I find an answer that still allows me to eat Pad Thai once in a while!)

  • 8 oz. stir-fry rice stick noodles (the noodles are almost fettuccine-width)
  • ½ block firm tofu
  • 2 T. cornstarch, or more as needed
  • 1 T. sesame oil
  • 1 tsp. chili oil
  • 2 T. fish sauce
  • 1 T. granulated sugar
  • 1 T. brown sugar
  • 2 T. fresh lime juice
  • pinch crushed red pepper flakes
  • ¼ c. water
  • 2 T. canola oil
  • 2 small garlic cloves, finely minced  
  • 2 tsp. minced ginger
  • ½ small carrot, grated
  • 1/3 c. finely chopped red bell pepper, opt.
  • 2 c. chopped baby spinach or shredded Napa cabbage
  • ¾ – 1 lb. uncooked large (16-20) shrimp, peeled, deveined, and cut into thirds
  • 2 lg. eggs
  • 4 green onions, thinly sliced
  • 1-2 c. bean sprouts
  • 1/3 c. chopped salted peanuts
  • 2 T. sesame seeds, opt.  
  • 1 lime, cut into wedges

Bring 6 cups of water to a boil in a medium saucepan. Remove from heat. Add the rice noodles; let stand for 8 minutes or until the noodles are soft but firm. (Basically al dente.) Rinse under cold water; drain well. Set aside.

Meanwhile, cut drained tofu into 1/4-inch slices and coat with cornstarch.  Combine the sesame oil and chili oil in a medium frying pan. Bring oil to medium heat and fry the tofu until both sides are a nice golden brown. Remove from pan and drain on a paper towel. When cool cut into bite size pieces. Set aside.

In a small bowl, whisk together the fish sauce, granulated sugar, brown sugar, lime juice, crushed red pepper flakes, and water; set aside.

Set a wok or large fry pan over high heat for 1 minute, then add the canola oil and heat until the oil shimmers. Add the garlic, ginger, carrot, red bell pepper, and spinach; sauté for 30 seconds. Add the shrimp and sauté until almost cooked through, 1-2 minutes. Transfer to a plate.

Add the noodles to the pan and stir-fry for 1 minute. Pour in the fish sauce and toss to coat the noodles. Cook until the noodles are hot, then push them to one side of the wok/pan and scramble the eggs in the remaining space. Add the reserved shrimp mixture, fried tofu chunks, green onions, bean sprouts, and half the peanuts. Toss to mix. Garnish with the remaining peanuts, sesame seeds, and lime wedges. Serve immediately.


ROMAINE LETTUCE WITH ITALIAN SALAD DRESSING

OLYMPUS DIGITAL CAMERA

The other day I was planning to serve a very rich lasagna, and decided that what I needed to go with the lasagna to help cut through the richness from the meat, the sauce, and the inordinate amount of cheese, was a simple romaine salad with an acidic dressing. Not too acidic you realize, but with just the right amount of acidity. And this simple dressing that I have been making since I first discovered champagne vinegar about 10 years ago, immediately came to mind. It‘s one of those salad dressings that coats lettuce beautifully, without leaving it soggy. So a perfect salad dressing to dress up plain bite sized pieces of romaine.

While I’m on the subject of romaine, I think I’ll take the opportunity to expound on its many virtues. (Sometimes I feel romaine is underrated and not given the credit it’s due! So I intend to set the record straight right now.)

First of all, from a nutritional standpoint, romaine lettuce is a very good source of dietary fiber, manganese, potassium, biotin, vitamin B1, copper, iron, and vitamin C. It is also a good source of vitamin B2, omega-3 fatty acids, vitamin B6, phosphorus, chromium, magnesium, calcium, and pantothenic acid.

Plus, it’s crunchy. (In my book, one of its most redeeming qualities!) And it’s a fairly dark green. (And green is my favorite color. So duh!)

Now I know, many of you are really into the gourmet lettuces. And I understand. I love them too. But when I think salad, I think crunch. And I’m sorry folks, spring mix by itself just does not crunch! Neither does rocket (arugula) or red leaf or any of the other popular soft leaf varieties! And I am still of the school that strongly believes that salad must crunch! To be a proper salad, that is!

So what I am really advocating, in case you haven’t already figured it out, is that romaine lettuce is the bomb! And although you may use other lettuces in your salads as I often do, romaine should still be there to provide that crunchy element necessary to make your all greens salads perfect. (And yes, I love salads with just greens. I also love salads that contain almost all the contents of my refrigerator and pantry. But let’s save that type of salad for another day!)

So if you too love an easy and delicious salad, give this dressing a try. Combined with beautifully perfect bite sized pieces of romaine lettuce, there is just about nothing finer to serve with a rich main dish. Honestly, I promise that you will not miss your darling little leaves of gourmet lettuce. You will also love the fact that you have not spent your paycheck to enjoy a salad that has nutritional value and tastes like it was prepared by the chef at Canlis!

So have fun with this dressing. It is almost fool proof and can be dressed up in any way you choose. Add it to a mixed vegetable salad, a kale and blue cheese salad, or on top of your favorite Cobb salad. Just make it. It’s easy, inexpensive, and perfect. Enjoy!

  • 3 T. champagne vinegar
  • 1 tsp. Dijon mustard
  • ¾ tsp. kosher salt
  • freshly ground black pepper
  • 1 garlic clove, minced
  • ½ c. extra virgin olive oil
  • romaine lettuce or a variety of lettuces including romaine

In a small bowl or covered jar, whisk or shake together vinegar, Dijon mustard, salt, pepper, and garlic. Add the olive oil and either whisk or shake until the liquid is emulsified. Adjust seasoning. Store in the refrigerator, but bring to room temperature before adding to greens of your choice. 


BOLOGNESE SAUCE (RAGÙ ALLA BOLOGNESE)

OLYMPUS DIGITAL CAMERA

Once in a while I have an “aha moment”.  And usually when this happens I wonder why in the world I didn’t think of this (whatever it might be) sooner! Well one of those “aha moments” occurred this last week when I was preparing Lasagna Bolognese. I had prepared the red sauce for the lasagna and was giving it a taste to make sure the seasoning was correct, when it hit me that this easy sauce, with the possible addition of a grated carrot and a stalk of celery, would be perfect over al dente spaghetti. Add a sprinkle of Parmesan cheese, and Bob’s your uncle!

And yes, I have other recipes for spaghetti sauce, but this particular recipe uses very simple ingredients, doesn’t take all day to simmer, and always turns out wonderfully. Plus it freezes beautifully.

Now I know what those of you who are Italian sauce experts will be thinking when you look at the list of ingredients. (And yes, I can read minds!) Where are all the rest of the herbs usually in a recipe for ragù, like thyme, rosemary, Italian seasoning, for example? And what about wine? Where’s the wine in this recipe? Well the answer is quite simple really. Additional herbs are simply not necessary. And frankly, wine can sometimes make an Italian red sauce taste too acidic.

Now don’t get me wrong, I sometimes use wine in my sauces, but this one just doesn’t need it. Neither does it need any sugar, especially if you use canned Italian tomatoes. And then, even if the sauce is a slight bit acidic, a tablespoon or two of butter right at the end takes care of the problem in a second. (I really do try to stay away from additional sugar if at all possible.)

So next time you want a hearty Italian meal that your entire family is sure to like, make up a big old batch of this sauce, boil up some spaghetti (al dente of course) and grate up some Parmesan cheese. Serve with a simple green salad, and perhaps some garlic bread, and you have a recipe for success. And of course, since you didn’t pour any wine in your sauce, you should have plenty to pour in your glass. And if this sauce doesn’t fairly scream out for a nice rich cabernet, pinot noir, or Sangiovese as an accompaniment, I’m not the proud owner of “Essentials of Classic Italian Cooking” by Marcella Hazan. And I’ve got my copy right in front of me as I write!

  • 1 T. extra-virgin olive oil
  • 1 lb. bulk Italian sausage (either chicken or pork)
  • ½ c. chopped onion
  • 1 small carrot, grated
  • 1 stalk celery, very finely chopped
  • 2 cloves garlic, chopped
  • 1 (28-oz.) can chopped or diced tomatoes (Italian tomatoes preferably)
  • 1 bay leaf
  • pinch crushed red pepper flakes
  • 1 tsp. dried oregano
  • ½ tsp. kosher salt
  • freshly ground black pepper
  • ½ c. loosely packed fresh basil chiffonade*
  • 1-2 T. butter, optional

In a large covered sauce pan, heat the olive oil over medium high heat. Add the sausage, chop it into small pieces as it cooks, and sauté until nicely browned. Add the onion, carrot, and celery; sauté until the onion is soft and translucent, about 4 minutes. Stir in the garlic and cook for an additional minute. Add the tomatoes, bay leaf, red pepper flakes, oregano, salt, and pepper.  Stir to combine ingredients. Bring to a boil, reduce heat, cover, and simmer for about 30 minutes.  When the sauce is done, remove from heat, remove bay leaf, add basil, and adjust seasoning. If the sauce tastes acidic, add butter 1 tablespoon at a time to round out the flavor.  (Even better if made a day or two ahead.)

Please note: This is a very thick and chunky sauce. If you prefer a more “saucy” sauce, add a small can of tomato sauce along with the chopped or diced tomatoes.

*Chiffonade (pronounced “shif-oh-nod”) is a knife technique used for cutting herbs and leaf vegetables such as lettuce into thin strips or ribbons. To chiffonade leaves of basil, stack the basil leaves and roll them into a tube. Then carefully cut across the ends of the tube with your knife to produce fine strips.


ROASTED MUSHROOM LASAGNA WITH BÉCHAMEL SAUCE

OLYMPUS DIGITAL CAMERA

Since I knew I was going to have a large crowd (41) for last Sundays JazzVox concert, I decided to fix a big ole Italian meal. Complete with appetizers – Caponata Alla Siciliana, Marinated Goat Cheese, and Crab and Artichoke Dip. (I didn’t get a picture of the Crab and Artichoke Dip, so I am going to have to make it again very soon before I can post the recipe. Oh the sacrifices I must make for this blog!) Followed by Lasagna Bolognese, vegetarian Roasted Mushroom Lasagna with Béchamel Sauce (this recipe), romaine salad with Italian Salad Dressing (soon to be published), and Herb and Garlic Focaccia (again – soon to be published). And for dessert, Italian Dream Cake and Glazed Italian Lemon Cookies. Look for the cookie recipe in the near future also.

And for those of you who are looking at the menu and saying to yourself “is this woman crazy making all that food”, I offer a simple response. Yes she is! I mean – yes I am!

But if you are going to lavish food on 41 hungry people, 10 of whom are teenagers, you simply need to fix a large quantity with multiple choices. And what better dish or dishes to feed a large crowd than lasagna? Now granted, lasagna is not a quick dish to prepare.  But none of the steps taken individually are difficult to construct. It’s just that there are a stinkin’ lot of steps! (I sound like I’m trying to persuade you not to make this lasagna, but that’s not the case. But, I’m also not going to lead you down a primrose path! (For those of you who are too young to know the meaning of “being led down a primrose path”, it means “being led to a life of ease and pleasure”.) Or as Lemony Snicket* would define it “being in and out of the kitchen in less than 30 minutes”. Simply not going to happen!)

But if I do say so myself, it is time well spent. The lasagna is creamy, herby, and full of mushroom flavor. And it’s vegetarian. So next time you need or want a veggie main dish, give this lasagna a try. It’s just really, really good.

*For a wonderful read that contains more vocabulary words and definitions (some real, some just for the circumstance) than your average grade school English primer, check out one of Lemony Snicket’s books in the charming children’s series “A Series of Unfortunate Events”. If all of the 3 R’s could be taught in such a delightful way, there would be a lot more children achieving than left behind. And if Lemony Snicket were telling you about this recipe, he would undoubtedly tell you not to make this dish. That you should try a recipe that was simpler and quicker to prepare. That you should fix a dish that you knew you would like. That you would be upset with the final product. But then, he tries with all his might to dissuade youngsters from reading his books too if all they like are happy endings. (His books never have a happy ending!) But unlike his books, this recipe does have a happy ending. It’s called a happy mouth. Enjoy!

  • ½ onion, coarsely chopped
  • 2 lbs. mixed mushrooms (cremini, button, Portobello, shiitake) sliced between ¼-inch and ½-inch thick
  • 2 T. extra virgin olive oil
  • 8 T. unsalted butter, divided
  • 1 tsp. kosher salt
  • freshly ground black pepper
  • 1 T. finely chopped fresh rosemary
  • 2 garlic cloves, finely minced
  • ½ c. flour
  • 6 c. milk (whole milk is best)  
  • ¼ tsp. kosher salt
  • ¼ tsp. white pepper or black pepper to taste (white pepper actually has a sharper flavor than black)
  • 1 lb. lasagna noodles* (I like Culinary Circle Authentic Bronze-cut Lasagna noodles)  
  • 1 c. grated Pecorino Romano cheese
  • 1½ c. grated mozzarella cheese 
  • 1½ c. grated Parmesan cheese
  • 2 T. chopped Italian parsley

Place the onion and mushrooms on a large low sided baking sheet.  Drizzle with olive oil. Cut 2 tablespoons of the butter into small pieces and place on top of the mushrooms. Sprinkle with the salt and pepper. Using your hands, toss the vegetables together until they are evenly coated with the oil, butter chunks, and seasonings.

OLYMPUS DIGITAL CAMERA

(Before the mushrooms are roasted.)

Place in a pre-heated 400 degree oven for 20 minutes or until the vegetables are tender and browned. (Turn once during the baking process to ensure even browning.)  Remove from the oven and sprinkle with the fresh rosemary. Stir. Set aside.

OLYMPUS DIGITAL CAMERA

(After the mushrooms are roasted.)

Meanwhile to prepare your béchamel sauce, melt the remaining 6 tablespoons of butter in a heavy saucepan over low heat. Add the garlic and cook for about 1 minute of until the garlic gives off its aroma. Whisk in the flour and cook for a couple of minutes or until the roux starts to turn a delicate golden brown. Slowly whisk in the milk and bring to a slow boil, stirring the entire time. Boil for one minute as the sauce continues to thicken. Remove from heat and whisk in the salt and pepper. Set aside. Reserve 1 cup of the béchamel sauce. (This will be spread on the lasagna half way through the baking process.)

Before cooking the noodles, have all the other ingredients prepped and ready to go. Cook the noodles in boiling salted water until al dente (firm to the bite). Drain the noodles and run under cold water. Drain again.  

To assemble:  Spread ½ cup béchamel sauce in a buttered 10×16-inch baking pan.  Arrange 1/3rd of the lasagna noodles over the sauce. Spread half of the roasted vegetables over the noodles, followed by half of each kind of cheese, then half of the béchamel sauce. Repeat, beginning with another third of the noodles, remaining roasted veggies, and remaining half of each cheese, except the Parmesan. Save out about a quarter cup. Layer on the remaining noodles. Carefully cover the pan with foil that has been sprayed with non-stick cooking spray and bake in a pre-heated 375 degree oven for 30 minutes. Remove the foil; spread the reserved 1 cup béchamel over the top and sprinkle with the reserved quarter cup of Parmesan cheese. Bake uncovered for an additional 15-20 minutes or until the lasagna is bubbly and lightly browned on top. Remove from oven, lightly cover with the foil you used earlier, and allow the lasagna to sit about 15 minutes before serving. Sprinkle with the parsley just before cutting into portion sized pieces.

*Hint: when deciding how many noodles to cook, spread the bottom of your pan with a single layer of uncooked noodles. Triple that number and you have just the right amount. (Seems too easy, doesn’t it?)  


ITALIAN MEATLOAF

OLYMPUS DIGITAL CAMERA

We recently purchased half of a Highland* cow together with Mr. Cs sister Katie and her husband Rick. When we received our quarter of the beef, we had 34 – 1 lb. packages of very lean ground beef among all the other cuts. Now that’s a lot of ground beast! Our beef had been packaged exactly as Rick and Katie’s. So at Christmas time when they were visiting for the holidays, Katie asked me what I planned to do with all the ground beef? Since I happen to really love ground beef, I answered that I already had several recipes that called for ground beef. But when I looked through my recipes, I realized I didn’t actually have that many. So I thought about my favorite cuisine – Italian. What about an Italian meatloaf, I thought to myself? So I set about figuring out a recipe.

Now the one thing that meatloaf absolutely must be is moist. If it is dry and has the consistency of sawdust, you might as well use it as a doorstop! So in order to offset the leanness of the beef, I added an equal part of pork Italian sausage. (You could use chicken Italian sausage, but the meatloaf would not be quite as moist.) And the recipe turned out to be very good. Absolutely moist and full of the Italian flavors that we so dearly love. And the topping, which is basically a simple marinara sauce, is a nice alternative to the usual ketchup and brown sugar variety.

So if you want a new slant on meatloaf, give this recipe a try. It is a wonderful way to prepare a large meat dish using 2 fairly inexpensive cuts of meat. Plus planned-overs can be used in a number of different ways – sandwiches, cut up in small squares to use as “meatballs” for spaghetti, or crumbled on a pizza, to name just a few.

So however you serve this dish, your family and friends are bound to like it. And for your young children who think of meatloaf as a boring alternative to “real” food, like McDonalds hamburgers, for example, don’t call it meatloaf. Call it something fun like Monday Moo Meat or some other fun name depending on whatever night you are serving it to your family. Then serve it with a potato dish like Oven Roasted Steak Fries with Fry Sauce (on this site) and carrot sticks, and your kids will love it. Or they might possibly think you have slipped over the edge. That could also happen! (I always felt it was better for my children to think of me as slightly crazy rather than as your average boring mother type! I succeeded too!)

*Highland cattle are a Scottish breed. They have long horns and long wavy coats that are black, brindle, red, yellow, white, silver or dun colored. And, this is the hard part, they are just stinkin’ cute! But, as cute as they appear, they are raised primarily for their meat. So as long as I stick to thinking of these darling critters in terms of small white packages that live in my freezer, I’m OK.

  • 1 T. extra virgin olive oil
  • ½ onion, finely chopped
  • 3 garlic cloves, minced
  • 2 T. Italian seasoning, divided
  • 1 tsp. kosher salt
  • freshly ground black pepper
  • ¼ c. minced fresh parsley
  • 1 c. finely grated Parmesan cheese
  • 3 eggs
  • 2 T. milk
  • ½ c. Italian style dry bread crumbs
  • 1 lb. bulk Italian sausage* (pork or chicken)
  • 1 lb. lean ground beef
  • 1 (8-oz.) can tomato sauce

Heat the oil in a small fry pan. Add the onion and fry until translucent. Add the garlic and sauté for one minute. Take all but 2 tablespoons of the cooked onion and garlic out of the pan and place in a large mixing bowl.  Set the pan, complete with contents aside. 

To the bowl with the cooked onion and garlic, add one of the tablespoons of Italian seasoning, salt, pepper, parsley, Parmesan, eggs, milk, and bread crumbs. Stir until thoroughly blended. Add the Italian sausage and gently stir until completely blended. (I use the meat serving fork from my set of tableware to help break up the meat as I stir it into the other ingredients. I find it to be the best tool for the job.)  Add the ground beef and do the same. Pat into a lightly greased 9X13-inch baking dish. 

Bake in a pre-heated 350 degree oven for 25 minutes. Meanwhile, add the tomato sauce, remaining 1 tablespoon Italian seasoning, and a pinch of kosher salt and pepper to the pan with the 2 tablespoons onion and garlic. When the meatloaf has baked for 25 minutes, remove it from oven and slather on the sauce. Return the meatloaf to the oven and bake an additional 15 minutes or until the meatloaf reaches an internal temperature of 160 degrees. (If you don’t have an instant-read thermometer, ask Santa for one next Christmas. They are the best thing to hit the culinary tool parade since high temperature spatulas!) But seriously, the meatloaf should be done after about 40 minutes. So don’t panic if your kitchen does not contain an instant-read thermometer. I didn’t have one until about 3 years ago, and I’ve been making meatloaf for a heck of a lot longer than that!    

*If you don’t happen to have bulk Italian sausage around, you can add 1 teaspoon of fennel seed and ¼ teaspoon crushed red pepper flakes to either plain ground pork or bulk breakfast sausage and achieve a good enough replacement.