Category Archives: MEXICAN FOOD RECIPES

LEFTOVER TURKEY POZOLE WITH GREEN CHILIES AND AVOCADO CHUNKS

Happy belated Cinco de Mayo. We celebrated last evening with Mr. C’s fabulous Margaritas and this delicious pozole. Since I am sure some of you are wondering “what the heck is pozole”, I’m going to provide you with a quick and fascinating explanation of its origin, etc.

From the benitosmexican.com site – “Pozole (pronounced po-so-le) means “hominy” and it is basically a cross between soup and stew. It is a popular and beloved dish throughout Mexico and is commonly enjoyed for events and special occasions, such as weddings, Independence Day, and Christmas. It is described as Mexican comfort food, because it warms you from the inside out.

Similar to many Mexican dishes, the name Pozole originates from Nahuatl and has a significant history. The main ingredient in Pozole is hominy, which is made from corn. Due to the belief that humans were made by the corn gods, in Mexican Aztec history corn was considered a sacred plant. Therefore, the Aztecs and other Mesoamerican peoples cooked Pozole only on special occasions.

Originally, Pozole was made from the human meat of prisoners whose hearts had been ripped out in ritual sacrifice. Thankfully, after the Spanish conquest in the 1500’s, cannibalism was banned and the meat in this dish was replaced with pork. While this little piece of dark history may be shocking, don’t let it scare you off!”

Well, there you go. Aren’t you glad you were interested enough to read about the history behind pozole. Moving on, let’s get to the real “meat” of what makes pozole a dish you might enjoy serving to your family.

Basically, it’s delicious. And it’s fairly easy to prepare. And it’s a one dish meal. (And yes, you can spell pozole with an “s” (posole) or a “z” (pozole). Either way is correct and universally accepted.)

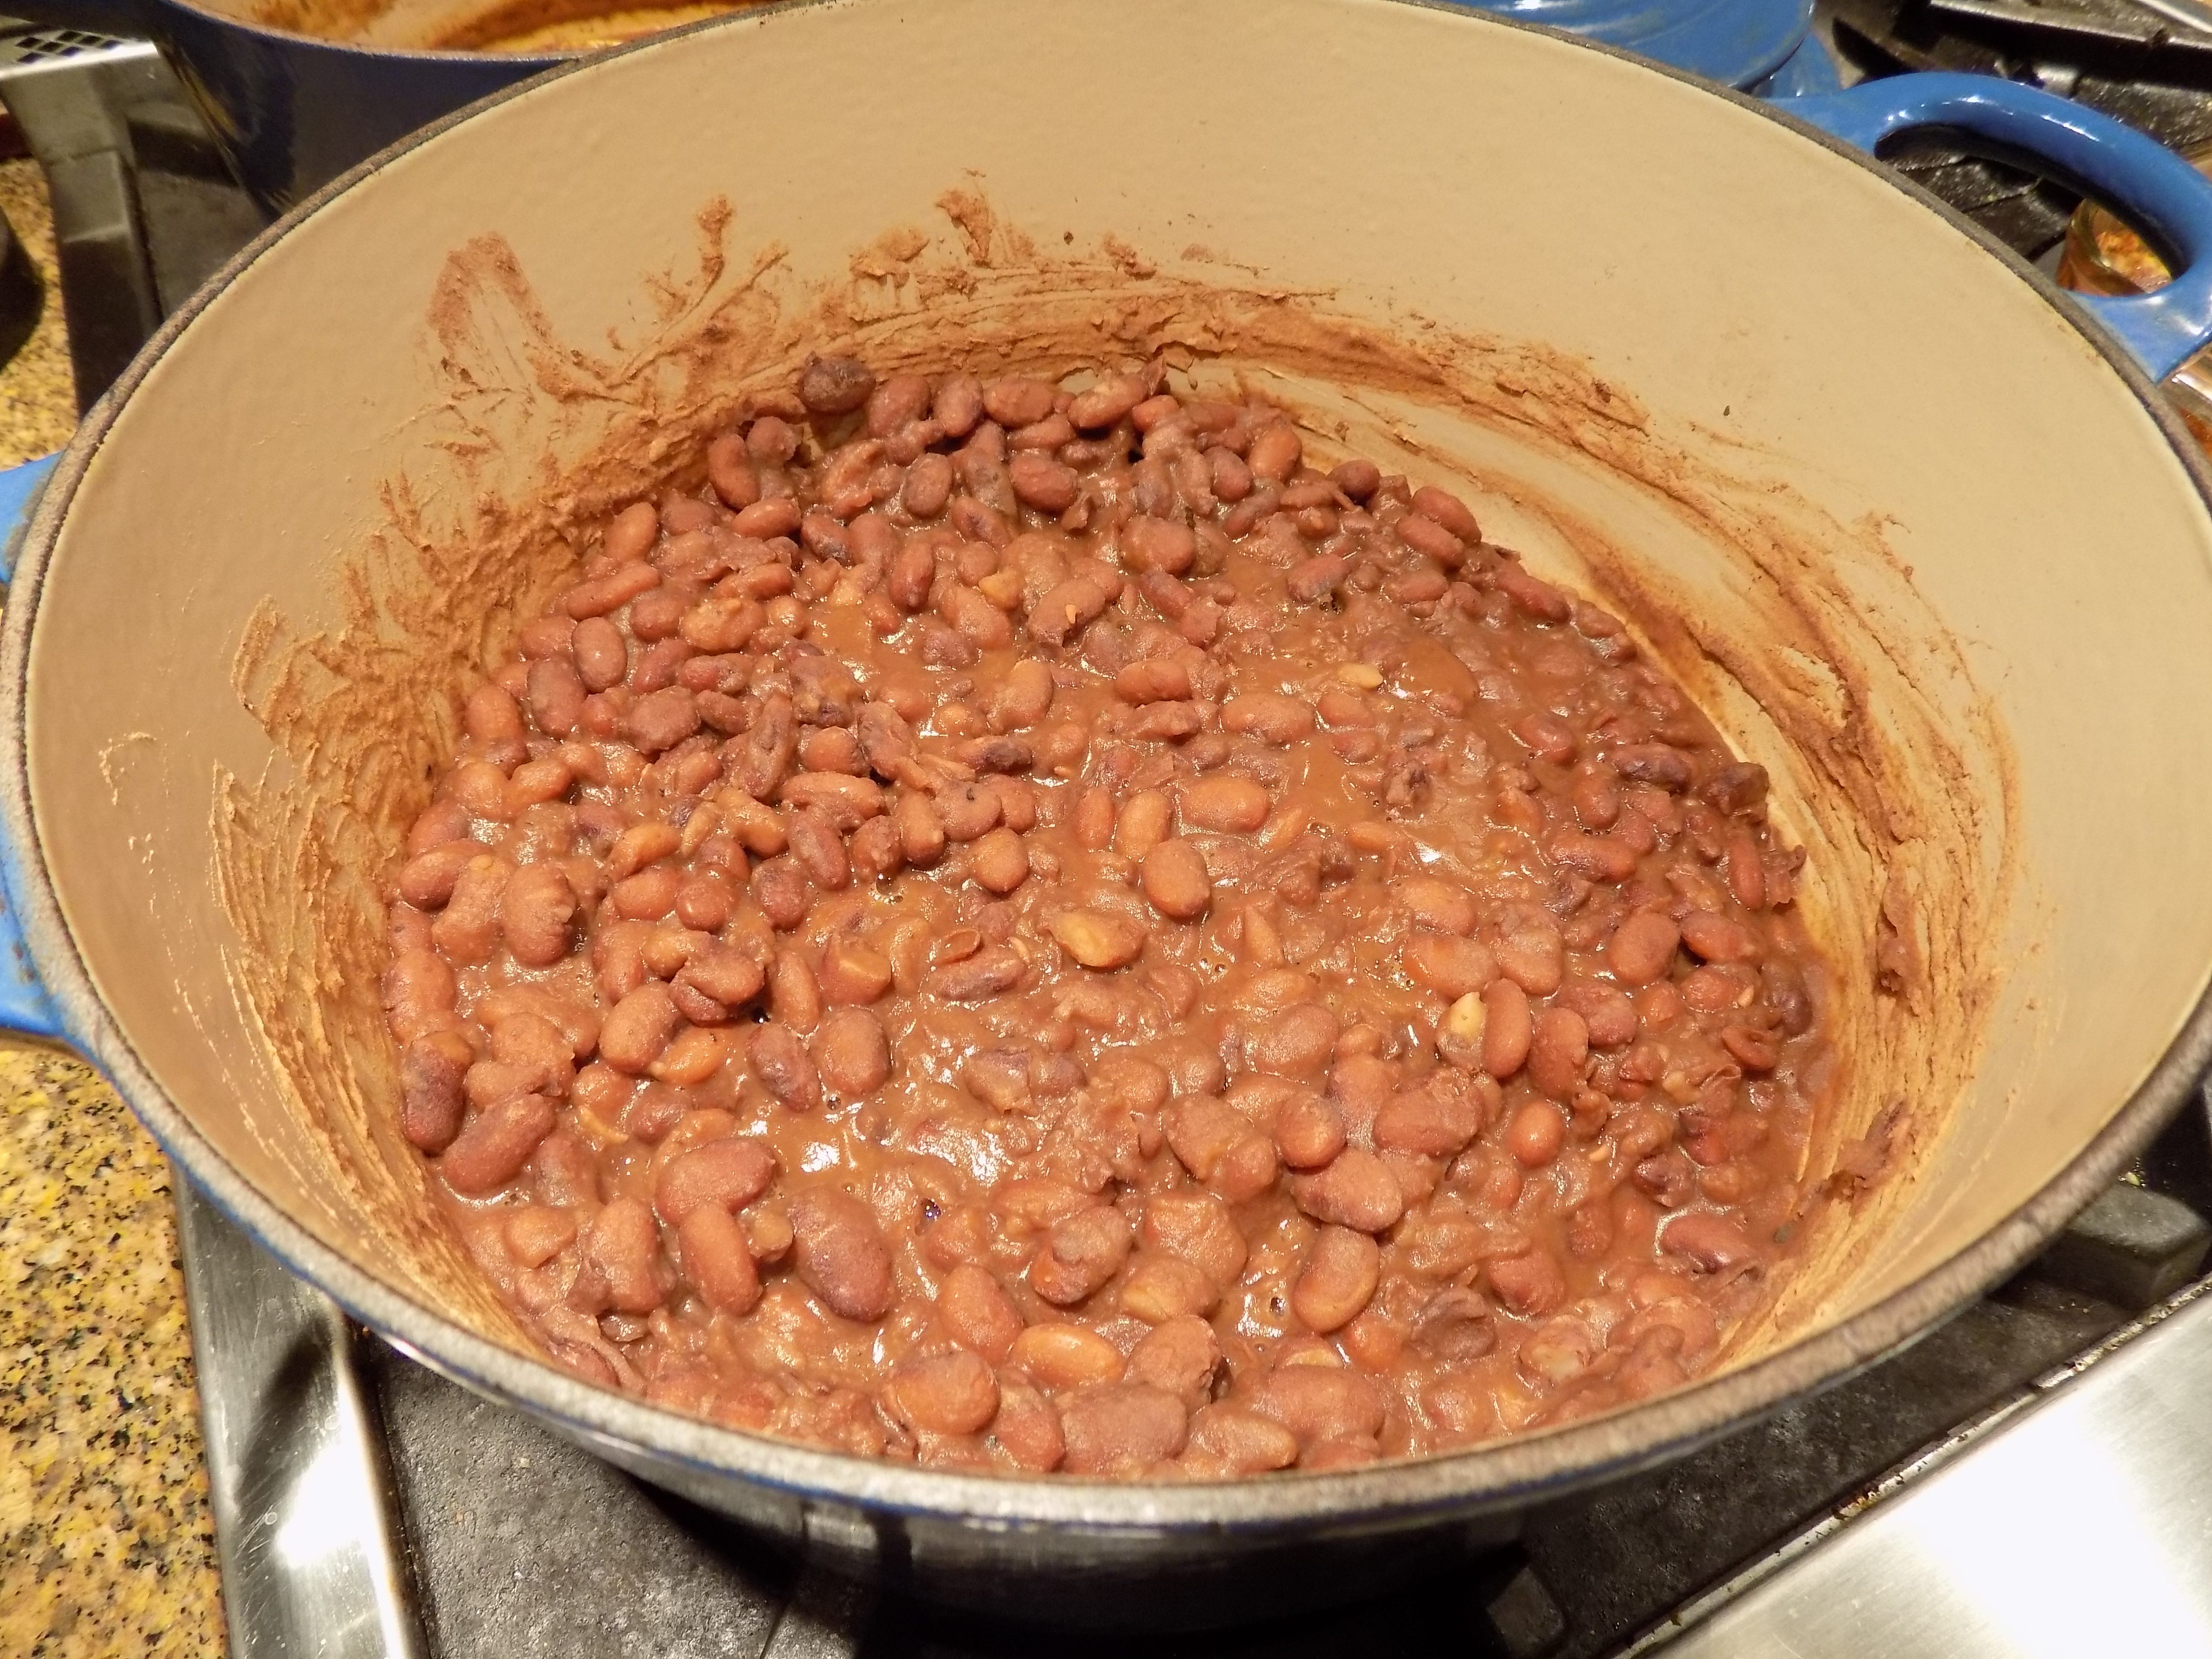
Now I am aware that not everyone has dried hominy (pozole) just lying around. I sure didn’t until I discovered this delicious stew/soup/whatever! a few years ago. (For two other posole recipes on this site, see my Red (Rojo) Posole with Pork, and Posole (Hominy) Side Dish with Pork and Green Chile.

But next time you visit your local grocery store, with your mask and gloves firmly in place of course, pick up a bag. (I buy Los Chileros de Nuevo Mexico White Corn Posole at QFC.) Or go on line and place an order. Pozole is truly worth the effort.

So as promised, you now have another recipe for what to do with leftover turkey. And for all of you who might be concerned that this dish might be too spicy for you, not to worry. It is really pretty tame. And if you don’t have any leftover turkey lurking in your refrigerator or freezer, by all means cook up a bit of chicken and call it good!

To all – stay safe, stay sane, and keep cooking new and interesting food. If nothing else, preparing different recipes can help keep your boredom at bay. And what fun for your family to look forward to whatever adventure you have planned for them at the dinner table. Today a visit to Mexico, tomorrow perhaps Hungarian cuisine or East Indian. There is simply no end to the enticing choices available. Be creative, but above all – Have Fun! Salud  

½ c. dried white corn posole (hominy) or 2 (15-oz.) cans drained and rinsed hominy*

2 T. extra virgin olive oil

½ med. sized yellow onion, chopped

3 garlic cloves, finely minced

2 tsp. ground cumin

1 T. Ancho chili powder

pinch crushed red pepper flakes

½ tsp. oregano (preferably Mexican), crumbled

small bay leaf

freshly ground black pepper

1 (7 oz.) can diced green chiles

1 (4 oz.) can Hatch diced green chiles

2 T. tomato paste

1 qt. chicken broth (low sodium if possible)

1 c. water

2 c. bite sized pieces of cooked turkey or chicken

2 T. roughly chopped parsley or cilantro

¼ c. thinly sliced green onions

chunks of avocado

sour cream (Mexican style is best)

Place dried hominy in a non-reactive container and cover with water; soak overnight. Next day, boil posole in salted water for approximately 2-2½ hours or until tender. Drain. 

Pour the oil into a large, heavy-bottomed covered pot and heat over medium heat. Add the onion and slowly cook until the onion is soft. Add the garlic and cook for one minute. Stir in the cumin, Ancho chili powder, crushed red pepper flakes, oregano, bay leaf, black pepper, diced green chiles, Hatch chiles, tomato paste, chicken broth, and water. Bring to a boil over high heat. 

Reduce heat and let the soup simmer, partially covered, for one hour. Add the hominy, cooked turkey pieces, and parsley. Simmer for an additional 10 minutes. Taste and adjust the seasoning.

Serve with chopped parsley, green onions, avocado chunks, and sour cream as a topping.

*Use canned hominy if in a hurry, but taste and texture are just not as good as when you start with dried posole.

MEXICAN RICE PILAF

I really hate it when I have to eat my words. (I enjoy eating almost everything else, but eating my own words causes me anxiety and hives.) But sometimes there is just nothing for it except to get it over with and start chewing. So – in full disclosure, in a previous post for Mexican rice, I stated that “with the exception of a particularly delicious paella I once enjoyed in Spain and a fine recipe I have for cabbage rolls, I don’t like rice and tomatoes cooked together”.

But when researching recipes for a recent Mexican food themed meal I found this recipe from Once Upon a Chef. And since I love and trust this site, I bit the bullet. I did make a couple very minor changes, but I don’t mess with the bones of a Jenn Segal recipe, because she is a remarkable chef. So I left in the tomato paste.

And of course, you know what I have to say next. The rice was wonderful, and one of the main reasons was because the (damn) tomato paste was one of the ingredients! Gurrr!

Now this is important so pay attention. Sometimes, actually quite often, I am wrong about food combinations. It’s all a matter of taste anyway. So as I have previously stated, any recipe for something like this rice dish, is simply a guide. If you wanted to add peas (as Jenn originally included), add peas. Or you like a more pronounced garlic influence, up the number of garlic cloves. Or you feel chopped celery would add a nice base flavor, chop away. Or if you are like me, and still on the fence about cilantro, decrease the amount in any given recipe and add a bit of fresh parsley. That’s the joy of cooking. You make it your own by simply being creative and adding your own special touch.

So make this wonderful rice. It turned out that one of the enchilada dishes I served was quite runny. So what my guests did was top their rice with the enchilada. It was great! So don’t hesitate to use this as a base for other Mexican dishes. Have fun in the kitchen. That’s what this is all about.

2 T. extra virgin olive oil

1 c. finely chopped yellow onion

1 jalapeño pepper, stemmed, seeded, and finely minced (or more or less to taste)

2 lg. cloves garlic, finely minced

1½ c. long grain white rice

2 T. tomato paste (preferably Italian tomato paste)

3 c. vegetable broth

1 tsp. kosher salt

freshly ground black pepper

½ tsp. chili powder

½ tsp. ground cumin

2 T. finely chopped cilantro

2 T. finely chopped parsley

4 tsp. fresh lime juice, or more to taste

Heat the olive oil in a large covered pot over medium-low heat. Add the onions and jalapeño and cook, stirring frequently, until onions are softened and translucent, about 5 minutes.

Add the garlic and rice; cook, stirring frequently, for about 3 minutes.

Add the tomato paste, broth, salt, pepper, chili powder, and cumin; turn up the heat and bring to a boil.

Reduce the heat to low, cover the pot, and simmer until all the liquid is absorbed, about 20 minutes. Stir periodically. When done, remove from heat.

Add the cilantro, parsley, and lime juice; fluff the rice with a fork to mix. Let the rice sit for a few moments for the flavors to meld. Taste and adjust seasoning, add additional lime juice if desired.

To make ahead, do not add the cilantro, parsley, and lime until you have re-heated the rice and just before you plan to serve. To reheat the rice, heat in a covered container in a 350 degree oven for 30-40 minutes, or until the rice is good and warm. Stir in the cilantro, parsley, and lime. Adjust seasoning. Serve immediately.

OVERNIGHT MEXICAN COLESLAW

I know I’ve said it before, ad nauseam in fact, but I love dishes I can prepare ahead for special dinners with family and/or friends. There is just something about waking up on the day of the planned event having at least part of the meal happily residing in my refrigerator or on a counter. OK, I still feel a bit of panic, but it is soon offset by remembering that I have at least one if not some of the preparation already completed. (And at my age, every little bit helps.)

So recently when I was planning to serve Mexican food to 38 people, I realized most of the dishes I wanted to serve would have to be fixed ahead. And I knew I wanted to serve a coleslaw, both for color and crunch.

Now most of my coleslaw recipes you can cut the veggies ahead, and you can prepare the dressing ahead, but you shouldn’t combine the two parts until just before you plan to serve. But I wanted a coleslaw that could be made ahead, in fact, one that would profit by spending some quality time in cold storage. So I went online. (Of course I did!) And found a recipe on The Kitchen Magpie site. As usual, I changed the ingredients a bit, but not in any radical manner.

So all I can say now is that if you like coleslaw, this is a recipe which should be given special attention. It is crazy delicious and very simple to assemble. And you can make it the day before you want to serve it! (I keep coming back to that salient feature, but I’m old, so cut me some slack.)

Anyway – just make this salad. It’s yum!

1/3 c. fresh lime juice

½ tsp. ground cumin

2 tsp. honey

2 cloves garlic, finely minced

½ tsp. kosher salt

freshly ground black pepper

½ c. extra virgin olive oil

½ head green cabbage, very thinly sliced

½ head red cabbage, very thinly sliced  

1½ c. grated carrot

4-5 very thinly sliced green onions

¼ c. chopped cilantro

1 T. chopped Italian parsley

Shake the lime juice, cumin, honey, garlic, salt, pepper, and olive oil together in a small covered jar. 

Toss the green cabbage, red cabbage, carrot, green onions, cilantro, and parsley together in a salad bowl.

Pour the dressing over the cabbage mixture and toss together until the veggies are completely covered in dressing. If time allows, cover the bowl and refrigerate overnight for best results. Toss again just before serving. 

CHUNKY SHRIMP, AVOCADO, AND TOMATO DIP

This lovely seafood/guacamole/salsa like appetizer is simply delicious. The recipe comes from one of my favorite recipe sites – Natasha’s Kitchen. I changed a couple of amounts here and there, but this gem can only be attributed to Natasha’s culinary genius.

It’s like guacamole on steroids. Every bite beckons you to take another bite. So in that way, this is a dish where you could conceivably make a pig of yourself in front of your friends and family. So maybe the first time you prepare this before meal nibble, you should do so all by yourself in the privacy of your own kitchen. Just sayin’. It’s just that good. Or, you could always make a double batch and eat as much as you want, leaving the lions share for your family and friends. (Sounds like I speak from experience, right?!?!) Actually not.

I made this last Sunday for a Mexican food themed pre-concert meal for our 101st JazzVox concert in our home. But I barely got a taste of it before our guests heartily enjoyed their way through the whole bowl. But the bite I did get made me certain that it would not be too long before I made some just for Mr. C. and me.

So if you are ever in the mood for a special appetizer, give this delightful recipe a try. I would also advise you to visit Natasha’s site. She has a wonderful flair for food and her recipes are mostly easy to follow and include, again mostly, readily available ingredients. Happy eating!

Oh, and sorry I haven’t posted recipes for a while. We were enjoying another adventure out in this amazing world of ours. If you would like to follow us on our recent trailer trip, klick on September 2019 Trailer Trip.

1 lb. lg. raw shrimp, peeled, deveined, and tails removed

¼ tsp. kosher salt

freshly ground black pepper

1 T. extra virgin olive oil

3 med. limes, juiced, or more to taste

couple dashes of hot sauce (I use Frank’s Red Hot), opt.

½ English cucumber, semi peeled, seeded, and finely diced

4 Roma tomatoes, seeded and finely diced

3 avocados, diced  

½ c. finely diced red onion   

1/3 c. chopped cilantro

yellow and blue tortilla chips, for dipping

Season shrimp with salt and pepper. Heat the olive oil in a fry pan over medium high heat. Add shrimp and sauté just until cooked through. Remove from pan. Allow to cool, then coarsely chop and place in a large mixing bowl.

Pour the lime juice over the shrimp, and let sit for a few minutes before gently stirring in the hot sauce, cucumber, tomatoes, avocados, onion, and cilantro. Taste and adjust seasoning. Serve with tortilla chips.

CHICKEN ENCHILADA SUIZAS CASSEROLE

So, depending on whether or not you are trying to eat healthier, you are in for a treat with this recipe (slightly modified by yours truly) from the Joyful Healthy Eats site. And in case you have never enjoyed an enchilada suizas, you probably don’t know that most of the time the key ingredients are a various combination of butter, sour cream, heavy cream, crème fraiche, half & half, and cheese. Lots of cheese. (I mean really, what’s not to like?) But in this recipe, there is nary a mention of butter, sour cream, heavy cream, crème fraiche, or half & half. There is of course cheese in this recipe, but then how could it not contain cheese, since the very definition of suizas means Swiss and alludes to its copious use of cheese and other dairy products.

But, using only non-fat Greek yogurt along with both Mozzarella and Monterey Jack cheese, the total fat content in this recipe is far lower than in typical recipes for this amazing dish.

Also, layering the tortillas rather than rolling them up, reduces the amount of time it takes to prepare these enchiladas. And any time I can save time as well as calories, I say hurray to that!

So what you are left with is a delicious casserole filled with tender chicken pieces, tortillas and cheese that simply melt into the lovely green chili sauce. If it sounds delightful, you would not be wrong. This casserole is really, really amazing. And the best part. You don’t have to feel guilty eating it! Of course, it still has calories. But about half as many as most enchiladas suiza. And it’s gluten free. And isn’t that always special!

So do yourself a favor. Next time you want Mexican food, make it at home. Paired with my recent post for Mexican Black Beans, you have a healthy, nutritious, and delectable meal you can serve your family and friends that is every bit as good, if not considerably better than you can find in most Mexican restaurants.

Now, if you are the kind of person who doesn’t feel a Mexican meal is complete without rice, I have a great recipe for you to try that’s already on this site. And if you guessed that the recipe would be entitled Mexican Rice, give yourself a gold star. Just be for-warned. There are no tomatoes in my recipe. (Just throwing that out there so you won’t be surprised when you read the ingredient list.) I just don’t happen to like most tomato flavored rice recipes. So my recipe is completely different. (Pretty darn delicious too.) So give all three of these recipes a try. Throw a Mexican dinner for your family and friends. Just don’t forget the Guacamole and Margaritas. (And yes, I have recipes for them too. So make that – five new recipes to try.) But wait, there’s one more recipe you need to make for your family and friends – Tres Leche (Three Milks) Cake. (Actually there are even more Mexican recipes if you search under Mexican Food Recipes.) OK, I’m done now. You may be excused. Buen provecho.

Chicken:

2 boneless skinless chicken breasts

1 tsp. extra virgin olive oil

½ tsp. seasoned salt

freshly grated black pepper

¼ tsp. granulated garlic

¼ tsp. paprika

Place chicken breasts in an 8×8-inch baking pan. Pour on the olive oil. Using your hands, best tool in the kitchen BTW, massage the oil all over the chicken. Wash your hands and mix together the seasoned salt, pepper, granulated garlic, and paprika. Sprinkle the mixture evenly over both sides of the chicken.

Bake in a pre-heated 450 degree oven for 20-25 minutes or until the chicken is cooked through and no longer pink.  If you use an instant read thermometer to measure the temperature at the thickest part of the breast, it should read about 170 degrees. Remove from oven and allow to cool completely before dicing into small cubes. (Save the juices that have accumulated in the bottom of the pan as the chicken cools. You are going to add them to the sauce.)

Green Chili Sauce:

1 T. extra virgin olive oil

1 c. chopped yellow onion

2 garlic cloves, minced

¼ tsp. ground coriander

½ tsp. ground cumin

¼ tsp. kosher salt

freshly ground black pepper

4 c. (1 qt.) chicken stock

7-8 oz. canned diced green chilies

2 T. water

2 T. cornstarch

2/3 c. plain non-fat greek yogurt

Heat the oil in a large skillet. Add the onion. Sauté until translucent, about 3-4 minutes. Add the garlic and sauté for 30 seconds. Add the ground coriander, ground cumin, salt, and pepper. Stir in the chicken stock and green chilies. Bring to a boil, and simmer for 10 minutes or until the chicken stock has reduced a bit.

In a medium sized bowl, whisk together the water and cornstarch. Add to the skillet along with the juices from baking the chicken, and cook until the sauce thickens. Remove pan from heat and whisk in the yogurt. Taste and adjust seasoning. 

Building the Casserole:

15 small white corn tortillas or 10 regular sized

1½ c. shredded low-fat mozzarella cheese

1 c. shredded Monterey Jack cheese

avocado chunks, opt.

diced fresh tomatoes, opt.

Spread a very small amount of the sauce on the bottom of a lightly greased 9×13-inch baking pan. Add a layer of tortillas (feel free to cut them to fit the pan), then 1/3rd of the remaining sauce, cooked chicken, and cheeses. Repeat 2 more times. Finish with the last of the shredded cheese on top. (If it looks like a little more cheese on top would be nice, you know where your grater lives!)

Bake in a pre-heated 350 degree oven for 30-40 minutes or until the cheese on top is starting to brown and is nice and melted, and the sauce around the edges of the pan is bubbly. Let sit for about 5 minutes before serving.

Serve garnished with freshly diced avocado and tomatoes.


MEXICAN BLACK BEANS

OK, so I recently told you that I was on yet another of my healthy kicks, so here goes a new recipe using dried beans. Now before you close down this post or jump out of your bedroom window, I want you to know that these are the best black beans I have ever tasted. And I have been on this strange planet for quite a number of decades now. And, I have made more recipes using dried beans than I can count. And I am good with numbers!

This recipe is straight out of the little recipe book that came with my Cosori Instant Pot/Pressure Cooker. (Thanks again Paula and Mark.)

I am truly not exaggerating when I say these beans could not be more delicious. Or nutritious! They are tender, savory, and juicy. (You need to serve them in a bowl.) But OMG (oh-my-goodness), they make for a very happy mouth. And if I’m not mistaken, my digestive track is probably giving me a “high-five” for providing it with the total and soluble fiber it so richly deserves. Not to mention the important micronutrients like potassium, magnesium, folate, iron, and zinc that come with the whole package.

So if you are trying to eat healthier and still enjoy food that tastes like it’s been prepared by a world class chef, give these beans a try. And if you can find a restaurant that serves beans that are this delicious, please let me know. If they can turn out beans like this, imagine what their chiles rellenos would taste like. The mind boggles at just the thought of a chiles rellenos that good.

Anyway, make some of these beans. And not just because they’re good for you. But out of the sheer pleasure of tasting something so delicious it will almost make you weep. Thank you Cosori for this wonderful recipe. And good health to you all.

2 c. dry black beans, rinsed 

1 onion, chopped 

4 garlic cloves, chopped 

1 T. chili powder 

1 tsp. paprika 

½ tsp. ground cumin 

2 tsp. kosher salt

freshly ground black pepper

2 tsp. extra virgin olive oil 

3½ c. water 

juice of 1 lime, or more to taste

Place the beans, onion, garlic, chili powder, paprika, cumin, salt, pepper, olive oil, and water in your Instant Pot pressure cooker.

Secure the lid, making sure the pressure release valve is in the locked position.

Select Beans/Chili then add additional time to read 45 minutes.

Press start.

Allow the cooker to naturally release for 15-20 minutes when done cooking. Add the lime juice and adjust seasoning.


INSTANT POT MEXICAN SHREDDED BEEF ENCHILADAS

I want you to know just how brave I have become. I have actually used my Instant Pot 3 times in the last few weeks. Amazing right? And I must say in all honesty – what in the heck was I worried about? My Instant Pot is so easy to use, and so far the results have been terrific. OK, I still don’t sauté in my Instant Pot because I like to control that step on my stove top. But cook dried beans, or in this case meat that would normally have to simmer for hours, well I am now so on board the Instant Pot train! And the pot is even easy to clean! Better and better.

So the other day I got a wild hair to make a shredded beef enchilada. I love Mexican food, and already had a great recipe for Cheese Enchiladas with Red Chili Sauce (the best red sauce you could ever hope to create at home BTW), but my mouth was craving shredded beef. So I went on line and glommed together this recipe. And I must say it filled my expectations and then some. And easy? Oh yah!

So if you too have been the least bit hesitant to use your Instant Pot, get over your fears and give this recipe a try. I topped the enchiladas with homemade Pico de Gallo (on site) and sour cream. And served Mexican Cabbage Salad (see recipe below) and Instant Pot refried pinto beans on the side. (Beans recipe to be posted in the next few days.)

And if you love shredded beef enchiladas as much as I do, make this recipe at your earliest convenience. It is just plain yummy. And if you have extra meat, don’t hesitate to freeze it for the next time you experience an enchilada craving.

2 T. extra virgin olive oil

3 lb. boneless chuck roast, all visible fat and gristle removed, and cut into 3-inch pieces

1 c. beef broth

juice of 1 lime

1 sm. can (8 oz.) tomato sauce

2 tsp. chili powder

2 tsp. dried oregano, preferably Mexican oregano

2 tsp. ground cumin  

1 tsp. paprika

1 tsp. kosher salt

¼ tsp. crushed red pepper flakes

¼ tsp. ground cloves

freshly cracked black pepper

1 can (lg. or sm.) chopped green chilies

1 sm. yellow onion, rough chopped

4 cloves garlic, rough chopped

2 bay leaves

flour tortillas, warmed on a dry griddle

Heat olive oil in a large frying pan. Brown all the pieces of meat and place them in your Instant Pot. Add more olive oil if necessary. (The beef chunks should be very well browned on all sides.) Don’t wash the fry pan. Pour off any fat, but leave the brown bits for later.

In a medium sized bowl, whisk the broth, lime juice, tomato sauce, chili powder, oregano, cumin, paprika, salt, crushed red pepper flakes, ground cloves, and black pepper together. Stir in the canned green chilies, chopped onion, chopped garlic, and bay leaves.

Pour over the meat and give the whole mess a good stir.

Place the lid on the instant pot and lock.  Steam release knob should be set on “sealing”.  Cook on manual setting (high pressure) for 60 minutes.  Allow pressure to release naturally.

Remove beef from pressure cooker and shred with 2 forks, discarding any fat. 

Pour the remaining liquid from the Instant Pot into the fry pan. Discard the bay leaves. Heat and stir up the brown bits on the bottom of the pan. If the sauce is not thick enough, make a simple water and cornstarch slurry (1 to 1 water and cornstarch mixture) and add to the meat juices. Bring to a boil, and whisk until smooth and sauce reaches desired consistency. Add shredded beef to pan. Adjust seasoning. Cook until warm.

Fill warmed tortillas with meat, roll, and top with Pico de Gallo and sour cream. Or whatever your heart desires. Meat can also be used as a filling for tacos or on a taco salad. Let your imagination be your guide.

Note: I have not tried making this shredded beef the more traditional way. That is on either my cook top or in the oven, but I see no reason why it wouldn’t turn out just fine. Just check it every hour or so to make sure the beef is not getting too dry. Add water or beef broth as required.

MEXICAN CABBAGE SALAD  

½ small head cabbage, chopped

1 jalapeno pepper, seeded and minced

½ small red onion, minced

1 carrot, shredded  

1 T. chopped fresh cilantro

juice of 1 lime

pinch kosher salt

freshly ground black pepper

In a bowl, mix together the cabbage, jalapeno pepper, red onion, carrot, cilantro, lime juice, salt, and pepper. Store in refrigerator until ready to use.

This salad would also make a great accompaniment to fish tacos. Just sayin’!  


MEXICAN PINTO BEANS

I love dried beans. They are so terribly multitalented and the best part – they are really, really good for us. Let me count the ways! Source – Huffington Post, Bonnie Taub-Dix

  1. Beans contain an abundance of soluble fiber, which can lower cholesterol and triglyceride levels. In other words, they are heart healthy.
  2. Beans are low in fat (only 2-3 percent) and contain no cholesterol.
  3. Beans pack protein. Half a cup provides 7 grams of protein, the same amount as 1 ounce of chicken, meat, or fish. Beans are a terrific source of protein for vegetarians and vegans.
  4. Beans balance blood sugar. With a low glycemic index, beans contain a beautiful blend of complex carbohydrates and protein. Because of this, beans are digested slowly, which helps keep blood glucose levels stable, which in turn helps curtail fatigue and irritability.
  5. Beans cut the risk of cancer and chronic diseases. Scientists recommend that adults consume 3 cups of beans per week to promote health. Beans contain an abundance of antioxidants which prohibit (and in some cases even prevent), the oxidation of other molecules in the body. The benefits of antioxidants are very important to good health, because if free radicals are left unchallenged, they can cause a wide range of illnesses.
  6. Beans help our bodies stay regular. Filled with fiber, beans can promote regularity by preventing constipation. To maximize the benefit, always accompany high-fiber foods such as beans with ample amounts of water.
  7. Beans give us that “full” feeling. Because beans are metabolized more slowly than other complex carbs, they may aid in weight loss by keeping us feeling full without being excessively high in calories.
  8. Beans are convenient and inexpensive. Canned or dry, beans are a breeze to purchase, prepare, and store. They are also the least expensive source of protein, especially when compared to fresh meat.
  9. Beans are rich in nutrients. They contain a powerhouse of vitamins and minerals, such as copper, folate, iron, magnesium, manganese, phosphorous, potassium, and zinc. The Dietary Guidelines for Americans refer to many of these important nutrients as “shortfall nutrients,” meaning most of us aren’t getting enough of them.
  10. Beans are very versatile. They can be incorporated into a main dish (chili), side dish (rice and beans), appetizer (soup) or snack (dip). It’s easy to be creative when you have pinto beans, kidney beans, black beans, black-eyed peas, garbanzo beans (chickpeas), split peas, and lentils, etc. etc. in your pantry.

Now that you know the health reasons behind incorporating more beans into your diet, let me share with you the real reason I eat beans. They are just plain delicious! And this recipe, which is really simple to prepare, is a good example. But before you get too excited, I need to mention that this dish is never going to be the star of any Mexican meal. Think of this dish like you would the back-up singer in a band. Creates another level of enjoyment for the audience, would be missed if not on the stage, but not the reason you came to the concert in the first place.

Or think of how you order a meal in a Mexican restaurant. You never order “whole beans with an enchilada on the side”. Of course not. You order an enchilada which almost always comes with a side of beans! So this is that side of beans that is good on its own, but is really on the plate to compliment the enchilada, or tamale, or whatever!

And that’s exactly what happened last evening. I made Cheese Enchiladas with Red Chili Sauce, (on this site) and served these beans on the side. What a yummy meal. BTW, the Red Chili Sauce for the cheese enchiladas is absolutely the best Mexican red sauce I have ever tasted. I’ve been making it now since the mid 70’s, and like I said, I have never tasted one better. Even the restaurants in New Mexico, Arizona, or Colorado can’t make a red sauce as flavorful as this one! (And yes, I can boast about this sauce, because I didn’t invent it. I received it from my late friend Jan W.)

So, break out the tequila, put on a mariachi CD, and whip up a Mexican dinner for your family and/or friends. Don’t forget the Guacamole! (Recipe also on this site). Salud!

  • 1 lb. dry pinto beans (about 2½ cups)
  • 8 c. water, divided, or more as needed
  • 1 lg. bay leaf
  • ½ tsp. cumin
  • ½ tsp. smoked paprika
  • ½ tsp. granulated garlic
  • ½ tsp. onion powder
  • 1 tsp. chili powder
  • 1/8 tsp. cayenne pepper
  • 2 tsp. kosher salt
  • freshly ground black pepper (not too much)

Pour beans into a colander. Run water over the beans and remove any rocks, dirt, or misshaped beans. Add beans to a large covered pot. Pour in 6 cups of the water and bring to a boil. Cover and simmer on low for 1 hour. Stir periodically.

After an hour, add the remaining 2 cups water, bay leaf, cumin, smoked paprika, granulated garlic, onion powder, chili powder, cayenne pepper, salt, and black pepper; stir to combine. Bring to a boil. Cover, reduce heat, and simmer on low heat for an additional 60 to 90 minutes, stirring occasionally. Beans are done when they are soft and the liquid is creamy. (Add more water if the beans aren’t tender but most of the liquid has evaporated. If you have too much liquid, remove the lid and simmer gently until you achieve desired consistency.) Adjust seasonings as required.


CHILES RELLENOS CASSEROLE

OK, there are days (I hate to admit this) when I simply don’t want to cook dinner. All I want is to go out to eat! Practically anywhere! Just – out! And really, there need be no good reason for my lethargy towards dinner preparation on these days. I just know I don’t want to cook, mainly because my inspiration level is on empty.  Plus nothing sounds good. On those days what I need is for someone else to give me dinner suggestions (menu), do the prep work (cook), and clean up the mess (kitchen help). Not that Mr. C. doesn’t do the dishes after meals. He does. Actually, he is a marvel at efficiency when it comes to meal clean up. It’s just that some evenings I don’t even want him to spend time in the kitchen. I know – crazy.  So usually, on these occasions, we simply go out.

But then there are the times when I can’t even decide where I want to go. And the thought of putting on lipstick and driving more than 15 minutes seems way too onerous to even contemplate. (There aren’t an abundance of good restaurant choices near our home you see.) So when this happens, and it’s happening more regularly the older I get, I usually bite the bullet and fix the easiest and most delicious thing I can think of to prepare. And this dish fits the bill perfectly.

Now after looking at this recipe you are going to want to say to me “Patti, that looks like the most fattening conglomeration of ingredients I can imagine putting in my mouth”. And you know what? You’d be right! It is a cholesterol bombshell! But you know what else; it is heaven in a pan. And this heavenly concoction can be thrown together in under 15 minutes. (Of course there is the baking time. But who cares. While the casserole is in the oven you’ll have plenty of time to relax and have a nice adult beverage.)

So what to fix to go along with this caloric wonder? Well how about chicken dinner sausages, fresh from your freezer? And a simple little green salad with olive oil and vinegar dressing. Again, quick, easy, and delectable.

So the other evening when inertia had me firmly in its grip, I fixed this casserole, grilled some defrosted sausages, and made a simple little salad of romaine, red onion, tomatoes, marinated black olives, and lots of basil tossed with a simple vinaigrette. The whole meal took less time to prepare than the time I had already spent thinking about where I might want to go for dinner. Isn’t that pathetic?!?! (The things you learn about me through this blog.) Luckily for you, whatever I’ve got can’t be transmitted through the internet. So you can safely catch my drift, but not my silliness! Tiddely Pom*

  • 3 c. (12-oz.) grated Monterey or Pepper Jack cheese
  • 1½ c. (6-oz.) grated sharp cheddar cheese
  • 1 (7-oz.) can diced mild green chilies, drained if packed in water
  • 1 T. flour
  • 2 T. milk
  • 2 eggs

Combine the cheeses and place half of the mixture in a lightly greased 9×13-inch pan. Sprinkle the green chilies over the cheese. Sprinkle on the remaining cheese.

Whisk together the flour and milk. Add the eggs and beat until smooth. Pour over the cheeses and egg mixture.

Bake in a pre-heated 375 degree oven for 50-60 minutes or until firm and brown on top, sides, and bottom. Remove from oven and let sit for 5-8 minutes. Cut into small pieces for appetizer bites or larger pieces when serving as a side dish or main course.

*Don’t know the term Tiddely Pom? Look it up.

MEXICAN STYLE STUFFED GREEN PEPPERS

I love stuffed green peppers. I always have. Even as a small child I favored them over a simple meat and potatoes dinner. There was just something delightful about each of us having our own delectable container filled with seasoned meat. I liked the tidiness of the presentation. And along with the stuffed pepper would always come our very own baked potato. Again a tidy package on which to heap all kinds of lovely ingredients like butter, salt, and pepper. No sour cream, bacon, or sliced green onions in those days. But as much butter as we wanted. (We had our own cows and my grandmother churned our butter. So butter was not a luxury, it was simply taken for granted and eaten enthusiastically.) Sigh……..

So yesterday while we were at the grocery store, I noticed that green peppers were on sale. I looked at Mr. C, he looked at me, we nodded yes simultaneously, and the making of our dinner menu was hatched right there in the produce section of our local IGA. (It’s OK, we’re married! Hatching dinner plans in public is still considered acceptable behavior for married couples!)

Anyway, when we arrived home I decided to work up a recipe for stuffed peppers featuring Mexican ingredients and seasonings. So I began my task and came up with this recipe. I hope you enjoy it. And don’t hesitate to serve it to your children. They might balk at the pepper part, but I bet they will love the filling. And to its credit, the filling is high in protein and some other really-good-for-growing-children ingredients. Including, and this is the fun part, you can sneak wheat germ into the filling and your kids won’t even notice. Hah – is that great or what?!?! For this recipe, I would suggest about a quarter cup of wheat germ. At least, that’s the amount I used per pound of meat while I still had kidlets at home.

For more information about the health benefits of wheat germ for children, visit www.parentinghealthybabies.com, then search under Health Benefits of Wheat Germ for Children.

Please note: For my recipe for a delicious, unmistakably Italian stuffed green pepper, search under Stuffed Green Peppers on this site.

  • 4 green peppers, tops sliced off and seeds and membranes removed and discarded (save the top to finely dice and add to the filling)
  • 2 tsp. extra-virgin olive oil
  • 1 lb. lean ground beef
  • ½ small onion, finely chopped
  • 1 jalapeño, minced (first carefully remove the seeds and membranes)
  • 2 cloves garlic, minced
  • ½ tsp. kosher salt
  • freshly ground black pepper
  • ¼ tsp. smoked paprika
  • ½ tsp. ground cumin
  • ½ tsp. dried oregano (Mexican preferably)
  • 2 tsp. chili powder
  • 1 (8-oz.) can tomato sauce 
  • 2 tsp. Worcestershire sauce
  • ½ c. cooked brown rice
  • ½ c. low-fat sour cream
  • ½ c. grated shredded sharp cheddar or cheese of choice, plus more to sprinkle on top for presentation

Heat oil in a large skillet over medium-high heat. Add beef and fry until cooked through and browned. Add onion, jalapeño, and the finely diced flesh from the top. Cook until the veggies are slightly softened, about 4 minutes. Stir in garlic and cook for 1 minute. Add salt, pepper, smoked paprika, cumin, oregano, chili powder, tomato sauce, and Worcestershire sauce. Cook for about 2 minutes to blend flavors. Remove from heat and add the cooked rice, sour cream, and cheese; mix well. Adjust seasoning.  

Lightly grease an 8×8-inch baking pan. Place the peppers, cut side up in the pan and fill with the meat mixture. (If you have extra filling, bake it in another small baking dish.)

Bake the peppers in a pre-heated 350 degree oven for 75-90 minutes or until the pepper is very soft and starting to brown. (If the filling gets too brown during the baking process, cover with aluminum foil.)

Remove from oven and sprinkle with a small amount of grated cheese. Serve immediately.

[contact-form][contact-field label=’Name’ type=’name’ required=’1’/][contact-field label=’Email’ type=’email’ required=’1’/][contact-field label=’Website’ type=’url’/][contact-field label=’Comment’ type=’textarea’ required=’1’/][/contact-form]