Category Archives: VEGETABLE SIDE DISH RECIPES

OVEN BAKED SEASONED “FRENCH FRIES”

OK, who doesn’t love French fries? If you happen to be one of the 20 people living in this country who doesn’t love French fries, then why in the wild world of sports (yes, I know I’m showing my age) are you even reading this post! Go away!

Because this recipe is all about loving French fries but not wanting to eat them on a regular basis because they are mostly deep fat fried. Well, at least the truly great French fries I have had the pleasure of experiencing have all been deep fat fried. And frankly, I really don’t want to own a deep fat fryer. I am all too familiar with my proclivities. And owning a deep fat fryer would only lead to more deep fat fried foods. And we absolutely do not need to go in that direction. Especially as we approach our golden years. (Approach, right Patti!)  

So, believe me when I tell you that I have been trying to make a reasonably decent “baked” French “fry” for decades. Decades. Seriously! And until I found this recipe (or should I say my take on the recipe for Homemade Fries that I found on the wellplated.com site), I have only had dismal failures. But by golly, this recipe made truly delicious “fries”. And even Mr. C. was impressed and ate his share of the fries and enjoyed them. And isn’t that special since he is, and never will be, a potato lover.

So, if you too would like to serve “French fries” without shlepping your deep fat fryer from the back of your pantry and throwing away your money on a quart or more of oil, and then having to deal with the whole oily mess after you’re done, I suggest you give this recipe a try. Play around with the seasonings until you find what rocks your socks. But learn that the secret step to making great baked fries is, oh never mind, read the recipe and learn for yourself.

And no, oven baked fries are never going to take the place of pomme frites*. But then, I’m never going to look like Jane Fonda either! Sometimes you just do the best with what you have. Or as in this case, decide to bake your “fries” for a healthier choice for yourself and your family.

Peace and love to all.  

4 tsp. extra virgin olive oil, divided

1 lg. russet or 2 med. Yukon Gold potatoes

¼ tsp. kosher salt

¼ tsp. seasoned salt 

½ tsp. granulated garlic

1/8 tsp. granulated onion

freshly ground black pepper

Place a rack in the lower third of your oven and preheat to 450-degrees. Drizzle a rimmed baking sheet with half of the olive oil, spreading it evenly with your fingertips.  

Slice the potato or potatoes into ¼ inch-wide sticks. Place the cut potatoes in a large bowl. Pour very hot tap water over the top so that it covers the potatoes by at least an inch. Leave alone for 10 minutes. (This step simulates cooking fries first at a lower temperature and then a second time at a higher temperature. Which BTW is the secret to perfectly cooked French fries.)

Then drain the potatoes and dry them as well as possible with paper towels. Place them back in the bowl and pour in the remaining olive oil and sprinkle with kosher salt, seasoned salt, granulated garlic, granulated onion, and black pepper. Toss to coat, making sure the potatoes are well coated with the seasoned oil.  Spread the potatoes into a single layer on the prepared baking sheet.

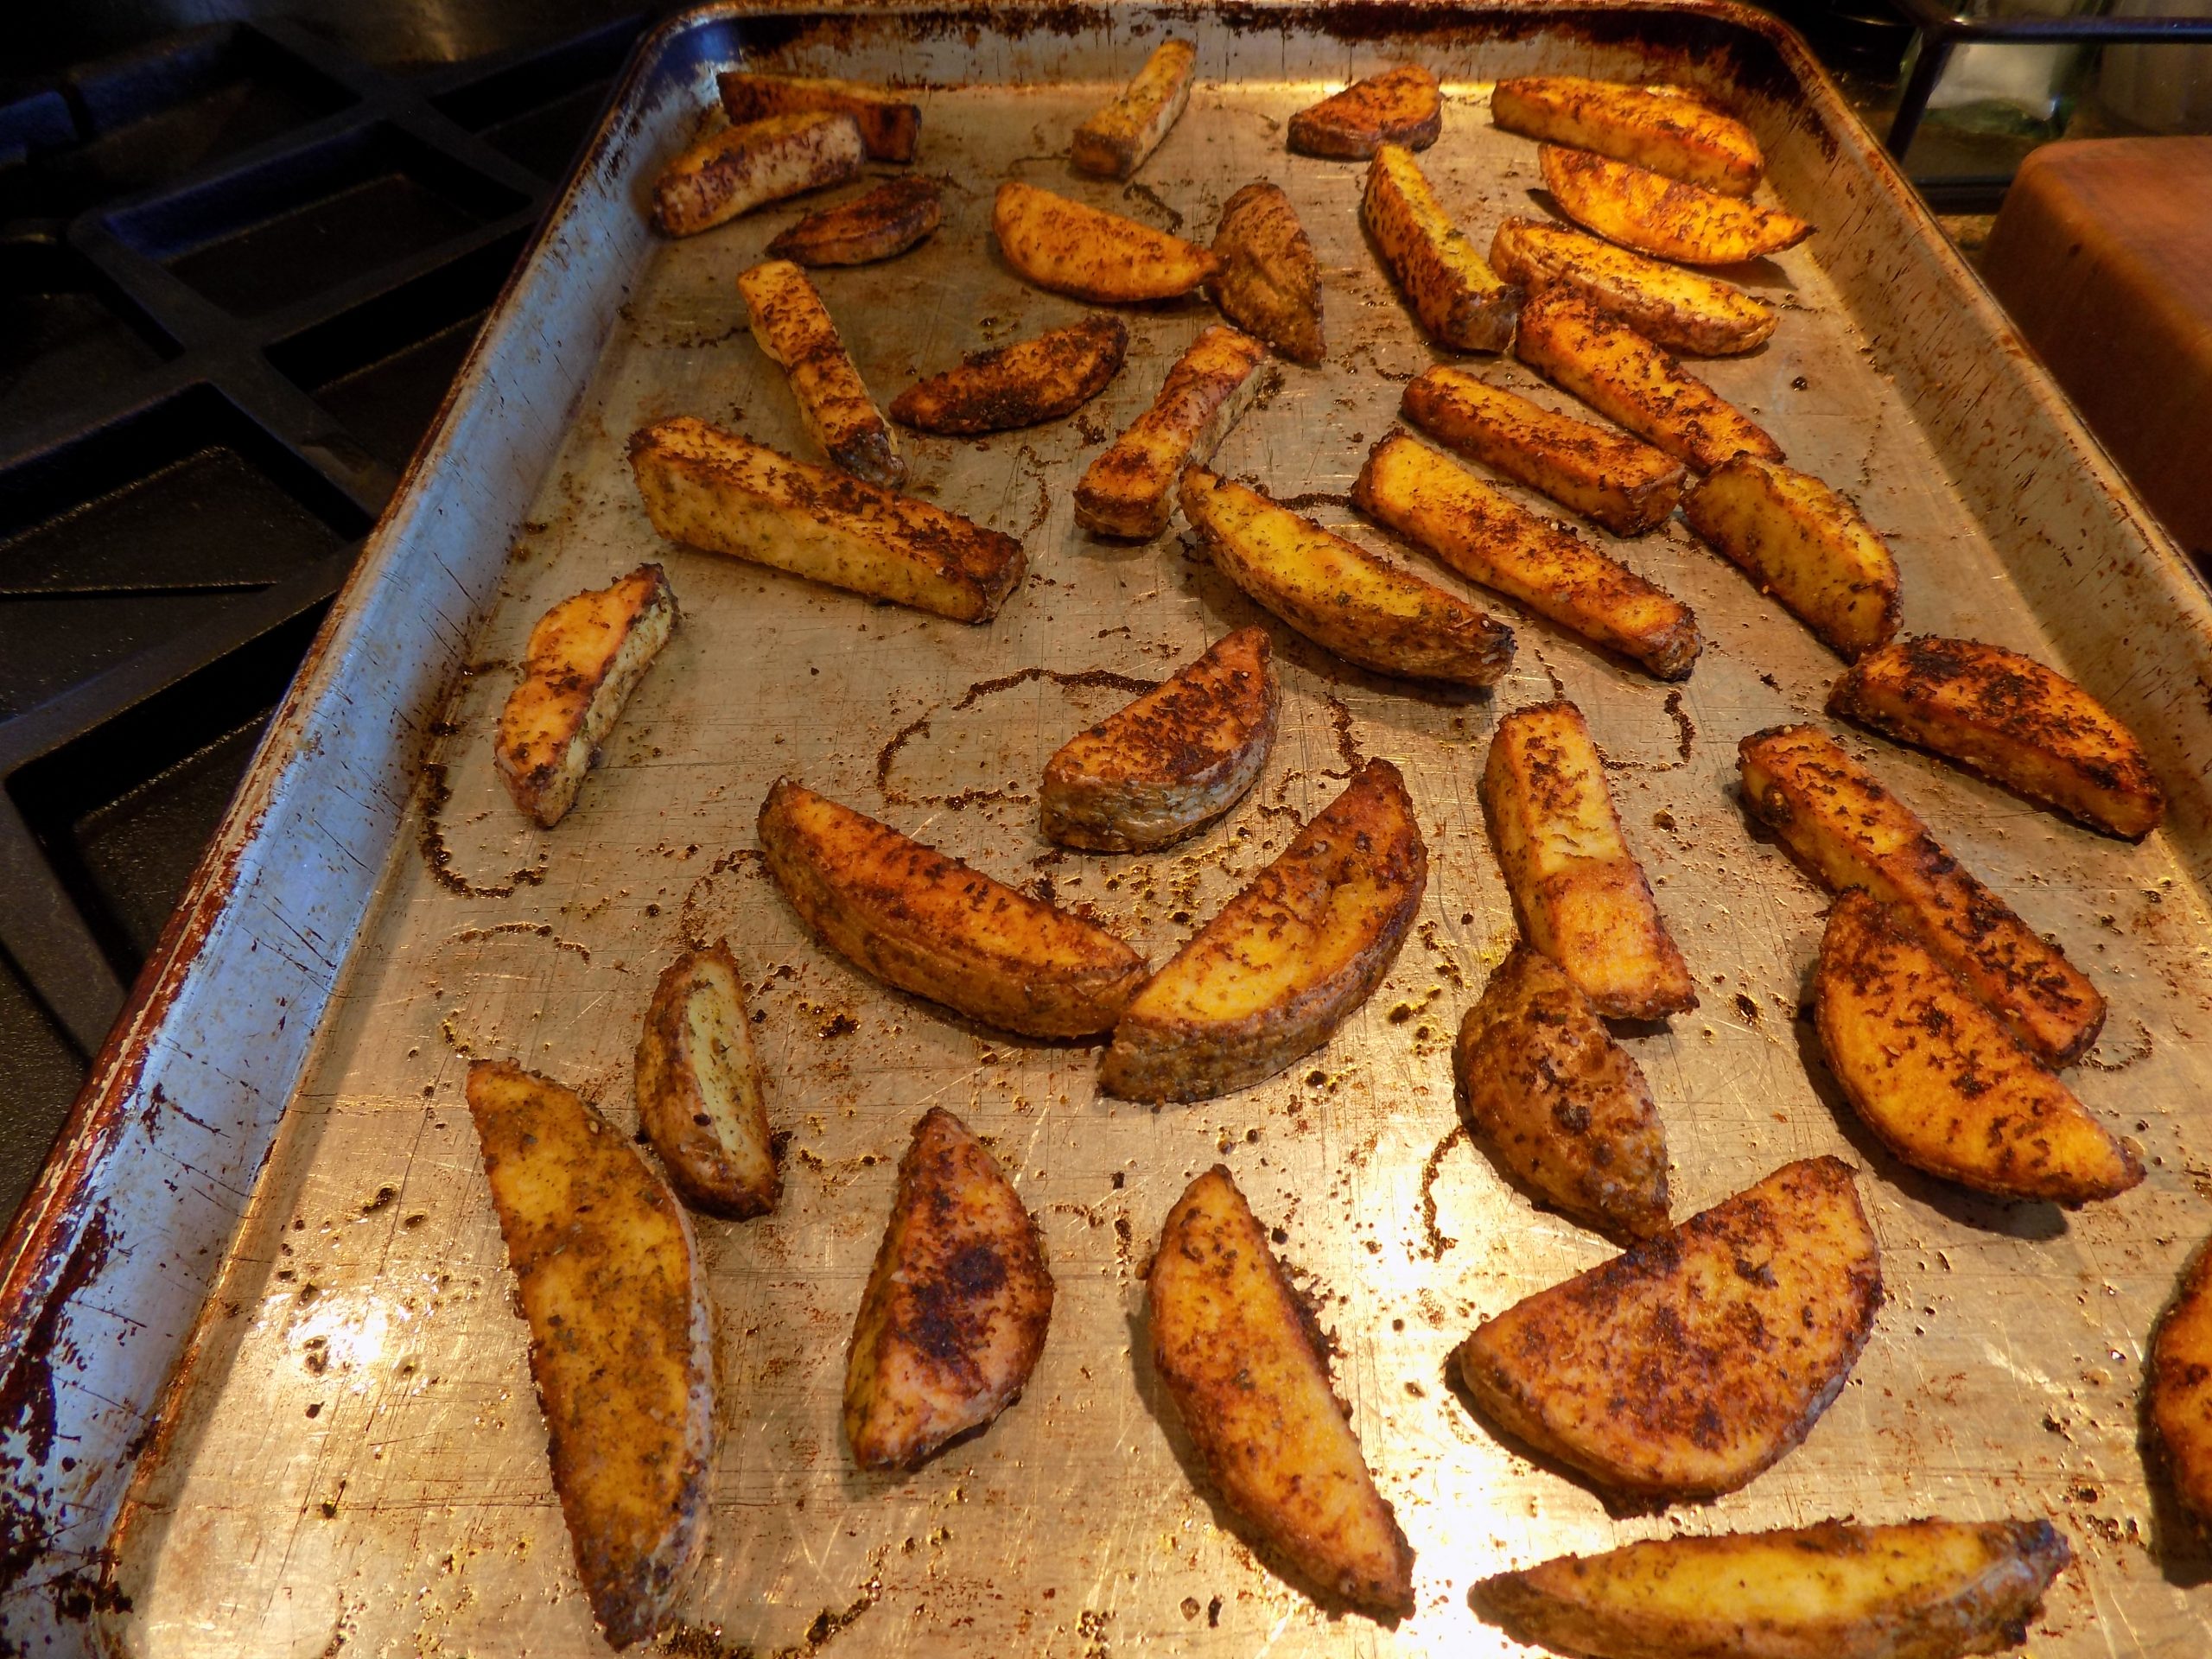
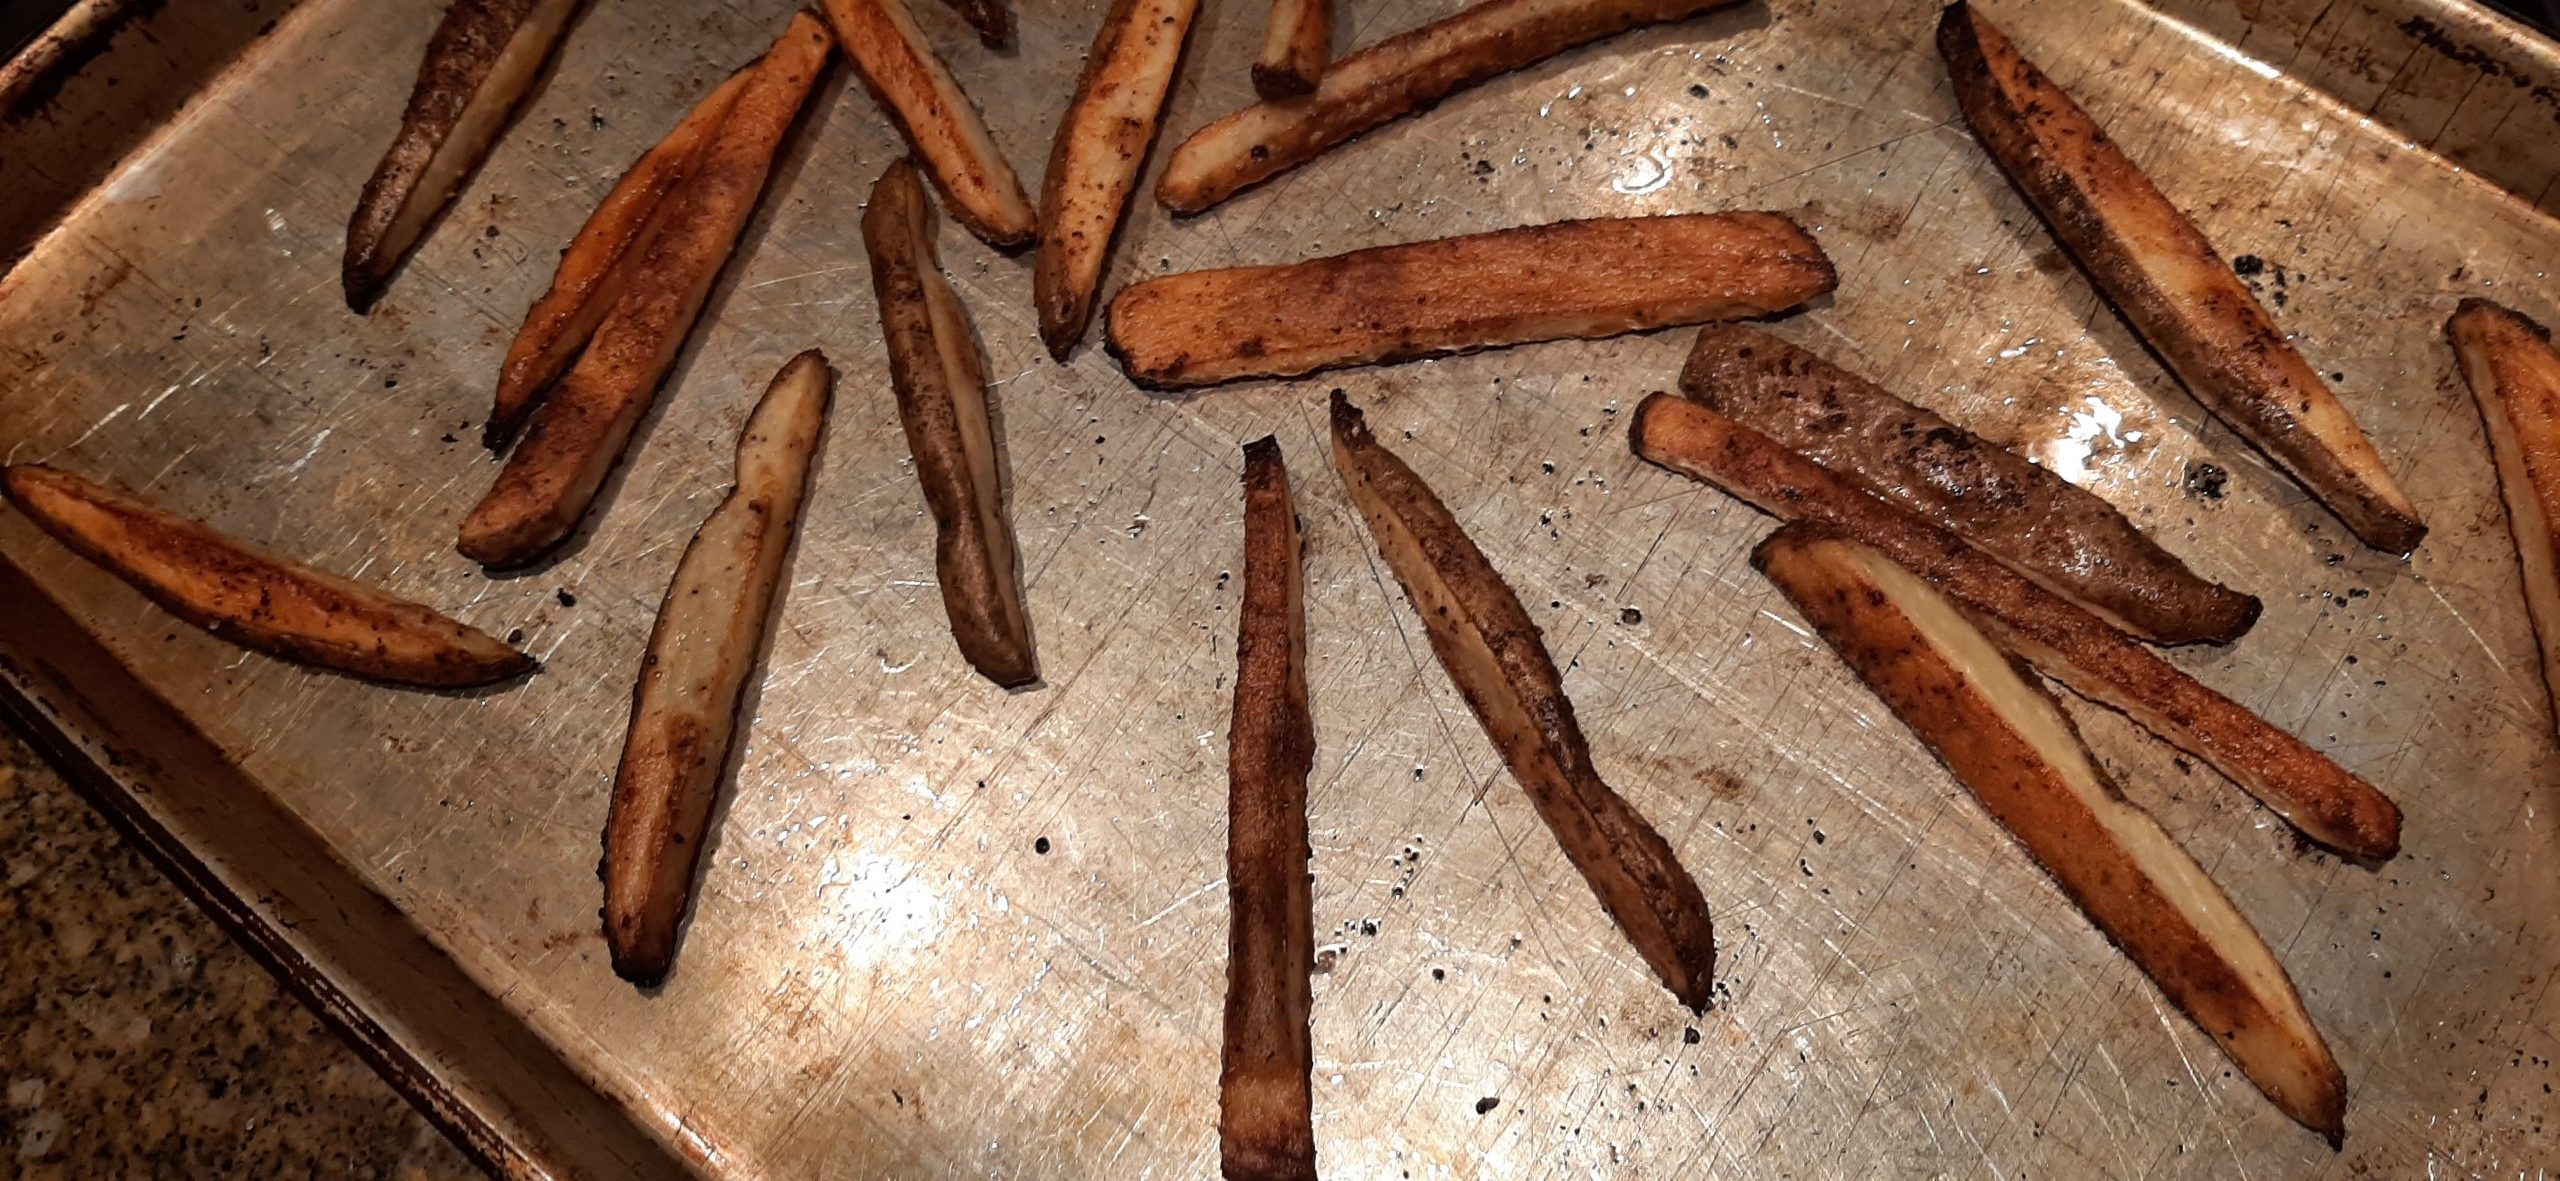
Bake in a pre-heated 450-degree oven for 15 to 20 minutes. Remove from oven and carefully loosen the fries from the bottom of the pan with a spatula. Flip the pieces over and make certain they are once again in a single layer before returning the pan to the oven. Continue baking until the fries are as golden and crisp as you like, about 5 to 10 minutes more. Remove from oven and serve immediately.

This recipe serves 2 people nicely. But can be doubled, tripled, etc. beautifully. Just don’t crowd the baking sheet. Each piece of potato requires it’s own space.  

*So, what is the difference between pomme frites and French fries? They are basically the same since they both feature fried potatoes. But there are a few minor cooking and serving differences between American style French fries and frites. Pomme frites are traditionally served in paper cones with aioli, a creamy Mediterranean-style mayonnaise sauce. Served hot, the twice fried frites are crisp on the outside with creamy insides that deliver massive potato flavor. Some of the edges/nubs are crisper, which provides a great textural contrast. And bottom line – they are simply amazingly delicious. But truthfully, they are best when eaten in France or Belgium. But then, isn’t everything!

CORN AND BLACK BEAN SALAD WITH A SRIRACHA LIME DRESSING

For me, summer salads are much more fun to prepare than winter salads. And I know, there are no official rules governing the time of year any given salad can be served. I mean, salads aren’t like shoes for example, where good etiquette simply shouts that white dress shoes should never be worn after Labor Day. (Who even wears dress shoes anymore?)  Anyway, all things considered, I should be able to serve any old kind of salad any old time I please. But the reality is that I associate potato salad, pasta salads, and fresh fruit salads, for example, with summer picnics. And a salad with a spring mix of greens, apples, dried cherries, and pecans with a creamy maple syrup and shallot dressing reminds me of something I would serve at a winter holiday meal. Not as a salad to go with hamburgers or smoked ribs.

But then there are salads like this one that can be served year-round. And are still plenty of fun to make. Maybe not the salad you would want to serve for Thanksgiving or Christmas, but on a bleak winter evening, it would be perfect.

I guess what I am taking a very long time to say, in my own very wordy way, is that this salad is great any time of year. And it’s fun to make. Because you can practically throw any fresh or cooked veggie into the mix. And with the delicious sriracha dressing, this salad is a treat for your taste buds. Plus, and here I go again on my nutritional soap box, with all the veggies and black beans, it’s a fairly healthy salad too. OK, not as healthy as say, kale dressed with only olive oil and vinegar. But a whole heck of a lot more fun for your mouth.

So, if you too like salads that are creamy, crunchy, and very tasty, give this salad a try. I mean really. There are avocados in this salad. What more could you want?

So, have fun in your kitchen and make more salads. They are generally good for us and the best way I know of to get more veggies into our diets.  

And as always, peace and love to all.

Sriracha Lime Dressing

1 T. fresh lime juice (lemon juice in a pinch)

1 garlic clove, grated

½ c. mayonnaise

¼ c. sour cream

¼ tsp. kosher salt

freshly ground black pepper

2 tsp. sriracha, or more to taste

Whisk all ingredients together in a large salad bowl. Taste and adjust seasoning.

Salad Ingredients

1 (15-oz.) can black beans, rinsed and drained

kernels from 2 cooked ears of corn or 1 (15-oz.) can corn, drained

⅓ c. finely chopped red onion

½ c. diced celery

½ orange, red, or yellow bell pepper, diced

1 c. halved black olives

½ c. sliced pimento stuffed green olives

1 c. halved cherry or grape tomatoes

In the same bowl with the dressing, stir in the black beans, corn, red onion, celery, bell pepper, black olives, and green olives. Gently stir in the tomatoes and diced avocado. Cover and refrigerate until ready to serve.

This salad is best if made ahead a couple hours before serving. Great the next day too.  


OVEN ROASTED ZUCCHINI AND BROCCOLI

I am always looking for simple ways to prepare veggies. And roasting them is as easy as it gets. So, when I needed a plain veggie to accompany grilled pork tenderloin and Mediterranean Quinoa Salad for dinner the other evening with Mr. C’s sister Katie and husband Rick, I fixed this recipe. Simple, low calorie, and delicious. And the nice thing about roasted veggies is that they go well with all kinds of main dishes. I chose zucchini and broccoli because that’s what I happened to have on hand. But the dish would have been fine with either vegetable all by itself. (Or asparagus would have been delightful too.) And yes, I know. Grated Parmesan would have been wonderful on top. But sometimes that little bit of extra richness just isn’t necessary. And why add extra calories if the dish is great as is?

So, next time you want to serve broccoli and/or zucchini in just a bit of a different way, give this recipe a try. No fancy ingredients, not a lot of prep time – just good eating!

Well, that’s it for today. Had a delightful time hosting Rick and Katie for a couple of days. Absolutely wonderful to have relatives and friends in our home again. Of course, we are still being careful. Regardless of mask mandates being lifted soon, we are still going to wear masks when we are out and about. And respect others wishes when we are in their homes or businesses. But we have decided that we need to reclaim our lives. So, it’s like that old Reagan era aphorism goes – trust but verify. Trust the educated folks who are saying that things are getting better. But continue to wear our masks to demonstrate the truth behind the statement. Because I believe our continuing fight to bring covid under control is partially due to the folks who continue to care about others by wearing a mask when good judgement dictates.

So, many thanks to all of you who have worn masks and continue to wear masks to help us all. It is after all, our civic duty to do so. But apparently, some people just never quite got the message that freedom and responsibility go hand and hand. But for those of you who did, I salute you and truly appreciate your consideration.

Peace and love to all.

3 T. extra virgin olive oil

1 lg. garlic clove, finely minced

1 tsp. Italian seasoning

½ tsp. kosher salt

freshly ground black pepper

2 med. zucchini, halved and sliced into ½-inch pieces

4 c. broccoli florets and peeled stems

1 T. fresh squeezed lemon juice

Whisk the olive oil, garlic, Italian seasoning, salt, and pepper together in a mixing bowl. Add the zucchini and broccoli. Toss to coat.

Transfer to a parchment paper lined baking sheet in a single layer.

Roast in a pre-heated 425-degree oven for 25 minutes or until the veggies are lightly browned and tender. Remove from oven and drizzle with the lemon juice. Serve immediately.


JALAPEÑO POPPER STUFFED ZUCCHINI

In my never-ending quest to get more veggies into our diet, I added 2 small zucchinis to the list for our last round of grocery shopping. Mr. C. does most of the shopping these days, for various reasons, and he came home with 2 perfect little squash. So, yesterday afternoon while deciding what to serve with salmon, I decided to make stuffed zucchini. I already have a great recipe for Cream Cheese and Parmesan Stuffed Zucchini, but I wanted a filling that had a bit of a bite to it, to offset the subtle flavor of the salmon. So, I adapted my original recipe to what you find below. And oh, my, word – the zucchini was extraordinarily yummy. Just enough jalapeño to tantalize our tastebuds, but not enough to bring tears to our eyes. (Oh, there actually were a few tears shed, but only because we would have enjoyed having leftovers.)

So, if you too love zucchini and would like a new and exciting way to serve this terribly versatile veggie, I recommend giving this recipe a go. Easy to prepare, common ingredients that everyone should have at their disposal, and super delicious. And if by some crazy chance you aren’t familiar with pickled jalapeños (I like Mrs. Renfro’s Nacho Sliced Jalapeño Peppers), then you are in for a new treat. I always have a jar on hand. Great for nachos, in guacamole, to perk up refried beans, in fillings for enchiladas, etc. etc. Oh, they are also fantastic in my Jalapeño Popper Dip. So, put pickled jalapeños on your grocery list if you don’t already have some in your refrigerator, and make something fun to eat with this delicious product. And always remember to play with your food. (Even if your mother told you not to.)

Peace and love to all.

3-4 T. cream cheese, room temperature

¼ c. finely grated sharp cheddar cheese

1 T. sour cream

1 T. chopped pickled jalapeño

pinch granulated garlic

pinch seasoned salt

freshly ground black pepper

2 small zucchini (about 6-inches each), cut in half lengthwise and seeded

paprika

Mix the cream cheese, cheddar cheese, sour cream, chopped pickled jalapeño, granulated garlic, seasoned salt, and pepper together.

Place the zucchini halves in a baking dish. Equally fill each cavity with the cream cheese mixture. Very lightly sprinkle with paprika.   Bake in a pre-heated 375-degree oven for 30-40 minutes or until the filling is puffy and slightly brown. Serve hot.

CREAMY BAKED CHEESY CAULIFLOWER

So, OK, how do you get your family to eat veggies? I don’t know about you, but when I served “icky” veggies to my kids as they were growing up, I had to resort to tactical maneuvers even highly trained military experts would be proud of! Secret Sauce, for example. (See “recipe” below.) And the other secret ingredient was cheese sauce. And make that plenty of cheese sauce, thank you very much!

And now that my kids are all grown up, I still need to fuss with cruciferous veggies because Mr. C. will never fall into the category of cruciferous veggie lover. He loves other vegetables, like anything that goes into a green salad. But cruciferous veggies, at least the ones I can get him to eat at all, must be fussed with. Which I don’t mind doing for him, because I love “Secret Sauce” and cheese as much as the next gal.

So, the other evening when I served cauliflower per this recipe, all decked out with cheese and bacon, he ate it without wincing. (I actually think he liked it quite a bit, but he would never admit it!)

So, if you too have members of your family who wouldn’t mind if the only two veggies they were ever served were potatoes and corn, give this recipe a try. Most people, regardless of age, love bacon and cheese. And there really isn’t that much of either in this recipe. So, do yourself a favor. Feel good about serving yourself and your family a healthy vegetable. And as far as the rest of the ingredients are concerned, well, at least the cauliflower isn’t being deep fried, or breaded, then deep fried, or breaded, deep fried, and served with a buttery cheese sauce. It really could be prepared a lot more caloric and unhealthier. (My story and I’m sticking to it!)

As always, remember that variety is the spice of life. And that there are just so many wonderful veggies from which to choose. And I know, when you are a busy person just trying to get dinner on the table, the last thing you need is a fussy recipe for the vegetable. So, save your fussing for your days off. Just don’t forget to serve those veggies. Because everyone, regardless of age, needs the ruffage that veggies provide. And the vitamins, etc. etc. Plus, if you are like me, I often prefer the veggie portion of dinner, over the meat. (And no, I’m not contemplating vegetarianism.) We just eat a lot less meat than we used to. And even as a toddler, I preferred green onions over ice cream. (Or so I was told.) So, I have a long history, and I do mean a long, long history as a veggie loving critter. But I love ice cream now too. Mores the pity…….

And sorry there’s no picture. My brain was apparently on post-Christmas hiatus.

Peace and love to all.

½ lg. head cauliflower, cut into small chunks

2 oz. cream cheese, room temp.

¼ c. Greek yogurt

pinch kosher salt

freshly ground black pepper

2 T. minced green onions

2 T. freshly grated Parmesan cheese

3 slices diced bacon, cooked crisp (divided)

½ c. grated sharp cheddar cheese

paprika

Steam the cauliflower until crisp tender.

Meanwhile, stir the cream cheese, Greek yogurt, salt, pepper, green onions, Parmesan cheese, and ¾ of the crumbled bacon together in a large enough bowl to accommodate the sauce and the cooked cauliflower.

When the cauliflower is cooked to crisp tender, add it to the bowl and gently mix until all surfaces of the cauliflower are covered with the cream cheese mixture. Or a close proximaty.

Scoop into a lightly buttered 9-inch square or equivalent sized casserole or baking dish. Even out the surface, then top with the cheddar cheese and the reserved bacon.

Sprinkle on a bit of paprika and bake in a pre-heated 350-degree oven for 30 minutes, or until hot and bubbly. Serve hot.

Secret Sauce

1 part mayonnaise

1 part soy sauce

Stir the two ingredients together and serve with any of your favorite, or least favorite vegetables.


OVEN FRIES WITH SAVORY SEASONING

In my never-ending quest to make my life less complicated, I have had to make many concessions over the years. One such concession is to not fight battles over which I have absolutely no control. For example – turning Mr. C. into a potato lover. And God knows I’ve tried my darndest to win him over. Because I happen to love potatoes and could happily eat them a couple times a week. And yes, I know. Potatoes are a starchy carbohydrate with little protein to call their own. And according to Harvard, the carbs in potatoes are the kind that the body digests rapidly and have a high glycemic load (or glycemic index). That is, they cause blood sugar and insulin to surge and then dip. But in their defense, they are fat free. And they contain fiber, potassium, vitamin C, vitamin B6, and manganese.

So, what have I learned regarding serving potatoes over the course of 3 decades with Mr. C? Well, I’ve learned to curb my desire for potatoes to about twice a month. And even then, when I serve them, they must be buried in flavor, or gravy, or sour cream, bacon, cheddar cheese, and freshly chopped chives. And before you ask, French fries don’t count. French fries are simply a subset that happen to have hardly any relationship to the actual vegetable itself. They are merely a way of getting ranch dressing into your mouth when eating fried fish or hamburgers.

So, what’s a potato lovin’ gal like me to do? Well, this recipe for a baked and low-fat version of a French fry, is an easy way to ensure that we are both going to enjoy our dinner. Because these babies are loaded with flavor. And very easy to prepare. No hacking or slashing. Just some dried herbs and veggies, a bit of olive oil, a few minutes in a hot oven, and dinner is served.  

As always, think of new and exciting ways to get your family to eat their veggies. And yes, even with all the bad press, botanically speaking, potatoes are still a vegetable. And as much as I kid about Mr. C., he is a still the most wonderful sport when it comes to trying out all the different dishes I come up with. He never complains, in fact, he generally applauds my efforts. Even when a dish falls into the “ghastly” category, he never throws it in the garbage and calls for pizza delivery. Even though he has Pappa Murphy’s number on speed dial. And who could ask for more loyalty and love than that? So, on that happy note, give these easy and delicious “fries” a try. Your family will be glad you did. Your cardiologist too.  

Peace and love to all.

1 tsp. dried parsley

½ tsp. kosher salt

½ tsp. granulated onion

½ tsp. granulated garlic

¼ tsp. dried oregano

¼ tsp. dried thyme

¼ tsp. dried basil

¼ tsp. paprika

freshly ground black pepper

2-3 peeled or unpeeled Yukon Gold potatoes cut lengthwise into ½ inch-thick sticks.

1 T. extra virgin olive oil 

Pre-heat the oven to 450-degrees.

Grind the dried parsley, salt, granulated onion, granulated garlic, oregano, thyme, basil, paprika, and black pepper together. (I use my small mortar and pestle.)

Spray rimmed baking sheet with nonstick spray.

Rinse the cut potatoes under cold water, then thoroughly dry them with a tea towel or paper towels.

Toss potatoes with olive oil and spice mix. Transfer to prepared sheet, spreading in a single layer. Place in top third of oven.

Bake in pre-heated oven turning after 20 minutes. Continue to bake for an additional 20-minutes, or until the potatoes are tender on the inside and brown on the outside.

Remove from oven and serve immediately. (No ranch dressing required.)

CORN AND BLACK BEAN SALAD WITH FETA CHEESE

And yes, I have two other corn salad recipes on this site. And yes, one of the recipes is very similar to this one. And that’s not a coincidence. Because I started with my recipe for Black Bean and Grilled Corn Salad, then adjusted it a bit and added a few ingredients I thought would make for tasty additions.  And frankly, I love corn salads. So, for me having choices is a lovely thing. And since it’s summer and we are once again free to entertain, I figured you too might enjoy having another healthy and mayonnaise free salad recipe at your disposal. And I might add, very easy to prepare. And the prep instructions state those six little words I so love to read, and I imagine some of you might also appreciate – refrigerate for several hours or overnight! I tell you, as I continue into my golden years, but still loving to entertain, I must start preparations at least a day ahead if I want to adhere to my own self-imposed standards of what constitutes a meal for company.  

When I was younger, even with 4 kidlets under foot, I thought nothing of calling up good friends at 11:30 a.m. on a Saturday, for example, and having a whole spread ready for guests at 6:00 p.m. Including homemade bread and dessert. Not anymore. No way, no how! Now I need to plan ahead, shop ahead, bake ahead, chop ahead, and then take a nap ahead! Even though in my head I am still super woman, the reality is that I am no longer able to leap tall buildings with a single bound. Heck, I can’t even climb our stairs without stopping at the top to wonder how much longer before our elevator is my main means of travel between our basement and the main floor. But, at least for me, the solution is to just keep going and keep cooking. But spread the tasks into reasonable segments. In between which, force myself to sit down, read a chapter in my book, or check my email. Even though the break may only be 10 minutes, it is now a mandatory requirement for me to get almost any chore completed. But the good news is – I can still do most things. It just takes me a bit longer.

But to offset the physical limitations imposed by advancing age, there are the things that don’t change at all. I’m still very capable of laughing, loving my life, looking forward to new adventures, and spending time with Mr. C., our wonderful family, and our fabulous friends. And really, is there anything better or more important than that?!    

As always, live your life to the fullest. Don’t let anyone or anything hold you back from enjoying every minute of your day. And don’t stop making memories. They are truly our life blood.

Peace and love to all.

2-3 ears of corn

¼ c. extra virgin olive oil

1 tsp. lime zest

3 T. fresh lime juice

2 garlic cloves, finely minced

1 T. pickled jalapeño juice

½ tsp. kosher salt, or more to taste

freshly ground black pepper

1 c. diced celery, including celery leaves

1 c. halved black olives

1 orange bell pepper, diced

¼ c. finely chopped red onion

2 T. chopped pickled jalapeño slices, or more to taste

1 (15 oz.) can black beans, rinsed and drained

2 c. cherry or grape tomatoes, halved or cut in thirds

1 c. crumbled feta cheese

Bring a large pan of water to a boil. Add the ears of corn, bring water back to a boil, and cook corn for 3 minutes. Remove from water and let sit about 15 minutes before cutting the corn kernels off the cob. Set kernels aside.

Whisk the olive oil, lime juice, garlic, jalapeño juice, salt, and pepper together in a large mixing bowl.

Mix the corn, celery, olives, orange bell pepper, red onion, chopped jalapeño, and black beans in with the dressing. Gently fold in the halved cherry tomatoes and crumbled feta cheese. Cover the bowl and refrigerate for several hours or overnight.

When ready to serve, stir gently and scoop into a pretty salad bowl. No decoration required.  


GARLIC ROASTED SUGAR SNAP PEAS

I know, I’m lazy. And yes, the older I get, the lazier I become. So, when I have already prepared a main dish and a side, I have little patience for fussing with a vegetable. But one of the easiest and almost foolproof ways to bring out the very best qualities in most any veggie is to roast it in the oven. (Or grill it, but that takes way too much time when I am tired or in a hurry!) So, a few evenings back, I decided to roast some lovely sugar snap peas for our dinner. And they were delicious. And had been ever so easy to prepare.

During almost any veggies brief stay in a hot oven, something miraculous happens. Any inherent bitterness gets mellowed, while at the same time, the natural sugars in the vegetable caramelize. Leaving the lucky person who gets to eat these delectable morsels very much pleased with themselves for A) eating a veggie & B) enjoying a veggie with very few additional calories or carbohydrates attached. I mean really – how fantastic is that!?!? And bonus points for snow peas because they are relatively rich in fiber. And we all need lots of fiber in our diet. (Especially those of us in our “golden” years! Golden years here defined as: between retirement and the beginning of age-imposed physical, emotional, and cognitive limitations.)  

So, although this is a basic and very simple recipe to prepare, it tastes like you worked very hard to produce this splendid addition to your already well thought out menu. And please know, this recipe can easily be modified. Like a little heat – add a light sprinkle of crushed red pepper flakes. Want some onion flavor too – add a bit of granulated garlic. Like lemon? Add some lemon pepper. Use your imagination.

But please remember, this recipe is meant to be quick and easy to prepare. You need not roast garlic for this dish. Or caramelize sweet onions. Or even add freshly chopped parsley. This is a slam dunk veggie dish.

As always, take time over preparing your menu. Think about what flavors compliment each other. And always plan with diversity in mind. And try to use whatever you have on hand that should be eaten before it is no longer edible. And has to be thrown away.

In my case, many delightful dishes started with an ingredient or two that yelled at me when I opened the refrigerator door. Fortunately, I usually listen because using ignored and aging ingredients not only saves us money, but almost always results in a new culinary discovery. And isn’t that grand? No waste, saves money, and a great dish to boot! My idea of culinary perfection. Well, that and a really moist and delicious chocolate cake. (BTW, my Mocha Chocolate Cake with Sour Cream Frosting fits that description.) Just saying!  

Peace and love to all.

½ – 1 lb. sugar snap peas*, calyx cut off and strings removed (if necessary), and pods thoroughly dried 

1 T. extra virgin olive oil 

½ tsp. kosher salt

freshly ground black pepper 

½ tsp. granulated garlic  

Preheat oven to 450-degrees.

On a rimmed baking sheet, toss snap peas with oil, salt, pepper, and granulated garlic. 

Bake for 10 to 12 minutes or until desired tenderness. Serve immediately.

*Sugar snap peas are a cross between green peas and snow peas. The pods appear quite fat, but like snow peas, you eat the entire pod. Cut off the calyx (end attached to the stalk), and remove the fibrous strings running down the center.  (Note: some varieties are string-less.) You may also see these peas labeled simply as “snap peas” or “sugar peas.”


SAVORY OVEN ROASTED SWEET POTATOES

I am always looking for easy ways to serve veggies. And one of the veggies we particularly favor is the lowly sweet potato. But even if our taste buds admire sweet potatoes passionately, they can become a bit boring if they are always served the same way. So, with a minimum of effort, this simple combination of ingredients can turn your basic sweet potato into a dazzling low calorie side dish that everyone in your family will enjoy. And for the cook, who undoubtedly has other dishes to prepare, this recipe produces savory, crispy on the outside, buttery on the inside, chunks of vegetable goodness! With a minimal amount of effort! Now tell me true, who doesn’t welcome that kind of dish to their dining room table?!?! (This is a no brainer folks.)

I found this recipe on the chelseasmessyapron.com site. I added granulated onion because I could, and we were both seriously happy with the result. In fact, there was a bit of fork stabbing going on at the dinner table. But that’s all in the past now and no one lost an eye! Remember, It’s all fun and games ‘til someone loses an eye. (Sorry, family joke. Right Kaspar?) Anyway……

You simply must try this recipe next time you get a hankering for sweet potatoes. But don’t be surprised if you are unable to stop yourself from eating these little darlings until you are stuffed. Which BTW, is quite alright. The ingredients are all good for you. (Isn’t it grand when something tastes fabulous and it’s healthy too.) So, stop right now and add sweet potatoes to your grocery shopping list. Because if you are anything like me, if it isn’t on the list, it will probably remain at the food emporium along with all the other items that failed to be jotted down. (Isn’t it fun getting older?!)

As always, keep playing with your food, keep trying fun ways to get your family to eat healthier, and don’t worry if you slip once in a while and serve something that you are sure would cause eyebrows to raise. Like what I’m going to serve for dinner tonight, for example. Tonight, we are going to feast on salami and cheese grinders (think hot submarine sandwiches). Complete with mayonnaise, mustard, lettuce, onion, tomato, black olives, pepperoncini, and anything else I can think of to tantalize our taste buds. And on the side – Tim’s extra thick potato chips and a big old glass of dark beer. I can hardly wait! (And yes, tomorrow I’ll be good again.) But not tonight!!

Peace and love to all.

2 lbs. sweet potatoes, peeled and cut into roughly ½-inch chunks

2 T. extra virgin olive oil

¾ tsp. fine sea salt, divided

freshly ground black pepper

½ tsp. ground chili powder

½ tsp. paprika

½ tsp. ground cumin

½ tsp. granulated garlic

¼ tsp. granulated onion

Combine the olive oil, ½ teaspoon salt, pepper, chili powder, paprika, cumin, granulated garlic, and granulated onion in a large baking pan. (I use my fingers for this delicate operation.) Then add the sweet potato chunks and toss to coat every bit of every surface. Spread the coated chunks out evenly with no overlapping. (If the potatoes touch each other the pieces will steam rather than roast. Not what you want!)

Bake in a pre-heated 425-degree oven for about 30 minutes or until fork tender. Flip once during baking time.

Remove from oven, sprinkle with the remaining sea salt, and serve immediately.


ASIAN GREEN BEANS

So, how many ways are there to take fresh green beans, a vegetable that’s semi acceptable to most young children and veggie hating adults because of their fairly benign flavor, and turn them into something special? A preparation that will practically guaranty that everyone at table will delight in packing away these low-calorie, nutrient rich (vitamin C, dietary fiber, folate, vitamin K and silicon needed for healthy bones, skin, and hair), skinny green darlings? (Even if they are – a vegetable!)   

Well of course there are several ways to make green beans sublimely edible. And some are even on this site! But last evening, I was in the mood for Chinese food. (When am I not???)

So, I started thinking about how to use the green beans we had received in our last farm box to best advantage? (Did I mention I was in the mood for Chinese food?) Yah, I did. Anyway, soy sauce had to be part of the equation. And I am a true believer in the culinary merits of toasted sesame oil. Throw in a bit of garlic and Sriracha for good measure, and you’re set on the right path. Of course, I had a little bit of help with this recipe from Amanda at thewholesomedish.com. (It’s basically her recipe with a couple of additions I read about in the comments section of her blog post.) But I put my own spin on the recipe, so I’m taking credit for that much at least! Now, let’s get to the main reason for posting this recipe.

Green beans fixed this way are DAMN DELICIOUS! And very easy to prepare. And the sauce can be made ahead of time. The green beans can also be snipped and set aside until needed. (I love it when I can do my prep work well ahead of when we actually feel like having dinner.)

I served the beans last evening with SWEET AND SOUR SESAME PORK and plain steamed rice. (Recipe for the pork to follow in the next couple of days.) And between the two dishes, I felt like we were dining at a very fine Chinese restaurant. (And I hadn’t even worked up a sweat!) (Plus, there was no hidden MSG anywhere to be found!)  

So, if you too love Chinese food (American Chinese food that is), I recommend you prepare both of these recipes next time only Chinese food will quench your craving.

And, of course, always give in to your cravings. (Even if they are for chocolate chip cookies.) Because this is it folks. What we are experiencing right now, is our reality. And not to make too fine a point on the obvious – but we and everyone we know and love, are going to be a long time dead! (Some sooner than later!) But while we are still alive – we should LIVE!

I take prednisone. Granted, only 4 little milligrams to assuage the pain and lethargy caused by rheumatoid arthritis. (I’m lucky!) But still there could be nasty side effects. But like I told my rheumatologist, I would rather feel good now and suffer the consequences when I’m older. If there are any consequences. But while I’m still able, I plan to continue living life to the fullest. And if that includes chocolate cupcakes or cookies every so often, then I say – bring it on! Because I am still alive and happier than I have any right to be. I’m married to a wonderful man. I have some of the best friends and fabulous relatives imaginable. And my children are amazing, productive, and remarkable individuals. So, I am truly a blessed person. But please know, I do not take any of my wonderful life for granted. I cherish every moment. I pray you are as happy and content in yours.

Peace and love to all.  

4 tsp. vegetable oil 

2 tsp. toasted sesame oil

3 T. soy sauce

2 tsp. granulated sugar

freshly ground black pepper (just a smidge)

¼ tsp. Sriracha, or more to taste

1 – 1½ lb. fresh green beans, cut into roughly 2-inch pieces

2 garlic cloves, finely minced

Heat a large skillet or wok over medium-low heat for 2 minutes.

In a small bowl, whisk the vegetable oil, sesame oil, soy sauce, sugar, black pepper, and Sriracha together. Set aside.

Add the green beans to the skillet. Stir them as they start to cook and char a bit. Then, reduce the heat and carefully add the soy sauce mixture to the hot skillet (liquid may spatter a bit). Stir to coat the beans in sauce. Cook for 3-4 minutes, stirring occasionally.  

Stir the garlic into the green beans. Cook for 1 minute, stirring often. Then, serve immediately. (Do not over-cook. These beans should still be somewhat crisp.)

Max in front of the fire on this cold and wintry day. (We finally got the snow that was predicted!)
Our courtyard from the dining room.
In back of our house from the dining room.