Category Archives: BBQ & PICNIC RECIPES

BBQ CHICKEN WITH BOURBON BBQ SAUCE

OLYMPUS DIGITAL CAMERA

Ok, once you take a look at this recipe you are going to wonder if I have lost my mind thinking you would ever consider going through all the steps listed below just to prepare a simple thing like BBQ’d chicken. (You might even be wondering why I would ever construct a sentance like the one I just did!) In fact I would go so far as to say, you might even be calling me a lunatic right this very minute! (Wouldn’t be the first time, I’m sure!) But – if you did take the time and effort to make this wonderful chicken, you might actually forgive me both the recipe and the sentance structure. Because, if I do say so myself, this is just darn fine BBQ chicken. And yes I know, there are 4 steps (well 5 if you count making the BBQ sauce) and I understand that it looks like an all day process. But actually it’s not that bad, especially if you make the Dry Rub for Chicken and the Bourbon BBQ Sauce ahead of time. And really, the brine goes together in about 3 minutes.

Now granted, skinning the chicken pieces is about as much fun as cleaning the gutters of your home. But removing all those unnecessary fat calories should make you feel super virtuous. So take one for the team, give yourself some points for protecting your own and your loved ones arteries, and prepare to be amazed at how much skin and fat are actually on your average piece of chicken. It’s enough to almost put you off visiting Ezells or Colonel Chicken ever again! Almost! And yes, I know. You can simply buy boneless, skinless chicken pieces and call it good. But I truly believe that chicken pieces which still contain the bones God gave them at birth, remain juicier longer during their arduous adventure with heat, which in turn helps create a better finished product. (Good grief! Where are these sentences coming from today? Sometimes I even scare myself! Perhaps it was the BBQ chicken I ate yesterday?)

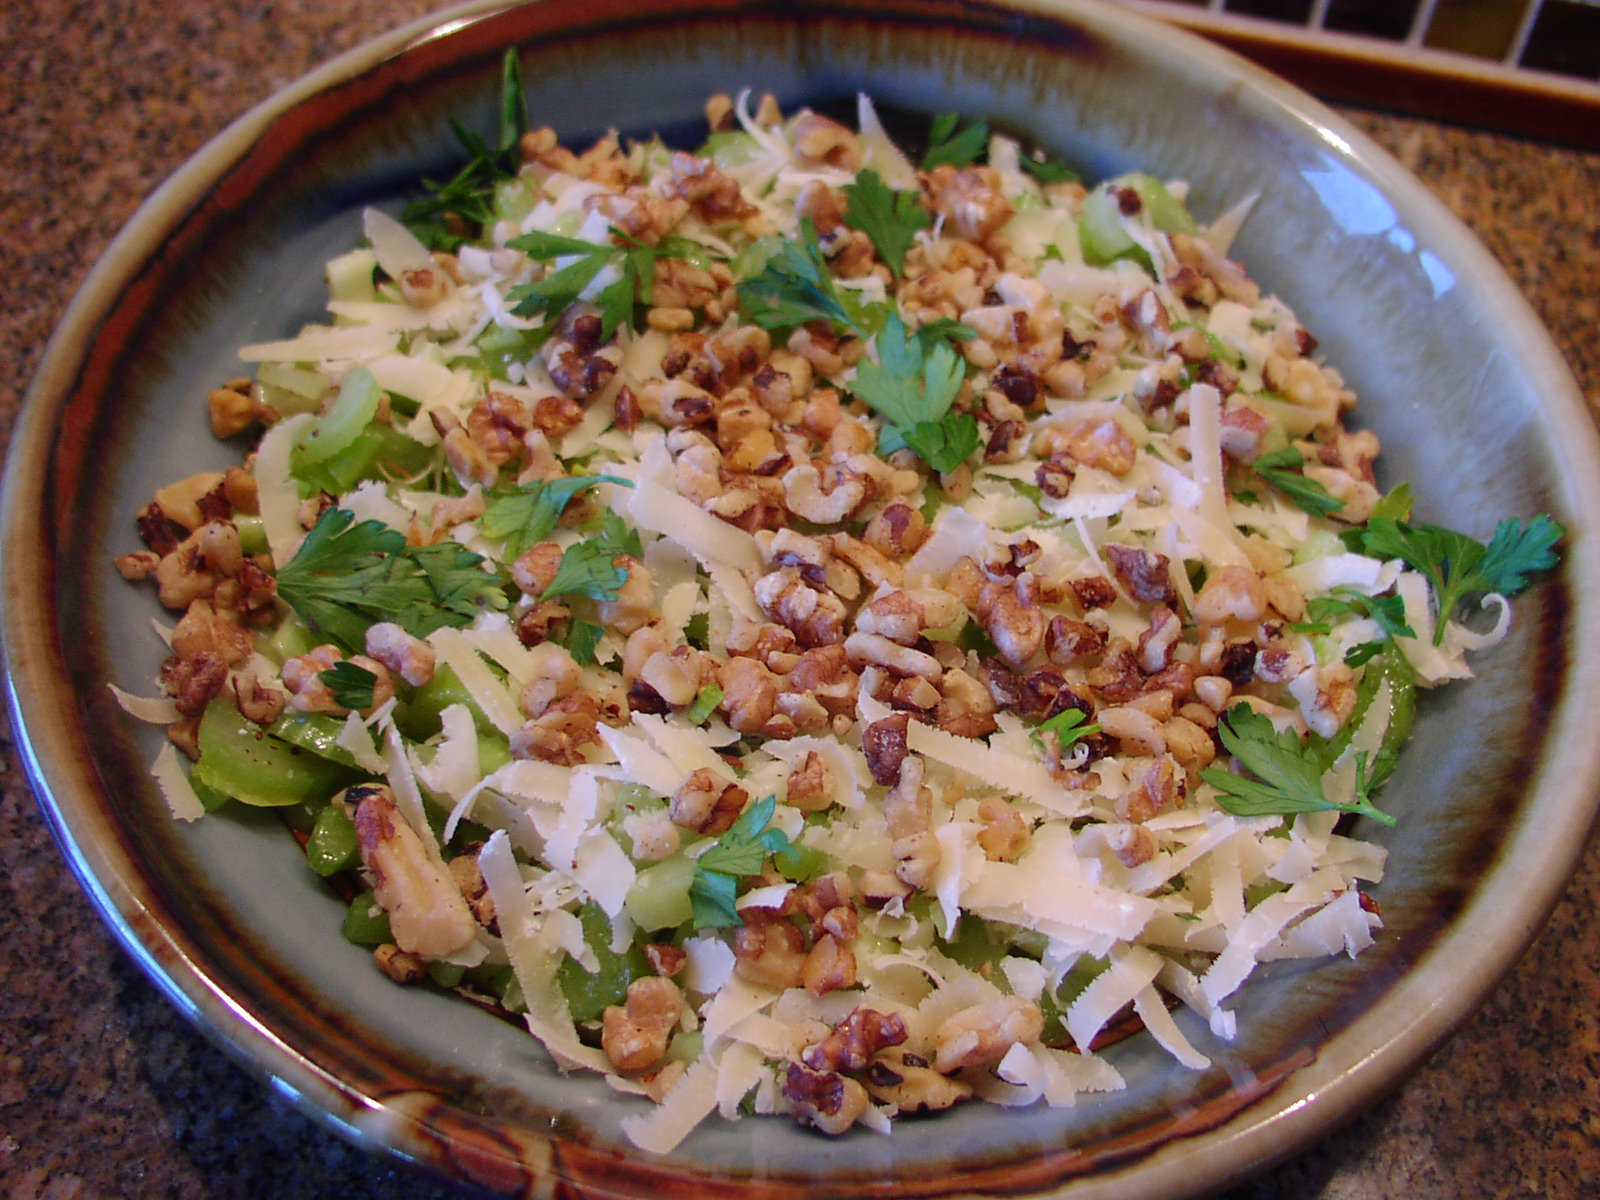
Anyway, don’t worry about me. Just have some fun and  invite your friends over for a BBQ. Serve them this chicken, along with a side of Old Fashioned Potato Salad, Vegetarian Baked Beans, some chunks of cold watermelon, and my Mocha Chocolate Cake with Sour Cream Frosting and you will have a happy crowd on your hands.

And in case you can’t figure out what constitutes the 5 steps mentioned above, allow me to list them for you:

1)      Brine the chicken pieces

2)      Dry rub the chicken pieces

3)      Bake the chicken pieces

4)      BBQ the chicken pieces

5)      Serve the chicken pieces with BBQ sauce

6)      Devour the chicken pieces (Oops. I guess there are actually 6 steps. And I a retired banker. Shame on me!)

Brine Ingredients:

  • 4 c. water
  • 1/3 c. white vinegar
  • 1/3 c. kosher salt
  • 1/3 c. brown sugar

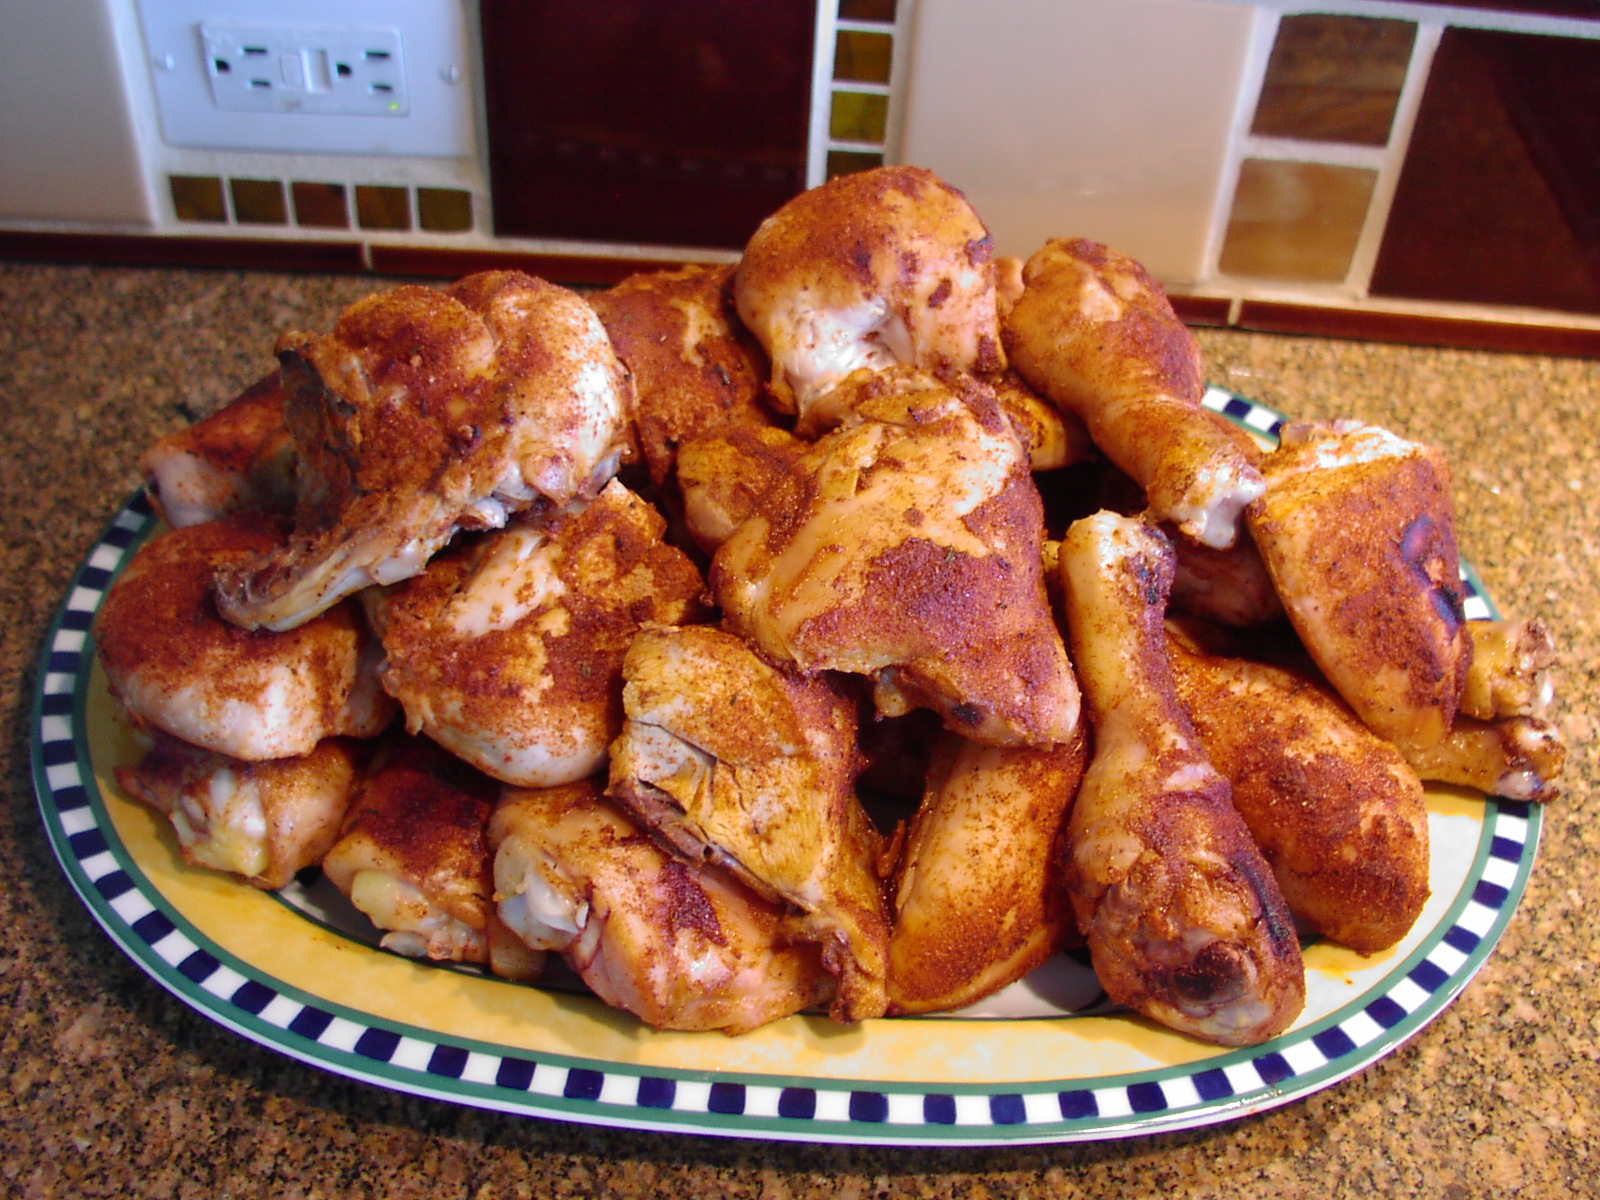
16 or so pieces of chicken (I start with bone-in, skin-on chicken pieces – 3 breast halves – skinned and cut in two, 6 thighs – skin removed, and 4 drumsticks, most of the skin removed)

Brining Directions:

In a large plastic or glass container, whisk together the water, vinegar, salt, and brown sugar. Add the chicken and refrigerate for 1½ to 2 hours, but no longer.

Please note: If you don’t own a large glass or plastic container, line a metal pan with a garbage bag and pour the liquid in the bag along with the chicken pieces. Also, buy reasonably small pieces of chicken if at all possible. The smaller the pieces, the more delicious the final product.

Dry Rub for Chicken Ingredients:

  • 6 T. packed dark brown sugar
  • 2 T. regular paprika
  • 2 T. chili powder
  • 2 T. kosher salt
  • 1 T. smoked paprika
  • 1 T. granulated garlic
  • 1 T. onion powder
  • ½ tsp. dried thyme
  • coarsely ground black pepper

Dry Rub Directions:

Mix all ingredients together and store in an airtight container.

Putting it All Together:

Drain the chicken pieces and pat dry with paper towels. Place the pieces on sided baking sheets liberally coated with cooking spray. Generously coat each piece with the dry rub. Loosely tent the pan(s) with a piece or pieces of aluminum foil. Bake the chicken for 30-35 minutes in a pre-heated 350 degree oven or until the internal temperature of each piece reaches 160 degrees. Remove from oven and place pieces on your BBQ set at a fairly low temperature. BBQ each piece for about 3 minutes on each side. (Remember, the chicken is already done. All you are doing at this point is adding a little bit of smoky flavor and a couple of grill marks to each piece.) And lest you think I forgot about the BBQ sauce, I don’t add sauce while the pieces are on the grill. I have found that some people prefer just the flavor of the rub and don’t bother with the sauce, so I serve the sauce on the side. Once all the pieces have finished their short acquaintance with the grill, place them on a platter, loosely cover with foil, and serve them either warm or at room temperature.

Please note: if you don’t have a BBQ or just don’t want to go to the bother and mess, just serve the pieces straight out of the oven. You might want to remove the foil for the last few minutes to allow the spice rub to dry out a bit.

BOURBON BBQ SAUCE

  • ¼ c. butter
  • ¼ c. minced onion
  • 3 cloves garlic, minced
  • ¼ c. brown sugar
  • 2 tsp. whole grain mustard
  • 1 c. ketchup
  • 1/3 c. Worcestershire sauce
  • ¼ c. fresh lemon juice
  • ¼ tsp. hot sauce, or to taste
  • ¼ tsp. cayenne
  • 2 T. bourbon

Melt butter in a medium sized covered saucepan. Sauté onion until translucent; add garlic and cook until garlic releases its aroma, about 1 minute. Add remaining ingredients, bring to a boil, reduce heat, cover pan, and simmer gently for at least 30 minutes, stirring occasionally. Sauce should thicken some during cooking. Serve warm or at room temperature.

This recipe (at least the brining, dry rubbing, and baking part) is loosely based on the BBQ chicken recipe found on the Smitten Kitchen web site. (Great blog BTW.)


ROASTED VEGGIES WITH LEMON GARLIC AIOLI

OLYMPUS DIGITAL CAMERA

So OK, most of you already know that roasted veggies are the greatest culinary breakthrough since polenta was introduced into mainstream American cooking. And of course, unless you happen to be from another planet, you also know that veggies when roasted are as universally revered as Boris Badenov and Natasha Fatale! It’s just an accepted culinary fact. (Not that Boris and Natasha are edible, you realize. But you must admit they are about as delectable as your favorite apple pie!)

But if you happen to be one of the few who are unfortunate enough to have no experience with roasted veggies, have I got a treat for you! Even if you do know roasted veggies as well as you know your mailman or milkman (no implication of wrong doing intended) this Lemon Garlic Aioli recipe from Melissa Clark will lift even the already magnificent roasted veggie to a new high!

And for being an aioli that you make from scratch rather than starting with a mayonnaise base, it is really quick and easy to prepare. Plus you can make it up to three days in advance. Wee ha……

So I guess the only thing left to say is that I hope you give this recipe a try the next time you roast veggies. I love to serve this dish as an appetizer, but it would work just as well as a veggie side dish.

But wait – there is one other small little thing I should warn you about before I send you off to the kitchen to warm up your blender. This aioli is so amazing, that people have been known to take one bite, throw back their head, and howl in delight. They have also been known to sputter OMG three times in a row. If either response happens, do not be too concerned. They will soon recover and return to their natural apathetic selves as soon as their equilibrium returns.

Aioli Ingredients:

  • 1-2 garlic cloves (I use 1 medium)
  • 1 tsp. lemon juice or more to taste
  • ⅛ tsp. fine sea salt or more to taste
  • 1 large egg, room temperature
  • 1 lg. egg yolk, room temperature
  • ¾ c. extra-virgin olive oil

Suggested Veggies Ideal for Roasting:

  • beets, (any color) peeled and cut into 3/4-inch cubes
  • romanesco, cut into bite-sized florets
  • broccoli, cut into florets and the stems (after they have been peeled), cut into bite-size pieces
  • cauliflower, cut into bite-size florets
  • sweet potato, peeled, halved, quartered lengthwise and cut into 3/4-inch cubes
  • eggplant, cut into 1-inch squares
  • red, orange, or yellow peppers, cut into 1/2-inch wide pieces
  • broccoli rabe/rapini, cut into even sized portions, leaves and stems still attached (no need to peel the stems)
  • whole button mushrooms or large slices of portabella mushrooms
  • zucchini or other summer squashes, cut in half lengthwise and then into 3/4-inch long pieces
  • pea pods

Aioli Directions:

Grate the garlic clove(s) directly into your blender or food processor. Add lemon juice and salt; let sit for a couple of minutes. Add eggs and blend until combined. With the blender running, slowly add the olive oil in a thin, steady stream. Taste for seasoning and add more salt or lemon juice as needed. Can be prepared up to 3 days in advance.


Roasted Veggie Directions:

  • extra virgin olive oil
  • kosher salt
  • freshly ground black pepper

Place vegetables on rimmed baking sheets according to how long each needs to bake. (See chart below)

(Veggies with about the same baking time can be placed on the same sheet. I tend to keep each variety separate so I can remove the veggies individually if necessary and keep them separate for plating.) Drizzle all the veggies with just enough olive oil to moisten, and sprinkle with salt and pepper. (You don’t want too much olive oil or your veggies will taste greasy.)

Roast in a pre-heated 425 degree oven for the time reflected below or until they are fork tender. Turn the veggies periodically while they are roasting. Remove from oven and cool to room temperature. Arrange on platter and serve with the aioli on the side.

Approximate Roasting Time for Veggies: (watch the veggies carefully because every oven and veggie is different)

  • beets – 40 to 50 minutes
  • petite carrots – 40 to 50 minutes
  • romanesco – 20 to 30 minutes
  • broccoli – 20 to 30 minutes
  • cauliflower – 20 to 30 minutes
  • sweet potato – 20 to 30 minutes
  • eggplant – 20 to 30 minutes
  • red, orange, or yellow peppers – 15 to 20 minutes
  • broccoli rabe/rapini – 15 to 20 minutes
  • whole button mushrooms or large slices of portabella mushrooms – 15 to 20 minutes
  • zucchini or other summer squashes – 15 to 20 minutes
  • peapods – 15 to 20 minutes


MOCHA CHOCOLATE CAKE WITH SOUR CREAM FROSTING

OLYMPUS DIGITAL CAMERA

This recipe makes a large quantity of cake. And since I mainly build cakes for large gatherings these days, this is a perfect recipe for my needs. And it is perfect for more reasons than just the quantity! This recipe produces the most perfect moist, dense, simple, and deeply flavored chocolate cake ever. No cake flour required or melting expensive chocolate. Just standard ingredients most of us usually have on hand anyway. Amazing! I found the cake recipe on the Taste of Home web site. The frosting I have been making for more years than I care to admit.

Now if you are like me (and I truly hope that is not the case), trying to decide what size cake pan to use when the recipe calls for three 9-inch round pans and you want to make one single layer cake calls for some algebraic action. And since I can remember virtually nothing from my 9th grade algebra class (except of course how much I hated it), I decided to elicit the assistance of the resident genius. (At least I knew that a 9-inch round pan and a 9-inch square pan do not contain the same amount of square inches. I believe that much knowledge should garner me at least some respect.) I also know how to figure the square inches in a square or a rectangular pan. Square pan – inches along one side times the same number i.e. 8-inch pan – 8 x 8 = 64 square inches. Rectangular pan – one of the short sides times one of the long sides i.e. a 9 x 13-inch pan = 117 square inches.

But then came the part where I needed Mr. Cs fine brain. How to figure the square inches in a round pan. Simple if you know (or can remember) the formula, that is)! Pi x the radius squared. Right, like I remembered that from a class 143 years ago! But thanks Mr. C. for “reminding” me of this very important equation. Whew, taxes the old brain I’ll tell you that!

Anyway, because I am on your side and don’t want you to have to go through the mental gymnastics I went through when I prepared this cake, I am going to give you the square inches of an 8-inch round pan and a 9-inch round pan for future reference. You can proceed from there! An 8-inch round pan has the equivalent of 50 square inches. A 9-inch round pan has the equivalent of 64 square inches. And as a bonus, 1½ times this recipe fills a 16-inch square pan beautifully and requires a double recipe of frosting. It also serves about 50 starving adults!

(And I know it seems like a lot of unnecessary mental work to figure out just the right size cake pan to use. But you really don’t want to end up with a cake the thickness of a cookie or the batter so thick in your pan that the middle has no chance of getting done.) But enough with the math Patti!

I guess the only thing left to do is invite you to bake this chocolate cake for your family and friends in the near future. I know you will not be disappointed. In fact Valentine’s Day is just around the corner. And nothing says “I love you” like chocolate. Need I say more?

Cake:

  • 1 c. unsalted butter, room temperature
  • 3 c. packed brown sugar
  • 4 eggs, room temperature
  • 1 T. vanilla extract
  • 3 c. all-purpose flour
  • ¾ c. cocoa powder
  • 1 T. baking soda
  • ½ tsp. salt
  • 1½ c. room temperature coffee or 1½ c. water and 1½ rounded tsp. instant espresso coffee
  • 1-1/3 c. sour cream

Cream the butter and brown sugar together. Add the eggs, one at a time, beating well after each addition. Beat in vanilla. Whisk together the flour, cocoa, baking soda, and salt; add to creamed mixture alternately with coffee and sour cream, beating well after each addition.

Pour into a greased and floured 9×13-inch glass pan and an 8×8-inch square or round pan* or three 9-inch greased and floured round baking pans. Bake in a pre-heated 350 degree oven for 30-35 minutes or until a toothpick inserted near the center comes out clean. Don’t over-bake! If you are going to build a layer cake, let cakes cool for 10 minutes before removing from pans to wire racks to cool completely. If you are making just single layer cakes, just place pans on wire racks to cool as soon as they come out of the oven.

*Using the 2 pans allows you to take the larger cake to work or a function and still have a small cake for yourself and family at home. No more – “mom/honey, don’t we get any of the cake”? How sweet is that?

Frosting:

  • 6 oz. good semi-sweet chocolate chips
  • ¼ c. unsalted butter
  • ½ c. sour cream
  • 2 tsp. Kahlúa or other coffee flavored liqueur or 1 tsp. vanilla
  • ¼ tsp. instant espresso coffee (I use Medaglia D’oro)
  • ¼ tsp. salt
  • 2½ c. powdered sugar or more as needed

Melt the chocolate chips and butter together in your microwave. Measure the sour cream, liqueur, instant espresso, and salt into a mixing bowl. Add the melted chocolate and butter. Whisk in powdered sugar until desired consistency is achieved. Spread over the top of the single layers or between layers and over top and sides of triple layer cake.

Please Note: If you are making a 3 layer cake, you will need to double the frosting recipe. Also, it sometimes helps with the frosting effort if you spread frosting over the first layer, refrigerate the cake for about 30 minutes, add the second layer, frost the top, and refrigerate again before proceeding to the top layer.


KALE AND WILD RICE SALAD

OLYMPUS DIGITAL CAMERA

This is my adaptation of PCCs Emerald City Salad. PCCs recipe calls for half a bunch of kale and half a bunch of chard, half a red pepper and half a yellow pepper, and half a fennel bulb. I don’t like “half a somethings”. As much as possible I like to use the entire pepper, or bunch of green onions or whatever. And that’s because I unfortunately have this unforgivable tendency to forget about “half a somethings” and let them turn to “ish” in my veggie drawer. And I know. You would expect a savvy person like me to have my culinary life better organized. Forget that! I’m as capable as the next person when it comes to forgetting what lies at the bottom of my refrigerator. In fact, I may actually be better at it than any of you. (I know, not something to be proud of.) But enough about my shortcomings and more about this amazing salad.

Mr. C and I first enjoyed this salad at our friend Rachael’s home. She had purchased the salad from her local PCC. Now being the food snob that I am, I assumed that any purchased salad could never taste as good as one prepared at home. What I was forgetting was that the salad came from PCC. PCC knows how to do food right. Of course you pay through the nose for their deli items, but the few I have tasted have been first cabin. And I know they are made with fresh organic ingredients and contain no unhealthy additives.

So before you prepare this salad, should you have any misgivings, go to your nearest PCC, after first hitting your local cash machine of course, and give this salad a try. Then having learned that the salad is absolutely delicious, give my version a try. I promise you won’t miss the chard, or the flavor of both a red and a yellow pepper, or the additional thin slices of fennel. Just don’t not make this salad. It is ever so healthy for you without making you feel like you have had to sacrifice flavor for the pleasurable feeling of virtuosity. I say that’s a win/win situation.

  • 1 c. uncooked wild rice
  • 3 c. salted water
  • ½ c. extra virgin olive oil
  • ½ c. fresh lemon juice
  • 2 garlic cloves, minced
  • ½ tsp. kosher salt
  • freshly ground black pepper
  • 1 bunch kale, stems removed, cut into bite sized pieces and massaged (see massage instructions below)
  • 1 red or yellow bell pepper, diced (or half a red & half a yellow pepper)
  • 1 carrot, cut into match stick sized pieces
  • 1 fennel bulb, thinly sliced
  • 1 bunch green onions, chopped
  • ½ c. chopped Italian parsley

Bring water to a boil; add rice. Stir. Bring rice back to a boil, cover and reduce heat to simmer. Cook until the water is absorbed, 60 to 65 minutes; remove from heat and let cool. (Or do like I do –use your rice cooker!) While the rice cooks, whisk together the olive oil, lemon juice, garlic, salt, and pepper. When the rice is cool, toss it with the dressing. Just before serving, toss the massaged kale, red pepper, carrot, fennel, green onions, and parsley in with the dressed rice. Add salt if needed.

Salad can be made up to 4 days in advance.

Massaged Kale:

Using your fingers, rub the kale until it turns a darker green and when tasted, has lost all its bitterness.


ROTOLO AL FORNO (MEAT AND CHEESE ROLLED SANDWICH)

OLYMPUS DIGITAL CAMERA

(The Rotolo al Forno is in the foreground, just to the left of the deviled eggs.)

This is one of those recipes that is easy to prepare and sure to please. It is simply a wonderful combination of soft white bread, tangy mustard, tasty deli meat, and 2 kinds of cheese. Sounds just like a sandwich, right? Well it should, because that’s exactly what it is. Except for the fact that it’s kind of fancy and looks divine on a table, Rotolo al Forno is just your basic meat and cheese sandwich presented in a gussied up form. (Love that word – “gussied”.) Anyway, it’s lovely to behold and even lovelier to consume.

I first had this appetizer/sandwich/main dish many years ago when my friend Julie made it for a dinner gathering she and her husband Joe were hosting. At the time, most of our friends had small children, good jobs or were starting new businesses, but no what you would call “disposable income”. We were all just able to pay our mortgages, feed and clothe our children (if we had them), go camping in the summer, and afford box wine or Coors beer for occasions with our buddies. (This was the 70s folks, so cut us some slack on the box wine and Coors beer!) Where was I? Oh yes – so for all of us, this much meat and cheese in one dish was considered if not gourmet, pretty swell and elegant.

And that was Julies’ forte. She loved to try new recipes and the more labor intensive the better. So those of us who were her friends got to experience all kinds of new and amazing taste adventures. She was a true gourmet and taught me a lot about fine cuisine. Julie and Joe are now both deceased, but their friendship lingers on in our memories of fun get-togethers, fabulous New Year’s Eve parties and new and exciting dishes. This may not be an exciting dish, but it is never-the-less delicious. Try it the next time you have guests coming for lunch or you need a hearty appetizer. Just don’t forget to lift a glass to Julie. I’m sure from heaven she will lift a glass right back at you. Cheers everyone.

  • 1 loaf frozen white bread dough
  • Dijon mustard
  • ¼ lb. thinly sliced deli salami
  • ¼ lb. deli pastrami, thinly sliced
  • ¼ lb. deli ham, thinly sliced
  • 1/3 lb. thinly sliced Swiss cheese
  • 1/3 lb. thinly sliced Provolone cheese
  • 1 beaten egg yolk

Thaw bread and let rise one hour. Punch down and roll out to approximately a 12×16-inch rectangle. Using a pastry brush, spread a very thin layer of Dijon mustard over the bread dough. Layer with meat and cheese and roll up like a jelly roll. Pinch the seam together and place, seam side down, on a lightly greased cookie sheet. Brush with egg yolk. Let sit uncovered for 30 minutes. Bake the bread in a pre-heated 375 degree oven for about 25 minutes or until the top is a dark golden brown.

Remove from oven and let sit for about 25 minutes before cutting into 1-inch slices. Serve warm or at room temperature.

Note: If you are going to bake the roll ahead of time, let the bread cool completely before you cover with plastic wrap and place in the refrigerator. When you are ready to serve, slice, plate, and warm for a few seconds in microwave.


SMOKED SALMON SPREAD

OLYMPUS DIGITAL CAMERA

I think this year I had the most fun I have ever had on the first day of the year. Mr. C and I hosted a New Year’s Day brunch. Many of our friends brought their musical instruments or fabulous voices (sorry I didn’t get any pictures, but I was too busy being the hostess) and we had an afternoon of friendship, food and music. I simply can’t think of a better way to start the New Year. I had so much fun!

The buffet was a new adventure to plan and the execution was possible because I planned out the preparation to the nth degree. I started by spending an entire day playing prep chef. I grated cheese, sautéed onions, prepared fillings, etc. – basically anything and everything I could do ahead of time to make the 2 days before the party easier on myself. I shall do that again the next time I prepare food for the masses. (Actually I told Mr. C I wanted a prep chef for my next birthday. Wish me luck on that one!)

Anyway, one of the dishes I prepared was my Smoked Salmon Spread. I have been making this for years and it always goes over very well. All together I made 13 dishes, one of which was simply a plate of sliced apples. Others contributed by bringing yummy pickled herring, a lovely cherry jell-o dish, and a wonderful quiche. So as you can imagine, we didn’t starve.

OLYMPUS DIGITAL CAMERA

This picture shows the table just before our guests started filling their plates. Several of the dishes, if they aren’t already on this blog, will be featured within the next few weeks. So, starting on the back right side, Pancetta and Gruyère Breakfast Casserole, Breakfast Egg Casserole with Italian Sausage and Mushrooms, Ham, Oven Roasted Potatoes, and Cheddar Cheese Breakfast Casserole, Smoked Salmon Spread, Bacon, Date, And Cream Cheese Spread, Deviled Eggs (already on blog), sliced apples, Rotola Al Forno, pickled herring, cherry jell-o, Cinnamon Nut Coffee Cake, Zucchini Bread, Dried Cranberry and Almond Braided Danish, and Eggnog Spice Bundt Cake. (And yes, the sun was shining into our West facing dining room.) Marvelous. People actually got to see the water and the mountains (Port Susan and the Cascade mountains, including Mt. Baker) from our East facing windows. Now, how often does that happen on the first of January?

So Happy New Year everyone. And may this new year find you happy, healthy, and in the kitchen having fun!

  • 8-oz. cream cheese, room temperature
  • ½ c. sour cream
  • 2 tsp. finely minced green onion
  • 2 tsp. minced fresh parsley
  • 2-3 tsp. fresh lemon juice, or more to taste
  • ¼ tsp. kosher salt
  • freshly ground black pepper
  • ½ lb. smoked salmon (I use the smoked salmon from Costco that is thinly sliced like lox, but any nice smoked salmon will do)
  • milk

Beat cream cheese and sour cream together. Add green onions, parsley, lemon, salt, pepper, and smoked salmon. Stir until salmon is broken down and mixture is creamy. Add milk until you reach desired consistency. Refrigerate at least 4 hours before serving.


BACON WRAPPED BLUE CHEESE STUFFED DATES

OLYMPUS DIGITAL CAMERA

This is one of those recipes where you get high praises for fundamentally doing no “real” cooking. Basically all you do is assemble 3 ingredients and turn on your oven. And the final product? Well suffice it to say that several people complimented me on the dates at the wonderful holiday party last evening hosted by our good friends John and Deanne.

I actually felt a little guilty because some of the appetizers brought to the gathering took a considerable amount of time to prepare. I know that for a fact because I have made a few of the dishes myself and know how time consuming they can be. So here I am, modestly accepting compliments for an appetizer that has fewer ingredients and less culinary ability required than any other appetizer on the table. I wish I could finish this story by saying I’ll never do that sort of thing again, but alas we have another holiday party to attend this afternoon. Now, I’m reasonably sure even those of you who are not rocket scientists can guess what I am bringing as our contribution. (Thanks again Mr. C for going to the store at the crack of dawn for more bacon.)

So if you too are feeling lazy, but still want to wow your family and friends with an appetizer that takes the term “out of this world” to a new level, make a batch of these for your next gathering. Or take them with you if you are invited to bring a little “something” to share. They can be plated at home (on a pretty plate or platter*, of course), don’t need to be transported in an ice chest (unless the party is in some place like Florida or Costa Rica), and don’t require warming when you arrive at your destination. Just plop them on the table and get out of the way!

*Remember: for most people presentation is important. And especially during the holiday season, your host or hostess has probably worked very hard to set a lovely table. Do that person the courtesy of nicely plating whatever dish you take to share with the other guests. In other words, leave your Tupperware at home! (If it’s impractical to plate ahead of time, bring a nice serving dish and plate your offering when you arrive at the gathering.) There is truly nothing more frustrating for a hostess than having a guest show up with his or her famous clam dip in a yellow Tupperware bowl and just plopping it on your beautifully decorated table. Don’t do that to someone who has invited you to their home. End of common sense lesson number 34. (Sorry, it’s just the Martha coming out in me! I’ll be OK in the morning.)

  • 35 whole pitted dates, slit from end to end (I use my kitchen shears)
  • 1 lb. lean, thin sliced bacon cut in thirds (you will have some extra)
  • about 2 oz. crumbled blue cheese
  • toothpicks

Take a bit of blue cheese and place in each date. Close the date with your fingers. (If you put too much blue cheese in the date it won’t close.) Place each date, cut side down, on a piece of bacon, wrap from both ends to the middle, and secure with a toothpick. Place on a baking sheet with sides and bake in a pre-heated 350 degree oven for 10 minutes. (If you have a convection oven, now is a good time to use it.) Remove from oven and flip with a small spatula. Bake for an additional 4-6 minutes or until the bacon is crisp. The dates can be served warm or at room temperature.

Note: Obviously you can make as many or as few of these dates as you need. I just usually make 35 because they fit on one of my baking pans perfectly.

OUTRAGEOUS BROWNIES

OLYMPUS DIGITAL CAMERA

At the risk of sounding disingenuous (I’ve waited months to use that word!), on the subject of brownies I probably possess more knowledge than any health conscious person should ever admit. So when I say that these brownies are truly the bomb, I mean it with every chocolate loving fiber in my body! They simply are the best brownies I have ever tasted.

And yes, they are an Ina Garten recipe and you could have (or maybe already have) found them for yourself in Ina’s cookbook or on the internet. But this recipe completely flew under my brownie radar until our friend Tina brought them to a party last 4th of July at the Camano home of our dear friends Ken and Christine. Mr. C had arrived late after playing a gig, and the first thing he was handed when he walked in the door, besides a drink, was one of Tina’s brownies. I’m telling you, within two minutes he was one happy fellow; a drink in one hand and a big old brownie in the other. (Life just doesn’t get much better folks!)

So if you too have more knowledge than you care to admit on the subject of brownies, but had yet to discover Ina’s amazing brownie recipe, give it a try. After all, you can never acquire too much knowledge on a subject, or consume too many foods that cause your body to release endorphins. According to Dr. Ruth Westheimer, “chocolate stimulates the release of endorphins, natural hormones produced by the brain that generates feelings of pleasure and promotes a sense of well being. Chocolate may also make a person feel better by directly interacting with the brain. One of the ingredients in chocolate is tryptophan, an essential amino acid needed by the brain to produce serotonin. Serotonin is a mood-modulating neurotransmitter, the brain’s “happy chemical”. High levels of serotonin can give rise to feelings of happiness”. (I know I always feel happy when I eat chocolate.) And when chocolate is in the form of a moist, fudgy, and nutty morsel like one of these brownies, well there just isn’t anything finer.

Thank you again Ina for this (and many other) absolutely wonderful recipes.

  • 1 lb. unsalted butter
  • 1 lb. plus 12-oz. semisweet chocolate chips, divided
  • 6-oz. unsweetened chocolate
  • 6 extra-large eggs, room temperature
  • 5 tsp. espresso powder* (I use Medaglia D’oro)
  • 2 T. pure vanilla extract
  • 2 ¼ c. sugar
  • 1 ¼ c. all-purpose flour, divided
  • 1 T. baking powder
  • 1 tsp. salt
  • 3 c. chopped walnuts or pecans

*Ina uses 3 tablespoons of coffee crystals

Melt the butter, 1 pound of the chocolate chips, and the unsweetened chocolate in a medium bowl over simmering water or over very low heat on the top of your stove. Allow to cool to just warm to the touch. (And yes, sometimes you just have to play with your food when you cook!)

In a large bowl, whisk the eggs, espresso powder, vanilla, and sugar together. Don’t over-mix. Stir the warm chocolate mixture into the egg mixture and allow to cool to room temperature. In a medium bowl, whisk together 1 cup of the flour, the baking powder, and salt. Add to the cooled chocolate mixture. Toss the walnuts and the remaining 12 ounces of chocolate chips in a medium bowl with the remaining ¼ cup flour. Stir into the chocolate batter. Pour the batter into a lightly buttered and floured 12 x 18 x 1-inch baking sheet or two 9 x 13-inch baking dishes.

If your baking sheet or pans are metal bake the brownies in a pre-heated 350 degree oven for 20 minutes; then rap the baking sheet(s) against the oven shelf or on a bread board on your counter to force the air to escape from between the pan and the brownie dough. Bake for an additional 10-15 minutes or until a toothpick comes out clean. Do not over-bake! Allow to cool thoroughly, refrigerate, and cut into desired size squares.

If your pans are glass bake the brownies in a pre-heated 325 degree oven for 20 minutes; then rap the pans gently against the oven shelf or on a bread board on your counter to force the air to escape from between the pan and the brownie dough. Bake for an additional 10-15 minutes or until a toothpick comes out clean. Do not over-bake! Allow to cool thoroughly, refrigerate, and cut into desired size squares.

Note: This recipe can be halved very easily.


CREAMY ANCHOVY GARLIC SPREAD

OLYMPUS DIGITAL CAMERA

It has been my experience that anchovies and garlic (the dynamic duo) can ward off almost any illness (not to mention werewolves, vampires, and witches (picture provided).

OLYMPUS DIGITAL CAMERA

Plus anchovies and garlic just taste fabulous together. So when I decided I wanted to feature them in a creamy spread, I of course went to my source of all things edible – the internet.

How in the wild world of haute cuisine did we ever exist without the internet? And why are there still people out there who refuse to even open the lid of a laptop? (Why am I asking you? You’re on the internet reading my ramblings!) Anyway, my point is – the internet is WONDERFUL!

So of course when I went recipe searching, there were lots of recipes with anchovies and garlic as key ingredients. None of the recipes however (at least in the 10 or so search pages I perused) seemed from first glance to achieve the creamy results I was after – except for one. So borrowing the bones of this dish from Darlene Hinton’s recipe on the Allrecipes site, I came up with this spread.

Now I know there are those of you out there who are anchovyphobic. I blame that on bad press. I mean really, if oysters hadn’t for centuries been touted as aphrodisiacs, who in their right mind would have ever put one of those ugly things in their mouth?

Anyway, please don’t hesitate to give this spread a try even if you do have a wee problem with hairy little fishes. (Just kidding.) And as a side note, anchovies are a truly wonderful addition to many dishes. I often start a red pasta sauce by melting a couple of anchovies in olive oil. And anchovies are simply wonderful in salads (think Caesar) or on pizzas, where they add just a lovely saltiness.

So be brave. Next time you serve Italian food, make this spread as a before dinner appetizer. It’s easy, relatively inexpensive, and different. That’s a good thing.

And regarding the picture of the “lady” who is about to open her front door to trick-or-treaters; if you consistently eat anchovies and garlic, you should never have to fear meeting the likes of her!

  • 2 small cloves garlic, rough chopped
  • 7-8 anchovy fillets
  • 6 T. unsalted butter, room temperature
  • 1 (8-oz.) package cream cheese, room temperature
  • ¼ c. sour cream
  • 2 dashes hot pepper sauce (I use Frank’s Red Hot Original)
  • freshly ground black pepper
  • 1 T. finely chopped fresh chives

Combine the garlic, anchovies, butter, cream cheese, sour cream, hot pepper sauce, and pepper in the container of a food processor. Process until smooth. Stir in the chives. Transfer to a serving bowl, and refrigerate for at least 6 hours or better yet, over night. Serve at room temperature with plain crackers (not quite as plain as saltines) or toasted baguette slices.

CELERY SALAD (CÉLERI SALADE)

OLYMPUS DIGITAL CAMERA

For years I have wanted to try a celery salad. I know I could have tried one moons ago, but sometimes you just need a little impetus to get you off your duff. And the inducement to try one now came from my need for a refreshing salad to serve with the French meal I am going to prepare for this Sunday’s JazzVox concert. My menu needed a tart or almost acidic tasting salad to counteract all the richness from the other dishes I had planned. (In case you haven’t noticed, French food can be a bit rich.) I also needed something crisp and crunchy.

I found exactly what I needed when I stumbled onto Ina Garten’s recipe for this delightful salad. I played with it just a wee bit, but the bones of her recipe are still there! Even my dear husband, who normally might be expected to turn up his nose at any dish with celery as the main ingredient, was charmed by this salad.

So give this delightful recipe a try. It’s easy to prepare, the main ingredient is dirt cheap, (who doesn’t like that) and it’s really, really good.

  • ¼ c. extra virgin olive oil (FYI: My go-to olive oil is Trader Joe’s Premium 100% Greek Kalamata Extra Virgin Olive Oil. I use it for everything!)
  • 1 tsp. grated lemon zest
  • 2 T. + 1½ tsp. fresh lemon juice
  • 1 T. minced shallots
  • ½ tsp. celery seed
  • ¼ tsp. celery salt
  • ¼ tsp. anchovy paste
  • ¾ tsp. kosher salt, divided
  • freshly ground black pepper
  • 2½ c. thinly sliced celery hearts, tender leaves included, thinly sliced on a slight angle (about 6 stalks)
  • 2 T. grated Parmesan cheese
  • ¼ c. toasted walnuts, coarsely chopped
  • 1 T. rough chopped Italian parsley

At least an hour before you plan to serve this salad, whisk together the olive oil, lemon zest, 2 tablespoons lemon juice, shallots, celery seed, celery salt, anchovy paste, ½ teaspoon salt, and pepper. Place the celery in a mixing bowl and toss it with the remaining 1½ teaspoons lemon juice and the remaining ¼ teaspoon salt. Add enough dressing to moisten well. Cover and refrigerate for about an hour to allow the flavors to develop.

When ready to serve, taste the salad. (If it needs a wee bit more salt, add a light sprinkle of course salt with the pepper when you are plating the dish.) Arrange the celery mixture in a shallow dish or plate, sprinkle with Parmesan, the toasted walnuts, parsley, salt (if needed), and pepper. Serve immediately.